5 minute read
The Split Flap Production Process


Sean Rossiter President
It’s been a lot of fun to bring analog technology into the 21st century. Our clients have had some truly unique ideas and we’ve been fortunate enough to be the ones to make those ideas a reality.
Advertisement
With each new project and its distinct application of our core technology, we get to explore the bounds of what’s possible and confront new challenges head on. We take pride in solving these challenges quickly and coming up with a product that has quality in front of mind when you see it, when you feel it, and when you hear it. The hours and hours of obsessing over the details are partly because that’s who we are, but mostly because we care about who you are and the vision you have.
Each piece has been assembled by hand, and we’ve taken the time to inspect every step along the way. This tribute to manufacturing, in the home of some of the country’s first manufacturers, is important to us and what we stand for.
Before we dive in, be sure to check out the Analog Dictionary page to get familiar with the terminology that we use to describe the different components of our analog tech.

The cabinets are the literal backbone of the sign. They start out as bare sheets of cold rolled steel in a shop just up the road from us, owned and operated by our friends at General Metal Company. For years, General Metal (GM to us, and now you) has been laser cutting and bending metal into various shapes and sizes for us. With the powder coated sheet metal parts prepped for assembly, a trained Oat Foundry technician, preferably in a We Build Cool Stuff t-shirt, rivets together a series of uniquely designed panels. We reinforce the connected panels, constituting the structure of the Split Flap that will later receive modules. Using an extensible sheet metal design allows us to build boards in a limitless number of sizes, capable of fitting any space or budget.
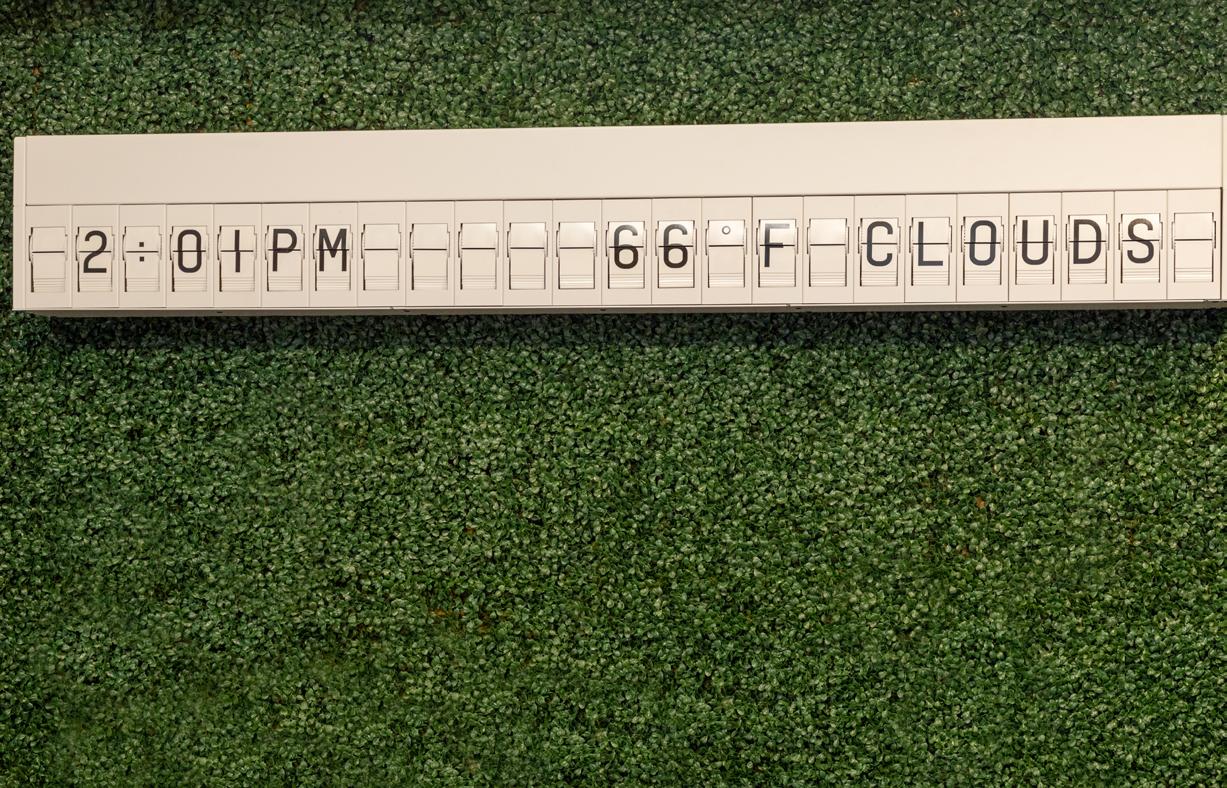
After assembling the sheet metal of the cabinet, there’s some delicate circuitry and wiring that’s added to the panels. This wiring feeds up to the brains of the operation housed in the header section of the Split Flap above the modules. The cabinet houses an array of circuit boards populated with thousands of components, all communicating with one another and the main controller every second. This connected arrangement cements the foundation upon which all modules will be able to be individually controlled – letting us do some really fun, intricate animations once the sign is all together.
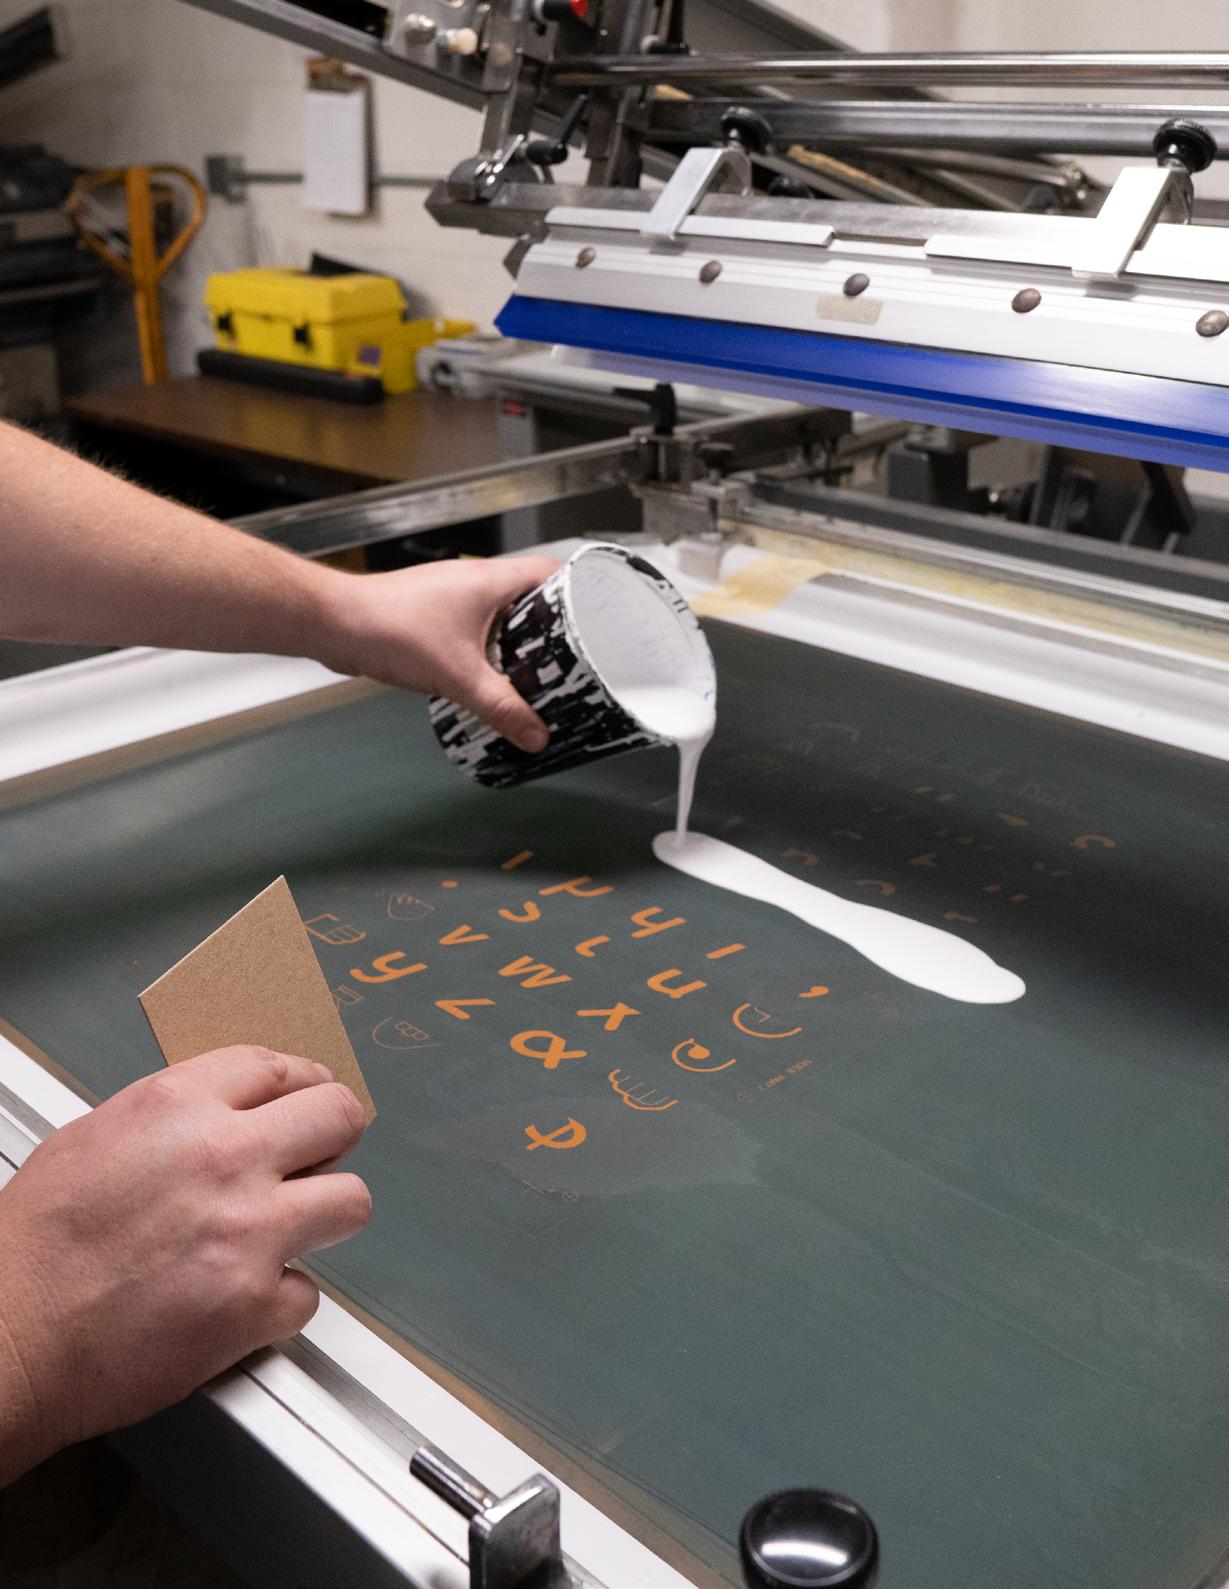
We use two tried and tested printing techniques to make our flaps, each for a unique application. Some are screen printed by another local vendor of ours, Nu Art Graphics, in West Chester, PA. More complicated shapes and colors oftentimes requires the finer capability of digital printing handled by the team at NGS Printing. Once printed, cut, and received, each set of fifty flaps is then broken out and placed into a carousel, one at a time, in order, by a member of our production team. Excess material from breaking out the flaps is then recycled locally.
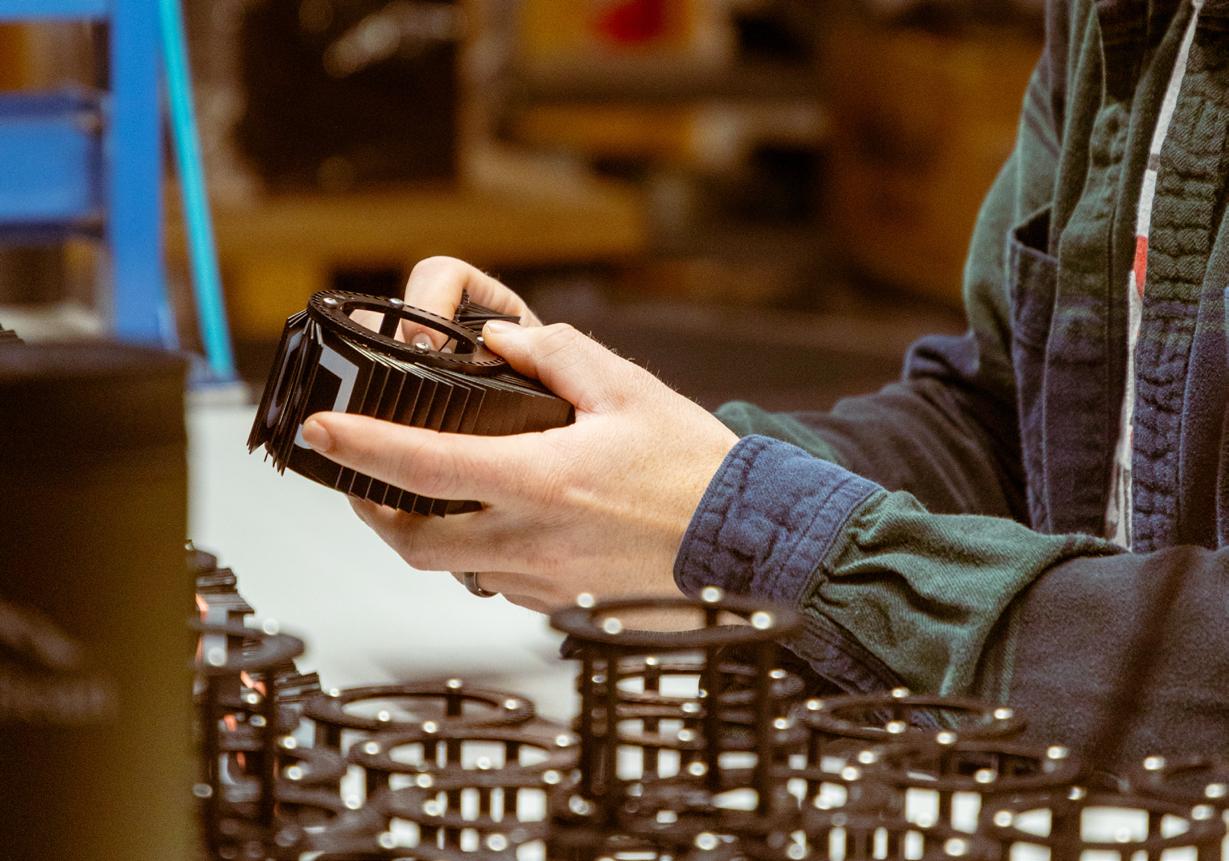
Remember our friends at GM? Modules start as a single flat piece of metal that’s cut from a larger sheet. A series of complex, precise bends followed by careful powder coating turns it into the base unit of a module. Once they arrive at our shop, the team can prepare them for housing a carousel of flaps. We assemble our custom-designed printed circuit board to the module along with a hand-picked stepper motor. There’s a bit of tricky wiring and other components involved here, but we’ll spare you with the boring details and get to the fun part


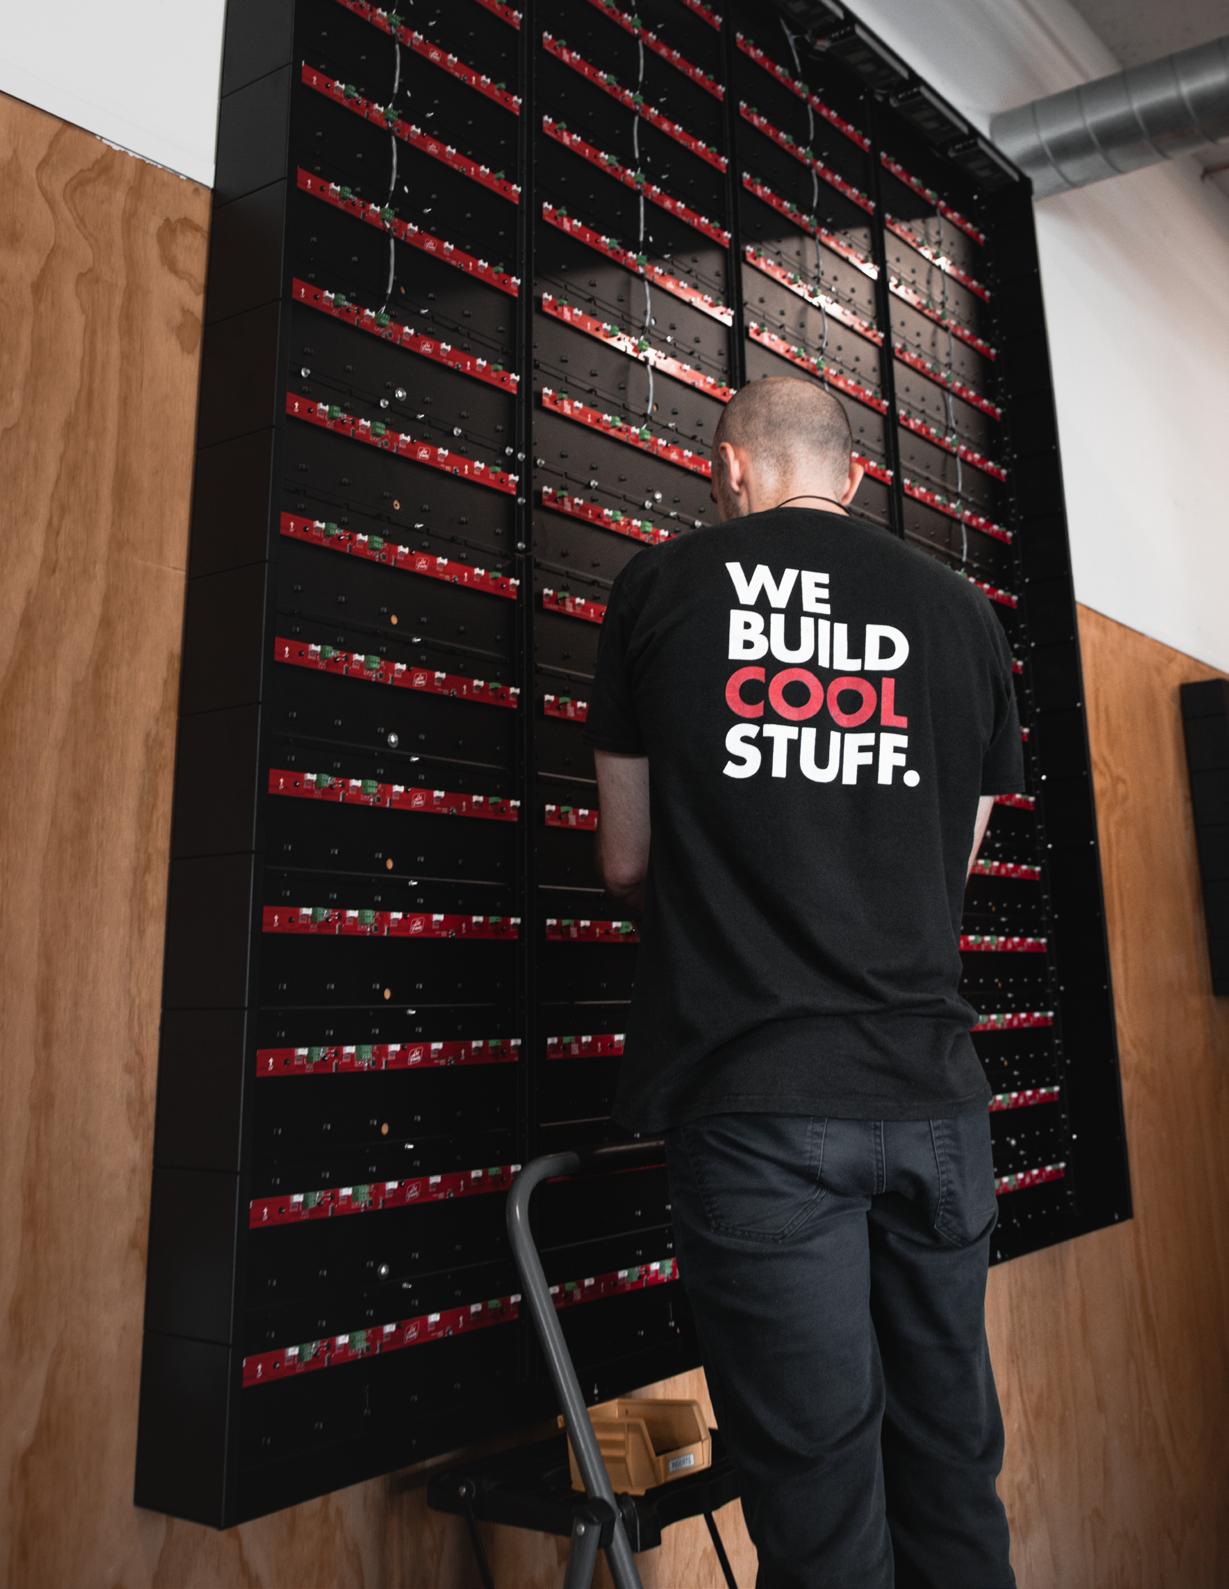
Now that our modules are complete with motors and flaps, our team places each module into their forever home inside the cabinet. Each module is hung from the cabinet and plugged into the circuitry to give it the power and data it needs to carry out its assignments. We populate modules from the bottom row to the top before affixing the header panel to tuck away the electronics and finish the front face of the Split Flap.
Once all modules are onboard, we can begin the testing and QA process. First, we do a second check to ensure all characters are in the proper order and confirm there are no visual defects. Then, we run simulated use testing on each module for 50,000 rotations. This can represent anywhere from months to years depending on the use case, but allows us to monitor each module once every few seconds over the course of a few days for even the hint of a hiccup. Only modules that have never experienced an issue get the greenlight to move forward. From there, we calibrate each module for its position within the cabinet so that each of the fifty flaps across the tens, hundreds, or even thousands of modules, falls at exactly the same time as one another when we tell them to.

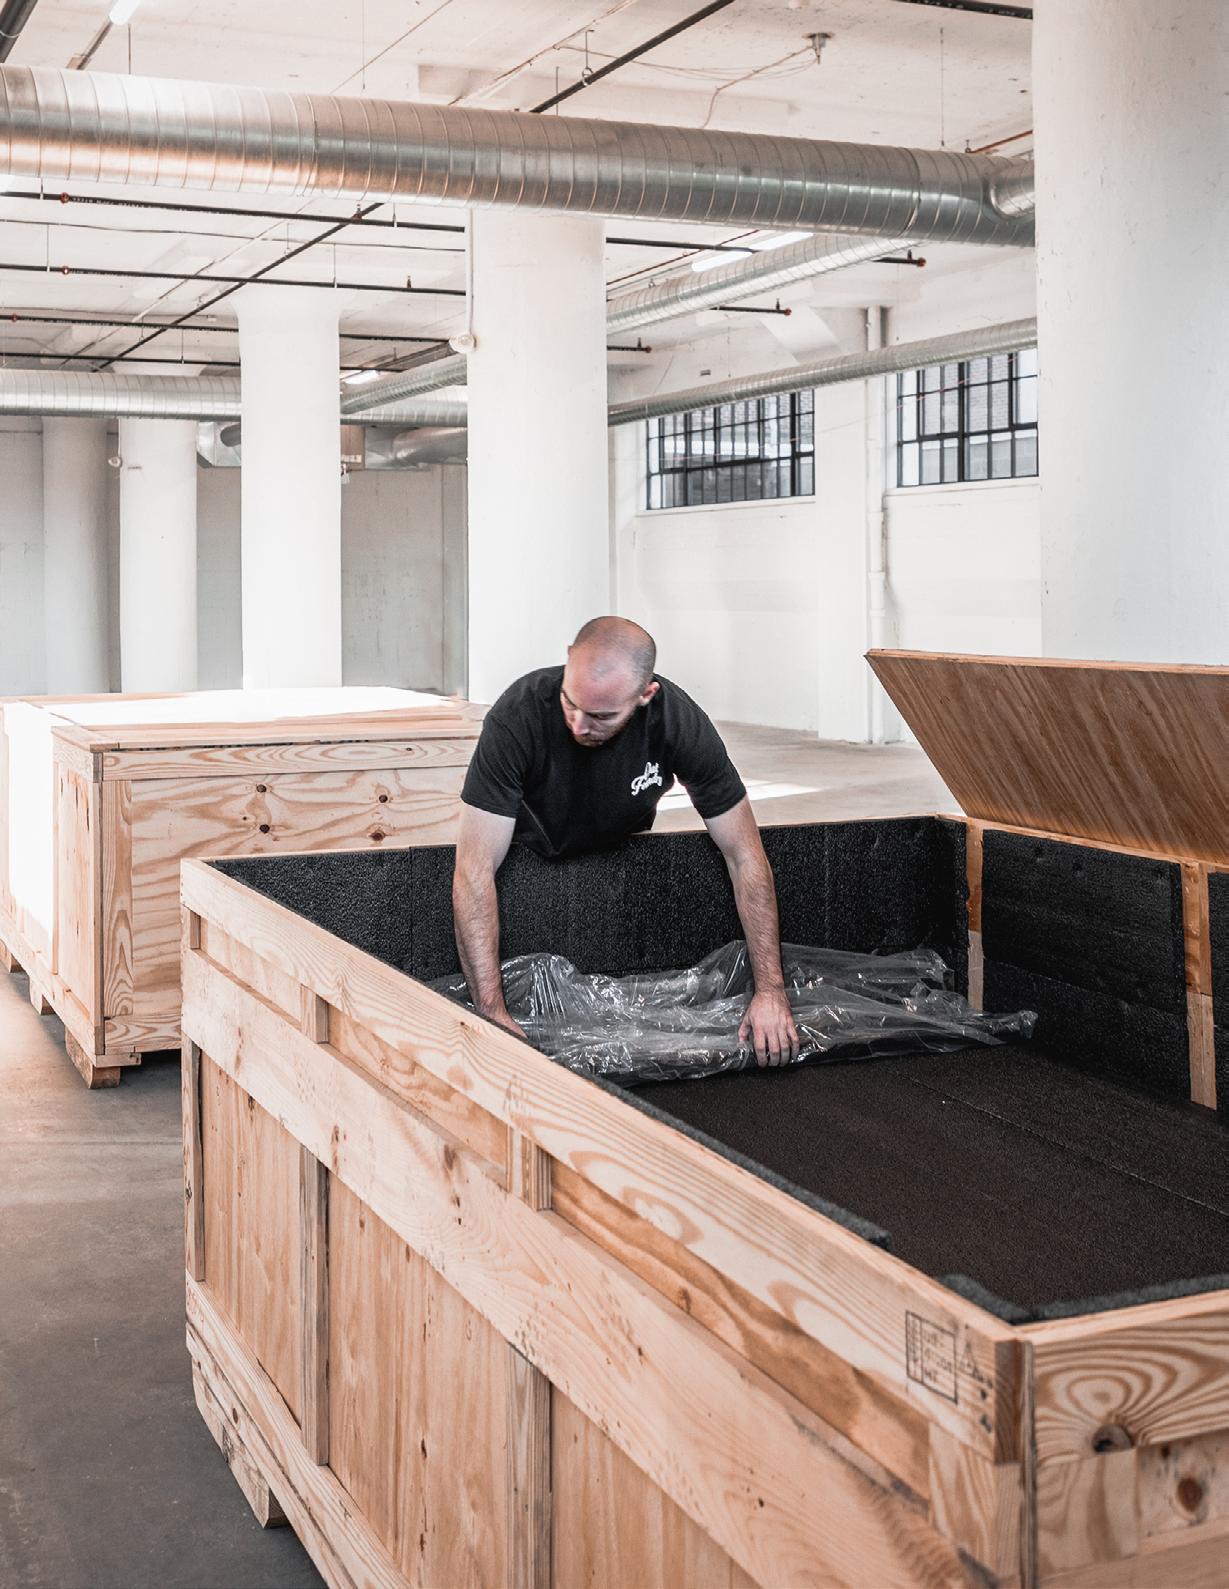
With testing done, it’s time to pack for the journey ahead. Since every Split Flap is made-to-order as a specific size for an intended space, that means custom packaging as well. Our partners at Arrow Crating and Packaging across the Delaware River expertly craft custom foam lined crates that protect our boards from any bumps the road, sky, or sea has to offer. Smaller boards ship with modules in place. We pack larger boards by separating the cabinet superstructure from the modules. In this scenario, modules are labeled for their position, bagged, and boxed in order, ready for installation.
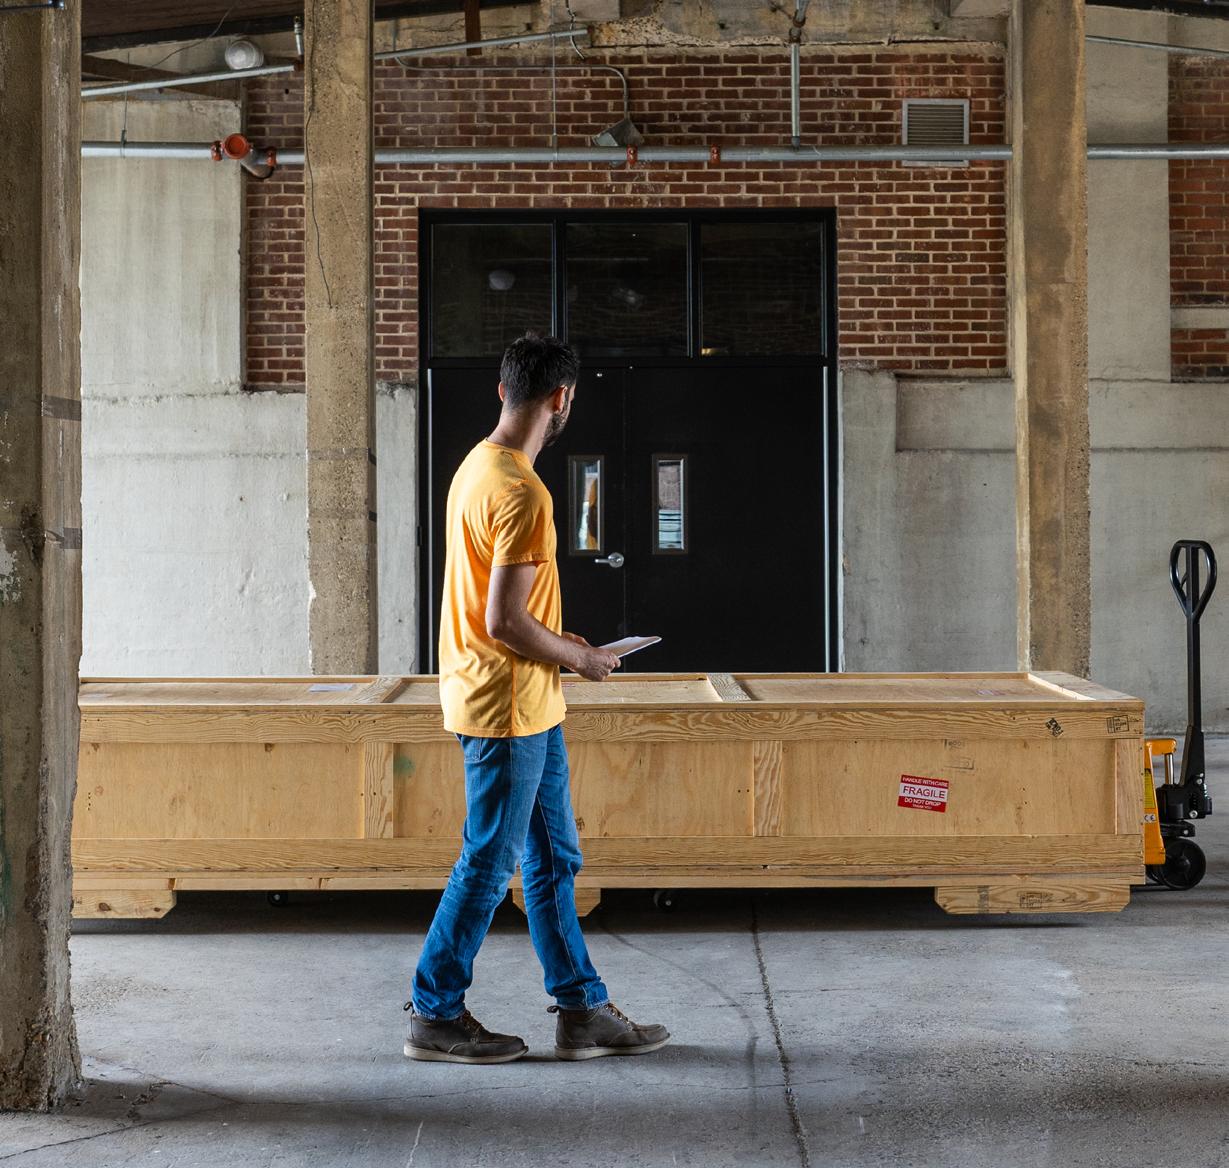
Our analog technology may move between a myriad of trucks, trailers, planes, and containers on its journey, with dozens of touchpoints in between. Working with our local dispatch, we ensure the crate is safely loaded onto the first truck. From city to city, country to country, we monitor the movement of the crate every step of the way. We work with the on-site team to ensure everything is ready for the arrival of the display. Once it’s navigated loading docks and doorways, it’s ready to uncrate and install.
We’ve shipped our Split Flaps around the globe. Cross country trips here in the states, flights south to Central America, transatlantic trips to the UK, Switzerland, Hungary, Azerbaijan and more, Pacific passage to Hong Kong, Australia, and India – our boards are frequent flyers with plenty of stamps in their passports, and always looking for more.
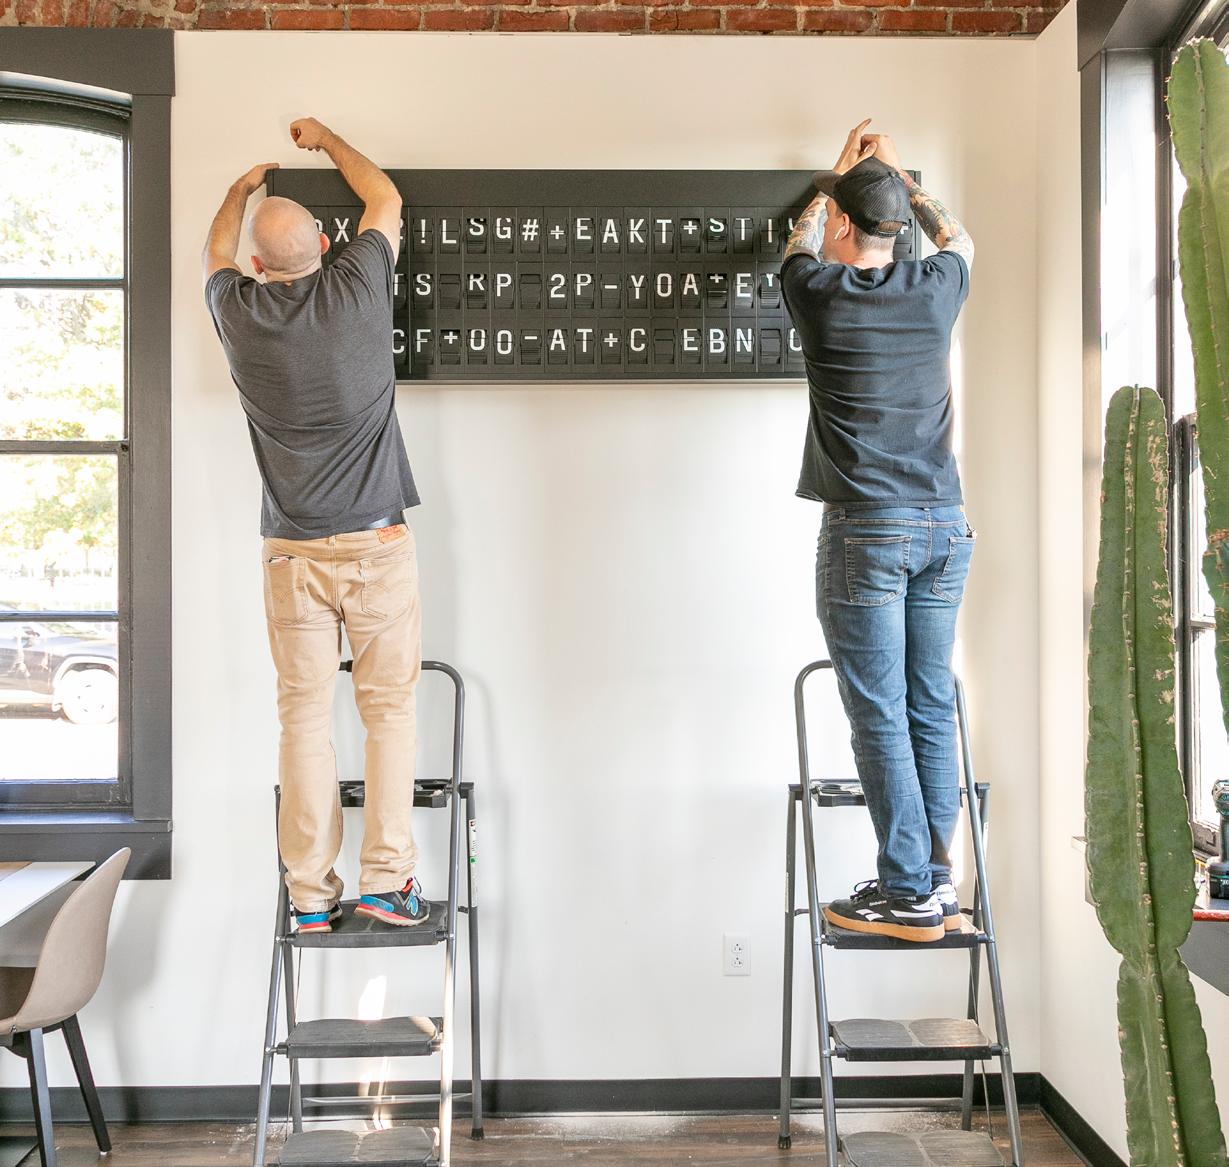
It’s a great day when a Split Flap crate is opened back up for the first time – this means the site is ready for install. The first step is to hang the cabinet with included hardware, checking that it’s level and plumb.
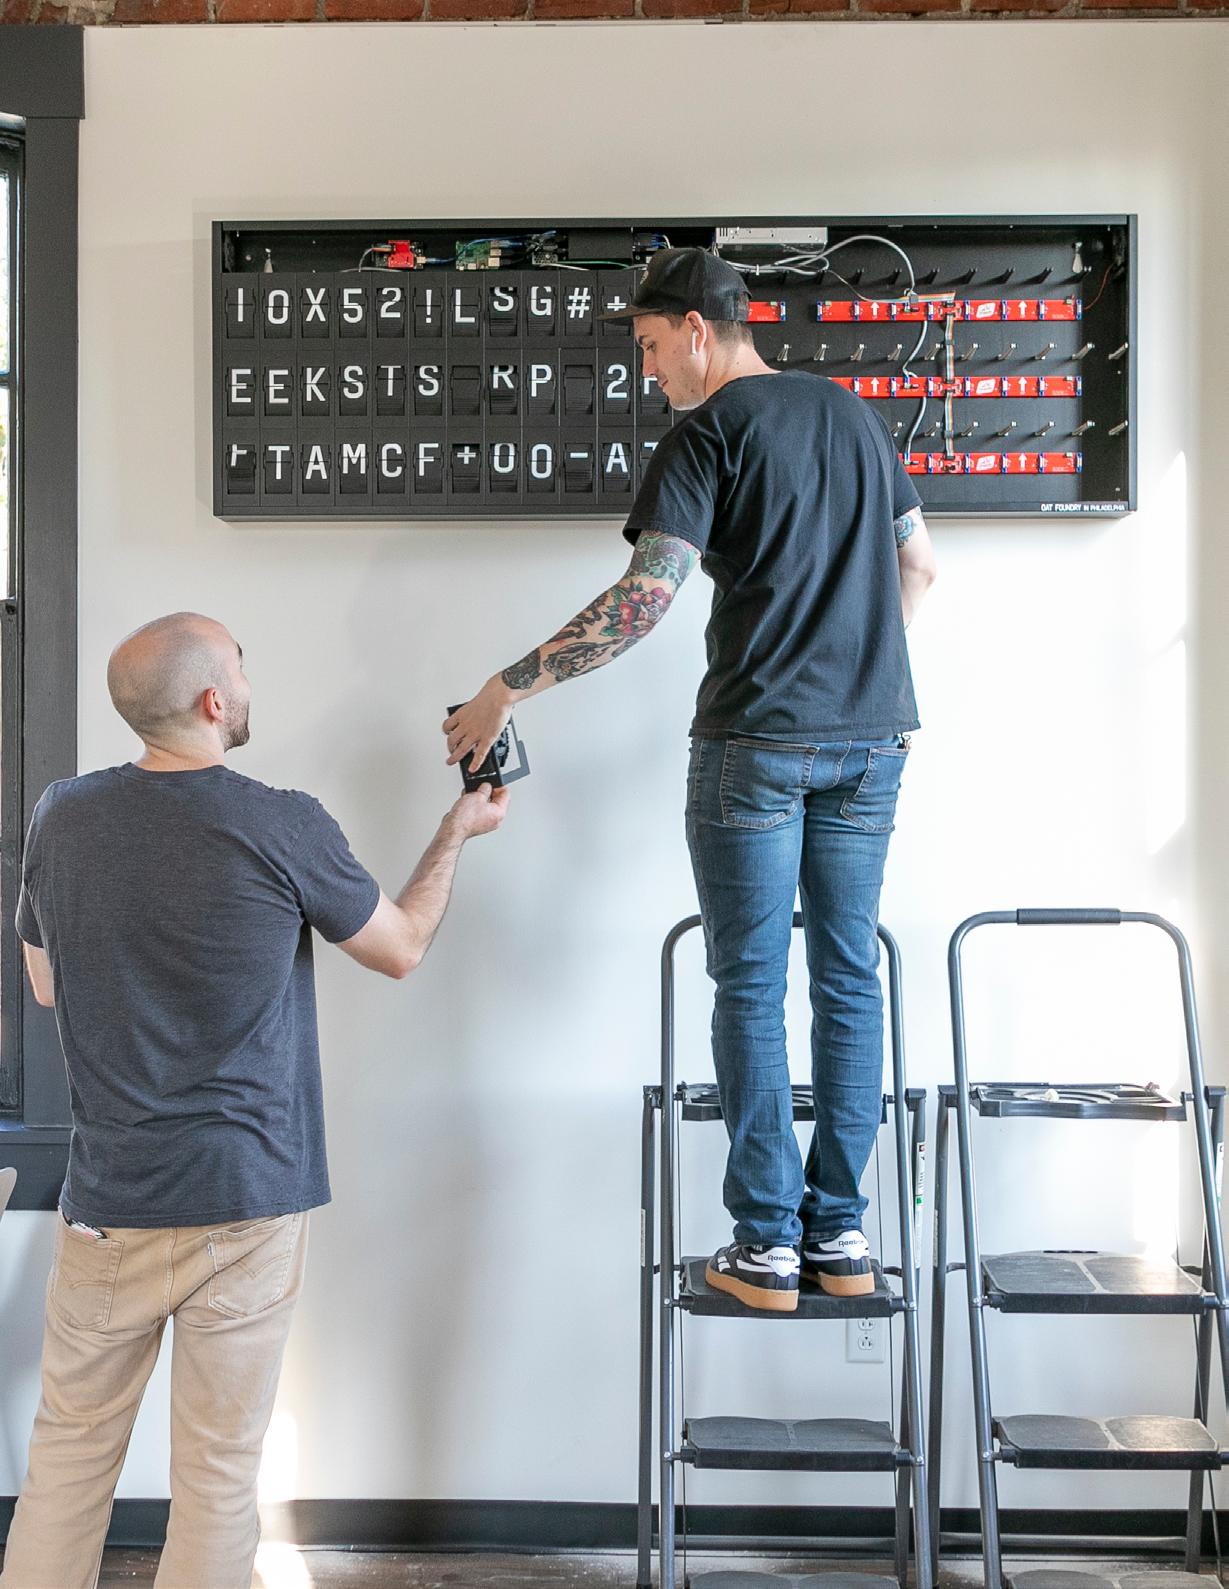
Then, plug in and hang each module in their labeled positions, working from the bottom up. Connect power and data then watch (and listen!) for the magic to happen. Teams already working in the space install a vast majority of our boards. From general contractors, carpenters, electricians, and a host of other trades, from owners to maintenance staff we’re always available to answer questions and simplify the process – or lend a hand ourselves when the occasion arises.