A Marie Antoinette-inspired packaging design combining pastel aesthetics with rococo themes, elegant typography, and intricate patterns to evoke a sense of luxury and indulgence while practical design ensures usability.
Final Packaging Design for Marie Antoinette Marshmallows
Them Eat Marshmallows”
Documenting the creative journey behind the Marie Antoinette Marshmallow packaging. From historical research and fashion mood boards to colour palettes and product packaging sketches, every detail is inspired by the opulent 18th century.
Exploring Hand-Crafted Techniques
Exploring traditional techniques with fine liner and ink to create detailed outlines, followed by using coloured paper to craft simplified shapes, and experimenting with lino printing and paint for added texture and depth.
Finalisation of Marie Antionette Design
Showcasing the refined digital illustrations, typographic experiments, and box layout for “Marie’s Delights” using Adobe Illustrator.
(2024)
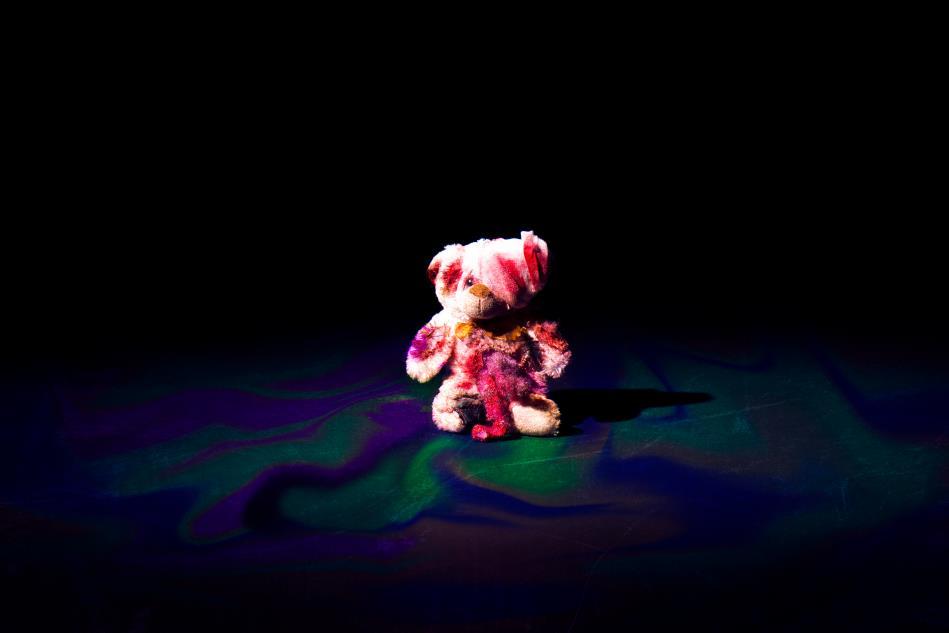
Final Poster Design for Women’s Aid
Social Issue brief dedicated to raising awareness about domestic abuse to encourage call-to-action.
The distressed teddy bear symbolises vulnerability and isolation, contrasting with the powerful distorted typography to evoke the viewer’s emotional response.
This poster elicited strong emotional reactions during a class critique.
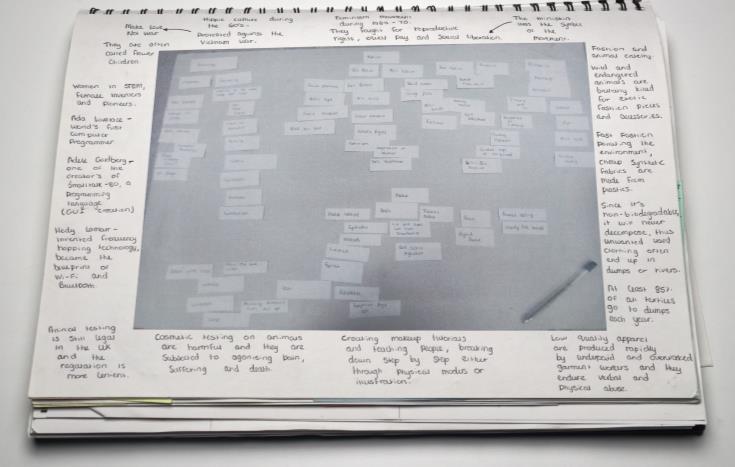
Social Issue Development Process
I explored visual ideas for my social issue campaign. My work included hand-drawn concepts, layout variations, and experimental photography.
Teddy Bear Photography Exploration
For this series, I used a controlled studio with professional lighting, focusing on central compositions and close-up shots.
I've utilized the expansive space by incorporating dark shadows and low-key lighting to create a striking narrative of pain and isolation that resonates with the viewers.
I brought together a sewing needle & thread to affix a separate teddy bear image onto the distressed background.
Using alcohol inks and coffee stains, I explored how these materials interacted with each other, creating organic patterns and textures.
Through Adobe Photoshop, I transformed my earlier photoshoots by creating vibrant, psychedelic effects.
I applied the paintbrush tool to add vivid strokes of colour, used Gaussian blur to achieve a soft, fluid motion effect, and merged the colours seamlessly through blending options.
The bottom text "Bruises of Silence" was manipulated using the liquify tool to create a distorted and melting effect.
It draws attention to the hidden and lasting impact of abuse and emphasizes the urgency and importance of the message.
I selected a bold sans-serif font to enhance the top message. I adjusted hierarchies to balance the text with the poster. I experimented using tools such as perspective warp and motion blur for added dimension.
This documentary-style movie poster celebrates Hedy Lamarr’s pioneering role in STEM. The design merges vintage elements with technology to highlight her legacy.
Final Animation: https://imgur.com/a/mmDtNES
My iterative design process includes mood boards inspired by vintage and modern-day film posters, cybernetics research from my trip to the science museum and initial thumbnail sketches.
A behind-the-scenes look at the Hedy Lamarr poster creation, combining digital techniques like layering circuit patterns, bitmap textures and analog effects to merge vintage photography with futuristic tones.
Vintage-inspired typography, reminiscent of Old Hollywood movie posters, ties into the theme, while animated binary code was created frame-byframe to reinforce growth, progress, and innovation.
Chaos In Paradise – 2023
(Photoshop)
Photomontage piece, combining traditional Japanese motifs with surreal imagery and poetry.
Elvira – 2024
(Photoshop)
Brutalist-style poster, a focus on bare essentials such as bold typography, shapes and raw imagery.
05 Stencils And Gelli Plate Experimentation
This spread showcases my experimentation with stencils and Gelli plate printing. I explored layering, texture, and colour, to create compositions inspired by industrial symbols and organic patterns. This experiment allowed me to refine my skills in printmaking techniques.
This project showcases a bold and playful identity for my hypothetical personal design brand, "Cosmo Studio.“
Demonstrating my proficiency in Adobe Illustrator, including typography, colour gradients, and character design.
Hand-drawn sketches exploring chibi-inspired hairstyles, and accessories to embody the studio's playful identity. The mood boards highlight influences from Japanese pop culture, kawaii aesthetics, and vibrant typography styles from the late 1990s to early 2000s.
I explored typography layering, colour gradients, text warp, and various hair and accessory combinations to add to my Kawaii-inspired mascot.
A playful logo design for a fictional snack brand, "Snackable," featuring a lively doughnut illustration. The character-driven concept was developed from initial hand-drawn sketches to a polished digital design, focusing on bold, illustrative techniques using Adobe Illustrator.
Self-Set Project
Proposal
Designing Chibi-Styled Illustrations
Turning Them Into Hypothetical Products
Project Rationale
I want to pursue Graphic Design as my career choice and for this project I want to focus on improving my illustration & sketching skills as I feel like it’s one of crucial skills that I’m lacking.
My proposal for this project will be learning how to draw chibi characters seen in Japanese pop culture & turning them into 3D models as figurines. at some point, I’d like to build an online art business based around selling my own designs.
Skills Will Include
• Sketching & drawing.
• Knowledge of both traditional & digital illustration techniques.
• Using professional design software such as Adobe Illustrator & Photoshop.
• 3D Designing
• Creative thinking to develop unique concepts.
Artist Inspiration
I will be looking at designers such as:
• Katilente
• Charuca
• Mizna Wada
• Sanrio
• Chic Kawaii
Expected Outcome
• Improvement in sketching & drawing abilities, particularly in chibi style.
• Finalized 3D model on Cinema 4D or Blender
• Chibi illustrations used as concepts on products such as stickers, stationary or figurines.
Research & Context
I will look at various tutorials on the internet such as Youtube videos & art blogs to learn how to draw autonomy of chibi characters & learn 3D Designing.
My best approach to learning Blender is to follow a YouTube tutorial to replicate a model. This will help me grasp the basics of creating shapes, using tools, & refining models while also memorizing essential keyboard shortcuts for efficiency.
I decided to follow a YouTube tutorial on creating a 3D model of a gummy bear. The tutorial covered shaping and molding techniques, as well as adding textures, which will be useful when designing my own 3D character later.
Youtube Tutorial:
https://www.youtube.com/watch?v=CQfZjc dUx60
Using the Shift + A command, I loaded various shapes to choose from. For the base model of my gummy bear, I primarily used spheres & cylinders. To mold them into the desired shape, I switched to Edit Mode & used the G key along with my mouse for basic reshaping. I also used the S key to scale the model to my desired size & the R key to rotate the object as needed.
One simple trick I learned early on is using the number keypad to switch camera angles, allowing me to view my model from all directions.
After creating the torso of the gummy bear, I focused on shaping the arms and legs. I also learned another way to reshape cylinders—using the Ctrl + B command to adjust the bevel. By scrolling the middle mouse wheel, I could add more segments, allowing for greater control over the shape. Then I proceeded to use the R key to rotate & move the cylinder shape at the bottom of the torso.
Once I placed the cylinder shape, I added a modifier to create a mirrored symmetrical object by duplicating one side of the model and reflecting it across an axis. This is useful for modeling objects that needed symmetry. I took advantage of this to create the legs & arms of the gummy bear, refining them with the Scale & Rotate commands to fit model.
Next, I added another sphere to form the head of the bear, molding it freely using the G key & mouse. I then focused on creating the ears using a cylinder shape, scaling it down & flattening it with the S + Z keys to achieve a hockey puck-like shape. Afterward, I used the R + X keys & the 9, 0 (90 degrees) shortcut to rotate & position the ears onto the gummy bear's head.
Repeating the last step, I used the mirror modifier again to reflect the second ear to the other side so its perfectly symmetrical.
Conclusion
Unfortunately, this gummy bear project was short-lived. After adding the final shape—the nose—I moved on to phase 2, which involved sculpting the features of the teddy bear & refining the eyes, nose, & body.
However, I kept running into issues: whenever I tried to sculpt with the brush, it either distorted the shape in unwanted ways or didn't sculpt at all, no matter how many different brushes I used.
After troubleshooting & attempting to resolve the issue without compromising the shapes or starting over, I realized that I had likely missed a crucial step in the tutorial. The problem could be related to the layers of each shape, preventing me from selecting the entire body to sculpt it properly.
From Zero To Frog
Attempt 2:
A minute into the video, I learned one of the most important aspects of adding objects: adjusting the number of arcs applied to a specific shape. This makes it much easier to manage and manipulate the shape efficiently.
You can adjust this in the Operator Presets menu, where you can modify the arcs, as well as the scale, location, and size of the shape.
Although my first experience with Blender didn’t go as planned, it didn’t discourage me from continuing to learn its complexities. Instead, I decided to try a different tutorial from another artist and came across a video on 3D character modeling for a kawaii frog character. This tutorial will be valuable for my brief, as I plan to draw & 3D model my own character.
Youtube Tutorial:
https://www.youtube.com/watch?v=rEBwBrRz yhw
Another important tip I learned from this artist is using Shift + A to add a reference image to your panel, which helps with tracing & referencing your character.
After splitting a sphere in half and adding a mirror modifier for symmetry, I also discovered another modifier called Subdivision Surface. This smooths the object, creating a more organic shape—perfect for character modeling & sculpting.
During the first stage of creating the head of my froggy character, I learned that you can cut out certain areas of an object and replace them with additional shapes. By selecting the vertices, I could delete the selected area and then use the E key to extrude it upward & the S key to scale to create the eyes for the frog.
To Conclude
In conclusion while I didn’t have enough time to fully complete my self-set project due to the complexities of 3D design & juggling university applications & other priorities for my B1 project, I thoroughly enjoyed the process of learning Blender.
Through this project, I gained valuable skills in 3D modelling, such as shaping, sculpting, & using modifiers like Mirror & Subdivision Surface. I also learned how to manipulate shapes using tools like extrusion, scaling, & rotation. Despite the challenges, I am determined to continue improving my skills in Blender & further explore 3D design in the future. This project has been a rewarding experience, and I look forward to applying what I’ve learned to future creative endeavours.
Skills Building Project
To begin, I first needed to prepare my assets through Adobe Illustrator since I’m animating an eye illustration, I need to ensure that it’s all designed in separate layers before uploading to an After Effects project.
Then I created a new composition & arranged the eye layers into the timeline, & that all layers are properly aligned to form the eye when fully open.
Eyes Blink Animation
I also decided to challenge myself by creating motion graphics for the first time using Adobe After Effects. I already had some basic knowledge of the software a few months prior from working on my Hedy Lamarr movie poster, where I animated binary code. So, I skipped the fundamentals and went straight to learning how to create a blinking eyes animation.
Youtube Tutorial:
https://www.youtube.com/watch?v=o1vfmPwFQ0
Eye Movement
First, I focus on the eyeball and iris layers. I decide where the eye is looking (e.g., left, right, up, or down) & set keyframes for the position of the iris or eyeball.
To make the movement smooth, I use Easy Ease on the keyframes & adjusted the speed graph if needed. This helps the eye motion feel natural, not robotic.
Blink Animation
I start by selecting the eyelid layer & setting a keyframe for its starting position (fully open).
Then, I move forward in the timeline & adjusted the eyelid to close. I usually do this by scaling the eyelid layer or using a mask to make it look like it’s covering the eyeball.
To complete the blink, I reverse the process to reopen the eye, adding more keyframes to make the motion smooth.
Shape Morph Animation
After mastering the blink, I wanted to push myself further & explore more advanced techniques. That’s when I discovered shape morphing—a method that allows one shape to smoothly transform into another. At first, the concept seemed intimidating, especially when working with Bezier paths to control the curves & transitions. But I was determined to figure it out.
Youtube Tutorial:
https://www.youtube.com/watch?v=o1vfmPwFQ0
Creating The Shape
I use the Shape Tool to draw the initial shape. For example, I might start with a simple circle & rectangle to create my transition.
Bezier Path
I selected both shape layer & right clicked to convert to a bezier path as this gives me full control of the path points & handles.
Morph Animation
I set a keyframe for the Path property at the beginning of the timeline. This locks in the starting shape. I move forward in the timeline to the point where I want the morph to complete.
I used Easy Ease to smooth out the transitions. I also played with the speed graph to fine-tune how quickly or slowly the shapes transformed.