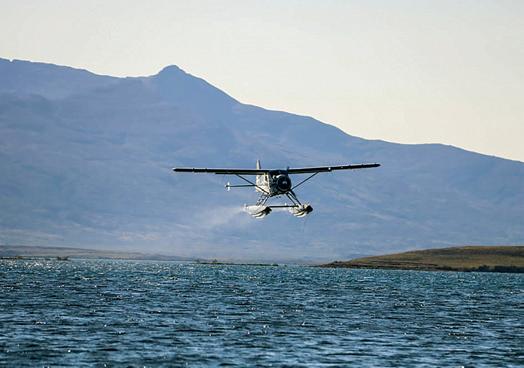
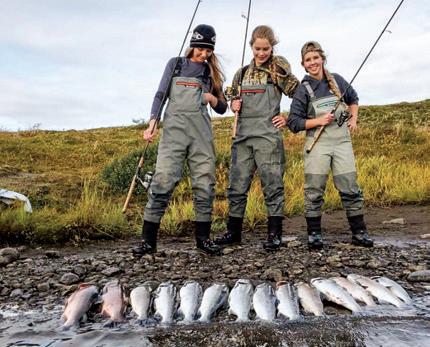
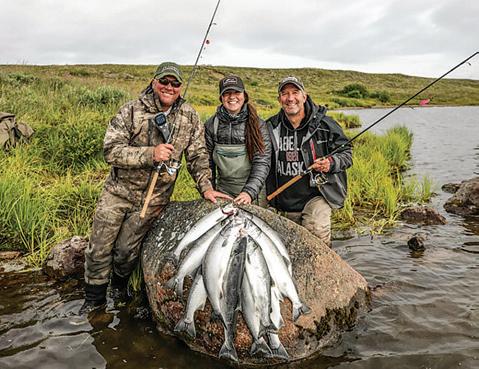
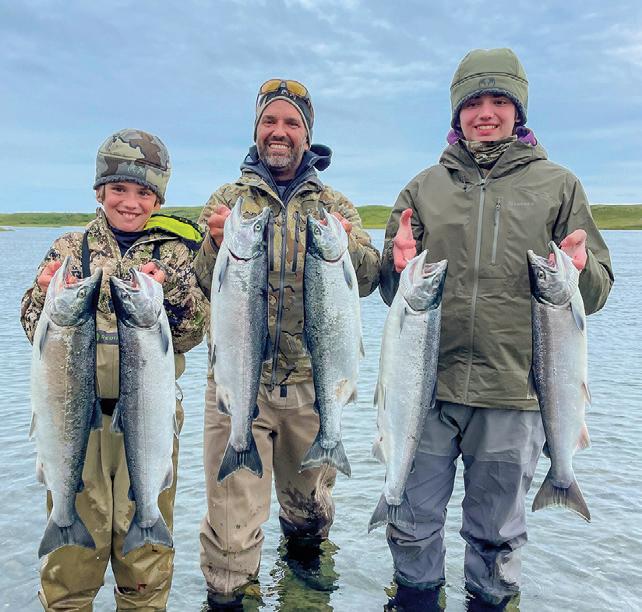
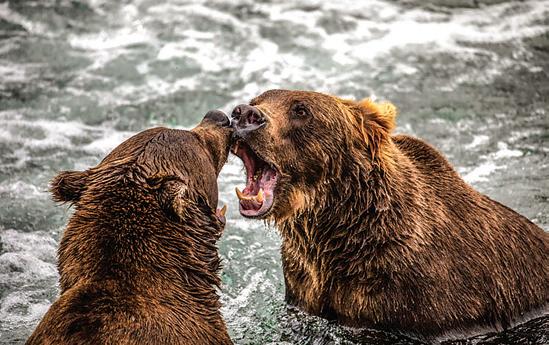
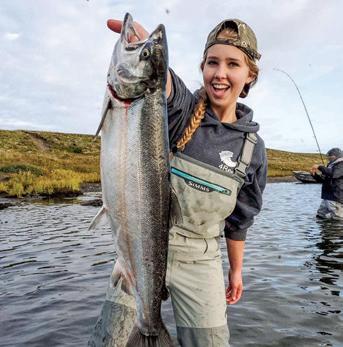
Our remote Alaskan fishing lodge is situated on the upper stretches of the beautiful Egegik River. You’ll watch some of Alaska’s most stunning sunrises, complete with a distant, active volcano. We are a fishing camp specializing in coho fishing, brown bear viewing, and flyout fishing adventures to even more remote destinations in the Last Frontier.
Coho Fishing The Egegik River
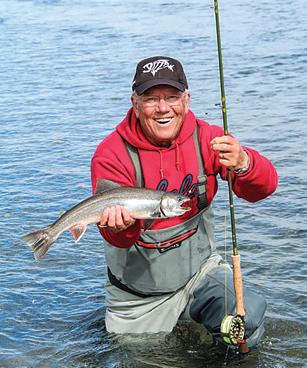
The Egegik River is touted by many experienced anglers as the best silver salmon stream in all of Alaska. Becharof Lodge On The Egegik River was the first fishing lodge to become established on the breathtaking Egegik River, and is less than a 5 minute boat ride from some of the best fishing holes on the entire river.
Now Booking for 2026 Coho Fishing Trips
Included in your fishing trip:
• 6 days fishing/5 nights stay in camp
• Experienced, fully guided fishing.
• Comfortable cabins furnished with beds, cozy comforters & bedding.
• Home cooked meals, snacks, and nonalcoholic beverages.
• Transportation from the lodge to prime fishing holes on the Egegik River.
• Freezing and vacuum sealing of your fish, up to 50 lbs., per angler.
$4,850per person Includes round trip charter from King Salmon. Call for more details.
PUBLISHER
James R. Baker
GENERAL MANAGER
John Rusnak
EDITOR-IN-CHIEF
Andy Walgamott
OFFICE MANAGER / COPY EDITOR
Katie Aumann
LEAD CONTRIBUTOR
Frank Jardim
CONTRIBUTORS
Larry Case, Graciela Casillas, Scott Haugen, Phil Massaro, Mike Nesbitt, Paul Pawela, Nick Perna
SALES MANAGER
Paul Yarnold
ACCOUNT EXECUTIVES
Rachel Edgington, Janene Mukai
DESIGNER
Kha Miner
PRODUCTION ASSISTANT
Emily Baker
WEBMASTER / INBOUND MARKETING
Jon Hines
INFORMATION SERVICES MANAGER
Lois Sanborn
ADVERTISING INQUIRIES
ads@americanshootingjournal.com
CONTENTS
COVER STORY
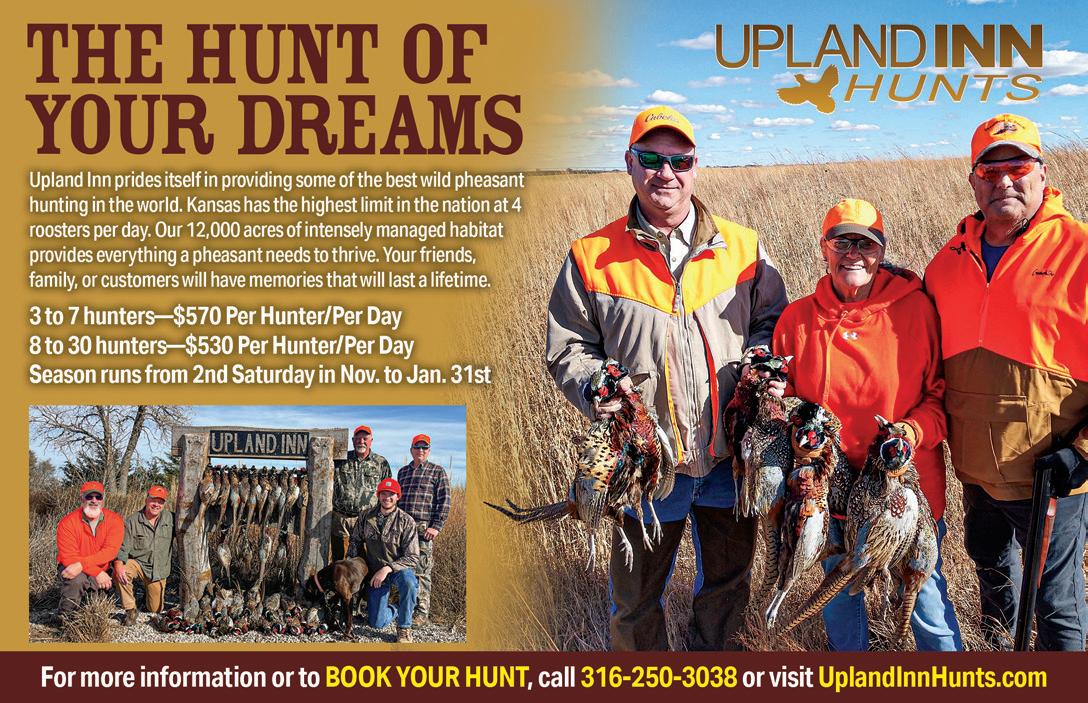
WHERE PHEASANT HUNTING DREAMS COME TRUE 22
Looking to splurge on a ringneck hunt? You could do worse than book an outing at a pair of lodges in the colorful birds’ heartland. Larry Case sings the praises of Kansas’s Upland Inn Hunts and South Dakota’s Thunderstik Lodge.
FEATURES
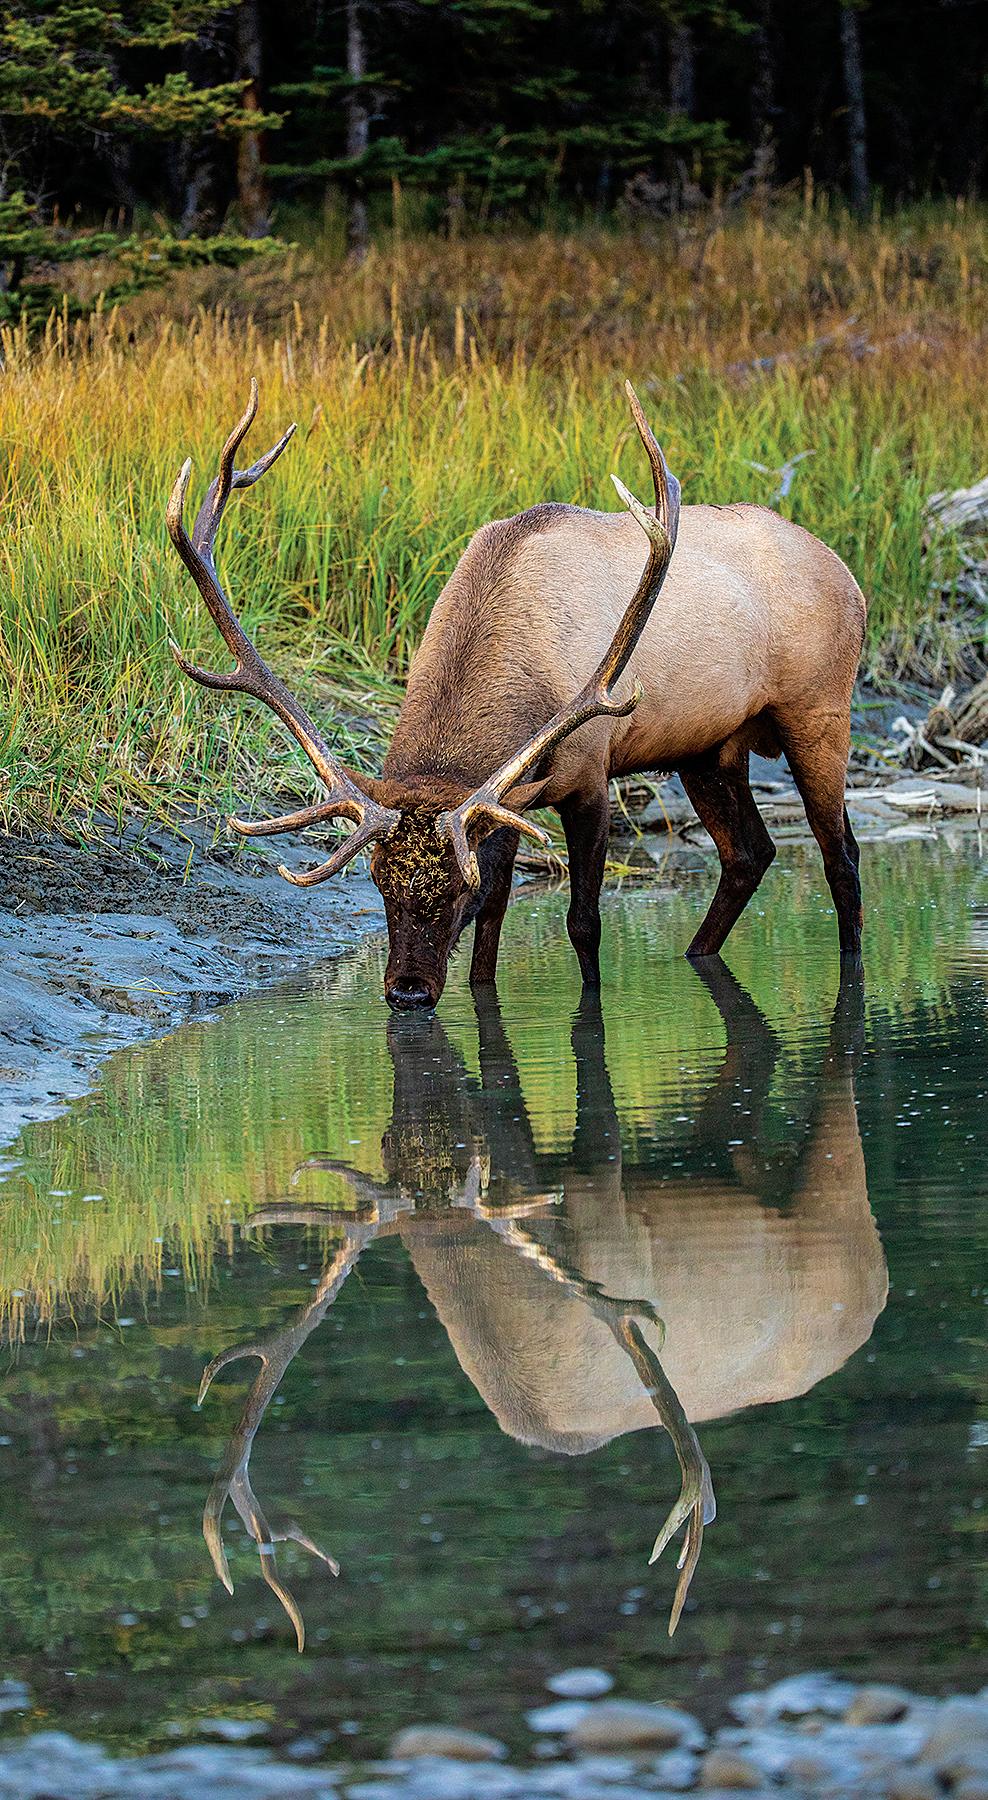
29 R OAD HUNTER: CLEARING UP ELK WALLOW CLUES
Scott Haugen has been hunting elk for over 45 years, and the more time he spends studying wallows, the more he learns about bull behavior. With the rut and bow season on in September, Haugen shares wisdom gleaned from decades spent in elk country.
37 BULLET BULLETIN: BEAR WITH ME …
From heavily forested New England to the piney ridges of the West to Alaska’s open tundra, there are a lot of different bears and ways to hunt ’em. Phil Massaro, our professor of projectiles, delivers a dissertation on the bullets available to bruin hunters.
47 TACTICAL TRAINING: A GOOD REASON TO GET OUTDOORS
For veterans and first responders, transitioning back into “normal” life can be hard and may lead to bad places. Fortunately, there’s help in the form of The Reason Outdoors, a nonprofit providing free hunting and fishing trips. Graciela Casillas shares the “ecotherapy” vision of cofounder Tony Cowden and crew.
60 SELF-DEFENSE TRAINING: ON PROVERBS, PSALMS AND PROTECTION
Faith, self-defense and fast, easy draws are at the core of CrossBreed Holsters. Find out more about this maker of inside- and outside-the-waistband tactical holsters that are drawable from a concealed carry position in just a second.
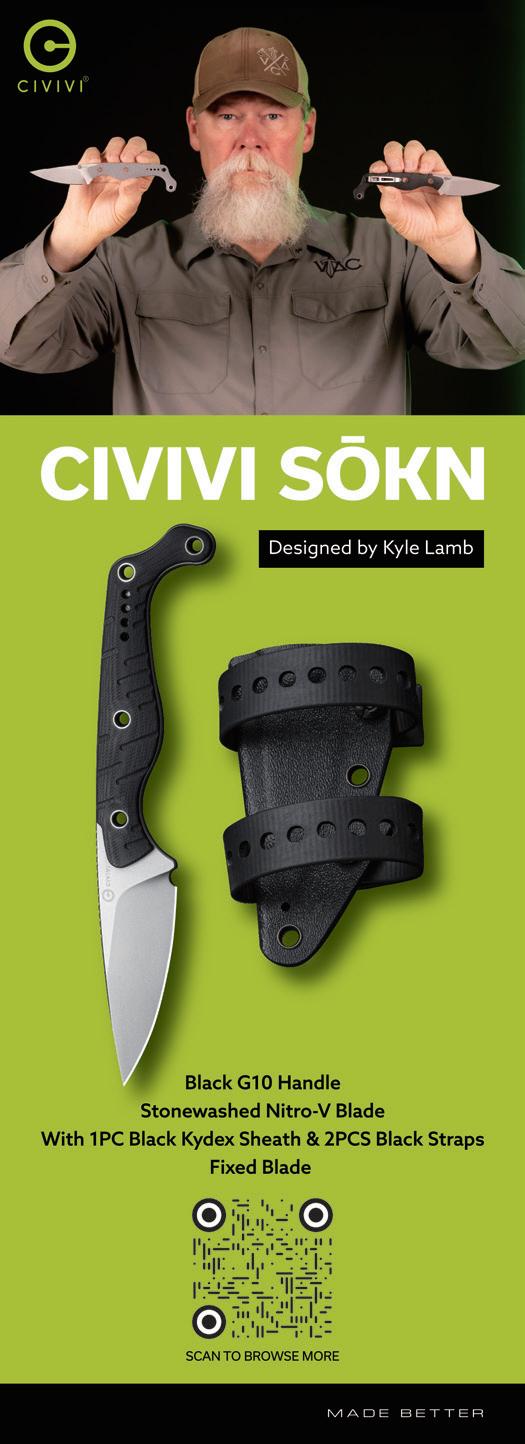
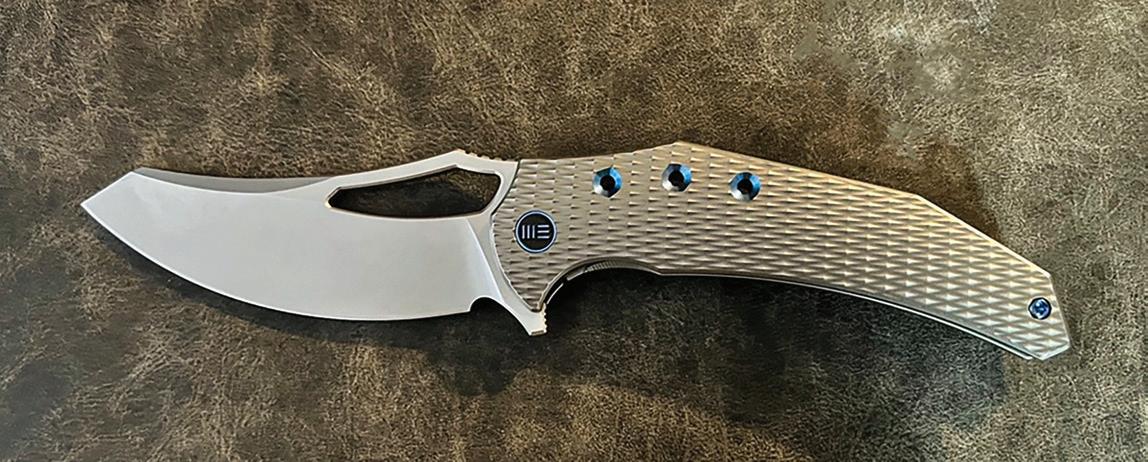
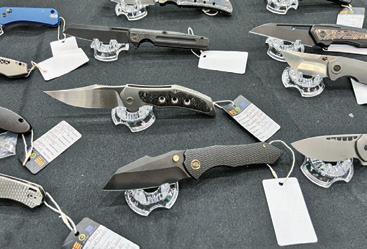
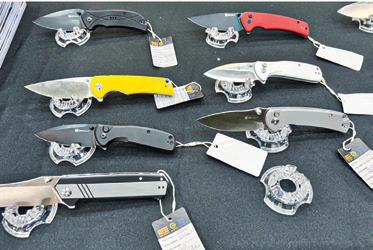
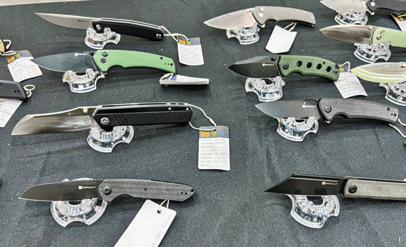
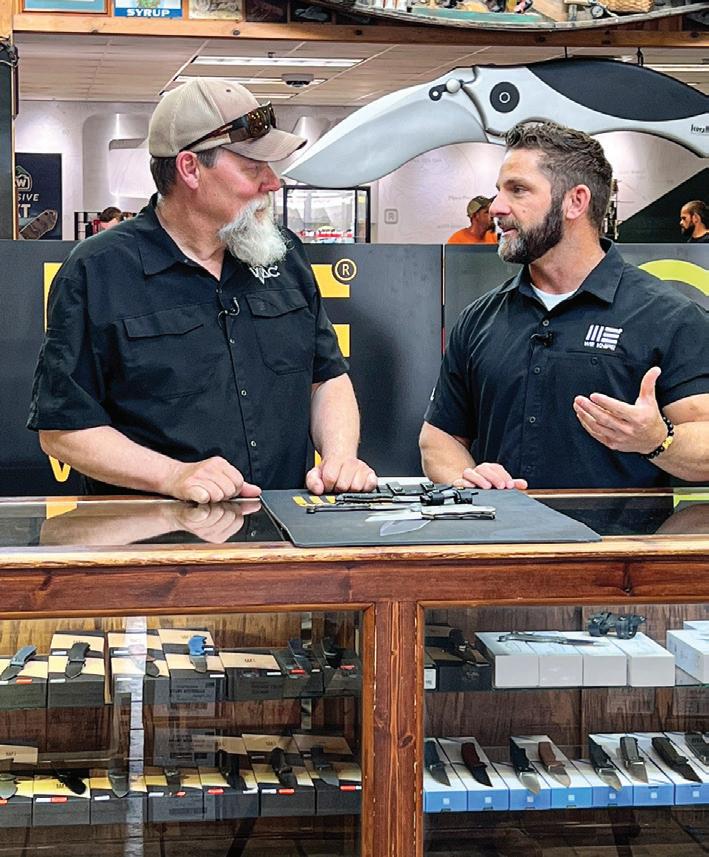
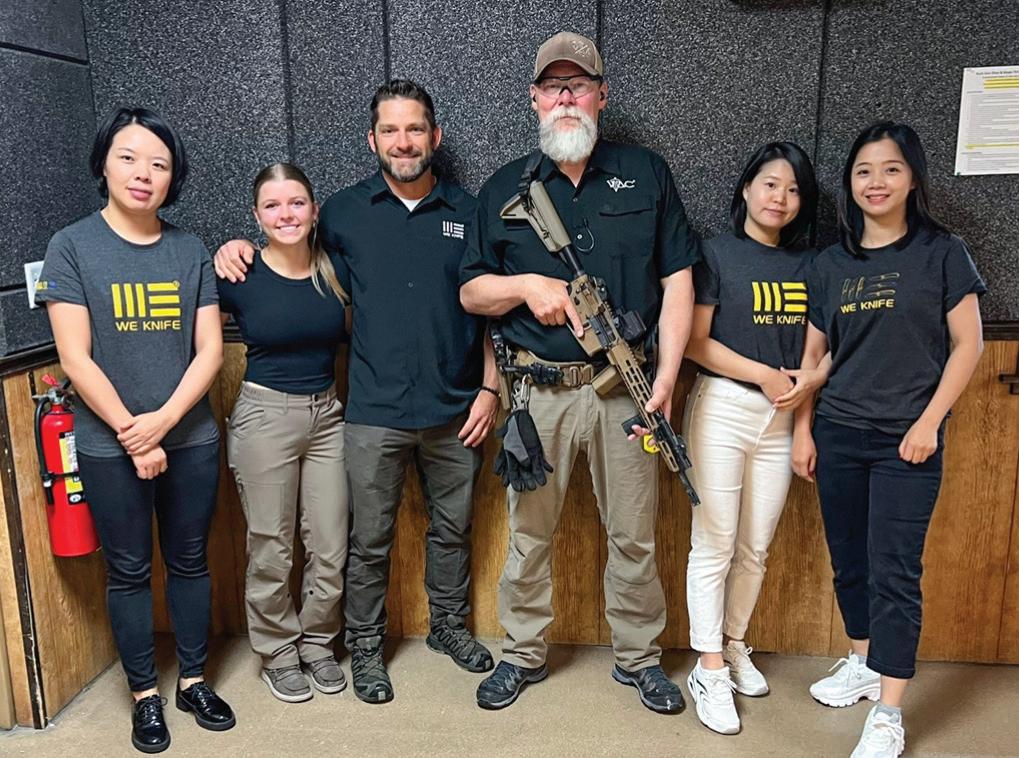
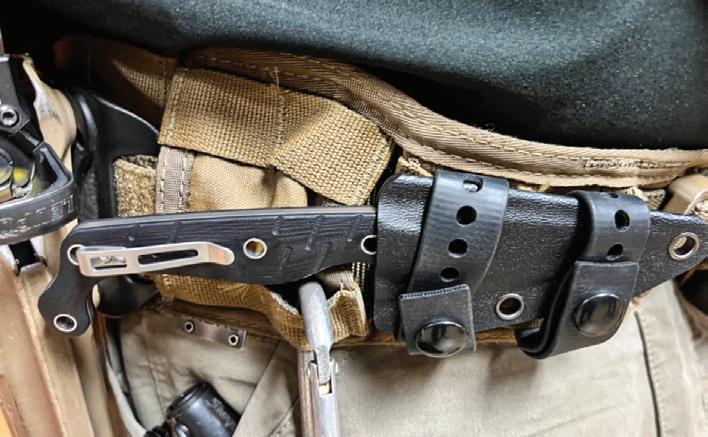
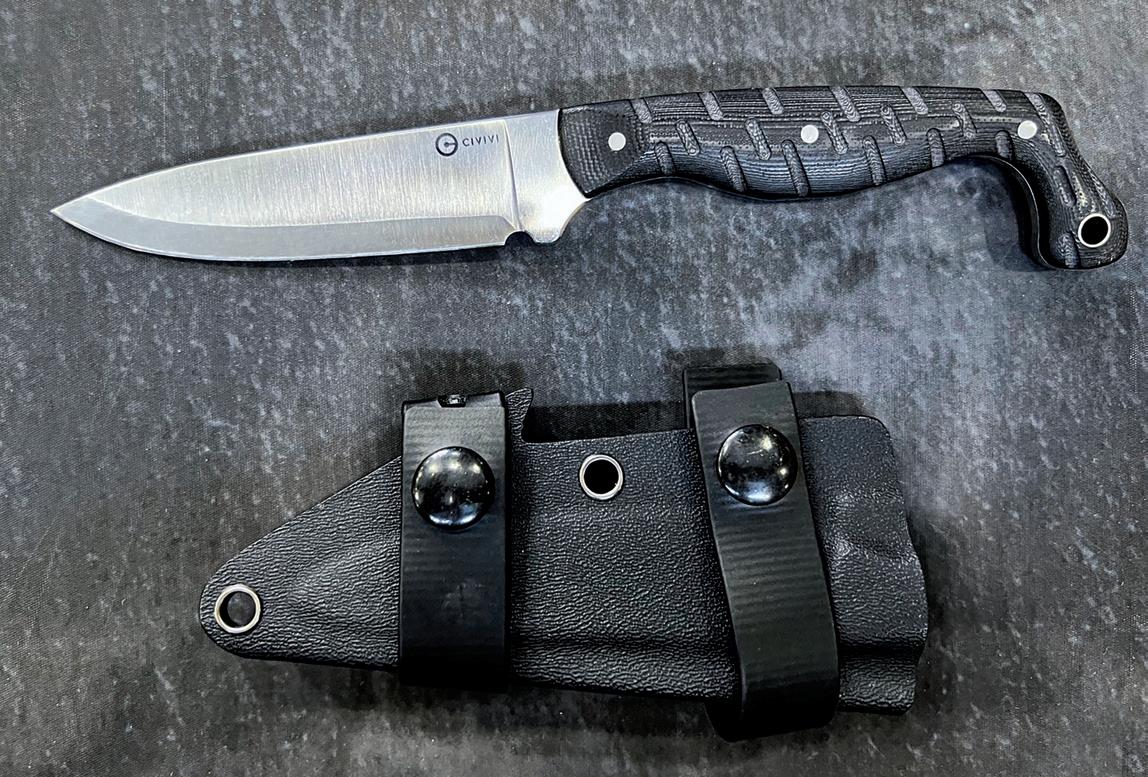
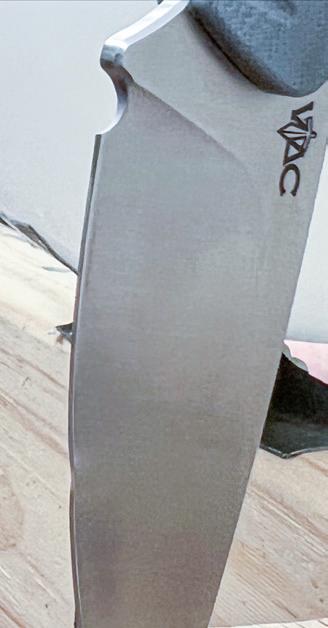
73 M AKING THE CUT: ‘WE’ GOT THIS We Knife Co. may not be a household name, but the Chinese blade maker’s Epaulette and Sokn knives certainly turned the head of our lover of all things sharp and pointy. Paul Pawela details the reverse tanto and fixed-blade knives.
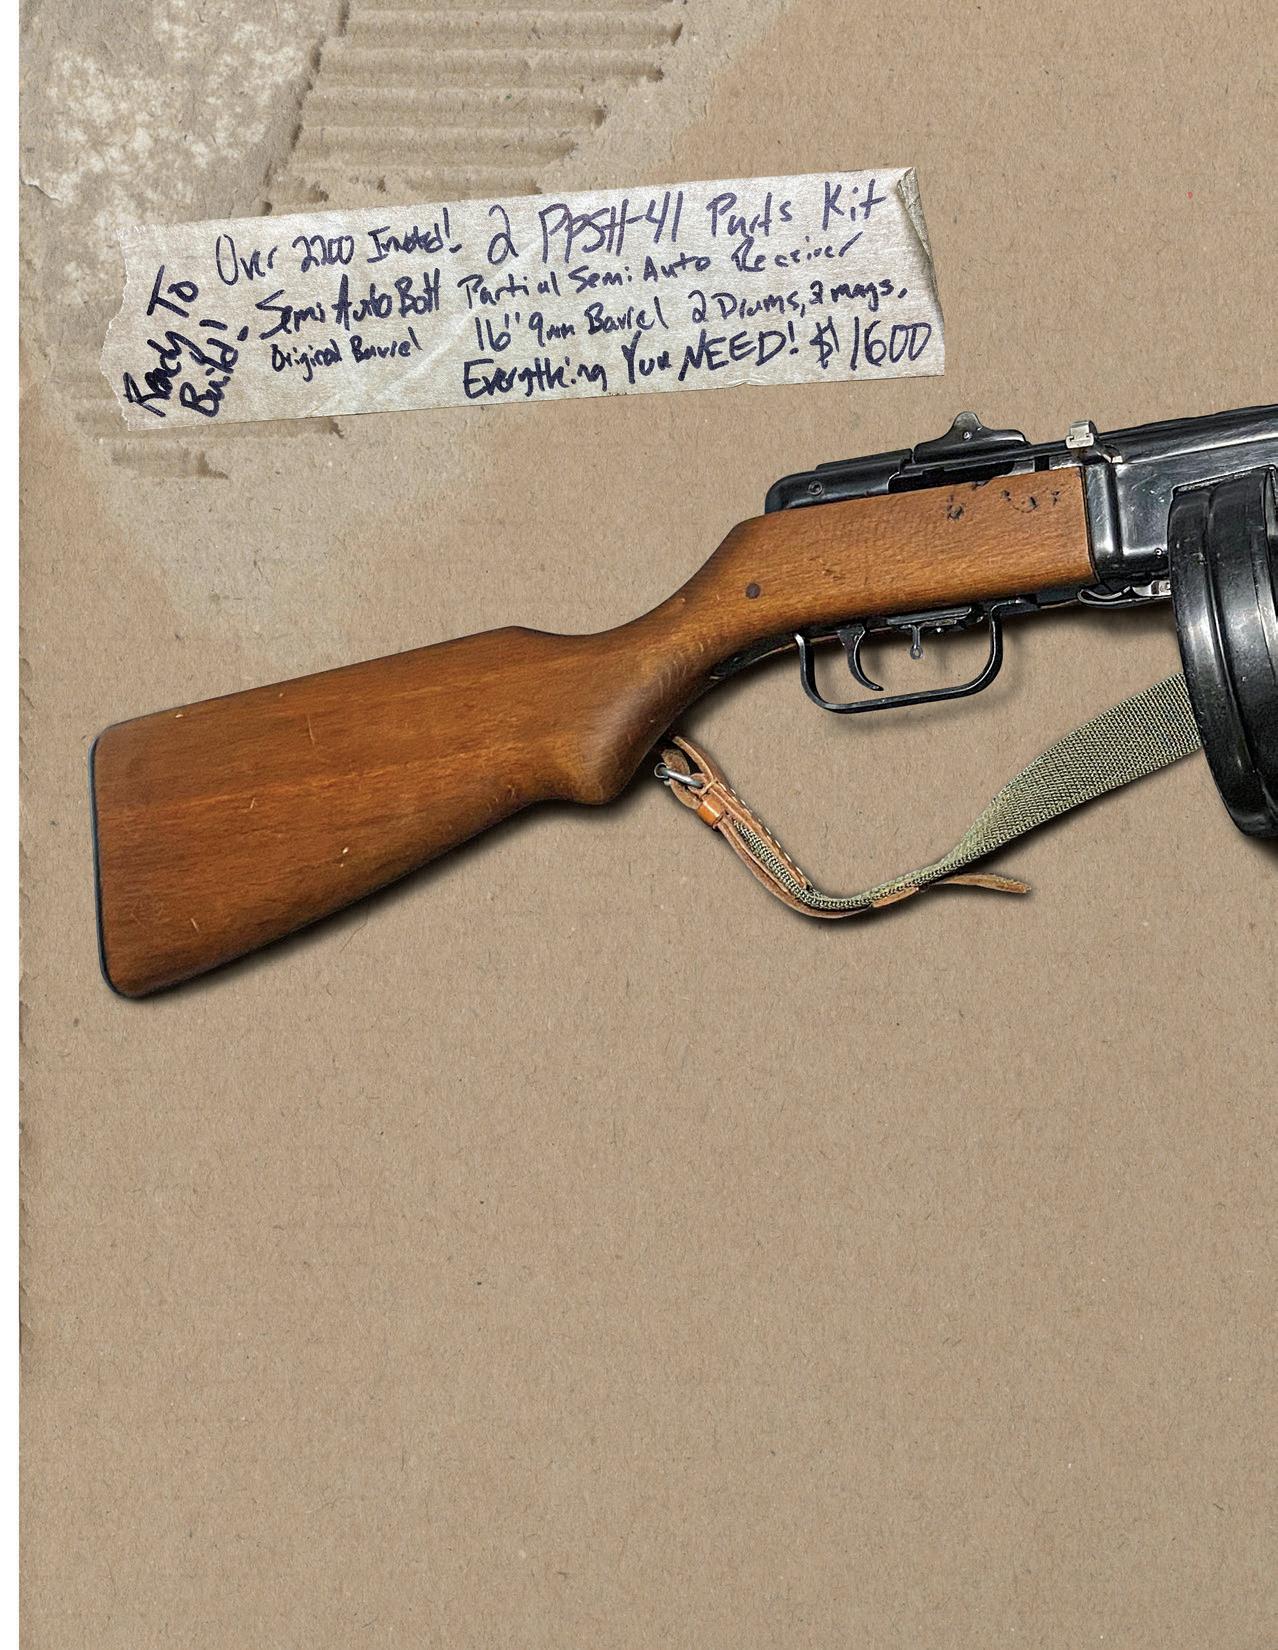
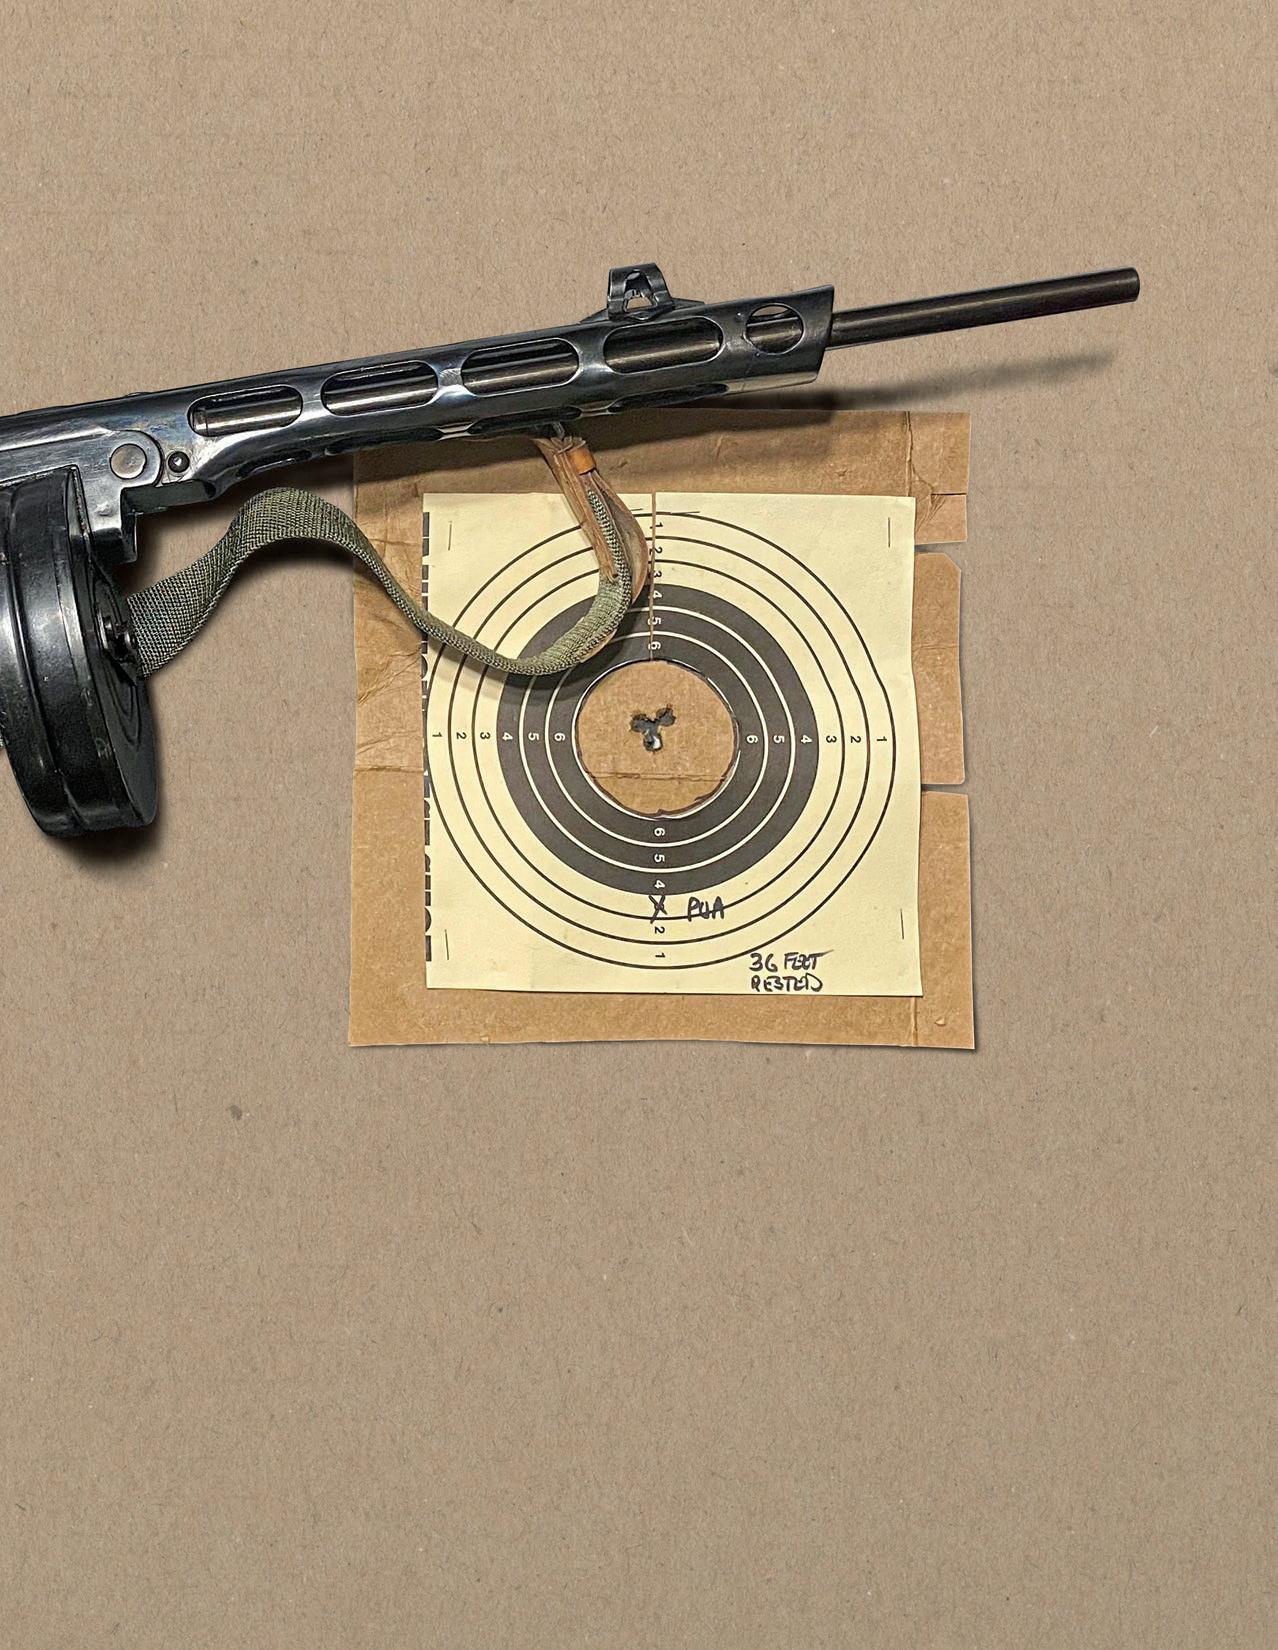
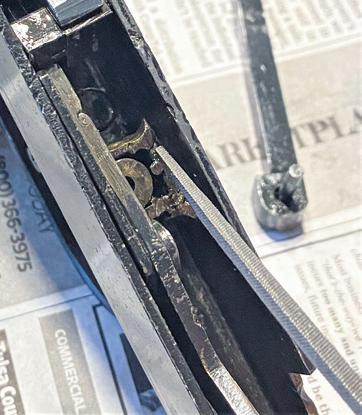
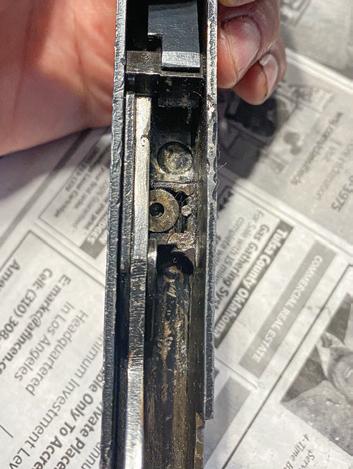
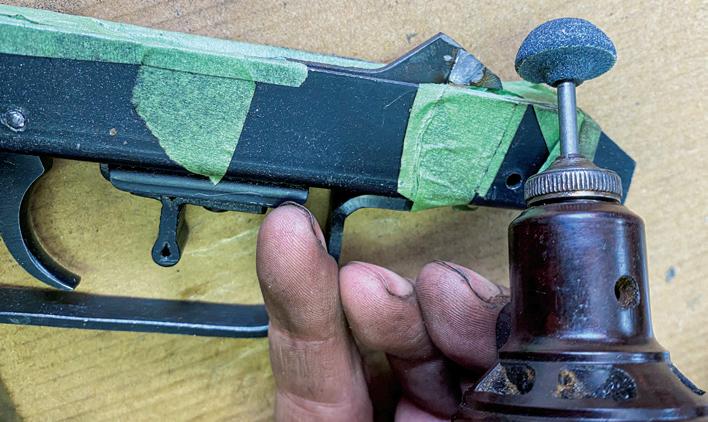
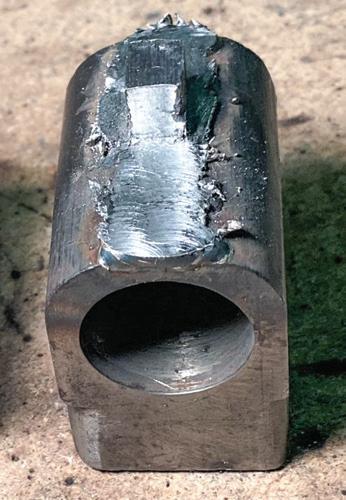
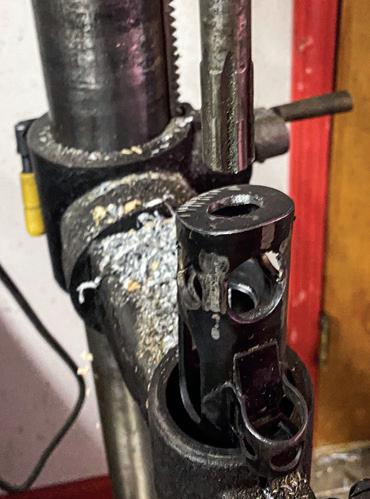
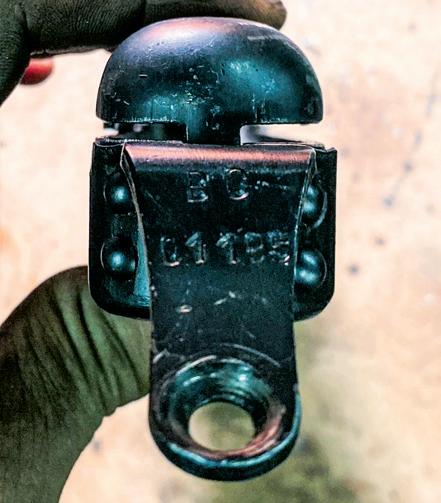
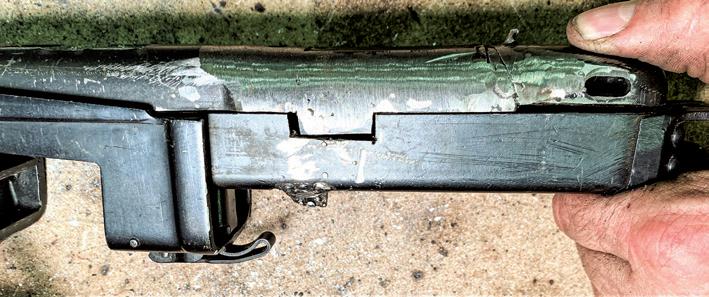
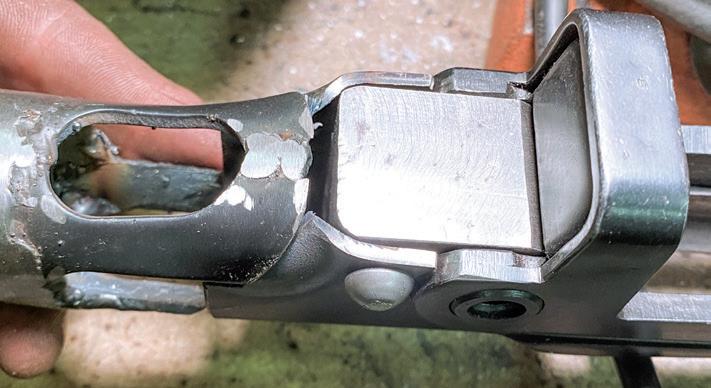
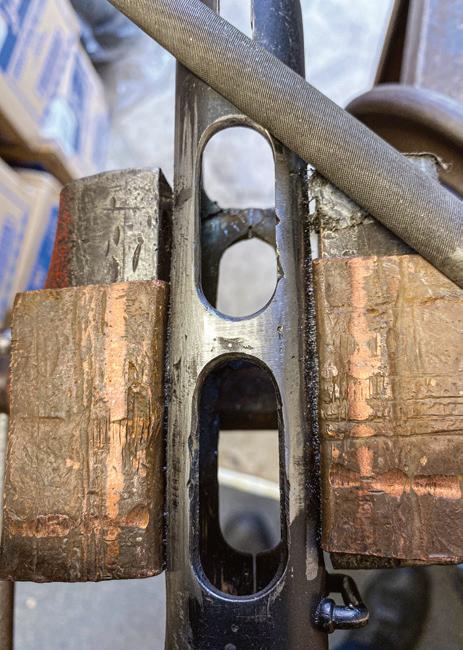
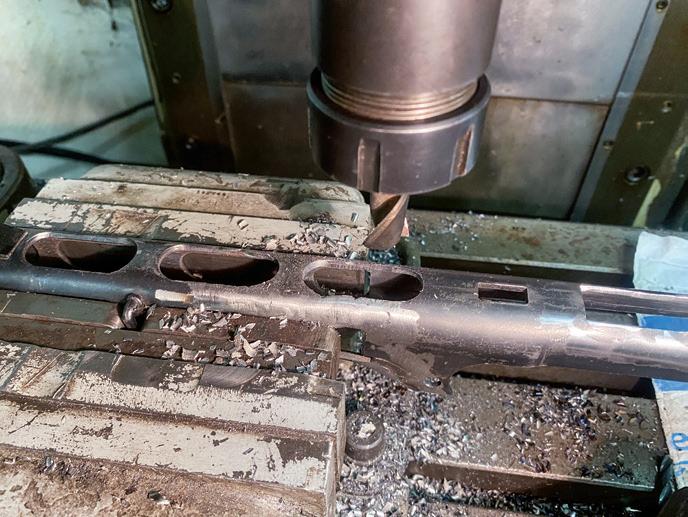
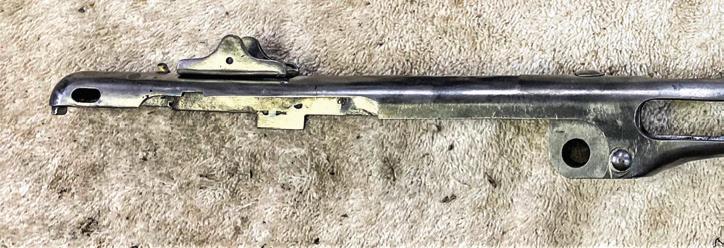
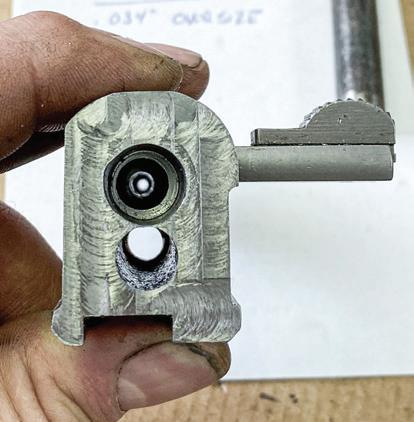
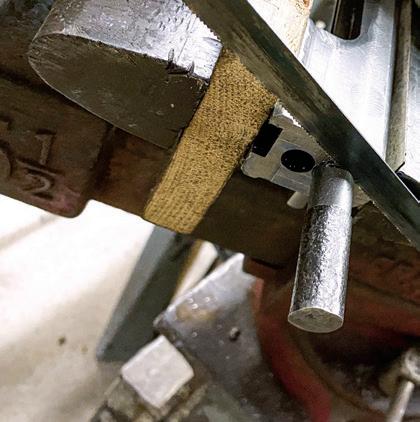
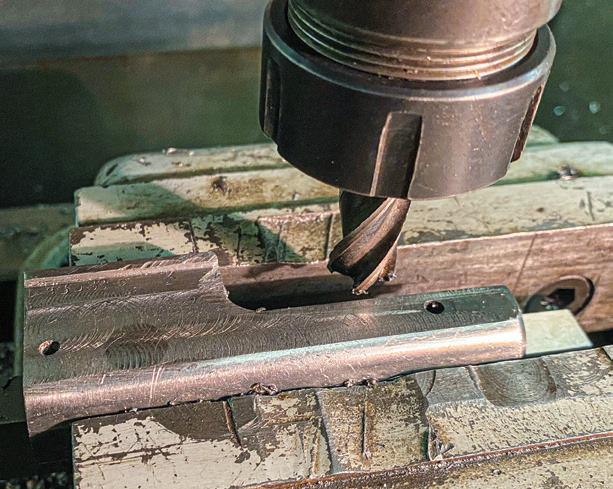
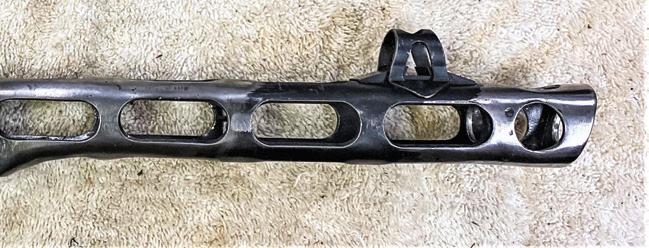
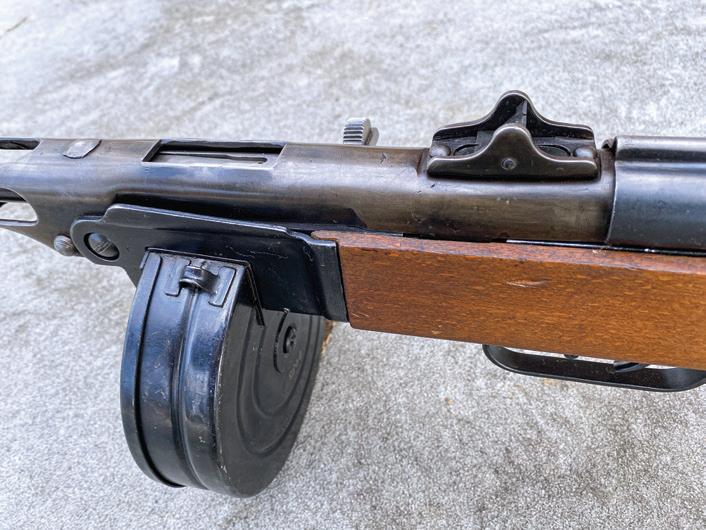
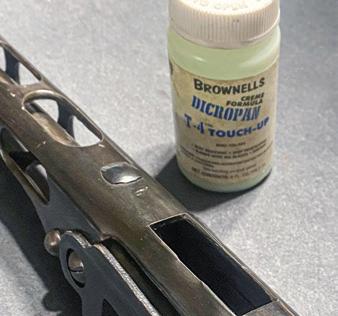
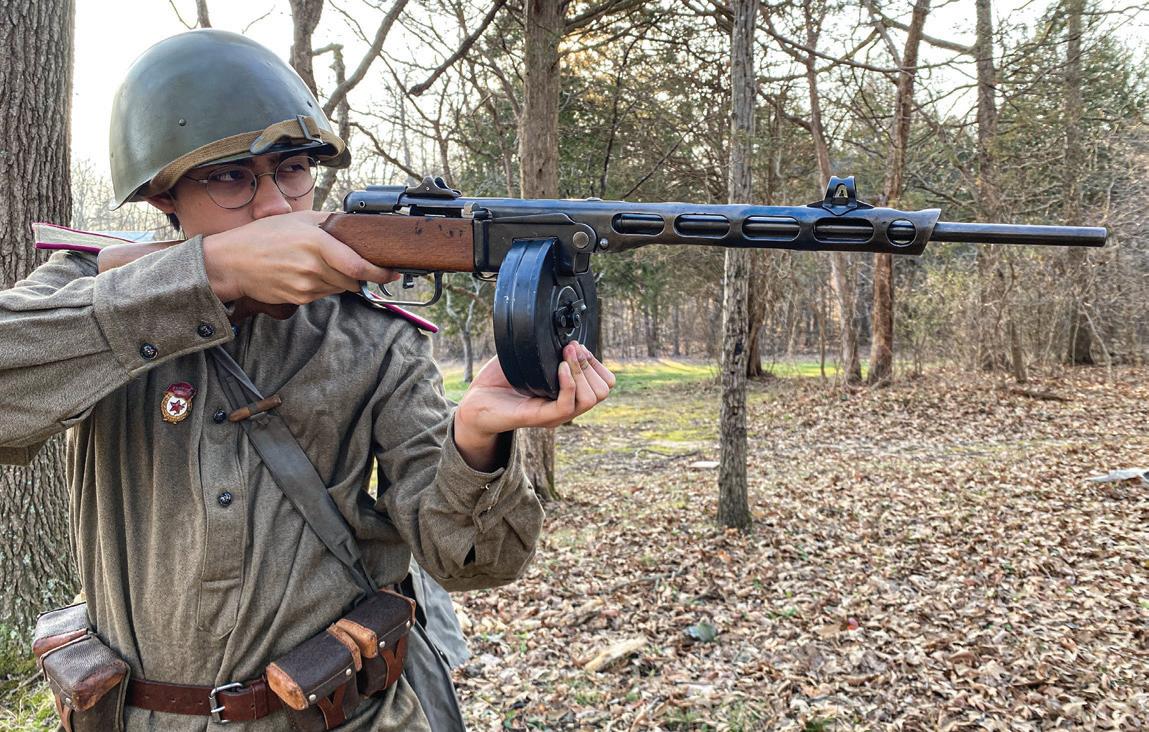
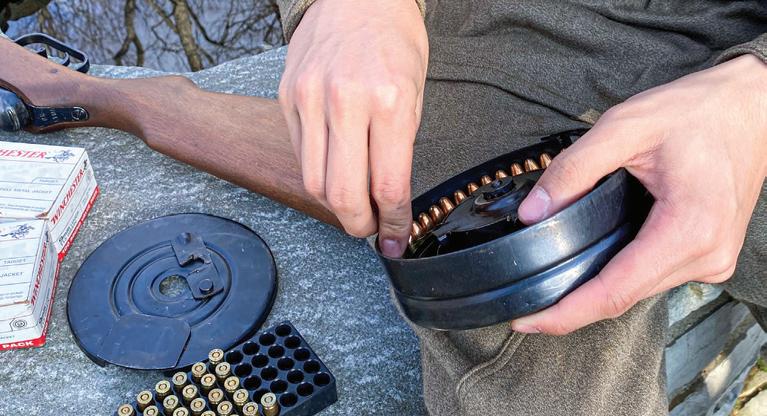
78 THE SEMIAUTO PPSH-41 BUILD FROM HELL
Frank Jardim was just trying to do a gun collector friend a favor when he brought the sketchy kit for a Soviet-era submachine gun into his shop to put together. What possibly could go wrong? Er, what wouldn’t?
(UPLAND INN HUNTS)
MORE FEATURES
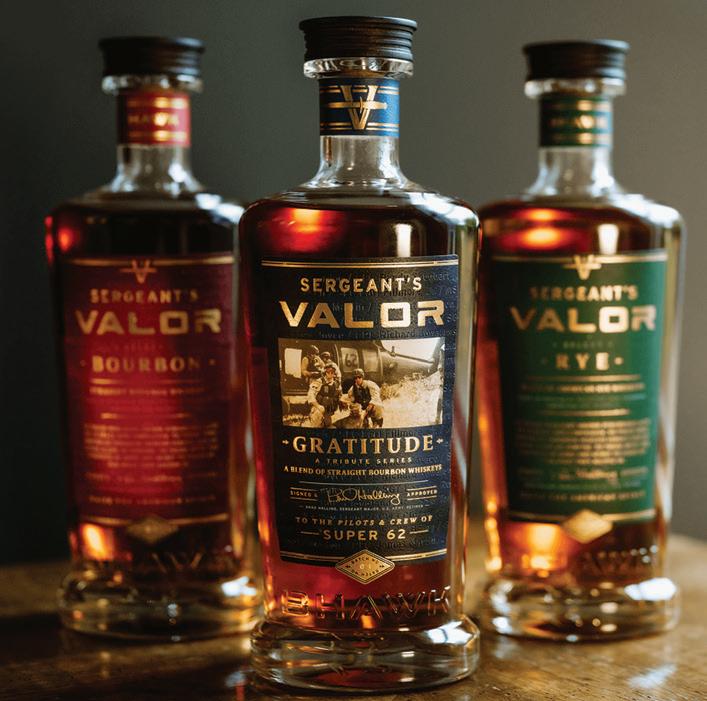
53 MILITARY SPOTLIGHT: A TOAST TO ONE OF OUR BEST
You may have never heard of Sergeant Major Brad Halling, but that doesn’t make his service – which ranged from Central America to Germany to Mogadishu – less heroic. We lift a glass to Halling, who now operates a destination whiskey distillery in retirement.
57 L AW ENFORCEMENT SPOTLIGHT: NO SUCH THING AS OFF DUTY
Five o’clock may signal quitting time for the vast majority of us, but not necessarily for police officers. Nick Perna hails the cops whose duty to act overrides the end of a shift to come to the rescue of those in need of help.
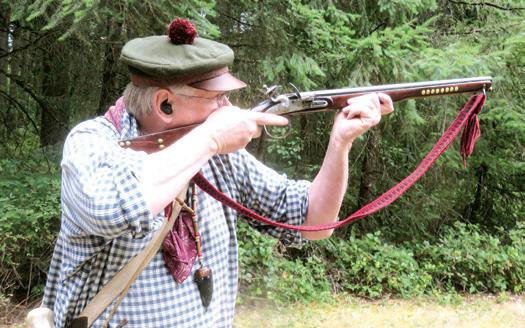
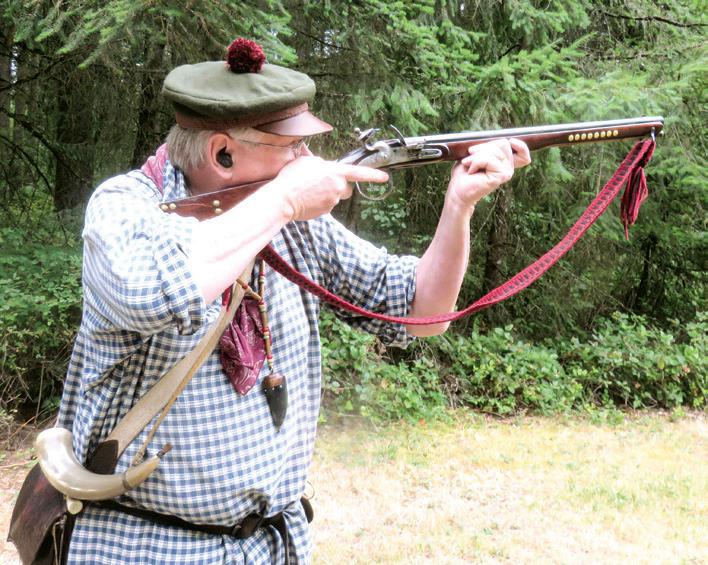
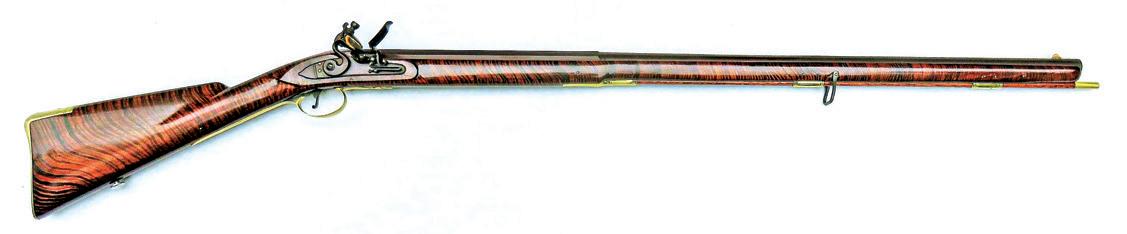
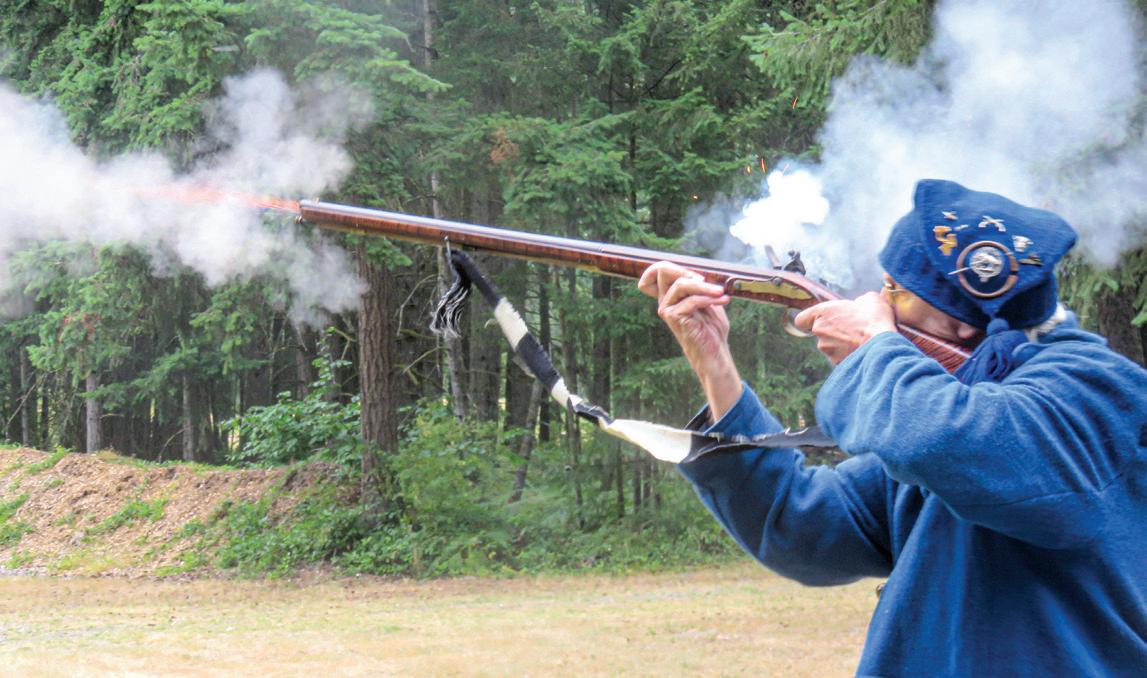
91 BL ACK POWDER: BIG FUN WITH ONE GUN
It used to be the Trade Gun Frolics, but even shrunk down from three days to one, as well as using just one flintlock, a muzzleloader club still has lots of fun. Mike Nesbitt details the matches and skills on display at this year’s event.
company Spotlight
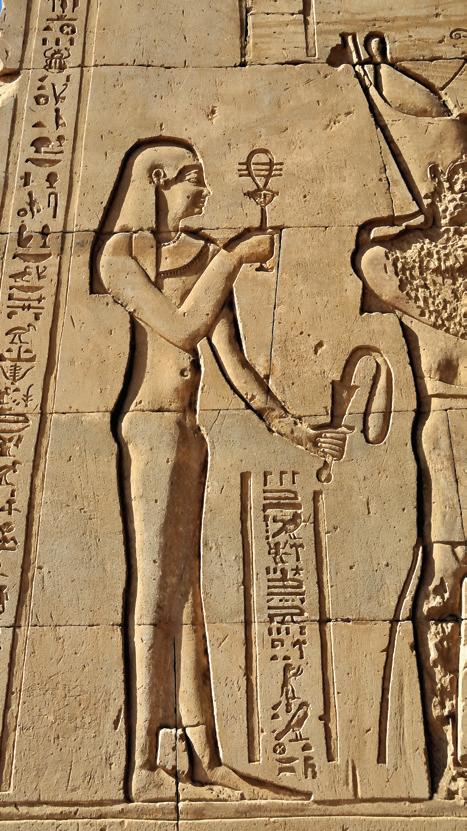
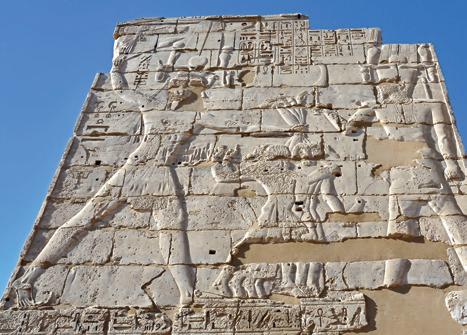
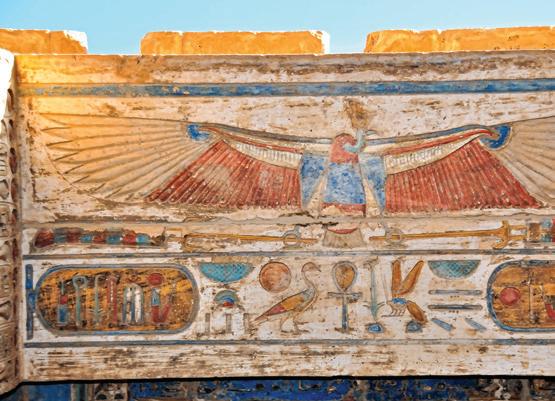
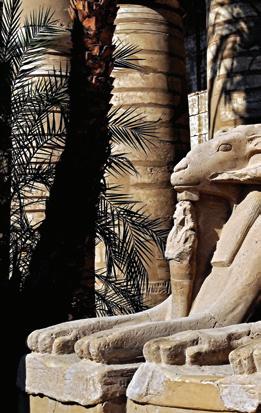
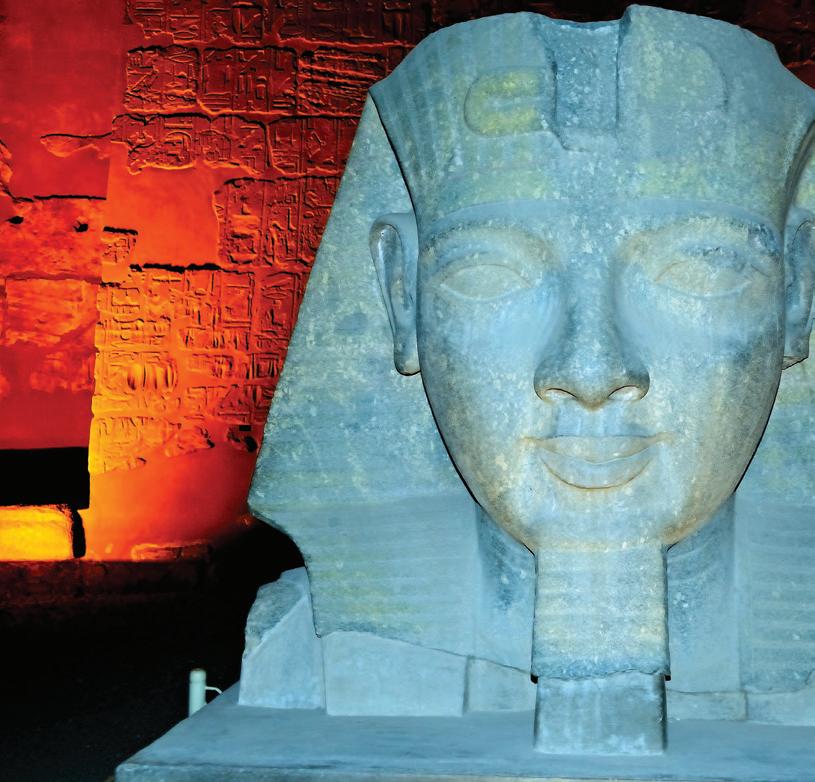
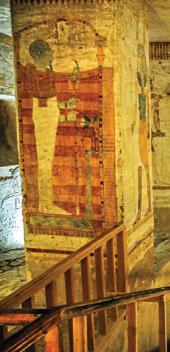
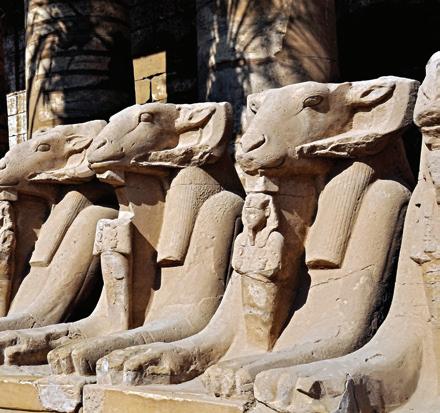
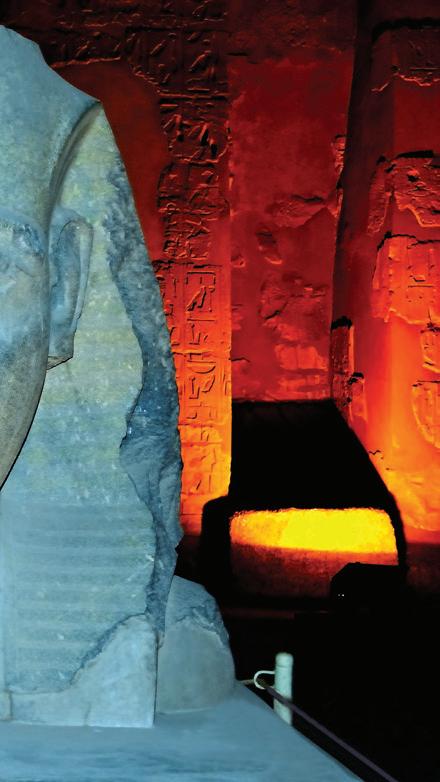
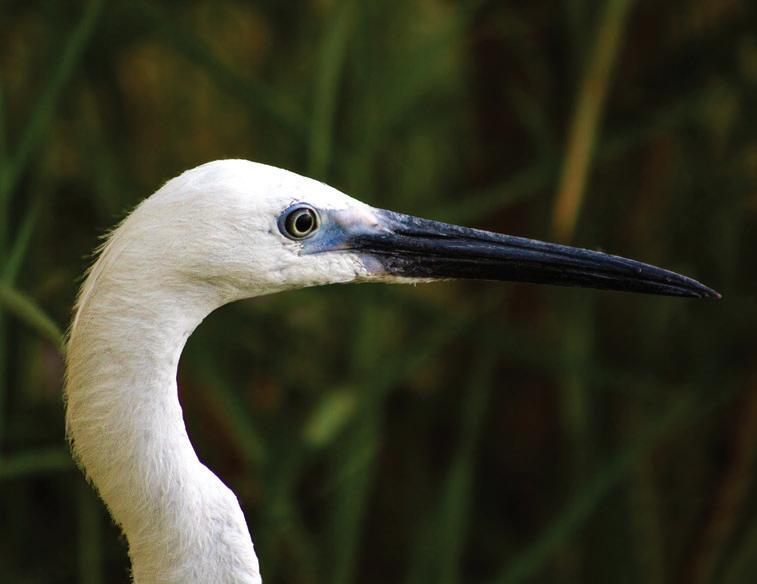
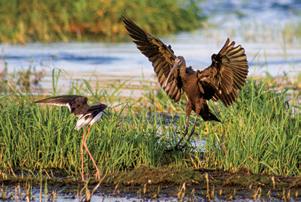
96 SAIL BACK INTO TIME OF THE PHARAOHS
History. Wildlife. Luxury. It’s all on offer when you sign up for a cruise on Aggressor Adventures’ Nile Queen II, where the ancient world and modern amenities meet for a six-day/ five-night trip of a lifetime.
Product Spotlight
66 THE WAR WAGON, REBOOTED
With the Wild West, pioneer trains and warriors on horseback on his mind ahead of a crosscountry drive this summer, Paul Pawela was all in on a chance to test out a V-Line Tactical Weapons Locker XD.
DEPARTMENTS
19 Gun Show Calendar
21 Competition Calendar
(MIKE NESBITT)
C&E Gun Shows cegunshows.com
Crossroads Of The West Gun Shows crossroadsgunshows.com
Florida Gun Shows floridagunshows.com
GunTVShows.com guntvshows.com
RK Shows rkshows.com
GUN SHOW CALENDAR
September 6-7
September 6-7
September 27-28
October 4-5
October 4-5
September 6-7
September 6-7
September 13-14
September 13-14
September 20-21
September 20-21
September 27-28
September 27-28
September 6-7
September 13-14
October 4-5
October 11-12
September 6-7
September 12-14
September 26-28
September 27-28
October 4-5
September 5-7
September 6-7
September 12-14
Columbus, Ohio
Hickory, N.C.
Hamilton, Ohio
Fayetteville, N.C.
Salem, Va.
Phoenix, Ariz.
Sandy, Utah
Hurricane, Utah
Vallejo, Calif.
Mesa, Ariz.
Ogden, Utah
Las Vegas, Nev.
Tucson, Ariz.
Miami, Fla.
Palmetto, Fla.
Fort Myers, Fla.
Orlando, Fla.
Escondido, Calif.
Queen Creek, Ariz.
Fresno, Calif.
Chandler, Ariz.
Fullerton, Calif.
Strafford, Mo.
Columbus, Ga.
Corbin, Ky.
September 13-14 Gray, Tenn.
September 20-21 Franklin, Tenn.
September 20-21 Atlanta, Ga.
September 27-28
September 27-28
Gainesville, Ga.
Paducah, Ky.
Ohio Expo Center
Hickory Metro Convention Center
Butler County Fairgrounds
Crown Expo Center
Salem Civic Center
Arizona State Fairgrounds
Mountain America Expo Center
Legacy Park
Solano County Fairgrounds
Centennial Hall
Weber County Fairgrounds
Las Vegas Motor Speedway
Pima County Fairgrounds
Miami-Dade Fairgrounds & Expo
Bradenton Convention Center
Lee Civic Center
Central Florida Fair Grounds
California Center for the Arts
Horseshoe Park & Equestrian Center
Elks Lodge
Rawhide at Wild Horse Pass
Fullerton Elks Lodge
Strafford Sports Center
Columbus (Ironworks) Convention Center
Corbin Civic Center
Appalachian Fairgrounds
Williamson County Expo Center
Atlanta Expo Center
Galaxy Event Hall
Trader’s Mall
Texas Gun Shows gunshowstx.com
September 6-7
Hondo, Texas
September 12-14 San Antonio, Texas
September 27-28 Galveston, Texas
October 4-5 Buda, Texas
Medina County Fair Hall
Alzafar Shrine Auditorium
Moody Gardens Convention Center
Central Texas Fieldhouse
Tanner Gun Shows tannergunshow.com
Wes Knodel Gun Shows wesknodelgunshows.com
September 13-14
Aurora, Colo.
September 20-21 Greeley, Colo.
October 11-12
Arapahoe County Fairgrounds
Island Grove Regional Park
Colorado Springs, Colo. Norris Penrose Event Center
October 25-26 Redmond, Ore.
Deschutes County Fair & Expo Center
COMPETITION CALENDAR
USA Shooting usashooting.org
United States Practical Shooting Association uspsa.org
September 6
San Antonio/Johnson JROTC PTO San Antonio, Texas
September 5-7
Iowa Section Championship Elkhart, Iowa
September 5-7
North Texas Open Waxahachie, Texas
September 5-7
Western PA Section Championship Erie, Pa.
September 11-14
High Desert NM Sectional Championship Edgewood, N.M.
Glock Sport Shooting Foundation gssfonline.com
Cowboy Mounted Shooting Association cmsaevents.com
International Defensive Pistol Association idpa.com
September 6-7
Twin Tiers Regional Classic Pine City, N.Y.
September 6-7
Tennessee Sports Foundation Glock Classic Jackson, Tenn.
September 5
California State Shoot Yreka, Calif.
September 7-8
Tennessee State Championship Shelbyville, Tenn.
September 5-6
Arkansas State IDPA Championship Lonsdale, Ark.
September 5-6
Idaho IDPA State Championship Nampa, Idaho
October 15-19
International Shooting Sport Federation EST Training Course Colorado Springs, Colo.
September 12-14
Carolina Classic Salisbury, N.C.
September 13-14
Heartland International Practical Shooting Confederation Shotgun Qualifier Alda, Neb.
September 19-21
Colorado State USPSA Championships Simla, Colo.
September 13-14
Badger State Regional Classic Muskego, Wis.
September 13-14
Atomic City GSSF Los Alamos, N.M.
September 9-13
Eastern Championship Shelbyville, Tenn.
September 19
Charlie Little Family Benefit Shoot Maple Plain, Minn.
September 6
North Carolina State IDPA Match Dunn, N.C.
September 12-13
Missouri State Championship Barnhart, Mo.
September 20-21
Oregon Open Sectional Championship Keno, Ore.
September 25-28
USPSA Area 3 Championship Piedmont, S.D.
September 19-21
Glock Annual Shoot XXXII and Gunny Challenge Talladega, Ala.
September 27-28
The Sunflower State Classic Wellington, Kan.
September 26-28
State Fair of Virginia Shoot Doswell, Va.
September 27-28
NM State Championship Socorro, N.M.
September 12-14
2025 Sportsmen Challenge Saline, Mich.
September 18-20
IDPA National Championship Whitewright, Texas To have your event highlighted
WHERE TO GO PHEASANT HUNTING 101
Looking to splurge on a ringneck hunt? You could do worse than these two lodges in the birds' heartland.
STORY BY LARRY CASE
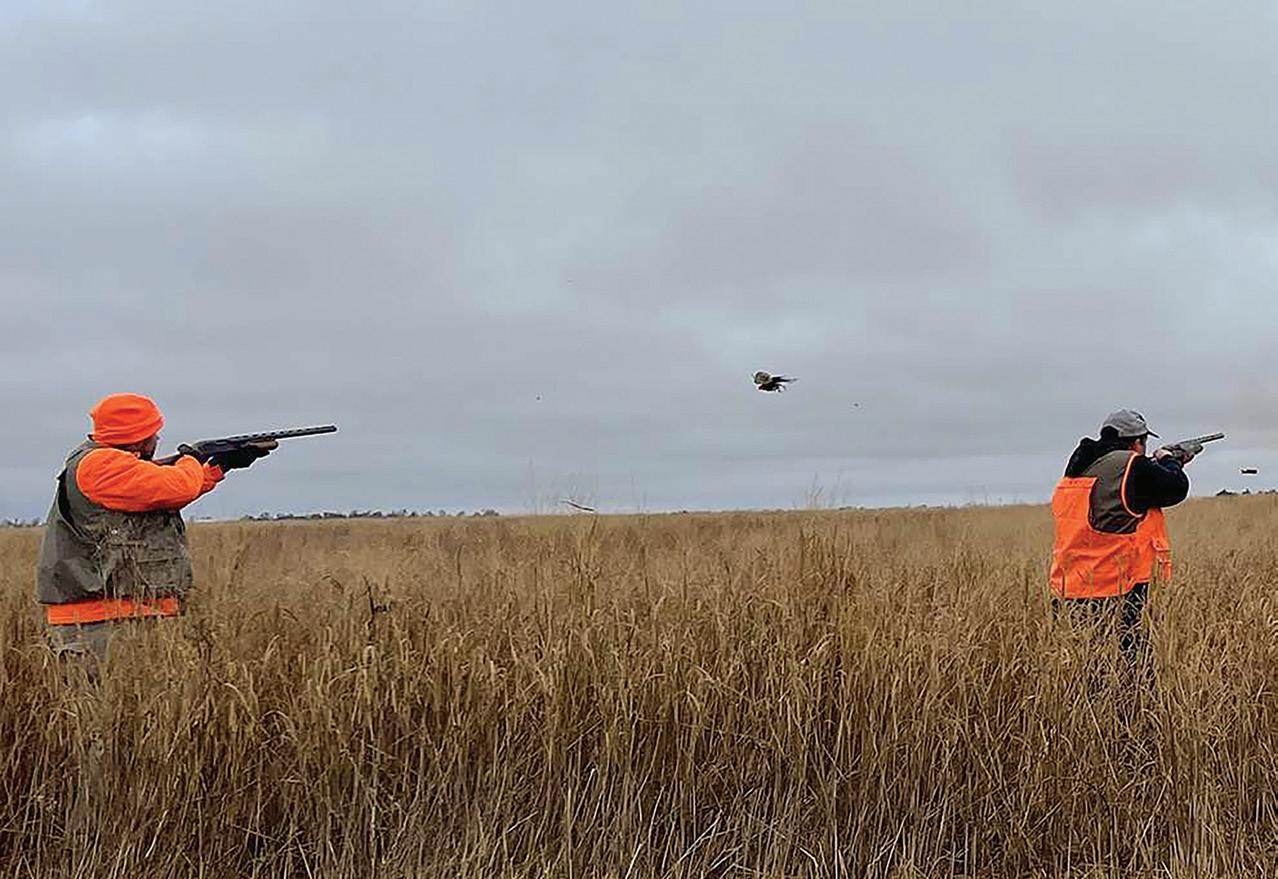
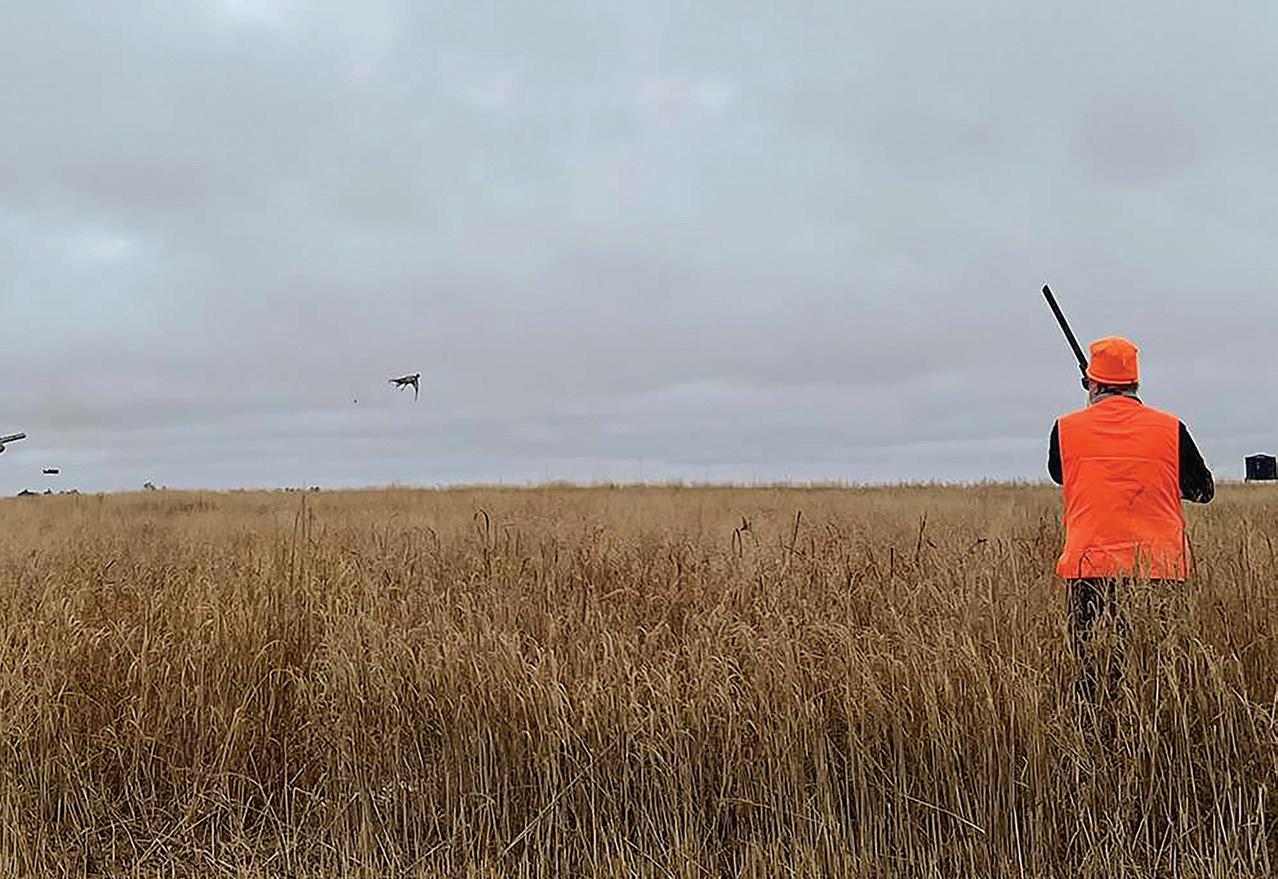
Iwatched as a hard-charging springer spaniel came tearing through the brush from my left. Right behind the springer was a highly motivated little English cocker; the dogs were plowing into the cover in front of me and I knew something was up. Before you could say “28-gauge,” a rooster pheasant launched itself skyward as only a Chinese ringneck can do – gaudy, cackling and trailing those beautiful long tail feathers.
This pheasant was gettin’ the heck out of dodge and wasn’t saying any long goodbyes. It went almost straight up and I yanked the trigger on the overand-under I was carrying. The big rooster crumpled like they are supposed to do, and at the shot a second bird blasted out of the cover, hurried on by the aforementioned springer and cocker.
My hunting partners left and right were all yelling “Rooster!” which seemed self-evident to me, as I had a ringside seat to the pheasants’ spectacular departures. (It certainly wasn’t a demure hen.) The first pheasant had just hit the ground when I lined up on the second and sent a load of Federal No. 6s in its direction. Amazingly, this rooster dropped as well – I’m sure it was as surprised as I was.
All of this took about eight or nine seconds and right then I figured I was probably the greatest wing shot in the state of Kansas. (That would change very quickly as we encountered more long-tailed ringnecks.)
As we talked about last time in part one of our little sermon on pheasant hunting (see our July issue), few shotgunning endeavors equal the rough and rowdy thrills of chasing ringnecks. Slogging through the cover with a couple of eager bird dogs, some likeminded amigos and a good shotgun in pursuit of the ringneck pheasant can be highly addictive. In part one we talked about pheasant hunting in general, some choices on gear and guns, and what you might expect from a day in the pheasant fields. All of that is great, but as with most hunting endeavors, the thing you really need is a place to go hunting. Where are you going to go for ringnecks? Here are two spots to consider.
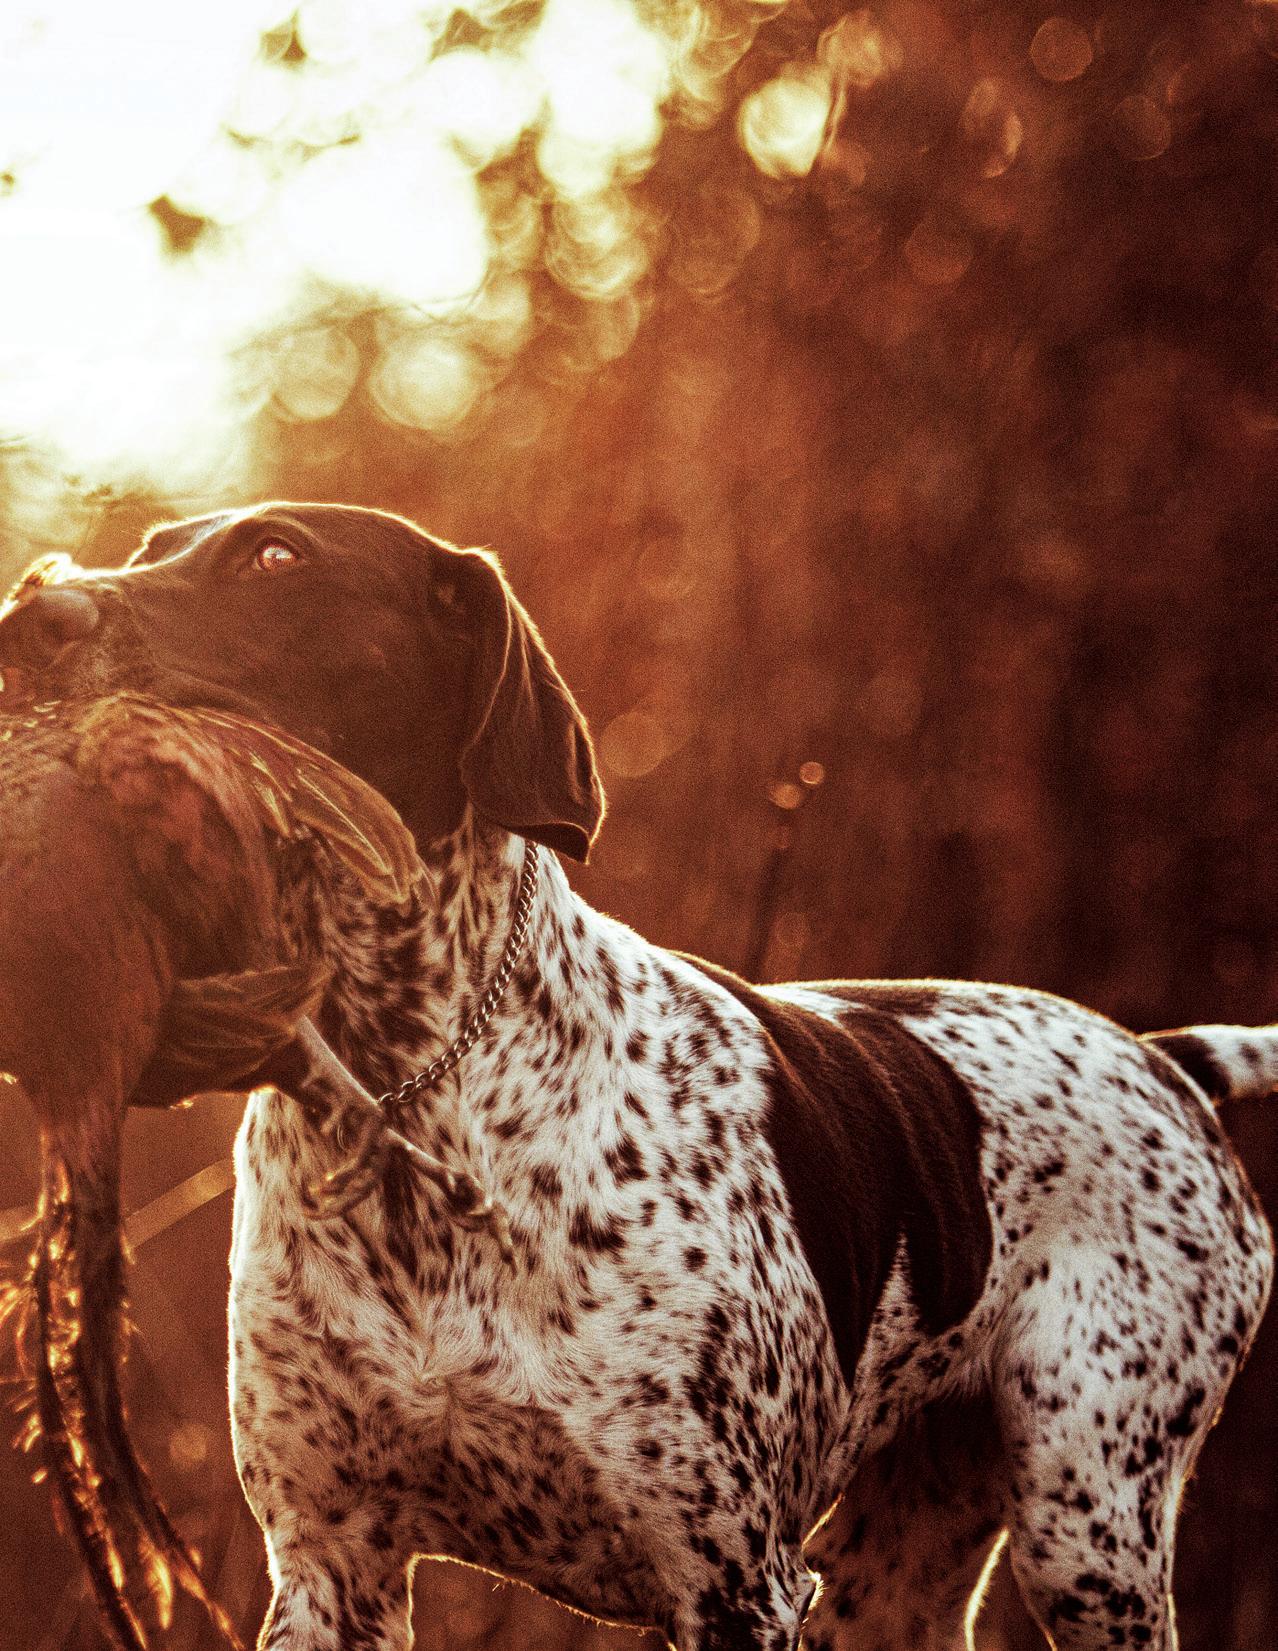
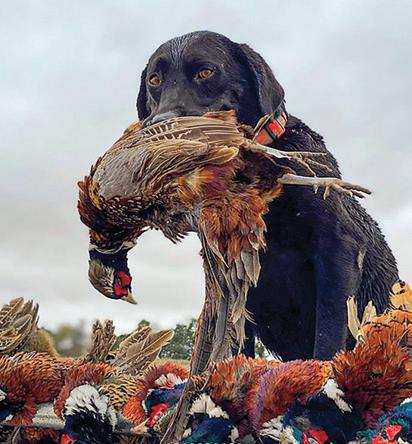
A German shorthaired pointer brings a ringneck pheasant to hand. These magnificent game birds are a favorite of many wingshooters, and the Great Plains are the thriving core of their range in North America. (SHUTTERSTOCK)
UPLAND INN HUNTS
(Greensburg, Kansas)
Upland Inn Hunts, located in southern Kansas near Greensburg, is a premier hunting outfitter offering everything from world-class ringneck pheasant hunts to whitetail deer, doves, quail and turkey opportunities.
“Upland Inn Hunts prides itself in providing some of the best wild pheasant hunting in the world,” said Jason Johnson, owner and operator. “Our 12,000 acres of intensely managed habitat provides everything
6,000 acres of CRP native grass in 50 different fields, we utilize controlled burns, strip disking, inter-seeding and food plots to provide everything a pheasant needs, from nesting to brood rearing to over-winter survival.
With pivot-irrigated corn, beans, milo and wheat surrounding our CRP fields, a diversity of habitat lets our game birds thrive. With an abundance of acreage, most of our fields only get hunted six to eight times per season, providing some incredible late-season pheasant hunts.”
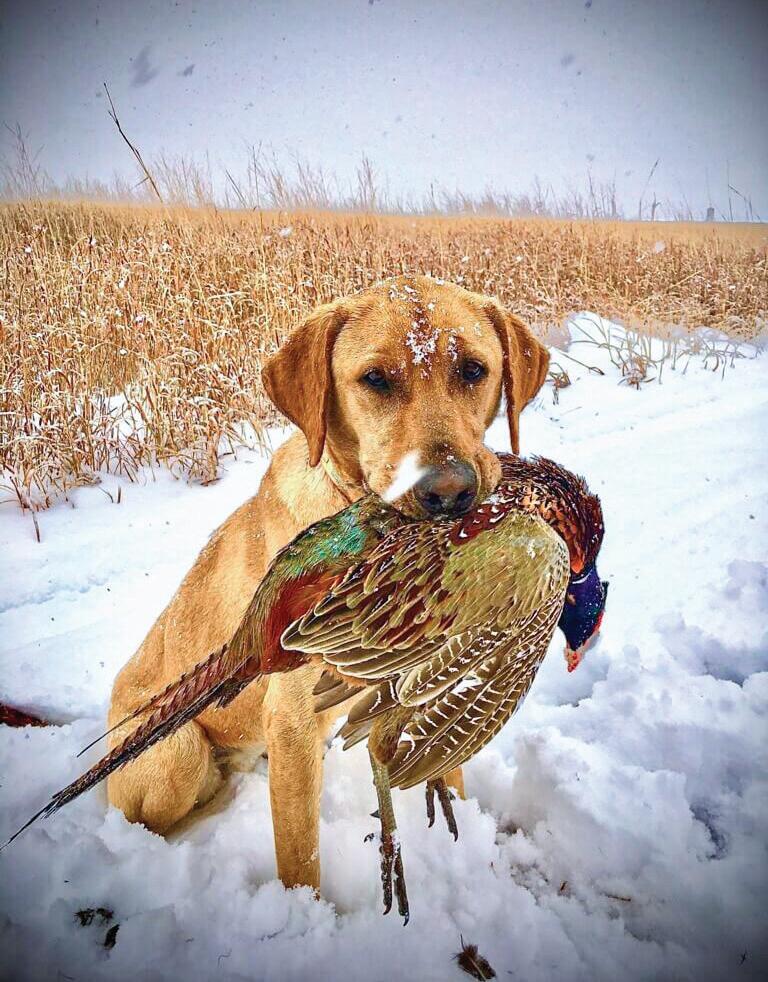
Adding to the uniqueness of a hunt here, Upland Inn provides quality and diverse lines of dogs, both pointing and flushing breeds. (UPLAND INN HUNTS)
“The pheasant numbers are going to be fantastic this season!” Johnson added. “With the great spring and summer rains we have received, the nesting and brood rearing conditions have been perfect. All 12,000 acres and 50 CRP fields look fantastic. We use an extensive system of trail cameras here at Upland Inn Hunts; all 50 cameras spread out among our 50 CRP fields continue to pick up a bunch of birds daily.”
David Miller, world-class shotgunner and CEO at Akkar USA firearms, has hunted at Upland Inn Hunts many times and films episodes of the popular outdoor series Gun Dog TV there.
“At Miller Shooting Sports, our journey has been deeply enriched by the many years we have spent in collaboration with Upland Inn Hunts in Greensburg, Kansas,”
very beginning, Upland Inn has been more than just a venue; it has been a place where memories are made, camaraderie is fostered, and the spirit of sportsmanship flourishes. Over the years, we have hosted many events at Upland Inn, each marked by the amazing hospitality and exceptional service that the staff consistently provides. The scenic beauty of the Kansas landscape, paired with a perfectly maintained hunting area, creates an unparalleled experience for both novice and seasoned pheasant hunters alike. There’s a unique
charm to the atmosphere, a sense of community that welcomes everyone who walks through the door. As we reflect on our journey, we are immensely grateful for Upland Inn Hunts and the incredible experiences that have shaped our history. We look forward to many more years of partnership, growth and unforgettable memories in the years to come!”
I can tell you this because I have been there: You will see lots of birds flying on an Upland Inn hunt. And the lodging is top-notch with several
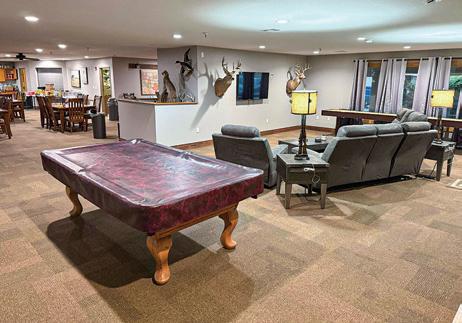
options. Standard lodging is two twinover-full bunks in a room. These lodges typically have shuffleboard tables, pool tables, horseshoes, cornhole, poker tables, fire pit, couches, bigscreen TVs, high-speed internet, snack bar, premium quality mattresses and linens, etc. A heated dog barn is located by each lodge.
and pool
Upland Inn Hunts’ premium lodging offers two beds per room with a
bathroom in each room and includes all of the amenities as the standard lodging. Your next option is a Best Western motel just four blocks from the lodges and, yes, your dog can stay in the room with you for $20 a night.
Visit uplandinnhunts.com for more information.
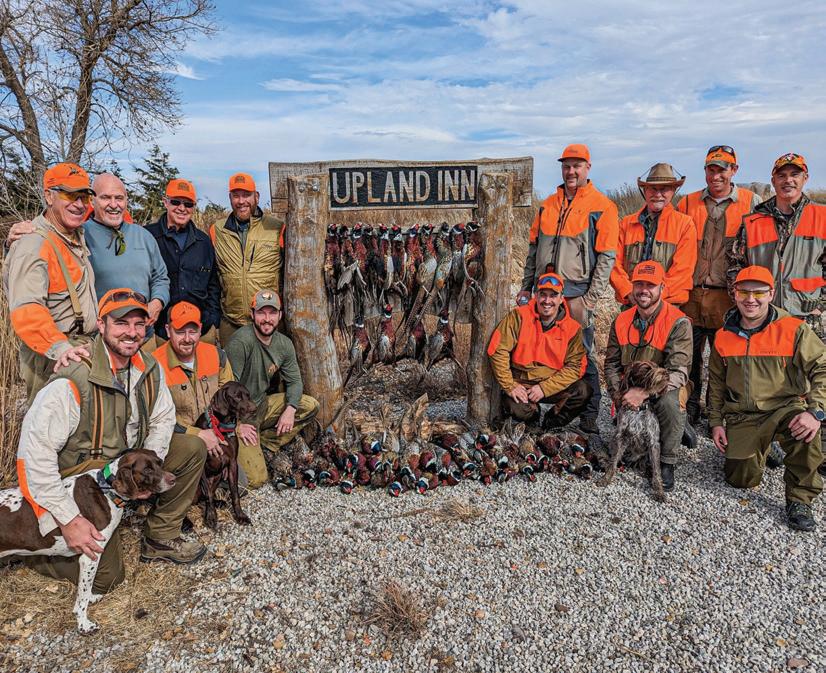
The lodge prides itself on providing some of the best wild pheasant hunting in the world. (UPLAND INN HUNTS)
Post-hunt amenities include shuffleboard
tables, fire pit, horseshoes, cornhole, tables for card games, couches, bigscreen TVs, high-speed internet, snack bar, etc. (UPLAND INN HUNTS)
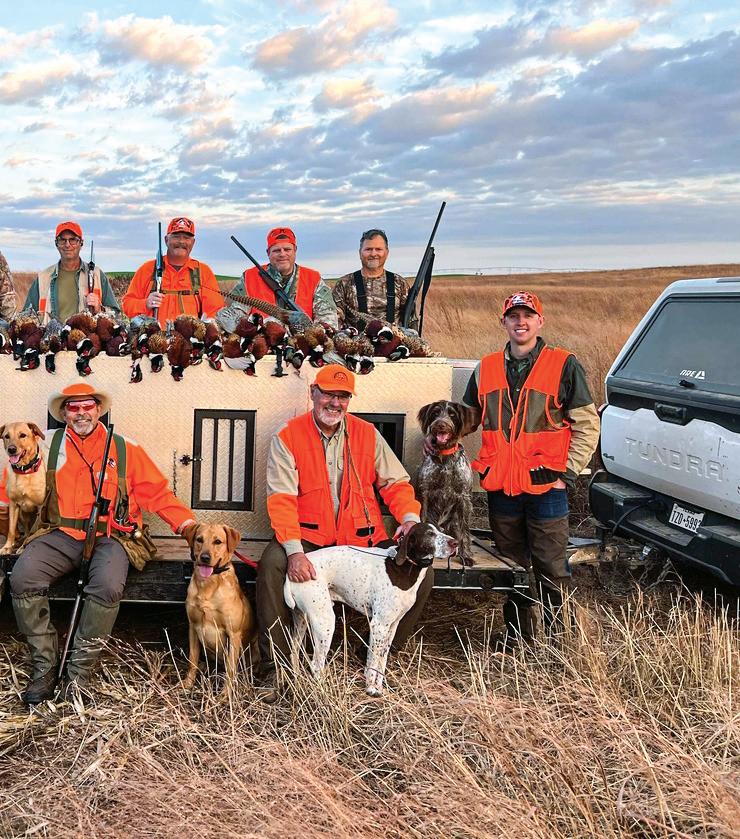
Upland Inn invests extensive resources in their 12,000 acres, which includes 6,000 acres of native grasses enrolled in the federal Conservation Reserve Program. With a state bag limit of four roosters per day, on their best days, they ’ve counted over 500 pheasants during a four-hour hunt. (UPLAND INN HUNTS)
THUNDERSTIK LODGE
(Chamberlain, South Dakota)
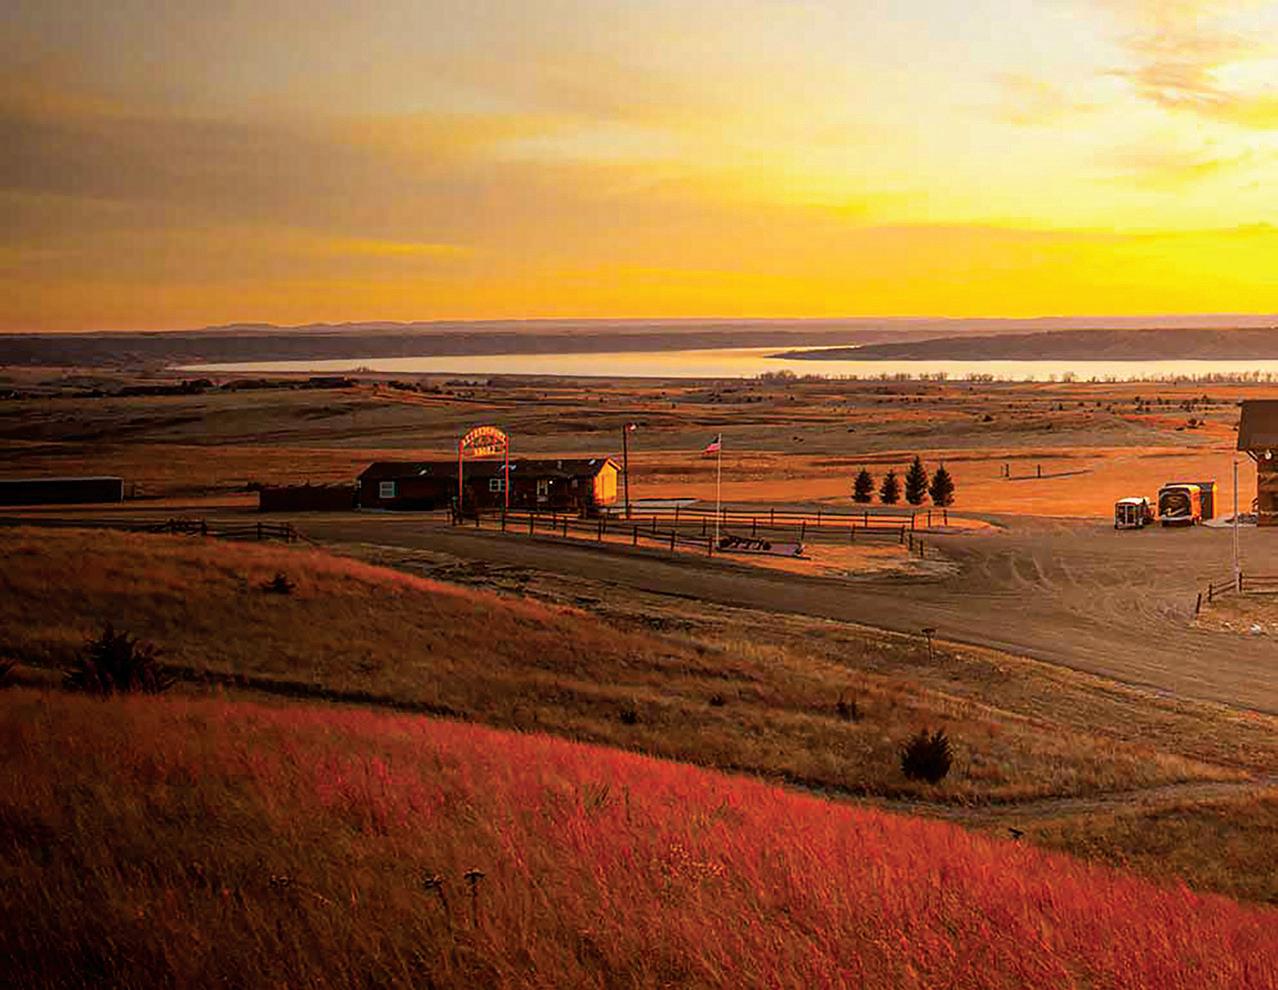
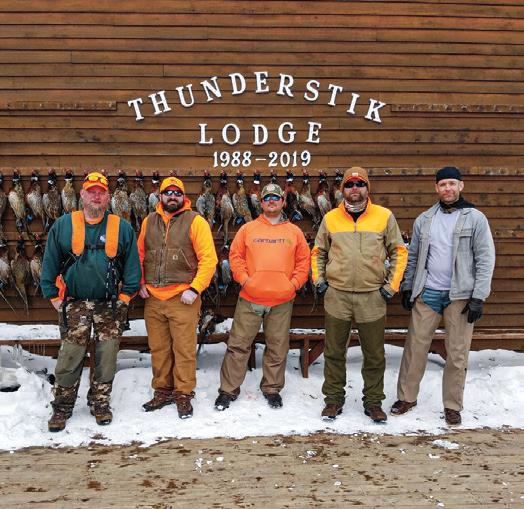
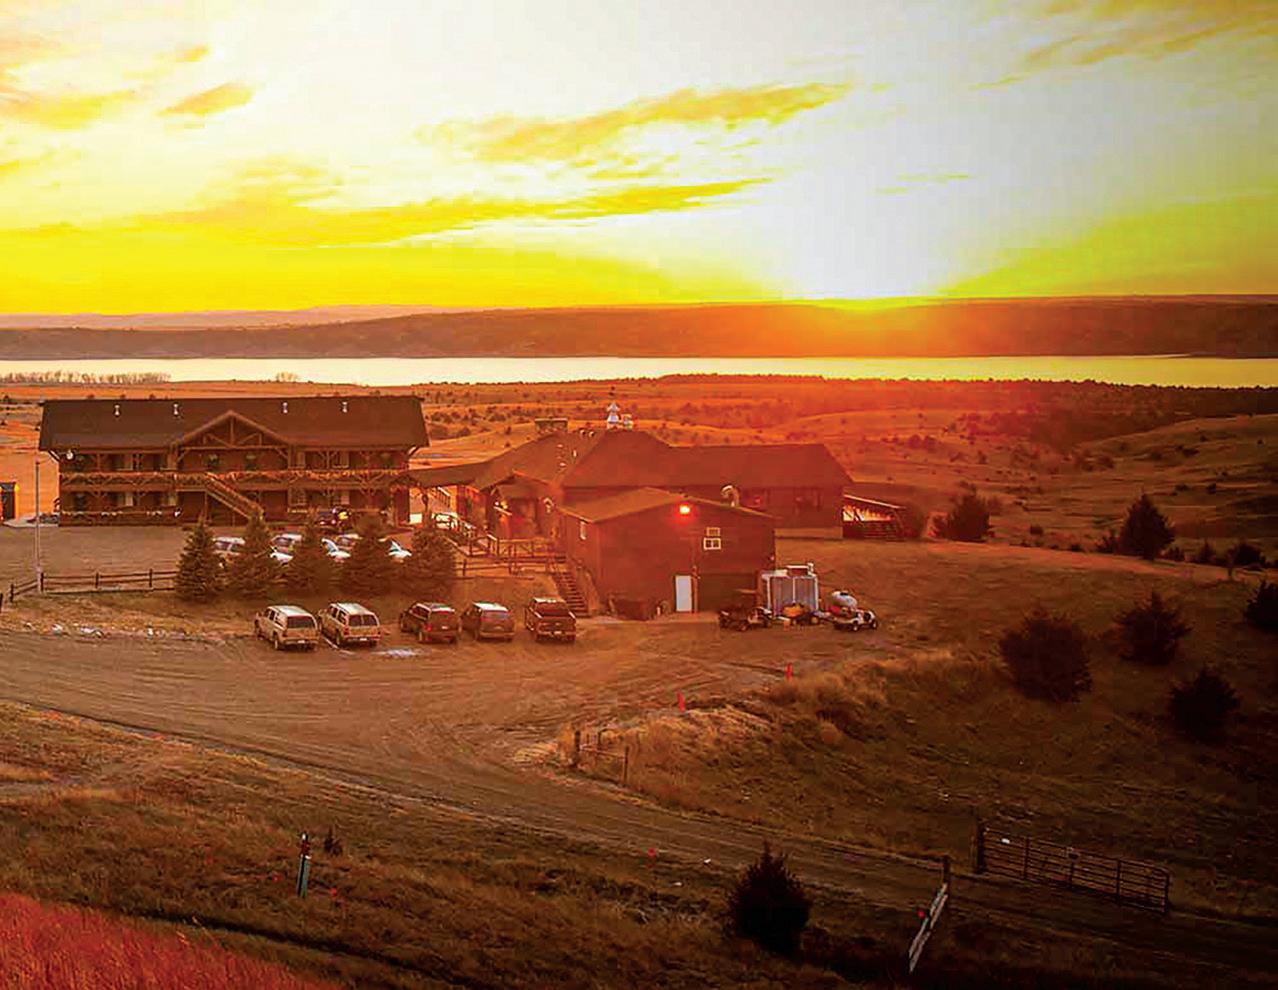
Nestled within the vast South Dakota grasslands, overlooking the majestic Missouri River, Thunderstik Lodge is the state’s premier pheasant hunt. Since 1988, their professional staff has been tending to hunters’ every
need and creating the perfect hunting experience. Thunderstik Lodge has a unique setting and an exceptional staff that has built relationships with hunters from around the globe. They are proud and grateful to have one of the highest return rates in the industry. The lodge offers allinclusive pheasant hunting packages, perfect for corporate hunts or smaller
groups. Many of their guests have been coming to the lodge for over 20 years and some enjoy spending time with fellow hunters from around the country as much as the hunt itself. I have been a guest at Thunderstik Lodge and I can testify that the lodging, the food and – the biggest consideration – the hunting are unsurpassed.
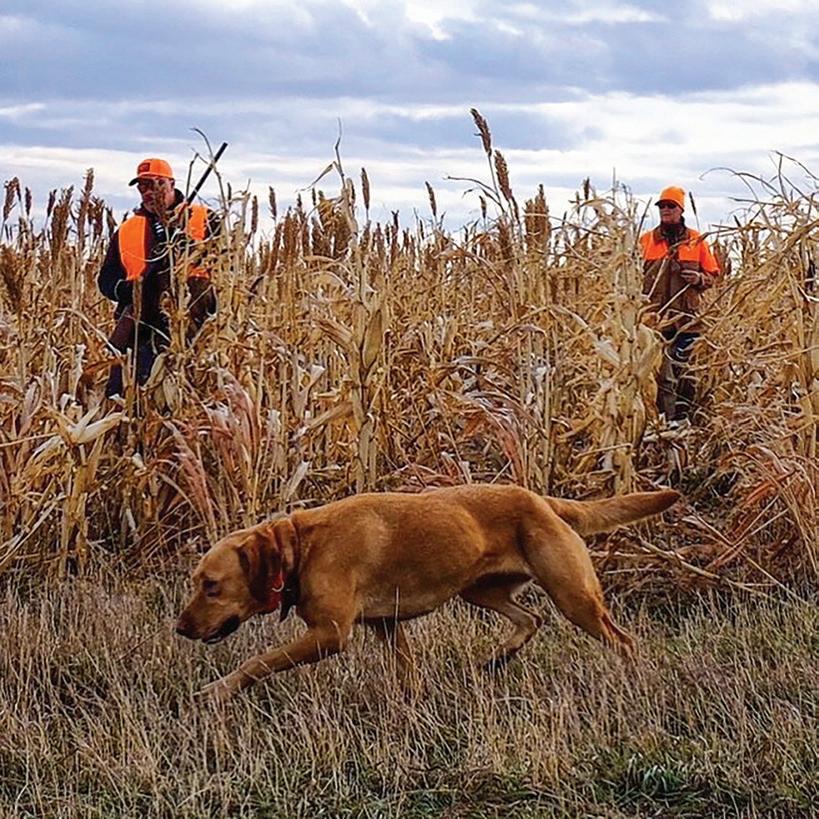
Thunderstik offers over 7,000 acres of prime South Dakota pheasant land. They plant a variety of crops to create ideal habitat for pheasants to find hunting cover and breed. In the fall, as the local farmers begin to harvest their fields, Thunderstik Lodge leaves their crops standing, which creates a perfect haven for wild birds to congregate. You will have the opportunity to hunt a variety of different habitats during your stay.
Known worldwide as the nation’s pheasant hunting capital, South Dakota offers the ideal habitat and terrain to hunt ringnecks. The state consistently produces the highest populations of pheasants, and the rolling grasslands are spectacular. (When I was at Thunderstik, I kept expecting a herd of buffalo to come
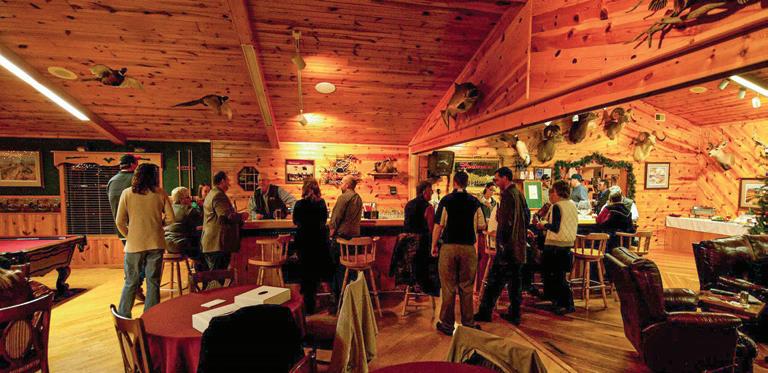
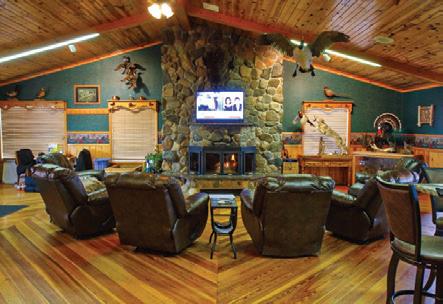
The lodge is large enough to accommodate corporate events. (THUNDERSTIK LODGE)
Each suite consists of a gathering area with a couch and comfortable chair, flat-screen TV and plenty of space to store hunting gear and guns. (THUNDERSTIK LODGE)
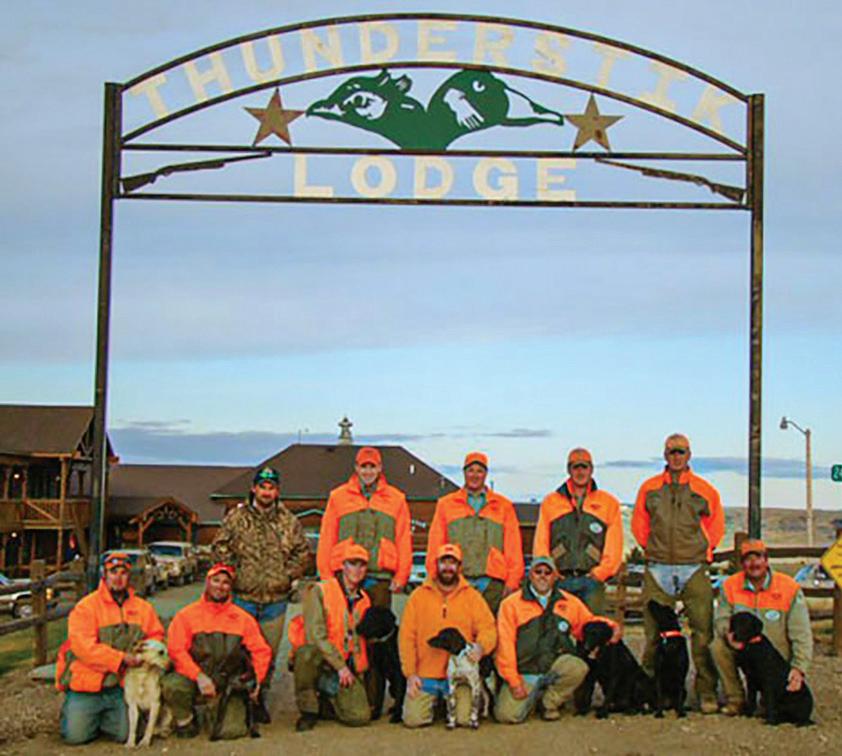
Known as “the talent,” Thunderstik Lodge’s hunting dogs are the highlight of the pheasant hunting experience here. (THUNDERSTIK LODGE)
stampeding over the ridge!)
Oh yeah, did I mention that the guides and the dogs are top notch? They are; I never saw a guide at Thunderstik who wasn’t well prepared, very knowledgeable and absolutely familiar with the terrain and how best to show his hunters how to be successful. Same with the dogs. If some of the Labs I saw could drive the truck … well, they were that special.
Not that you will be spending much time in the lodge, but the
accommodations are luxurious and spacious. Thunderstik Lodge can accommodate up to 32 people in their two-bedroom, two-bathroom suites at the main lodge. They also have three luxury cabins near the lodge for VIP guests.
Each suite consists of a gathering area with a couch and comfortable chair, flat-screen TV and plenty of space to store hunting gear and guns. Most suites break into two bedrooms with multiple beds and a
private bathroom attached. All suites are based on double occupancy, but single occupancy is sometimes possible upon request, depending on the time of year.
I am not a restaurant or food critic, so all I will say about the food at Thunderstik is that it was gourmet-class at every meal and I never heard a complaint. From appetizers to the main courses to the bar menu, it is all first class. Visit thunderstik.com for more.
You can experience breathtaking views of the Missouri River from Thunderstik’s front porch after an exciting day of South Dakota pheasant hunting. (THUNDERSTIK LODGE)
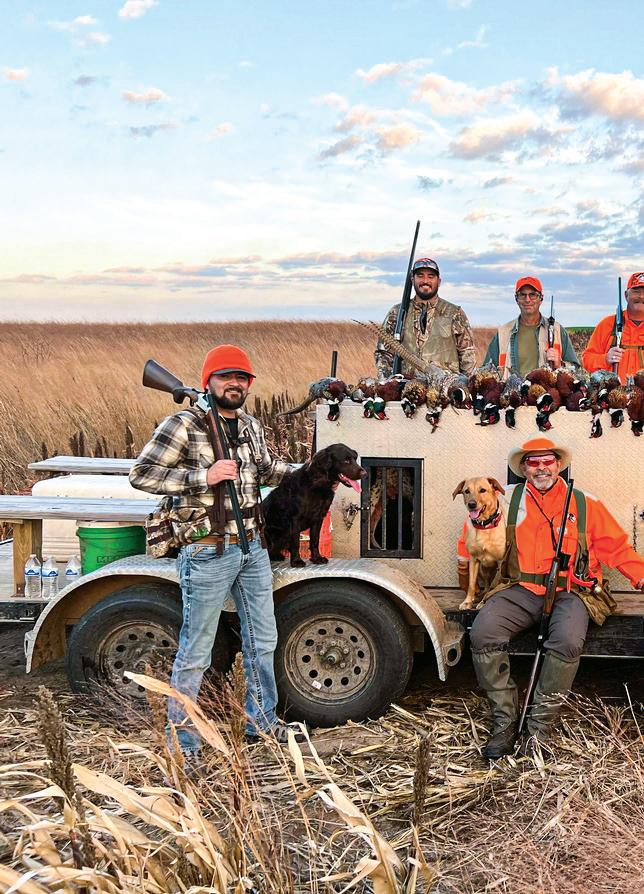
Each group of hunters at Thunderstik has a dedicated guide and plenty of hunting dogs to go around. Hunting groups are never mixed and the lodge does its best to limit groups to less than eight hunters. (THUNDERSTIK LODGE)
ROAD HUNTER
CLEARING UP ELK WALLOW CLUES
Here's how to read the signs left at muddy bull baths.
STORY AND PHOTOS BY SCOTT HAUGEN
It was the third day in a row a buddy called, asking me to help him on an elk hunt. It was his second year of bowhunting.
“This bull is using a wallow every day,” he began. “I’ve sat on it, but the bull hasn’t shown up; must be coming at night. Can you come try to call it in for me? I know it’s not far off because I can smell it every time I go near the wallow. You should smell the place …”
“You should smell the place.” Those words stuck with me. Everything my friend said after that sounded like the teacher on the Peanuts cartoon. “Blaa, waah, blaawaah …” Though I’d not seen the place he was hunting, I knew what the outcome would likely be for him if he continued hunting the wallow.
But I appeased my buddy and was there the next morning. Going in I knew it was going to be an opportunity to educate him. It was mid-September, 80 degrees every day. The hike into the canyon was long but not hard. The more we dropped in elevation, the cooler the air became. A nearby creek kept the surrounding vegetation moist and growing.
When we rounded the corner of an
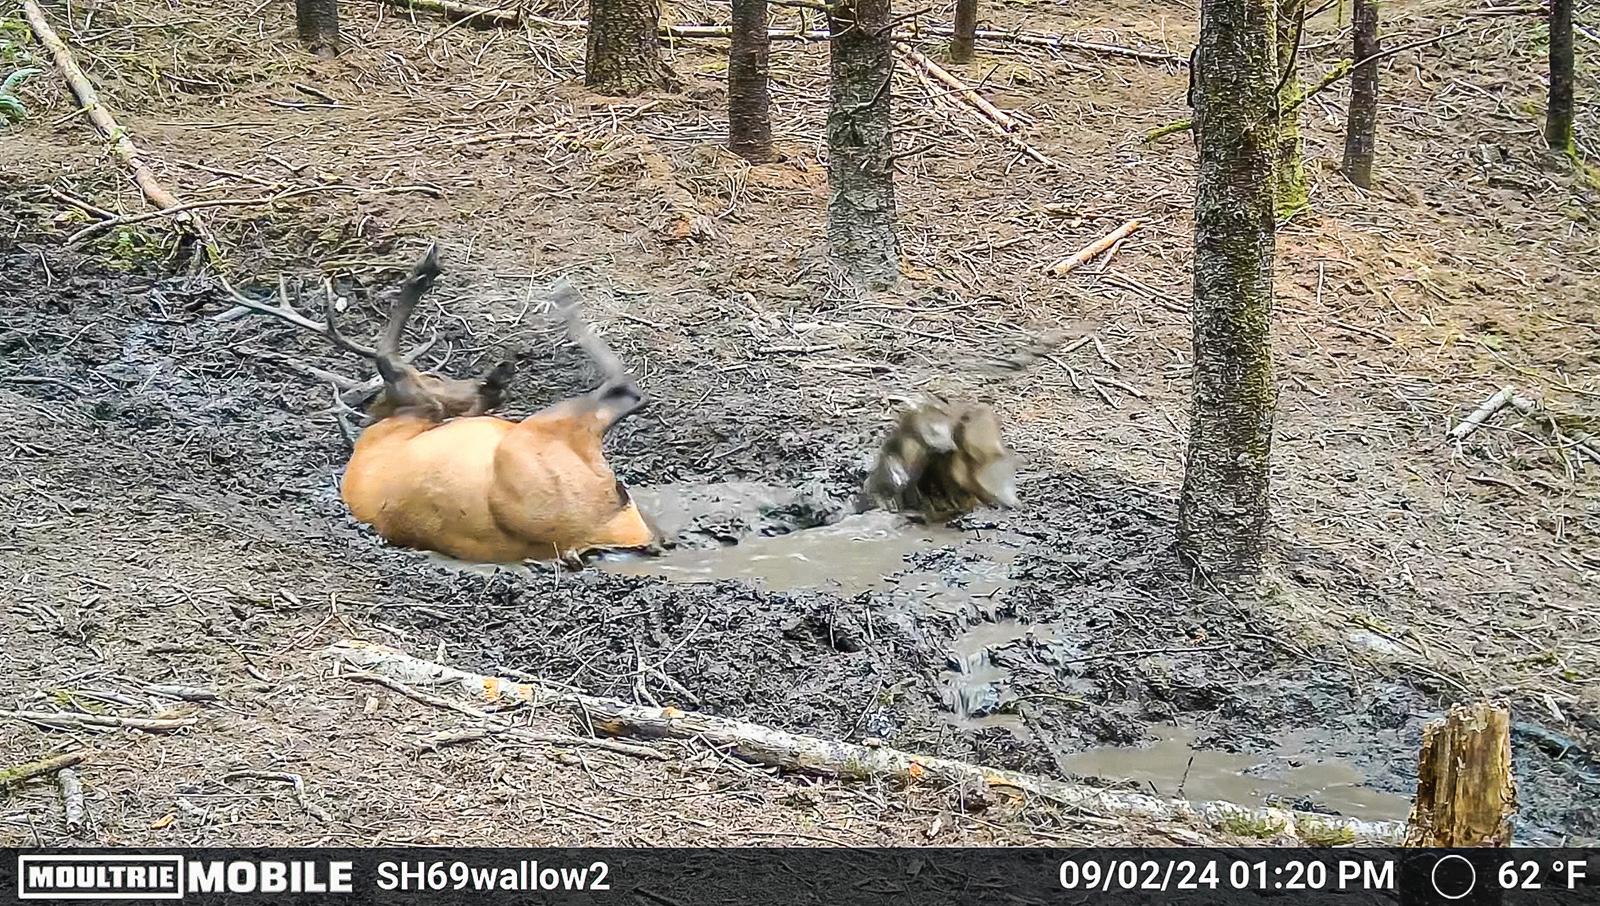
Elk use small water holes in many ways, and not always to wallow.
ROAD HUNTER
Don’t just glance at an elk wallow; look closely at it. What can be learned from them will make you a better hunter.
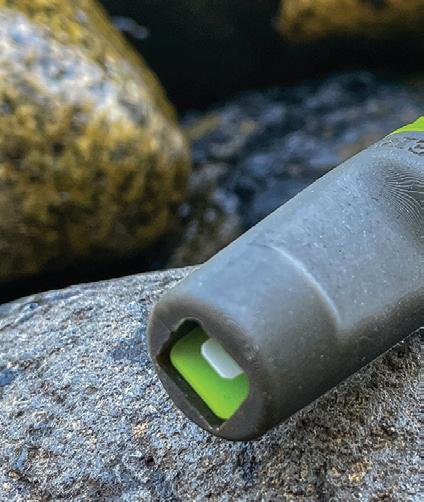
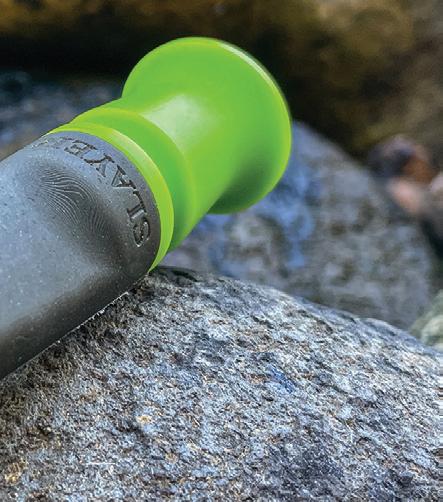
SLAYER HAREM COW CALL
If you struggle with a diaphragm call, fear not, the perfect bite-down cow elk call is here! But first, let me back up. Twenty years have passed since I helped a call company develop a bite-down, hands-free cow elk call. I love diaphragm calls and use them religiously to generate cow and bull sounds. But in the heat of the moment, when at full draw and perhaps breathing hard from covering rugged ground, my mouth was often dry and I struggled to get precise sounds from diaphragm calls.
The hands-free call I designed was a small, open reed with notches cut in the bottom that could be gripped with the bottom teeth. I killed elk with it, but it was far from what I envisioned. Enter Slayer Calls’ new Harem bite-down call. The open reed of the Harem is enclosed by soft rubber that can easily be held in your mouth. The more pressure you apply by biting down, the higher the pitch as you blow. The range of cow and calf elk sounds the Harem delivers is vast and very precise. It’s perfect for emulating herd chatter and specific cow sounds all season long. For bowhunters, slide the Harem into the corner of your mouth and operate it hands-free. If you’re at full draw and need to stop a bull in a specific spot to thread an arrow through, the Harem will allow you to do it with efficiency. The call I dreamed of for years is here – I just wish I’d have thought of the ingenious design because the Harem is killer, in more ways than one!
old logging road, the sweet smell of elk in rut permeated the air. It smelled fresh, but was it? I stood, looking, studying the land and thinking.
“C’mon, let’s set up and call,” my buddy pleaded. “That bull was just here; that’s how it smells every morning.”
I shot him a wink instead.
The wallow was easy to find; green grass flourishing in a shaded wet spot. I knelt by it. “Was this track here yesterday?” I asked him, pointing to one on the edge with sediment still suspended in it. “I don’t know, this is the first time I looked close at it,” he said.
My buddy’s mistake was that he was making assumptions based on what he smelled, not what he observed in the actual wallow. I put my foot in the wallow, next to the elk print. I lifted it and light brown sediment swirled in the pool. We watched it for a couple minutes.
“What are you doing?” he asked.
“There’s no flow in this wallow,” I pointed out. “See how the sediment isn’t moving or even settling?”
I found two more wallows nearby. They weren’t easy to see due to their being surrounded by brush. Same thing. Neither of them had a current flow. There was no doubting a bull had been there, but how long ago? The pools were murky, not running clear. The
grass around them was matted down and covered in dry mud. I picked up a handful of the dried mud and sniffed it, then moved it to my buddy for a whiff.
“That’s strong,” he said.
“That’s old,” I replied.
We kept moving down the draw on a game trail. Dry mud was splattered
on briar bushes. We found two rubs on cedar trees. The sap in both was dry and the strips of bark were curling on the edges, devoid of moisture. I’d not been to this place before and was eager to learn more. We covered ground, saw nothing fresh, then headed back to the truck.
We passed by the wallow I’d stepped in. The move was intentional. It had been three hours since I’d stepped in it, yet the suspended sediment looked nearly as it did when we left it. You get a 700-pound bull rolling in this and it can take days to settle. This bull was likely only here one time as it worked its way down the draw and just kept going. It was the only track we saw, not even any cow sign. What droppings we found were hard and pale. Though the stench of the rutting bull was powerful, it was likely miles from us by now.
ON A PUBLIC land hunt high in the Wyoming wilderness one archery season, two buddies and I came across the most impressive rub line I’d ever seen. Over 20 pine trees had been worked over, all on the same trail atop
a timbered ridge, all within 50 yards. We were at 9,800 feet in the Absaroka Range. We split up, taking different draws to learn more. It was the day before the opener and our second day of scouting.
Each of us found fresh wallows and trails covered in wet, splattered mud. Trails were going up and down the hills, most of them connecting to the trail atop the ridge where the rubs were. For the bulls it was nothing to move up and down the mountain, but for us it was hard on our lungs.
The next day each of us had a place to hunt. We stuck to trails inside the timber. Our thinking was that because there were so many bulls working the area, we’d intercept them between wallows, creeks and ridgetops. It worked. One buddy and I arrowed big six-points opening morning. We spent the rest of the day packing out the meat. The next morning our other friend tagged out on a big seven-by-seven.
ON A MID-SEPTEMBER bowhunt in Montana one year, a shallow swale I
It doesn’t take much water for a rutting bull elk to wallow. This trail camera caught seven different bulls using this wallow in 24 hours.
Slayer Calls’ new Harem bite-down call.
ROAD HUNTER
entered reeked of bull elk. The days were hot, and the gentle hillside below a spring I’d found was exposed to the wind and sun. The droppings I inspected were hard, even in the middle when broken open. The area smelled strong of rutting bulls, but the water was crystal clear. I grabbed a stick, swirled it around in the water and got sediments moving. A
current swiftly carried the fine sediment downhill. The rest of the heavy sediment quickly settled. Then I mucked it up with my boot. In a couple minutes it was like I’d not even been there. In places like this, bulls can wallow and leave little sign, at least nothing that appears fresh in hot, dry conditions.
I looked around and found one
splash of mud on a leaf. By the angle of the splash, it was easy to see the bull had come out of the spring and headed straight uphill. I followed and found more splashes of mud. In the early-morning shaded timber, the mud splashes were frequent and still wet. The bull wasn’t following a trail. It was walking through thick, waist-high brush. Minutes later I reached a stretch of flat ground covered in timber, let out one cow call and the bull bugled. One more cow call brought the bull within spitting distance, but it was day one of a 10-day hunt, and the five-pointer wasn’t what I was looking for.
Two days later I found a big wallow high on a hillside. Multiple trails led to it. It was muddy and deep, so I studied the sign all around it. I spent nearly an hour working in circles around the wallow. Every splash mark I found was at a severe angle, not straight down. This indicated the bulls left the wallow on the run, either because of the pressure of competing bulls or the immediate need to tend cows. With bulls being so rut-crazed, I moved downhill into the rising thermals and called in the timber. Multiple bulls answered.
Over the next four days I called in 11 mature bulls on that timbered ridge, passing two big ones I should have probably punched holes in. But this was a premium tag and I was looking for a 380-inch-or-better bull. I saw two, didn’t get shots and went home empty. I did call in a nice bull for a friend who arrowed his first elk.
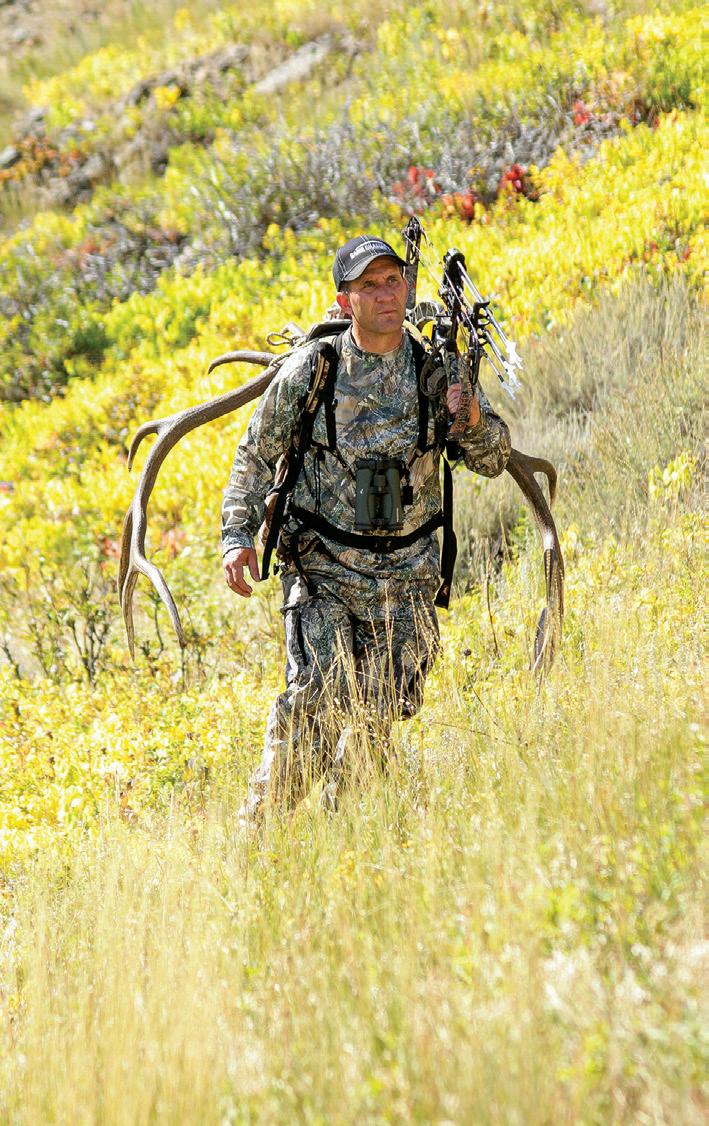
OVER THE DECADES, closely studying wallows has taught me a lot about elk and elk hunting. When you find a wallow, don’t just look at it; closely inspect it. See if there’s a current flow that quickly whisks away sediment and any fresh sign. Look for nearby tracks and trails and scour the area for wet splash marks. Search for nearby rubs and closely inspect them for freshness, something that’s easy to decipher based on the condition of sap and shredded bark.
If you see a pool of water from a distance, walk to it for a closer look. It
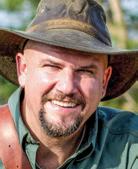
Author Scott Haugen has been hunting elk for over 45 years. The more time he spends studying wallows, the more he learns about elk behavior.
might be a drinking hole, a wallow, or if it’s big enough, both. I’ve never killed a bull in a wallow, but the information I’ve gleaned from them has accounted for many thrilling encounters and notched tags.
Don’t assume wallows are shoo-ins for killing a bull. Bulls often approach them with caution, sometimes pausing on the outskirts to make sure all is safe before moving in. When they’re done, some leave in a rush.
And don’t be like the guy I found one morning, hunting from a treestand at the edge of a waterhole in the forest. At the base of the tree he was in, a four-wheeler was parked, covered in pine bows, 5 feet from water’s edge. Bull elk will do crazy things when rut-crazed, but they’re not stupid. I shook my head and walked away. The hunter had no idea I was even there.
The more wallows you inspect, the more you’ll learn about elk and how they use them. Consider how temperature, humidity, wind currents, sunlight and shade impact sign in and around a wallow. Even if there’s no water, elk will wallow. I’ve killed some nice bulls on dry wallows, but that’s a story for another time. ★
Editor’s note: For signed copies of Scott Haugen’s popular books, including a DVD on field dressing and caping elk and other big game, visit scotthaugen.com. Follow his adventures on Instagram and Facebook.
BEAR WITH ME …
A dissertation on the myriad projectiles for the many ways to hunt bruins.
STORY BY PHIL MASSARO • PHOTOS BY MASSARO MEDIA GROUP
ummer is over and beloved fall is upon us – not so good if you have to return to school, but fantastic news for hunters. Each year, as summer wanes, the first big game hunting opportunity here in my native New York is the early black bear season in the Catskill and Adirondack Parks. The first part of September, while certainly
Sstill warm and definitely still buggy, gives us a reason to sight in the rifles, oil up the boots and head to the woods. We cannot hunt bears over bait here in New York, so our methods involve sitting on watch, just as we do for deer, or the spotand-stalk technique,
though the latter is far less popular.
Across the country, bears are hunted in a variety of habitats and at a wide variety of ranges. In the Northeast, our shot distances tend to be short, unless you catch a bruin raiding an open beanfield or glimpse one berry picking along a power line cut. Change the location to the wide-open fields of South Carolina or the arid mountains of
Bears have a well-earned reputation for being tough animals with the hardware to hurt you. Choosing the proper projectile is paramount.
The Nosler Partition makes any cartridge better, and might just be
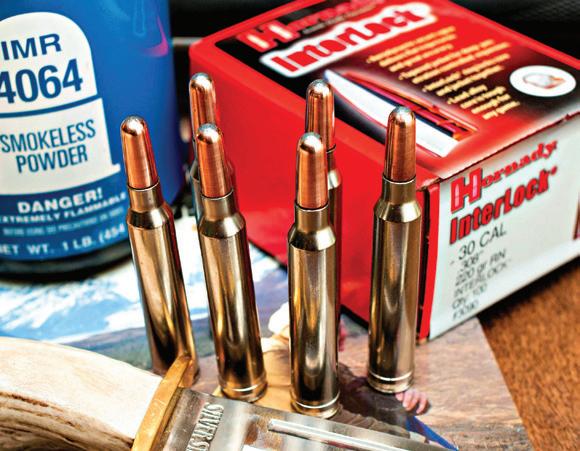
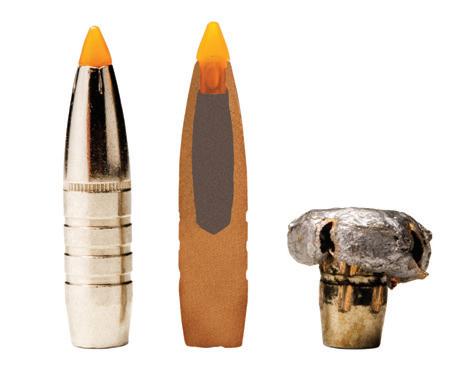
Heavy for caliber, the Hornady 220-grain .30-caliber roundnose Interlock is a wonderful choice for bears at closer ranges, such as a baited hunt.
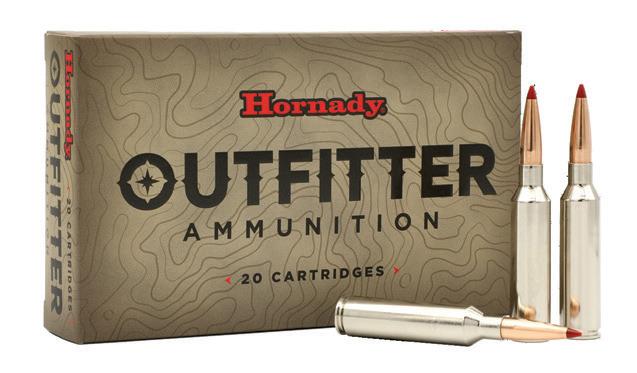
Hornady’s 7mm PRC Outfitter load is a 160-grain CX lead-free bullet that offers high weight retention and deep penetration, making a sound choice for the bear hunter.
(HORNADY)
Arizona – both areas that hold big black bears – and the average shot distance will greatly increase. Switch it up again to Quebec, Alberta or Ontario, where spring bear over bait is so popular, and shot distances will quite often be inside the 50-yard mark. Unleash the hounds, as they so often do in Idaho and Maine, and shot distances are no more than a stone’s throw, as your bear will be treed. So when we talk about bear bullets, there will assuredly be more than one answer, and especially so if we are talking about the grizzly and brown bear instead of the oh-so-common black bear. Let’s examine what I’ve found to be a “proper bear bullet,” covering a number of situations and scenarios.
BLACK BEAR – AND black bear hunts – are much more common than their larger cousins, and while a black bear certainly deserves respect, they’re much easier to kill than a grizzly or polar bear. You need to reach the vital organs for a quick kill, and the issue can often be the heavy shoulder bones. Keep your bullet just behind the shoulder and you’ll find that a good cup-and-core bullet of decent weight will work just fine. The thick hair and fat on a bear’s body can often plug an entrance and exit wound, and there’ve been times where I know I hit a bear in the vitals but found no blood at all, only to find the bear piled up 40 yards away. I’ve
one of the best bear bullets around.
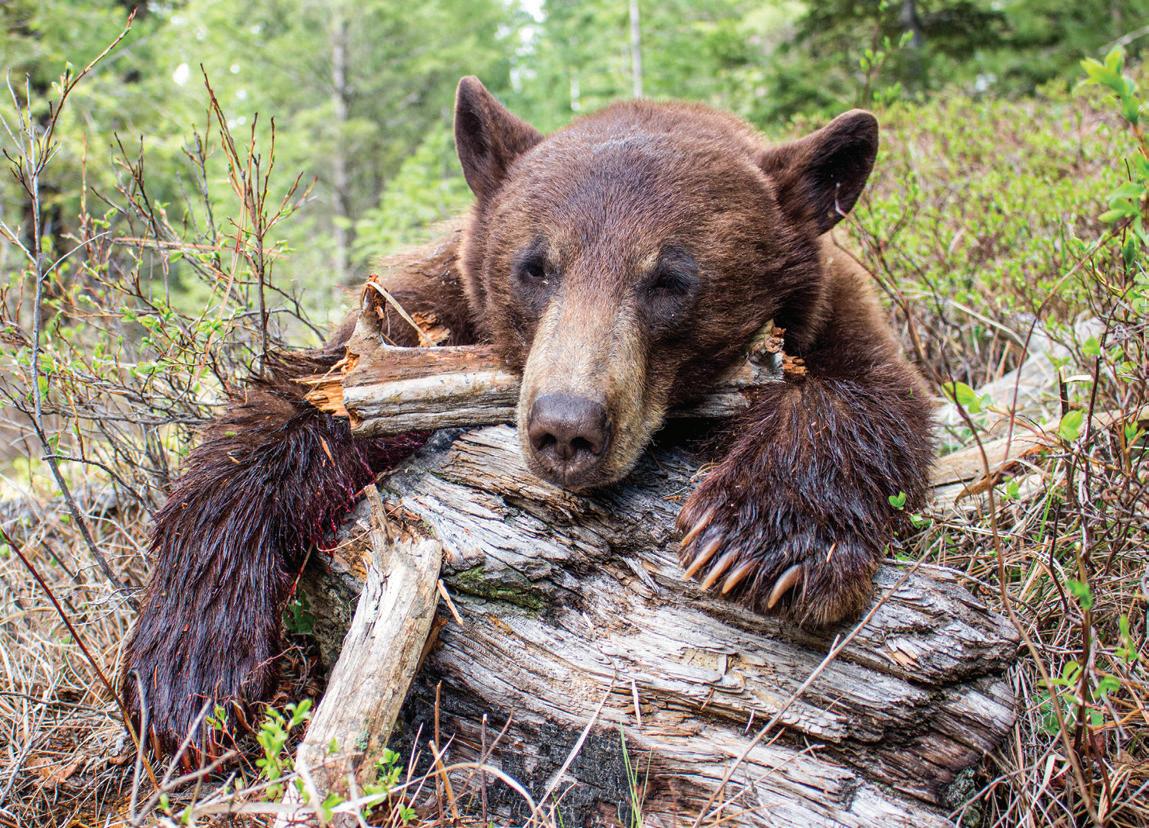
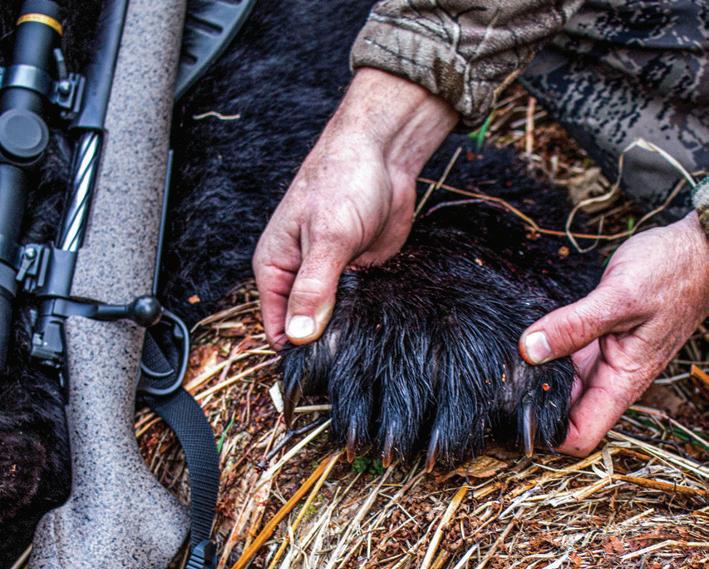
Author Phil Massaro’s Alaskan black bear had a healthy set of front paws, replete with sharp nails. A 450-grain Woodleigh Weldcore made short work of the boar.
used a number of different cartridges for black bear, from the middle-of-theroad .308 Winchester to the faster 7mm PRC and .300 Winchester Magnum to the heavyweight .404 Jeffery (used while on a combination brown/black bear hunt).
If it’s a baited hunt, or in a closequarters situation like the hemlock forests of the Catskills, I like a roundnose bullet, as I feel the increased frontal area makes a difference in the size of the wound channel. Hornady’s 220-grain roundnose Interlock shot very well from my .300 Winchester Magnum and worked wonderfully on
a frontal shot on a medium-sized black bear, especially at the sedate 2,450 feet per second from my handloads. I used the 220-grain slug in an effort to mimic the classic formula of the .318 Westley Richards, though I’ll admit that the 180-grain variant would probably give equal performance. The Hornady Interlock design is a simple cup-andcore design – much like Federal’s PowerShok and Remington’s Core-Lokt – but I also don’t mind hedging my bets with a bonded-core bullet.
In Alaska, on that combination brown/black bear hunt, I reached for my Bansner & Co. .404 Jeffery, which
loves the Norma African PH 450-grain Woodleigh Weldcore load. Admittedly heavy for a black bear, I was perfectly outfitted for a coastal brown bear and I’ll note that the bonded-core Woodleigh did not kill that black bear bore too dead at all. Sadly, I didn’t get an opportunity to test the combination on a brown bear. While Woodleigh is recovering from the devastating fire that razed its factory in Australia, Northern Precision Custom Bullets from New York offers a bondedcore bullet of very similar construction, if you are so inclined.
For longer shots on bear, the spitzer and spitzer boattail designs make
Massaro used the then-new 7mm PRC with 175-grain ELD-X bullets to take this bear in British Columbia; it handled the job perfectly.
BULLET BULLETIN
perfect sense, but you’ll want a healthy sectional density value. The classic Nosler Partition might be one of the best black bear bullets ever produced, as the front half of the bullet is soft enough for rapid expansion, while the rear core guarantees deep expansion, even if you hit those shoulder bones. If I’m hunting in deer country where the possibility of a black bear is a reality, a Nosler Partition is often my go-to. It is a flat-based bullet, but can be used out to 300 or 400 yards without issue. If you prefer the polymer-tipped projectiles – and there are many great designs to choose from – I’d recommend a good sectional density value, especially for the non-bonded models like the Hornady ELD-X and Nosler Ballistic Tip. And to those who might doubt the capabilities of the Ballistic Tip on black bears, I can attest to the fact that my pal Dale, who relies on a 130-grain Nosler BT for nuisance deer management in his Winchester XPR in .270 Win., has taken several good-sized black bears with that combination without issue.
The stiffer polymer-tipped bullets –and among these I will name the Federal Trophy Bonded Tip and Terminal Ascent, the Norma Bondstrike and the Swift Scirocco II – will work perfectly for bear, yet will give the flat trajectory and wind deflection values desired for the longer shots. The bonded construction
The author has long touted Federal’s Trophy Bonded Tip bullet as one of the best balanced performers in the big game fields, and this applies to bear hunting as well. The bonded core and long copper shank at rear result in high weight retention and proper penetration. (FEDERAL PREMIUM)
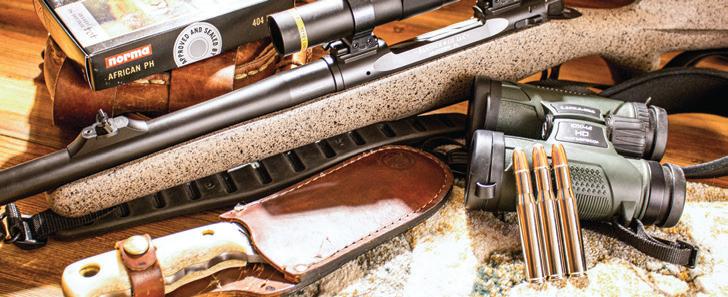
When planning his Alaskan brown/black bear hunt, the author chose a Bansner & Co. Custom rifle in .404 Jeffery, with 450-grain Woodleigh Weldcore bullets in Norma’s African PH ammo line. It worked wonderfully for black bear; sadly, the brown bear didn’t make an appearance.
BULLET BULLETIN
will assure that the projectile will hold together on closer shots where impact velocities are high, yet the profile will help retain the energy to guarantee reliable expansion. I’ve personally used a variety of this style bullet on bears, and have loaded many more for friends and clients alike, and find this class of bullet to be the best choice for all-around black bear hunting, with the Federal Trophy Bonded Tip as possibly the best do-all choice.
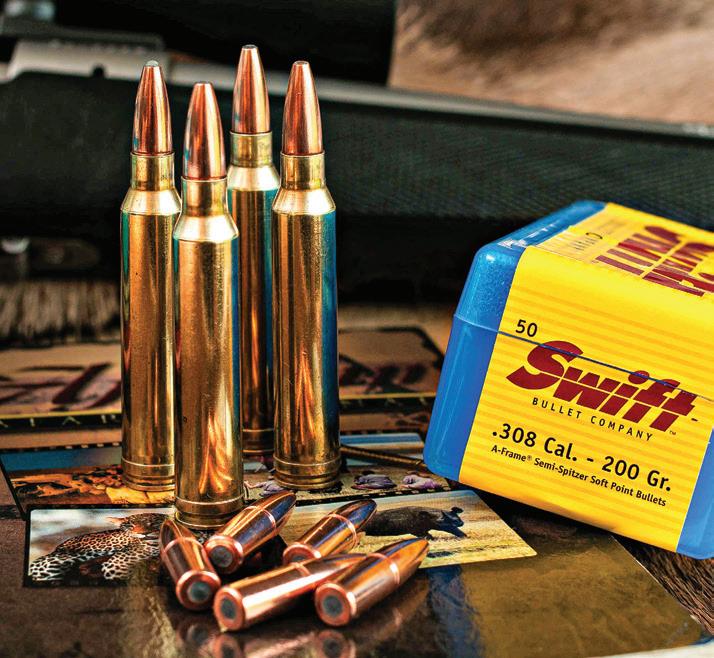
SWITCHING GEARS TO the grizzly/ brown/polar bear class, and I might recommend a different bullet style and caliber. These bears can and will hurt you when wounded, and I like the confidence of carrying a bullet that will most definitely give the penetration needed. This is the realm of the premium bullets like the Swift A-Frame,
the Woodleigh Weldcore, the Barnes TSX and the Hornady DGX Bonded, as you want to destroy as much vital tissue as possible and the animal’s sheer size demands a different level of penetration.
I also feel that the .30-caliber cartridges are the absolute minimum for the great bears, as they possess the bullet weight to properly handle these beasts. In fact, while .30 caliber remains America’s chosen son, I think that proper grizzly cartridges begin with the 33-caliber cartridges, including the .318 Westley Richards, .338-06 A-Square, .338 Winchester Magnum and the like. The larger bullet diameter and the 250-grain slugs bring an appreciable difference in field performance. Alaskan guide Phil Shoemaker has long sung the praises of the .30-06 Springfield with 220-grain bullets, but has also relied on his “Old Ugly” – that battered .458 Winchester Magnum – for backup on brown bears. I have no issue with anyone choosing a .375 H&H Magnum, .404 Jeffery or .416 Rigby for a coastal brown, as they bring a power level that hunters will appreciate more than the bears will.
For those who enjoy pursuing bears with handguns, I’d recommend a stiff jacketed bullet – a bonded core might
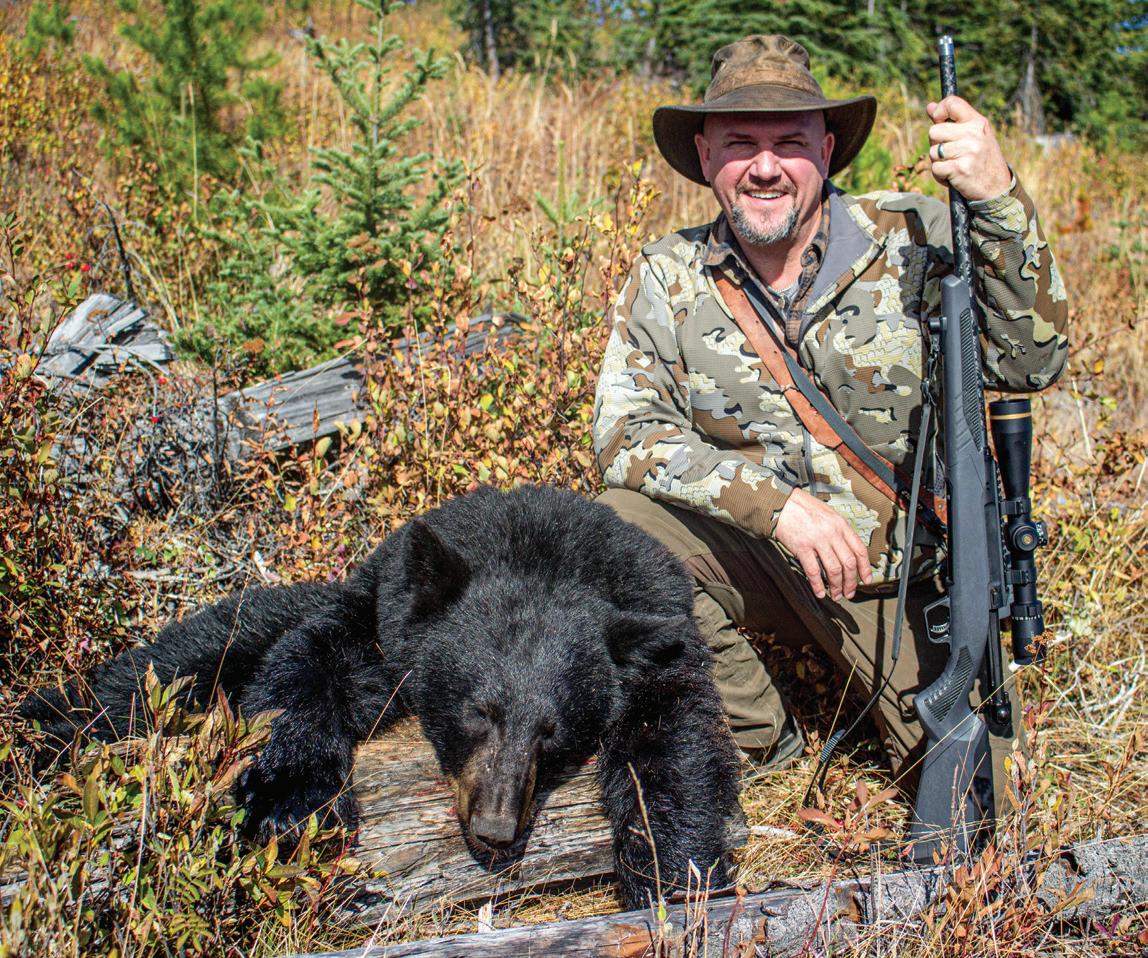
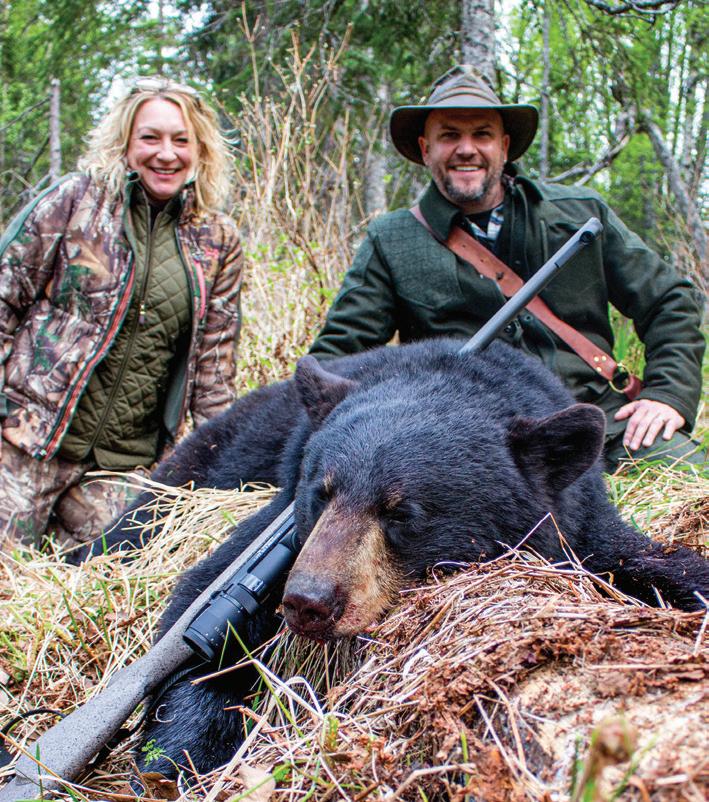
A happy author and his wife with a good male Alaskan black bear, taken cleanly with a .404 Jeffery.
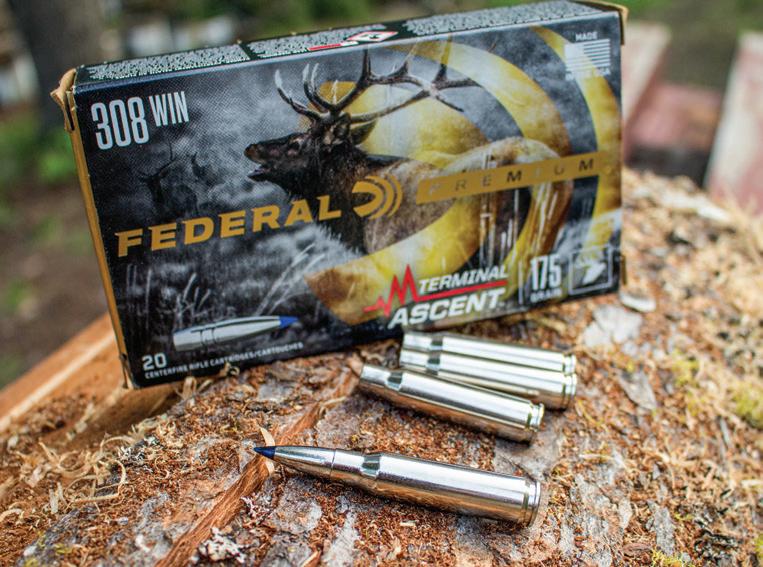
Massaro used a Savage .308 Winchester and the 175-grain Federal Premium Terminal Ascent load to take the chocolate color-phase Idaho black bear shown on page 37. Like the Trophy Bonded Tip bullet, it makes a sensible allaround hunting choice.
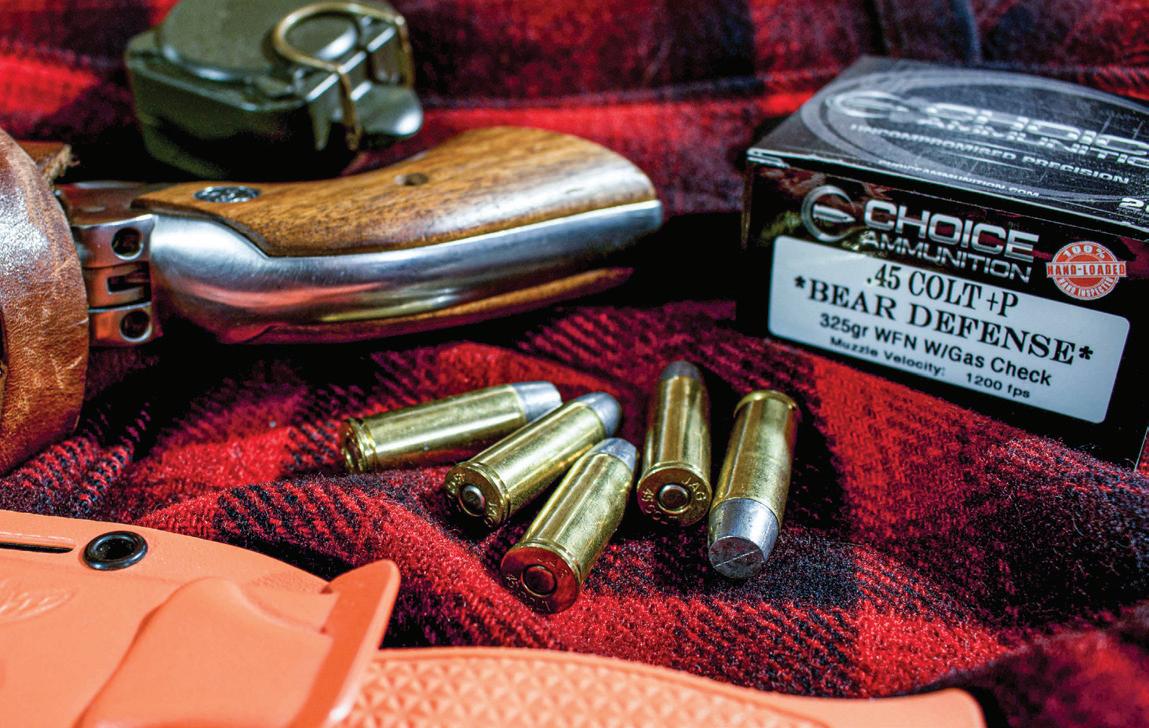
not be a bad idea – or a heavy hard-cast lead design like Choice Ammunition’s Bear Defense load, to guarantee deep penetration. I do not recommend the light-for-caliber frangible designs, as the hide and bones can stop those bullets faster than you’d want.
WE HAVE MORE bullet designs to choose from than ever, and most of them are fantastic, but when it comes to bears, it matters most where you hit them. I would highly recommend you try several of the designs I’ve mentioned and see which perform best in your particular rifle. If you prefer cartridges on the lighter side – say, – the choice of a premium bullet is paramount, and I’d personally opt for the heaviest model that shoots well in your gun. Sectional density is your friend, but shot placement is paramount with any bruin; they have the hardware to ruin your day when wounded, and nobody needs that. ★
For the handgunner, a hard-cast lead projectile from a stout cartridge like the .45 Colt is the way to go; Choice Ammunition’s Bear Defense load is one that checks all the boxes.
The stiff, bonded-core bullets – like the Swift A-Frame shown here in .300 Winchester Magnum – are the sensible choice for the largest bears in Alaska and Canada.
A GOOD REASON TO GET OUTDOORS
Nonprofit helps veterans and first responders restore purpose and enjoy camaraderie through free hunting and fishing trips.
STORY BY GRACIELA CASILLAS • PHOTOS BY THE REASON OUTDOORS
hen you’ve spent years living at a high operational tempo, whether in the military or as a first responder, coming home isn’t as simple as hanging up your gear. The transition can feel abrupt, even disorienting. One day, your life has a clear mission, a tightknit team and an unshakable sense of purpose. The next, you’re dropped back into a world that moves on without you, where people are concerned with coffee orders and weekend plans while you’re
Wcarrying memories, losses and scars that don’t fade.
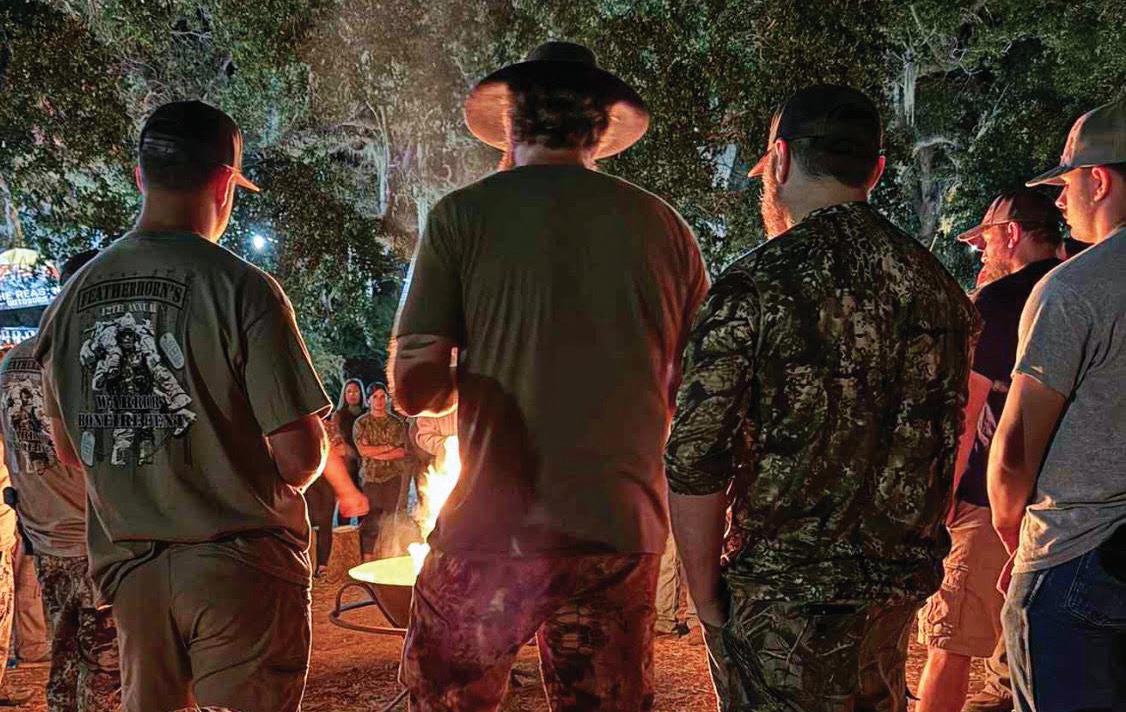
It’s in that space, between the life they knew and the life they must rebuild, that many veterans and first responders find themselves adrift. That’s also where The Reason Outdoors steps in. Founded in 2023 by combat veterans Tony Cowden, Ryan Kuperus and Drew Somplaski, TRO is a 501(c) (3) nonprofit with a simple but powerful mission: to guide veterans, first responders and their families on hunting and fishing trips that are completely free. Everything – travel, lodging, licenses, tags, gear, even taxidermy and meat processing – is
covered. But TRO is about far more than an expense-free adventure. It’s about connection, resilience and giving participants a reason to look forward to tomorrow.
FROM
COMBAT
ZONES TO CONSERVATION LANDS
Tony Cowden knows the toll of service firsthand. With 28 years in special operations, he’s seen both the intense camaraderie and the hard truths of war. For years after returning from deployment, he carried a deep sense of anger and disillusionment, particularly after realizing that the reasons for certain missions weren’t
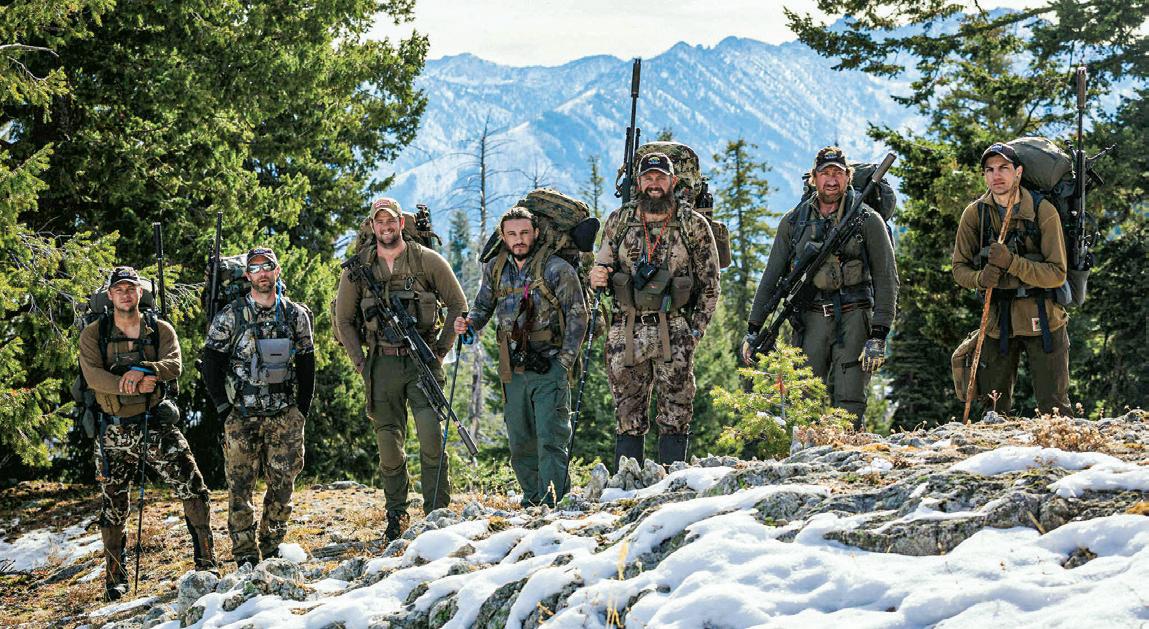
Founders of The Reason Outdoors and others on an Idaho backcountry elk hunt.
TACTICAL TRAINING
always what he’d been told. But over time, his perspective shifted away from bitterness and toward gratitude for the people in his life and the opportunities to keep moving forward. That shift became the seed for TRO.
Tony and Ryan Kuperus had discussed creating an outdoor-based nonprofit nearly a decade earlier, but the timing wasn’t right. In summer 2023, as they planned a hunting trip in Idaho, they decided to make it official. They filed the paperwork, secured nonprofit status and launched The Reason Outdoors. The name reflected their philosophy: Hunting, fishing and time in nature aren’t just pastimes; they’re reasons to stay healthy, active and alive.
ECOTHERAPY IN ACTION
The concept at TRO’s core is ecotherapy, using nature as a tool for healing. Sunlight, fresh air, the challenge of the hunt and the
TRO outing participants around a campfire.
satisfaction of harvesting one’s own food all play a role in restoring both body and mind.
“Life in combat zones can be brutal, but it’s also simple,” Tony explained. “You have one mission, one focus. Hunting and fishing can mirror that in a healthier way. You’re outdoors, you have to be present, you have to think. It’s physically and mentally engaging. And it’s a break from the constant noise of modern life.”
TRO trips are deliberately designed to be immersive. Participants aren’t just tagging along; they’re learning. From physical fitness programs and gear preparation to backcountry skills and ethical harvesting, TRO teaches veterans and first responders how to hunt or fish for themselves, giving them tools they can use long after the trip ends.
SAVING LIVES, LITERALLY
For some, the impact is immediate and
profound. On TRO’s very first hunt in 2023, one participant quietly revealed that he’d been on the verge of ending his life just weeks earlier. With a pistol in his hand, he was interrupted when his girlfriend came home unexpectedly. Setting the gun aside, he picked up his phone, opened Instagram and saw a post from Tony inviting veterans to apply for the Idaho hunt. He messaged Tony that day. Tony’s reply was simple: “You’re going. You’re on this hunt.”
That trip became a turning point. The participant not only completed the hunt, but he also has since become a mentor, helping guide other veterans on TRO hunts and assisting with fundraisers, including the organization’s first major Sniper Challenge.
MORE THAN JUST THE HUNT
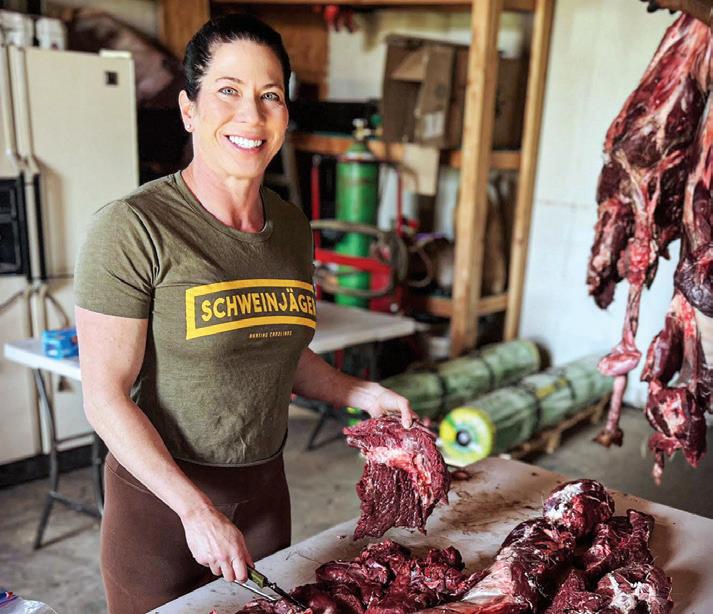
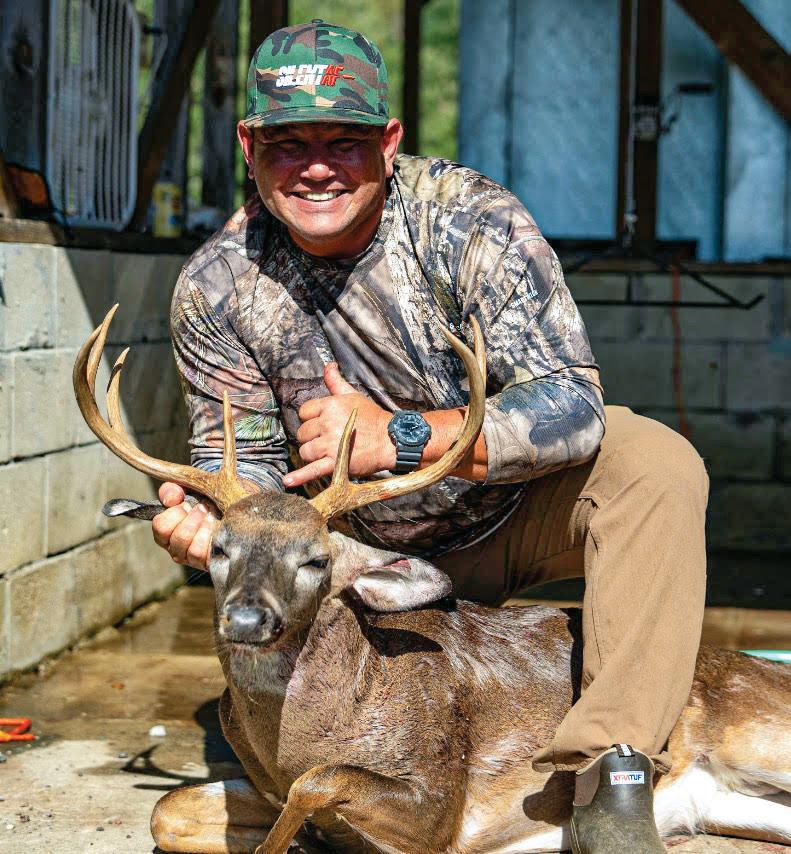
In under two years, TRO has taken over 160 veterans, first responders and family members on more than 100 hunts – everything from coyotes
and wild hogs in North Carolina to elk, antelope and mule deer in Montana, Idaho and Wyoming.
These aren’t crowded group trips. TRO keeps the teams small to preserve quality mentorship and camaraderie. Participants might spend a single night on a coyote hunt or 10 days on a backcountry elk expedition, but every trip begins long before boots hit the trail.
“We plan hunts up to a year in advance,” Tony said. “We give them a training plan, we make sure they’ve got the right gear, often donated by incredible partners like Kryptek, Stumpy’s Custom Guns and others, and we guide them through every step, so they feel prepared and confident.”
Family participation is encouraged. Some of TRO’s most meaningful moments have been watching a parent witness their child’s first harvest.
“That’s not just passing on a skill,” Tony noted. “That’s passing on a legacy.”
WHY IT WORKS
For veterans and first responders, the draw isn’t just the hunt, it’s the camaraderie. In service, your team is your lifeline. You train together, sweat together, bleed together. That kind of bond is hard to find in civilian life. TRO recreates that environment: shared challenges, shared laughs and, yes, plenty of friendly banter between branches and generations. There’s also the sense of mission. Participants have a goal, a plan and people count on them. For many, that’s enough to reignite the pride and purpose they thought they’d lost.
THE SNIPER CHALLENGE: FUNDRAISING WITH FIREPOWER
In 2025, TRO hosted its first Thorson Ranch Sniper Challenge outside White Sulphur Springs, Montana, a precision rifle competition designed both to challenge participants and raise funds for TRO’s programs. The support from the shooting industry was nothing short of overwhelming. Companies donated more than $70,000 worth of gear, from custom rifles and premium optics to
Processing elk meat in Montana.
South Carolina whitetail.
TACTICAL TRAINING
high-end rangefinders. Competitors traveled from across the country, including Virginia Beach, New Mexico and Arizona, to take part.
For an inaugural event, the turnout was exceptional: 28 teams, 56 shooters and an atmosphere of sportsmanship and respect. The event raised over $20,000, funding that will cover multiple TRO hunts this year. And beyond the fundraising, the Sniper Challenge gave veterans and first responders something equally valuable: something to look forward to, something to train for, something to be part of.
FIRST RESPONDERS: THE OTHER FRONT LINE
While TRO began with a heavier focus on military veterans, first responders now make up nearly half of its participants. The need is just as great, if not greater in some ways. Police officers, firefighters and paramedics may not deploy overseas, but they face trauma daily: fatal accidents, violent crimes, overdoses, suicides. They don’t get a 20-hour flight home to decompress; they change clothes and
go from chaos to family dinner in a matter of minutes. “It’s a rollercoaster,” Tony said. “And the toll it takes is real.” TRO gives them the same chance to unplug, connect and breathe.
HOW TO SUPPORT T.R.O.
Like any nonprofit, TRO relies on community support to keep its mission alive. While funding is critical, covering travel, licenses, tags and other costs, TRO also needs:
• Hunting opportunities: Landowners willing to host hunts;
• Gear donations: Rifles, optics, clothing, packs and other essentials;
• Team leaders: Experienced hunters willing to mentor veterans and first responders in their state. Every dollar, every donation, every volunteer hour goes directly toward giving someone a reason to keep going.
A MESSAGE TO THOSE WHO NEED IT
If you’re a veteran or first responder wondering if TRO is for you, Tony’s message is simple: Apply. Whether you’ve hunted your whole life or
never set foot in the woods, you’ll be welcomed, mentored and equipped.
“We can’t take everyone right away,” he admitted, “but we want you in the pipeline. This is about more than a hunt. It’s about giving you something to train for, something to share and a team to belong to again.”
LOOKING AHEAD
In less than two years, TRO has grown from three founders and a single hunt to a nationwide network of mentors and team leaders. Tony envisions a future where TRO has a presence in every state, with regional leaders organizing hunts and fishing trips in their own backyards.
His ultimate wish? That TRO’s services would no longer be needed, that the gap between service and civilian life could be bridged without the weight of isolation, loss and hopelessness. But until that day comes, TRO will keep doing what it does best: giving veterans and first responders the tools, the skills and the reasons to keep moving forward. Because sometimes, a reason is all it takes.
If you’d like to support The Reason Outdoors as a donor, landowner, gear sponsor or mentor, visit thereasonoutdoors.org. And if you’re a veteran or first responder in need of connection, challenge and purpose, apply for an upcoming hunt. Everything is covered. All you need to bring is yourself. ★
Editor’s note: Author Graciela Casillas is a certified personal protection specialist who works as a staff instructor with Executive Security International bodyguard school (esibodyguardschool.com). She is also an advanced firearms trainer and has worked with many world-class firearms instructors. She has authored many articles on the subject for various publications and holds a bachelor’s degree in law and society, master’s degrees in education and physical education, and lifetime teaching credentials in psychology.
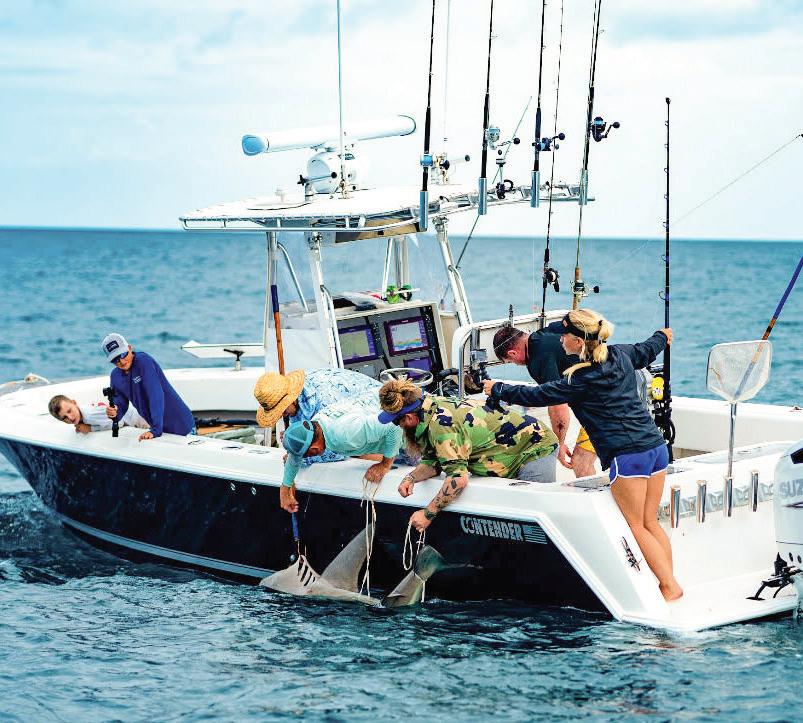
Shark fishing in Florida.
A TOAST TO ONE OF OUR BEST
Meet Brad Halling, one of the greatest American warriors you've never heard of.
STORY BY PAUL PAWELA PHOTOS COURTESY OF BRAD HALLING
G MILITARY SPOTLIGHT
eneral George S. Patton once said to his Third Army, “Men, all this stuff you hear about America not wanting to fight, wanting to stay out of the war, is a lot of horse dung. Americans love to fight. All real Americans love the sting and clash of battle. When you were kids, you all admired the champion marble shooter, the fastest runner, the big-league ball players and the toughest boxers. Americans love a winner and will not tolerate a loser. Americans play to win all the time. I wouldn’t give a hoot in hell for a man who lost, and laughed. That’s why Americans have never lost and will never lose a war. The very thought of losing is hateful to America. Battle is the most significant competition in which a man can indulge.”
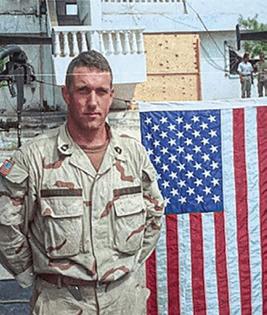
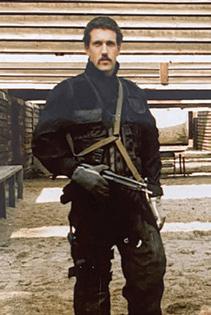
Once again, we at American Shooting Journal honor the heroism of a true American patriot and one of the finest warriors the country has ever produced, retired US Army Sergeant Major Brad Halling.
Halling has always served in US Special Forces in one form or another. His career began in 1983 with the 7th Special Forces Group, where he deployed to Honduras as part of a team of military advisors supporting a now-declassified military and paramilitary operation.
From 1984 to 1987, Halling served in the 10th Special Forces Group’s Operational Additional Detachment 62, where the group’s focus was on the Eastern Bloc. Halling’s team concentrated on Poland. In 1987,
he served in the Physical Security Support Element-Berlin prior to the fall of the Berlin Wall and Germany’s reunification. PSSE was a cover name for the 410th Special Forces Detachment, a small US unit tasked with clandestine unconventional warfare and counterterrorism.
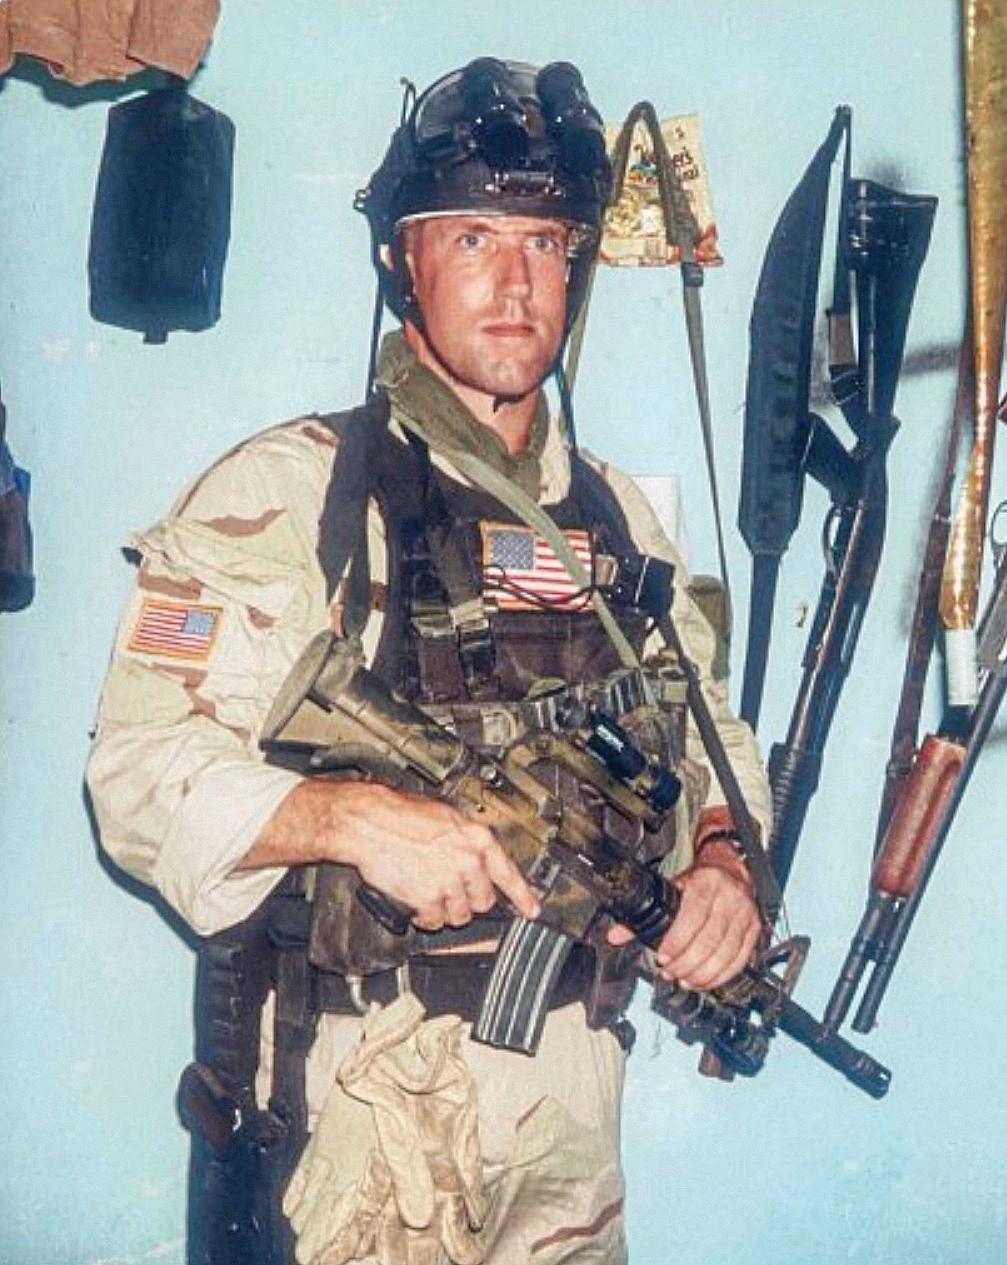
LATER, HALLING TRIED out for Delta Force selection and made it. After being assigned to C Squadron, he deployed to Mogadishu, Somalia, as part of Operation Gothic Serpent, which would forever be known as Black Hawk Down, made infamous by the popular book and movie of the same name.
Sergeant Major Brad Halling in Somalia a few days before Operation Gothic Serpent. This is the last picture of him with both of his legs – but far from the last of him serving his country.
MILITARY SPOTLIGHT
One of the most powerful scenes in Black Hawk Down, the book and the movie, occurs after the Somalis overrun the American forces and have just successfully shot down two American Black Hawk helicopters. As one of the downed helicopters, Super Six Four, is about to be overrun by a massive mob of Somalis, the men in another Black Hawk helicopter, Super Six Two, including three Delta Force snipers – Gary Gordon, Randy Shughart and Halling – hold them back.
Most everyone who saw the movie or read the book knows of the heroism of Gordon and Shughart, who asked for permission to go on foot to the crash site of Super Six Four to set up a perimeter defense. They knew, almost for certain, that they would be going against overwhelming odds and might die for their efforts. Still, they were determined to give it everything they had. But the other part of that story involves the other Delta Force sniper who was still defending the Black Hawk in the air. Halling took over as the minigun gunner once the crew chief, who had been operating it, was severely wounded. Behind the mini-gun, Halling was laying down 6,000 rounds of hate per minute on the enemy, dedicated to protecting his comrades.
With the enemy Somalis trying to return the favor by filling the skies with rocket-propelled grenades, eventually one of the RPGs hit its target on Black Hawk Super Six Two. Halling was severely wounded, and his leg was nearly torn off.
However, a Delta Force operator is not out of the fight until he’s out of the battle. Halling kept his composure and used a crewmember’s belt and a screwdriver as a makeshift tourniquet to stop the bleeding.
The pilot of Super Six Two was able to make a safe landing and get the wounded to medical treatment. When a doctor advised Halling that he might have to amputate his left leg, Halling motioned to a wounded soldier nearby and said instead, “Doc, don’t worry about me. You’ve got to take care of my buddy.”
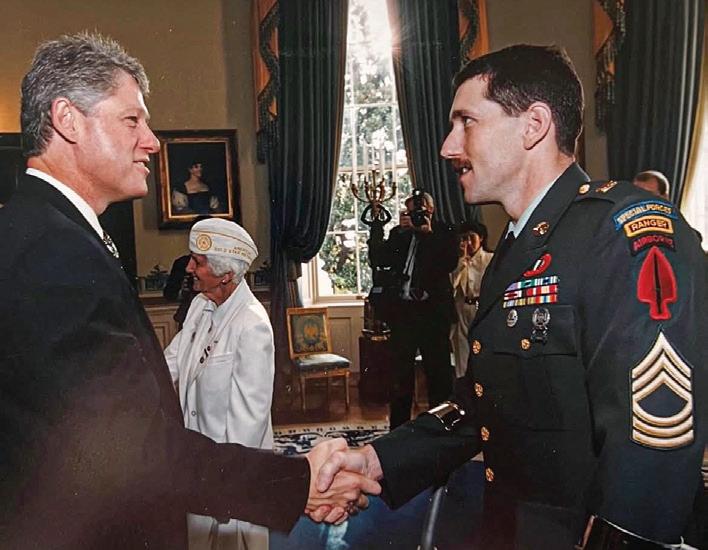
Halling has been to the White House a few times. Here was the first time where he received an award and also shared lessons learned regarding the events in Somalia. He later returned for Medal of Honor ceremonies for teammates Gary Gordon and Randy Shughart.
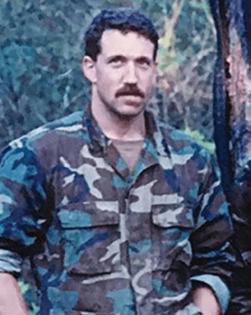
Halling deployed on many different operations, from Central America to Germany to Africa.
The damage inside Black Hawk Super Six Two after getting hit by a rocket-propelled grenade.
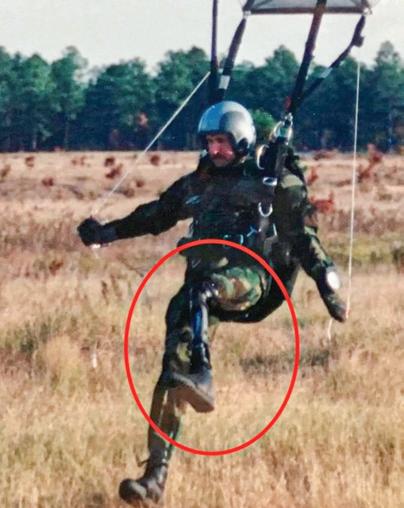
DESPITE LOSING HIS leg, Halling was determined to stay in the Army. Asked by a medic during rehab at Walter Reed Hospital in Maryland about his plans for the future, Halling stated, “Well, my goals are to run again, probably swim again, and get back to airborne status.”
The medic told Halling that he needed to understand he was an abovethe-knee amputee, so those were out of the question. Clearly, the medic didn’t understand how determined this Special Forces warrior was to return to active status, especially to his beloved unit. Eighteen months later, Halling had not only checked off all three of his rehab goals, but was downhill skiing too.
In fact, Halling became the first above-the-knee amputee to stay on active duty through full Army retirement. He returned to work, stayed operational and was on airborne status, participating in scuba training and opening doors for amputees across the services to join in the Continuation on Active Duty program. Halling was also one of the first Americans to wear the groundbreaking bionic knee device.
AFTER RETIRING IN 2000, Halling completed a graduate program at the University of Connecticut to become a certified prosthetist. While working in a prosthetic clinic in Long Island
during 9/11, he felt called to return to Fort Bragg in 2003. He then rejoined the US Army Special Operations Command to train soldiers, where he continued to serve until founding BHAWK distillery in Southern Pines, North Carolina, with his wife, retired US Army Colonel Jessica Halling.
BHAWK is short for Brad Halling American Whiskey Ko., a destination distillery where community members can wine and dine, paying tribute to all the heroes they served with.
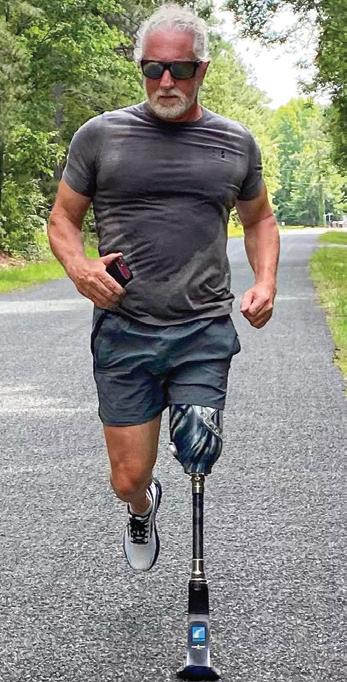
To this day, Halling still runs, although he admits it’s becoming harder. When asked why he keeps going, he says it’s in honor of his fallen mates because they can’t.
Brad Halling is a true example of leadership, courage, devotion, warrior spirit, loyalty and dedication as a husband and father. He is an inspiration to every American man in the United States. May God always bless you and yours, Sir! Yes, we said “Sir” because you’ve earned it! ★
Halling became the first above-the-knee amputee to stay on active duty through full Army retirement.
Every year on his birthday, Halling goes on a run to honor those he had the good fortune to walk alongside and serve with.
Today Halling is cofounder and CEO of Brad Halling American Whiskey Ko. There is a conscious effort throughout the distillery to impart meaning and a sense of gratitude.
NO SUCH THING AS OFF DUTY
Recognition for officers who respond even when their shift is over.
STORY AND PHOTO BY NICK PERNA
or most folks, at the end of their work day, they can put their job behind them and enjoy their free time accordingly. For first responders, this isn’t an option. Paramedics and other medical professionals are expected to provide aid when they least expect to have to. If someone has a heart attack at McDonald’s, and a medical professional is on scene, they will usually provide aid until a higher level of care arrives.
FTo a certain extent, this is even more true for law enforcement officers. A good cop has a few things he carries with him while off duty that allow a response when it’s warranted. One is a gun, the other a badge.
Many civilians carry a concealed firearm on them to protect themselves and their families, and there have definitely been instances where they have stepped up to protect others. Take the recent situation where Marine Corps vet Derrick Perry used his legally concealed firearm to detain a knife-wielding maniac at a Walmart in Michigan.
Not to make light of those who routinely exercise their Second Amendment rights. On the contrary, they make the world a safer place. But, unlike the police, they don’t carry the third component: a duty to act.
LAWS VARY FROM state to state regarding an officer’s requirement to act when off duty. Regardless, good cops carry with
them a 24/ 7 mentality of stepping into situations that require their training and expertise.
I was taught early on in my law enforcement career that as a police officer, you are never really off duty. This is a lofty responsibility; a heavy burden to bear. You quickly figure out what stuff you will get involved in and
what to avoid. In today’s overly litigious society, it’s probably a good idea to let a jaywalker or petty shoplifter commit their minor crimes.
Civil attorneys – and I use that term loosely – love to sue off-duty cops. It can be an easy payday for them and their “clients,” especially if they can figure out a way to go after the officer’s
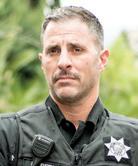
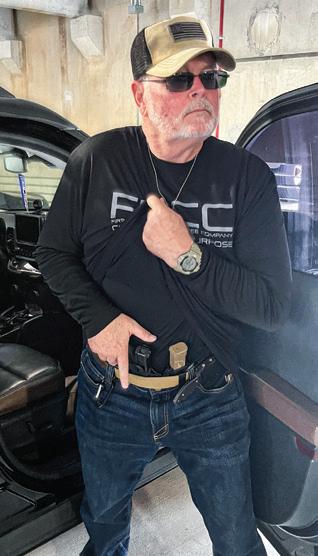
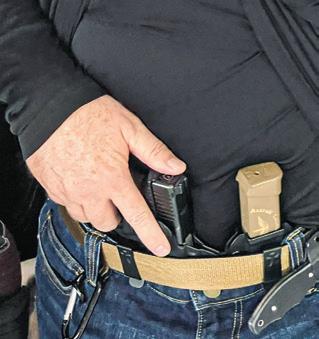
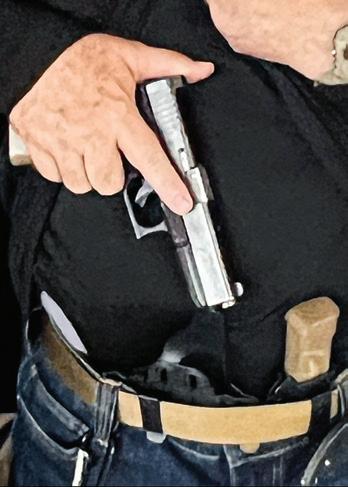
“When you’re off duty, it’s you, your gun and badge,” says author and retired cop Nick Perna. He gives kudos to his fellow officers who are always ready to act, even when off the clock.
L.E. SPOTLIGHT
agency, where the truly deep pockets lie. Similarly, it’s generally a good idea to avoid an off-duty law enforcement intervention if you’ve had a couple of cocktails when you go out for dinner or for a night on the town.
But when it’s time to act, the situation is severe enough and the officer has a sober mind, you act. Response takes all forms, from being a good witness and providing accurate, timely suspect descriptions to responding officers, to stepping into a violent scenario where you could lose your life helping others.
The really scary part about an offduty response is that we are generally ill-equipped to do so. When on the street, cops have a “bat belt” full of tools to assist them. Impact weapons, OC spray, Tasers and handcuffs are all there at our disposal, ready to be deployed. The most important item that is missing while off duty is a police radio, the officer’s lifeline,
which allows him to bring all types of resources to resolve the situation.
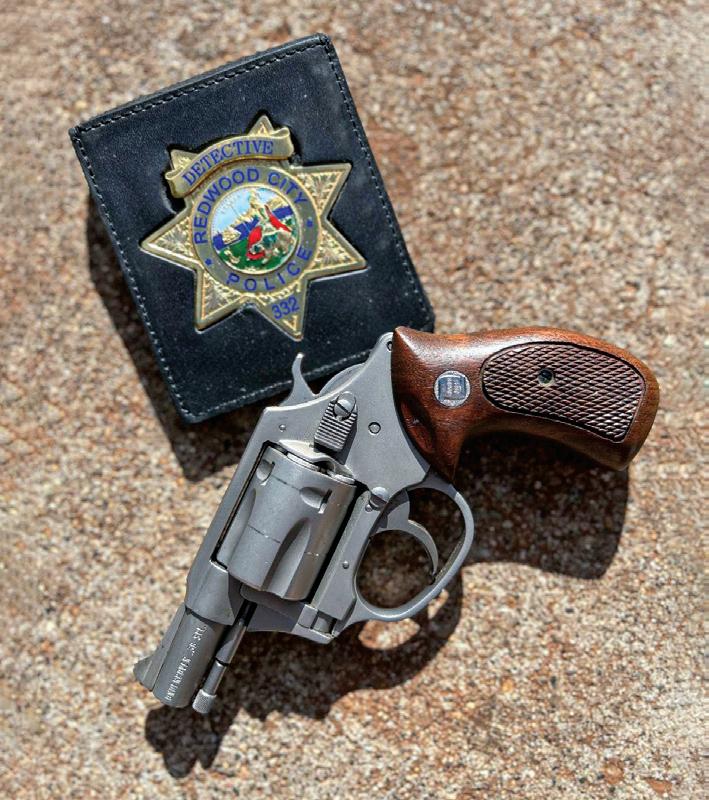
When you’re off duty, it’s you, your gun and badge. You can’t hit the “push to talk” button on the radio and call in the cavalry. If you’re lucky, there’ll be someone nearby who can call 911 on their cell phone, assuming you’re not put on hold while dispatchers deal with other emergencies. It can be a lonely world when it’s just you, your blaster and a piece of tin.
I’ve written previously about officers who have gone above and beyond the call of duty, all while off duty. Take Officer Matt Cydzik of my law enforcement agency, who pulled two young people out of a burning car after a major accident (see the October 2023 issue). In a case from earlier this year, a San Bernardino County, California, Sheriff’s Department deputy intervened when a suspect shot two people in the city of Fontana. The unnamed deputy
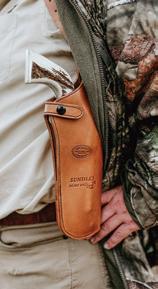
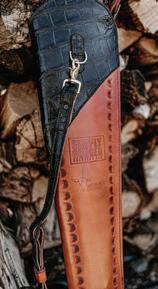
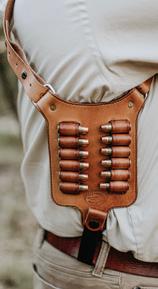
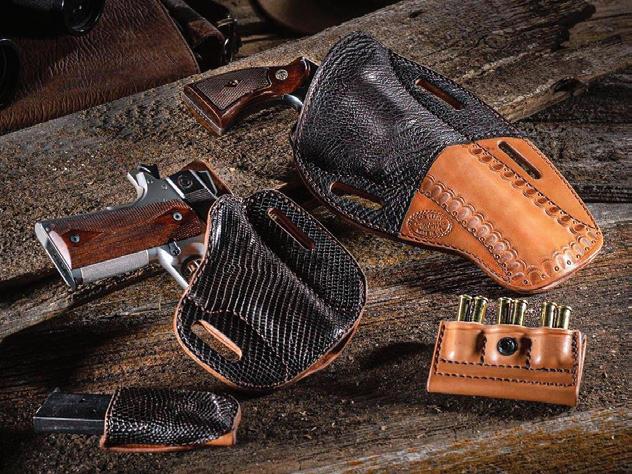
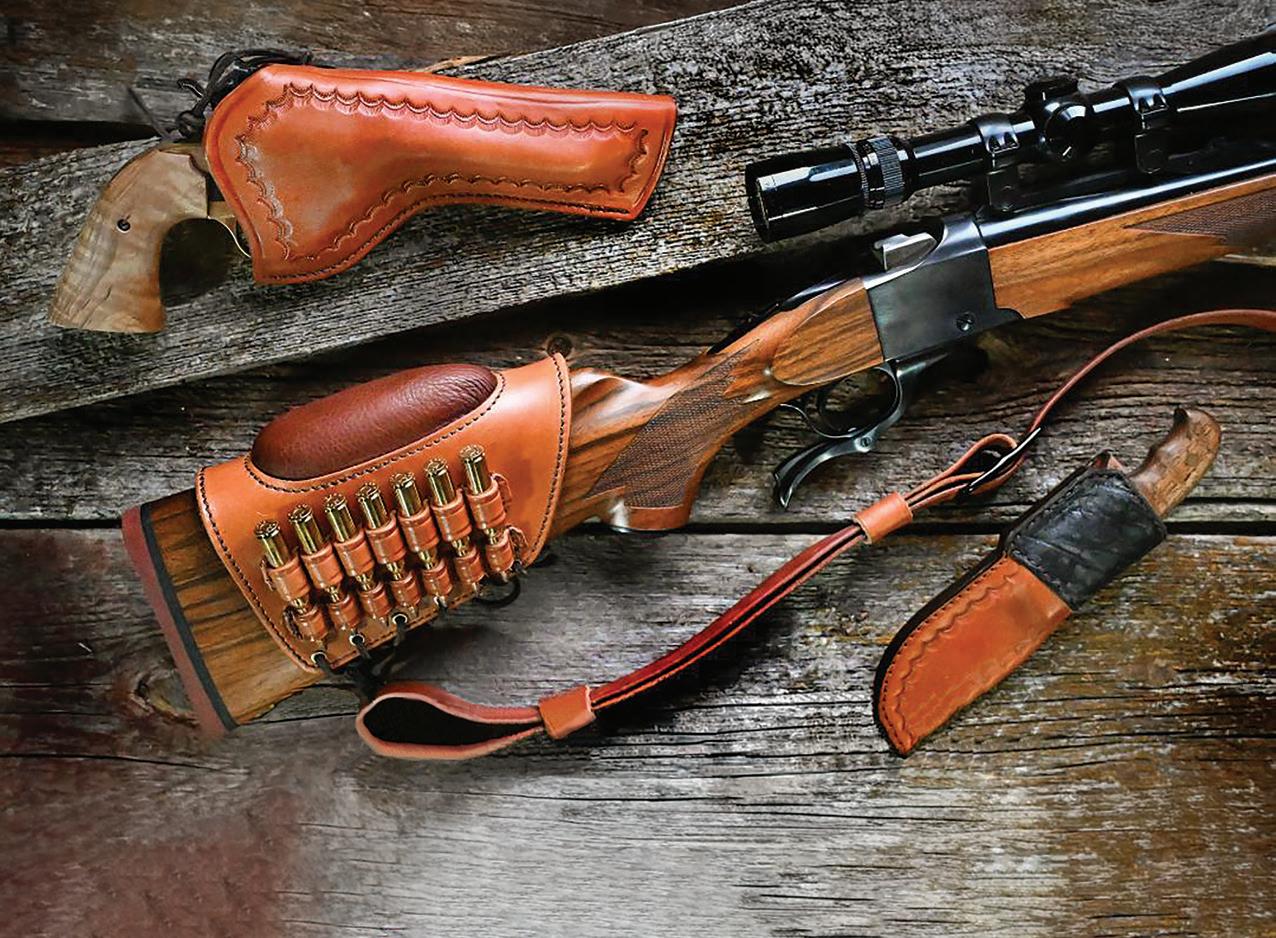
SIMPLY RUGGED LEATHER GUN HOLSTERS
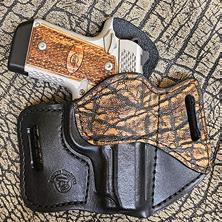
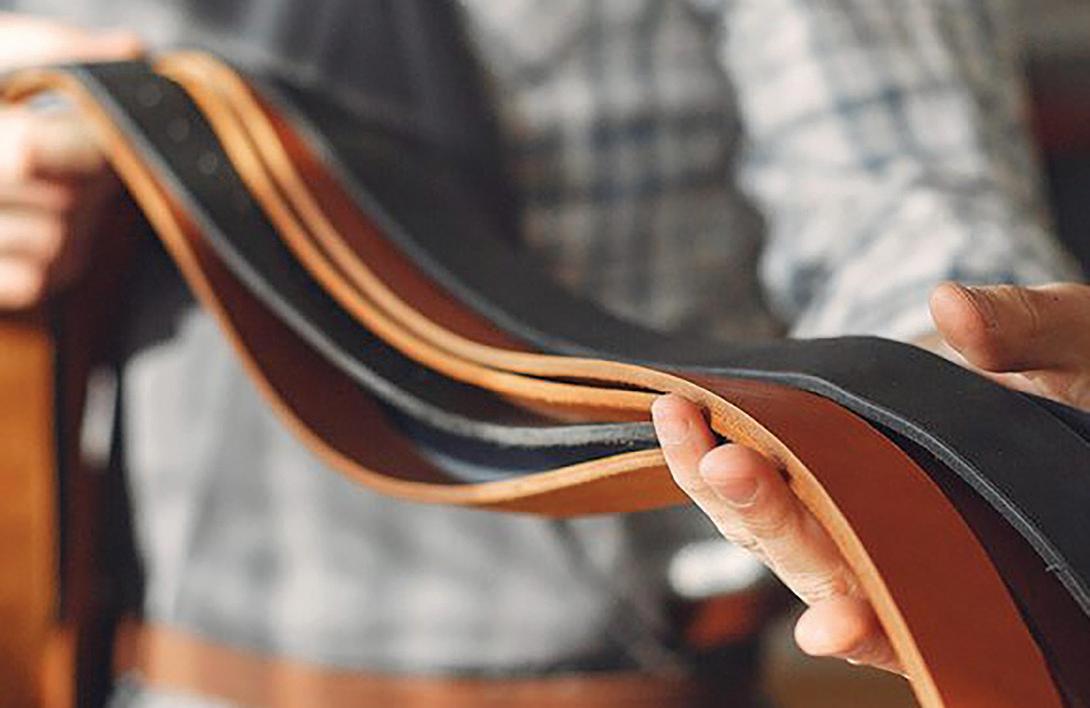
Over 20 years ago, Rob Leahy, co-owner of Simply Rugged Holsters, was having trouble finding a holster to fit his favorite revolver, a S&W N-Frame. It was this that led him to invent his own way to carry a large revolver. Using design elements from Roy Baker’s excellent Hidden Thunder Pancake design, Leahy made his to cover more of the gun, simplified it and eliminated the thumb break. Finally, Leahy made the leather holster from thicker, high quality leather. A comfortable design to help support guns from large to small, whether worn inside-the-waistband (IWB) or outside-the-waistband (OWB), your gun will be held
shot and killed the suspect, preventing further violence. In Charleston County, South Carolina, another off-duty deputy, Master Deputy Alexander McKinnon, tackled a suspect who had just robbed a jewelry store. The list goes on and on …
So, this month’s edition of Law Enforcement Spotlight is dedicated to those officers who chose to be “on duty” when they were off duty. ★
Editor’s note: Author Nick Perna served for more than 24 years with the Redwood City Police Department in Northern California before his recent retirement. He previously served as a paratrooper in the US Army and is a veteran of Operation Iraqi Freedom. He also has a master’s degree from the University of San Francisco. He is a frequent contributor to multiple print and online forums on topics related to law enforcement, firearms, tactics and veterans issues.
firmly between two pieces of leather. The wide set belt slots hold the firearm in close to your body and apply tension to the gun. This is a very stable design concept; the gun rides with your body, it becomes part of you, and does not flop around. These features provide good retention and concealment, which causes less fatigue for the user. Simply Rugged Holsters create a wide variety of outdoors, training and concealed carry holsters, belts and pouches for long guns and pistols.
Self-Defense TRAINING ON PROVERBS, PSALMS AND PROTECTION
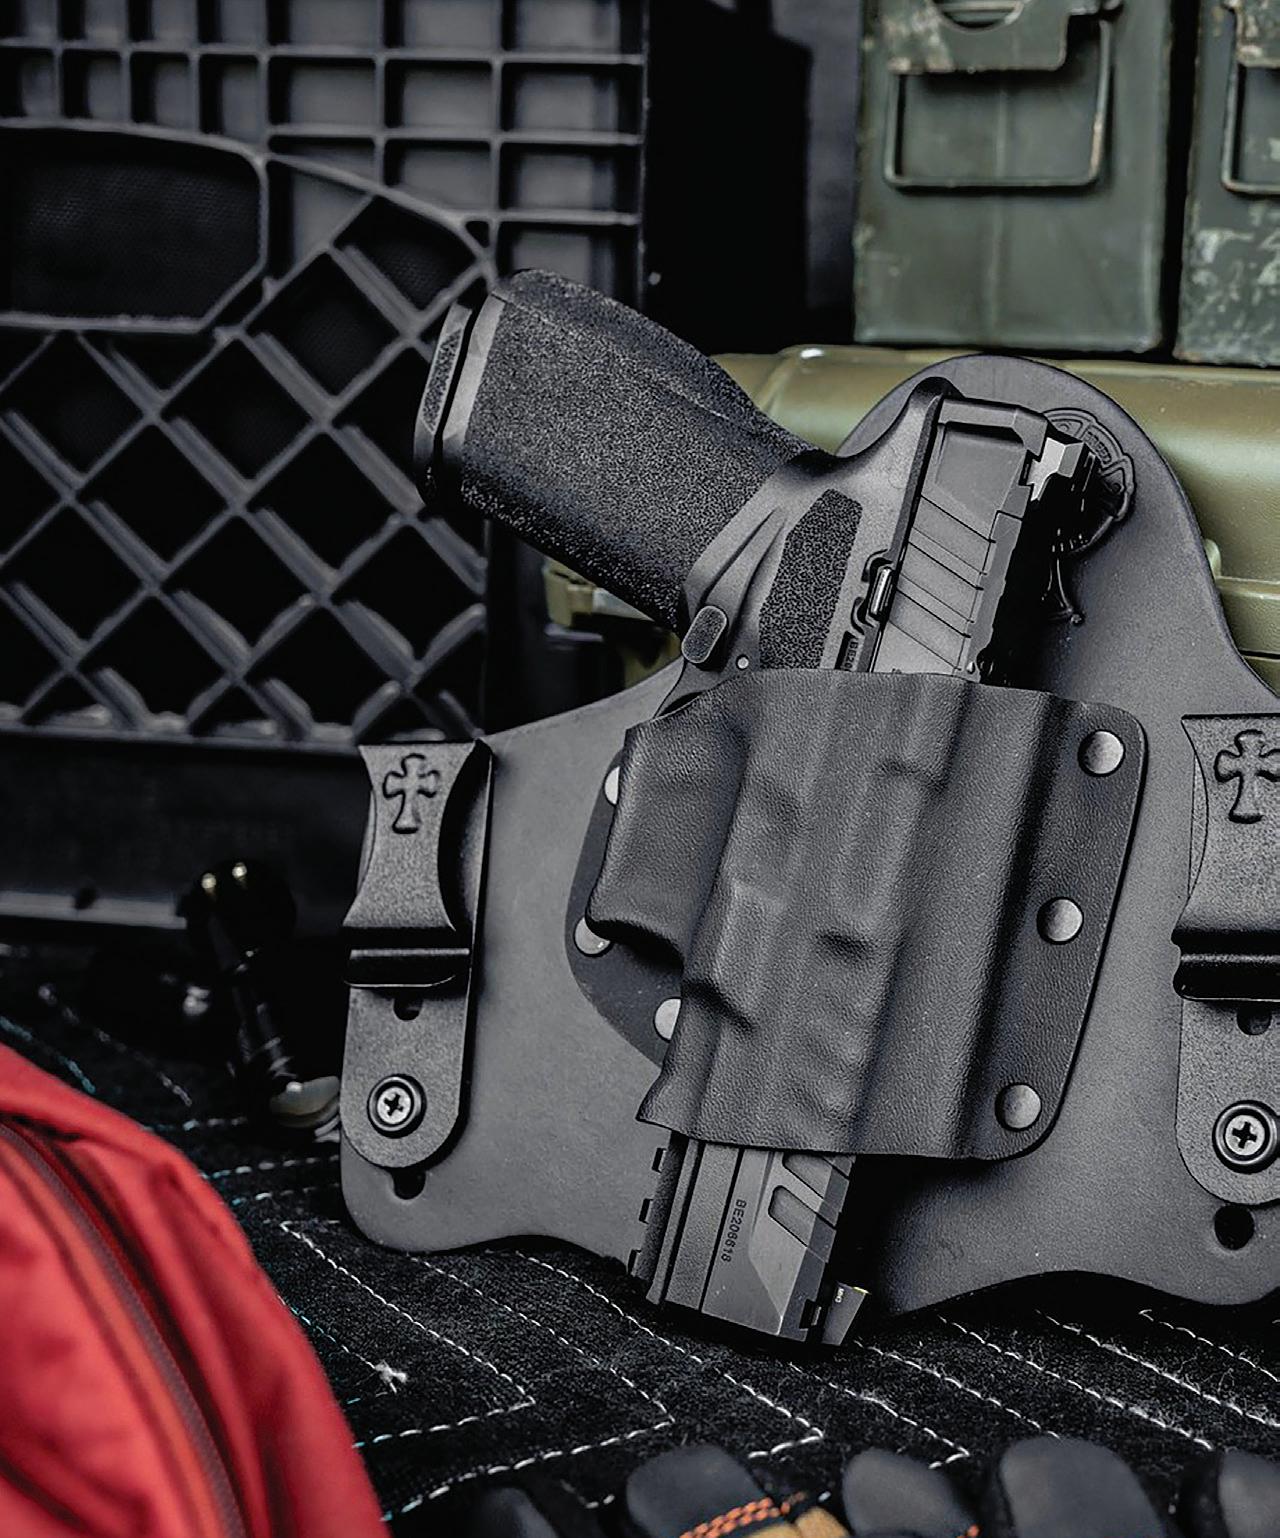
Faith, self-defense and fast, easy draws are at the core of CrossBreed Holsters.
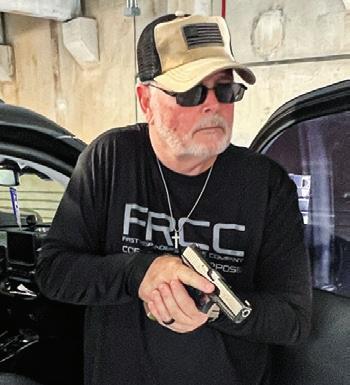
STORY AND PHOTOS BY PAUL PAWELA
Ihave used this quote before and will probably use it many more times because of the power of the words: “Carrying a firearm is an act of love. It says I love my life, my family, and my friends, and I will do whatever it takes to protect them.” And as has also been said, “With great power comes great responsibility.”
The fact of the matter is that when a trained armed protector is present at the right time and place, the number of casualties among the innocent is significantly reduced. This has been proven at schools, places of worship and crowded public areas, where the good guys and gals with guns happen to be right there when the perpetrator starts shooting or swinging knives, allowing them to stop the carnage sooner.
and self-preservation. But the great responsibility of carrying a firearm is significant. It not only requires training, but also reliable equipment such as firearms and the proper holsters to carry them in.
WHEN I SAY that carrying a firearm is an act of love, I cannot think of any other holster maker that embodies that idea more than CrossBreed Holsters.
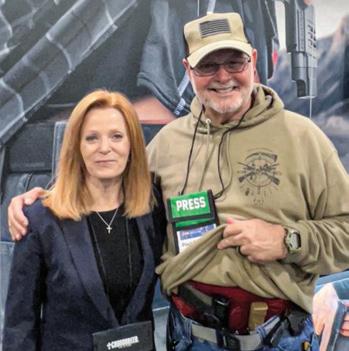
In full disclosure, I will admit that the owner of CrossBreed Holsters, Carol Craighead, is not only a good friend to my wife and I, but she is also our adopted family and we love her dearly, as well as all the employees of CrossBreed Holsters.
I always admired Carol’s late husband, Mark, the founder of CrossBreed Holsters (crossbreedholsters.com).
He was a real man’s man in every sense of the word and was not afraid to share his faith in Jesus Christ, symbolized by
Researchers such as professor John Lott (author of books such as More Guns, Less Crime and Gun Control Myths) and retired US Army Lieutenant Colonel Ed Monk (author of First 30 Seconds: The Active Shooter Problem, among others) have documented in their many publications that more mass murders are stopped by armed citizens than by responding police. In case after case, the slaughter of innocents stops as soon as an armed protector takes action.
I cite these sources to help explain why we carry firearms for our protection
Carol Craighead, owner of CrossBreed Holsters, with author Paul Pawela.
SELF-DEFENSE TRAINING
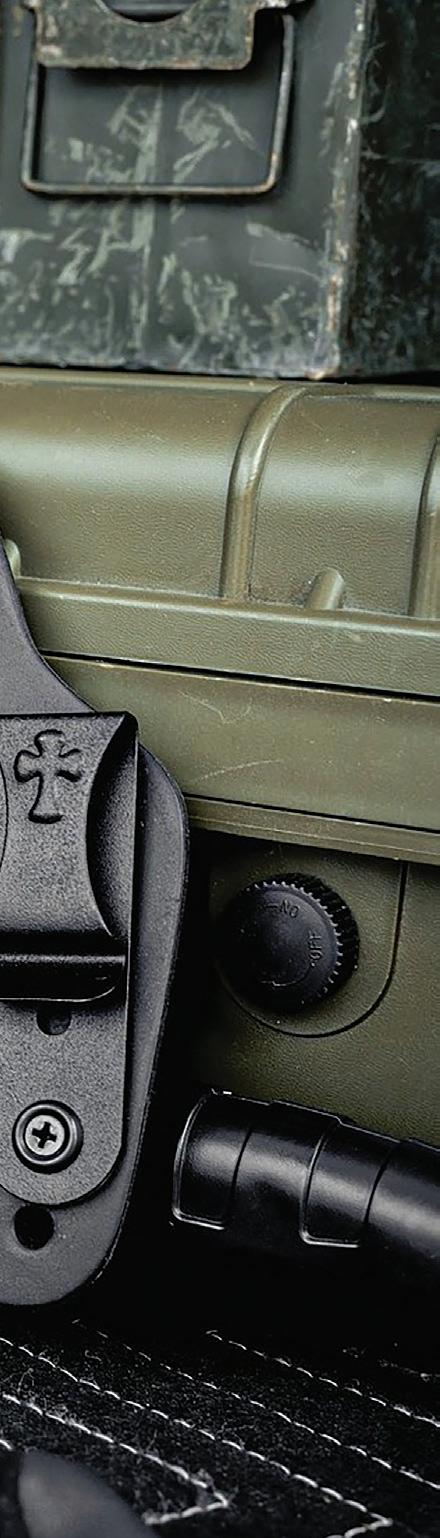
the cross stamped on each holster to represent his faith and devotion.
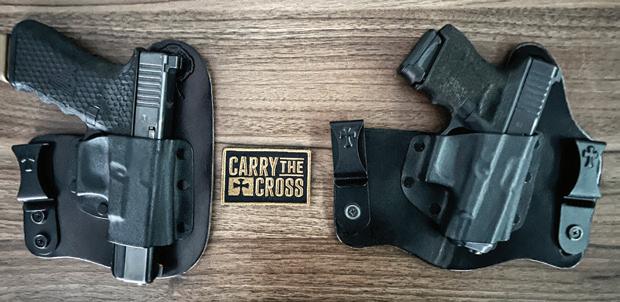
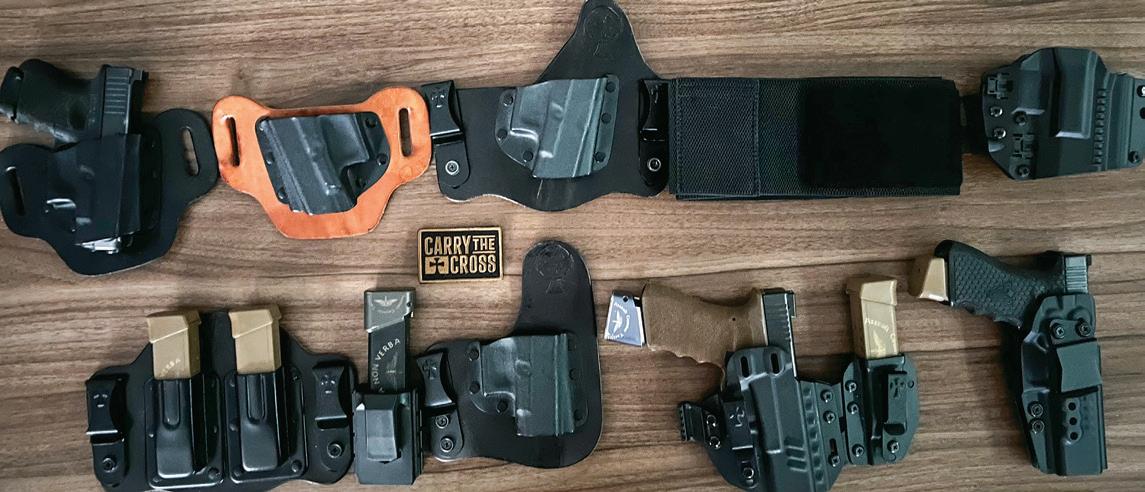
CrossBreed Holsters, pioneers and leaders in the industry, manufacture high-quality leather and Kydex holsters. I have used various models of their holsters for years and find them to be some of the most comfortable holsters to wear, period.
Carol Craighead is a pillar of strength and a symbol of love after her husband’s unfortunate passing. Her company, which had 25 employees at the time, was driven by her desire to continue her husband’s legacy through her love, drive and passion. Under her leadership, the company has grown to 62 employees, sales have quadrupled and CrossBreed holsters are now available through a network of over 400 dealers.
Not only is Carol a savvy businesswoman, but she also understands, as a
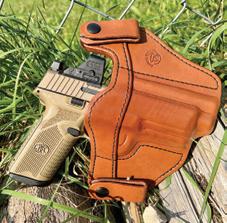
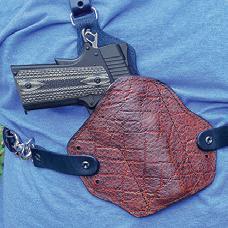
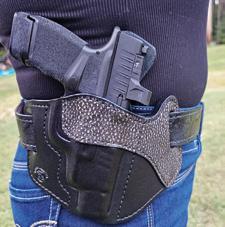
Just a few of the CrossBreed Holsters products Pawela has in his collection.
SELF-DEFENSE TRAINING
woman herself, the need for women to protect themselves. Thus she has teamed up with eight-time world champion shooter Lena Miculek and Sig Sauer to create The Rose Retreat, which aims to provide training in self-defense and shooting for women, as well as develop an excellent product line of holsters specifically designed for women.
Carol and CrossBreed consistently go above and beyond for me by allowing me to test new product lines.
A MENTOR OF mine and a legend in the training world has stated that holsters are not supposed to be comfortable; they are supposed to be comforting. With all due respect to the mentor, having lived in Florida, I have known too many police officers who refused to wear ballistic vests because they were too hot and
uncomfortable, resulting in tragedy.
The same goes for the CCW carrier; if they do not have a comfortable holster, they risk the same results. CrossBreed Holsters are exceptionally comfortable to wear and easy to draw from.
In 1988, a popular law enforcement training tape titled Surviving Edged Weapons, which featured two of my martial arts and edged weapons mentors, demonstrated how quickly a knife could be pulled and used to injure or kill a police officer before the officer could get their weapon out of their duty holster. This was not the fault of the officer but rather the officer’s poorly designed holster.
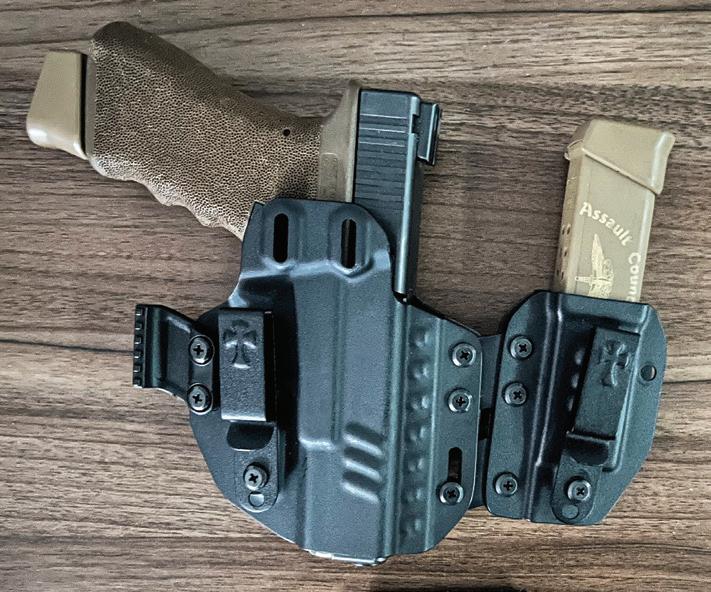
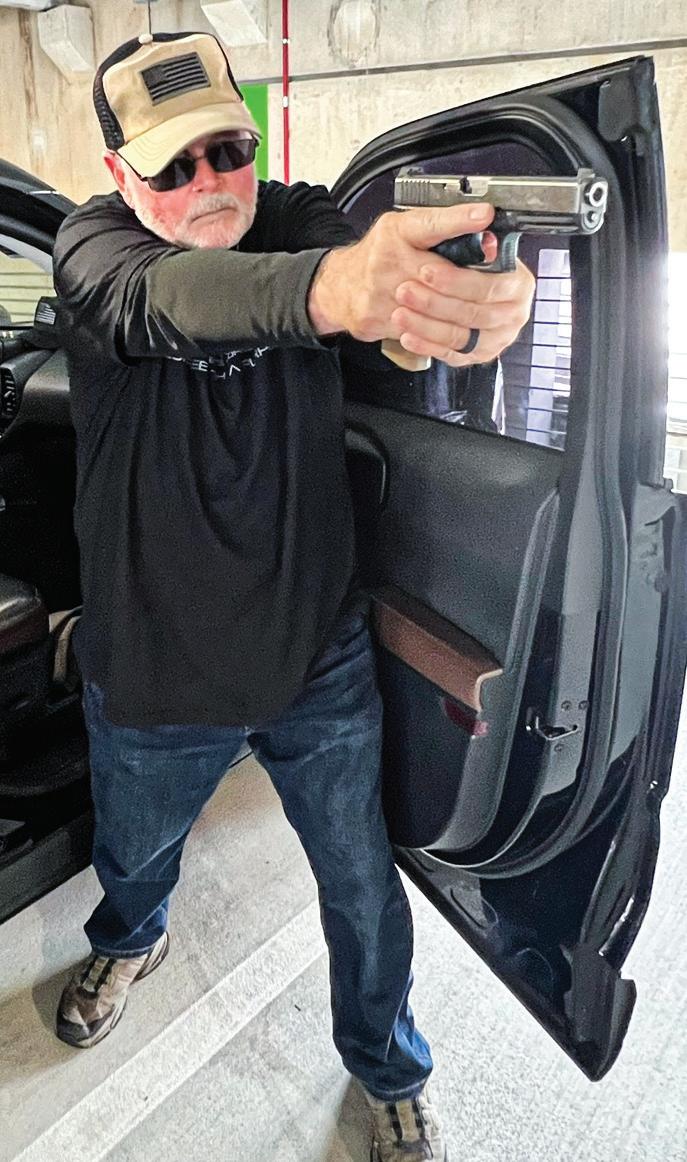
The counter to this is newer technologies in holster design and materials found in CrossBreed’s latest inside-the-waistband and outside-the-
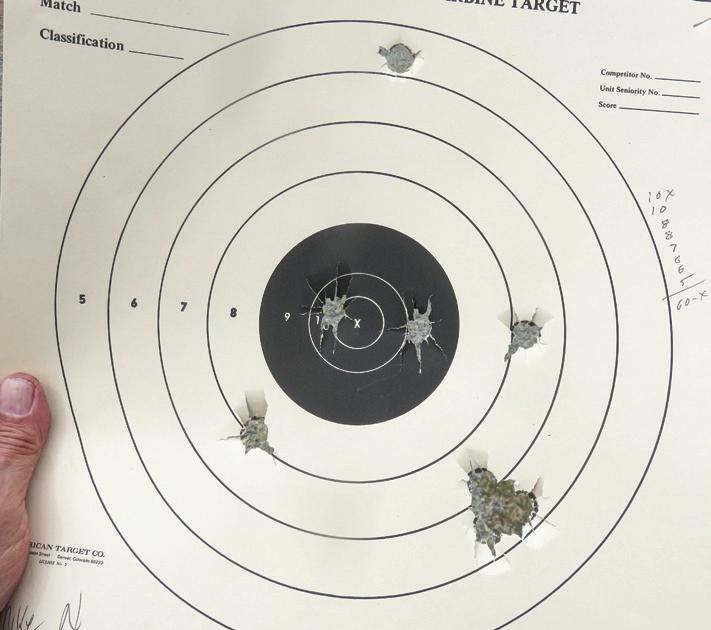
waistband N8 Tactical holsters. My average draw time with these holsters was 1 04 seconds from concealed carry and improved with additional practice. The main idea is that quickly getting the gun into action helps achieve either a good sight picture or a point index to get the job done, and CrossBreed Holsters excel in that area.
At 64 years old, I live by Psalm 144:1: “Praise be to the Lord, my Rock, who trains my hands for war, my fingers for battle.” I trust in the Lord and in CrossBreed Holsters with my life. And that’s my two cents! ★
Editor’s note: Author Paul Pawela is a nationally recognized firearms and self-defense expert. For his realistic self-defense training, see assaultcountertactics.com.
Pawela demonstrates how quick and easy it is to draw his handgun from a CrossBreed holster. He timed it out to an average of 1.04 seconds.
PRODUCT SPOTLIGHT
THE WAR WAGON, REBOOTED
Crosscountry drive a chance to test out V-Line Tactical Weapons Locker XD.
STORY AND PHOTOS BY PAUL PAWELA
hroughout history, people have always needed to move money and goods from one place to another. The challenge has been finding a secure way to do so.
TThe pioneers, who traveled West for a better life, always had to watch out for bandits trying to steal their money. Many people traveled on horseback, armed to the teeth with Winchester rifles, dueling pairs of Colt .45s on the saddle horn, and a double-barreled shotgun strapped across the saddle, carrying all valuables in saddlebags.
The people riding across the plains in covered wagons carried similar kinds of weapons to protect their treasures. Usually, somewhere on the wagon was a double-barreled shotgun, a Winchester rifle or a Sharps carbine, along with a variety of handguns to defend what they had. They also often had a strong box to keep their valuables locked away.
However, when one thinks of transportation needs in the Old West, one cannot overlook the Wells Fargo stagecoach, which popularized the phrase “riding shotgun.” The stagecoach was guarded by rough men armed with sawed-off doublebarreled shotguns, lever-action rifles and revolvers. These tough men protected valuable cargo across lawless terrains, risking their lives every time they climbed into the front seat of a coach.
To this day, the name Wells
Fargo evokes vivid images of brave shotgun guards riding atop Concord stagecoaches, fighting off highway robbers or mounted Indian warriors.
HAS ANYTHING CHANGED from how we traveled across the plains of the Old West, other than the method of transportation? While we no longer travel by horseback, securing valuables or guns in our vehicles is still a problem, especially considering the rate of gun thefts from cars across the country.
According to an analysis of FBI data, on average, at least one gun is stolen from a car every nine minutes in the United States. The rate of firearms stolen from vehicles has tripled compared to a decade ago, showing consistent increases nearly every year over the decade, along with a significant spike during the pandemic. Vehicles parked at homes in driveways are the most common source of stolen firearms, highlighting the need to always securely store guns.
I have always been honest with you, dear reader. I’ve made mistakes in the past, such as years ago when a firearm was stolen from my own vehicle (I had a revolver in a fanny pack in the back seat). After returning home from a long trip, there was no communication between my partner and me. We were both eager to get inside and relax after the journey. Neither of us was able to secure the firearm, but I take full responsibility for not doing so.
The next morning, I noticed my car
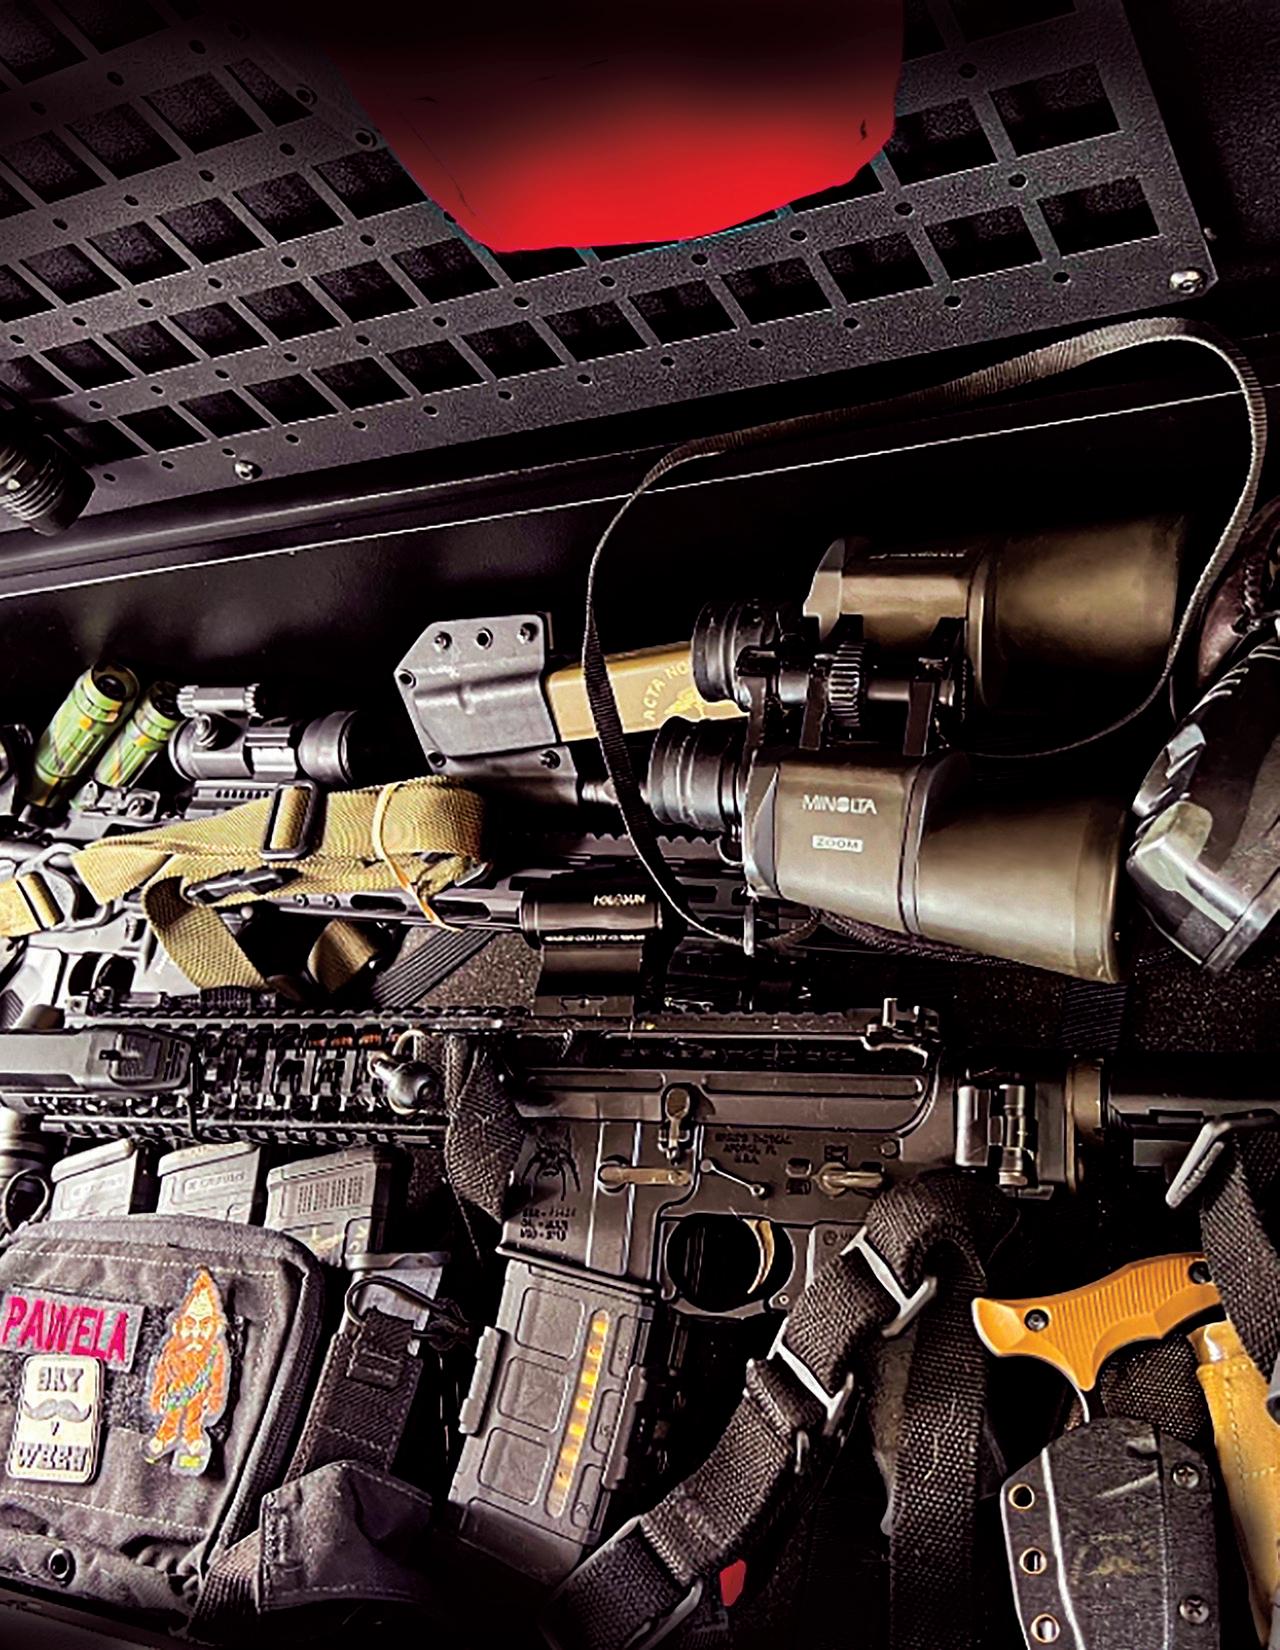
For a recent road trip around parts of America, author Paul Pawela probably overdid his packing of self-defense items. Regardless, the V-Line Tactical Weapons Locker XD had plenty of room to accommodate and organize everything he brought.
PRODUCT SPOTLIGHT
had been broken into and I had the indignity of reporting all the details of my missing firearm to the police.
Of course, that wasn’t the end of the story. Several months later, I received a call from DC police informing me they had my gun; it had been involved in the shooting of a police officer. The officer was wearing a vest, thank the Lord, and the bad guy wasn’t, but that didn’t make up for the sick feeling of guilt I carry to this day.
I SHARE THIS story with you for many reasons. America is a wonderful place to travel through; it has many beautiful sights, but just like in days gone by, there are still threats to be aware of.
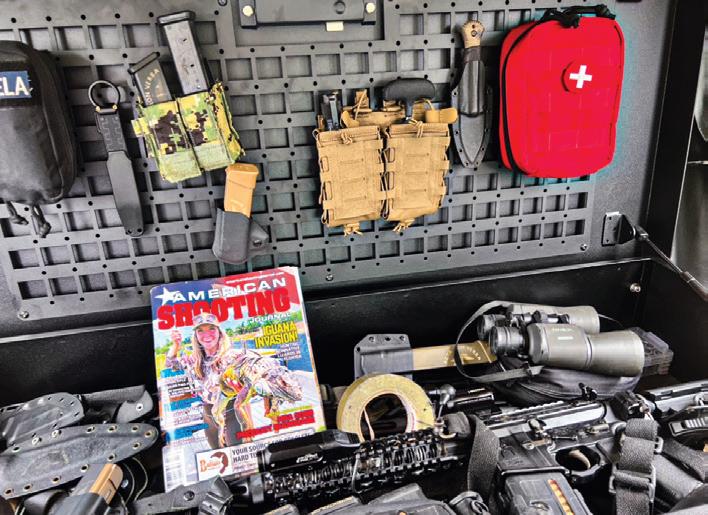
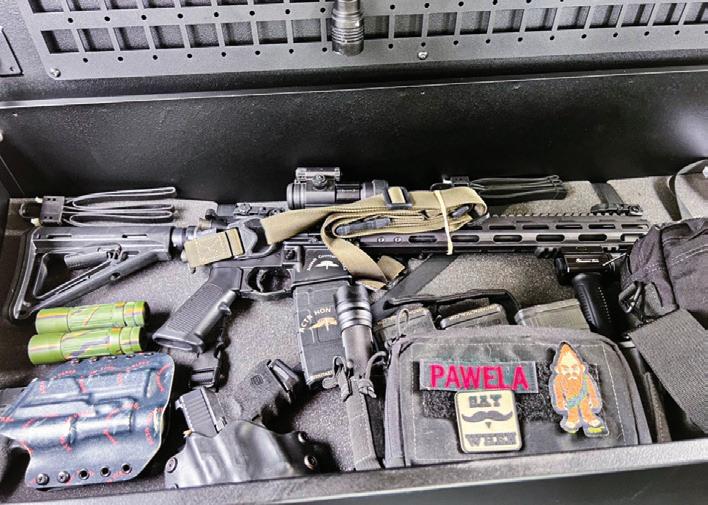
Informing the general manager of American Shooting Journal, John Rusnak, that I would be embarking on a journey with my wife across 20 states (see the August issue), he asked if I would consider testing out the V-Line Tactical Weapons Locker XD. My response was a firm 100-percent heck yes. Mr. Rusnak worked his magic, and within a few days, I received a beautiful V-Line safe shipped to my house.
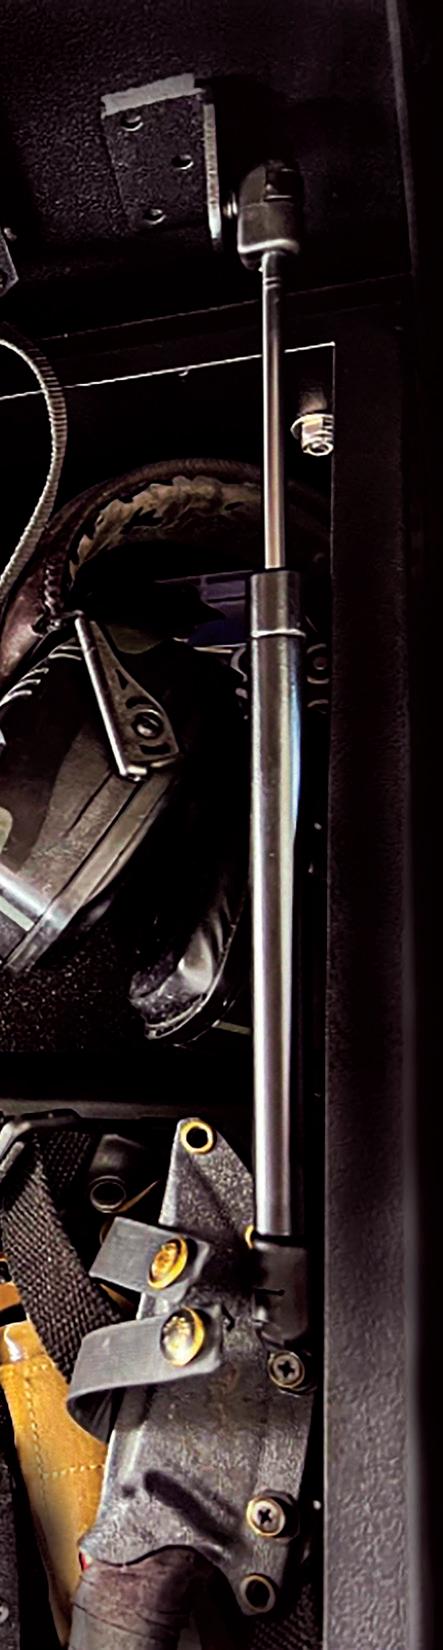
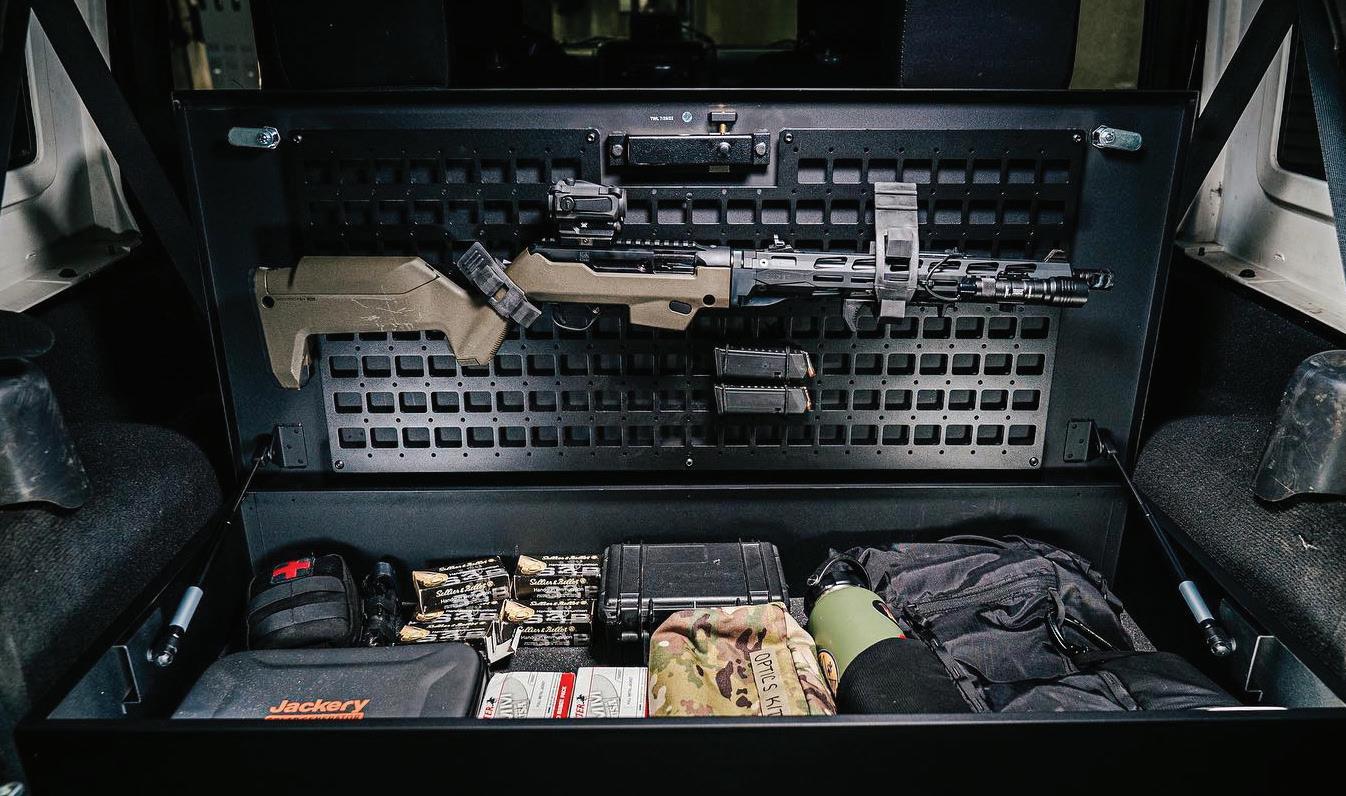
V-Line’s Next Gen Tactical Weapons Locker XD now includes improvements requested by the tactical community over the past year. New features include
The vehicle safe features a durable 14-gauge steel lid and a 16-gauge steel body. It has two key locks at the corners and a dependable Simplex mechanical lock for quick access. (V-LINE IND.)
A foam pad at the bottom of the case protects your firearms and gear, along with quickrelease nylon straps. Optional adjustable or fixed long gun mounts, designed with brackets specifically for the V-Line-designed MOLLE panel, can be purchased from V-Line’s website.
PRODUCT SPOTLIGHT
a MOLLE panel board, which I used for tactical med kits, knives and spare magazine pouches.
On the lid is a heavy-duty lock cover for the Simplex mechanical lock. It is designed for law enforcement, security agencies, public safety personnel and firearm enthusiasts who are concerned about securing their firearms, so being built for professionals is always a reassuring plus.
The Tactical Weapons Locker XD features a durable 14-gauge steel lid and a 16-gauge steel body. It has two key locks at the corners and a dependable Simplex mechanical lock for quick access. Both came in very handy on the trip.
A foam pad at the bottom of the case protects your firearms and gear, along with quick-release nylon straps. The Tactical Weapons Locker XD fits between the wheel wells in most SUVs, pickup trucks and the trunks of vehicles with enough space. It is an excellent home improvement solution for storing your tactical gear securely.
Optional adjustable or fixed long gun mounts, designed with brackets specifically for the V-Line-designed MOLLE panel, can be purchased from V-Line’s website (vlineind.com).
I PUT THE safe to the ultimate test. Did I go overboard? Probably. Since my wife was the driver for the entire 5,000-mile road trip, I rode, er, shotgun so I could easily access anything in the V-Line safe if needed.
Inside the safe were his and hers belongings, including two AR-15 semiautomatic rifles with optics and twin 30-round magazines attached; two complete med kits; two extra Glock 17 pistols with extended magazines; at least three tactical flashlights placed in various spots in the safe; and one go bag containing six Magpul 30-round magazines. Additionally, there were about half a dozen different types of knives, thanks to a stop at Blade Show in Atlanta along the way.
Were there times when more items were put in the safe? Yes, occasionally
a full 5.11 Tactical Rush backpack was placed in the safe. To be honest, it was a tight fit, but we managed to make it work. However, the Gnome chest rig and the Night Howler small backpack from Squatch Survival Gear had no trouble fitting in the safe at the same time.
Traveling in our Bronco, we visited Western haunts including Northfield, Minnesota, the town where the JamesYounger gang of bank robbers was brought to an end by its citizens, as well as Deadwood, South Dakota, where Wild Bill Hickok was killed. We drove to Mount Rushmore and saw a significant portion of the Pony Express Trail. So many sights to see, and we were safe, literally. We were a moving modern war wagon, complete with our arsenal perfectly secured in the V-Line Tactical Weapons Locker XD.
We had peace of mind wherever we stopped, thanks to the V-Line safe, which is strong, rugged and affordable. When traveling with firearms, I highly recommend V-Line’s Next Gen Tactical Weapons Locker XD. ★
The Tactical Weapons Locker XD fits between the wheel wells in most SUVs, pickup trucks and the trunks of vehicles with enough space. (V-LINE IND.)
MAKING THE CUT
‘WE’ GOT THIS
Chinese knife maker’s Epaulette, Sokn blades earn plaudits.
STORY AND PHOTOS BY PAUL PAWELA
he more years I spend in the self-defense industry, the more I realize that nothing is truly a coincidence. A few days before I was about to start my 5,000mile journey throughout the US (see last issue), with my first stop planned in Atlanta for the Blade Show, I received a very nice knife from We Knife Company in the mail. The model was the Epaulette, which features a reverse tanto blade in a frame lock design.
TI was surprised, but after an exchange with American Shooting Journal general manager John Rusnak,
I discovered that I was to review the knife for my Making the Cut column. But since I already had about three different knife manufacturers to review, I put the knife away in the box, packed it in my backpack and pushed the subject to the back of my mind.
When I arrived at Blade Show, I ended up talking to the usual vendor suspects I always do, and then I accidentally discovered We Knife’s booth.
I was completely stunned by the size of the booth; they had one of the biggest display booths at the convention. I immediately started taking pictures of
the incredible number of different knives on display. As I was photographing the knives, a representative from We Knife approached me and started discussing their knives with me. I found them to be both helpful and informative.
I told the folks at We Knife that I had received their Epaulette knife for a magazine article, and then it clicked for them that I was the writer from American Shooting Journal. Of course, I was asked, “How do you like the knife so far?”
I told them I liked the features of the knife so far, but I needed to experiment with it much more. I assured the fine
The Epaulette from We Knife Co., Ltd.
Just a small sample of the knives the company had on display at the Blade Show.
MAKING THE CUT
folks at We Knife that I had a 5,000mile road trip to get better acquainted with the knife.
The We Knife people smiled and wished me a good journey; little did either of us know that we would end up meeting each other again in a different state for an altogether different event.
AFTER ATLANTA AND the Blade Show, my wife and I traveled to Nashville, Tennessee. While visiting a friend, I was asked to take a side trip to Sevierville, home of Smoky Mountain Knife Works, the world’s largest knife store with a 108,000-square-foot showroom.
The assignment was to meet Tim Harmsen, creator of the Military Arms Channel and now host of the hit TV show Wild Shots, a production from Bob Cefail, who also produces Surviving Mann, among others. Before filming at the Smoky Mountain Knife Works facility, a short detour was made to Bud’s Gun Shop & Range, located just around the corner.
There, Harmsen filmed a segment with ex-Delta Force legend Kyle Lamb (who was also featured in the August issue) for Wild Shots. He was accompanied by Seth Ercanbrack, vice president of marketing and business development at We Knife, along with some key personnel from We Knife who had flown in from China to observe the filming of the Lamb segment.
It didn’t take me long to realize why We Knife was there in full force during Lamb’s shooting segment. Attached to Lamb’s belt was an interesting knife sheath with an exciting knife inside! You don’t need to be Sherlock Holmes to see that this knife is a collaboration between Lamb and We Knife. Or more accurately, between Lamb and Civivi, a subsidiary of We Knife.
It makes perfect sense for the two to collaborate on a project together. Many readers already know a lot about retired Sergeant Major Lamb’s story and his time in special operations, but what might be unfamiliar is that he is also an avid hunter and skilled custom knife maker. Lamb and We Knife’s
Kyle Lamb (left), accompanied by Seth Ercanbrack, vice president of marketing and business development at We Knife, films a segment for Wild Shots
Some key personnel from We Knife who had flown in from China to observe the filming of the Lamb segment.
collaboration, called Sokn, which basically means “attack,” is fitting given Lamb’s background.
THE CIVIVI SOKN is an EDC fixed-blade knife with a Kydex sheath featuring loops for easy on and off access. Another useful aspect of the knife design is that if someone wants to remove the belt loops from the sheath, the sheath and knife can be placed in a pants pocket via the clip mounted on the knife. The sheath has a hook that helps separate the knife from the sheath for quick access.
The Sokn is a full-tang tactical knife with a 2.82-inch Nitro V blade and a G10 handle, ideal for survival, camping, hunting or any other situation where a reliable knife is needed.
We Knife is a Chinese company located in Yangjiang, Guangdong, and it has been producing high-quality knives
since 2000. It should be noted that China is one of the largest professional manufacturers and exporters of highquality knives and tools imported into the United States. We Knife is capable of manufacturing high-quality knives
using professional and advanced production equipment, which includes CNC/EDM machines, CNC grinders, stamping machines, laser engraving equipment and anodizing equipment. We Knife believes that quality and
The Civivi Sokn and sheath.
The Lamb-designed Sokn knife shown in its shealth attached to a belt.
MAKING THE CUT
innovation are the keys to growth. To achieve this, they have a strong R&D team that continuously designs highquality knives with the help of various innovative designers.
When speaking with the We Knife representatives from China, they emphasized that their mission is to build the highest quality knives and tools, provide customers with a wide range of choices and product variety, and respond to market needs. We Knife introduced the Civivi brand in 2018, primarily to focus on offering a utilitarian everyday carry product line at more affordable prices.
AFTER FILMING AT Bud’s Gun Shop and Range was finished, everyone packed up and headed back to Smoky Mountain Knife Works so Harmsen could direct and star in the interview with Lamb and let Ercanbrack talk about the Sokn and We Knife in general.
I must say I was really impressed with the staff at Smoky Mountain Knife Works. The personnel were as professional as possible, rolling out the red carpet for the production team. Kudos to them for doing an outstanding job. While I was there in person, I’m eager to see the whole
production on television.
Afterward, the crew packed up and traveled to Nashville and the private range of a trick shot artist known only as 22plinkster. One of the tricks he performed during the filming of Wild Shots was to take a Sokn knife, drive the blade into some wood, place
balloons on both sides of the knife, and then shoot the knife so as to split the bullet and pop the balloons. The Sokn had a slight dent in the blade, but otherwise everything was intact.
IT’S BEEN SEVERAL months since I received my We Knife Epaulette, and since then, I have become proficient in pulling the knife out of my pocket and opening it using the lever.
Both knives from We Knife are treasures to me; words cannot fully express how much they mean. I would love to tell you how these treasured knives are joining my collection, but I have two treasures of my own who have made it to the rank of Eagle Scout. I will be presenting these excellent knives to them in recognition of their hard work as they pin on their Eagle Scout awards.
I hope my grandsons will cherish these knives for the rest of their lives. I can’t think of a higher compliment than to give the treasured knives I obtained from a great company to two young men who achieved the highest rank in the Boy Scouts. So, yes, We Knife makes the cut! ★
Editor’s note: For more information, go to weknife.com.
During the filming of the first episodes of Wild Shots, the Sokn’s blade was used by 22plinkster to split a bullet and pop two balloons.
The trick shot left only a small indent.
It looked like a great deal … until author Frank Jardim opened the box.
The finished semiauto build after much toil and gnashing of teeth – and the untimely breakdowns of Jardim’s vertical milling machine and his drill press.
The Semiauto PPSH-41 Build from Hell
Or, How I spent 80 hours, broke two machines in my shop and straightened an off-center firing pin hole to help a gun collector friend who bought a sketchy kit for a Soviet-era submachine gun.
STORY AND PHOTOS BY FRANK JARDIM
At a local gunshow a few years ago, I spotted a cardboard box bearing a masking tape label with a hastily scribbled but enticing description of the contents. It claimed that therein were a pair of PPSH-41 parts kits, with barrels and all the necessary US-made semiauto 922(r) compliance parts, ready to build … for a mere $1,600. At the time, and now, that’s a great deal.
I looked in the box. Yikes! I closed the box. I have a machine shop, and what I saw inside gave me pause. The box disappeared by midshow, which I attributed to the old “there’s a sucker born every minute” adage. Only later did
I realize an elderly collector friend whom I hold in very high regard was the new owner. He always wanted one to shoot. There are things we do for our friends that we would never do for anyone else. Taking on the PPSH-41 semiauto build from hell was one of them.
In retrospect, I could have finished two semiauto builds from scratch in the time it took to undo all the mistakes the neophyte builder made on the most complete kit. The lesson here is that almost any mistake can be corrected with patience, knowledge and skill, but it’s just more sensible to do it right the first time. Sometimes that means farming out aspects of the build that
DIY review
For some unknown reason, the neophyte builder of the PPSH-41 kit thought it would be a good idea to weld the selector switch from the inside of the fire control group, clogging it with slag and leaving the high spot –indicated by the author’s file – that jammed the sear in the down position when the trigger was pulled. Since Jardim wasn’t looking to make a machine gun, he had to file this extra material away to allow the sear to move freely up and down.
In this striker-fired build, the bolt was shortened at the rear to the point that it will allow the disconnector to pop up behind it when in battery, preventing the bolt from being reopened until the striker drops. That’s no good! Jardim added a bird’s beak to the front of the disconnector so it could slide under the bolt. To keep the inside of the fire control group clean, he taped it up before welding and grinding.
Always check your parts! This US-made trunnion was incorrectly dimensioned and needed material added to the top (in this case, two parallel beads of weld) to properly position it vertically in the receiver. If Jardim had not done this, the firing pin would have never been able to strike the cartridge primer or the trunnion would be unstable in the receiver.
Because this semi build needed a 16-inch barrel to stay a rifle, the author had to ream out the inner hole in the nose of the barrel jacket about 1/8 inch larger to allow the barrel to pass through without touching the jacket. Reams need to find their own center, so a rigid setup wasn’t desirable for this job. Jardim simply held the jacket steady in the socket for the drill press table.
you can’t handle yourself, or holding off on a complex project until you have the knowledge and skills to do it right. I’m a big advocate of learn by doing, as long as you don’t ruin your build in the process. The gun came out great, but I probably had around 80 hours of work into it, including all the research to evaluate the legality, safety and effectiveness of the semiauto conversion that the neophyte set out to do. Since this was my first PPSH-41 conversion, I was something of a neophyte too. To his credit, the neophyte was on the right course regarding the necessary semiauto re-engineering, but his problem was he apparently lacked the shop skills.
Once I knew what needed to be done, I got to work with all the efficiency and precision a machine shop can offer … at least for a little while. As if to smite my hubris, Hephaestus denied me the use of both my milling machine and primary drill press before the build was done, forcing me to resort to improvisation, and hand work, to complete the project. These improvisations may be helpful to you if you find yourself similarly underequipped with machine tools.
FIRST LET’S TAKE a look at what’s going on in a semiauto build project in general. Submachine guns typically have a rugged fixed firing pin in the bolt face
When the neophyte welded the receiver, he didn’t check his work in progress and it ended up crooked, including the leftleaning twist you can see here.
and fire from an open bolt, which, in addition to being mechanically simple, helps to keep the chamber cool and avoid cook-offs. By contrast, key features of a semiauto build are removal of the full-auto feature from the fire control group, installation of a floating firing pin in the bolt, and converting the action to fire from a closed bolt. Furthermore, turning a box of cut-up submachine gun parts into a legal semiauto requires alterations so that the original full-auto parts can’t simply be substituted in the new semiauto gun to restore full-auto capability. A full-auto bolt must not fit in the semiauto upper receiver. A fullauto fire control group must not fit in the lower receiver, and additionally, the semiauto upper receiver should not accept a full-auto lower receiver. If it did, it would permit any full-auto lower receiver and fire control group to be easily fitted to the semiauto upper. Add a fixed firing pin full-auto bolt adapted to fit the semiauto upper and you’re right back to a machine gun again.
Converting the fire control group from select-fire to semiauto is as easy as setting the selector to the rear (semiauto) position, drilling a hole through the side of the housing, and plug welding it in place so it can’t move. With this striker-fired conversion, I found the disconnector popped up behind the shortened bolt and prevented it from being drawn back to cock the striker. To eliminate that problem, I extended the tip of the disconnector and gave it a bird’s beak shape so it could slide under the rear of the bolt during cocking. I also filed a corresponding ramp in the bottom rear of the bolt to reduce drag on the bolt during recoil.
To ensure an unmodified full-auto lower receiver couldn’t be attached to the semiauto upper, a tab was welded on the bottom edge of the upper that mated into a corresponding slot in the top edge of the lower receiver. Likewise, to prevent an unmodified full-auto fire control group from being installed on the lower, a tab was welded to the bottom of the lower that mated with a corresponding slot in the top
The barrel jacket was not only overground at the welds, but used a piece of new material that didn’t match the ventilation holes in the original portion of the jacket. It had to be cut off and replaced.
Jardim used the lower receiver to realign the upper after making saw cuts in it to twist and bend it straight. Note the denial lugs attached to the upper and lower.
It turned out that the welds were so bad, they all cracked when the author tried to straighten the receiver. Here you can see how he clamped the upper receiver in place on the lower and prepared a deep trough for a new weld bead.
The jacket was attached to the receiver with a strong lap weld formed by hammering the bottom corners of the receiver over the front corners of the trunnion until the jacket could slip over them.
DIY review
edge of the semiauto fire control group. In a full-auto open-bolt/fixed-firingpin action, the bolt itself, when released by pulling the trigger, is driven forward along the guide rod by the recoil spring to both chamber the cartridge and detonate its primer. Switching to a closed-bolt/floating-firing-pin semiauto action requires we devise a new way to detonate the chambered cartridge. There are two approaches to choose
from: hammer-fired and striker-fired. For better or worse, the neophyte chose a striker-fired action, cutting the rear ¾ inch off the bolt so it could be used as a striker. To propel the striker forward, an additional spring is needed. This is why it’s so hard to cock a strikerfired semiauto conversion. You are compressing two springs instead of one. Often you need all the leverage and muscle you can bring to bear.
Typically, to prevent the installation of a full-auto bolt in a semiauto gun, the inside width of the semiauto’s receiver channel is reduced from 1/8 inch to ¼ inch, or some type of obstruction (denial bar) is welded in the channel. Either way, an original bolt won’t fit. The exterior geometry of the semiauto bolt is altered to mate with the narrower receiver channel or move around the denial bar.
To convert the full-auto bolt to
The weld beads, including the low spots built up with weld bead, were left high after grinding so that they could be smoothed out with a file to match the surface height of the surrounding metal.
The ends of the ventilation slots were quickly cut on a mill … before it broke down.
The finished semiauto receiver.
After Jardim’s mill went down, he improvised this setup with his drill press and a broken end mill to make a mini boring bar and straighten out the back of the hole. It was not the most solid setup with that vise hanging over the table, but made for an acceptable compromise.
plug pin after pressing
The semiauto bolt was narrower than the full-auto bolt. Unfortunately, the neophyte made the cut at an angle. Jardim was able to clean it up on the mill. It is critically important to secure your parts solidly when cutting. If you don’t, the force of the cutter or drill bit moving against them can shift the part in the vise, leading to gouged work, broken tooling or some wacky-angled surface.
semiauto, the lateral pin that secures the fixed firing pin in the bolt face is tapped out, and the hole drilled all the way through to the rear. A bushing is made to support the tip of the new floating firing pin at the bolt face. Retain the new floating firing pin in the bolt with a lateral pin or set screw at the rear. When adapting an existing firing pin, as was done here, ensure it’s long enough to protrude from the rear of the bolt so it
can be hit by the striker. It is advisable to drill the rear of the firing pin hole to a diameter just large enough to allow the installation of a compression spring to hold the firing pin below the bolt face until it’s driven forward by the impact of the striker. This will reduce the likelihood of slam-fires.
As I mentioned previously, in this striker-fire bolt adaptation, the striker was cut from the rear of the original
bolt. This appeared advantageous because the new striker was already the correct size to move in the receiver channel, had the hole for the guide rod/ recoil spring correctly located, and included the old sear notch. That’s a lot of machining operations saved. However, the sear notch ultimately turned out to be too far forward by about 3/8 inch to engage the sear when I tried to cock the assembled gun. You might wonder
What the heck?!? This was one off-center firing pin hole. Welding it up would have left a nearly impossible surface to drill through, so the author decided to plug the hole and start fresh.
A view of the plug welded in, and the neophyte’s mislocated firing pin retainer pin hole welded up too.
Filing the surface flush. Note the notch on the edge of the hole for a dot of weld bead to secure the plug.
DIY review
You
why it didn’t catch when the notch on the bottom of the striker engaged the sear perfectly before it was separated from the rear of the original full-auto bolt. It’s because that was before I added the stiff striker spring to the mix. When fully compressed, it was longer than the original guide-rod-mounted recoil spring it surrounded and so reduced the available space for the striker and bolt to travel rearward by, you guessed it, about 3/8 inch. The striker spring prevented the striker from moving back in the lower receiver enough to catch the sear. Rather than risk cutting the striker spring down, a better solution was to cut the sear notch further to the rear so the sear could engage it before the striker spring reached maximum compression.
So that’s the overview of the alterations that made up this semiauto conversion. Much of the work is pretty straightforward if you have some shop and welding skills. However, it is not what I’d call simple work. Without accurate measuring, frequent checks to ensure your parts are in alignment, and careful, solid welding, milling and drilling setups, a trainwreck is virtually guaranteed. The horrors of this project were many, but let me share the two major ones that ate up the majority of my shop time. They will illustrate what not to do, as well as the fixes I came up with.
THE RECEIVER
When the original military guns were demilled for import, the barrel jackets and receivers were torch cut. On some kits, the parts are all from the same gun, but that doesn’t necessarily make them easier to assemble because the demil torch cuts displaced about ¼ inch of
material, so there will be big gaps to fill. Since I didn’t have an original PPSH-41, I looked up the blueprints online to get the correct dimensions. It’s amazing what you can find online. Usually you’ll need to obtain one or more new USmade receiver sections. You make the new semiauto receiver by welding all these parts back together so that all their key geometric features are where they are supposed to be. This receiver was made from no less than seven pieces. That’s a lot of pieces to keep straight. The neophyte crashed and burned here, leaving me with a supposedly “finished” receiver more crooked than Lombard Street. On top of that, the welds looked very sketchy on the inside with lots of splatter, and outside they were overground, leaving an uneven, undulating surface that looked like ass. It’s very easy to grind a weld too deep with a Dremel tool, which is exactly what happened here.
The front ventilated barrel jacket is particularly hard to line up right for welding because not all guns had the same sized oblong ventilation holes, and some even had two different size holes. In this case, the neophyte had welded in a section of new production ventilated jacket with holes that were absurdly longer than the ones on the original parts of the jacket.
The right way to weld the receiver was to grind off the weld slag from the edges of the receiver parts, inspect them for obvious bends that would interfere with aligning them, and then clamp them down on a flat work surface, correctly spaced and carefully aligned along the left side and top with a steel straight edge. I would have tacked each piece along the left side, which is supposed to be straight, and then check for warping along the top and side with the steel straight edge. At that point, I would also check that the parts were all comparably level when inspected directly from the rear. Since mixed parts may not have the same thickness, or exterior profile, it’s very possible to have them canted to the left, even though they seem to be aligned along the top and bottom. The next step
Using a Sharpie marker as expedient Dykem, Jardim marked the location for the rear of the firing pin hole by transferring measurements from the front of the bolt to the rear. The lines were scribed with the sharp point of the caliper.
Jardim cut a shoulder in the rear of the firing pin with an improvised hand-drill lathe and a file. This prevented the spring from riding up on the pin and jamming in the hole. This part was too small for the author’s lathe, and by this time the belts on his drill press had broken.
can see the new firing pin bushing installed through the hole. Clearly, the retaining pin was going to cut into the inner diameter of the bushing after drilling. To minimize the deflection of metal into the ID, the author filed a groove in the center of the retaining pin so when he drove the firing pin back through the bushing, the deflected metal would have some place to go.
Jardim smoothed out the inside of the firing pin hole and bushing by coating the firing pin with valve grinding compound and turning it in the hole with a handheld drill until the pin moved back and forth easily inside the bolt. You don’t want it to get stuck in the forward position while shooting.
A groove was cut in the retaining pin in the drill press with a round file.
is to tack weld the right side, and recheck the alignment. If everything still looks straight, finish the welds in short stitches so you don’t pour too much heat into the metal and warp it. Make sure the welds are good and deep.
To fix the neophyte’s mess, I initially hoped I might make saw cuts where realignment was needed and twist the receiver straight. Doing that confirmed my fears the welds weren’t deep because they all cracked. I corrected the misalignment by twisting, then deeply ground down into the broken weld lines so I could lay a ¼-inch-wide, deep bead in them. Since the blocking tab was already welded to the left side of the receiver and appeared to be the only good weld on it, I clamped the receiver to the lower with the necessary improvised spacers to keep the parts level, double-checked the alignment and started tacking.
On the barrel jacket eyesore, I cut off the new oversized slot jacket section and fitted a piece of original jacket, being careful to size the slots correctly and keep each part of the jacket correctly aligned as I tack welded it in place. You can’t weld inside the jacket because there isn’t enough room. To ensure the butt welds were deep and strong, I deeply angled the upper edges of the joint to create a trough for the weld bead to fill.
The barrel jacket to receiver welding is complicated by the need to transition the straight sides of the barrel jacket into the curves that blend into the bottom of the receiver. Thank goodness the neophyte didn’t even try it. The trick is to correctly locate and temporarily install the trunnion first. That way you can bend over the lower corners of the receiver around it until they are underneath
The finished semiauto bolt and firing pin, the latter retained by a pin made from a tempered nail.
Bottom of the striker showing the material that had to be removed so it could engage the sear.
With his vertical mill out of service, Jardim was able to make this cut using a milling vise on his 65-year-old working drill press. He used plenty of cutting oil, advanced the cutter slowly, regularly clearing the chips, and only made cuts in line with the clamping force of the vise so the part wouldn’t tilt. A milling vise is a handy expedient for small jobs like this.
The finished semiauto striker, bolt, guide rod and springs. The author found the original recoil spring (bottom) didn’t have enough energy to reliably drive the bolt into battery, so he adapted a larger spring and guide rod of unknown origin to the job. The larger diameter rod didn’t permit a captive spring/guide rod assembly. A small sacrifice to make for safer, more reliable function.
A look inside the semiauto striker-fired action showing the striker cocked.
The bare spots on the receiver were touched up with Brownells Dicropan T-4 cold blue, an ideal product to match a shiny black finish. The longer you rub it in, the darker it gets. It took about 20 minutes and a few cotton balls to get the bare spots blended.
DIY review
the rear edges of the barrel jacket, thus setting you up for a nice, strong lap-joint weld. Once again, alignment, clamping, tacking and rechecking your alignment is key to success.
Once all the welds were done, I reduced about 95 percent of the excess bead with the 8-inch bench grinder, leaving the rest to finish level by hand with broad file strokes so I cut evenly across the surface of the metal, and not too deeply in any one spot. Once the exterior of the metal was correctly profiled, I could clamp the barrel jacket straight in the mill vise. I used three setups (left side, top and right side) and carefully cut the rear portions of the oblong barrel jacket slots where the jacket joined to the receiver. Excess weld on the edges of the barrel jacket holes and rough edges were likewise cleaned up by hand with files.
THE BOLT
Somehow, the neophyte had drilled a
wildly crooked firing pin hole. It may not be critical if the firing pin hole is angled 1/16 inch off-center, but angled over ¼ inch is just absurdly sloppy and will result in drag on the sides of the pin when the striker hits it. In a hammer-fired gun, the hammer might miss it completely! I suspect he started off-center; the bolt wasn’t oriented in the vise in line with the drill spindle, or perhaps he tried to do it by hand.
The deeper the hole, the harder it is to drill straight, even on a drill press. Spindles have more runout the farther you extend them, and long drill bits deflect under drilling pressure. You’ll have better chances of success if you set the bit in the chuck, so it’s no
longer than it needs to be, and raise the drill table so you minimize spindle travel. If you need to use drills of several diameters, allow enough room to change bits without breaking the setup. You absolutely have to measure carefully to locate the hole correctly and then mark it with your center punch perfectly so the drill at least starts in the right spot. Then secure the bolt in a drill vise so the surface to be drilled is at a perfect 90-degree angle with the drill bit and thus aligned with the spindle. Use cutting oil and a sharp drill bit, and drill the hole in small increments, withdrawing the bit to clear the chips from the hole and drill flutes before they deflect its course. I would have drilled
The author’s son, wearing a World War II Soviet Army uniform, test fired the semiauto. The drum mags are notoriously finicky and were originally matched to the guns. Tuning it to hold more than 16 rounds will be another article.
DIY review
this hole from both sides too, first removing the fixed firing pin, extractor and extractor spring and using that hole as a drill bushing to keep the bit straight. Then I would locate the hole on the back of the bolt by measurement, mark the spot with a center punch, and drill the larger hole where the rear of the firing pin and spring will go. Any other diameters required to accommodate the rear portion of my firing pin, in this case a relief for its shoulder, were drilled in the same vise setup so concentricity was maintained. Any drift between the front and rear holes was corrected with a round file.
Once a hole is drilled off-center, it’s very hard to correct it. One way to do it is to plug the hole and start fresh. To do this, you secure the part solidly in a mill vise, so it won’t slip out of alignment during cutting, use an endmill to delicately recut a straight hole, and then press a slightly oversize rod (about .002 inch) in the hole to restore the rear of the
bolt into a solid piece of metal. I would have done this, but my mill head spindle developed a problem and I had to take it offline for repairs. Instead, I had to use my drill press. The drill press vise wasn’t deep enough to hold the bolt by the rear, where it would be the steadiest, so I shifted it to overhang the table and let the front of the bolt hang down. This setup allows for more deflection of the table, but it was better than trying to hold the bolt steady by the nose with the surface to be cut sticking three inches in the air. Drill presses typically have Morse taper shafts, and lateral stress can cause the chuck to vibrate right out! This, and the runout at the spindle, is a formula for breaking the teeth off expensive milling cutters. It is for occasions such as these that I keep a box of damaged end mill cutters. I found one with a single sharp undamaged tooth in the correct diameter and put it to work as a mini boring bar. Because of the flex and runout of the drill press setup,
the hole wasn’t perfect, but it was good enough to be plugged for redrilling.
With the rear of the firing pin hole now correctly aligned and more or less squarely bored, I turned a plug to fit it on the lathe, relieved the edge of the hole on one side to weld it in, pressed it in, hacksawed off the excess, welded the plug in place, and dressed the surface smooth with files. At that point, I was ready to locate, center punch and drill the new hole for the rear of the firing pin. The remaining slight misalignment in the middle between front and rear holes was removed with a round chainsaw sharpening file.
There were plenty of other minor challenges that needed addressing, but for the sake of brevity, I can’t address everything in my 13 pages of notes in one article. The accompanying photos will at least touch on some of them. Patience, careful measuring, and checking and double-checking your work as you go is the formula for a good build. ★
BLACK POWDER
BIG FUN WITH ONE GUN
Muzzleloaders' Trade Gun Frolic features variety of matches to shoot.
STORY AND PHOTOS BY MIKE NESBITT
By definition, a trade gun was a smoothbore muzzleloading gun that the fur companies, such as the Hudson’s Bay Company, would trade to white trappers and Indians for furs. Trade guns evolved to have certain characteristics and the most well remembered, and the most often copied today, was the Northwest gun.
For shooting in today’s trade gun events, the guns must be smoothbores, flintlocks, with no rear sight and no set triggers. With regard to muzzleloading, a trade gun event can be the most fun of all.
WE USED TO have Trade Gun Frolics, which were three-day events with camping, traders and several different matches all shot with the flintlock smoothbores. The aggregate was made up of three different sections: the paper match, which used two targets, one at 25 yards and another at 50 yards; the trail walk, which was 10 shots at hanging gongs; and finally another 10 shots at flying or rolling clays. The rolling targets were the “rabbits” and they jumped and jolted so they were very hard to hit. That variety made a good 30-shot aggregate.
Then, for more fun, we added
several novelty matches. One of those “fun matches” was the group shoot, in which competitors took five shots with patched round balls at a paper target posted at 25 yards. The intention was to get the smallest group with those five shots. To make things different, the shooters could shoot from any position except we didn’t allow shooting from a benchrest. In this match, I always favored the sitting position for added steadiness. Some very good groups
were fired, but these scores did not add any points to the shooter’s aggregate. Another of the novelty matches was the Canoe Gun Match. In this match, a paper target was posted at 25 yards, usually featuring the standing bear. That bear had scoring rings but no actual bull’s-eye. The shooter sat down on a “canoe seat,” which was mounted on rockers so that the shooter and the chair would rock sideways, perhaps as a canoe might. All shooting and reloading
A traditional Northwest Gun, in 20 gauge, with a 41-inch barrel.
Mike Moran draws a bead on a flying clay with a “canoe gun.”
BLACK POWDER
had to be done from that rocking canoe seat. We usually kept this to a threeshot match but it could have been done with more. And using a short-barreled canoe gun in the Canoe Gun Match did have one advantage: they were easier to reload while sitting down.
Then there was the Slice of Pie Match, which featured a paper target that looked like a slice of pie, with the high scoring ring at the narrow point and the lesser scores at the wide end. The different thing about this one-shot match was that shooters used buckshot, and it was a re-entry match. To enter the match, the shooter would go to the registration table and “buy” the target for $1. The shooter would be provided
with 12 pieces of buckshot, .25-caliber pellets usually called No. 4 buck. In the 28- and 24-gauge guns, those pellets could be loaded in four layers of three pellets, but in the 20-gauge guns they’d be loaded in three layers of four pellets. All the same for making a 12-pellet load. Back on the firing line, those pellets were loaded and only one shot was taken at the slice of pie target. The highest score won and because it was a re-entry match, several trade gunners would buy targets to try over and over, but getting even one hit on the slice of pie was often hard to do.
BUT THAT WAS how we used to do it. Now, after a change in the sponsoring clubs
was made, new ideas have come into focus and the Trade Gun Frolics, still one of the events of the Washington State Muzzleloading Association, or WSMA, have been condensed into a one-day format. It’s one of those one-day matches that I’ll be telling you about.
In the current Trade Gun Frolic format, each of those segments described above requires just eight shots, and each segment has a possible score of 80 points. With a large group of shooters, the shooters would be divided into three groups with each group starting on different parts of the match and rotating after completion of each segment. The entire match would be completed after three such rotations.
Author Mike Nesbitt’s 20-gauge Fowler with a 36-inch barrel, by TVM.
Nesbitt gets a hit on a flying target while shooting left-handed.
BLACK POWDER
Nesbitt put all eight of his shots on the paper target, though the “high 5” cost him a few points that might have made his overall score closer to the second-place shooter.
The gun I use now is not a Northwest gun; it is a general rendition of a 20-gauge fowler from, perhaps, the 1790s or the early 1800s. I say “perhaps” because my gun is not a copy of a specific fowler, nor is it a copy of the guns from any particular maker who was active in those times; it is simply a fowling piece that looks like it might have been made in those times. That Tennessee Valley Muzzleloading fowler easily meets the requirements for these events.
Our group started on the flying clays and Mike Holeman used his lefthanded fowler to shatter the first flying bird. Then I got one on my second shot. A couple of other shooters each got fliers before Mike and I both scored our second hits. That put Mike and me in the lead for flying clays in this match. Cody Mehr also scored two hits on the flying targets while using a very nice 24-gauge Northwest gun that he had just bought, getting a very good start.
For a birdshot load, the 20-gauge barrel was about .60 caliber, and a good powder charge was simply 60 grains, or 1 grain per caliber. The powder I was
using was GOEX 3Fg. Over the powder was placed a wad – I punch my own wads out of scrap leather. Then a 75-grain powder measure was used for measuring the birdshot. Let me explain that the load should contain either the same volume of powder and shot, or a greater volume of shot. You don’t want a greater volume of powder because that can cause hollow patterns. And to top off the load, an overshot wad was added before all of that was rammed down the barrel.
Some have asked me if shooting a right-handed flintlock from the left shoulder presents any problems. That can be quickly answered with no, none at all. It would be the very same as shooting the left barrel of a double-barreled flintlock shotgun from the right shoulder. The flash from the flash hole is there, certainly, but that is well ahead of the shooter’s face. So, the ignition of the pan and the powder charge is simply never noticed.
THE NEXT SEGMENTS of the match were for shooting with a patched round ball. With a 20-gauge, several shooters like to use .600-inch-diameter round balls
but I favor a .595-inch ball. One reason for that is because it allows me to use a slightly thicker patch, a .015-inch patch instead of one that is .010 inch thick. The thicker patch holds more lube and I do favor the lubricated patches. More lube translates into easier reloading during the matches.
Next for our group was the paper target. This had a rather small bull’seye and it was posted at 25 yards for another eight shots, all offhand. One good thing about shooting at such a paper target with a 20-gauge is how the bullet holes are easily seen. That lets the shooters sort of sight in before going on to the gongs. Shots were going low on my target, so I tried to hold just a bit higher. That worked, but too well. My next shot was a 5 right at 12 o’clock; not a miss, but almost. The final score on my target was a 60-X, so maybe that high 5 cost me a little …
The final “relay” for our group was the gong shoot. The gongs were set up on the range, four of them at 25 to 35 yards. We were to shoot at each of the gongs twice to get our eight shots for score. One of the gongs was a simple cross, like an X, a rather thin one at that. It was simply easier to miss that target than it was to hit it and I missed it with both of my shots.
Our top shooter on the gongs was Paul Nelson, who got seven of them. Which one he missed is something I don’t know but I’ll bet it was that thin cross. We can’t blame him if he did miss that target, and hats off to Paul for getting seven of the gongs. While Paul was our only shooter to get seven of the gongs, both Cody and Mike got six of them.
None of us were surprised to hear Cody’s name called for first place, with 154 points. Next was Mike, just four points behind Cody with a score of 150. I came in third with 135 points.
To mention again how much fun the Trade Gun Frolic is would be repeating myself, but it is easy to see how much variety there is to this event and it is all shot with just one gun. Now I’m getting ready for the next one. ★
Head of Pharaoh Ramses II at the Luxor Temple, illuminated at night with hieroglyphics in background. (SCOTT JOHNSON)
Medinet Habu Temple ceiling. (SCOTT JOHNSON)
Hieroglyphics symbol for a woman carved into a column. (SCOTT JOHNSON)
Beautiful ancient temple of Medinet Habu. (SCOTT JOHNSON)
Sacred Lake outside Karnak Temple. (SCOTT JOHNSON)
Columns and statues at Karnak Temple. (SCOTT JOHNSON)
SAIL BACK INTO TIME OF THE PHARAOHS
Aggressor Adventures’ Nile River cruise offers travelers luxury, history, wildlife.
PHOTOS BY AGGRESSOR ADVENTURES
ggressor Adventures offers exciting excursions in exotic locales around the world. With each trip offering luxury accommodations and five-star service, guests can choose their own adventure, whether it’s scuba diving with sharks in the Caribbean, exploring ancient temples in Thailand or enjoying a river cruise down the Nile River. There truly is something for everybody.
For those seeking to explore one of the world’s most ancient places while still enjoying high-end comfort, a cruise on the Aggressor Nile Queen II might
just be perfect. One of Aggressor’s destinations since 2017, the Nile River cruise takes adventurers back in time to see the land of the pharaohs.
The six-day/five-night trip includes guided tours of Karnak Temple, the largest temple complex in Egypt, as well as Luxor Temple, Valley of the Kings, Hatshepsut Temple and many other ancient sites between Luxor and Aswan.
There are a few different iterations of the Nile River cruise, depending on what guests are looking for. While some guests prefer to explore the ancient ruins and archaeological treasures of
Aggressor Nile Queen II.
Tomb of Pharaoh Seti II in Valley of the Kings. (SCOTT JOHNSON)
Karnak Temple. (SCOTT JOHNSON)
Egypt at each stop along the cruise, others want to take in the breathtaking scenery and search for some of the 453 bird species that live or migrate through the Nile River Delta.
However guests decide to enjoy the day’s adventures, they will return in the evening to the beautiful Aggressor Nile Queen II. On board, guests can expect amazing views from deluxe staterooms with a private bathroom and tiled walkin shower, as well as chef-prepared meals and snacks and complimentary beer and wine.
Under the helm of president and CEO Wayne Brown, Aggressor Adventures strives to ensure that each trip with them is an “adventure of a lifetime,” and the Nile Queen II certainly delivers. Visit aggressor.com for more information about the Nile Queen II and all the other destinations Aggressor Adventures offers. ★
Some of the 453 different bird species found along the Nile River.
Amenities guests can expect on board include deluxe staterooms with private bathrooms, hot tub and chef-prepared meals.