


Disassembly series handlebar mount:

Thank you for choosing XTRIG. All of our products are designed and manufactured to the highest standards using the best materials available. XTRIG products are race proven and ensure ultimate performance. XTRIG cannot be held responsible for incorrect assembly or misuse of the product.
Please follow the assembly instructions.Expert advice and correct installation of XTRIG products by an authorized XTRIG dealer are essential to ensure the optimum in safety and functionality.
Thank you
Scope of delivery:
(1)2x base support
(2)4x cone rubber
(3)2x stud bolt M10
(4)2x cone
(5)2x nut M10
(6)2x clamping bars
(7)2x lower handlebar cups
(8)4x elastomers yellow/medium (9) 4x intermediate rubbers
(10) 2x upper handlebar cups (11) 4x bolt M8x45 AF=10
Functionality:
Progressive handlebar clamp mounted on elastomers. Vibrations from the engine and chassis are absorbed. Hard and whipping impacts are damped. Handlebar precision is maintained. Adjustable handlebar positions due to modular design. Tuning individually adjustable by exchangeable elastomers (8). Handlebar damping in the direction of the arrow (Fig. A)
XTRIG Kit no.
50400010
50400011
50400012
Elastomer green soft
Elastomer yellow medium (standard)
Elastomer red hard
Instructions assembly XTRIG PHDS OEM
These instructions may differ for individual details depending on the model. The basic installation of the PHDS OEM is described.
Preperations:
Place the cleaned motorcycle on a suitable stand. Check that the motorcycle is in good condition.
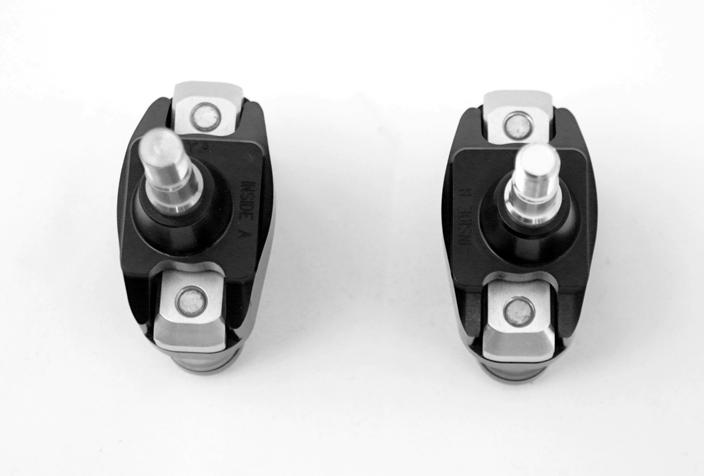
Caution!
Observe Inside A/B for Honda and Yamaha (Fig. B).


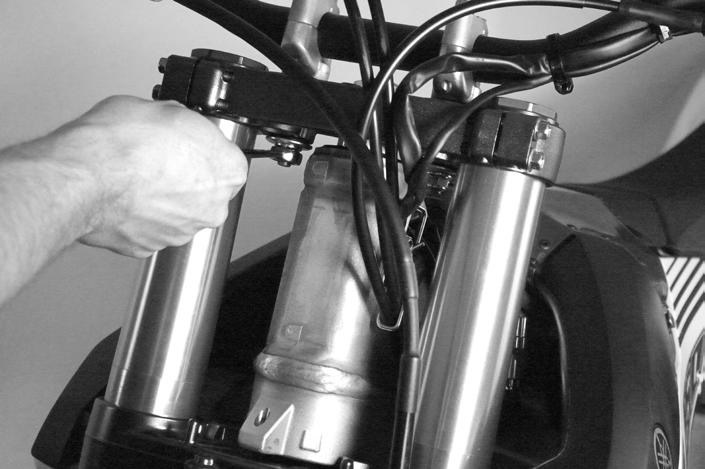
Insert base support (1) with preassembled cone rubber (2) and stud bolt M10 (3) into the triple clamp
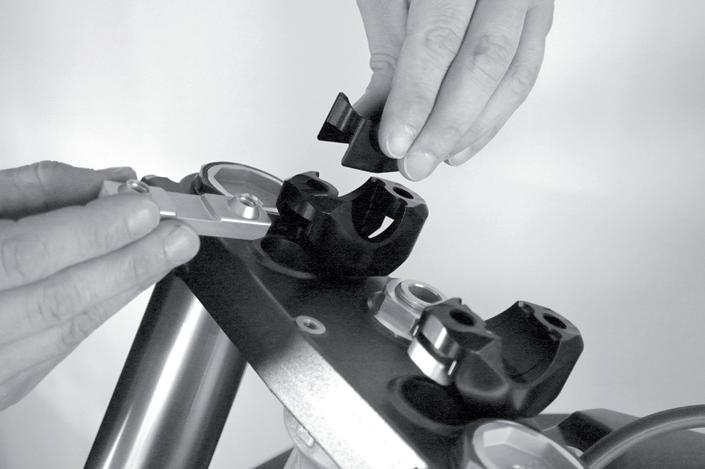
Insert the clamping bar (6) into the base support (1) (cone upwards) and engage the lower handlebar cup (7) in the clamping bar (6)


Mount the handlebar and move it into the desired position
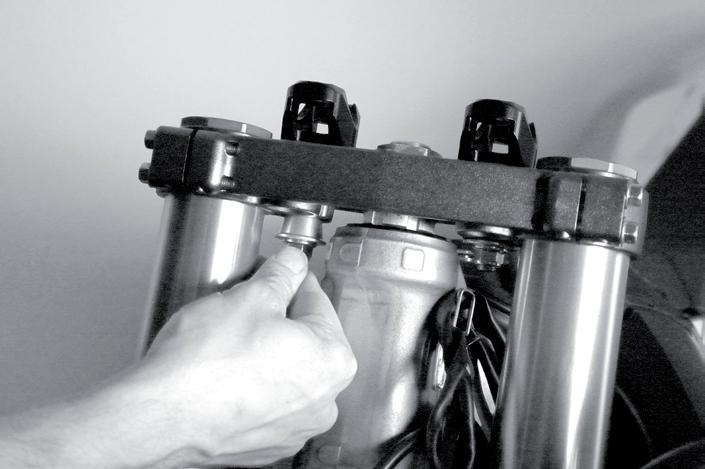
Mount the cone (4) and nut M10 (5) onto the stud bolt (3) from below. The base support (1) must be able to be turned by hand, but have to be free of clearance


Fit upper handlebar cups (10) with preassembled intermediate rubbers (9), M8x45 bolts (11) and elastomers (8)

Screw in the M8x45 bolts (11) evenly and tighten with 20 Nm. Make sure that the clamping gap between the handlebar cups (7 +10) is the same size
See picture correct / incorrect
!ATTENTION

After each fall, check the PHDS for possible damage and replace if necessary. Tightening torque of the steering clamp max. 20Nm.
Note: Tightening the M8x45 bolts (11) does NOT change the preload in the elastomers. Incorrect assembly may limit operation.
Warnings:
Follow the assembly instructions. If the instructions are not followed, there is a risk of serious injury or danger to life. XTRIG GmbH or its employees cannot be held responsible for incorrect assembly or incorrect use of this product. If any uncertainties should arise during assembly, contact a specialist workshop that sells XTRIG GmbH products. The products of XTRIG GmbH have been developed and manufactured exclusively for use in competitions. No warranty is associated with the purchase of these products. It does not comply with the German Road Traffic Licensing Regulations (StVZO) and may not be driven on public roads, country roads or highways.