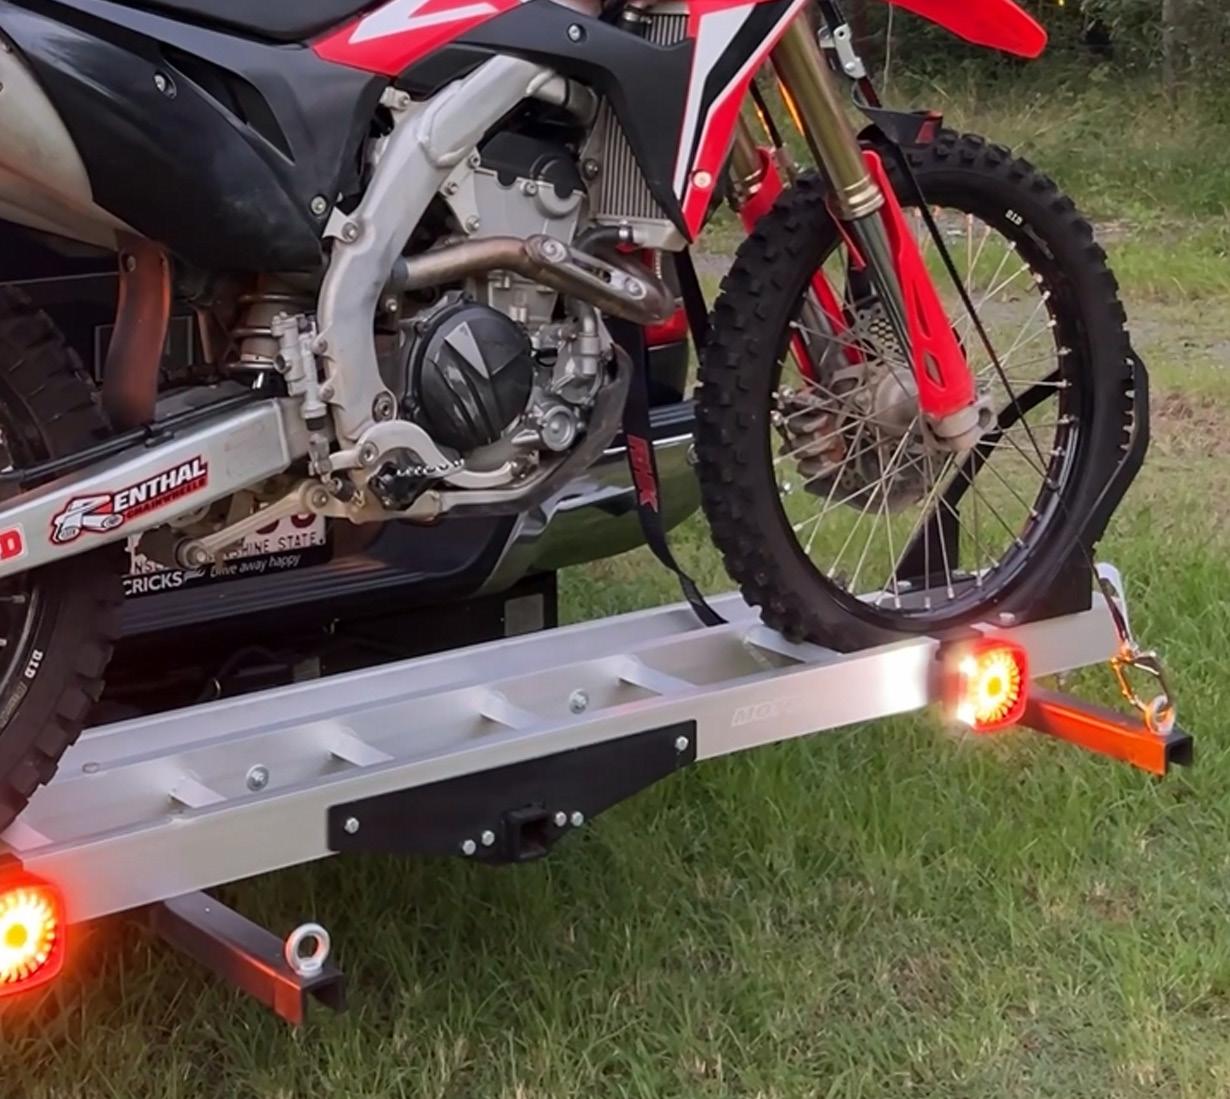
WIRELESS LED TAIL LIGHT KIT INSTRUCTION GUIDE
Thank you for purchasing the RHK Wireless LED Tail Light Kit. Please follow these instructions for simple installation and ongoing use.
Before you begin, make sure:
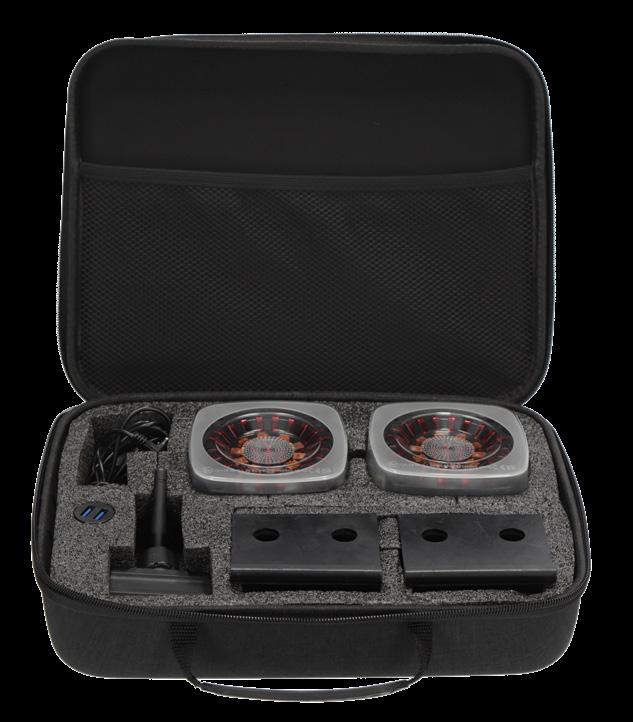
• You check all components are included and in good working condition.
• The wireless trailer lights are fully charged. Your vehicle has a flat 7-Pin trailer socket installed
• You’re parked safely and have access to both the trailer/bike carrier and vehicle.
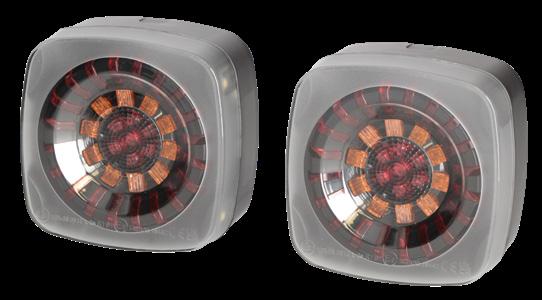
1. Charge LED Tail Lights
• Plug the lights into a USB charger.
• Check the charge indicator light on each indicator to confirm they’re ready for use.
Red = Charging
Green = Fully charged
• Seal the charger point with the rubber plug to prevent water and dust ingress.
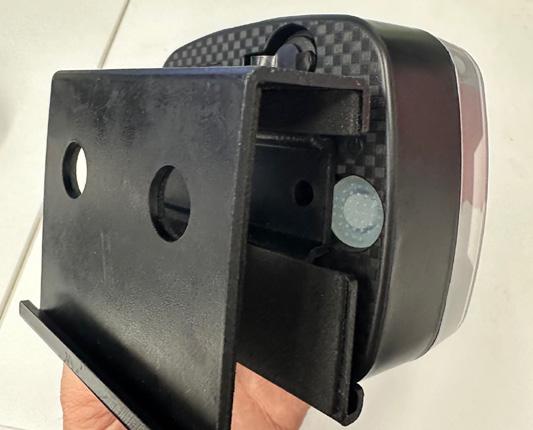
Attach the Mounting Brackets to the Lights
• Line up the metal mount to each light so that the on/off button is not covered and can be pressed with your finger.
• Once aligned, screw in place with the provided screws.
• Apply the rubber sticker to the inner side of the bracket, using one sticker for each bracket. This will assist with grip and reduce the likelihood of the brackets moving in transit.
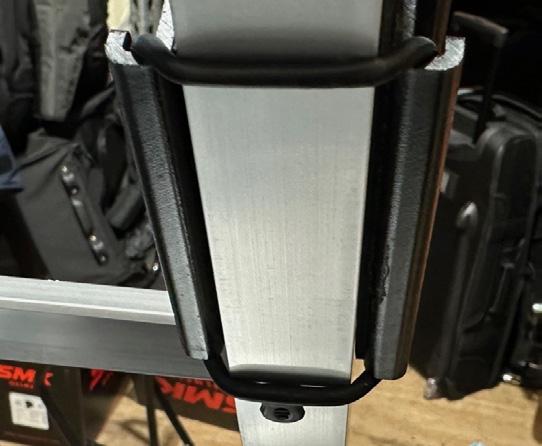
Attach the Lights to the Trailer/Bike Carrier
• Slot the lights onto the trailer. Ensure the number plate lights are facing inwards. Not only will this illuminate your number plate, they need to be positioned correctly to allow the left and right indicator functionality.
• Use the rubber bands to secure the lights to the rear of the trailer by hooking them over the mounting bracket and rest in the channel. This will help keep the lights secure on rough terrain.
• Position the lights where they’re clearly visible and won’t be obstructed.
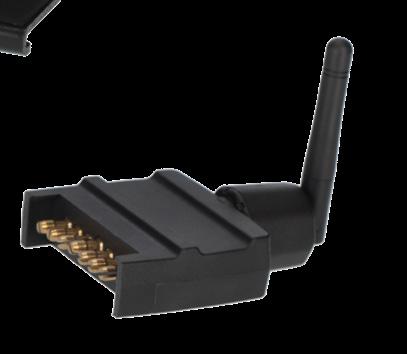
Plug the Transmitter into Your Vehicle
• Locate your vehicle’s trailer socket, which is usually near the tow bar.
• Plug in the 7-Pin wireless transmitter. It should fit snugly and feel secure.
Power On the Lights
• Press the power button on each light. The button will flash blue when the light is on and connected to the transmitter.
Test the Lights
• Turn on your vehicle and test that all lights function correctly:
• Indicators - left and right work and are positioned on the correct sides of the trailer
• Brake lights
• Tail lights
• Number plate lights
• Walk around the trailer to confirm everything is working.
Secure Everything
• Double-check that the lights are firmly attached.
• Ensure the transmitter is properly connected and not loose.
Tips
• Keep the lights charged between uses.
• Store them safely when not in use to avoid damage.