
MOUNTING INSTRUCTION
HOLESHOT DEVICE
Thank you for choosing XTRIG. All our products are designed and manufactured to the highest standards using the best materials available.
XTRIG products are race proven and ensure ultimate performance
XTRIG cannot be held responsible for incorrect assembly or misuse of the product.
Please follow the assembly instructions. Expert advice and correct installation of XTRIG products by an authorized XTRIG dealer are essential to ensure optimum safety and functionality. Thank you


MOUNTING OF CLAMP
Jack up motorcycle
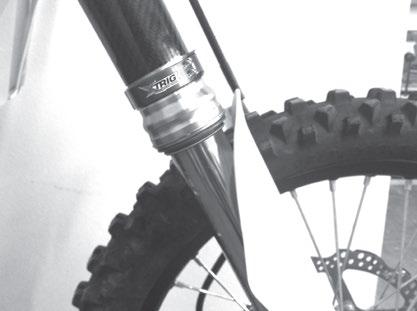
Place the clamping ring (1) on the fork tube, push it all the way down and screw it on with M3x12 bolt (3). The engagement area must point to the front
MOUNTING THE RELEASE BUTTON ON THE FORK GUARD
As an average measure down from the top edge dimension "X" from table and drill a hole with diameter 13.5 mm
SCOPE OF DELIVERY
(1) 1x clamping ring (2) 1x release button (3) 2x bolt M3x12 (4) 4x bolt M5x10
/ SX 110 ±10 mm
Moto 100 ±10 mm
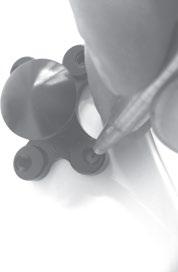
- Position the release button in the hole from the outside and mark the four smaller holes with a pencil (C).
- Drill out markings to Ø 5 mm.
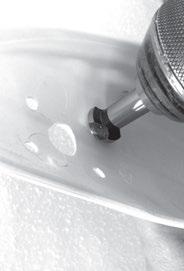
- 5 mm holes on the rear side with 90° countersink until the bolt M5x8 (4) are flush with the fork protection. (D)
- Screw the release button (2) onto the fork guard using the M5x10 bolt (4).
- Refit the fork guard.
- Loosen the clamping ring (1). Align the release button and the engagement area of the clamp. Then apply Loctite 243 to the M3x12 bolt (3) and tighten the clamp to 1.2 Nm.

HANDLING
While sitting on the motorcycle, bend over the handlebars, grab the rim and compress the fork, press the release button (2) and slowly extend until the release button is fixed on the clamp. Then unleash the release button. When the fork is compressed for the first time while driving, the release button is automatically loosen from the clamp.
BEWARE
CHECK THE RELEASE BUTTON FOR EASE OF MOVEMENT BEFORE EACH USE. AT TEMPERATURES BELOW 0° C THERE IS A RISK OF FREEZING.