
7 minute read
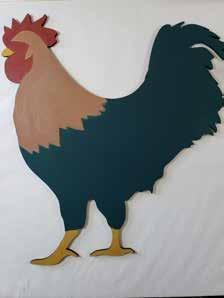
MR ROOSTER


PAINTING WORLD MAGAZINE Mr Rooster

By Marlene Fudge CDA
It is so hard to believe that I have been decorative painting for over 25 years! I have had the pleasure of having my designs published in numerous magazines and e-zines. I am very proud to be a DecoArt® Helping Artist as well as a Dynasty Designer. I teach at my local chapters and have taught at the New England Traditions convention in Massachusetts. One of my greatest achievements was earning my CDA in 2019 from the Society of Decorative Painters. My painting has given me so many wonderful opportunities and I have met the greatest friends along the way.
SUPPLIES:
SURFACE:
• Rooster 14 h” x 12 3/4” Item #31-L672
Cupboard Distributing (cdwood.com)
PAINTS: DecoArt ® Americana® Acrylics
• Antique Gold DA09 • Black green DA157 • Burnt Umber DA064 • Heritage Brick DA219 • Light Mocha DA241 • Mermaid Tail DA373 • Sable Brown DA051 • Teal Green DA107 • Terra Cotta DA062
BRUSHES: Dynasty® Black Gold
• #8,18 Shader- 206S • #4 Round- 206R • #10 Wave Filbert- 206WVFIL • #5/0, 0 Liner- 206L
Dynasty® Mezzaluna- Medium
• ½” Mop- Series 400
MEDIUMS:
• Minwax® Polycrylic Protective Finish- Clear
Satin
FRAMING SUPPLIES (OPTIONAL):
• 16” x 20” Black Frame • 16” x 20” Burlap Fabric • 16” x 20” Chicken Wire • Raffia • Wire Cutters • Protective gloves • E600 Glue or hot glue and glue gun
PREPARATION:
Transfer the pattern for the tail, neck, wattle and beak and feet. Leave off the details for now.
PAINTING INSTRUCTIONS:
BASECOATS:
Use the #18 shader for all basecoats. • Tail and Body: Mix Mermaid Tail Plus Black
Green (2: l) • Beak and Feet: Antique Gold • Wattle, Comb and Face: Heritage Brick • Neck and Head: Sable Brown When dry, transfer the details.,

TAIL:
Highlight along the tops of the tail feathers with a float of Teal Green, using the #8 shader. Mop as needed to soften the float. When dry, repeat this step to reinforce the highlight. Let dry. Highlight the bottom of the feathers in
the same way, except the feathers that go under another. Add a touch of water to Teal Green and using the #5/0 liner brush, pull some thin lines out from the tips of the feathers to add an extra highlight. (Image 2)
Image 2
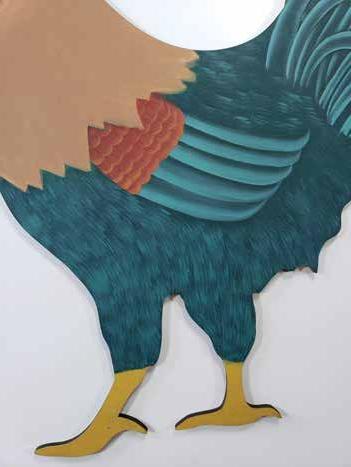
WING:
Using the #8 shader and Teal Green, float along the bottom of each wing feather. Start on the left and float the color out to a point on the tip of the wing. Mop to soften the float. Let dry and repeat to strengthen the highlight. (Image 3) Use the #8 shader to basecoat the top of the wing with Heritage Brick. With the same brush, float the scallops on the top of the wing with Terra Cotta. Add a touch of water to Terra Cotta and use the liner to pull some very thin strokes on the scallops. (Image 4)
BODY:
Mix together equal parts of the body background color plus Teal Green. Load the #10 Wave Filbert

Image 3
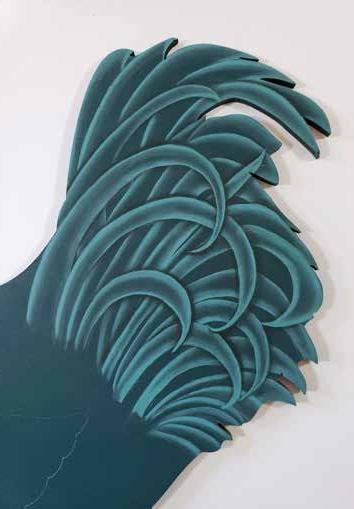
Image 4

and starting at the feet, pull the strokes upward following the direction on the line drawing. I find it easier to turn the rooster surface upside down and pull the strokes towards me. (Image 5) Using the #18 shader, shade under the neck, wing, and
Image 5
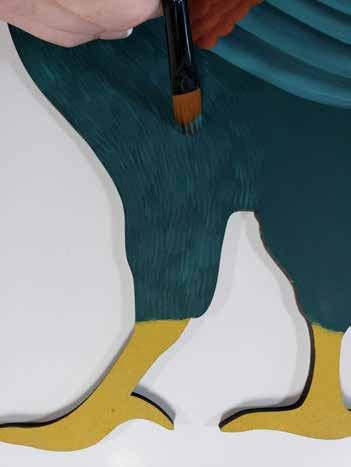
Image 6
legs with Black Green. (Image 6) Add a touch of water to Light Mocha and using the #0 liner, add the light feathers next to the top of the tail. (Image 7) Add a touch of water to Terra Cotta and using the same brush, add the feathers on the back. (Image 8) Pull these over the wing and bottom of the tail. Mix together equal parts of Light Mocha and Terra Cotta and add some strokes over this to highlight with the #0 Liner. (Image 9) When dry, use the #18 shader to shade the wing and back where it goes under the neck feathers.
BEAK AND FEET:
Use the Shader brush to basecoat the beak and feet with 2 coats of Antique Gold. Let dry. Using the same brush and Burnt Umber, shade the left side and along the bottom of the feet and also the beak next to his face and along the bottom. Add a touch of water to Burnt Umber and using the 5/0 liner brush pull little lines in the legs and feet. Also add the mouth line on the beak and the little nose hole the on the top of beak. Highlight the top of the beak and the right side and top of
Image 7

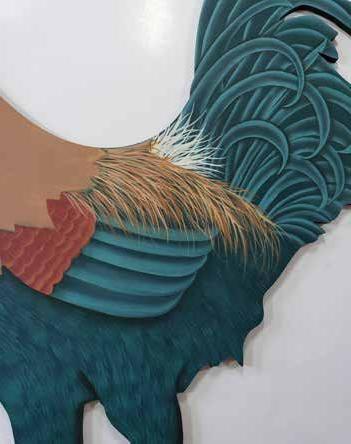
Image 8

Image 9 Image 10

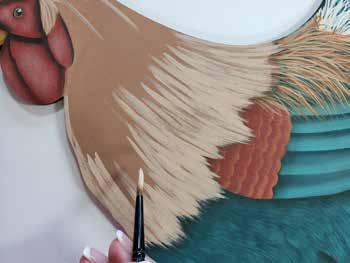
Image 11
Image 12
the feet with the #8 Shader with Light Mocha. Add some tiny Black Green feathers where the legs meet the feet. (Image 10)
COMB, WATTLE AND FACE:
Base coat the comb, wattle and face areas with Heritage Brick using the #8 shader. This will need 2 coats. Let dry. Using Black Green and the #8 shader, shade the comb against the head and the right side of the top points, the face, and the wattle. When dry, transfer pattern for the eye. Use the 5/0 liner brush to add the eye with Black Green. When dry, add a fine line of Sable Brown around the eye. Add a Light Mocha triangle and two tiny dots for the highlight. Use the #8 shader to shade around the eye with Black Green. To highlight these areas, mix together equal parts of Heritage Brick plus Light Mocha. Use the dry Mezzaluna brush and this mixture to dry brush on the left sides of the points on the comb, the center of the comb, the center of the face and the wattle. (Note: to dry-brush, dip the dry brush in the paint, wipe off most of the paint onto a paper towel. With the remaining paint, scrub onto the surface to leave a soft highlight). Dip the brush into the paint again and wipe ff some of the paint onto a paper towel. Hold the brush Image 13 vertically and tap the brush onto these areas to give it some “texture”. (Image 11)
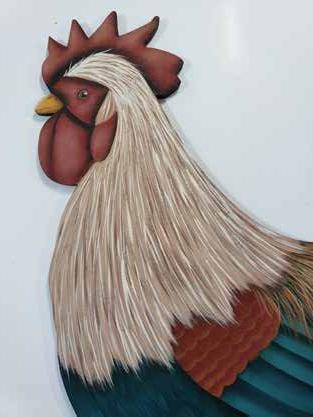
HEAD AND NECK:
Mix together equal parts of Light Mocha plus Sable Brown. Add a touch of water to this mixture and using the #4 round brush, stroke in the head and neck feathers. (Image 12) Leave a little of the background show through. Add a touch of water to Light Mocha and use the #0 liner to add some smaller feathers over the top. Leave the background show through. (Image 13)
FINISHING:
Remove any remaining transfer lines. Varnish with 3 coats of Polycrylic. Let dry.
OPTIONAL FRAMING:
Carefully remove the back panel and glass from the 16” x 20” frame. Cut the burlap to fit the back panel of the frame. Use either hot glue or E600 to glue the burlap onto the panel. Carefully cut the chicken wire, with the wire cutters, to fit the panel. (Use protective gloves to prevent any cuts from the sharp edges). Lay the chicken wire over the burlap and lay something heavy over the wire to hold it down. (Heavy books work well.) Glue the edges of the wire onto the burlap. Let dry. Insert into the frame and attach with the fasteners that came with the frame. (If needed, small nails can be used to hold in place.) (Image 14) Glue the rooster onto the center of the wire and let dry well. Cut little pieces of raffia and glue under his feet to look like straw.
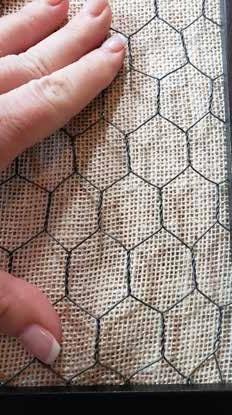
Image 14
Enlarge to the size to the surface of your choice.

Note to reproduction companies/stores: The bearer of the original color magazine has full rights to have this drawing reproduced and enlarged one time for personal use. This notice has been printed in red ink for verification of authenticity.


