Edit Portrait Groups
Group or single person
Overview
Portrait groups reflect the subject names and group assignments provided by your school. If your school is using the Lifetouch Portal, the groups in your Yearbook website will reflect any updates made in the Lifetouch Portal.
Best Practice & Next Steps
Editing an existing portrait group is useful when the students or staff in the group have changed. For example, a new student who joins the class after Picture Retake Day or a temporary staff member who becomes permanent halfway through the school year.
Edit a Subject
1. Access the subject by going to the dashboard and click on Manage Assets.
2. From the drop down select Portrait Images.
3. Click on the Group Name that needs the adjustment to be made.
4. The Manage Portrait Images>Edit Group screen will pull up.
5. Click on the subject’s name.
a. The Edit Subject Information dialog box displays.
6. Update the desired information.
a. Yearbook Name
b. Subject Type
c. Yearbook Image
i. If the subject has more than one portrait, the portrait with the green border and labeled Yearbook Image will display in the yearbook.
d. Group Affiliation-Select which group from the drop-down options.
7. Click Save.
Remove Subjects from the Group
This function allows you to remove an image from the current group.
1. From the Edit Group, click on the portrait to remove to select it.
a. The record is selected with a green box and the word Remove From This Group.
2. Click Remove Subjects.
a. The Remove Subjects dialog box displays.
3. Click OK.
a. The Remove Subjects dialog box closes, and the record is removed from the group.

Add Subjects to the Group
This function allows you to add additional subject records to the current group.
1. From the Edit Group screen, click Add Subjects.
a. The Add Subjects(s) to Group [Name] dialog box displays.
2. Two (2) options for searching for portraits.
a. Enter part of a name in the Search for Name Field.
b. Select the class or group to add from the Select Group drop-down.
3. Select the appropriate image(s) to add to the group.
a. Green boxes appear around each selected image.
4. Click Add to Group.
a. The images are displayed in the Create New Group screen for the new group.
5. Click Save.
Upload a New Record to the Group
This function allows you to upload a new subject record (not in your library) to the current group.
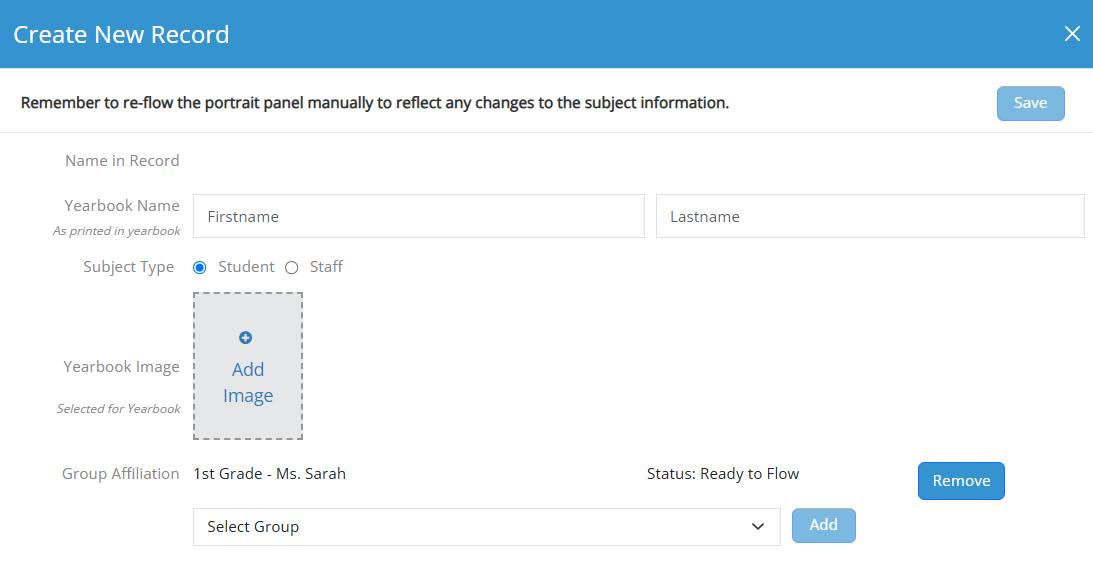
1. From the Edit Group screen, click New Record
a. The Create New Record screen displays.

b. Enter the subject’s first and last name in the appropriate Yearbook Name fields.
c. Select if the subject is a student or staff member using the Subject Type radio button.
d. Click the Upload Images box to search for and select the subject’s portrait.
i. Optional: If the new portrait should be added to multiple groups, include additional groups using the Select Group drop-down and click Add.
ii. Optional: To remove a group from the Group Affiliation list, click Remove for that group.
2. Click Save
a. The Edit Subject information dialog box closes and all changes to the subject record are saved.

