2.
3.
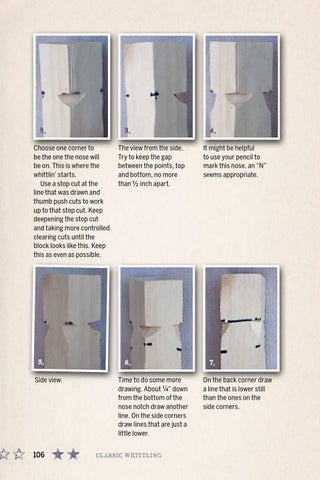
Choose one corner to be the one the nose will be on. This is where the whittlin’ starts. Use a stop cut at the line that was drawn and thumb push cuts to work up to that stop cut. Keep deepening the stop cut and taking more controlled clearing cuts until the block looks like this. Keep this as even as possible.
5. Side view.
106
The view from the side. Try to keep the gap between the points, top and bottom, no more than 1/2 inch apart.
6. Time to do some more drawing. About 1/4” down from the bottom of the nose notch draw another line. On the side corners draw lines that are just a little lower. C l as s ic W h itt l i ng
4. It might be helpful to use your pencil to mark this nose, an “N” seems appropriate.
7. On the back corner draw a line that is lower still than the ones on the side corners.