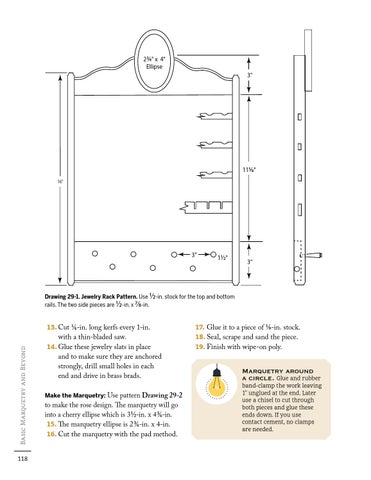
2¾" x 4" Ellipse 3"
115⁄8" 16"
3"
1½"
3"
Drawing 29-1. Jewelry Rack Pattern. Use 1/2-in. stock for the top and bottom rails. The two side pieces are 1/2-in. x 7/8-in.
Basic Marquetry and Beyond
13. Cut 1/4-in. long kerfs every 1-in.
118
with a thin-bladed saw. 14. Glue these jewelry slats in place and to make sure they are anchored strongly, drill small holes in each end and drive in brass brads. Make the Marquetry: Use pattern Drawing 29-2 to make the rose design. The marquetry will go into a cherry ellipse which is 3 1/2-in. x 4 3/4-in. 15. The marquetry ellipse is 2 3/4-in. x 4-in. 16. Cut the marquetry with the pad method.
17. Glue it to a piece of 1/8-in. stock. 18. Seal, scrape and sand the piece. 19. Finish with wipe-on poly.
Marquetry around a circle. Glue and rubber
band-clamp the work leaving 1" unglued at the end. Later use a chisel to cut through both pieces and glue these ends down. If you use contact cement, no clamps are needed.