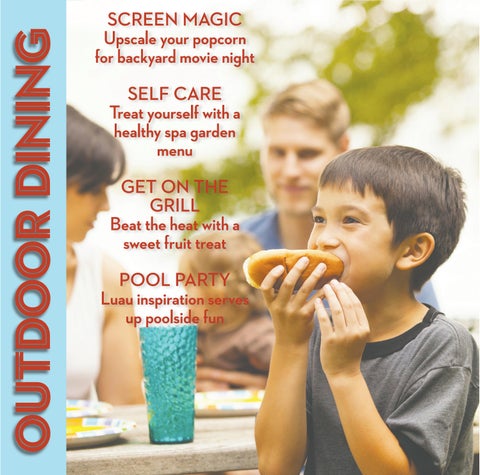
Dining outdoors has a naturally relaxed feel, and it’s a great time of year to take advantage. Enjoying a nourishing meal in the fresh air and the beauty of nature feels like a reset, and a great garden or lawn makes a stunning backdrop for a special-occasion meal. Plus, cooking on the grill takes the pressure off the thermostat when there’s no oven heating up your indoor spaces. Get inspired to step outside and take advantage of your own backyard oasis while the summer living is good.
3 Treat yourself to a healthy spa-inspired al fresco lunch.
6 Tiny sandwiches and tea are the key to hosting a timeless garden tea party.
8 Rock a festive Hawaiian theme with a yummy and fresh flavor profile.
11 It’s hot dog heaven and popcorn five ways for a movie night under the stars.
Patti Diamond is where frugal meets fabulous. She’s a meal-planning mastermind, and founder of Divas On A Dime, teaching families how to live well and eat better — on a budget that won’t break the bank. With wit, wisdom and a no-nonsense approach, Patti turns pantry staples into dinner magic and everyday chaos into calm. If you’ve ever felt broke, burned out or just plain hungry, she’s here to help you stretch a dollar, skip the drive-thru and feel like a diva doing it. Get her FREE weekly newsletter The Divas Weekly Inspiration and visit her website at www.divasonadime.com.
14 Get on the grill, with incredible plans for mains and dessert!
Recipes by Patti Diamond
Images by AdobeStock
spa garden lunch
Fresh, healthy food that feels like self-care
When temperatures are climbing, it’s crucial to stay hydrated. But let’s face it, not everyone — especially kids — jumps for joy at the idea of drinking plain water. I’d like to introduce you to agua fresca, the delightful, refreshing and incredibly affordable beverage that’s here to save the day!
Agua fresca, which translates to “fresh water” or “cool water,” is a beloved drink in Mexico and beyond. It’s essentially water infused with fruit and sometimes herbs and other natural flavorings. Unlike soda and fruit punch, which can be expensive and often loaded with sugar and
artificial ingredients, agua fresca is a healthy, homemade alternative that’s as kind to your wallet as it is to your body.
One of the best things about agua fresca is its versatility. You can mix and match fruits and herbs to create your own signature flavors. It’s a beautiful way to enjoy the bounty of seasonal produce and a fun project to experiment with different combinations. It’s also a great kitchen project to do with children, teaching them about healthy choices by involving them in the joy of creating something delicious at home.
Stay Cool and Hydrated With Delicious Agua Fresca
Refreshing cucumber, lime and mint agua fresca — a perfect summer beverage to keep you cool and hydrated.
Delicious Variations
What You’ll Need:
2 cups your favorite fruit (watermelon, cantaloupe, pineapple, strawberries or cucumber work great)
4 cups cold water
Here’s How:
Juice of one lime or lemon
1 cup carrots, finely minced
1-2 tablespoons of sugar or natural sweetener (optional, to taste)
In a blender or food processor, blend the fruit with 1 cup of water until smooth. Strain the mixture through a fine mesh sieve to remove any pulp or seeds. In a large pitcher, combine the fruit puree with the remaining water and citrus juice. Stir in the sugar or sweetener as desired. Let this chill in the refrigerator for at least an hour before serving. Enjoy over ice.
• Watermelon Mint: Add a handful of fresh mint leaves to the blender with the watermelon.
• Cucumber Lime and Mint: Mix mint and lime juice with cucumber for a refreshing twist.
• Strawberry Basil: Blend strawberries with a few basil leaves for a unique flavor.
• Pineapple Coconut: Mix pineapple with a splash of coconut water for a tropical treat.
Why Choose Agua Fresca?
Hydration is Key: In the sweltering heat, staying hydrated is more important than ever. Agua fresca provides a tasty way to keep up with your daily water intake.
Health Benefits: Most sugary drinks do more harm than good. They are not only less hydrating but also packed with ingredients that can be detrimental to health. Agua fresca, on the other hand, is as natural as you make it, with minimal added sugar.
Cost-Effective: Making agua fresca at home is incredibly inexpensive. With a few simple ingredients, you can prepare a large batch that will last for days.
Diva Tip - Agua Fresca Ice Pops
Turn your agua fresca into a fun summer treat by pouring it into ice pop molds and freezing it. These ice pops are a fantastic way to beat the heat and make for a healthy snack that kids and adults alike will love.
Photo by Jason Coblentz/Divas on a Dime
Easy Quinoa
1 cup quinoa
2 cups water or broth
1/2 teaspoon salt (optional)
Rinse quinoa under cold water in a fine-mesh strainer. In a medium saucepan, bring water or broth to a boil. Add quinoa and salt, reduce heat to low, cover and simmer for 15 minutes. Remove from heat and let sit, covered, for 5 minutes. Fluff with a fork, and it’s ready to go!
Simple Vinaigrette
3 tablespoons olive oil
1 tablespoon vinegar (balsamic, red wine or apple cider)
1 teaspoon Dijon mustard
1 teaspoon honey or maple syrup
Salt & pepper to taste
Whisk all ingredients in a small bowl or shake in a jar. Taste and adjust seasoning. Drizzle over your grain bowl and enjoy!
Build-a-bowl: the easy, affordable way to eat well
Grain bowls — also called Buddha bowls, nourish bowls or power bowls — are long known to meal-preppers. They’re quick, nutritious, endlessly customizable and make fantastic use of whatever ingredients you have on hand. Plus, they’re frugal, filling and work for breakfast, lunch or dinner. And grain bowls can be an easy and stress-free way to keep the focus on light, healthy nourishment. Prepare a big batch of grains, roast some veggies and have proteins ready to go, so you can mix and match ingredients all week.
How to Build the Perfect Grain Bowl
1. Start with Greens: A big handful of spinach, kale, arugula, romaine or mixed greens makes the perfect fresh foundation.
2. Add a Hearty Grain: Think quinoa, brown rice, farro, bulgur or barley — any whole grain works! You’ll want about 1/2 to 1 cup of cooked grains per serving.
3. Dress for Success: Toss your greens and grains with a simple vinaigrette, a squeeze of lemon or a spoonful of hummus, salsa or tahini before adding other toppings. Dressing first ensures every bite is packed with flavor.
4. Pick a Protein: Beans, lentils, shredded chicken, tuna, tofu, steak, shrimp or hard-boiled eggs make great protein choices.
5. Load Up on Veggies: Fresh, roasted or sautéed veggies all work beautifully. Think tomatoes, cucumbers, bell peppers, roasted sweet potatoes, caramelized Brussels sprouts — you name it!
6. Add a Pop of Fruit: Apples, pears, citrus, berries or dried fruits like cranberries or golden raisins add a hint of sweetness.
7. Don’t Forget the Healthy Fats: Avocado, nuts, seeds or cheese add richness and satisfaction.
Quinoa is a powerhouse grain. It is high in protein, cooks quickly and has a light, nutty flavor that works in all kinds of grain bowls.
Quinoa has a natural coating of saponins, which are bitter-tasting compounds that act as a defense mechanism against pests. Rinsing quinoa under cold water removes these saponins, eliminating bitterness and giving it a cleaner, milder flavor.
Photo by Jason Coblentz/Divas on a Dime
Summer Citrus Bliss: The Ultimate Refreshing Salad for Sunny Days
Hello, Sunshine! It’s time to embrace the vibrancy of summer with something fresh and rejuvenating. And what better way to kick off the season than with a citrus salad that feels as bright as the sun itself?
These juicy, tangy citrus fruits are perfect for lightening things up without compromising on flavor. Not only are they delicious, but they’re bursting with vitamin C, making them the perfect healthy indulgence for the summer months. This salad
is the epitome of a “reset” — a refreshing, zesty treat that’s as satisfying as it is beautiful.
To start, grab a variety of colorful citrus fruits — think blood oranges, grapefruits, mandarins or those sweet Cara Cara oranges. The beauty of this dish is its simplicity, yet it feels so indulgent. Toss the citrus with fresh greens, a little mint or parsley, and for that extra punch, a sprinkle of pomegranate seeds and crunchy pistachios. If you want to make it a full meal, grilled chicken
SUMMER CITRUS SALAD
For the Dressing:
4 tablespoons orange or mixed citrus juice
1 lime, juiced and zested
2 tablespoons apple cider vinegar
2 tablespoons honey
1 teaspoon Dijon mustard
1 small clove garlic, minced or pressed
1/4 teaspoon kosher salt
1/4 teaspoon black pepper
1/2 cup extra virgin olive oil
For the Salad:
6 to 8 cups lightly packed mixed greens
or fish makes a perfect protein-packed addition. But honestly, it’s just as delightful on its own.
The vinaigrette is equally as delightful, a sweet and tangy blend of citrus juices, honey, mustard and apple cider vinegar. The magic comes when you drizzle it all over the salad — creating a citrus symphony that perfectly balances the flavors. The dressing can be made ahead and stored in the fridge, so you’ll always have a ready-to-go burst of summer flavor when you need it.
Yield: 4 servings • Total Time: 20 minutes
Make the Dressing:
In a small bowl or jar, whisk together the orange juice, lime juice, vinegar, honey, Dijon mustard and minced garlic. Season with salt and pepper. Slowly drizzle in the olive oil while whisking. Taste and adjust seasoning with more salt, pepper or a bit more honey if needed. Yield: approximately 1 1/3 cups.
Assemble the Salad:
Toss the mixed greens with some of the dressing, then spread them on a platter. Arrange the citrus supremes, red onion and fresh herbs on top. Sprinkle with pomegranate arils and pistachios for an extra crunch.
To Serve:
2-3 navel oranges (or blood oranges or Cara Cara oranges), sliced into supremes
1 grapefruit, sliced into supremes
1/2 small red onion, thinly sliced
A handful of fresh mint or parsley, torn
4 tablespoons pistachios (optional)
1/2 cup pomegranate arils (optional)
Grilled chicken or fish (optional)
Drizzle the dressing over the salad just before serving, and enjoy the refreshing burst of citrusy goodness. This salad is a summer celebration in a bowl, and it’s the perfect way to indulge in something healthy, colorful and completely delicious. Here’s to the season of citrus, fresh starts and summer vibes!
How to Pare Fruit for a Fabulously Refined Salad:
For a polished look, slice a bit off the top and bottom of each citrus fruit, then stand them upright. Using a sharp paring knife, slice away the peel and pith, following the natural curve of the fruit. Cut along the membranes to release the gorgeous, juicy citrus supremes. Don’t forget to squeeze the remaining fruit to get every last drop of juice for the vinaigrette!
Photo by Jason Coblentz/Divas on
Summer tea party Serve flavors that are steeped in charm
Looking for a charming and unique way to gather friends and family this summer? How about hosting an outdoor Summer Tea Party? Imagine sipping tea in the sunshine, nibbling on savory sandwiches and enjoying the laid-back yet elegant vibe of a garden gathering. Whether it’s a casual afternoon with friends, a celebration for the whole family or a fancy tea with a twist, we’ve got the blueprint for a memorable, fun-filled time.
Tea Time, Summer-Style
This is Afternoon Tea, served between 2:00 and 4:00, and it’s all about light bites like savory sandwiches, scones and petite sweets. It’s the perfect mix of casual outdoor fun and elegant charm.
Brewing the Perfect Summer Cup
The key to a great tea party? The tea, of course! You can opt for tea bags, but if you want to impress, use loose tea. Start by bringing fresh cold water to a rolling boil — plan for 3/4 cup per serving, per person. Add 1 teaspoon of loose tea per serving, plus one for the pot. Before making tea, warm your teapot with hot water, then dump that out. Add the tea then fresh boiling water. Steep the tea for 3-5 minutes. Serve with sugar, cream or lemon slices.
Tea Sandwiches: Perfect for Al Fresco Dining
These sandwiches are meant to be delicate and crustless, with thin white or wheat bread for a colorful contrast. Be sure to save those crusts for breadcrumbs! Here are some bright, summery fillings:
Cucumber: Cream cheese, dill and lemon juice, topped with fresh cucumber slices on white bread.
Egg Salad: Chopped hard-boiled eggs with mayonnaise, Dijon mustard, white wine vinegar and a pinch of salt and pepper.
Deviled Ham: Ham, mayo, mustard, brown sugar and a dash of hot sauce.
These sandwiches are perfect for more than just tea — they make a delicious and light addition to any summer meal!
Eton Mess: The Perfect Summer Tea Party Dessert
Looking to add a touch of British charm to your outdoor summer tea party? Say hello to Eton Mess — a delightful, messy dessert that’s as fun to make as it is to eat. Originating from the prestigious Eton College in England, this dessert combines fresh strawberries, meringue and cream into a sweet, tangy and crunchy treat. Simple ingredients, effortless prep and a playful texture make this one mess you’ll want to embrace!
Why it’s perfect for summer: Eton Mess is refreshingly sweet, tangy and crunchy — just perfect for a summer’s day. It’s a simple dessert that’s guaranteed to impress without requiring a lot of fuss. After all, the best messes are the ones you can’t stop making!
ETON MESS
Yield: 6 servings
Total Time: 10 minutes
What You’ll Need:
1/2 medium lemon (juice and zest)
2 tablespoons granulated sugar (divided)
1 recipe baked meringue slab (see below) or 8-16 store-bought meringue cookies
2 cups cold heavy cream
Here’s How:
Prepare the strawberries: Slice them into a bowl, saving a few for garnish. Add lemon juice, zest and 1 tablespoon of sugar. Toss gently.
Meringue time: Coarsely crush the meringue slab or cookies by hand.
Whip the cream: Beat 2 cups of heavy cream with the remaining 1 tablespoon of sugar until soft peaks form.
Fold it all together: Gently fold the crushed meringue and two-thirds of the strawberries into the whipped cream.
Serve: Divide the mix into 6 bowls or glasses. Top with the remaining strawberries and a sprinkle of lemon zest.
BAKED MERINGUE SLAB
Yield: Approximately 6 cups
Prep Time: 10 minutes • Total Time: 2 hours
What You’ll Need:
3 large egg whites (room temperature)
3/4 cup granulated sugar
1/2 teaspoon vanilla extract
Pinch of salt
Here’s How:
Preheat your oven to 225 F and line a baking sheet with parchment.
Beat egg whites with a pinch of salt until soft peaks form, then gradually add sugar and continue to beat until stiff peaks form. Stir in vanilla.
Spread the meringue mixture on the baking sheet and bake for 1 hour or until dry to the touch.
Cool completely in the oven (this prevents cracking).
Once cooled, break into bite-size pieces.
Photo by
A luau themed menu
Make a splash at your next pool party
GRILLED HAWAIIAN
CHICKEN
Yield: 6 servings • Total Time: 9 hours 20 minutes
What You’ll Need:
5 pounds chicken legs or thighs
1 20-ounce can sliced pineapple
1 red pepper, sliced into rings to grill or bake
For the Marinade:
1/3 cup pineapple juice (from the can, reserve remaining juice for rice recipe)
1/3 cup soy sauce
1/2 cup water
1/2 cup brown sugar
3 chopped scallions
3 cloves garlic, minced
2 teaspoons fresh ginger, minced
1 teaspoon sesame oil
At Time of Cooking:
2 tablespoons brown sugar
Here’s How:
1. Marinate the Chicken:
Reserve pineapple rings for later. In a bowl, mix all marinade ingredients. Set aside 1/2 cup for basting. Place chicken in a gallon-size zip-top bag, pour marinade over, seal and refrigerate for at least 8 hours or overnight, turning occasionally.
2. Prepare Chicken for Cooking:
Remove chicken from marinade (discard marinade). Let chicken rest at room temperature for 20 minutes. Slice red pepper into rings and set aside with the pineapple rings. Mix reserved marinade with 1-2 tablespoons brown sugar. Microwave to dissolve honey if needed. Set aside half for basting and keep the rest to serve with rice.
3. To Grill:
Preheat grill to medium-high. Grill chicken, basting occasionally
with reserved marinade. Cook to 170 F (use a meat thermometer). This will take about 50 minutes. When nearly done, grill pineapple and red pepper until heated through and marked. Rest chicken for 10 minutes before serving.
4. To Oven Bake:
Preheat oven to 375 F. Arrange chicken in a foil-lined baking dish and bake for 35-45 minutes, turning halfway through. Baste with reserved marinade and top with pineapple and red pepper rings. Bake until chicken reaches 170 F. Rest for 10 minutes before serving.
5. Serve:
Place rice on a platter, arrange chicken, pineapple and red pepper around it. Squeeze lime juice over the dish and garnish with lime wedges and sliced scallion. Serve remaining marinade on the side.
KALUA PORK IN A SLOW COOKER
Craving that classic Hawaiian kalua pork? This easy slow cooker version brings the delicious flavors of traditional kalua pig straight to your table — no backyard BBQ pit required!
Preheat a large saucepan with a lid to medium-high. Melt the coconut oil or butter and add the rice.
Sauté the rice, stirring frequently for 3 minutes, until it smells slightly nutty but isn’t browning.
Add water, pineapple juice, coconut milk, soy sauce, salt and the ginger slice. Stir while it comes to a boil.
Once it boils, cover and reduce the heat to LOW.
Simmer for 20 minutes. Do not remove the lid. After 20 minutes, remove from heat and let it sit (covered) for 10 minutes — don’t skip this step.
Fluff the rice with a fork and serve with chicken and pineapple skewers.
Here’s How: Pierce the pork all over with a carving fork. This helps the seasonings really soak in.
Rub in the salt, followed by a generous drizzle of liquid smoke for that unmistakable smoky flavor. Now, transfer the pork to your slow cooker and let it start its magic.
Cover and set your slow cooker to LOW. Let it go for a glorious 12 hours — don’t rush it; this is the secret to tender, melt-in-your-mouth pork.
Once the pork is ready, remove it from the slow cooker. Use two forks to shred it into that perfectly pulled texture, adding in the luscious drippings
bit by bit to keep it nice and moist. Trust me, the extra drippings will take it to the next level!
Liquid smoke is usually tucked away near the BBQ sauces in your local grocery store, so check that section for a smoky flavor boost. It’s a small bottle, but it packs a big punch!
blue hawaii mocktail classic mai tai
Dive into a glass of paradise with this Blue Hawaii mocktail. It’s like an ocean breeze captured in a vibrant blue hue — cool, refreshing and full of tropical flair. Each sip is a wave of pineapple and coconut, transporting you to a sun-soaked beach, no passport required. Just pour, sip and repeat. Let the island escape begin.
What You’ll Need:
1 ounce blue curaçao syrup, non-alcoholic
1 ounce pineapple juice
1 ounce coconut water
1/2 ounce freshly squeezed lime juice
1/2 ounce lemon-lime soda or sparkling water, for a fizzy touch
Pineapple wedge, for garnish
Maraschino cherry, for garnish
Mint sprig, for garnish
Here’s How:
Fill a shaker with ice cubes. Add the blue curaçao syrup, pineapple juice, coconut water and lime juice to the shaker. Shake well until chilled. Strain into a tall glass filled with ice. Top with lemon-lime soda or sparkling water for a fizzy finish. Garnish with a pineapple wedge, maraschino cherry and a sprig of mint.
Beyond Blue Curaçao: Vibrant Alternatives for Your Blue Hawaii
If you’re looking for alternatives to blue curaçao in a Blue Hawaii mocktail, here are a few options that can still give you that vibrant blue color and tropical flavor: Blue spirulina powder: A superfood powder that’s naturally blue! It adds a fun color and can be mixed into the drink for a health boost (you’ll just need to dissolve it in a little water first).
Blue raspberry syrup: A fun, sweet alternative that gives a slightly tangy twist while maintaining the blue color.
Gatorade or sports drink (blue flavor): If you want something easy and budget-friendly, you can use a blue sports drink for the color and a burst of sweetness.
Transport yourself to a sun-drenched beach with just one sip of this classic Mai Tai. It’s like aloha in a glass — where the sweet embrace of rum meets the tang of fresh lime, and the tropical essence of orgeat syrup dances with every wave of flavor. Close your eyes, take a sip and let the island breeze find you, even if your toes are still on the living room carpet.
This recipe balances the flavors of rum, citrus and almond syrup perfectly. It’s a classic tropical cocktail that’s great for relaxing or entertaining.
What You’ll Need:
1 1/2 ounces white rum
1 ounce dark rum
1/2 ounce orange curaçao
1/2 ounce orgeat syrup
3/4 ounce fresh lime juice
Mint sprig, for garnish
Pineapple spear, for garnish
Maraschino cherry, for garnish
Diva Tip: A good substitute for orgeat syrup in a Mai Tai is Amaretto or a mixture of simple syrup and almond extract.
Here’s How:
Fill a cocktail shaker with ice cubes. Add the white rum, dark rum, orange curaçao, orgeat syrup and lime juice. Shake well until chilled. Strain into a rocks glass filled with crushed ice. Garnish with a mint sprig, pineapple spear and maraschino cherry.
Serve and enjoy your refreshing Mai Tai!
open air cinema Set the stage for backyard fun
“Movie night” takes on a new and special dimension when your movie theater is located under a sparkling canopy of stars. And you need surprisingly little to pull it together: a projector and screen of some sort, and a soft place to lounge.
Here’s what you need:
• A reasonably dim area, with a flat surface, to set up your outdoor living room.
• An outdoor rug, or a few large sturdy blankets for flooring.
• Some comfortable cushions and pillows, lawn chairs or chaises — bonus if you have an inflatable couch!
• A projector (many can be operated via apps on your cellphone).
• A screen or just a big flat white sheet that can be strung up on a flat vertical surface.
• An entertaining movie or show.
• All the snacks!
Tip: Fill an empty flowerpot with rocks to weigh it down, and top with a large tray to create a small side table to hold drinks and snacks.
Set the scene by mounting your screen or sheet where the show will be projected. A fence or side of the house works! Create a clean floor by putting down an outdoor rug or overlapping several blankets. Set up a variety of lounging areas by staging cushions and pillows alongside low chairs or chaise longues where you can stretch out. Connect a projector to a power source and secure the power cord if necessary, then arrange a small table in a central location to hold the projector. Keep the lights low, and it’s curtains-down time!
Summertime Popcorn Palooza: Elevate Your Snacking Game with DIY Gourmet Flavors
Forget the store-bought snacks and microwave packs. This summer, let’s celebrate with a DIY popcorn bar that turns snack time into a creative adventure! Popcorn isn’t just a practically virtuous, healthy, guilt-free treat, it’s also a blank canvas for culinary creativity that’s perfect for family movie nights or any summer gathering.
Mom’s Perfect Popcorn Recipe
Rule of thumb: Each 1/3 cup of kernels yields approximately eight cups of popped corn.
What You’ll Need:
4 tablespoons oil (choose from vegetable oil, olive oil, peanut oil, ghee or coconut oil)
2/3 cup popcorn kernels
Here’s How:
In a medium saucepan over medium heat, warm 4 tablespoons of oil. Patti’s current favorite is coconut oil for its subtle sweetness.
Add four popcorn kernels to the oil. When they pop, the oil is hot enough.
Add 2/3 cup of popcorn kernels to the pan and cover it. Here’s a clever tip: Remove the pan from the heat for one minute to ensure all kernels warm up evenly. Then, return the pan to the heat and let the popcorn cook until it’s all popped, with hardly any unpopped kernels.
DIY Gourmet Flavors for Your Popcorn Bar
Kick off the festivities with these 10 gourmet popcorn flavors that will delight everyone:
1. Ranch Delight: Melt half a stick of butter with 1 tablespoon nutritional yeast, 2 teaspoons dried dill weed, 2 teaspoons dried parsley, 2 teaspoons onion powder, 2 teaspoons garlic powder, 1 teaspoon lemon pepper and a pinch of salt.
2. Mediterranean Magic: Toss popcorn with 3 tablespoons olive oil, 1/2 cup grated Parmesan, 1 tablespoon Italian seasoning, 1 teaspoon garlic powder and 2 teaspoons kosher salt.
3. Green Goddess: Melt 6 tablespoons of butter with 1 teaspoon minced dried onion, 1 teaspoon granulated garlic and 1 tablespoon mixed dried green herbs such as parsley, chives, basil, green onion, tarragon and 2 teaspoons kosher salt.
4. Honey Mustard Pretzel Pleasure: Blend 4 tablespoons melted butter with 2 tablespoons brown deli
or Dijon mustard, 1 tablespoon honey and 1/2 teaspoon kosher salt. Drizzle over popcorn and toss with 4 cups mini pretzels.
5. Sriracha Lime Zest: Blend 4 tablespoons melted butter with 1/4 cup Sriracha, 1 tablespoon lime juice, 1 1/2 teaspoons grated lime zest and 1/2 teaspoon kosher salt. Drizzle over popcorn and toss for a zesty kick.
6. Chesapeake Bay Seafood: Melt 4 tablespoons butter with 2 teaspoons Old Bay Seasoning. Drizzle over popcorn and mix with 4 cups oyster crackers for a taste of the coast.
7. Buffalo Blue Cheese Blast: Melt 6 tablespoons butter with 1/3 cup Buffalo hot sauce. Toss with popcorn, sprinkle with 1/2 cup crumbled blue cheese and add 1/2 teaspoon celery salt for a spicy twist.
8. Tropical Escape: Melt 4 tablespoons butter with 3 tablespoons powdered sugar. Toss with hot popcorn and add a 10-ounce package of dried tropical fruit mix. Season with salt for a sweet and savory treat.
9. Cinnamon Toast Crunch: Melt 6 tablespoons butter, drizzle over popcorn. Mix together 1/3 cup sugar, 2 teaspoons cinnamon and 1 teaspoon kosher salt. Toss with popcorn and add 4 cups of your favorite cinnamon cereal for a breakfast-inspired snack.
10. S’mores Sensation: Toss popcorn with 4 tablespoons melted butter. Spread popcorn on a large parchment-covered baking sheet. Sprinkle 2 cups mini marshmallows, 2 cups crumbled graham crackers and 2 cups chocolate chips over popcorn. Bake at 300 F for 5 minutes, then toss to coat for a summer campfire favorite.
Diva Tip: Bacon Popcorn! You can pop popcorn in bacon grease? Oh, yes, you can! And it has a subtle bacony goodness that pairs beautifully with savory flavors like Cheese: sharp cheddar, Parmesan or even blue cheese. Herbs and Spices: like thyme, rosemary, or smoked paprika or garlic powder. Or Sweet Pairings: like maple syrup, brown sugar and dark chocolate.
Whether it’s a family movie night, a backyard BBQ or just a craving for something crunchy, this DIY popcorn bar offers endless possibilities for everyone to enjoy. With flavors that are easy to customize and enjoy together, let the summer snacking begin with a POP!
Photo by Jason Coblentz/Divas on a Dime
CHICAGO DOG
Start with an all-beef boiled dog in a steamed poppy seed bun. Top with green sweet-pickle relish, mustard, chopped onions, tomato slices, dill pickle spear, sport peppers and a sprinkling of celery salt.
Hot dogs are a classic concession stand food. Stock a BYOHD (build your own hot dog) bar and let your guests choose their own adventure!
Classics: Mustard (and ketchup in some circles), pickles or relish, chopped onions.
Next level: Sauerkraut, onion sauce (cooked onions in a tomato-based sauce), chili, finely chopped slaw, hot peppers.
Way wacky: Crushed pineapple, spicy mayo, tzatziki and feta cheese, cowboy caviar, crumbled bacon and shredded lettuce, buffalo sauce, queso and crushed tortilla chips.
Get on the grill
Go low and slow to unlock savory and sweet
This recipe takes a simple cut of meat to a tender, smoky masterpiece. Coated with a flavorful rub of garlic, paprika and brown sugar, the brisket slowly absorbs the rich wood smoke for a melt-in-your-mouth texture and a perfectly crispy bark. Great things take time — don’t rush it; this brisket is worth every minute.
SMOKED BRISKET
What You’ll Need:
1 (12 to 15 pounds) whole brisket
Brisket Rub:
2 tablespoons garlic powder
2 tablespoons onion powder
2 tablespoons paprika
2 tablespoons chili powder
2 tablespoons kosher salt and coarse ground black pepper
1 tablespoon brown sugar
Brisket Baste:
1 cup apple juice
1 cup apple cider vinegar
1/2 cup water
Prepare the Brisket: Mix garlic powder, onion powder, paprika, chili powder, kosher salt, pepper and brown sugar in a small
bowl. Season the brisket generously on all sides with the rub mixture. Let this sit at least 30 minutes (or up to overnight in the fridge).
Preheat Smoker: Start your smoker and set the temperature to 225 F and preheat with the lid closed for at least 10 minutes. I found the sweet spot for brisket is 225-250 F.
Smoke Brisket: Place the brisket, fat side down, on the grill grate. You’ll smoke until the internal temperature reaches 150 F (approximately 4-5 hours).
Mop or Spray to Baste:
Every 45 minutes to an hour, mop or spray the brisket with the baste.
Wrap and Continue
Smoking: At 160 F remove the brisket from the smoker. Double wrap the meat in butcher paper or aluminum foil. Return the brisket to the smoker and cook until it reaches an internal temperature of between 195 F and 205 F. (Proba-
bly three or more hours; don’t be in a hurry!)
The Moment of Truth:
The brisket is ready when the internal temperature of the thickest part of the meat reaches 200 F. The probe should slide through the meat effortlessly, with little resistance, like a hot knife through soft butter.
And Now to Rest: Once finished, remove from the smoker and let the brisket rest, wrapped, for at least an hour.
Why resting the brisket matters: Resting a brisket is non-negotiable. I recommend letting it rest for at least an hour, but if you’ve got the time, up to three hours is even better. Tuck the wrapped brisket in an old towel, stash in a cooler. It’ll stay warm and juicy, just waiting for that perfect moment to slice into.
To Serve: Slice the brisket against the grain and serve with pit master swagger! And maybe some cowboy beans and an ice-cold beer.
Photo by Jason Coblentz/Divas on a Dime
sweet pepper poppers: the adorable and delicious bite-size delights
These peppers are so versatile and so sweet, you can eat them right out of the bag. They’re delicious grilled; just rub them with oil and pop them on the grill. Word to the wise: Grill the whole bag, because they’re scrumptious hot or cold and make a simple side dish, a lovely addition to salads or a great snack.
the easiest cheesiest sweet pepper poppers
What You’ll Need:
1 1/2 pounds mini sweetpeppers (about 20 peppers)
8 ounces whipped flavored cream cheese, at room temperature
8 ounces (2 cups) cheddar cheese, shredded
Here’s How:
Some flavored whipped cream cheese options that would pair well with grilled sweet peppers include garden vegetable, jalapeño, chive & onion, and garlic & herb.
Preheat the grill to 400 F.
If you’re using a grill pan (which I highly recom-
mend), oil the grates or pan.
Prepare the peppers. Lay each one on a flat surface to see how it naturally sits without tipping over. Cut a slit in the top side of each pepper and remove the seeds using a small spoon or your fingers. Set them aside while you
whip up the cheesy filling.
In a medium bowl, beat together the cream cheese and cheddar cheese using a hand or stand mixer until it’s fluffy and well combined.
Get the filling into the peppers. Use a small spoon or, for extra precision, pipe it in using a piping bag or even a zip-
top bag with the corner snipped off. (No need to aim for perfection here — trust me, it’ll get messy. Embrace the messy.)
Place the peppers cut side up on the grill for 4 to 6 minutes, until they’re tender with nice grill marks. As they blister, the cheese inside gets all melty and gooey — pure magic!
Photo by Jason Coblentz/Divas on a Dime
turn up the heat with these irresistibly sweet grilled fruit recipes for your next bbq!
Next time you’re firing up the BBQ, why not try grilling some fruit for a deliciously unexpected treat? Grilled fruit takes on a smoky sweetness that perfectly complements savory BBQ dishes, making it a unique and easy addition to your spread. Whether you’re looking to add a sweet side or a fun dessert, grilling fruit is a simple way to elevate your cookout.
Now, let’s dive into the pièce de résistance: the Grilled Mixed Fruit Sundae. Imagine this: the aroma of caramelized banana, strawberry and pineapple wafting through the air, creamy vanilla ice cream melting in the bowl, topped with homemade caramel sauce, made boozy if you like that kind of thing. I say yes.
grilled mixed fruit sundaes
What You’ll Need:
3 tablespoons butter, melted
3 tablespoons firmly packed brown sugar, divided
4 bananas, cut in half lengthwise keeping in peel
1 fresh pineapple peeled, cored and sliced into rings, 3/4 inch thick
1 tablespoon balsamic vinegar
16 ounces fresh strawberries, tops removed
Pinch flakey salt
Vanilla ice cream for serving
Boozy caramel, optional (recipe follows)
Toasted chopped nuts and coconut strips, optional
Yield: 6 to 8 servings • Prep Time: 15 minutes
Cook Time: 10 minutes • Total Time: 25 minutes
Here’s How:
Preheat your grill to medium-low heat and wipe the grill grates with oil or spray with cooking spray. If you’re using bamboo skewers, soak them in water for at least 30 minutes before use. Alternatively, you can use a grill basket for all the fruit.
easy
Yield: 1 cup
Total Time: 5 minutes
4 tablespoons (1/2 stick) butter
1/2 cup heavy cream
1/2 cup brown sugar
1 to 2 tablespoons dark rum, bourbon, whiskey or other liquor
1/4 teaspoon vanilla extract
In a small bowl, mix warm melted butter and 2 tablespoons brown sugar until sugar dissolves. Brush this mixture onto halved bananas and pineapple rings. In another small bowl, mix balsamic vinegar with the remaining brown sugar until the sugar has dissolved.
Dip the strawberries in the balsamic and brown sugar mixture. Place the strawberries on skewers. Grill the bananas and pineapple rings for about 3 minutes on each side, or until grill marks develop. Remove them from the grill and set aside, keeping them
In a small saucepan over low heat, cook the butter, heavy cream and brown sugar, stirring occasionally, until the sugar completely melts and the sauce is a uniform caramel brown. Bring just to a boil then remove from heat. Let cool a little, then stir in the liquor of choice and vanilla. Keep warm.
warm. Then put the strawberry skewers on the grill, cooking for about 2 minutes on each side until hot and slightly tender.
To Assemble the Sundaes: Remove the peel from the bananas, roughly chop, then divide all the grilled fruit between 6 to 8 sundae
cups. To take this over the top, add a little sprinkle of salt to intensify the complex flavors of the caramelized sugars. Top each serving with a scoop of vanilla ice cream, a drizzle of boozy syrup and a sprinkle of chopped nuts and coconut, if desired.
boozy caramel sauce
Photo by Jason Coblentz/Divas
brown sugar cinnamon grilled peaches
What You’ll Need:
2 tablespoons butter, melted
1/4 cup brown sugar
1/2 teaspoon cinnamon
Pinch salt
6 to 8 peaches or nectarines
4 teaspoons oil (see note below)
Vanilla ice cream for serving (optional)
Yield: 6 to 8 servings • Prep Time: 15 minutes
Cook Time: 10 minutes • Total Time: 25 minutes
Here’s How:
If you’re serving the crumble (below), make that first and set aside. Preheat grill or grill pan to medium heat (about 375 F to 400 F). Clean and generously oil the grill.
Meanwhile, in a small bowl, melt the butter. Add the brown sugar, cinnamon and salt, and stir to combine. Set aside. Next, prepare the peaches. Halve the peaches and remove the pits. Brush the cut sides and the skins with oil. Peeling isn’t necessary because the skin will loosen during cooking, but if you want to peel them, knock yourself out.
Place peaches, cut sides down, on the grill. Cook peaches undisturbed until grill marks appear, 4 to 5 minutes. Turn the peaches over and cook until tender, 4 to 5 minutes more. Fill the well of each peach with a spoonful of the brown sugar and butter mixture.
Remove to a platter when done.
Note: Neutral-flavored oil helps stop the peaches from sticking to the grill. Use grapeseed or canola for no flavor, or olive oil or coconut oil for a hint of flavor. Coconut oil is my personal favorite.
graham cracker crumble
What You’ll Need:
3 sheets of graham crackers, cinnamon grahams are great
1/4 cup brown sugar
1/8 teaspoon ground cinnamon
Pinch salt
2 tablespoons butter, melted
1 teaspoon vanilla extract
Here’s How:
Preheat oven to 350 F.
Line an 8-inch x 8-inch pan with parchment or use cooking spray. Place graham crackers in a zip-top bag and crush into large crumbs with a rolling pin (or your stressed-out hands in need of a constructive outlet). You can finish this in either a bowl or right in the bag.
Add the brown sugar, cinnamon, salt, vanilla and melted butter. Stir or smush to combine. Place mixture into prepared pan, spreading into an even layer. Bake 8 to 10 minutes or until crisp and golden brown. Smell that? It’s all about this crumble.
Photo by
Demystifying the science of smoke for bbq season
Summer’s here, and that means it’s time to fire up the grill and enjoy some good food with friends and family. Whether you’re a seasoned BBQ pro or a beginner, let’s dive into the art of smoking meat and turn your outdoor cooking into something special.
I’ve been lucky to learn from some amazing pitmasters over the years, and today I’m sharing their tips for smoking meat like a pro.
Grilling vs. BBQ vs. Smoking:
Grilling uses high, direct heat for quick cooking, perfect for tender cuts like steaks and burgers.
Barbecuing involves slow, indirect heat and smoke, ideal for tougher cuts like ribs and pork shoulder with the lid closed. Remember, with BBQ, if you’re lookin’ you ain’t cookin’.
Smoking takes even longer, using low heat and wood smoke to infuse deep flavor into large cuts like brisket. Each method brings something unique to the table, from fast meals to flavorful slowcooked perfection.
Best Meats for Smoking:
Go for tougher cuts that need long cooking times — brisket, tritip, pork shoulder, ribs or whole chickens are all great choices. Let smoke be the star of the show. Keep it simple with seasoning: A dry brine of 1/2 teaspoon kosher salt per pound of meat is all you need.
The Wood:
Charcoal gives you heat, but wood gives you flavor. Alder is mild and works with almost everything, even fish. Apple and cherry
EXTRAS!
Grilled Fruit Pairing Ideas:
• Pineapple + Spicy BBQ Sauce = Tropical Kick
• Peaches + Honey + Cinnamon = Sweet Dessert
• Watermelon + Feta + Mint (grill it lightly) = Refreshing Summer Salad
DIY Fruit Skewers:
Create a fun fruit skewer station! Let guests build their own skewers with fruits like pineapple, strawberries and grapes. Throw them on the grill for a few minutes, and guests will have a delicious, customizable treat!
wood are sweet and pair perfectly with pork and poultry. Stronger woods like hickory, pecan, oak and mesquite bring big, bold flavor.
Don’t Over Smoke!
Most meats only need about half their cooking time in smoke. Finish cooking with heat from the coals (or pop it into a low oven if needed; I won’t tell anyone).
Soak Wood? Skip It!
Forget soaking your wood. For the best smoke, the wood needs to reach 570 F to combust, and wet wood just stalls the process. Keep that temperature steady, as fluctuations can dry out your meat. Look for that nearly invisible bluish smoke from dry hardwood for the best results.
Grill Smoking Tips:
No smoker? No worries. Create two heat zones on a charcoal grill: direct heat on one side, indirect heat on the other. Add an aluminum pan of water on the cooler side to help regulate temperature and maintain humidity. Toss wood chips or chunks onto the coals, place the meat on the indirect side, close the lid, and let the magic happen.
My Final Tip:
Cook with a thermometer, not a clock. A digital probe thermometer will save you from guessing. Just a few degrees can make the difference between juicy or dry and tender or shoe leather. Outdoor cooking with barbecue techniques doesn’t have to be complicated. With a little time and practice, everyone can do this. Start with a pork shoulder or whole chicken, and soon you’ll be the BBQ master of your neighborhood.
Grilling Safety Tip:
Always oil your grill grates to keep fruit from sticking. A paper towel dipped in oil (and held with tongs) works wonders for this!
Beverage Pairing:
Serve refreshing drinks like iced tea, lemonade or a fruity sangria alongside your BBQ. They’ll balance the smoky richness of the brisket and sweet grilled fruits perfectly.
These little extras will keep your BBQ running smoothly and add a fun, memorable touch to the day!
side burner six ways hot to go
The underutilized side car of propane grills is actually incredibly useful!
It’s great for caramelizing onions and sautéing other veggies to complement your meal. Try button mushrooms in a butter bath to serve alongside a beautifully grilled flank steak.
You can simmer a sauce. Add some nice dimension to a DIY barbecue sauce, and you’re ready to baste right at the grill!
Baked beans, you say? Yes, please. Keep side dishes hot and ready to serve while your dry rub finishes in the flames.
Get yourself a giant pot and have a seafood boil. That way, the smell of shrimp tails isn’t lingering in the kitchen long after the guests have gone home.
Melt something. Butter and herbs to brush on bruschetta, or chocolate and caramel to drizzle over grilled fruit.
Cook your corn on the cob in boiling water. When it’s done, transfer directly to the grill for a quick char, giving you an extra layer of flavor.
Going from your own backyard to another location doesn’t have to be a deal-breaker. Here are a few ways to keep hot food hot for a jaunt to the park or a potluck:
Use a cooler. Yes, really. Coolers are insulated and absolutely keep things cold when filled with ice. They also can keep hot dishes hot, especially when wrapped with foil or a towel. Pro-tip: If you have a lot coming off the grill (ribs!), a clean cooler works like a charm.
Speaking of towels, wrap a covered dish in foil and then layer with towels to help it retain as much heat as possible, if you don’t have a cooler.
You can purchase insulated bags or carriers that keep hot foods hot. If you “have casserole, will travel” often, consider purchasing a serving dish with a zip-up cover just for this purpose.
Keep sauces or sides hot in a vacuum thermos by prewarming it with hot water.
Why watermelon?
Refreshing and hydrating, this gorgeous fruit is summer’s best friend. Straight from the folks who love it best – the National Watermelon Promotion Board – here’s the skinny on how to select and store your marvelous melon.
Find the best specimen.
Check all sides. You’re looking for a creamy yellow underside, called the “ground spot.”
Lift her up!
The melon should be heavy. After all, it’s 92% water!
Give it a gentle squeeze. You want a melon that’s without bruises, cuts or dents and feels firm.
Bring it home.
Rinse with cool water and dry off with paper towels.
Store whole melons on the counter out of direct sunlight, or in the refrigerator.
If it was cold when you got it, keep it cold. Cut melon should be kept in a covered container in the fridge, and should be good for at least 3-5 days.
Fun Fact.
Watermelons have a 3-4 week shelf life after they leave the vine.