

Understand the Billing Structure
This article provides comprehensive guidance for KidKare by Minute Menu’s billing structure, processes, and how you can reconcile and dispute invoices
Last Modified on 07/10/2023 4:51 pm
Click here to download a printable PDF version of this article.
Click a link below to jump to a specific topic
Understand Invoices
Invoices are generated and sent on the first of every month for the previous month’s services Your invoice will come from orders@kidkare.com. It lists the following:
Billed Items
Description of Billed Items
Quantity of Billed Items
Applied Discounts
Total Billed Amount
Refer to your contract for specific line-item pricing and any applicable discounts
Payment Options
We offer three payment options:
Click the link in the lower-left corner of your invoice and pay with a credit card or via ACH.
Mail a physical check to our lockbox
Send an ACH payment directly to us through your banking institution. If you choose to remit payment this way, contact finance@kidkare.com for banking details
You can also pay your invoices (credit card or ACH), view past invoices, and view past payments in our Customer Portal For more information and to register, email finance@kidkare com

Note: KidKare accepts Visa, MasterCard, American Express, and Discover with an applied 3% convenience fee that will be added to your account within 1-3 business days after remitting payment.
We strongly recommend you pay your invoice online via ACH However, if you choose to pay your invoice via a physical check, please mail your check to the following address:
Minute Menu Systems, LLC
DEPT 0603 PO BOX 120603
DALLAS, TX 75312-0603
Billing Timeline
KidKare by Minute Menu bills on the calendar month, not the claim month If you enter June data in month of July, you are charged for this activity on the August 1st invoice for the July billing period
This timeline is important to remember as you review and reconcile your invoices, as Billing does include active non-claiming center fees We’ll discuss center status in greater detail under the Center Status & Billing heading, but remember that centers must meet several conditions before we consider them active for billing purposes
Billing Period vs Usage Period
Billing is split into two different periods:
Billing Period: One month prior to your invoice date
Usage Period: 60 days prior to your invoice date.
For example, for an invoice dated April 1:
The billing period is March 1 - 31.
The usage period is January - February
Center Status & Billing
KidKare by Minute Menu charges a $99 fee for active non-claiming centers We consider a center active if all of the following criteria are met:
The center was active during the billing period
The center was active at any time during the usage period
The center recorded attendance during the usage period
The center has previously submitted a claim at least once
The figure below walks through a possible billing scenario Click the image to enlarge it

Note that, in the example above, Center B was given 60 days to submit their December claim before the sponsor was charged the active non-claiming fee KidKare by Minute Menu allows 60 days for claim submission in accordance with the federal 60-day claim submission requirement.
We strongly recommend that you encourage your centers to submit a claim even if they only recorded a few days worth of attendance/meal counts This way, you still get paid and avoid the active non-claiming center fee
Implementation fees are billed under the same conditions as active center fees, except the center being billed has not previously submitted a claim at any time. This fee is charged until the center being billed submits their first claim.
Best Practices for Managing Center Status
When a center is not claiming or doesn’t plan to claim, it is important that you update their status in Minute Menu CX accordingly This means removing any sites who are not actively claiming from your system You can reactivate centers who decide to start claiming again at any time
Remove centers on or before the last day of the month For example, if you’ve been billed for a center in January and do not want to be billed for them for February, you must remove them on or prior to January 31.
Remove Centers if They Close for Several Months
If a center notifies you that they will be closed for an extended amount of time, remove them so they do not appear in your active center searches. You can reactivate the center once they resume operations.
To remove a center:
1 Click the Select Center drop-down menu at the top of the window and select the center to remove
2 Click Centers from the toolbar The Manage Center Information window opens
3 Click Remove in the bottom-left corner The Remove Center dialog box opens

4 Click the Withdrawal Date box and select the date on which to remove the center This box defaults to today’s date
5 Click the Removal Reason drop-down menu and select the reason you are removing this center If in doubt, select Other

6 Click Continue The center is removed
Once the center notifies you that they are resuming normal operations or that they are ready to claim with you again, you must reactivate them before you can process claims for them

1 Click , clear the Active and Pending boxes, and check the Removed box This filters the Select Center list to removed centers only.

2. Click the Select Center drop-down menu and select the center to remove.
3 Click Centers from the toolbar The Manage Center Information window opens
4 Click Reactivate in the bottom-left corner
5 At the Do You Want to Reactivate This Centerprompt, click Yes
6 At the Center Reactivated prompt, click OK The center can now resume claiming with you
Use Track Received Claims to Find Non-Claiming Centers
The Track Received Claims feature allows you to see which centers have submitted claims for processing for the claim month. You can print or export this information and use the resulting data to contact centers who are not claiming and take action accordingly
1 Click the Claims menu and select Track Received Claims The Track Received Claims window opens
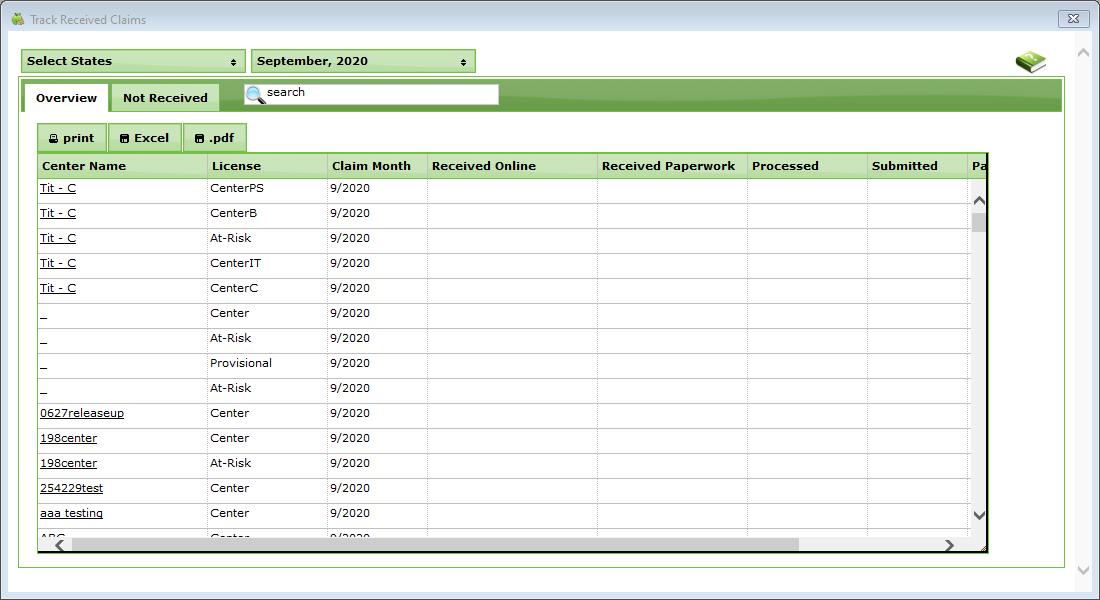
2. Click the Month drop-down menu and select the claim month(s) to view.
3 Click the Not Received tab Centers who have not submitted claims for the selected month(s) display in this tab. You can also see whether attendance was recorded, meals were recorded, and the last month in which you processed a claim for the listed centers

4. Print or export the report:
a Click Print to send the report to your printer
b. Click Excel to export an Excel file. When prompted, click Save to save the export to your computer.
c Click PDF to export to PDF When the PDF opens, click Save to save a copy to your computer
Use the Centers List Export to Find Non-Claiming Centers
You can also use the Centers List Export to generate a list of centers who did not submit claims for a selected month Review this list each month and take action accordingly This could include contacting non-claiming centers and encouraging them to submit claims, as well as removing centers who are not/will not submit claims
1. Click the Reports menu, select Centers, and click Centers List Export. The Center Filter window opens.
2 Ensure the Active box in the Status section is checked
3. Check the Claims box.
4 Select the Did Not Claim In option
5. Use the drop-down menus to select the month and year on which you need to report.

Note: You can set additional filters, as needed For example, you could run this report for a specific program type, such as ARAS.
6. Click Next. The Select Output for Export File window opens.
7 Check the Director’s Contact Info and Director’s Name boxes This ensures that you have a list of contact information for each non-claiming center.

8 Check the box next to any other information you wish to see on this report
9 Click Next The report is generated as a spreadsheet

Note: You may also consider investigating non-claiming centers further before contacting them Run attendance reports, such as the Weekly Attendance + Meal Counts report, to see if they’ve recorded attendance and/or meal counts. If your centers use KidKare, you can also view centers on this list in Observer Mode to see if data is being recorded during the claim month
Reconcile Your Bill
Use the Billing Details report in KidKare to reconcile your invoice against your data However, it is important to note that this report may not match your invoice exactly, as contracts typically cap claim fee charges at $99 for one (1) center. Keep this in mind as you review the Billing Details report.
Note: Refer to your contract for specific caps for your sites
The Billing Details report lists your monthly invoice details by site, including:
Center #: This is the number for the center for which there was a charge associated
Center Name: This is the name of the center associated with the Center ID.
Fee Type: This column lists the type of fee charged for the center This can include the following:
Claim Fee
Claiming Center Fee
Implementation Fee
Active Center Fee
Claim Month: This is the claim month associated with the displayed reimbursement If a center has claims for more than one month, the center will appear multiple times on the report (once for each claim month claim fee)
Date Processed: This displays the most recent date a claim associated with the reimbursement was processed This includes claims that were re-processed, where billing is charging for an adjustment For example, if billing is run in December, and there is a September claim that was processed in October and re-processed in November, the Billing Details report shows a Claim Month of September and a Date Processed for November.
Total Federal Reimbursement: This is the sum of the total federal reimbursement amount, including cash in lieu for the center. If this is the result of a claim adjustment, this amount displays in parenthesis.
Cash in Lieu (Lunch): This is the sum of the cash in lieu amounts for lunch for the center
Cash in Lieu (Dinner): This is the sum of the cash in lieu amounts for dinner for the center.
Billable Reimbursement: This is the total billable reimbursement for the center This is calculated by subtracting the Cash in Lieu (Lunch) and Cash in Lieu (Dinner) amounts from the Total Federal Reimbursement amount
Billing Amount: This is the total billable amount for each center.
View the Billing Details Report
As stated previously, you generate and view the Billing Details report directly from KidKare. This means you can access your data at any time from any Internet-connected device
1 Log in to app.kidkare.com Use the same credentials you use to access Minute Menu CX
2. From the menu to the left, click Billing Report. The Billing Report page opens.
3 Click and select the month for which to print the report
Note: You cannot select future months.
4. Click Go. The report is generated.
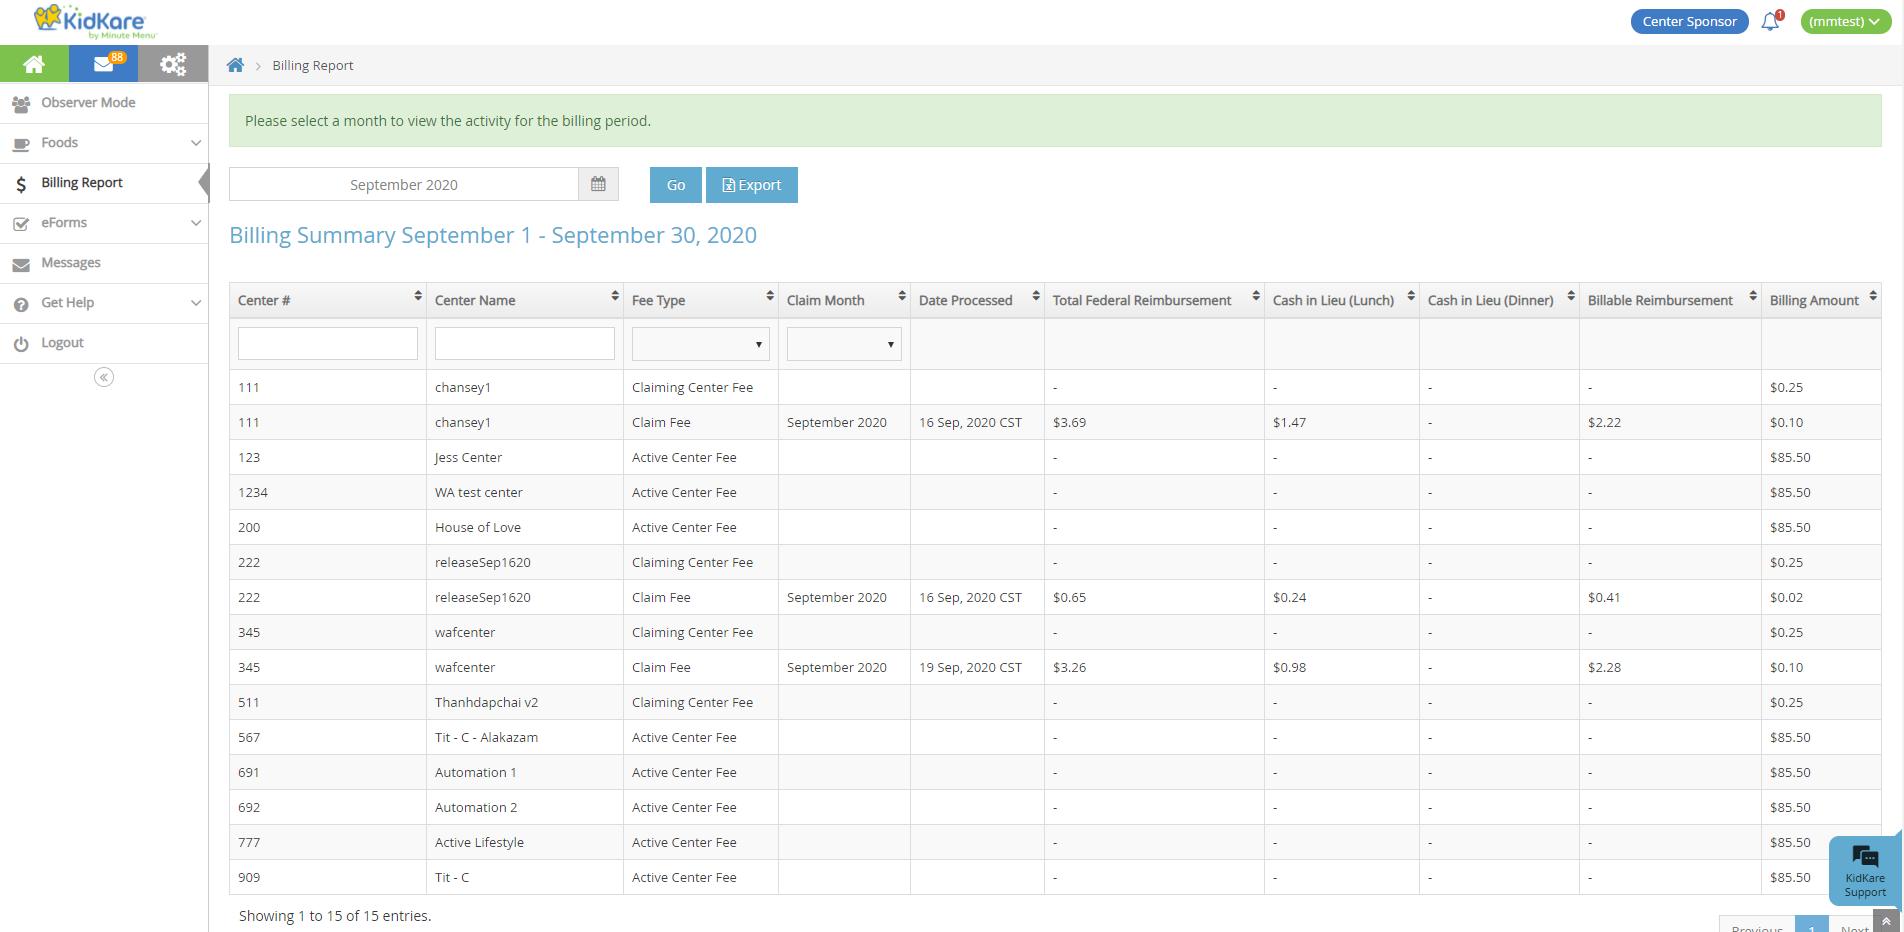
5. Click Export to export the report to a spreadsheet (XLSX) file.
Review the Billing Details Report
Once you generate and/or export the Billing Details report, compare the sites listed here to the items for which you were billed on your invoice
Remember to reference your contract for any claiming fee caps that may apply, as these likely account for claim amount differences between your invoice and the Billing Details report.
Review Fees & Investigate
There are several fees you may be charged each month, depending on site activity:
Claim Fee
Claiming Center Fee
Implementation Fee
Active Center Fee
Of these, the fees that appear to cause most concern is the Active Center Fee and the Implementation Fee To begin investigating the charges for these fees, click the Fee Type drop-down menu and select Implementation Fee and/or Active Center Fee The Billing Details report filters to display only those centers for which you were charged these fees.
Once you have a list of these centers particularly those for which you were charged the Active Center Fee use tools, such as Track Received Claims, to investigate whether these centers were billed in error
1. Click the Claims menu and select Track Received Claims. The Track Received Claims window opens.
2 Click the Month drop-down menu and select the month to view Since billing looks at the first month of the usage period when considering attendance, it may be good to filter to the first month of the usage period If
your invoice is dated April 1, this would be January
3 Click the Not Received tab Centers who have not submitted claims for the selected month(s) display in this tab
4 Review the Days of Attendance column This column indicates the number of days attendance and/or meals were recorded during the month you selected
5 The Active Fee should be accurate for a listed center if:
The Last Claim Month column contains a date, showing the center has submitted a claim at least one time previously
There is a number other than 0 in the Days of Attendance column.
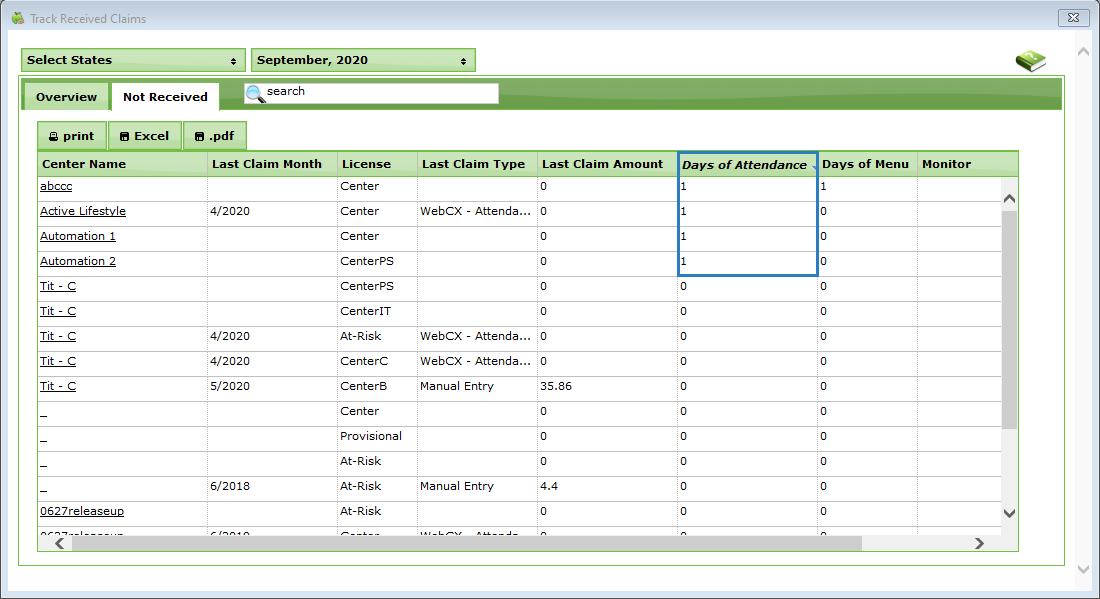
The listed center is at Active status. Check this in the Manage Center Information window, or run the Center List Export for the centers listed on the Billing Details report Be sure to include Status in the report output.
6 The Implementation Fee should be accurate for a listed center if:
The Last Claim Month column does not contains a date, showing the center has not submitted a claim previously
There is a number other than 0 in the Days of Attendance column
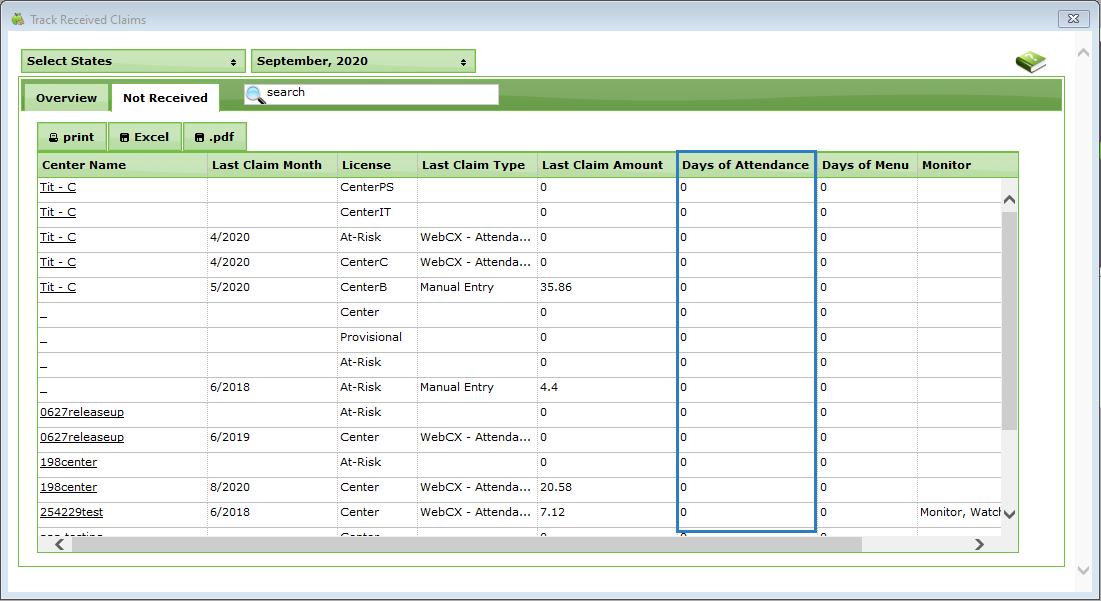
The listed center is at Active status. Check this in the Manage Center Information window, or run the Center List Export for the centers listed on the Billing Details report Be sure to include Status in the report output.
Contact the Finance Team
Direct all billing questions to the Finance team This includes any billing questions, concerns, or disputes Please do not submit a ticket for billing inquiries to our Support team You can reach the Finance team at the following email addresses:
accountsreceivable@kidkare.com finance@kidkare.com
Note: You can also contact our Administrative Accounting Specialist Jasmin Amaya at (972)-954-3868
Frequently Asked Questions
The following are frequently asked questions surrounding billing processes for Minute Menu CX. If you have a question that is not answered here, please contact finance@kidkare.com for assistance.
How do I avoid being charged the non-claiming fee going forward?
If you have active centers who are not submitting claims each month, we recommend you encourage them to submit their claims even if they are only claiming a handful of days out of the month. If they are not, contact the affected sites and determine whether they plan to actively claim in the near future. If they are not planning to do so, remove them until they are ready to resume claiming
However, remember that timing removal is important You should remove centers on or before the last day of the month as soon as you know they do not plain to claim.
Some of my sites are not going to be claiming for an extended period of time. Do I need to remove them to avoid being charged an active non-claiming fee?
Yes Remove centers as soon as they notify you that they will not be claiming for an extended amount of time Remove centers on or before the last day of the month. You can reactivate them as soon as they notify you that they are ready to begin claiming again.
I don’t know if certain centers will resume claiming, but I don’t want to completely remove them. Is there another way to handle this?
Currently, Minute Menu CX only allows you to remove or activate centers. However, you can reactivate a removed center at any time If a center advises that they are going to resume claiming, reactivate them in the month in which they plan to begin claiming again
If a center is not recording attendance, then they are not technically “active ” They are only getting the software set up. Are they expected to enroll many children, plan meals, and begin claiming in a short period of time? If they get prepared to start early, we have to pay the implementation fee as they don’t have a claim at all yet?
You are charged an Implementation Fee for centers who meet all of the following conditions:
The center was active during the billing period. This is the month prior to your invoice date.
The center was active during the usage period
The center recorded attendance during the first month of the usage period.
The center has not submitted a claim at any time
This means that a center can be at Active status, working to enroll children and get set up, and not be considered Active by billing if they have not recorded attendance during the usage period
Once the center begins recording attendance, you are charged the Implementation Fee, as that center has not submitted a claim previously However, once the center does begin claiming, you will no longer be charged the Implementation Fee, and, as long as they continue to claim, you are not charged the Active Center Fee.
KidKare by Minute Menu strives to be fair in all billing aspects If you are experiencing unforeseen circumstances and need to discuss your bill, please contact our Finance team at finance@kidkare com
View the Billing Details Report
The Billing Details report lists your monthly invoice details by site You can run this report for the current or previous months as you are billed
Note: The billing period is the month prior to your invoice date.
It lists the following:
Last Modified on 06/20/2024 2:58 pm
Center #: This is the number for the center for which there was a charge associated.
Center Name: This is the name of the center associated with the Center ID
Fee Type: This column lists the type of fee charged for the center. This can include the following:
Claim Fee
Claiming Center Fee
Implementation Fee
Active Center Fee
Claim Month: This is the claim month associated with the displayed reimbursement If a center has claims for more than one month, the center will appear multiple times on the report (once for each claim month claim fee)
Date Processed: This displays the most recent date a claim associated with the reimbursement was processed This includes claims that were re-processed, where billing is charging for an adjustment For example, if billing is run in December, and there is a September claim that was processed in October and re-processed in November, the Billing Details report shows a Claim Month of September and a Date Processed for November.
Total Federal Reimbursement: This is the sum of the total federal reimbursement amount, including cash in lieu for the center If this is the result of a claim adjustment, this amount displays in parenthesis
Cash in Lieu (Lunch): This is the sum of the cash in lieu amounts for lunch for the center
Cash in Lieu (Dinner): This is the sum of the cash in lieu amounts for dinner for the center
Billable Reimbursement: This is the total billable reimbursement for the center This is calculated by subtracting the Cash in Lieu (Lunch) and Cash in Lieu (Dinner) amounts from the Total Federal Reimbursement amount
Billing Amount: This is the total billable amount for each center

Required Permissions: Users must have the Manage Settings/Policies permission enabled for their account to access this report. For more information about setting permissions, see Create Staff Types or Create Staff Accounts.
You run this report in KidKare
1. Log in to app.kidkare.com. Use the same credentials you use to access Minute Menu CX.
2 From the menu to the left, click Billing Report The Billing Report page opens
3. Click and select the month for which to print the report. Remember, the billing period for your invoice is the month prior to the invoice date For example, if your invoice is dated June 1 2021, select May 2021 to view invoice detail for June.
Note: You cannot select future months
4 Click Go The report is generated

5. Use the blank boxes in the Center # and Center Name columns to filter to a specific site. You can also use the drop-down menus in the Fee Type and Claim Month columns to filter by fee and claim month
6. Click a column header to sort in ascending or descending order by that column.
7 Click Export to export the report to a spreadsheet (XLSX) file
Steps to Get Started
Last Modified on 05/15/2020 11:48 am
Below is a list of tasks you should complete as you get started with Minute Menu CX Click each link to view more information Each article opens in a different tab, so you do not have to leave this page
1. Install Minute Menu CX.
2 Create Staff-Member Accounts
3. Confirm Your Company Information
4 Enroll Centers and Manage Center Information
5. Enroll Children or Import from Procare
6 Plan Menus
7. Send Welcome Messages to Your Centers
For information about your basic monthly process with Minute Menu CX, see Monthly Process

Note: If your centers use Procare 10 or higher and want to import children, do not enroll children, as this could result in duplicates Please check with your centers to find out whether they need to import from Procare
Monthly Process with Minute Menu CX
Last Modified on 05/15/2020 1:53 pm
The basic monthly process with Minute Menu CX typically follows the pattern below Click each link to view more information Each article opens in a different tab, so you do not have to leave this page
1. Advance the Claim Month
2 Ensure Center Information is Correct
3. Activate Pending Children(as Signed Forms are Received)
4 Enter or Verify Center Receipts
5. Enter Site Reviews
6 Process Claims
7. Submit Claims to the State
8 Issue Payments to Your Centers
Create a Test Center
You can create a CX test account and use it to train yourself, your staff, and your center at no cost to you
Last Modified on 05/15/2020 1:58 pm
1. Click Enroll Center from the toolbar at the top of the window. The Enroll Center window opens to the General tab by default
2. Click the Center # box and enter a center number. You can enter any number that is not currently in use.
3 Click the Center Name box and give this center a name Be sure to use the word Test in the name
4. Click the Email Address box and enter your own email address.
5 Complete the remaining required fields Required fields are: State, Original Start Date, and Profit Status

6 When finished, click Next The License/Schedule tab opens
7 Complete the required fields in this tab Required fields are shown in red and may vary by state
8 When finished, click Next The Oversight tab opens
9 Click the Login box and enter a new log in ID that is easy to remember
10 Click the Password box and enter a new password

11. Click Save.
12 Click Send Welcome Letter to send a welcome letter to the email address you entered in the General tab A web page opens.
13 Click Send Email
The welcome email includes a Start-Up Guide that walks you through the center side of the account. We recommend you enroll a child in age group, plan and record meals, print menu production records, record attendance, and so on We also encourage you to share your test center account with other staff members to help them learn CX
[VIDEO] Complete Your Procare Import
Last Modified on 11/16/2020 8:58 am
Centers that use Procare 10 or higher can import children to Minute Menu CX on a one-time basis or on an on-going basis If you do not know whether your centers currently have Procare, ask them during your next site visit or phone call Do not enroll children if your center would like to import from Procare, as this can result in duplicate child records. Watch the video tutorial below or download our handout (linked below) to learn more!
Note: Click here to view and print our Procare Import handout
Before centers can import their data, you (the sponsor) must:
1. Email cxsupport@minutemenu.com and request credentials for the Procare import.
2 Provide the credentials you receive to your center
3. Obtain the center's Procare School ID number, and enter it in the following boxes in the Manage Center Information window: External ID and Alternate #
Once these steps are complete, the center can begin the import process. If centers need further instructions, link them to Procare's help article Minute Menu CX Step by Step
Use Longer Classroom Names for Procare Import
Last Modified on 11/16/2020 8:58 am
Procare now allows classroom names of up to 30 characters to be transferred to Minute Menu CX If you wish to use longer classroom names in your transfer from Procare to Minute Menu CX, you must first update classrooms in Minute Menu CX to avoid creating duplicate classrooms with children split between them.
Follow the instructions below to update your classrooms appropriately:
1 Click the Select Center drop-down menu at the top of the window and select the center to update
2. Click the Tools menu and select Manage Classrooms. The Manage Classrooms window opens.
3 Click Edit next to the classroom to update
4. Click the Short Name box and enter the updated classroom name. This name must match the classroom name in Procare exactly If this name does not match, a third classroom will be created in your listing
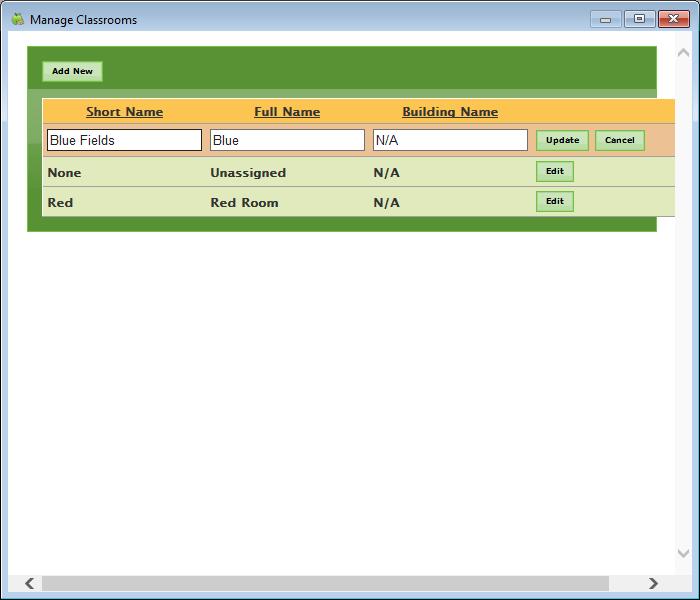
5 Click Update to save your changes
6 Repeat Steps 1-5 for each classroom in each Center Once you have updated all of your classrooms, you can import classrooms with longer names from Procare
Customize the Center Welcome Letter
Last Modified on 05/06/2021 7:36 am
You can customize the welcome letter sent to your centers when you first enroll them in your sponsorship If you are implementing your centers with KidKare instead of Minute Menu CX, you can toggle the email content to the KidKare version
Minute Menu CX Content
The Minute Menu CX Welcome Letter includes the following information:
A brief introductory message
Minute Menu installation instructions and al ink to the install file
Center admin login information
A link to the Get Started videos
A signature
KidKare Content
The KidKare Welcome Letter includes the following information:
A brief introductory message.
A link to allow the center admin to log in and set a password
A link to the Introduction to KidKare for Sponsored Centers video.
A link to the KidKare Features for Sponsored Centers PDF
A link to the KidKare Knowledge Base.
A signature
To customize the letter:
1 Log in to app.kidkare.com Use the same credentials you use to access Minute Menu CX

2 Click The Settings page opens
3 In the General Settings section, click Edit Welcome Letter Template The Welcome Letter Template pop-up opens
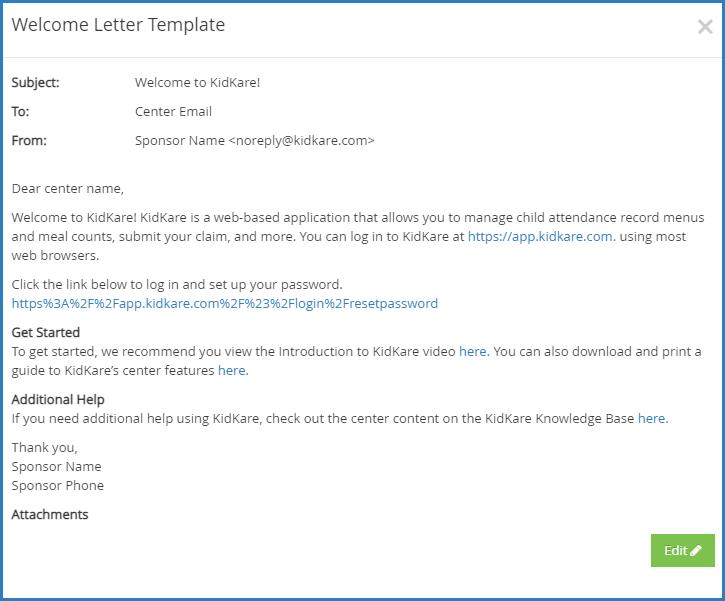
4. Click Edit.
5 Update the Subject and From boxes, as needed Variables you can use to fill-in certain information are listed at the bottom of the editor (SponsorName, CenterPhone, and so on). To add one of these variables to your text, type @ and begin typing the variable to use A list of available items displays as you type, so you can select the variable you need For example, to add the provider's name to the Subject, you would type @CenterName in the Subject box
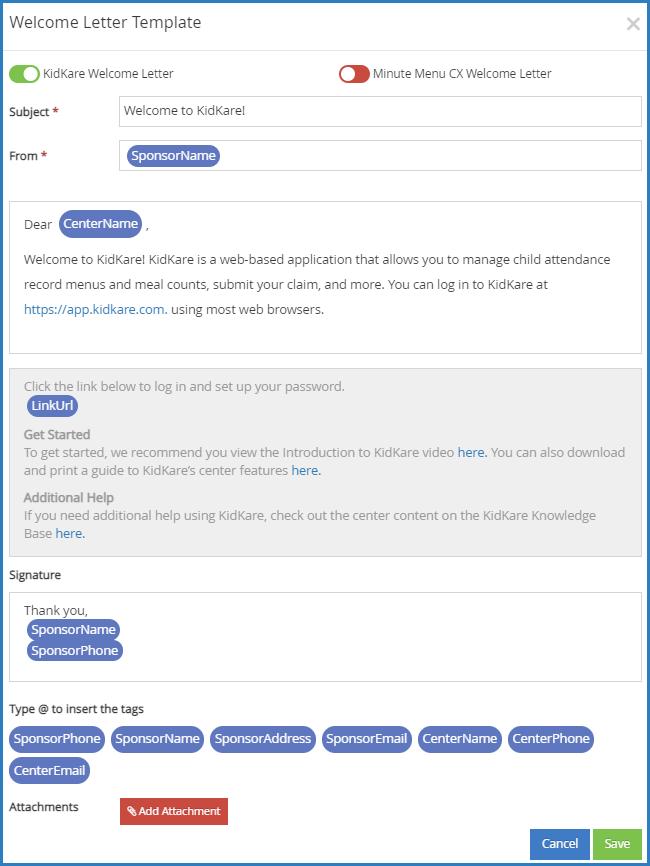


6 Specify which welcome letter you are sending: KidKare or Minute Menu CX The letter marked with is the active one To enable the other template, click Note that the slider turns green and the other letter's slider turns red You can only have one active welcome letter at a time
7 Click the first Message box and customize your messaging Just as you did in Step 5, you can use variables to complete certain information, such as the center's name
8 Click the Signature box to customize your signature
9 Click Add Attachment to add any attachments needed
10 When finished, click Save
To enroll a center:
Enroll Centers
Last Modified on 08/12/2021 8:07 am
1 Click Enroll Center from the toolbar at the top of the page The Enroll New Center window opens to the General tab
2 In the General tab:
a Click the Center # box and assign a number to the center You can enter up to four digits in this box
b Click the Center Name box and enter the center's name
c In the Center Site Info section, click the State drop-down menu and select the state in which the center resides
d In the Center Business Info section, click the Profit Status drop-down menu and select Non-Profit or For-Profit
e. In the Center Basics section, click the Original Start Date box and select the center's CACFP start date


Note: While the fields listed here are the only required fields, we recommend that you complete all other applicable fields, including the director's name and email address so you can send a welcome email through the program
3 Click Next The License/Schedule tab opens
4 In the License/Schedule tab:
a In the License Type section, click the License Type drop-down menu and select the center's license type
b Click the Program Type drop-down menu and select a program type You can choose from the following:
Adult Day Care
Child Care Center
At Risk - ARAS
Note: Only select At Risk -ARAS if the center is At-Risk ONLY If the center has both regular and At-Risk claims, select Child Care Center
OSCH - Outside School Hours Care
Head Start
Emergency/Homeless Shelter
Summer Food Program (SFSP)
c In the Capacities section, click the Max Capacity box and enter the total number of children allowed at the center
d In the Age Info section, enter the starting and ending ages of the children who can be claimed The Ending Age box defaults to 13 years This means that children can be claimed when they are 12, but not once they hit 13 (unless they are specifically marked as special needs)
e In the Regular Meals section, check the box next to each meal for which the center is approved
f If this is an At-Risk/SFSP center:
i Check the At-Risk SFSP box
ii. Click the At-Risk/SFSP # box and enter the At-Risk or SFSP program number.
iii Check the box next to each meal that is approved for At-Risk or SFSP

Notes: If a site does both ARAS and SFSP, enroll them as two separate sites For sites that do ARAS and have a regular claim, selecting meals here allows them to claim At-Risk meals.
g In the Meal Schedule section, enter a starting and ending time for each meal You can type a single digit and press Tab Minute Menu CX automatically formats the time for you
h Complete the remaining applicable information in this tab

5 Click Next The Oversight tab opens
6. In the Oversight tab:
a In the Directions to Sitesection, enter any directions ad notes on getting to the center These directions are available when leaving for site visits.
b In the Center Admin Info section, click the Administration Type drop-down menu and choose from the following:
Legally Separated from Sponsor: Select this option if you are a sponsoring organization
Legally Affiliated with Sponsor: Select this option if you are self-sponsored organization, such as a child care chain that does not disperse payment
c. In the Center Login Info section, you can update the center's log in ID and password to something easier, or you can accept the system-generated one Click Send Welcome Letter to send a welcome email containing this login information to the center
d In the Site Monitoring Info section, click the Monitor drop-down menu and assign a monitor to this system If this menu is empty, add monitors in the Manage Sponsor User window For more information, see Create Staff Accounts
e Check the Pay Via Direct Deposit box to use Minute Menu CX to issue direct deposits to the center (Minute Menu CX creates the ACH file, which you then upload to your bank's website) If you select this option, you must select a bank account type, enter the bank account number, and the bank routing number
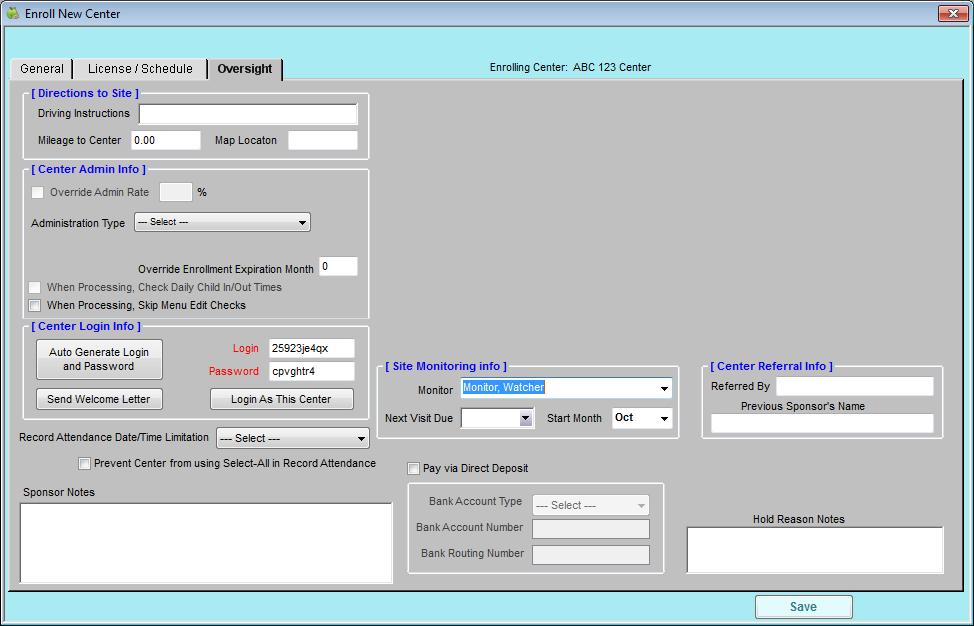
7 When finished, click Save
Set Up Head Start Centers
Last Modified on 05/15/2020 2:11 pm
Your Head Start centers require specific set up parameters in Minute Menu CX This article outlines a few of the differences between these locations and other center programs, as well as how you handle said differences in Minute Menu CX
Enrolling Head Start Centers
1 Click Enroll Center from the toolbar at the top of the page The Enroll New Center window opens to the General tab
2 Begin setting the center up as you normally would For details, see Enroll Centers
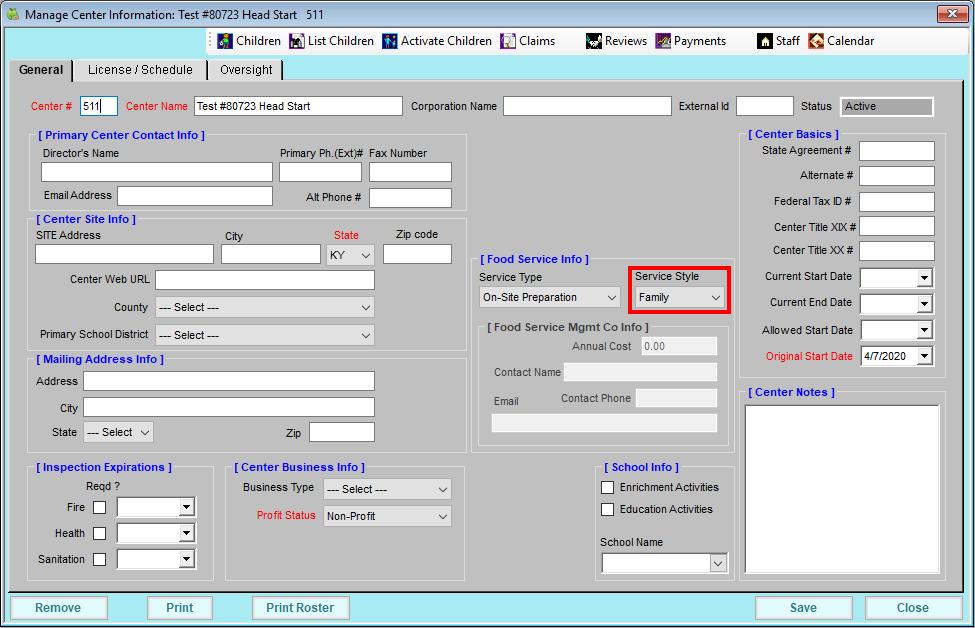
3 In the General tab, Set the Service Style drop-down menu to Family
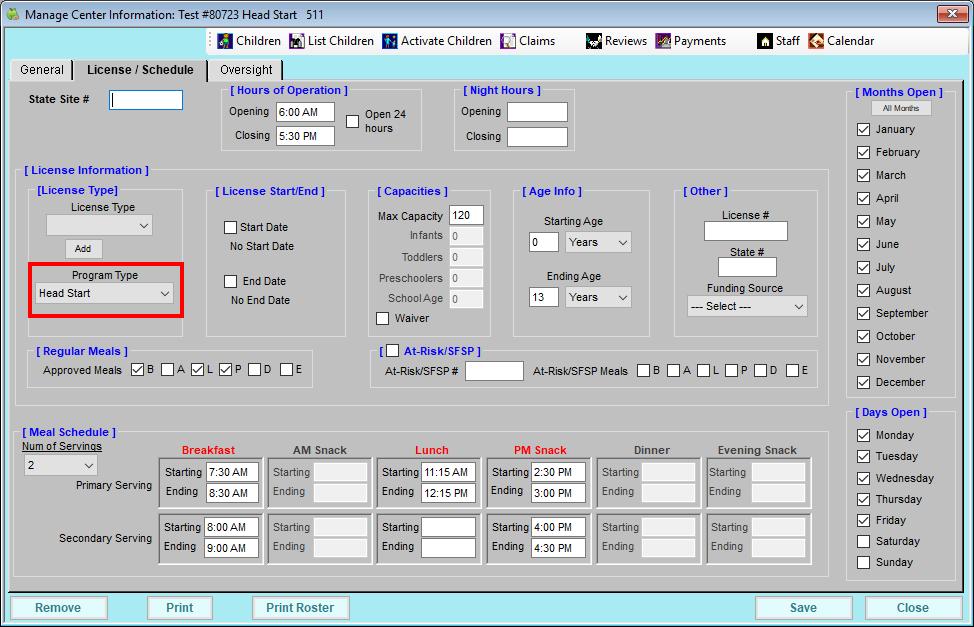
4. In the License/Schedule tab, click the Program Type drop-down menu and select Head Start.
5 Finish enrolling the center as you usually would
Enrolling Children in Head Start Centers
All children enrolled at a Head Start center are reimbursed at the Free rate If you use eForms, children should default to Free based on the income information their parents provide once you approve and renew their forms.
If you are manually enrolling children for a Head Start center, set the Reimbursement Level drop-down menu in the Manage Child Information Oversight tab to Free and provide the supporting income information from the paper income eligibility form

Note that children enrolled in Head Start programs may also have varied schedules This could be morning attendance two days and afternoon attendance three days, or some children may only be present for a few months of the year You can use the Child and Attendance reports to track attendance for these children
Foods & Menus for Head Start Centers
While Head Start sites are subject to the rules of the CACFP, some sites may serve specialty foods or fresher foods than is typical You can customize your food list, categories, and rules to accommodate the variations in foods offered. Determine what works best for your business and your sites.
Include Child Nutrition (CN) Label Numbers in Food Names
When adding foods to your food list, you can include the CN label number somewhere in the food name. This lets the State and your sites know that the food is a CN-labeled product being offered at meal service The CN label details should be stored on-location For more information, see Add CN Label Numbers to Foods
Create Custom Food Categories
Create custom categories to track specific food types For example, you could create a Whole Grains category to which you assign whole grain-rich foods. Your sites can then quickly find these foods when recording daily menus. You can also filter your food list and the food list export by these custom categories to easily manage your food list and track any specialty food items For information about creating custom food categories, see Food Categories
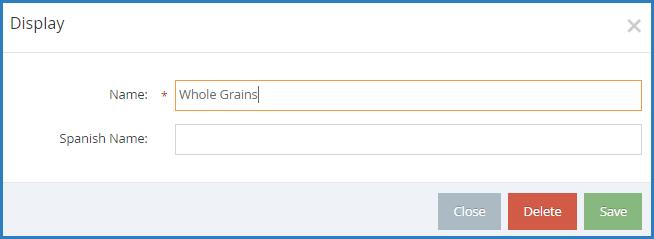
Note that these custom categories still exist under the broader meal component categories they do not supersede them. For example, a site would see the Whole Grain category when selecting a Bread/Alternate. When adding a food in KidKare, this is the Food Type you select

Create Food Rules
Food rules allow you to control what foods your sites can serve. There are two types of food rules:
Food Frequency Rules: These rules control how often a food can be served in a day, week, or month For example, this type of food could be useful for limiting high-calorie and high-fat foods, such as nut butters
Food Combination Rules: These rules dictate what foods cannot be served together You can also set a food combination rule that prevents any food included in the rule from being served For example, you can set up a rule that prevents two starchy foods from being served at one meal
When you create a food rule, you can also specify how it is handled during claims processing. You can apply the rule by child or by meal and determine whether the meal/child is warned or disallowed. For more information about setting up food rules, see Food Rules


Center Welcome Letter
Last Modified on 05/06/2021 7:42 am
Use Minute Menu CX to send welcome messages to centers Depending on whether you are implementing your centers with Minute Menu CX or KidKare, this welcome message will either include installation and login information for Minute Menu CX or login information and help content for KidKare To select the letter to send and customize the content, see Customize the Center Welcome Letter.
To send a welcome message:
1 Click the Select Center drop-down menu at the top of the window and select the center
2. Click Centers from the toolbar. The Manage Center Information window opens.
3 Verify that the director's email address in the General tab is correct This is the email that receives the welcome letter.

4 Click the Oversight tab
5. Click Send Welcome Letter.
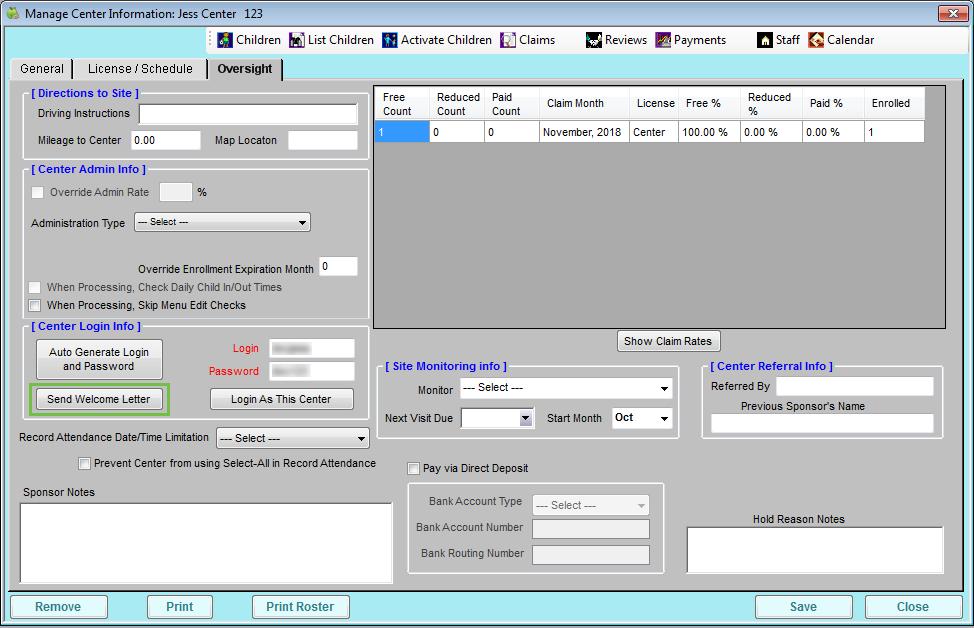
6 A web page opens in your default browser and displays the email Edit the text, as needed
7 When finished, click Send Email
View & Update Center Information
To access the Manage Center Information window:
Last Modified on 05/15/2020 3:00 pm
1 Click the Select Center drop-down menu at the top of the window and select the center to view
2 Click Centers from the toolbar
3 The Manage Center Information window opens This window is divided into three tabs: General License/Schedule Oversight
4 Review the information in each tab and ensure that it is correct for the claim month on which you are working.
5 Click Save to save any changes
Update Center Email Addresses
To ensure the highest security possible, we strongly recommend that each of your centers have their own, unique email address tied to their account This article provides steps you can take to audit for duplicate and blank email addresses in Minute Menu CX, so you can update center records accordingly
Locate Centers with Duplicate Email Addresses
Duplicate email addresses used across multiple center accounts has the potential to be a security risk To ensure that all data has the best protection possible, each of your centers must have their own, unique email address. You can use the Center List Export file and Excel to quickly locate duplicate email addresses in your system Since contact information is included, this report becomes a convenient call list

Note: If your centers need assistance setting up an email address, we have provided resources and step-bystep instructions in the Create Free Email Addresses article.
1. First, generate the report.
a Click the Reports menu, select Centers, and click Center List Export The Center Filter window opens.
b Accept the default Status filter (Active) and click Next The Select Output for Export File window opens.
c Check the Director's Contact Info and Director's Name boxes
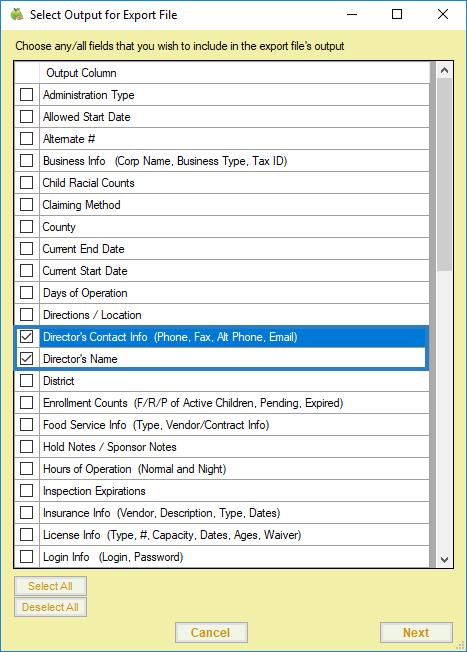
d Click Next The report is generated and opens in your spreadsheet program
e. Save the report to your computer.
2 In Excel, highlight duplicate email addresses:
a Select the Email column

b. From the Home tab, click Conditional Formatting, Highlight Cells Rules, and select Duplicate Values
c. Click OK at the prompt. Any duplicate email addresses are highlighted.
3 Filter the spreadsheet to show only the duplicate emails
a. Click the first row of the Email column.
b Click Sort & Filter in the top-right corner of the Home tab and select Filter The first row of each column in the spreadsheet is now a drop-down menu you can use to filter
c Click the Email drop-down menu, select Filter by Color, and click the color that matches the highlighted cells

d. The spreadsheet should now only show duplicated email addresses. Since the center name and center numbers are included, you can easily determine what sites need to be updated
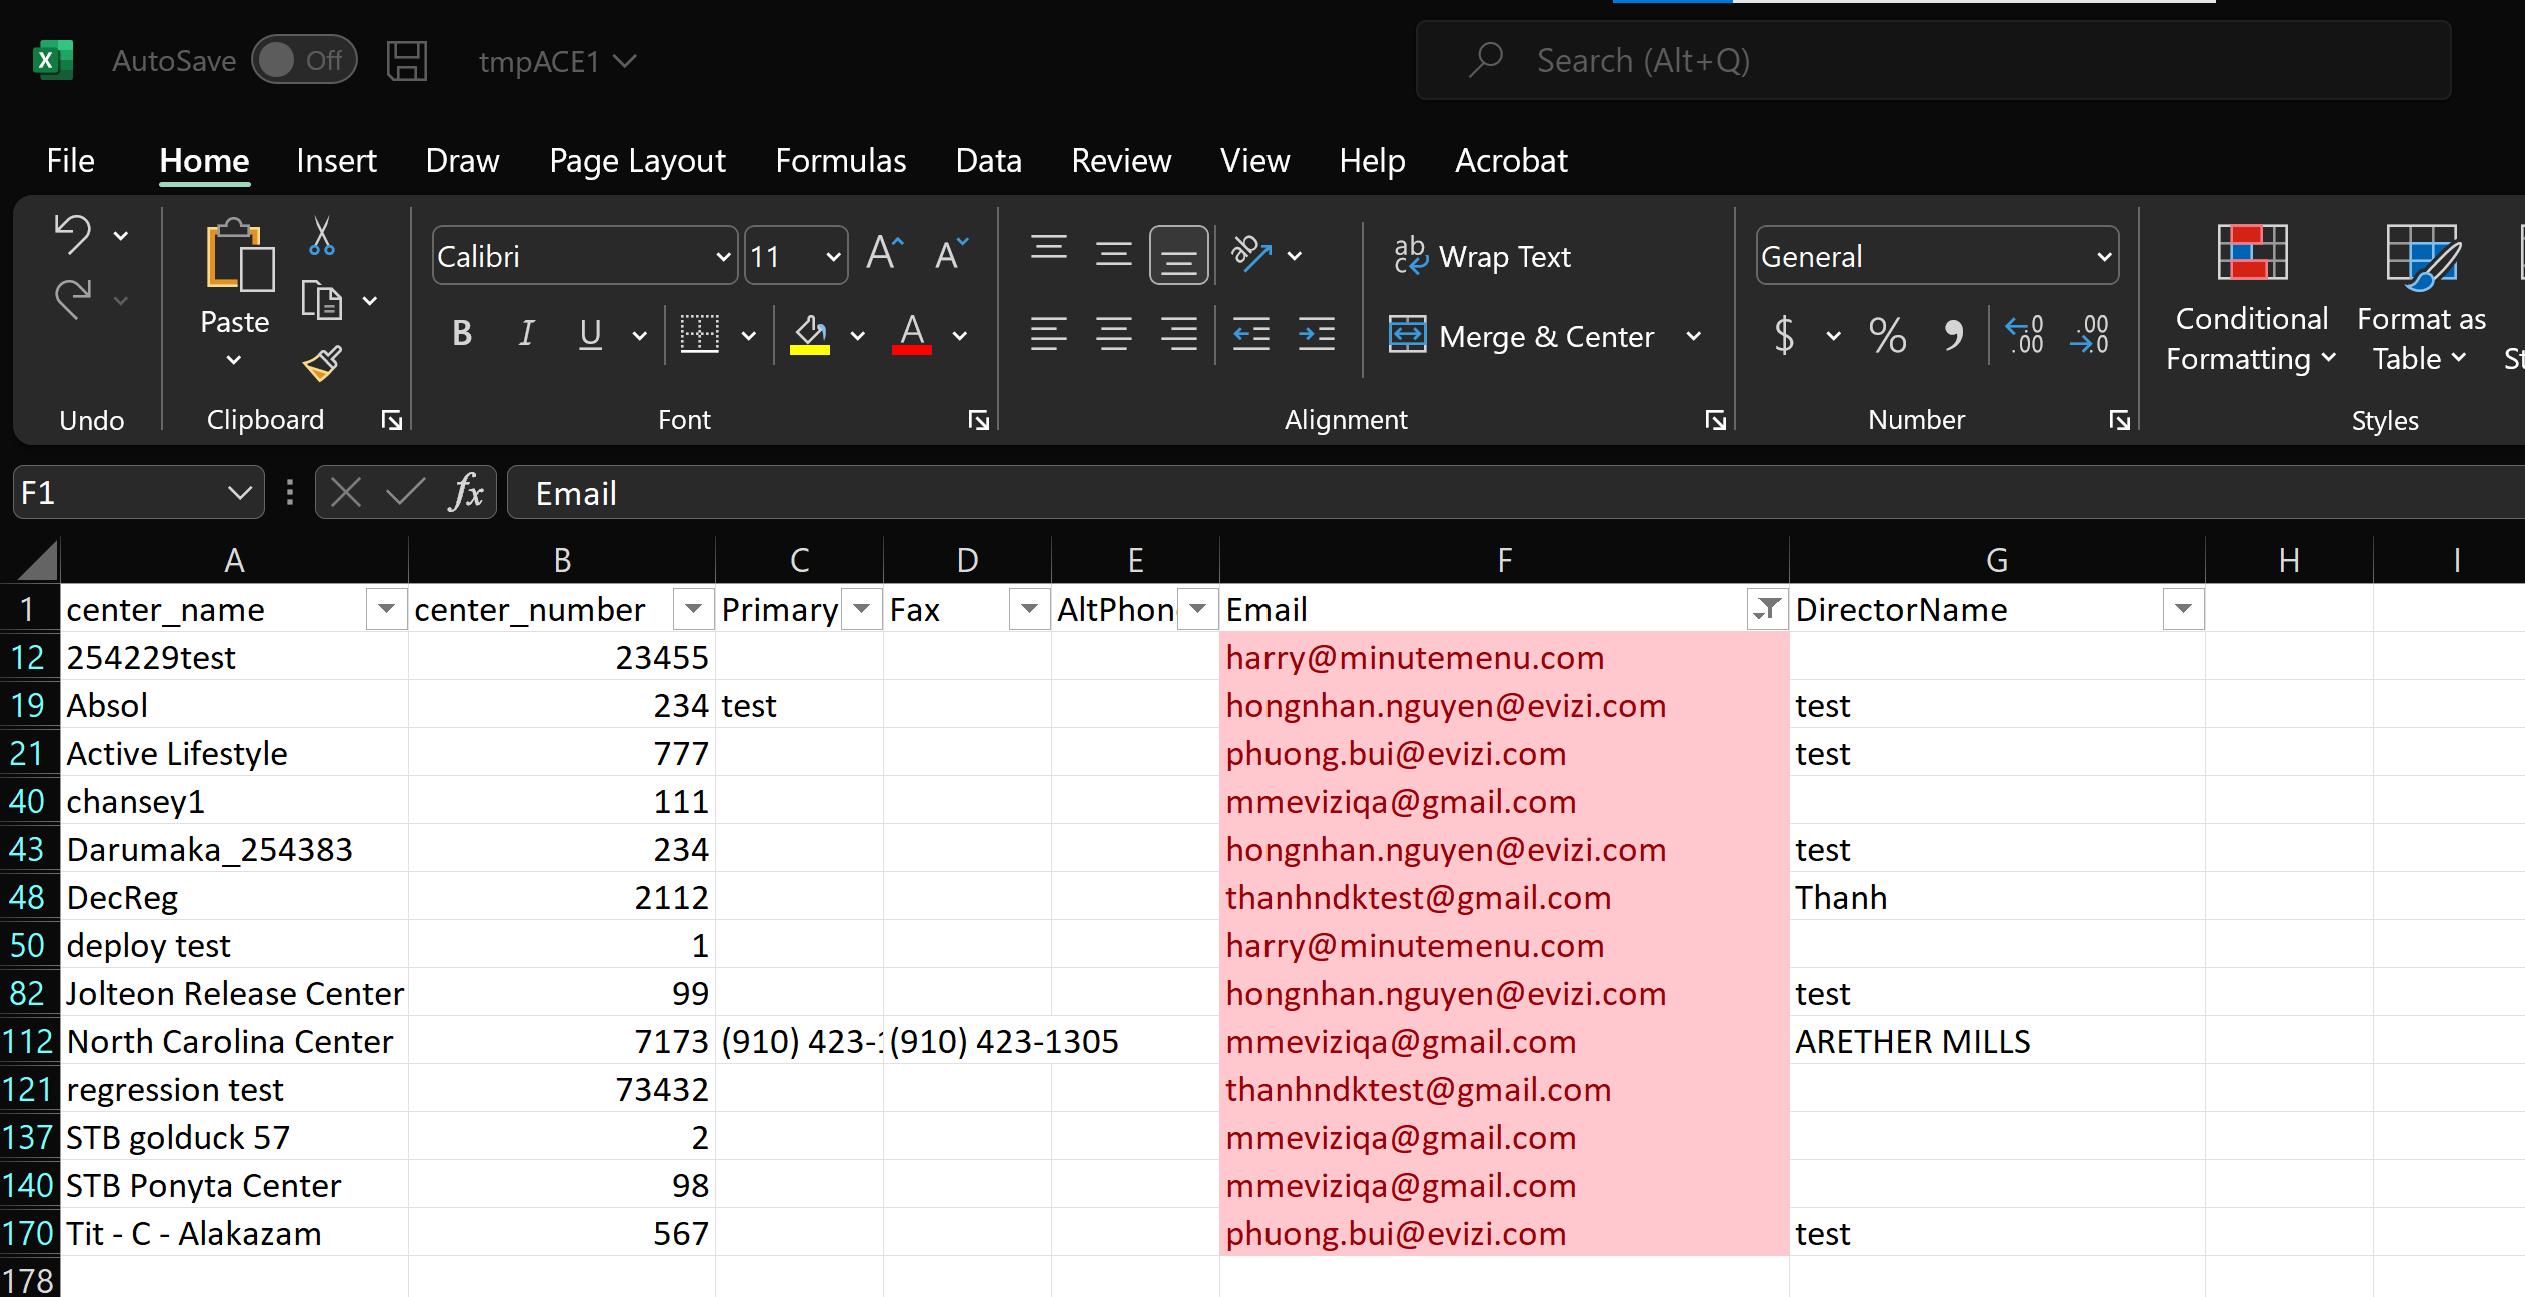
4 Update center email addresses in the Center Information General tab to ensure that each center has its own, unique email address.
Return to Top
Locate Centers with Blank Email Addresses
Not only does email provide a convenient way for sponsors to contact their sites, it ensures that centers can self-serve in the event they forget their user name or password Use the Center List Export file to generate a report you can then filter to show those centers for which you do not have an email address. Since contact
information is included, this report becomes a convenient call list

Note: If your centers need assistance setting up an email address, we have provided resources and step-bystep instructions in the Create Free Email Addresses article.
1. First, generate the report.
a Click the Reports menu, select Centers, and click Center List Export The Center Filter window opens.
b Accept the default Status filter (Active) and click Next The Select Output for Export File window opens.
c Check the Director's Contact Info and Director's Name boxes

d Click Next The report is generated and opens in your spreadsheet program
e Save the report to your computer
2 Filter the resulting spreadsheet to show blank email addresses only Note that these instructions are Excelspecific
a Click the first row of the Email column
b Click Sort & Filter in the top-right corner of the Home tab and select Filter The first row of each column in the spreadsheet is now a drop-down menu you can use to filter
c Click the Email drop-down menu and clear the Select All box
d Scroll to the bottom of the list and check the Blanks box

e Click OK You now have a list of sites with missing email addresses, as well as their director's phone number and name.

3 Contact the sites on your list for their email addresses and add their email addresses to the Center Information General tab
Return to Top
Manage the Same-Day Entry Requirement
Last Modified on 09/14/2020 11:41 am
You can control whether centers must record attendance data in on a daily basis This setting affects sites on a case-by-case basis, and you can enable/disable it at any time
Enable the Same-Day Entry Requirement
When enrolling or updating centers in CX, you can specify whether that center must enter attendance data on a daily basis. This setting is found in the Manage Center Information Oversight tab.
1 Click the Select Center drop-down menu at the top of the window and select the center to update
2 Click Centers from the toolbar The Manage Center Information window opens
3 Click the Oversight tab
4 Click the Record Attendance Day/Time Limitation drop-down menu and select By End of Day
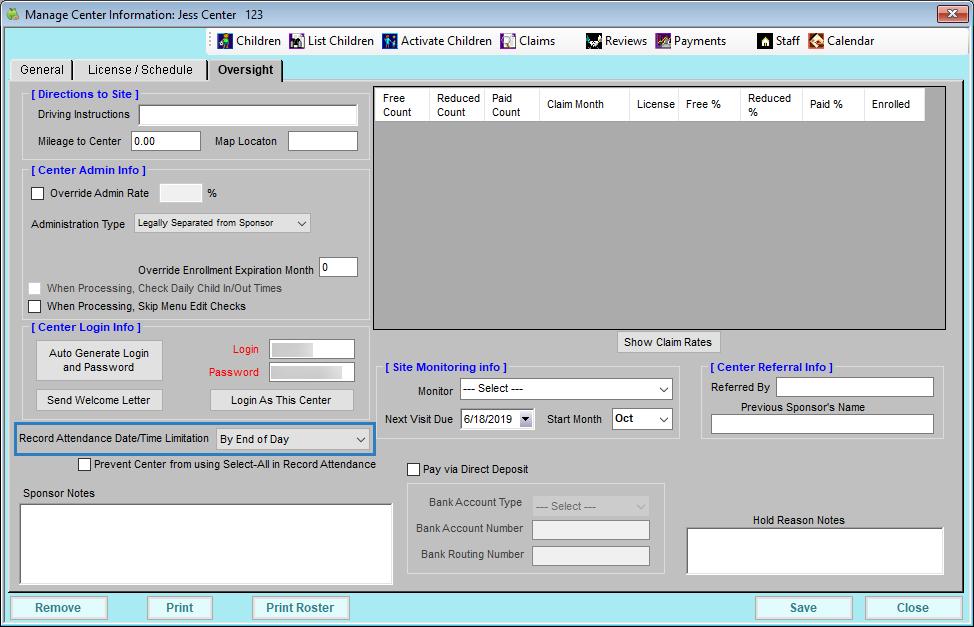
5. Click Save.
6 Repeat Steps 1-5 for each center to update
Disable the Same-Day Entry Requirement
At some times you may need to disable same-day entry requirement for certain centers For example, if KidKare by Minute Menu announces an extended maintenance window that may affect same-day entry, you may wish to temporarily remove this requirement.
1 Click the Select Center drop-down menu at the top of the window and select the center to update
2 Click Centers from the toolbar The Manage Center Information window opens
3 Click the Oversight tab
4 Click the Record Attendance Day/Time Limitation drop-down menu and select None or During Meal Service Times
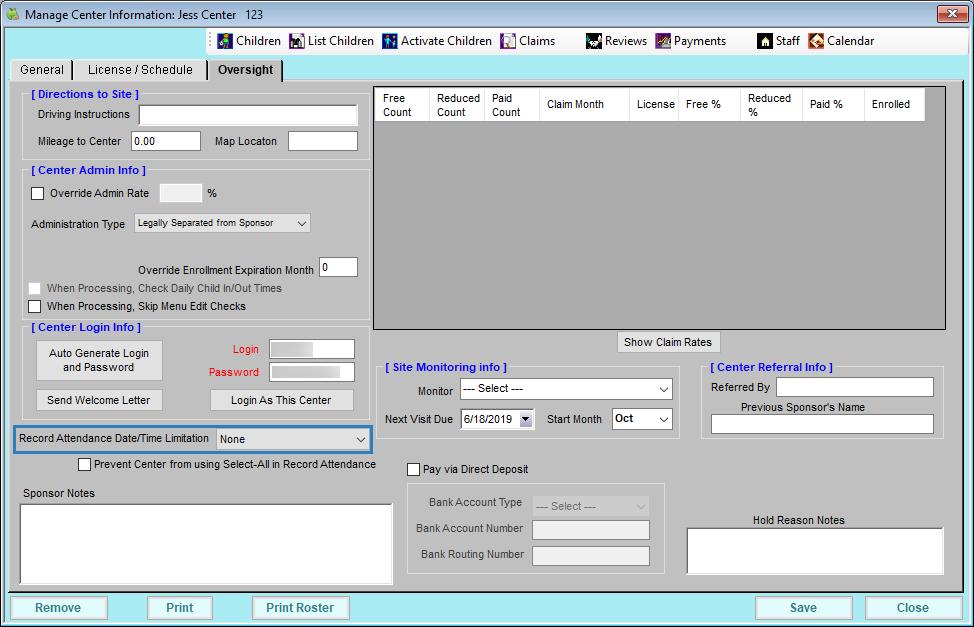

Note: You could also set this to By End of Week. However, if you are updating this setting to accommodate system maintenance that occurs at the end of the week, we recommend you select None or During Meal Service Times.
5. Click Save.
6 Repeat Steps 1-5 for each center to update
Require Centers to Certify Attendance Records
Last Modified on 02/08/2021 2:30 pm CST
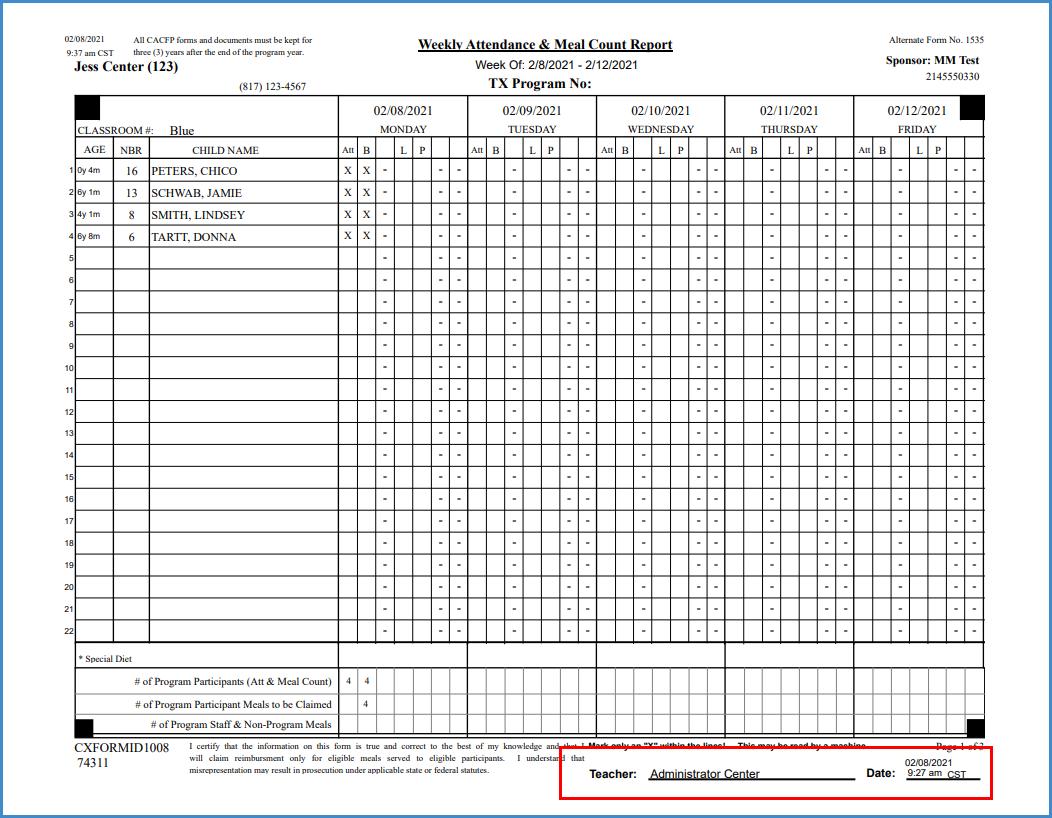
Some states require attendance records to be certified and signed by center staff You can toggle this requirement on for your centers in KidKare When you enable this requirement, your centers will be prompted to acknowledge and sign their attendance records upon saving attendance in KidKare The electronic signature will appear at the bottom of the Weekly + Attendance Report and consist of the teacher name (first and last) of the last record where the user certified attendance for the classroom for the day, as well as the date and time of the last certification for the classroom for the day

Note: This setting affects KidKare only. The process for recording attendance and meal counts in Minute Menu CX will not change.
To enable this requirement:
1. Log in to app.kidkare.com. Use the same credentials you use to access Minute Menu CX.

2 Click The Settings page opens

3 In the General Settings section, click next to Would you like to require center staff to certify the accuracy of attendance when saving Attendance & Meal Counts in KidKare. Your changes are saved automatically

When your centers record attendance and meal counts in KidKare and click Save, the following pop-up displays:

The electronic signature will appear at the bottom of the Weekly + Attendance Report, as shown below
Centers CACFP Participation Statistics
Last Modified on 05/28/2020 10:56 am
You can use several reports in Minute Menu CX to retrieve the number of centers and children served by the CACFP program under your sponsorship You can also pull the number of meals served over a defined period of time, such as last calendar year, current fiscal year, and so on
Number of Centers: Active or Removed Status
1 Click the Reports menu, select Centers, and click Center List Export File The Center Filter window opens
2 Set the following filters:
Status: Check the Active and Removed boxes
Original Start Date: Check the Before box, and select the day after the last day of the reporting period For example, if you are looking at statistics for last year, you would select January 1 of the current year

3. Click Next. The Select Output for Export File dialog box opens.
4 Check the box next to each output option to include in the file We recommend you check the Original Start Date, Removal Info, and Status boxes. These will help you ensure your filters are working properly.
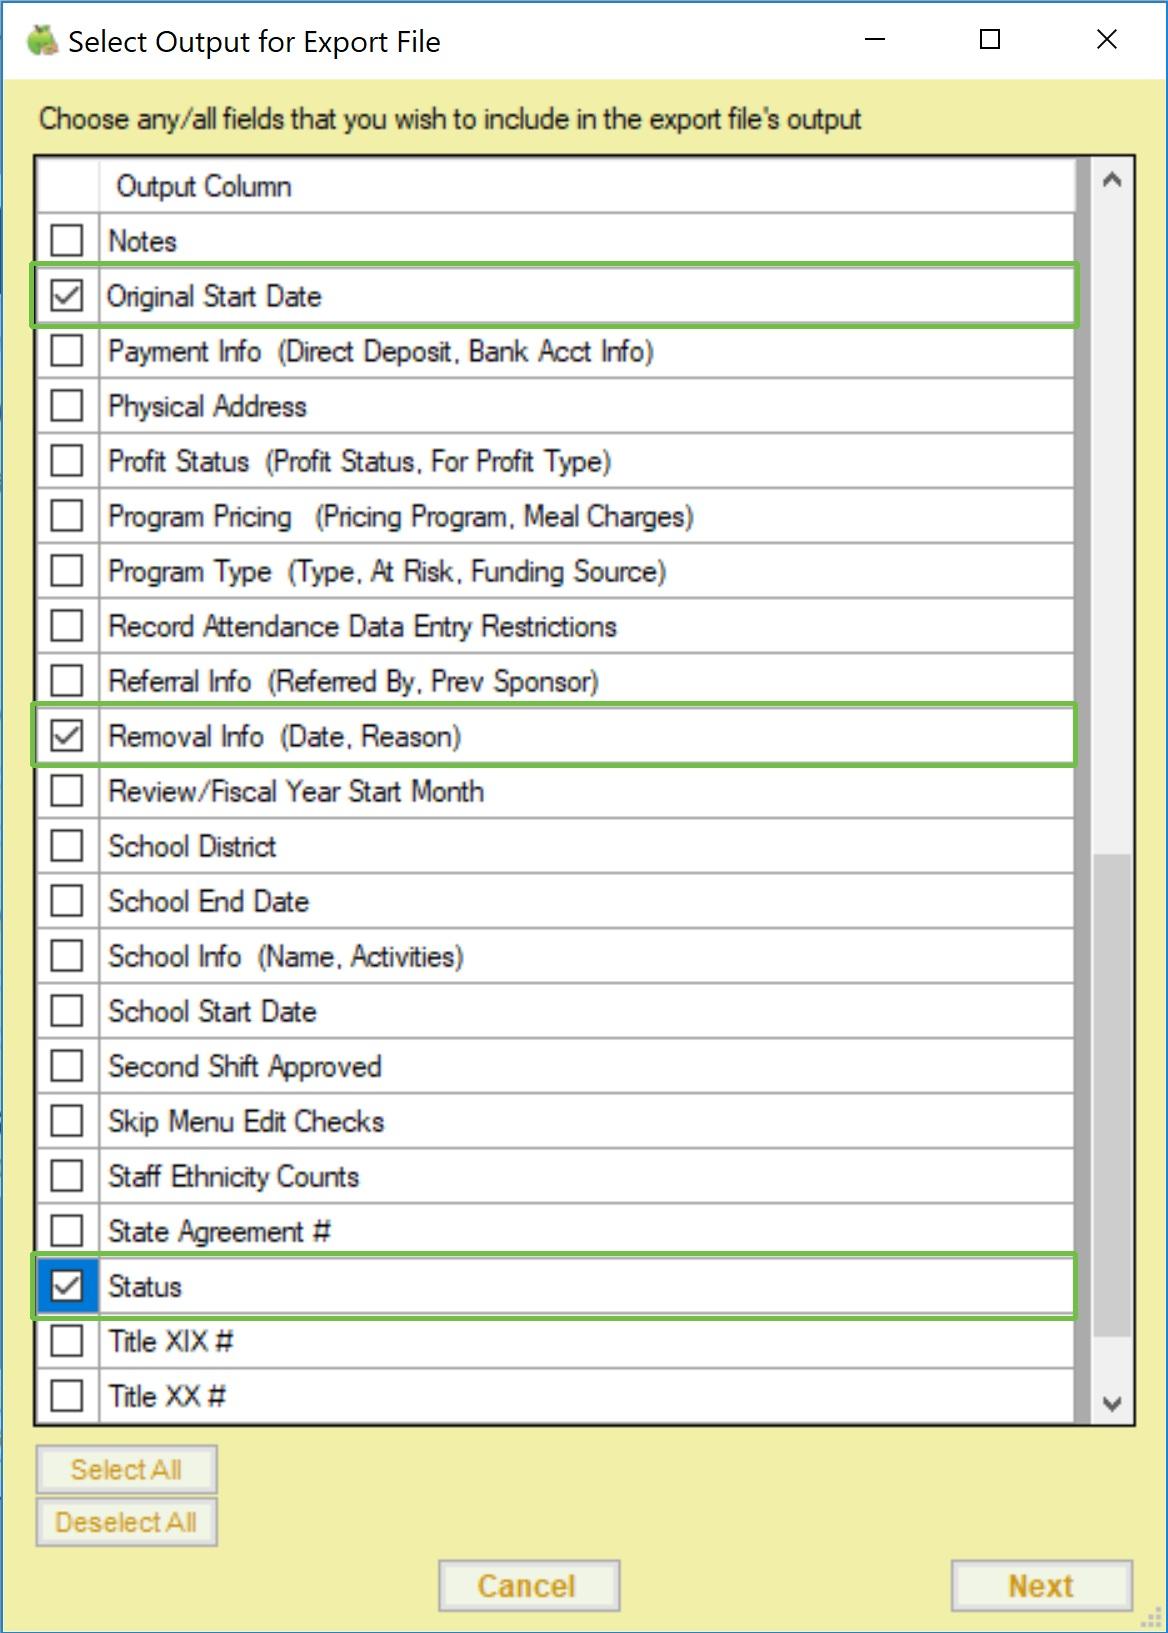
5 When finished, click Next The file is generated and opens in your default spreadsheet program
6. Delete any centers removed prior to the reporting period from the spreadsheet. For example, if you're reporting for calendar year 2019, delete centers with a removal date prior to 1/1/2019 Sort by the Status column to make this process easier. The remaining centers should be those who were active during your reporting period
Number of Children: Enrolled, Pending, Withdrawn
1 Click the Reports menu, select Children, and click Child List Export The Center Filter window opens
2. Set the following filters:
Status: Check the Active and Removed boxes
Original Start Date: Check the Before box, and select the day after the last day of the reporting period For example, if you are looking at statistics for last year, you would select January 1 of the current year
3 Click Next The Child Export Filter window opens
4 Set the following filters:
Status: Check the Active, Pending, and Withdrawn boxes
Withdrawn Date: Check the After box and enter the day before the first day of the reporting period
Then, check the Before box and enter the last day of the reporting period For example, if you are reporting for 2018, you would select December 31, 2017 for the After date, and January 1, 2019 for the Before date

5 Click Next The Select Output for Export File dialog box opens
6. Check the box next to each output option to include in the file. We recommend that you check the Current Enrollment Date, Enrollment Expiration Date, Original Enrollment Date, Status, and Withdrawal Date boxes These will help you ensure your filters are working properly.
7 When finished, click Next The file is generated and opens in your default spreadsheet program
8. Sort the spreadsheet by the Current Enrollment Date column, and verify that any children enrolled in 2019 were also there in 2018 (reference the Original Enrollment Date column) If they were note, remove them from the list.
Re-enrollment may skew some of the numbers, because the Current Enrollment Date is updated when reenrollment is completed So, if you have completed re-enrollment between the date these reports are generated and the reporting period, you cannot accurate determine which children have come on to the program at the end of the program, because the Child List Export File filter does not include a setting to look at the Original Enrollment Form Date
For example, if you are looking at January - December of last year, and you re-enroll children as of July 1st, you should run these reports for last year before July. Once you re-enroll children in July, the Current Enrollment Date will have changed for everyone, it it will no longer be possible to limit the export file to remove children who are
new to the program since the end of December However, you can include the Original Enrollment Form Date as an output option for the file, sort the resulting spreadsheet by that column, and delete children whose date places them outside of the reporting period you want
Number of Meals
1. Click the Reports menu, select Claims, and click Claim List Export. The Center Filter window opens.
2 Set the following filters:
Status: Check the Active and Removed boxes.
Original Start Date: Check the Before box, and select the day after the last day of the reporting period. For example, if you are looking at statistics for last year, you would select January 1 of the current year
3. Click Next. The Claim Export Filter window opens.
4 Check the Claim Date box Then, set the Starting Month to the first month of your reporting period, and set the Ending Month to the last month of your reporting period.

5. Click Next. The Select Output for Export File dialog box opens.
6 Check the Meal Counts box You can select any additional output options, as needed
7. When finished, click Next. The file is generated and opens in your default spreadsheet program.
Observe Centers in KidKare
When you log in to KidKare in Observer Mode, you can view center accounts, print reports, and more
Last Modified on 05/12/2022 1:14 pm
1. Log in to app.kidkare.com with the same ID and password you use to access Minute Menu CX. A list of your centers displays
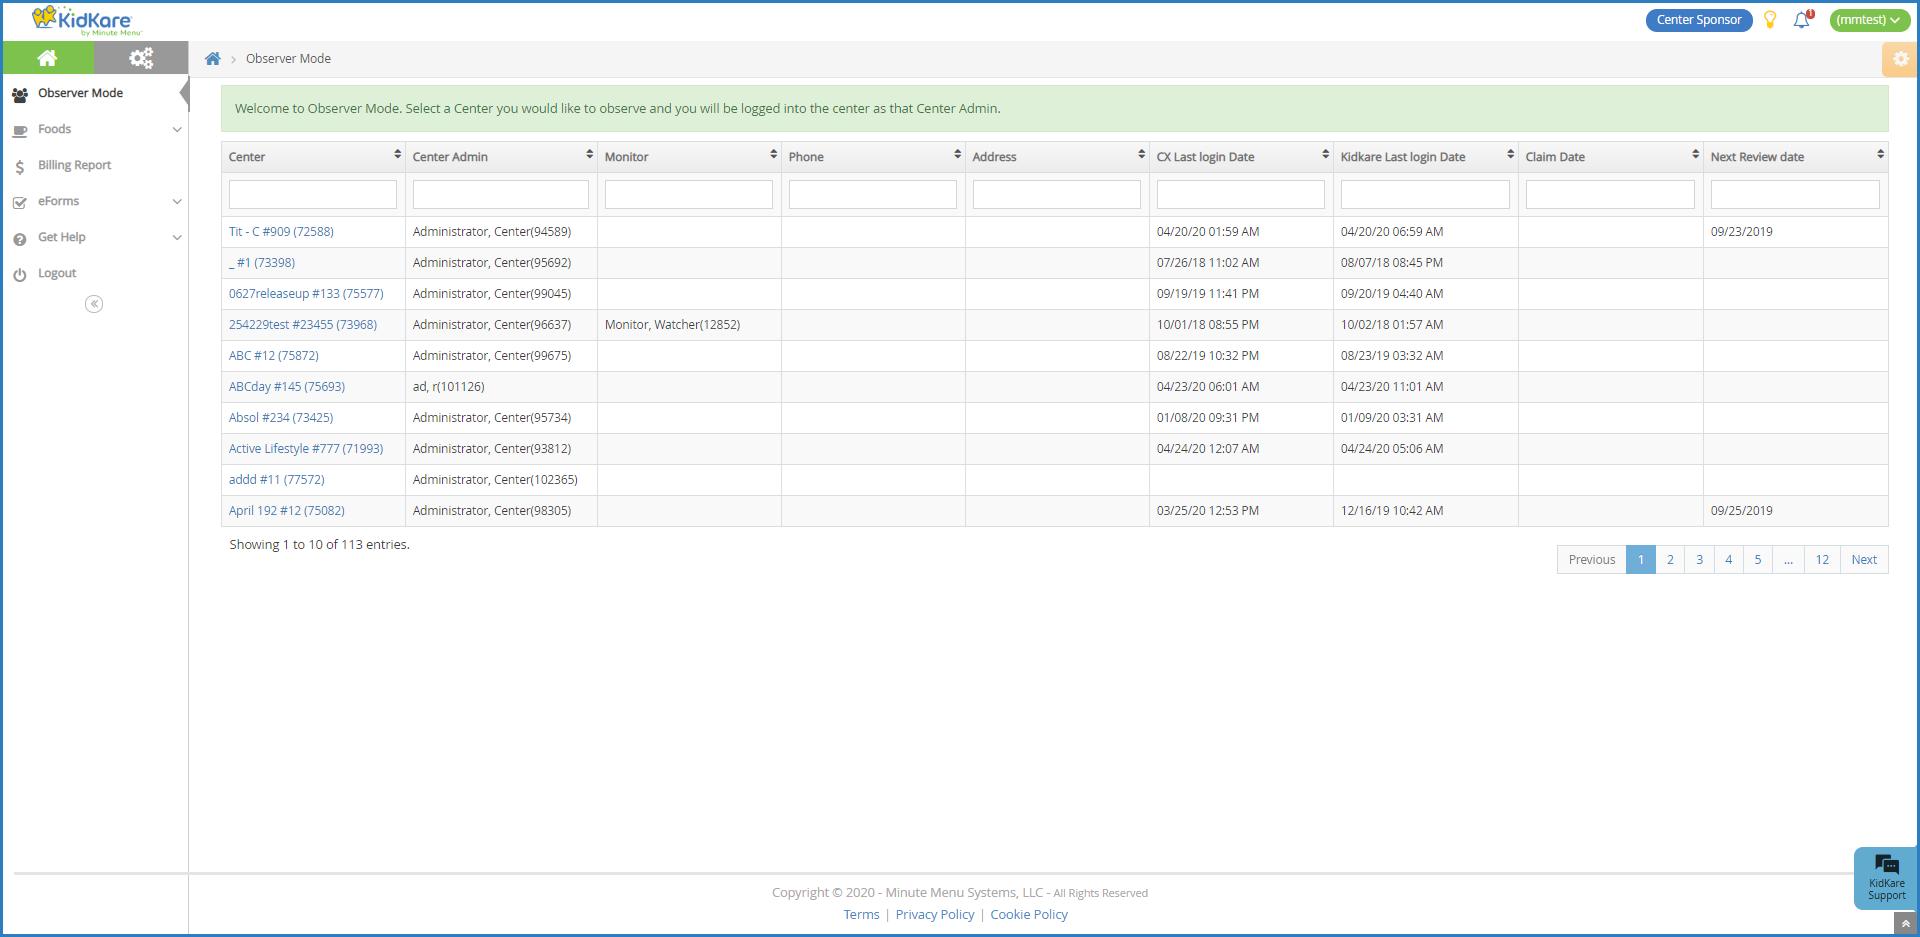
2 Click Filters in the top-right corner to set filters and customize the page display You can change the following settings:
Filter By: Filter the listed centers by status: Pending, Active, Withdrawn, or eForms Access
Monitors: View centers assigned to all monitors or just to you
Columns: Select the columns to include in the center list

3. Use the blank boxes at the top of each column to search for a specific center. For example, click the Center box and begin typing a center's name The list filters automatically
4. Click the Center, Center Admin, Monitor, Phone, Address, CX Last Login Date, KidKare Last Login Date, and Claim Date columns to sort information in ascending or descending order
5 Click a center's name to view that center's KidKare account as a center administrator The account opens A banner listing the center's name displays at the top of the page
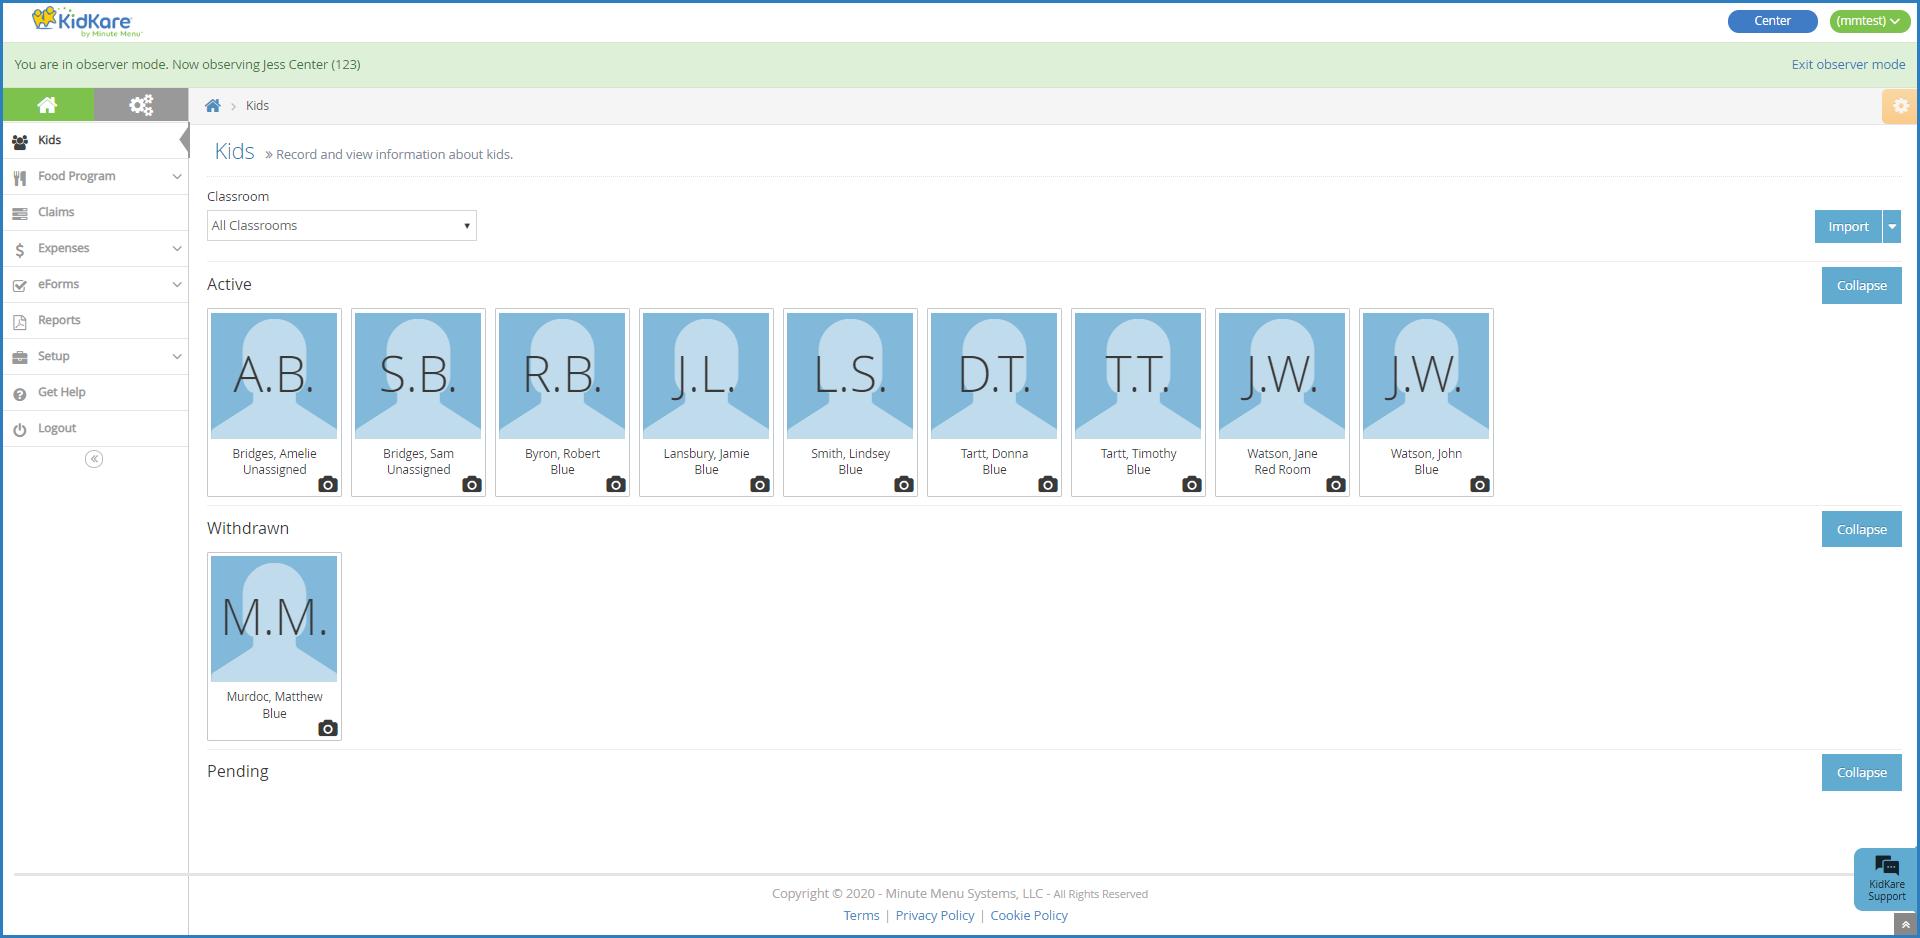
6. When finished, click Exit Observer Mode to return your sponsor account.
Control Center Access to KidKare Features
Last Modified on 04/21/2022 7:43 am
1 Log in to app.kidkare.com with the same credentials you use to access Minute Menu CX.

2 Click The Settings page opens

3 In the General Settings section you can:
Click the Language drop-down menu and select Spanish to view KidKare in Spanish.

Click next to Would you like to require center staff to certify the accuracy of attendance when saving Attendance & Meal Counts in KidKare? to require your centers to acknowledge that attendance and meal counts recorded are accurate

4 In the eForms Settings section, click next to each option to enable it You can change settings for the following:
Would you like to require sites to approve enrollment forms?
Would you like to require sites to approve income eligibility forms? Are sites allowed to send new enrollment requests to parents?
If a parent completes infant feeding details, do you want to indicate that the infant form is on file for the child?
If a parent indicates they participate in SNAP, would you like to require them to provide their SNAP
number for validation?
Would you like to require SNAP/TANF number validation for parents to submit their forms?
Would you like to disallow or warn the parent of incorrect formatting?
Would you like to hide the 'Open Online Forms' button?

5. In the Center Access section, click next to each option to enable it. You can change settings for the following: Kids Food Program Calendar Claims eForms Reports Setup Messages

Note: Are your centers just getting started in KidKare? Send them our KidKare Features for Sponsored Centers cheat sheet! This document lists the features available to sponsored centers and provides to useful documentation from the KidKare help site
[VIDEO] KidKare for Centers
Center staff can use KidKare to record meal counts and attendance from a smart phone, tablet, or computer They can also do the following:
Create menus and menu templates.
Enroll children via eForms or manually
Perform the Milk Audit.
Enter receipts and vendors
Submit claims to you.
Run reports
Last Modified on 11/17/2020 9:28 am
Watch the video below to learn more about what your centers can do in KidKare!
Use the Center Access Settings in your own version of KidKare to control what features your centers can and cannot access See Control Center Access to KidKare Features for more information Centers can find helpful articles and tutorials at the KidKare Knowledge Base You can also send them our KidKare Features for Sponsored Centers cheat sheet.

[VIDEO] Center-Side Training
Last Modified on 08/05/2020 10:07 am

Note: Click here for a PDF you can send to your center users This document links to the videos below Each video opens in the user's browser Right-click a video and select Open in New Window to open the video in a new window/tab.
Center Dashboard
Create Center Staff Types
Last Modified on 05/18/2020 2:28 pm
You can create center staff types with specific center permissions For example, you can set up center management, teachers, cooks, and so on Then, when you create a new center staff account, you can simply select the staff type and assign that type's permissions to the user
1. Click the Tools menu and select Center Staff Types. The Center Staff Types window opens.

2 Click Add A blank line displays
3 Click the blank line and enter the name of the staff type For example, if you are creating a receptionist role, you would enter Receptionist
4 Click Save
5. Click OK at the confirmation prompt. Continue to add as many center staff types as needed.
When finished, set permissions for the new center staff type(s):
1. Click the Tools menu and select Center Staff Type Permissions. The Center Staff Type Permissions dialog box opens
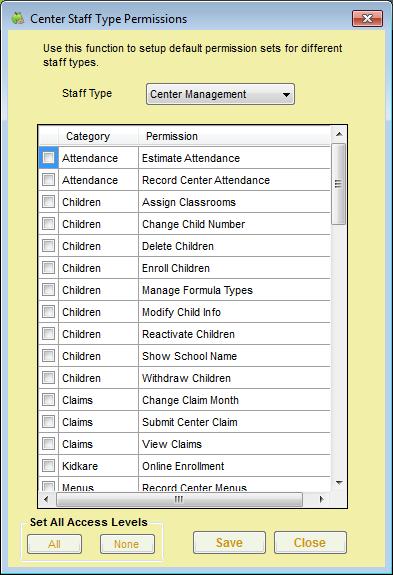
2 Click the Staff Type drop-down menu and select the center staff type for which to set permissions
3 Check the box next to each permission to assign to this staff type To assign all permissions, clickAll
4. When finished, click Save.
To add center staff members:
Add Center Staff
Last Modified on 05/18/2020 2:57
1 Click the Select Center drop-down menu at the top of the window and select the center
2 Click the Tools menu and select Center Staff The Center Staff window opens
Note: You can also click Centers from the toolbar at the top of the window Then, from the Manage Center Information window, click Staff
3 Click Add New
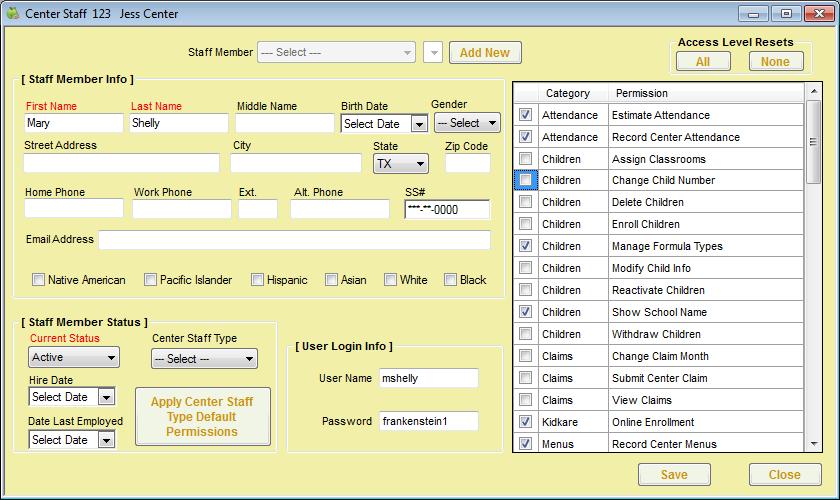
4. Click the First Name and Last Name boxes and enter the staff member's first and last name. These boxes are required
5. In the Staff Member Status section, make sure the Current Status drop-down menu is set to Active.
6 In the User Login Info section, accept the system-generated user name and password, or set new ones
7. In the box to the right, check the box next to each permission to give this staff member. You can also click All to select all permissions and None to clear all selections
8 Complete the remaining boxes in this window, as needed
9 When finished, click Save
Set Center Administrator Permissions
Last Modified on 07/12/2023 3:11 pm
You can control what areas of Minute Menu CX a center's administrator can access
Note: These permissions only take effect if Policy A.12 is set to Y.
1. Click the Tools menu and select Center Administrator Permissions. The Center Administrator Permissions window opens
2. Check the box next to each permission to assign to the center administrator. Click All to assign all permissions to the center administrator
3. Click Save.
Remove Centers
You can remove centers from your active list of centers Centers that you have removed can no longer access Minute Menu CX
To do so:
Last Modified on 05/19/2020 11:52 am
1 Click the Select Center drop-down menu at the top of the window and select the center to remove
2 Click Centers from the toolbar The Manage Center Information window opens
3 Click Remove in the bottom-left corner The Remove Center dialog box opens
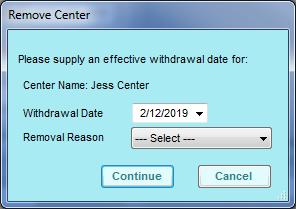
4 Click the Withdrawal Date and select the date on which to remove this center This box defaults to today's date.
5 Click the Removal Reason drop-down menu and select the reason you are removing this center
6. Click Continue.
You can still view information for centers you've removed
1. Click the down arrow next to the Select Center drop-down menu.
2 Check the Removed box
Reactivate Removed Centers
Last Modified on 10/19/2020 3:03 pm
After you've removed a center, you can re-activate them if needed Perhaps the center closed at one point, but decided to resume business Maybe they switched sponsors, but are returning to you No matter the reason you removed the center, you can reactivate them at any time
To do so:

1 Click , clear the Active and Pending boxes, and check the Removed box This filters the Select Center list to removed centers only
2 Click the Select Center drop-down menu and select the center to reactivate
3 Click Centers from the toolbar The Manage Center Information window opens
4 Click Reactivate in the bottom-left corner

5 At the Do You Want to Reactivate This Centerprompt, click Yes
6. At the Center Reactivated prompt, click OK.
Add Classrooms
1 Click the Select Center drop-down menu at the top of the window and select the center for which to create classrooms.
2 Click the Tools menu and select Manage Classrooms The Manage Classrooms window opens

3. Click Add New. The Add a New Classroom window opens.
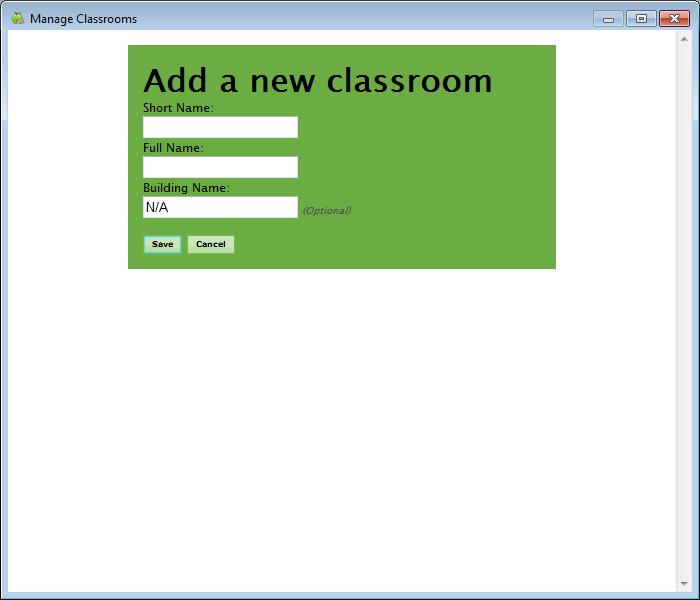
4. Click the Short Name box and enter a short name for this classroom.
5 Click the Full Name box and enter the full name for this classroom
6. Click the Building Name and enter the name of the building that houses this classroom, if applicable.
7 Click Save
Assign Classrooms
1 Click the Select Center drop-down menu at the top of the window and select the center for which to create classrooms.
Last Modified on 05/19/2020 1:46
2 Click the Tools menu and select Assign Classrooms The Assign Classrooms window opens

3. Select a child from the list that displays.
4 Click Assign Classrooms The Assign Classrooms dialog box opens
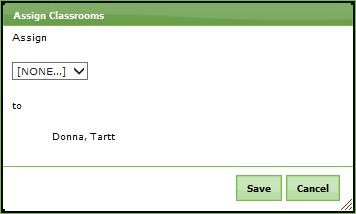
5 Click the Assign drop-down menu and select the classroom to which to assign the child You can also select New to add a new classroom
Edit Classrooms
1 Click the Select Center drop-down menu at the top of the window and select the center for which to create classrooms.
2 Click the Tools menu and select Manage Classrooms The Manage Classrooms window opens
3. Click Edit next to the classroom to change.
4 Click the Short Name, Full Name, and Building Name boxes and enter new information over the existing information.

5 When finished, click Update
Delete Classrooms
1 Click the Select Center drop-down menu at the top of the window and select the center for which to create classrooms.
Last Modified on 05/19/2020 1:51 pm
2 Click the Tools menu and select Manage Classrooms The Manage Classrooms window opens
3. Click Delete next to the classroom to delete. The classroom is removed.

Note: You can only delete classrooms to which children are not currently assigned. If a classroom has children assigned to it, the Delete option does not display.
Set Up Direct Deposit
Last Modified on 05/19/2020 2:31 pm
You can manage payments to centers in Minute Menu CX You can print checks, set up an ACH file for direct deposit, and/or export payment information to a third-party program
If you do not currently offer direct deposit but would like to, talk to your bank. Make sure that your bank or credit union can accept upload files for direct deposit. Minute Menu CX uses the nationally accepted ACH file format NACHA
To set up Direct Deposit:
1. Enter your bank account information in CX.
a Click the Administration menu and select Manage ACH Settings The Manage ACH Settings window opens.

b Complete each field Contact your bank for this information A description of each field is below
ACH _ BALANCE _ ACCOUNT _ NUMBER: If ACH USE BALANCE ROW FLAG below is Y, enter your bank account number
ACH _ BALANCE _ ROUTING _ NUMBER: If ACH USE BALANCE ROW FLAG below is Y, enter your bank account routing number
ACH _ COMPANY _ ID __ FEDERAL _ ID: This is the bank's Company ID, which is usually tax ID number, sometimes preceded by 1
ACH _ DESTINATION _ NAME: This is your bank's name
ACH IMMEDIATE DESTINATION: This is the Immediate Destination Number, which is usually the bank's routing number
ACH IMMEDIATE ORIGIN FEDERAL ID: This is the Immediate Origin Number, which is usually the Company ID, and is sometimes the same as the bank's routing number
ACH ORIGINATING IDENT CLIENT ROUTING: This is the Originating DFI, which is typically the first 8 digits of the bank routing number
ACH STANDARD ENTRY CLASS CODE: This is the Standard Entry Class Code. The default is usually PPD
ACH TRACE NUMBER CLIENT ROUTING MINUS 1ST: This is typically the last eight (8) digits of the bank routing number
ACH USE BALANCE ROW FLAG: If your bank requires a balancing entry, set this to Y and enter the Balance Account Number and Balance Routing Number (see above)
c. When finished, click Save.
2 Next, enter bank account information for each center
a. Click the Select Center drop-down menu and select the center.
b Click Centers The Manage Center Information window opens
c. Click the Oversight tab.
d Check the Pay Via Direct Deposit box
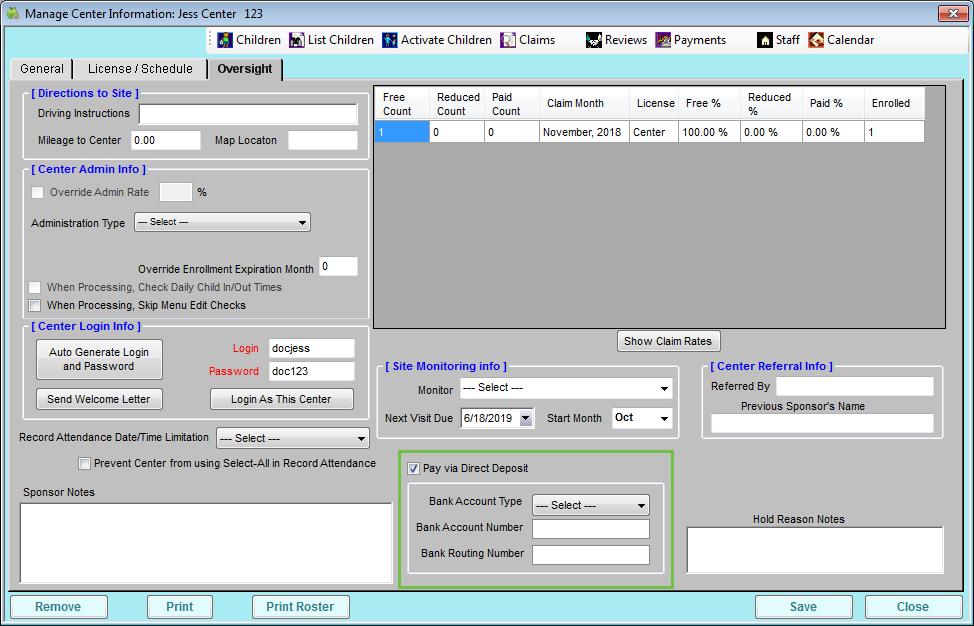
e. Click the Bank Account Type drop-down menu and select Checking, Money Market, or Savings.
f Enter the bank account and routing numbers in the Bank Account Number and Bank Routing Number boxes.
g Click Save
h. Repeat Steps 4a - 4g for each center for which to set up direct deposit.
3 Create a Pre-Note file You must have at least one submitted claim before you can create a Pre-Note file You can create a test claim, if needed
a Click the Payments menu and select Issue Payments The Issue Payments window opens
Note: Policy A.05 must be set to N before you can access the Payments menu.
b. In the Payment Method section, select the Direct Deposits option.

c Check the box next to a claim to calculate
d. Click Calculate.
e Click Next
f. Click the Starting DD Number box and enter the starting direct deposit number.
g In the ACH section, select the Create ACH Prenote File option

h. Click and select the location in which to save the file. Make sure that this is a location you can easily find later, such as the My Documents folder
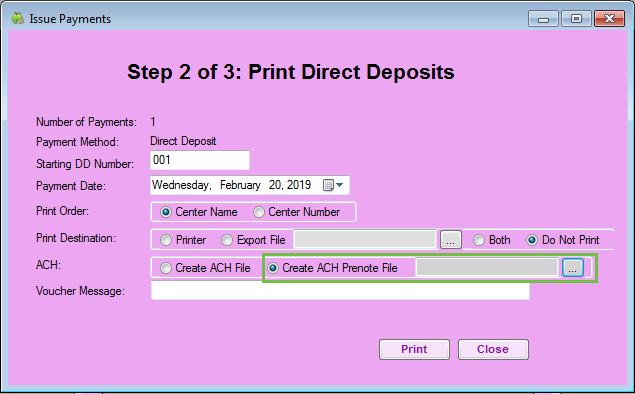
i. Click Print.
4 Send the Pre-Note file to your bank to test the direct deposit Contact your bank to determine where and how to upload the file to their website.
If the file is rejected, find out why, fix the error, generate a new file, and try uploading again If the file goes through, and you confirm that there were no issues, the ACH file has been set up successfully, and you can now use Minute Menu CX to generate ACH files for direct deposit
Locate Centers Receiving Paper Checks
Last Modified on 05/19/2020 2:38 pm
Use the Centers List Export File to quickly locate sites who are still receiving paper checks as payment You can then use the resulting list to contact sites and transfer them to direct deposit Direct deposit is a fast, electronic method of payment that ensures your sites still receive payment in a timely manner.
1 First, generate the report
a Click the Reports menu, select Centers, and click Centers List Export The Center Filter window opens
b Accept the default Status filter (Active) and click Next The Select Output for Export File window opens
c Check the Payment Info, Director's Contact Info, and Director's Name boxes
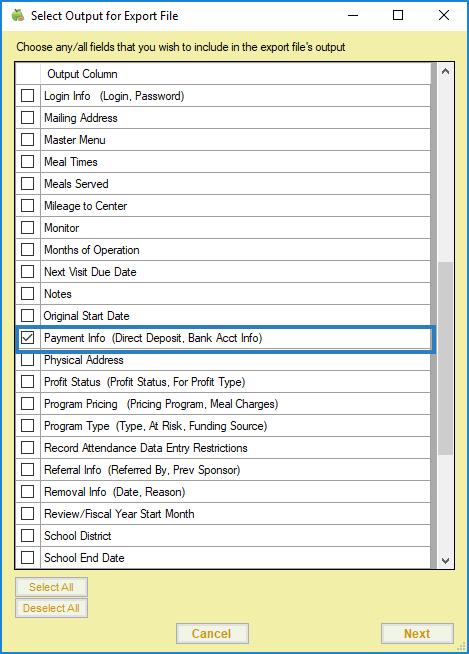
d. Click Next. The report is generated and opens in your spreadsheet program.
e Save the report to your computer
2 Filter the resulting spreadsheet to show blank email addresses only Note that these instructions are Excelspecific
a Click the first row of the DirectDeposit column
b Click the first row of the DirectDeposit column
c Click Sort & Filter in the top-right corner of the Home tab and select Filter The first row of each column in the spreadsheet is now a drop-down menu you can use to filter
d Click the DirectDeposit drop-down menu and clear the Select All box
e Check the N box

f Click OK You now have a list of centers who receive paper checks, as well as a list of their director's contact information.
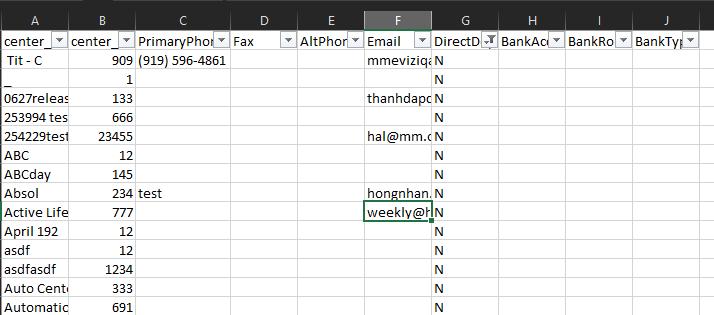
3 Contact the sites on your list to set them up on direct deposit instead Update their payment preferences in Minute Menu CX. For more information about doing this, see Step 2 in Set Up Direct Deposit.
Format Checks
Last Modified on 05/19/2020 2:39 pm
You can manage payments to centers in Minute Menu CX You can print checks, set up an ACH file for direct deposit, and/or export payment information to a third-party program
To set up your account to print checks:
1 Click the Administration menu and select Manage Check Format The Manage check Format window opens
2 Click the Location of Check VS Check Stub(s) drop-down menu and select Bottom Third, Middle Third, or Top Third
3 In the Not a Check and Check Format sections, drag and drop each field to match the format of the checks you already have
4 When finished, click Save

5. Click Print Test Check. We recommend you print the first few tests to plain white paper and compare them to an actual check
To have a signature print on checks automatically:
1 Place a blank white piece of paper on top of an actual check and sign the paper in the exact same place as you would on the check. Use a dark, felt-tip pen, and ensure your signature size is the same as it would be on an actual check
2. Scan the image and email it to cxsupport@minutemenu.com.
Issue Payments
Last Modified on 05/19/2020 2:45 pm
You can use Minute Menu CX to print checks or issue direct deposits to centers However, even if you choose to use another program to issue checks or direct deposits, you can still mark payments as Paid in Minute Menu CX in the Issue Payments function
Note: Policy A.05 must be set to N before you can access the Issue Payments function
1 Select payments
a Click the Payments menu and select Issue Payments The Issue Payments window opens
b In the Payment Method section, select the Checks option or the Direct Deposits option You must complete these steps twice if you are using both checks and direct deposit
Note: If you are running this function only to mark claims as Paid (i e , you are not printing checks or creating a direct deposit file), select the Checks option
c. Check the box next to the claim(s) you need to pay or mark as Paid.
d Click Calculate A list of unpaid centers displays in the bottom half of the center
e. Check the box next to each center to pay.

2 Click Next
3 Now, print checks or generate the ACH file for direct deposit
a Click the First Check Number/Starting DD Number box and enter the starting check/voucher number
b Click the Payment Date box and select the payment date This date is visible to centers in the centerside of Minute Menu CX If you are printing checks in advance, select the date that payment will actually be sent to the centers
c. Select the sort order. You can sort by center name or center number.

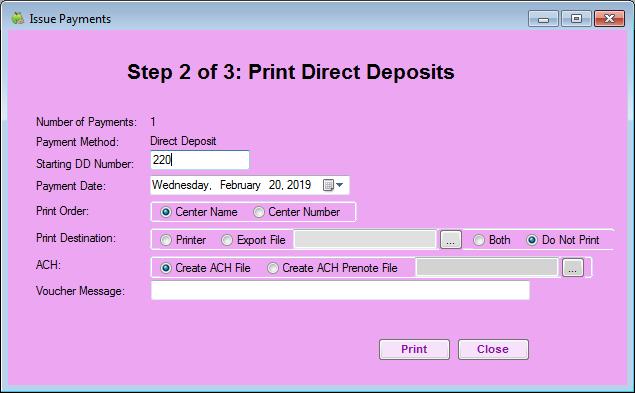
d Select a print destination for the checks/vouchers
Select Printer, Export File, Both, or Do Not Print.
If you select Export File or Both, click and select the file in which to save the exported file
e. (Direct Deposit Only) Select Create ACH File.

f Click the Check Stub Message/Voucher Sub Message box and enter any kind of message to print on the check stub.
4 Click Print
5. Verify that the checks/vouchers printed successfully and without paper jams. Minute Menu CX will ask if all checks printed successfully This is your last chance to easily re-print checks in a batch Be absolutely
sure that the checks printed successfully before responding to the confirmation prompt
Viewing the Check Register
1. Click the Payments menu and select Check Register. The Check Register window opens.

2 Set filters, as needed
3 Click Refresh List Payments that meet the limits you set display
4 Click Print Register to print the check register

Note: You can also access the check register for an individual center Click the Select Center drop-down menu, select the center, and click Centers The Manage Center Information window opens Click Payments The Check Register window opens
Void Payments
Last Modified on 02/22/2019 8:40 am

Note: Voiding payments in Minute Menu CX will not stop funds from being issued by your bank Contact your bank directly to stop payment of a check or direct deposit Voiding payments in Minute Menu CX allows you to reissue the payment, show that the payment has not been issued, and keep an audit trail of the funds for reporting purposes
To void payments in Minute Menu CX:
1. Click the Payments menu and select Check Register.
2 Set filters in the Center, Filter by Payment Date Month, and Payment Method sections
3. Click Refresh List. Payments display.
4 Click Void next to each payment to void

Make Non-Claim Payment Adjustments
The Non-Claim Payments Adjustment feature allows sponsors to make positive and negative adjustments to center payments using a specific dollar amount This feature should not be used for claim adjustments (where an individual claim is adjusted) For example, you would use this feature if you pay for catering for your centers and want to deduct a specific dollar amount from their payment.
If you use Issue Payments in Minute Menu CX, any non-claim payment adjustments you make are automatically included on the original claim
Creating a Non-Claim Payment Adjustment
1. Click the Payments menu and select Adjust Non Claim Center Payments. The Adjust Center Payments window opens
2. Click the Claim Month drop-down menu and select the month to which you need to make an adjustment.
3 Click the Select Center drop-down menu and select a center Only those centers with a claim for the selected month display in this menu.
4 Enter the dollar amount adjustments
Enter a dollar amount in the Amount Positive box to add money to the center's check.
Enter a dollar amount in the Amount Negative box to deduct money from the center's check
5. Click the Reason box next to Amount Positive and/or Amount Negative and enter a specific reason for the adjustment This reason prints on the check/direct deposit stub
6. Click Save. A row is added to the bottom of the window and displays the adjustment you added.

Changing Non-Claim Payment Adjustments
1 Click the Payments menu and select Adjust Non Claim Center Payments The Adjust Center Payments window opens
2 Click the Claim Month drop-down menu and select the month to which you need to make an adjustment
3 Click the Select Center drop-down menu and select a center Only those centers with a claim for the selected month display in this menu A list of adjustments for the selected center/month display in the bottom of the window
4 Click the link in the Center Name column The adjustment amount(s) and reason(s) display in the top portion of the window
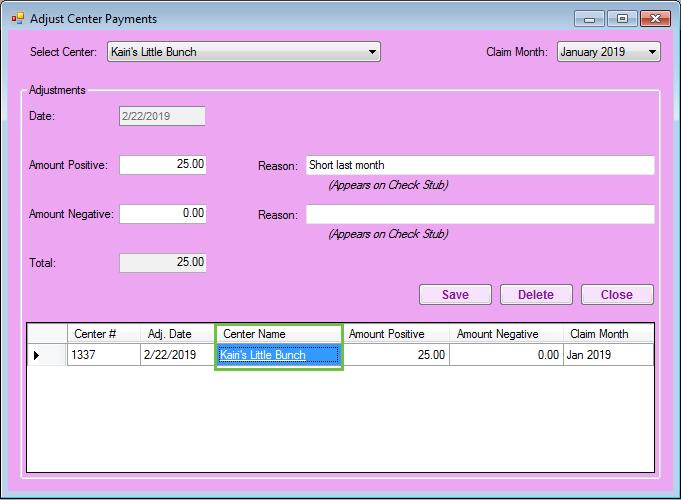
5. Update the adjustments, as needed.
6 Click Save
Printing the Non-Claim Payment Adjustment Report
To view a report of all Non-Claim Payment Adjustments within a selected date range:
1 Click the Reports menu, select Payments, and click Non Claim Payment Adjustments The Date Range/Export Options dialog box opens.

2. Click the Starting Date box and select the beginning of the date range.
3 Click the Ending Date box and select the end of the date range
4. Select Print to PDF or Export to Excel.
5 Click Continue
6. Select Selected Center or All Centers.
7 Click Run Report The report is generated in the format you selected in Step 4
Generate & Use the QuickBooks Export File
Setting Up the Export
To set up the QuickBooks export:
1 Click the Administration menu and select Manage Policies
2. Click + next to P. Center Payments.
3 Click + next to Policies P.2a - P.2e and enter your QuickBooks account information Ensure that the account names in QuickBooks match center names in CX exactly. Names that don't match exactly could cause errors during the importing process Extra spaces or punctuation can cause issues
4. When finished, click Save.
Creating the Export File
1 Click the Payments menu and select Issue Payments The Issue Payments window opens
2. In the Payment Method section, select Checks or Direct Deposit.
3 Check the box next to each claim month to pay
4. Click Calculate.
5 Verify that the total dollar amount of selected payments is correct

6 Click Next Step 2 opens
7 Click the First Check Number box and enter the starting check/payment voucher number
8 Click the Payment Date box and select the payment date
9 In the Print Order section, select Center Name or Center Number
10 In the Print Destination section, select Export File or Both (if you are also printing checks/direct deposit vouchers)

11 Click Browse and choose the location in which to save the export file
12 Click Print

Note: Even if you are not printing checks/direct deposit vouchers, you must click Print to create the export file.
Exporting Previously Created Payments
If you have run Issue Payments for a group of payments and wish to import them into QuickBooks, you can create an export file without running Issue Payments again. To do so:
1 Click the Payments menu and select QuickBooks Export The QuickBooks Export window opens

2 In the Centers section, select All Active Centersor Selected Center
3. Click the Starting Check Number and Ending Check Number boxes and enter starting and ending check numbers
4. Click the Starting Check Date and Ending Check Date boxes and enter the starting and ending check dates

5 Click and select the location in which to store the file
6. Click Create File.
Import the File into QuickBooks
1. Open QuickBooks.
2 Click the File menu, select Utilities, Import, and select IIF File
3. Browse to the location in which you saved the Minute Menu Export File.
4 Click Open The payment information imports into QuickBooks
Enable Messaging for Centers
Before you can use KidKare's messaging features, you must enable center messaging on the Settings page
Last Modified on 06/25/2020 7:55 am
1. Log in to app.kidkare.com. Use the same credentials you use to access Minute Menu CX.

2 Click The Settings page opens

3 In the Center Access section, click next to Messages Your changes are saved automatically

Message Centers in KidKare
Last Modified on 06/25/2020 7:54 am
KidKare's messaging feature allows you to send messages directly to your centers in KidKare Your sites can then review and respond to these messages, allowing both of you to keep a record of communications online
1. Log in to app.kidkare.com. Use the same credentials you use to log into Minute Menu CX.

2 Click The Messages page opens to the Received tab by default
3. Click Send Message. The Message Editor opens.
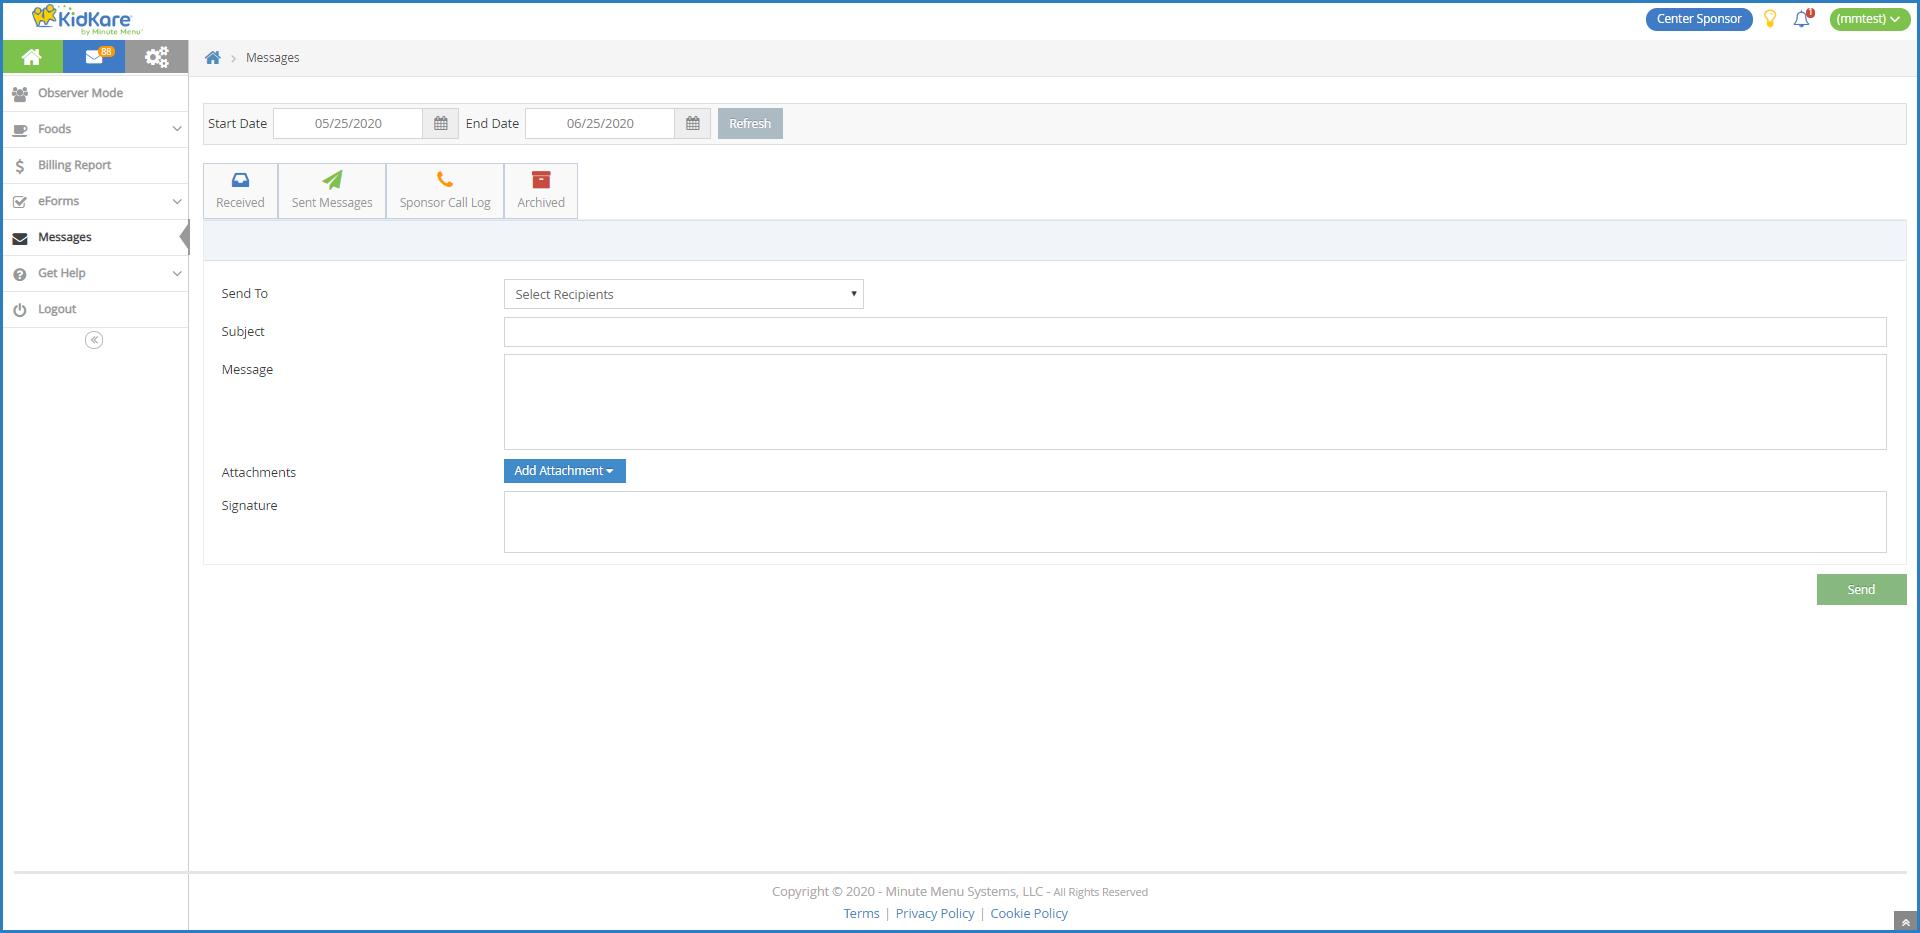
4 Click the Send To drop-down menu and select the center(s) to message You can use the Search box in this menu to search for specific centers To message all centers, select All Centers
5 Click the Subject box and enter a subject for this message
6 Click the Message box and enter the contents of your message
7 To add an attachment to your message:
a Click Add Attachment and select File
b Browse to the location on your computer where the attachment is stored
8 Click the Signature box and enter your email signature
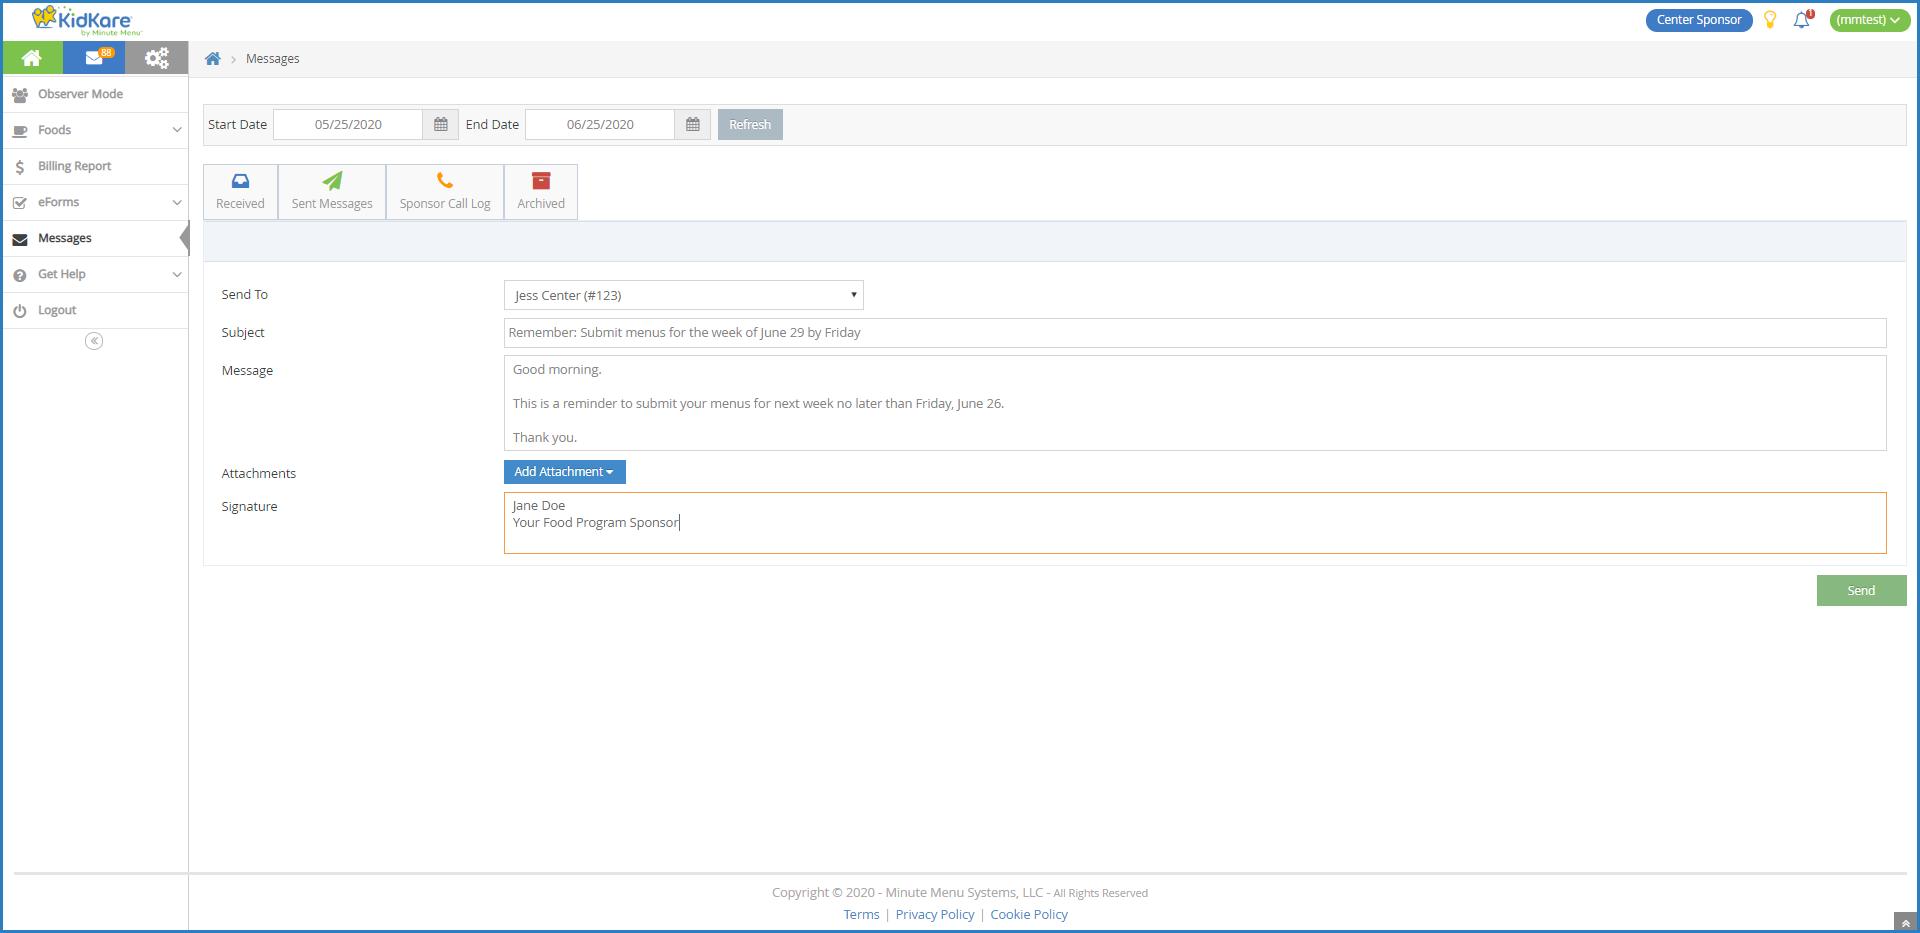
9. When finished, click Send.
View Received Messages
Last Modified on 06/25/2020 8:01 am CDT
Received messages display in the Received tab on the Messages page It is divided into the following columns: Received From, Subject, and Date You can also see the total number of messages, as well as the number that are unread, at the bottom of this page

1. Click . The Messages page opens and displays the Received tab by default. Your messages display in a table Unread messages display in bold

2 Click a message to view the message content

3. If your center has attached a file, click the file name in the Attachments section to view and download it.
4 When finished, click the Received tab to return to your received messages list
5. Use the Search Messages box to filter the messages that display. The message list is updated as you type.
6 To mark messages as read/unread:
a. Check the box next to the messages to mark as read/unread. You can also check the box at the top of the column to select all messages
b. Click Mark as Read or Mark as Unread.
7 To archive messages:
a. Check the box next to the messages to archive. You can also check the box at the top of the column to select all messages
b. Click Archive Selected. The messages you selected are moved to the Archived tab.
View Sent Messages
Last Modified on 06/25/2020 7:56 am
You can view messages you have sent in the Sent Messages tab Like the Received tab, the Sent Messages tab is divided into the following columns: Sent To, Subject, Reports, and Date The total number of messages and unread reports display at the bottom of the table

1. Click . The Messages page opens.
2 Click the Sent Messages tab

3 To mark sent messages as read/unread:
a Check the box next to the message(s) Check the box at the top of the column to select all messages
b Click Mark as Read or Mark as Unread
4 To archive messages:
a Check the box next to the message(s) to archive Check the box at the top of the column to select all messages
b Click Archive Selected The messages are moved to the Archived tab
5 To view message reports, click the link in the Reports column For more information about message reports, see View Message Reports

Note: You can also send messages from this tab Click Send Message and select the recipients For details, see Message Centers in KidKare
View Message Reports
Message reports provide useful data for your sent messages, such as the number of recipients who opened the message
Last Modified on 06/25/2020 7:57 am
To view this report:

1. Click . The Messages page opens.
2 Click the Sent Messages tab
3. Click the link in the Reports column for the message to view. The message report opens.

This report is divided into the following sections:
Message Details: This section displays the message subject, content, and sent date It also provides the number of recipients who have opened the message and the number of recipients who have responded to any attached survey
Questions: This section displays any survey questions you included in your messaging. If you did not include a survey in your message, this section does not display
Report: This section provides a review of recipients who have opened the message.
Manage Message Categories
Last Modified on 05/19/2020 2:58 pm
When you create internal log messages in the Message Center window, you can assign categories to them You set these categories up in the Manage Message Categories window If you do not set up message categories, all internal log messages are assigned to the General category by default
1. Click the Tools menu and select Manage Message Categories. The Manage Message Categories window opens

2 To add a message category:
a. Click Add. A blank row displays.
b Click the new row and enter the name of the message category
c. Click Save.
d Click OK at the success message
3. To change a message category:
a Click the category to change
b. Enter the new category over the existing category.
c Click Save
d. Click OK at the success message.
4 To delete a message category:
a. Click the category to delete.
b Click Delete
Note: Ensure that you have selected the correct message category to remove. There is no confirmation message, and the message category is removed immediately
c Click OK at the success message

Note: You must close and re-open Minute Menu CX before new messages categories are applied to the Category drop-down menu in the New Message window.
Send Messages to Centers
Last Modified on 05/19/2020 4:27 pm
You can send important messages to your centers in the Message Center window For example, you may send out claim or paperwork reminders to a specific center or all centers with your agency
1. Click the Tools menu and select Message Center. The Message Center window opens.
2 Click New Message in the top-right corner The New Message window opens

3. In the Message Type section, select Outgoing Message.
4 Check the Message Cannot be Deleted box to prevent centers from deleting this message
5. Click Select Centers to select the centers who should receive this message. This defaults to the center you selected in the Select Center drop-down menu prior to accessing the Message Center window
6. Click the Subject box and enter a subject for this message.
7 To include an attachment, click Attach, browse to the location on your computer where the file is stored, and click Open.
8 Click the text box and enter the body of the message
9. When finished, click Send.
Manage Your Inbox
Last Modified on 05/19/2020 4:41 pm
You can send important messages to your centers in the Message Center window For example, you may send out claim or paperwork reminders to a specific center or all centers with your agency This is where you also receive messaging from Minute Menu CX support This includes things such as scheduled updates or down time.
1 Click the Tools menu and select Message Center The Message Center window opens

2 Click the Start Date and End Date boxes and set a date range to view
3. To read and print messages:
a Check the Select box next to the message to read/print, and click Open You can also double-click the message. The View Message window opens.
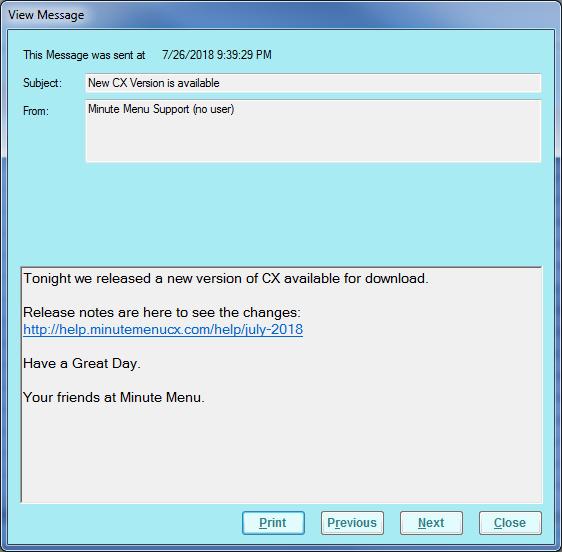
b To print the message, click Print
c Click Previous or Next to navigate through messages
d When finished, click Close to exit the View Message window
4 To export messages:
a Check the Select box next to each message to export You can also click All to select all messages
b Click Export The messages you select are exported to a spreadsheet file
5 To delete messages:
a. Check the Select box next to each message to delete. You can also click All to select all messages.
b Click Delete The selected messages are deleted
Manage Sent Messages
Last Modified on 05/19/2020 4:48 pm
Every message you send is added to the Sent Messages tab In this tab, you can see whether the recipient read the message, delete messages, and review message content
1. Click the Tools menu and select Message Center. The Message Center window opens. The Message Center window opens
2. Click the Sent Messages tab.

3. Click the Start Date and End Date boxes and set a date range to view.
4 Click the Layout drop-down menu and select View One Recipient Per Message or View All Center Recipients Per Message. Selecting View All Center Recipients Per Message collapses the listed messages into one line per-center
5. Select Show All to show messages to all centers, or select Selected Center to show only those messages for the center you selected in the Select Center drop-down menu at the top of the Minute Menu CX window
6. To view and print sent messages:
a Check the Select box next to the message to read/print, and click Open You can also double-click the message. The View Message window opens.
b Click See When Message Was Reviewed to view the review status of this message The Sent Message Review Statuses window opens This is useful if you selected View All Center Recipients Per Message in Step 2, as the view date does not display in the Sent tab unless all center recipients have reviewed the message When finished, click Close

c In the View Message window, click Print to print the message
d Click Previous or Next to navigate through messages
e When finished, click Close to exit the View Message window
7 To export sent messages:
a Check the Select box next to each message to export You can also click All to select all messages
b Click Export The messages you select are exported to a spreadsheet file
8. To delete sent messages:
a Check the box next to the sent message to remove
b. Click Delete. The messages are deleted and placed in the Deleted Messages tab.
Manage Log Messages
Log messages are messages for centers that are typically for your agency's eyes only However, you can also make these messages visible to centers, if needed
Last Modified on 05/19/2020 4:54 pm
1. Click the Tools menu and select Message Center. The Message Center window opens.
2 To create a new log message:
a. Click New Message. The New Message window opens.
b In the Message Type section, select Internal Log Message
c. Check the Visible to Center box to make this log message visible to the center(s) you select. If you check this box, this message displays the center's Log Message tab

d Click Select Centers and select the center(s) associated with this message If you already have a center selected in the Select Center drop-down menu at the top of the application window, that center populates the To box by default
e. Click the Subject box and enter a subject for this message.
f Click Attach to attach a file to this message, if needed
g. Click the text box and enter the body of the message.
h Click the Category drop-down menu and select the category to which to assign this log message You set up message categories in the Manage Message Categories window. For more information, see Manage Message Categories
3 To review log messages:
a Click the Log Messages tab

b Click the Category drop-down menu and select the category by which to filter the list
c. Select Show All to view log messages for all centers, or select Selected Center to view log messages for the center selected in the Select Center drop-down menu at the top of the application window The following information displays:
Created: This is the date and time the message was created
Center: This is the center to whom the message was directed.
Visible: A check in this box indicates that the center can also see this message Category: This is the category assigned to the message.
Subject: This is the message subject
d Check the Select box next to a log message and click Open to view the message itself You can also double-click the message to view The View Message window opens
e In the View Message window, click Print to print the message
f Click Previous or Next to navigate through messages
g When finished, click Close to exit the View Message window
4 To export log messages:
a Check the Select box next to each message to export You can also click All to select all displayed messages
b Click Export The messages you select are exported to a spreadsheet file
5 To delete log messages:
a Check the box next to the sent message to remove
b Click Delete The messages are deleted and placed in the Deleted Messages tab
Review Deleted Messages
Every message you delete is added to the Deleted Messages tab in the Message Center window
Last Modified on 05/19/2020 4:56 pm
1. Click the Tools menu and select Message Center. The Message Center window opens.
2 Click the Deleted Messages tab

3 Click the Start Date and End Date boxes and set a date range to view
4. Check the Select box next to the message to read/print, and click Open. You can also double-click the message The View Message window opens
5. In the View Message window, click Print to print the message.
6 Click Previous or Next to navigate through messages
7. When finished, click Close to exit the View Message window.
[VIDEO] About eForms
Last Modified on 03/16/2022 2:10 pm
eForms is an all-in-one enrollment process for the food program that eliminates paper forms for centers and your back-office With this feature, you can send enrollment invitations directly to parents, track enrollment status, and approve and renew child enrollment with a single click
Click here to print a useful checklist for getting started with eForms. Follow along with the steps, and check each item off as you complete it
eForms Process Overview
Watch the video below for a brief overview of the enrollment process with eForms We've also outlined each step in text, below, complete with links to more in-depth instructions for each step
Log in to app.kidkare.com with the same user credentials you use to access Minute Menu CX.
1 Add a Signature to KidKare: Each form you approve and renew through eForms requires your signature Before you approve and renew forms, add your signature to KidKare
2 Adjust eForms Settings: When you allow your centers to use eForms for enrollments, you can further customize the actions they can take For example, you can specify that your centers must review and approve enrollments before forms are sent to you for final approval/renewal These settings are located on the Settings page in KidKare
3 Enable Centers for eForms: Give centers access to the eForms feature Centers remain enabled until you disable them
4 Send Invitations: Send invitations to parents/centers to update child enrollment forms Use filters to select the centers/children to which to send invitations Parents with an email address on file automatically receive an email that invites them to update child enrollment and/or income eligibility information online.
5 Centers: Centers can view a list of all sent invitations, which allows them to follow-up with parents, have parents update enrollments online using a device at the center, cancel invitations (if needed), or even fill out paper forms (centers can then mark the form as completed on-site) Depending on your settings, centers must approve each enrollment before sponsors can renew it.
6 View Invitation Status: You can see how many new enrollment forms and/or income eligibility forms have been completed, started (but not finished), canceled, and so on. The eForms feature provides an overview of all statuses across all centers who use the eForms feature
7. Approve & Renew: Once the enrollments are complete, review them by comparing the old forms to the new forms You can also view parent signatures Once you've reviewed the data, update the information in Minute Menu CX with the click of a button.
Add a Signature for eForms
Last Modified on 02/22/2024 2:56 pm
Each form you approve and renew through eForms requires your signature Before you approve and renew forms, add your signature to KidKare in the Add Signature popup
To do so:
1 Log in to app.kidkare.com Use the same credentials you use to log in to Minute Menu CX
2 Click your username in the green bubble in the top-right corner, and select Add Signature

3 Click the Type Signature box and type your name
4 Using your mouse, finger, or stylus, sign the E-Signature box
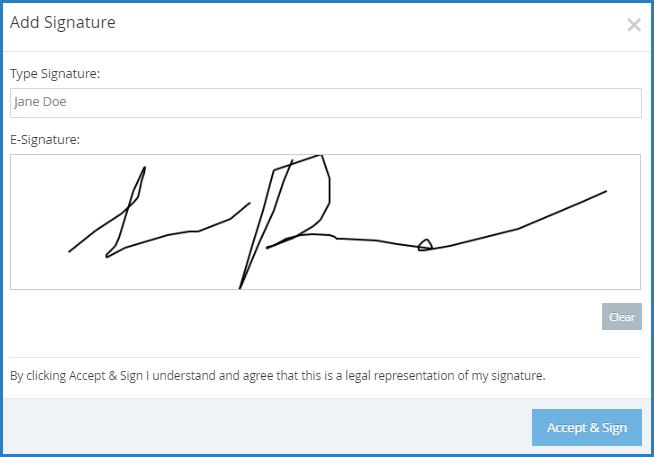
5 Click Accept & Sign
eForms Settings in KidKare
Last Modified on 09/22/2022 10:24 am
When you allow your centers to use eForms for enrollments, you can further customize the actions they can take These settings are located on the Settings page in KidKare
1. Log into app.kidkare.com. Use the same credentials you use to access Minute Menu CX.

2 Click The Settings page opens
3 In the Center Access section, set eForms to Yes to allow your centers to access eForms in KidKare If you need to customize this permission for specific centers, you can do so on the Enable Centers page For more information, see Enable Centers


4 In the eForms Settings section, click next to each option to enable it You can change settings for the following:
Would you like to require sites to approve enrollment forms?
Would you like to require sites to approve income eligibility forms? Who can send new enrollment requests?
Are sites allowed to send new enrollment requests to parents?
If a parent completes infant feeding details, do you want to indicate that the infant form is on file for the child?
If a parent indicates they participate in SNAP, would you like to require them to provide their SNAP number for validation?
Would you like to require SNAP/TANF number validation for parents to submit their forms? If so, would you like to disallow or warn the parent of incorrect formatting?

Note: If you require your sites to approve either form type, ensure that they add a signature to KidKare Direct them to this help article for instructions If you select "SITE" under the first two approval settings, the sponsor will not be able to approve or renew any eForms. If you select "SPONSOR" under the first two approval settings, the site will not be able to approve or renew any eForms. Use the option "BOTH" in order to allow the sites and/or sponsor to make final approvals on eForms
5. Your changes are saved automatically.

Note: You can only change the approval dropdown options in eForms settings if there are no current eForms pending If there are eForms pending, those must be approved or cancelled in order to adjust these settings
Enable SNAP/TANF Validation for eForms
Last Modified on 01/21/2021 8:40 am CST
You can require that SNAP/TANF numbers be validated before parents can submit their forms Validation ensures that the parent provided a correctly formatted SNAP/TANF number when completing income eligibility information
When you enable this feature, you can also specify whether the parent is warned and able to submit their forms or whether parents cannot continue completing their forms until the number is formatted correctly
To do so:
1. Log in to app.kidkare.com. Use the same credentials you use to log in to Minute Menu CX.

2 Click The Settings page opens

3 In the eForms Settings section, click next to Would you like to require SNAP/TANF number validation for parents to submit their forms? This enables SNAP/TANF validation.
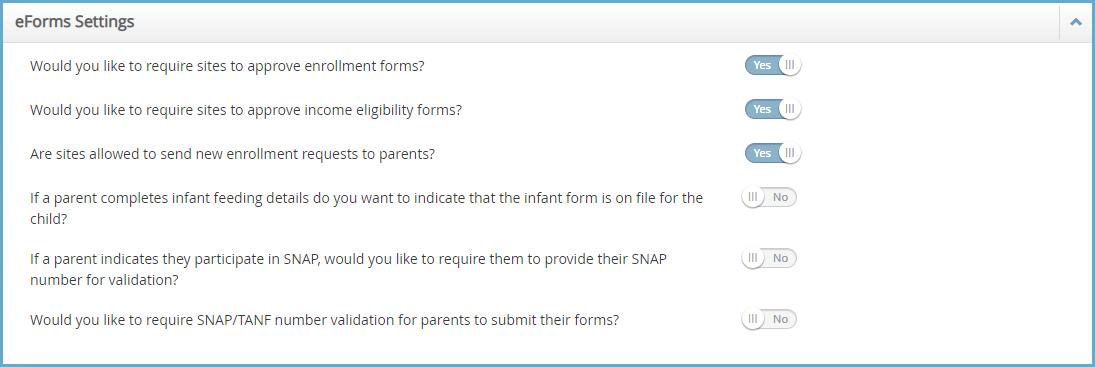
4 Next, specify what to do when a parent inputs an invalid SNAP/TANF number:
Warn: The parent will receive a message advising them that the provided SNAP/TANF number is invalid, but they will be able to complete and submit the form
Disallow: The parent will receive a message advising them that the provided SNAP/TANF number is invalid, and they will be unable to complete and submit the form until they correct it
[VIDEO] Enable Centers for eForms
If you have not done so already, access the Settings page and ensure that eForms is enabled in the Center Access section Click here for more information If this setting is not enabled, none of your centers can access eForms in KidKare
1 Log in to app.kidkare.com using the same ID and password you use to access Minute Menu CX
2 From the menu to the left, click eForms
3 Click Enable Centers
4 Use the Center and Status boxes to filter the centers that display

5. Click in the Status column to enable or disable eForms status for the listed center.

6 Click Review Changes.
7. Ensure that your changes are correct.
8 Click Save
Customize eForms Email Templates
Last Modified on 05/20/2020 2:02 pm
Customize the emails parent/guardians receive when you send enrollment invitations, send forms back for revision, and approve enrollments You can also customize the Thank You email sent when the parent submits their information to you or your center
1. Log in to app.kidkare.com. Use the same credentials you use to log in to Minute Menu CX.
2 From the menu to the left, click eForms
3. Click Send Invitations. The Send Invitations page opens.
4 Click Edit Email The Initial Invitation Template page opens by default
5. Click the drop-down menu at the top of the page and select the template to edit. For example, select Thank You for Your Submission Template to edit the automated email parents/guardians receive upon form submission.

6 Click Edit in the bottom-right corner The Rich Text Editor (RTE) opens You can edit the Subject, From, and Message fields.
7 Use the toolbar to format your message text
H1 - H6: Create headings The largest heading is H1 The headings become progressively smaller from there.
P: Designate text as Paragraph text This should be the main body of your message
Pre: Create pre-formatted text for copying and pasting.
": Create a block quote
B: Bold text
I: Italicize text
U: Underline text
S: Strikethrough text
•/123: Create bullted or numbered lists
Undo/Redo: Click the arrows to undo changes and re-do changes
Alignment Options: Left-align, center, right-align, or justify text
Indentation: Indent a line or remove an indentation
: Switch to HTML mode and use HTML to format instead of the RTE
Images: Click the picture icon to embed an image
Link: Click the link icon to add a hyperlink
Video: Click the play button to embed a video
8. Variables you can use are listed at the bottom of the editor. To use this variables, click in the message and type the variable exactly as it appears These will populate user-specific information in the message when it is sent. For example, #ParentName# will display as John Smith if this email is sent to John Smith.
9 Click Add Attachment to add an attachment to this message
10. When finished, click Save.
[VIDEO] Send Invitations
1 Log in to app.kidkare.com using the same credentials you use to access Minute Menu CX
2. From the menu to the left, click eForms.
3 Click Send Invitations
4. Set filters for the centers/children to include.
a Click the State drop-down menu and select the state(s) to view This option is only available if you are set up for multiple states.
b Click the Centers drop-down menu and select the specific center(s) to view
c. Click the Child Expired and Expiring Within drop-down menu and select 30 Days, 60 Days, 90 Days, or Custom Date If you select Custom Date, set a date range in the From/To boxes

d Click next to Hide Invitations That Are Currently Open to hide open invitations This is set to No by default
e In the What Forms Would You Like to See section, click elect Enrollment, Income Form, or both
f. Click Go.
5 Check the box next to the child/center to which to send an invitation You can also check the box at the top of the column to select all displayed records.
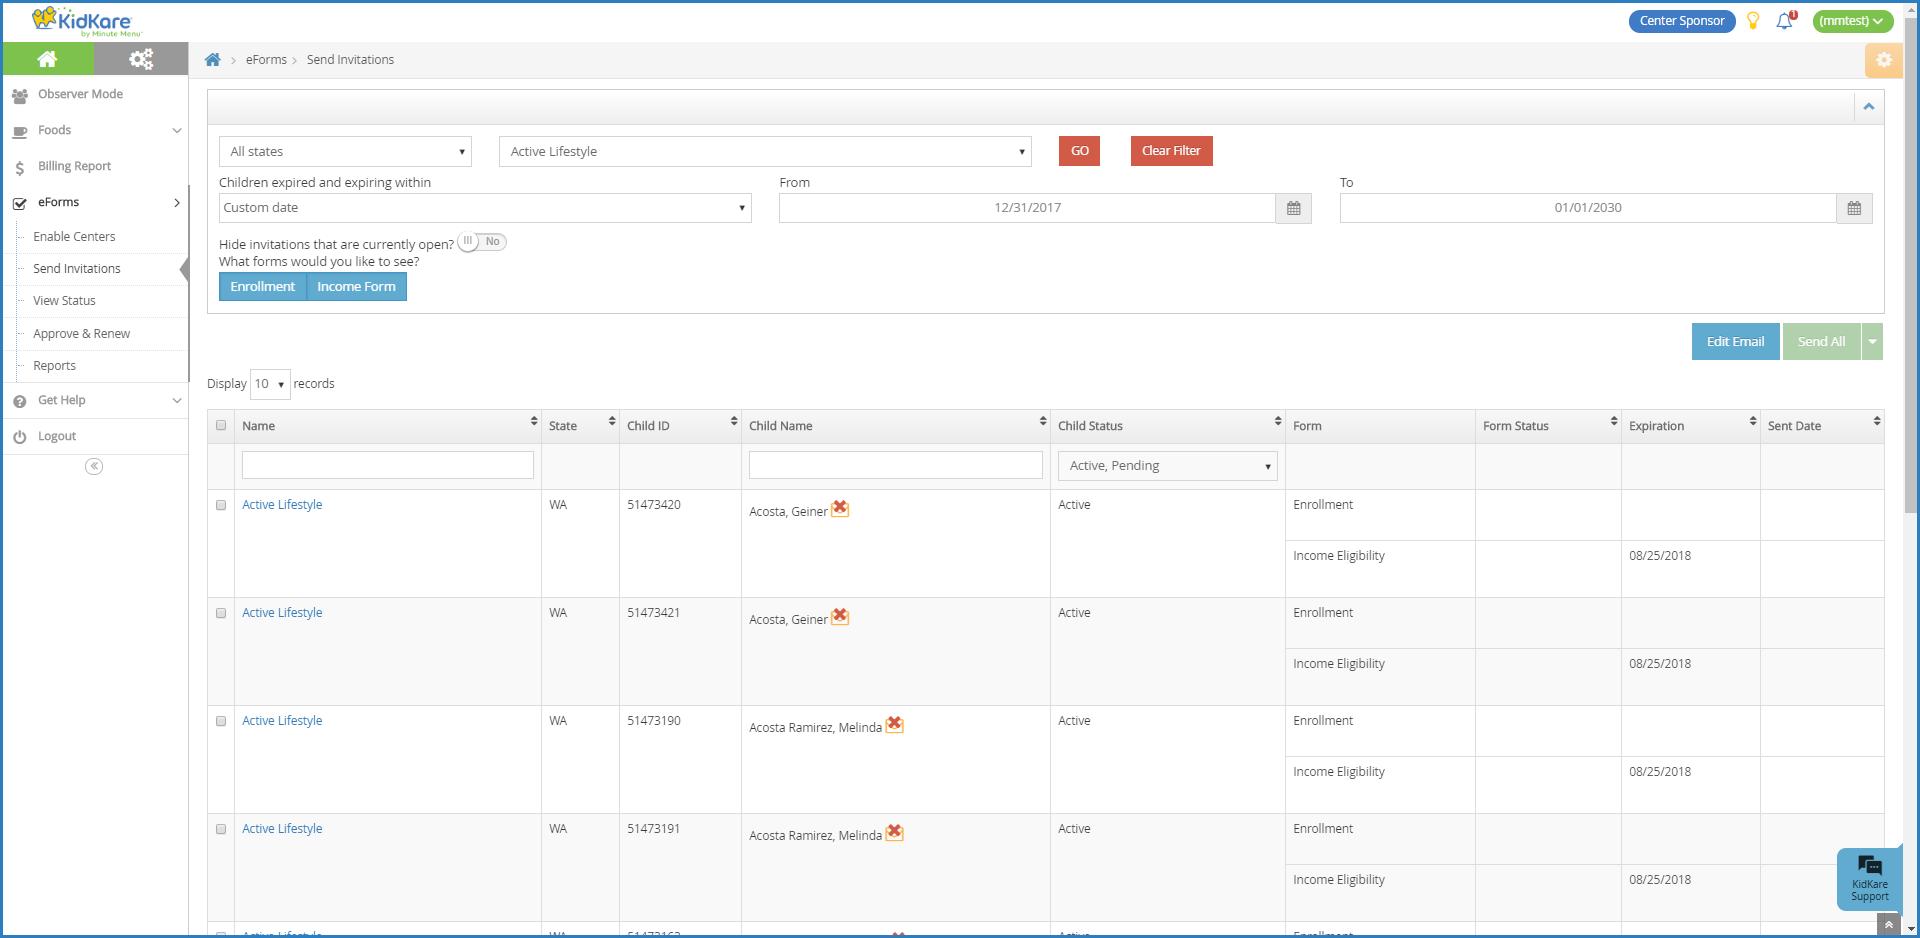
6 Click and select All, EF, or IEF Parents with an email address are emailed directly displays next to children for whom there is no email address on file.
Centers can log in to app.kidkare.com with their user credentials (the same ones they use to access Minute Menu CX) to view all invitations and their statuses
View Invitation Status
The View Status page provides an overview of your centers' invitation statuses You can see how many invitations have been sent, how many are complete, and so on
Last Modified on 05/12/2022 1:16 pm
1. Log in to app.kidkare.com using the same ID and password you use to access Minute Menu CX.
2 From the menu to the left, click eForms
3. Click View Status.

4 Set filters for the information to view
a Click the State drop-down menu and select the state(s) to view This option is only available if you are set up for multiple states
b Click the Centers drop-down menu and select the specific center(s) to view
c Select EF, IEF, or both
d Click the Invitation Sent Date drop-down menu and select 30 Days, 60 Days, 90 Days, or Custom Date If you select Custom Date, set a date range in the From/To boxes
e. Click Go.
5 Click each column to sort information in ascending or descending order
6. Click a center name to view that center in Observer Mode.
7 Click next to Export and View or All to export eForms status information
Export View: This exports the information displayed on the View Status page.
Export All: This exports complete invitation status details
Once you have invitations in the Submitted status, you can approve and renew them. For more information, see Approve and Renew
Customizing the View Status Page
Click Filters in the top-right corner to choose which columns to display You can also filter by access to the
eForms feature Possible columns include:
Name Number
State Total Sent
Not Started In Progress
Needs Approval
Submitted
Sponsor Approved
Manually Completed
Renewed
Canceled
Invitation Statuses
Status
Definition
Not Started The parents have not started filling out the form yet In Progress The parents have started filling out the form, but have not yet finished Needs Approval The form needs to be approved (by you or the center)
Submitted The parent or the center has submitted the form to you.
Sponsor Approved You have approved the forms
Manually Completed The parent completed a paper form
Renewed You have updated the system with the new date
Canceled The invitation was canceled.
[VIDEO] Approve and Renew eForms
Enrollment information is not updated in Minute Menu CX until you approve and renew enrollments on the Approve & Renew page This allows you to control when CX is updated However, remember that children updated with a future enrollment date may be disallowed from the current claim
In most cases, it is better to wait until the current claim is processed before renewing enrollments in CX For example, if your new enrollment start date is 10/1, you should wait until the September claim is processed before renewing enrollments in CX
When you have forms ready to review, a notification displays in the top-right corner of the page over the bell icon. The example below shows a notification that some centers have forms ready for approval and renewal.

You can approve and renew forms at the same time, or you can approve and renew the forms as two completely separate steps Each step is described below:
Approve: Review forms and check for errors. For example, check numbers for categorically eligible forms, verify parent signatures, review changes, compare last year's information with the updated information, and so on.
Renew: Once you approve the forms, renew them This updates the data in Minute Menu CX Remember to keep timing in mind for this step.
Approve and Renew: Approve and renew forms in one step
Before Renewing Forms
Before you renew forms and update data in CX:
Review and approve forms
Verify that the new dates will not cause disallowances on the current claim.
Verify that you have added your signature to KidKare For more information, see Add a Signature for eForms.
Approving and Renewing Forms
1. Log in to app.kidkare.com using the same credentials you use to access Minute Menu CX.
2 From the menu to the left, click eForms
3. Click Approve & Renew. The Approve & Renew page opens.
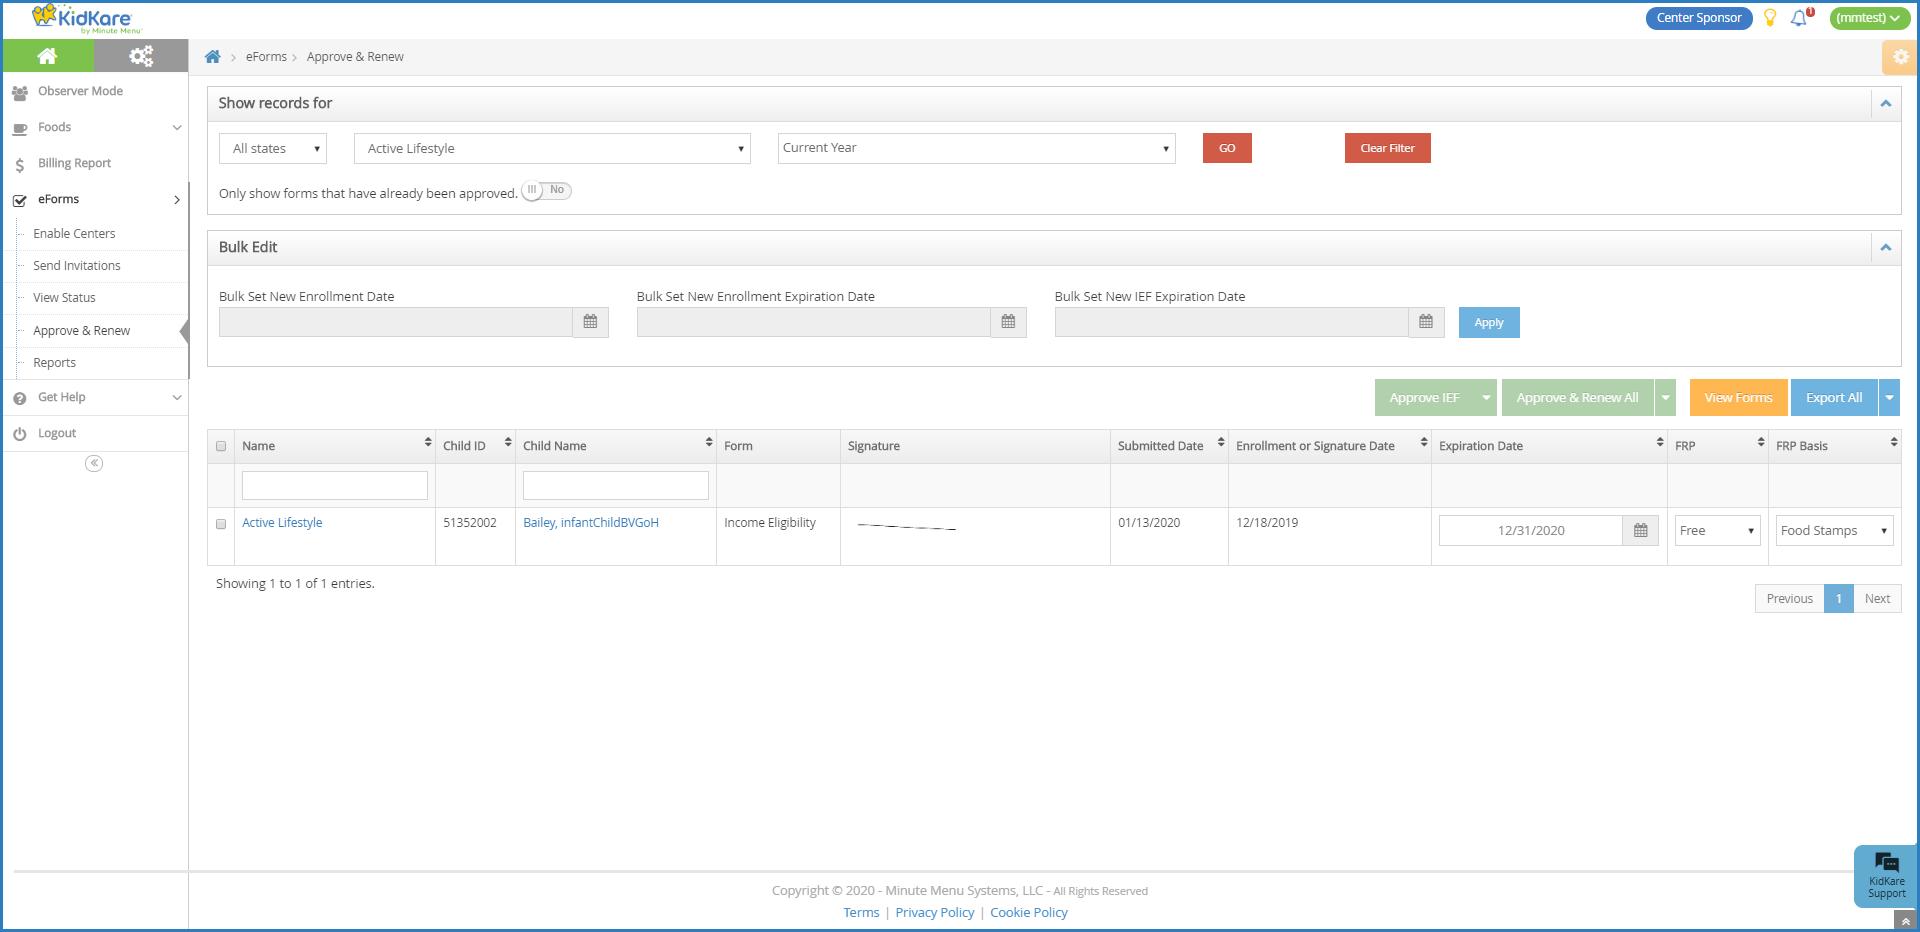
4. In the Show Records For section, set filters, as needed.
a Click the State drop-down menu and select the state(s) to view This option is only available if you are set up for multiple states
b Click the Centers drop-down menu and select the specific center(s) to view
c Click the Date drop-down menu and select 30 Days, 60 Days, 90 Days, Current Year, or Previous Year

d Click next to Only Show Forms That Have Already Been Approved to filter to only those forms that have already been approved
e Click Go
Note: You can also click Filters in the top-right corner to set additional filters and sorts, as well as to specify which columns display on the page
5 Check the box next to the record(s) to update
Note: Click View Forms to view the forms you are approving/renewing.
6. Do one of the following:
Bulk Edit: In the Bulk Edit section, set new dates in the Bulk Set New Enrollment Date, Bulk Set New
Enrollment Expiration Date, and Bulk Set New IEF Expiration Date boxes. Click Apply. Click Approve or Approve & Renew
Accept Parent Signature Dates: Click Approve or Approve & Renew.

Notes: If you do not have a signature set up in KidKare, you are prompted to add one once you click Approve/Approve & Renew You can also click a child's name to view their record and edit information, as needed When finished, click Approve or Approve & Renew
Sending Forms Back for Revision
If a form requires revision, you can send it back to the parent for changes To do so:
1. On the Approve & Renew page, locate the appropriate child.
2 Click the child's name The Child Information page opens
3. Click Send Back for Revision.

4. Select the form(s) to send back (EF, IEF, or both).
5 Click the text box and enter notes for the parent This information is included in the email sent to the parent.
6 Click Send
Exporting Approval Information
1 Click next to Export and View or All to export approval information
Export View: This exports the information displayed on the Approve & Renew page
Export All: This exports complete approval data.
Print Completed eForms
Last Modified on 05/20/2020 2:39 pm
Completed eForms are stored within KidKare You can retrieve and print these forms, as needed However, we do recommend that you simply store a digital copy, if needed Remember, you can retrieve these forms from KidKare at any time
1. Log in to app.kidkare.com. Use the same credentials you use to access Minute Menu CX.
2 From the menu to the left, click eForms
3. Click Reports. The Reports page opens.

Note: You can also access this page from the Approve & Renew page. To do so, click View Reports.
4. In the Show Records For section, set filters for the forms to view.
a Select Enrollment or Re Enrollment
b. Select the form type. You can choose from EF, IEF, or All Form Types.
c Select the center(s) to view You can select as many centers, as needed, or you can select All Centers.
d Select the date range to view You can select Current Year, Previous Year, or Custom Date If you select Custom Date, use the From/To boxes to set a date range.
5 Click Run Reports meeting the limits you set display
6. To download an individual form, click View Form. A PDF downloads. You can then print this PDF, as needed
7. To print multiple forms at once:
a Check the box next to each form to print
b. Click Combine & Print Forms. The forms you selected download.
[VIDEO] Center Training and Resources
Video Training for Centers
Watch the video below to learn more about the center side of eForms. Your centers can also view this video on the KidKare Knowledge base here
Start-Up Guide for Centers
Click here to download a printable start-up guide for eForms, and click here to download a printable checklist for centers You can then email this guide to your centers to prepare them to use the eForms feature You can also share the above video with your centers
Instruction Sheet for Parents
Click here to download and print an instruction sheet for parents. This guide helps parents start the enrollment process for their child. Centers can print this sheet and post it on a wall/door, or hand it out to parents.
KidKare Knowledge Base
Centers can also access the eForms help pages on help.kidkare.com and review the following articles and videos:
Send eForms
Work with eForms eForms Reports
Enroll Children
Last Modified on 08/04/2020 5:06 pm
You, the sponsor, and centers can both enroll children Centers can also import children from another program, such as Procare When centers enroll children, those children are automatically set to Pending, You must review and activate these children For more information, see Activate Children

IMPORTANT! Check with your center to see if they have Procare before you enroll children Do not enroll children if your center is planning to import from Procare, as this can result in duplicate records For more information, see Procare Import
1 Click the Select Center drop-down menu at the top of the window and select the center for which to enroll children
2 Click Enroll Child from the toolbar at the top of the window The Enroll New Child window opens
3. In the Child tab:
a Click the Child # box and enter a child number, or accept the system-generated number You can enter up to four characters in this box.
b Click the Classroom drop-down menu and select the classroom to which to assign this child You can also enter a new classroom name.
c Click the Child First Name and Child Last Name boxes and enter the child's first and last name
d. Click the Birth Date drop-down menu and select the child's birth date. The Age box updates automatically
e. In the Race section, check the box next to each option that applies.
f In the Ethnicity section, check the Hispanic/Latino box or the Not Hispanic box
g. In the Enrollment Info section, click each drop-down menu to set the child's enrollment dates and enrollment expiration date
h. In the Child In/Out Times section, check the box next to each day of the week the child is present in daycare Then, click the In and Out boxes and enter the child's usual in and out times
Note: If the child's In/Out times are the same for all selected days, enter the first In/Out times, and then click Copy In/Out Times to copy the times to the remaining selected days
i Check the box next to each meal in which this child participates
j. Complete the remaining fields, as needed.

4. Click Next. The Parent tab opens.
5 In the Parent tab:
a. Click the Select Parent drop-down menu and select an existing parent, or select Add New Parent. If you select an existing parent, go to Step 6
b If you are adding a new parent/guardian, click the Primary Contact drop-down menu and select Mother, Father, or Alternate
c Click the Home Phone box and enter a good phone number for the parent/guardian
d Click the Address, City, and State boxes and enter the parent/guardian's address information
e Click the Name boxes in the Mother Info, Father Info, or Alternate Contact Infosection and enter the parent/guardian's first and last name The required box depends on your selection in Step 5.b
f Complete the remaining fields, as needed

6 Click Next The Oversight tab opens
7. In the Oversight tab:
a Click the Reimbursement Level drop-down menu and select the child's reimbursement level according to their income eligibility form. You can also use the income eligibility calculator at the bottom of this tab to calculate the child's reimbursement level For more information, see Income Eligibility Calculator.
b Complete the remaining fields, as needed
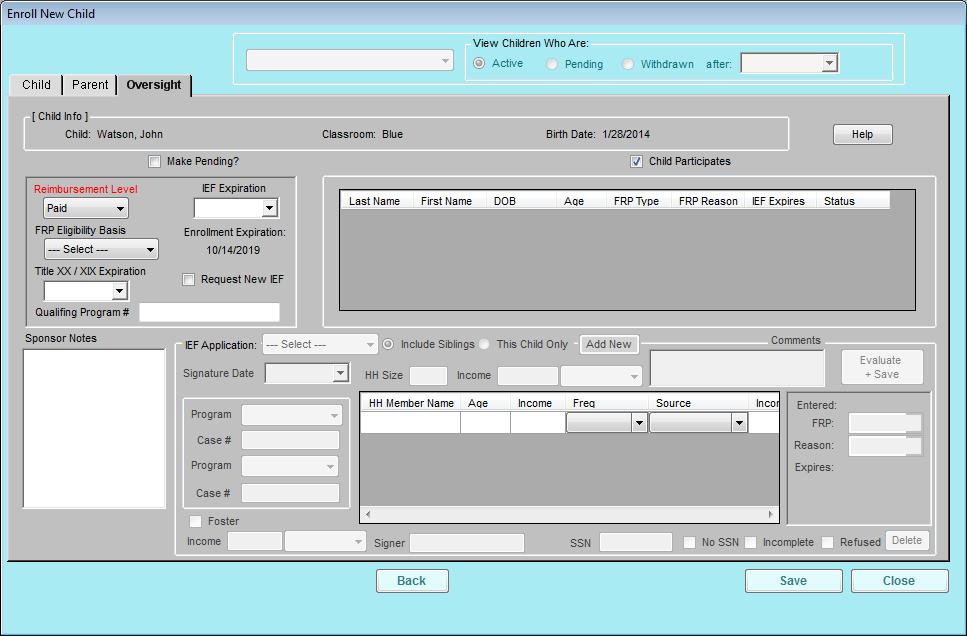
Note: Children are made active automatically unless you check the Make Pending box in the Oversight tab
8 When finished, click Save
For more information about the fields in each tab of the Child Information window, see Understand Child Information
Import Children in KidKare
Last Modified on 05/20/2020 2:56 pm
As a sponsor, you can import children for your centers in batches, using a provided template and instructions When you import child information, the system creates new records where none exist If a child record already exists and you import the record again with changes, the existing record is updated Any duplicate records are ignored during the import.
1 Log in to app.kidkare.com with the same ID and password you use to access Minute Menu CX A list of your centers displays
2 Filter to the center for which you need to import children For more information about filtering, see Access Observer Mode
3 Click the center to view The center's account displays to you in Observer Mode The Kids page is open by default
4 Click Import The Import page opens
Note: You can also click Setup from the menu to the left and select Import to access this page
5. Click Download Template & Instructions. Fill-out the template according to the instructions and save it.
6 Format your data according to the template and the PDF instructions
Note: Click here for more information about how the fields on the import template map to the Child List Export file in Minute Menu CX
7 Save your spreadsheet as an XLSX file
8. When finished, return to the Import page, and click Browse and browse to the location on your computer where the template is stored

9 Click Import.
If there are any errors in the import, the Import Errors page opens. Review the errors and click Continue Import or Cancel Import If you cancel the import, resolve any errors and try importing your spreadsheet again.
If there are no errors in your import, or if you specified to continue the import, the Import Preview
page opens and displays a sample record.
10 At this point, you can do the following:
Click View Another Record to view another sample record.
Click Cancel Import to cancel the import and update your template
Click Finalize Import to complete the import process.
Understand Child Information
This article provides more detailed information about the Manage Child Information window Each number on the images corresponds to a description below
Last Modified on 05/21/2020 11:07 am
Child Tab

1 The Child # box displays the child number Each child must be assigned a number You can enter up to four characters in this box.
2 The Classroom box displays the classroom to which the child is assigned Click the drop-down menu and select a classroom, or enter a new classroom
3 The Child First Name, Middle Name, and Child Last Name boxes display the child's name The Child First Name and Child Last Name boxes are required
4 The Birth Date box displays the child's birthday You can either type the birthday in this box, or you can click the drop-down menu to select the date from a calendar
5 Check the box next to the child's race and ethnicity These designations are required by the CACFP
6 The Original Enrollment Form Date/First Day in Carebox displays the child's original enrollment date This box is required Children claimed before this date will be disallowed You should only enter this date once, and it should never change
7 The Current Enrollment Form Date box is updated annually as you receive enrollment forms for the new
program year are received Children claimed before this date may be disallowed (subject to policy D.20)
8 The Enrollment Expiration Date box is updated annually as you receive enrollment forms Children claimed after this date may be disallowed (subject to policy D.1)
9 This section is for infants only
Select an infant food and formula preference: Center Supplies Food or Parent Supplies Food and Refuses If the child's parent supplies food for this infant, the center's food will automatically be disallowed from the claim.
Select the formula offered by the center and the parent's preferred formula The formula selection is populated by formulas you set up in the Manage Formula Types dialog box. To access this dialog box, click the Tools menu and select Manage Formula Types
If your agency requires a separate infant feeding form, check the Infant Form on File box when the form is received Centers do not have access to this options Centers will be alerted to all infants who do not have a form on file on the center dashboard (subject to policy D.24).
10 This section contains options for special needs situations
Check the Special Needs box to mark this child as having special needs. Special needs refers to children who are approved to be claimed from age 13-18 Check the Special Needs Statement on File box to indicate that you have received a statement (subject to policy D.7).
Check the Migrant Workers Child to indicate this child is the child of a migrant worker Migrant workers' children can be claimed at age 15 and younger.
Check the At-Risk Child box for each child who participates in the At-Risk program
Check the Special Diet box if the child requires special food or has food allergy.
Check the Milk Allergy box if the child does not drink the milk provided by their age group (whole milk for age 1 and 1% or skim for ages 2 and up). This box automatically includes children in the Substitute Milk section of the Milk Audit This box is not available if you do not check the Special Diet box.
Click the Diet Expiration Date box and enter the date on which the child's special diet statement expires. This box is subject to policy D.6.
Check the Diet Statement on File box when you receive the diet statement Special diet children who are served and do not have a statement on file may receive an error during claims processing (subject to policy D.5)
11 Check the box next to each day of the week the child is present at the center Then, enter the child's typical in and out times You can click Copy In/Out Times to copy times from the first boxes to all other selected days of the week
12 Check the box under each meal for which the child is typically present
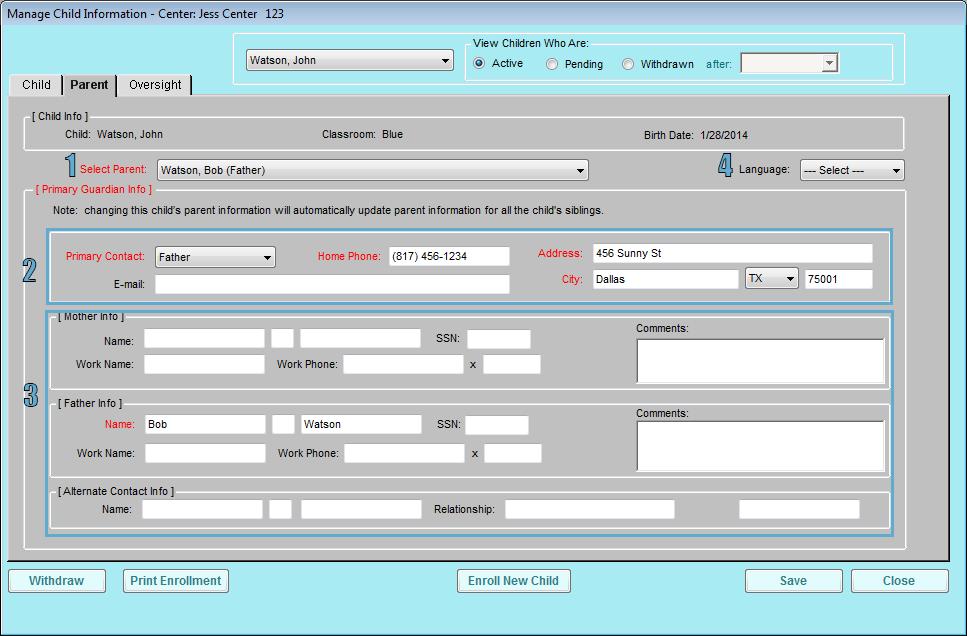
1. Click the Select Parent drop-down menu and select an existing parent/guardian record, or select Add New Parent to add a new parent/guardian record Children with the same parent will be siblings in the program
2. Select the primary contact and enter their home phone, address, and email address.
3 Enter the contact's name in the appropriate section, based on their relationship to the child We recommend you complete all applicable fields.
4 Click the Language drop-down menu and select the language in which communication should be sent You can select English or Spanish.
Oversight Tab


Note: Center accounts typically do not have access to the Oversight tab when enrolling children, as this is where the reimbursement level (free, reduced, or paid) is stored However, some self-sponsored sites do allow centers access to this page This is determined by policy F.2.b
1 Check the Make Pending/Make Active box to set an active child to pending or to set a pending child to active.
2 Click the Reimbursement Level drop-down menu and select Free, Reduced, or Paid
3. Click the FRP Eligibility Basis drop-down menu and select how the child qualifies for the reimbursement level you selected
4. If the child was categorically eligible through Title XX/XIX, click the Title XX/XIX Expirationbox and enter the expiration date for that program Enter the qualifying program number in the box below the expiration date.
5 Siblings are listed here
6. Use the lower half of the window to enter income eligibility information. Minute Menu CX then uses this information to help you calculate the child's reimbursement rate For more information, see Income Eligibility Calculator.
Activate Children
Last Modified on 05/21/2020 9:37 am
When centers enroll children, the children are automatically set to Pending status Sponsors must then review and activate these children There are two ways to enter categorical eligibility (FRP rates) and activate children: One at a time or multiple at a time
Activating Multiple Children at a Time
1 Click File and select Activate Children The Activate Children window opens

2 In the Filter By section, select All Centers or Selected Centers
3 In the Exclude Children if Enrollment finalized section, select the Before option or the After option Then, select a date
4 Check the Include Withdrawn Children Who Were Never Activated box to include withdrawn pending children in the list
5 Check the box next to each child to activate You can also click Select All to select all listed children and Deselect All to clear your selections
Note: Check your selections before proceeding You cannot undo this function
6 Click Activate Activating Children One at a Time
1 Click the Select Center drop-down menu at the top of the window and select the center for which to activate children.
2 Click Children from the toolbar The Manage Child Information window opens
3. In the View Children Who Are section, select the Pending option.
4 Click the drop-down menu and select a child
5 Click the Oversight tab
6 Click the Reimbursement Level drop-down menu and select the child's reimbursement level
7 Click the FRP Eligibility Basis drop-down menu and select the child's income eligibility basis
Note: You can also use the income eligibility calculator at the bottom of the window to calculate FRP rates/basis For more information, see Income Eligibility Calculator
8. Check the Activate Child box.
9 Click Save
[VIDEO] Use the Income Eligibility Calculator
You can enter household income information directly into Minute Menu CX Minute Menu CX will then calculate the child's reimbursement level and FRP basis
1. Click the Select Center drop-down menu and select a center.
2 Click Children from the toolbar at the top of the window The Manage Child Information window opens
3. Click the drop-down menu and select a child.
4 Click the Oversight tab The income eligibility calculator is in the bottom half of the tab
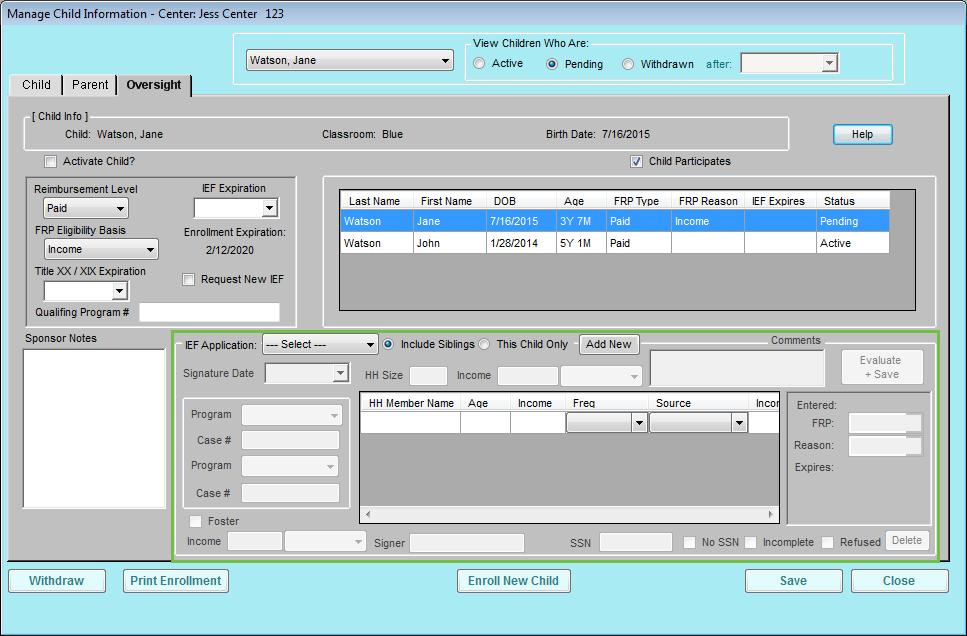
5 Click Add New
6 Click the Signature Date box and select the date the parent signed the form
7 To enter household income:
a Click the HH Member Name box in the table and enter each household member's name You must enter all household members, including children As you add names, the value in the HH Size box increases
b Click the Age box for each house hold member and enter their ages
c Click the Income box for each household member with an income and enter their income amount
d Click the Freq drop-down menu and select the income frequency For example, if you entered yearly income, you would select Yearly.
e Click the Source drop-down menu and select the income source For example, if these are wages, you would select Wages/Salaries.
f If there are multiple income sources for one person, scroll to the right and repeat Steps 7c -7e to add additional income.
g For each child listed, click the Freq drop-down menu and select No Income
Note: If the parent refused to provide income or program information, check the Refused box.
8 To enter qualifying program information:
a Click the Program drop-down menu and select the program
b. Click the Case # box and enter the provided case number.
c Repeat Steps 1 & 2 to add an additional program
9. If this is a foster child, check the Foster box.
10 Click the Signer box and enter the name of the person who signed the form
11. Click the SSN box and enter the signer's social security number. You must enter all nine digits. If no SSN was provided, check the No SSN box
12. Click Evaluate + Save.

Withdraw Children
Last Modified on 05/21/2020 9:47 am
When a child leaves a child care center, they should be withdrawn from the program Withdrawing a child removes them from future rosters However, you can still access a withdrawn child's information and claim history (select the Withdrawn option in the View Children Who Are section o the Manage Child Information window).
1 Click the Select Center drop-down menu and select the center
2 Click Children from the toolbar at the top of the window The Manage Child Information window opens
3 Click the drop-down menu and select the child to withdraw
4 Click Withdraw in the bottom-left corner of the window The Withdraw Child dialog box opens
5 Click the Withdrawal Date and select the withdrawn effective date This defaults to today's date

6. Click Continue. The child is withdrawn from the program.
Transfer Children
Last Modified on 05/21/2020 9:55 am
You can transfer children from one center to another with the Copy Child feature Once you copy the child to the new center in which they are enrolled, you must withdraw the child from the original center
1. Click the Select Center drop-down menu and select the center.
2 Click the Tools menu and select Copy Child The Copy Child dialog box opens
3. Click the drop-down menu and select the child you are copying/transferring.
4 Click Continue The Select a Center dialog box opens
5. Click the drop-down menu and select the center to which you are copying/transferring the child.

6. Click Continue. The child is copied to the new center. If the child is no longer attending the original center, you should withdraw them from that center For instructions see, Withdraw Child
Delete or Merge Child Data
If you mistakenly entered a child into Minute Menu CX twice, you may need to delete the child record entirely, or merge the child records
1. Click the Select Center drop-down menu and select the center.
2 Click the Tools menu and select Delete Child The Delete Child dialog box opens
3. Click the drop-down menu and select the child to delete.
4 Click Delete Children who have never been claimed and/or have household income entered are deleted immediately. You cannot recover deleted records. If the child has ever been marked in attendance or has household income entered, the program asks if the record should be merged Children who have been claimed or who have household income entered cannot be deleted they can only be merged.
5 To merge records, click Yes at the prompt
6. Click the Select Child drop-down menu and select the child with which to merge the deleted child.
7 Click Merge Child All of the child records are merged into the child record you selected In the example shown below, John Smith's name will be removed from the child list, but the records still exist under Johnny A Smith

Manage the School Calendar
Last Modified on 05/21/2020 11:05 am
The Manage School Calendar window allows you to add school out days for your sites This is useful for setting up summer vacation, holidays, or extended school closures Adding school out dates to the calendar removes the requirement that sites select School Out when checking children in for the day.
You can add school out days per child, center, school, or school district You can also add school out days for all children and all centers at once
1. Click the Select Center drop-down menu in the top of the application window and select a center.
2 Click the Menus/Attendance menu and select Manage School Calendar. The Manage School Calendar window opens
3 Select one of the following options: Choose Specific Child Selected Center Select Specific School School District
All Children, All Centers
4 Do one of the following to add School Out days: Double-click a day to add a School Out day
Click the starting day on the calendar, hold down Shift on your keyboard, and click the ending day on the calendar Then, right-click the calendar and select Add School Out If the center is an ARAS center, and the school out day is not ARAS-eligible, select Add School Out (Not At-Risk)instead.
5 To remove School Out Days, right-click School Out and select Remove School Out You can also doubleclick School Outto remove the day.

Child Rosters
Last Modified on 05/21/2020 11:10 am
There are two versions of the child roster in Minute Menue CX: a sponsor version and a center version The center version displays all enrolled and pending children The sponsor version displays all children who were included on the claim for the selected month
1. Click the Reports menu, click Children, and choose from the following: Child Roster Child Roster [Center Version]
2 Select one of the following options:
Selected Center: Print the report for the center shown in the Select Center box at the top of the window
All Active Center:Print the report for all of your active centers.
Choose Multiple Centers: Print this report for centers you select
3. Click Run Report. If you selected the Selected Center or All Active Center option, go to Step 5. If you selected the Choose Multiple Centers option, the Center Filter dialog box opens
4. Set filters for the centers to include on the report. You can specify the status, start dates, claim dates, state, and so on When finished, click Next
5. The Select Date dialog box opens. Click the drop-down menu and select the date for which to print the report
6. Click Continue.
7 If you are printing for multiple centers, you are prompted to specify a sort You can select Center Name or Center Number.
8 Click Continue A PDF is generated You can save the PDF or print it
Note: To display FRP rates on the center version of this report, set policy F.2 to Y
Child Historic Data
Introduction
Last Modified on 07/08/2022 11:17 am
The Child Historic Data function is an optional feature for Minute Menu CX This feature allows users to view and change past child information and keep track of when changes were made When Child Historic Data is enabled, the History Month drop-down menu displays in the top-left corner of the Manage Child Information window Changes to the file are effective from the claim month you select until another change is made to the child's record. This allows users to make changes to child information by claim month.
Child Historic Data allows you to change and retain any information kept on a child, including all information entered in the Manage Child Information window Each field can be changed for a specific month and following months by selecting the first month to be changed in the History Month drop-down menu and then changing the value The change then continues through the following months up to and including the month before a month where the same value has already been modified.
The History Month drop-down menu includes all past months where claims were processed, as well as two months forward from the currently set claim month
Enabling Child Historic Data
To begin using Child History Data contact Minute Menu CX support at cxsupport@minutemenu com to change Policy D.22.
Changing Child Information
When changing a child's recorded information with Historic Data, keep the following major considerations in mind:
When you make more than one change to a single field in the Manage Child Information window for any single claim month, the last change you make is the change maintained for that entire month.
When you make a change to any one value in the child's record for any month, that changed value persists for any and all following months, up to, but not including, a later month in which a change has already been made
Changes Within a Month
If a child's information changes several times throughout the month, each of the changes will be saved, but the last change will be the authoritative record that will be displayed onscreen for that month
Changes From Month to Month
Once a change has been made to a single value in a child’s record, that changed value will continue forward through succeeding months, up to, but not including a month where the same value has already been modified
For example, if a child's F/R/P status was Paid on January 1st and it is changed to Free for the August History month, the child remains Free for all following months as long as no further changes are made after August
Processing Claims
The Minute Menu CX processor uses the child information for the claim month selected in the Process Claims window For example, if you are processing a late claim for December, CX looks at the child data from December to process the claim
If changes have been made to a child's file for a given month and the claim has already been processed, the claim must be re-processed for changes to take effect and be reflected on the OER
Claim Month
Changes made to the child's current file are saved to the current claim month The current claim month is always listed at the top of the CX software window
If a change is made for a historic month and no other changes have been made more recently, the file change updates the current child record.
If a change is made for a historic month and other changes have been made more recently, the file change is only effective for that month
Example
1 In January, a child's FRP rate was changed to FREE
2 In April it changed to PAID
3 The current claim month is July
If a user goes to March and changes the child status to REDUCED, that change would be effective for March ONLY, since there was a more recent change in April. The change in April will affect the CURRENT month, July, because there are no other more recent changes since then
Add Administrative Users for Reviews
Last Modified on 05/16/2022 4:55 pm
Users must be granted permissions to view and edit reviews before they can access and configure the review questionnaire at https://reviews.minutemenu.com You can also specify permissions that only allow users to access review data and reports and/or complete the review questionnaire in KidKare
1. Click the Tools menu and select Manage Sponsor Staff.
2 Click the Staff Member drop-down menu and select the staff member to which to assign the Monitor role You can also click Add New to add a new staff account. For more information about adding staff accounts, see Create Staff Accounts
3. Check the Monitor box in the Staff Member Status section.

4 Click Save
5 Click Online Review The Online Review Permissions dialog box opens

6 Check the following boxes according to the level of access you need to grant:
Online Review Access: This allows the Monitor to access the review tool in KidKare.
Online Review Reports: This allows the Monitor to access reports and review data at https://reviews minutemenu com
Online Review Configuration: This allows the Monitor to edit the questionnaire for online reviews Only give this permission to the people who are authorized to make changes to your review questionnaire
7 Click Save The Monitor you updated can now interact with online reviews in the way you specified in Step
Customize the Center Review Questionnaire
Last Modified on 09/19/2022 11:40 am
KidKare by Minute Menu provides an initial questionnaire, but you can customize it to fit your agency and state's needs Updating this questionnaire updates the final review form your Monitors complete in KidKare
To update your questionnaire:
1 Log in to http://reviewadmin.minutemenu.com/ Your account must have online review configuration permissions before you can access this page.
2 Click the Design tab

3 Add review sections, as needed:
a Click Add Section The section details open
b Click the Category drop-down menu and select the category into which to place this section
c Click the Name box and enter the name of the section
d Click Save
4. Click . The question details open.
5 Click the Question Text box and enter the question
6. In the Response Details section:
a Click the Response Type drop-down menu and select the question type For more information, see the heading Question Types and Layouts, below.
b Check the A Response is Required box if this question is required
c. Check the Read-Only box if this question is read-only.
7 Click Advanced Options to specify additional question requirements For example, you can hide certain questions from the center's copy of the review. The available options vary between question types.
8 In the Question Location section:
a Click the Question Category drop-down menu and select the category in which to place the question
b Click the Question Selection drop-down menu and select the section into which to place the question
c Check the Follow-up Question To box to mark this question as a follow-up question If you select this option, a drop-down menu displays Select the question/situation on which to follow-up
9 Click the Help Text box and enter useful information for the end user
10 When finished, click Save
Question Types and Layouts
Question Type Response
This is a single line text box that allows Monitors to enter their response
Text: This is a text input box
Text, Email, Phone, Temperature, or Number
Date
Yes/No
Yes/No/NA
Single Choice, Single Child Picker, Meal Picker
Multiple Choice, Multiple Child Picker
Time/Duration
Date and Time
Memo
Signature
Email: This is a text input box that validates the input is in the following format: TEXT@TEXT TEXT
Phone: This is a numeric input box that limits users to no more than 10 characters The box automatically adds phone number separators
This is a date picker
This is a button selection Monitors can only select one option (Yes or No).
This is a button selection Monitors can only select one option (Yes, No, or N/A)
This is a single select drop-down menu
This is a multiple select drop-down menu
This is a time picker There are no restrictions for past, current, or future times
This is a date picker and a time picker The time picker does not have any restrictions for past, current, or future times
This is a multi-line text input box.
This box is used on the Finalize page You cannot configure it on the Admin site. Users can sign their name with a mouse, finger, or stylus
Assign Monitors to Centers
You must set up staff members who conduct site visits should be set up as monitors in Minute Menu CX Once you set up monitors, you can assign them to specific centers in the Oversight tab in the Manage Center Information window
Designate Monitors
1 Click the Tools menu and select Manage Sponsor Staff
2 Click the Staff Member drop-down menu and select the staff member to which to assign the Monitor role
You can also click Add New to add a new staff account For more information about adding staff accounts, see Create Staff Accounts
3 Check the Monitor box in the Staff Member Status section

4 Click Save
Assign Monitors to Centers
Now, assign monitors to specific centers.
1 Click the Select Center drop-down menu and select the center
2 Click Centers from the toolbar The Manage Center Information dialog box opens
3 Click the Oversight tab
4 In the Site Monitoring Info section, click the Monitor drop-down menu and select the monitor to assign to this center

5. Click Save.

Notes: The Next Visit Due box below the Monitor box is updated automatically each time you enter a monitor visit Minute Menu CX sets this date four months from the review date by default The Start Month box displays the start month of the monitor review year, which defaults to October
Print the Sponsor Review Summary Report
Last Modified on 05/19/2020 11:25 am
Print the Sponsor Review Summary report and take it with you on site visits You can print this report for all centers, or you can print it for specific centers
1. Click the Reports menu, Reviews, and select Sponsor Review Summary. The Report dialog box opens.
2 Select one of the following options: Selected Center, All Active Centers, or Choose Multiple Centers
3. Click Run Report. If you selected the All Active Centersoption, go to Step 5. If you selected the Selected Center option, the report generates
4. If you selected Choose Multiple Centers, the Center Filter window opens. Set filters, as needed and click
5. Specify how to sort the report. You c an sort by Center Name or Center Number.
6 Click Continue A PDF report is generated Print this report and take it with you on site visits
Complete the Review Questionnaire
Once a Monitor is ready to review a center, they can log in to KidKare on any device and complete the review
Completing the Review Questionnaire in KidKare
1. Log in to app.kidkare.com. Use the same credentials you use to access Minute Menu CX.
2 From the menu to the left, click Reviews
3. Click Review Centers. The Review Centers page opens.

4 Locate the center to review
Click the Center, Monitor (if available), Last Review, and Next Review Date columns to sort information in ascending or descending order
Click the blank boxes at the top of each column to filter information in that column. For example, you can click the Center box and begin typing a center's name Click Filters in the top-right corner to set additional filters. You can filter by Pending, Active, or Inactive status If available, you can also specify whether to show reviews for all monitors
5. Click the center's address in the Address column to open Google Maps™ in a new window.
6 When you are ready to begin the review, click the name of the center to review The Review Questionnaire opens.

The questionnaire is split into the following pages:
Main Meal
Food & Attendance
Service Analysis (Texas Only)
Compliance
Paperwork
Other
Finalize
7 Complete the questions for each page As each review is created by the sponsor administrator, review questions vary.
Click Save to save your progress before you continue
Click Continue to go to the next page.
Click a page icon to jump to that particular page
Click to view more information about the question (if the administrator provided it) When finished, click Close

The remaining number of required fields displays next to each page icon and updates automatically as you enter information The only exception is the Food & Attendance page: An asterisk displays for this page if there are missing fields
If you need to exit the review and return later, click Save & Exit Review at the top of the page, or click Save at the bottom of the page and close the review Your information is retained, and you can return to the review at a later time.
8 Once you reach the Finalize page, ensure that all review components are complete If you are missing required fields:
The All Required Fields Must Be Completed Before The Review Can Be Signed and Submitted message displays. Links to the incomplete pages are also included. Click the link to jump to the page you need to complete
The number of missing fields is indicated next to the page icon (except for the Food & Attendance page, which is marked with an asterisk)


9 Click the Notes box and enter any review notes Click to collapse this section Click to expand it again.
10 In the Signatures section:
If this is not a desk review, have the center representative sign the Center Signature box.
If this is a desk review and you want to require an electronic signature, set If this is a desk review, do you want to require an electronic signature? to Yes. The provider will receive an email and a KidKare message prompting them to acknowledge and sign for their review electronically For more information, see Require Signatures for Desk Reviews.
11 Sign the Monitor Signature box
12. Click Complete. The Confirmation page opens. Once you complete the review, the center receives an email
and a message in KidKare alerting them that their review report is ready They can download a copy of their review at the link in either one of these messages
About the Food & Attendance Review Page
The amount of required fields on the Food & Attendance page varies depending on user input. For example, if you do not select a meal, meal components are not required However, if you do select a meal, the components are required For this reason, the remaining required fields are marked with an asterisk next to the page icon, and the page display changes as monitors complete the review
1. In the Meal Service Details section:
a Select No Meal, Breakfast, AM Snack, Lunch, or PM Snack
b. If the center is approved for multiple servings, select the number of servings given at the meal (1 or 2) Then, select the time at which each serving was given
c. Select the meal components served in the Non-Infants and Infants section.
2 In the Milk Inventory On Hand section:
a. Select Pre-Serving to record milk amounts before the meal was served, or select Post Serving to record milk amounts after the meal was served
b. Enter the gallons of milk for each listed milk type.
3 In the Food Served, section, click the Attendance and Served Count boxes for each age group and enter the amount of participants who attended the meal and the amount of participants who were served a meal. KidKare totals these counts for you

4 When finished, click Continue
Service Analysis for Texas Sponsors
Sponsors for the state of Texas must also complete the Service Analysis page This page lists the food components entered on the Food & Attendance page for non-infants and infants, as well as the required quantities. You must enter the prepared quantities and indicate whether those quantities were sufficient.
1 Begin the review as you normally would For more information, refer back to the heading Completing the Questionnaire in KidKare, above
2 Enter information, as required, and click Continue to move through the review pages
3 When the Service Analysis page opens:
a Click the Category drop-down menu next to each listed food (if available), and select the category to which the food belongs
b Click the boxes in the Prepared column for each age group, and enter the quantity of food prepared
c In the Amount Sufficient column, click Yes or No
4 Repeat Step 3 for each meal You must complete these tables for both non-infants and infants
5 When finished, click Continue
Require Signatures for Desk Reviews
Last Modified on 05/16/2022 4:55 pm
When completing desk reviews, you can require that a center representative digitally sign to acknowledge they received a copy of the Review report You can toggle this option on and off when finalizing the review The review will not be complete until the center representative signs their review
1. Log in to app.kidkare.com. Use the same credentials you use to access Minute Menu CX.
2 From the menu to the left, click Reviews
3. Click Review Centers. The Review Centers page opens.
4 Locate the center to review
Click the Center, Monitor (if available), Last Review, and Next Review Date columns to sort information in ascending or descending order
Click the blank boxes at the top of each column to filter information in that column. For example, you can click the Center box and begin typing a provider's name
Click Filters in the top-right corner to set additional filters. You can filter by Pending, Active, or Inactive status If available, you can also specify whether to show reviews for all monitors
5. Complete the review questionnaire as you normally would. For details, see Complete the Review Questionnaire

6 When you reach the Finalize page, click next to If this is a desk review, do you want to require an electronic signature? The Center Signature box is removed

7. Sign in the Monitor Signature box and click Complete.
Review Acknowledgement
Once you click Complete, the center will receive an email and a message in KidKare prompting them to review and acknowledge their Review report.
When the center clicks the link, the Review Acknowledgement pop-up opens If this link is accessed from email, the center will be automatically logged into KidKare first
The center can click the link to open their review in a new tab Then, they can use a mouse, finger, or stylus to sign the Center Signature box. Once they acknowledge and sign for the review, they will receive a new message and email with a link to the updated, signed report. For more details and instructions for providers, see Sign for Desk Reviews Online
Delete In-Progress Reviews
You can delete in-progress reviews, if needed
1 Log in to app kidkare com Use the same credentials you use to access Minute Menu CX
2 From the menu to the left, click Reviews
3 Click Review Centers The Review Centers page opens

4. Click next to the center's name.
5 At the Are You Sure prompt, click Yes
[VIDEO] Enter Site Visit Reviews
1 Click the Select Center drop-down menu and select the center to review
2. Click the Tools menu and select List Reviews. The List Reviews window opens.
3 Click Add The Add a New Review window opens to the General tab by default
4. In the General tab:
a Click the Date box and select the review date This box defaults to today's date The date you set here also sets the date in the Next Review box. The next review date is set for four months from the current review date, unless you indicate that a follow-up visit is required If a follow-up visit is required, the date in the Next Review box is set for two weeks from the current review date.
b Click the Type drop-down menu and select the type of review you are conducting For example, if this is the first time you are reviewing this center, you would select 1st Review.
c Check any of the following boxes that apply to this review: Followup Required
Unnaounced
3 Year Detailed Review
Attempted Review Desk Review
d Click the Notes for Next Review box and enter any notes for the next scheduled review
e Click the Monitor drop-down menu and select the monitor who completed the review
f Click the Monitor Arrival Time and Monitor Departure Time boxes and enter the time the monitor arrived at the center and the time they departed from the center
g In the Block Claim section, indicate whether this was a review for block claims
h In the Training section, check the box next to each item that applies
i Click the Eval Grade box and enter the review grade
j Click the Review Comments box and enter any comments about this review

5 Click the Meal tab
6. In the Meals tab:
a Record attendance by classroom, age group, or center total The method you use is subject to Policy R.4

Note: You can skip entering counts in the table and enter totals directly below the table if totals are all you need. The total served count will be compared to the meal counts recorded by the center for that meal on that day (subject to Policy R 2)
b Click the Reviewed Meal drop-down menu and select the meal that was reviewed If you did not review a meal, select No Meal. If you select no meal, go to Step 7.

c Click next to each meal component and record the foods that were served for each age group
CX can cross-check the foods the monitor enters with the foods the center recorded (subject to Policy R 3)
d In the Milk Inventory On Hand section, check the Pre-Serving or Post Serving box Then, enter the milk totals accordingly
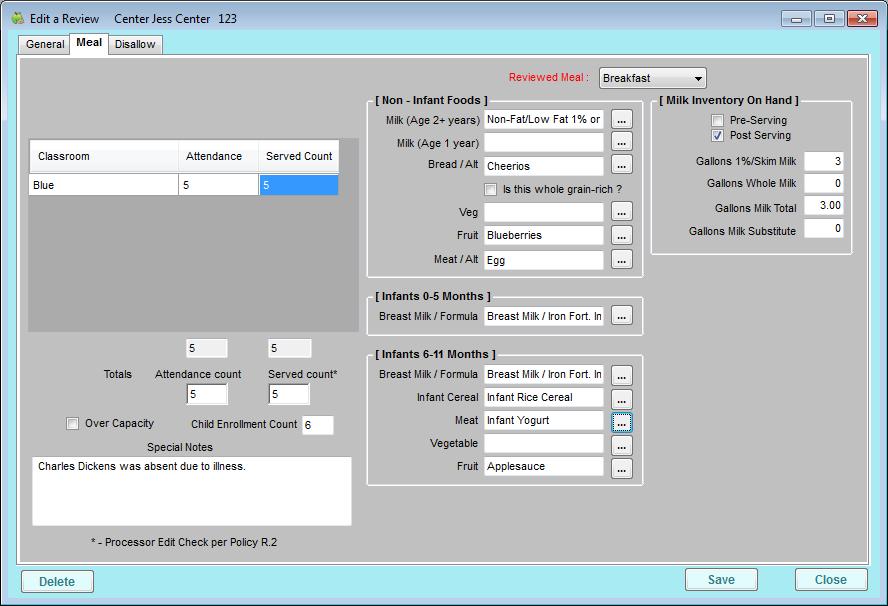
7. If you have disallowances, click the Disallow tab. If you do not have disallowances, go to Step 9.
Note: Only use the Disallow tab if meals need to be disallowed as a result of the monitor visit
8 In the Disallow tab, you can:
a. Disallow a range of meals:
i In the Disallow a Range of Meals section, set starting and ending dates to disallow For example, you could disallow meals served between February 4th and February 6th.
ii Check the box next to each age group to disallow
iii. Check the box next to each meal to disallow. Each meal you check in the Starting Date category is disallowed from the start date to the end date Each meal you check in the Ending Date category is disallowed on the end date only.
iv Click the Disallow Reason drop-down menu and select the reason these meals are disallowed You must have previously set up review disallow reasons to populate this menu. For more information, see Review Disallow Reasons
v. Check the box next to any of the following that apply:
5 Day Attendance Problem Closed
Corrective Action Visit
Corrective Action Started
vi Click the Corrective Action Notes box and enter any notes about corrective action you are taking with the center.
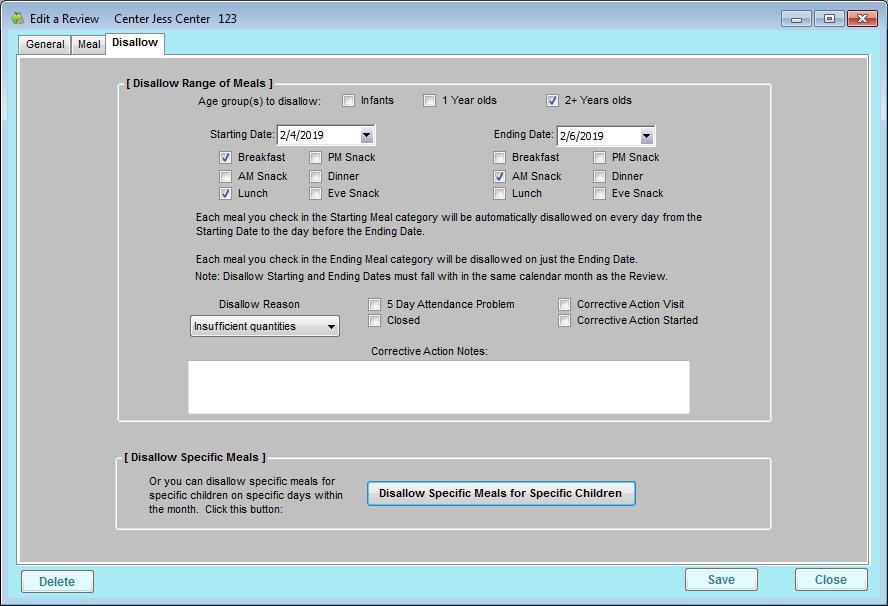
b. Disallow specific meals for specific children:
i Click Disallow Specific Meals for Specific Children at the bottom of the tab The Manually Disallow Meals window opens.
ii Click Add Disallow
iii. Double-click the date to disallow on the calendar. The Disallow Meals dialog box opens.

iv. Check the box next to each meal to disallow for the selected date.
v Click Apply + Close
vi. In the Children Affected section, check the box next to each age group to which this applies. To select specific children, check the Specific Children box Then click Select Children and select the children.
vii Click the Disallow Reason drop-down menu and select the disallow reason
viii. Click Save.

ix Click Close
9. Click Save.
Validate Online Reviews
Last Modified on 05/16/2022 4:56 pm CDT
Monitors can record reviews online with any Internet-connected device while present at the childcare center Once these reviews are completed and finalized, they appear in your Minute Menu CX database at Pending status The next step is to validate the review Reviews must be validated before they are classified as the center's completed review.
You can view validated reviews in the List Reviews window Validated reviews are also included in the Review Reports
1. Click the Tools menu and select Validate Online Reviews. The Validate Online Reviews window opens.

2 Filter the reviews that display
a. In the Filter By section, select the All Centers option or the Selected Center option.
b In the Review Status section, select the status to view: Pending, Rejected, Validated, or All Online Reviews.
c Click the Monitor drop-down menu and select a specific monitor to view
d. In the Date Range section, select one of the following options: Last 12 Months, Current Fiscal Year, or All Years
e. When finished, click Refresh List.
3 Click View next to a review to review it The Center Reviews window opens You can click Print to print this information. You can also click Online Review to open a report for this review. When finished, close this window
4 Check the box next to each review to validate
5 Click Validate
Rejecting Reviews
If there are reviews that were entered in error, entered for training purposes, or are otherwise not valid, you can reject them
1. Check the box next to each review to reject.
2 Click Reject
View Reviews
1 Click the Select Center drop-down menu and select a center, if needed
2. Click the Tools Menu and select List Reviews. The List Reviews window opens.
3 In the Center section, select Selected Center or All Centers
4. In the Range section, select Last 12 Months, Since Last October, or All.
5 Click Refresh List Reviews display according to the limits you set

6 Click View next to a listed review to view and edit review details
[VIDEO] Add Foods

Note: We have complied a list of CACFP resources for food buying and crediting in the CACP Click here for more information.
To add a new food:
1 Click the Administration menu and select Manage Foods KidKare opens in a browser
Note: You must have the Manage Foods permission enabled on your account to access the Food Tool For more information, see Set Staff Permissions
2. Log in using the same credentials you use to access Minute Menu CX.
3 From the menu to the left, click Foods
4. Click Food List. The Food List page opens.
5 Click New Food
6. In the Display section:
a Click the Category drop-down menu and select the category in which to list this food
b. Click the Name box and enter a name for this food.
c Click the Spanish Name box and enter the Spanish name for this food (optional)
d Click the Food Type drop-down menu and select the type of food this is
e If you select Vegetables or Fruit in Step 6.d, the Juice slider displays If this is a fruit or vegetable juice, click to set it to Yes

7. In the Nutritional Information section, click next to each nutritional marker that applies to this food:

Note: If you set Whole Grain-Rich to Yes, the food defaults to whole grain-rich when centers add the food to their menus
8. In the Food Quantity Group section:
a If you are entering a Bread/Alt or Infant Cereal:
i Click the Grains Group drop-down menu and select the Exhibit A grains group to which this item belongs You can view Exhibit A here Note that if you are updating an Infant Cereal, this drop-down menu is locked to Group I (ready-to-eat cereals)
ii Click the Serving Size box and enter the standard serving size for this item For example, if you are updating Brand B bread and the nutrition label says that one serving is one slice, you would type 1 in this box
iii Click the corresponding drop-down menu and select the serving unit Following our example, you would select slice. You can also click and enter a custom unit.
iv Click the Serving Weight box and enter the serving weight from the nutrition label in grams or ounces. Then, click the corresponding drop-down menu and select grams (g) or ounces (oz). In our example, a serving of Bread A weighs 45g, so we enter 45 and select grams (g) Once you enter this information, the 1 Serving = box displays and shows the amount of ounce equivalents in one serving of this item

v. Click to lock this calculation and prevent sites from overriding it on the Daily Menu page in KidKare and the Record Menu window in CX, if needed. Click to unlock it again.
b If you are entering any other component: Click each drop-down menu and specify how the food should be measured for Non-Infants and Infants. You can also click to view measurements by age group Your selection in this box affects the unit of measure used on the Menu Production Record when calculating the quantities needed. For more information about the Menu Production Record, see Menu Production Record
9. In the Approvals section:


a Click next to each meal for which this food is approved
b Click the Non-Infant, Infant 6-11, and Infant 0-5 drop-down menus and select Allow, Disallow, or Warn.
10 In the Effective Dates section:
a. If this food is only approved starting on a specific date, click the Start box and enter a start date for the food If you want this food to be available immediately, do not add a start date
b. If this food is only approved for a limited time, click the End box and enter an end date for the food. If
you enter a date in this box, the food will not be available once the end date is reached 11. Click Save.
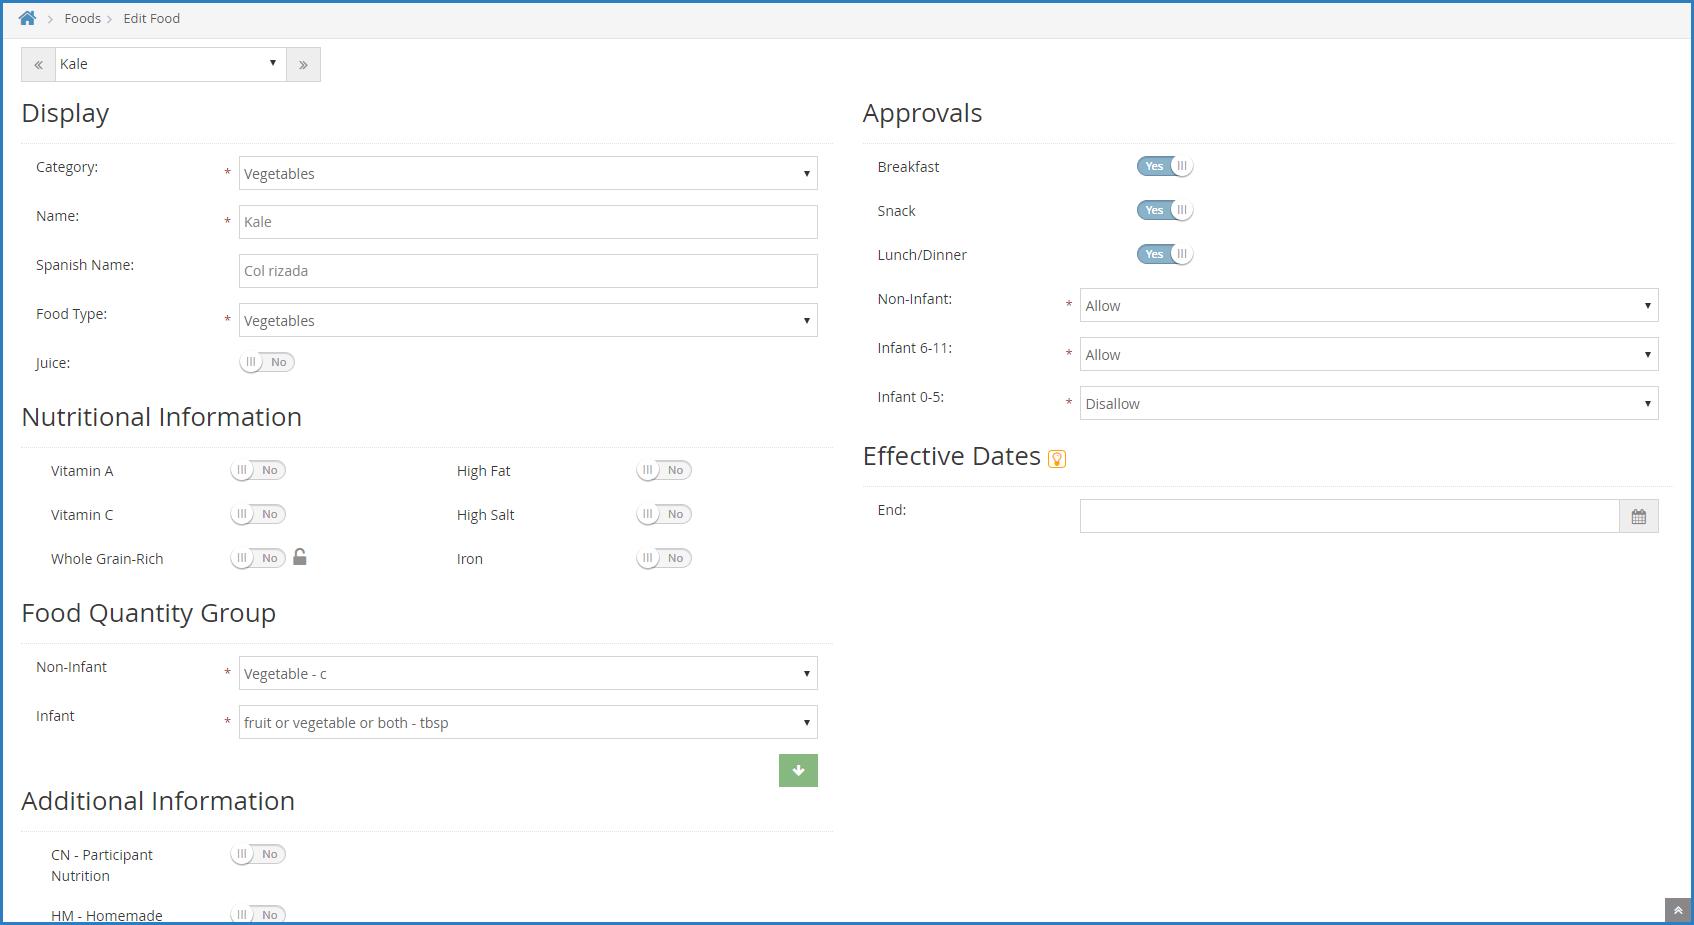
Manage Grains Ounce Equivalents Calculations
Last Modified on 08/19/2021 6:50 am
As of October 1, 2021, the USDA requires that all grains served be recorded using ounce equivalents instead of standard units of measurement This requirement applies to both the Bread/Alt and Infant Cereal components To accommodate this policy, you must enter an ounce equivalent calculation for all Bread/Alt and Infant Cereal foods. This calculation determines the total ounce equivalents present in the food you are entering. This value will inform all quantities calculations performed for Bread/Alt and Infant Cereal foods in Minute Menu CX and KidKare
Note that there are weight differences between brands of the same food For example, one slice of bread from Brand A may weigh 28g, but Brand B may weigh 45g. Sites can override your saved calculation to account for these differences so the proper amounts are served, unless you lock the calculation on the food list.
To add an ounce equivalent equation to existing grains on your food list:
1 Click the Administration menu and select Manage Foods KidKare opens in a browser
Note: You must have the Manage Foods permission enabled on your account to access the Food Tool For more information, see Set Staff Permissions
2. Log in using the same credentials you use to access Minute Menu CX.
3 From the menu to the left, click Foods
4. Click Food List. The Food List page opens.
5 Filter to the food items to update There are two ways to do this: If there are breads/grains missing the ounce equivalent calculation, a [red calculator] displays next to those items, and a banner displays at the top of the page Click the banner to filter to only those breads/grains that are missing the calculation
Click the Bread/Alt tab to filter to breads and/or the Infant Cereal tab to filter to infant cereals Items missing a calculation have a next to them
6. Click the item to update. The Add/Edit Food page opens.
7 In the Food Quantity Group section:
a. Click the Grains Group drop-down menu and select the Exhibit A grains group to which this item belongs You can view Exhibit A here Note that if you are updating an Infant Cereal, this drop-down menu is locked to Group I (ready-to-eat cereals).
b Click the Serving Size box and enter the standard serving size for this item For example, if you are updating Brand B bread and the nutrition label says that one serving is one slice, you would type 1 in this box
c. Click the corresponding drop-down menu and select the serving unit. Following our example, you would select slice You can also click and enter a custom unit
d Click the Serving Weight box and enter the serving weight from the nutrition label in grams or
ounces Then, click the corresponding drop-down menu and select grams (g) or ounces (oz) In our example, a serving of Bread A weighs 45g, so we enter 45 and select grams (g) Once you enter this information, the 1 Serving = box displays and shows the amount of ounce equivalents in one serving of this item
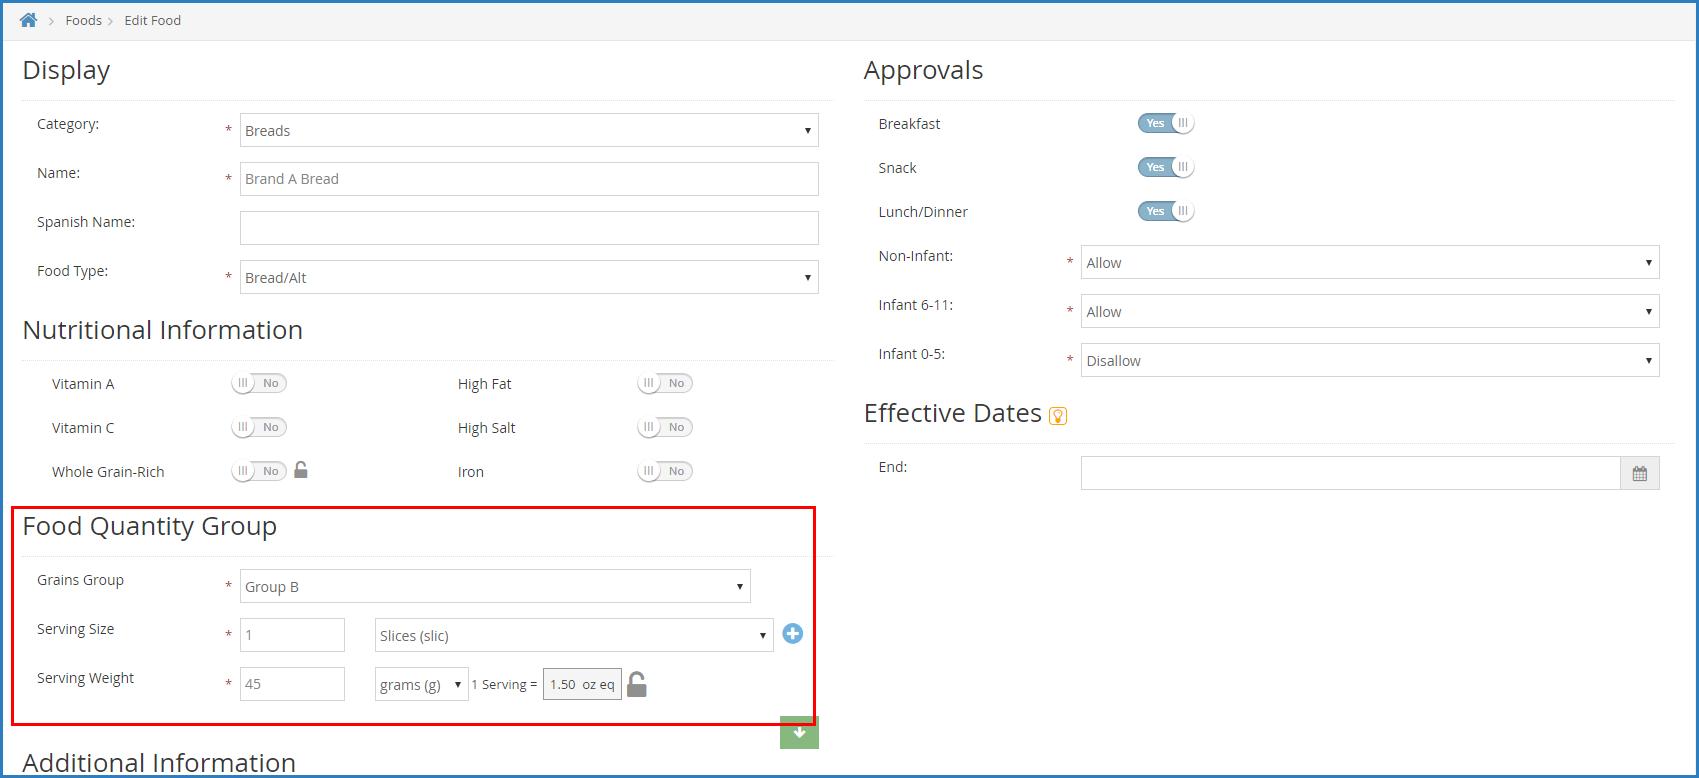
e Click to lock this calculation and prevent sites from overriding it on the Daily Menu page in KidKare and the Record Menu window in CX, if needed Click to unlock it again
8. Click Save. Repeat for each food you need to update.
Add CN Label Numbers to Foods
Last Modified on 05/21/2020 11:37 am
When adding foods to your food list, you can include the CN label number somewhere in the food name This lets the State and your sites know that the food is a CN-labeled product being offered at meal service The CN label details should be stored on-location If you choose to include these label numbers, develop a naming convention that you use consistently across the board. Consistency makes it easier to track these foods.
The figure below show what this might look like in KidKare The number after the dash is the CN label number

For information about adding items to your food list, see Add a New Food and Edit an Existing Food
Edit Foods
To edit an existing food on your food list:
1 Click the Administration menu and select Manage Foods KidKare opens in a browser
2 Log in using the same credentials you use to access Minute Menu CX
3 From the menu to the left, click Foods
4 Click Food List The Food List page opens
5 Locate the food to change You can filter the displayed list, as needed
Click Infant Cereal, Milk, Meat/Alt, Bread/Alt, Vegetables, and/or Fruit to filter to specific food types
Click the Name box and begin typing a food name to filter the food list
Click the Category drop-down menu and select the category to which to filter
Click the Name, Category, Food Type, Start, or End columns to sort information in ascending or descending order.

Click and select Yes to include expired foods, or select No to exclude expired foods
6. Click the food to change. The Edit Food page opens.
7 Change the food, as needed
Note: Do NOT add a Start date to existing foods. Adding a start date to an existing food removes the food fro your list until the start date is reached You should only use start dates on new foods
8 When finished, click Save
[VIDEO] Remove Foods
To remove foods from your list:
1 Click the Administration menu and select Manage Foods KidKare opens in a browser
2 Log in using the same credentials you use to access Minute Menu CX
3 From the menu to the left, click Foods
4 Click Food List The Food List page opens
5 Locate the food to remove You can filter the displayed list, as needed
Click Infant Cereal, Milk, Meat/Alt, Bread/Alt, Vegetables, and/or Fruit to filter to specific food types
Click the Name box and begin typing a food name to filter the food list
Click the Category drop-down menu and select the category to which to filter
Click the Name, Category, Food Type, Start, or End columns to sort information in ascending or descending order
6 Click the food to remove The Edit Food page opens
7 In the Effective Dates section, click the End box and enter an end date This should be the last day that the food is available to centers
8. Click Save.
[VIDEO] Create Food Categories
Adding a New Food Category
1 Click the Administration menu and select Manage Foods KidKare opens in a browser
2 Log in using the same credentials you use to access Minute Menu CX
3 From the menu to the left, click Foods
4 Click Food Categories
5 Click Add Category A pop-up opens
6 Click the Name box and enter a name for this category
7 Click the Spanish Name box and enter a Spanish name for this category (optional)
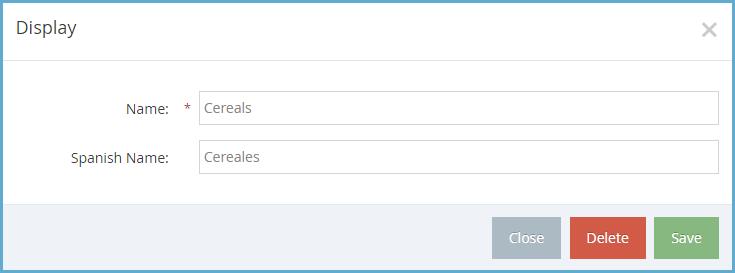
8 Click Save
Editing Food Categories
1 Click the Administration menu and select Manage Foods KidKare opens in a browser
2 Log in using the same credentials you use to access Minute Menu CX 3 From the menu to the left, click Foods
4 Click Food Categories
5 Locate the category to edit You can click the Name box or the Spanish Name box and begin typing a food category to filter the list
6 Click the category to edit
7. Update the name and/or Spanish name, as needed.
8 Click Save
Deleting Food Categories
Before you can delete a food category, you must move all foods assigned to that category to a different category To do so:
1 Click the Administration menu and select Manage Foods KidKare opens in a browser
2 Log in using the same credentials you use to access Minute Menu CX
3 From the menu to the left, click Foods
4 Click Food List
5 Click the Category drop-down menu and select the category you are removing The foods assigned to that category display
6 Click the first food in the list The Edit Food page opens
7 Click the Category drop-down menu and select a new category for this food
8 Click Save
9 Click at the top of the page to move to the next food
10. Repeat Steps 7-9 until all foods have been removed from the category you are deleting.
Now, you can delete the category
1. Click Foods.
2 Click Food Categories
3. Select the category to remove. A pop-up opens.
4 Click Delete
5. At the Are You Sure prompt, click Delete.
[VIDEO] Create Food Rules
You can add food frequency and food combination rules Watch the video below to learn more, or scroll down for step-by-step instructions
Adding Food Frequency Rules
1 Click the Administration menu and select Manage Foods KidKare opens in a browser
2 Log in using the same credentials you use to access Minute Menu CX
3. From the menu to the left, click Foods.
4 Click Food Rules The Rules page opens
5. Click New Rule and choose from the following:
Limit Foods/Day
Limit Foods/Week
Limit Foods/Month
6. The Food Frequency Details page opens. In the Display section:
a Click the Name box and enter a name for this rule This box is required
b. Enter a description, Spanish name, and Spanish description, if needed.
7 In the Apply To section, select the age group and meals to which the rule applies:
a. Click Infants or Non-Infants.
b Click Meal or Child

c Click next to each meal to which this rule applies
d Click the Serving Limit box and enter the number of servings of this food allowed for the time period you selected in Step 5
8 In the Action section, select Warn or Disallow
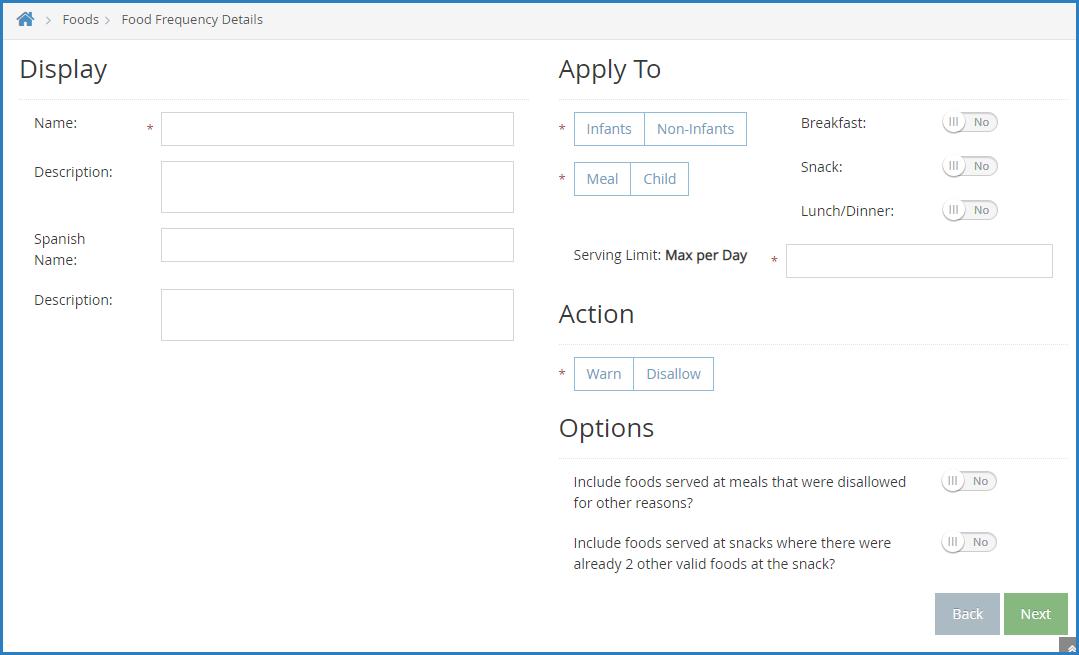
9 Click Next The Select Food Restriction page opens
10. Select a food type, category, or food to restrict.
To restrict a food type:
1. Click Food Type.
2 Select the type
To restrict a food category:
1 Click Category
2. Click the category in the first box and drag and drop it into the Selected Items for Rule box. You can click the Type to Search box and enter the category name to filter the categories that display.
To restrict a specific food:
1. Click Select Foods.
2 Click the food in the first box and drag and drop it into the Selected Items for Rule box You can click the Type to Search box and enter the food name to filter the foods that display.
11 Click Save

Adding Food Combination Rules
1. Click the Administration menu and select Manage Foods. KidKare opens in a browser.
2 Log in using the same credentials you use to access Minute Menu CX
3. From the menu to the left, click Foods.
4 Click Food Rules The Rules page opens
5. Click New Rule and choose from the following:
Any 2 Foods: The rule is executed when two specific foods are served together, such as french fries and mashed potatoes.
All Foods: The rule is executed when all foods on the rule are served
6. The Food Combination Details page opens. In the Display section:
a Click the Name box and enter a name for this rule This box is required
b. Enter a description, Spanish name, and Spanish description, if needed.
7 In the Effective Dates section, set a start and end date for this rule if it is only valid during a certain time period.

8 In the Apply To section, click next to each meal to which this rule applies
9 In the Action section, select Warn or Disallow
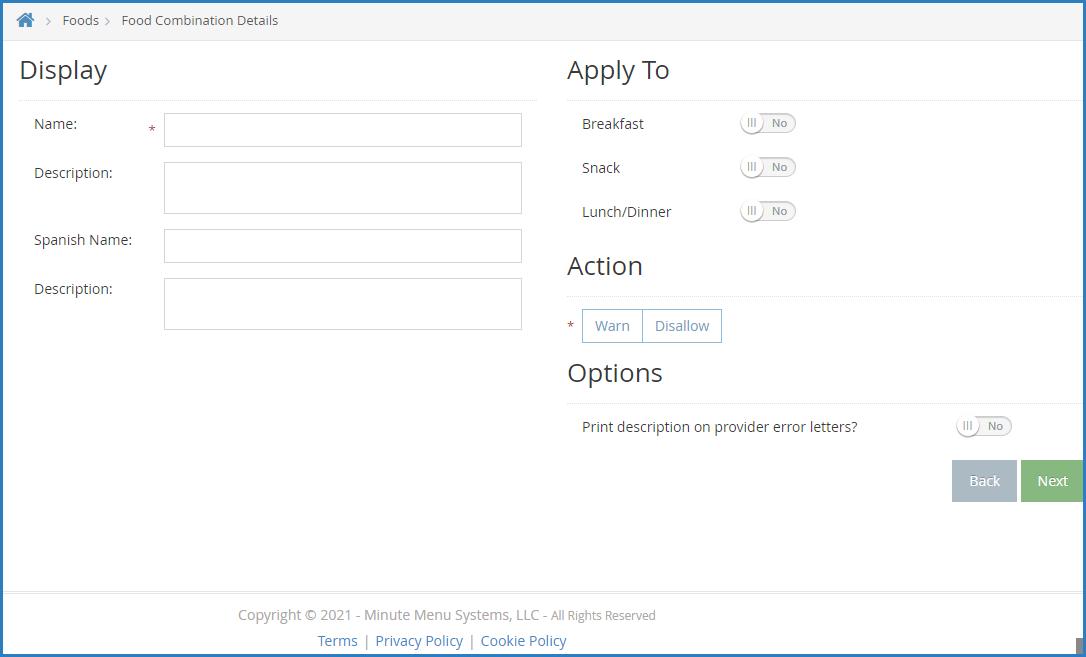
10. Click Next. The Select Food Restriction page opens.
11 Select a food type, category, or food to restrict
To restrict a food type:
1 Click Food Type
2. Select the type.
To restrict a food category:
1. Click Category.
2 Click the category in the first box and drag and drop it into the Selected Items for Rule box You can click the Type to Search box and enter the category name to filter the categories that display
To restrict a specific food:
1 Click Select Foods
2. Click the food in the first box and drag and drop it into the Selected Items for Rule box. You can click the Type to Search box and enter the category name to filter the categories that display
12 Click Save

[VIDEO] Mark Whole Grain-Rich Foods
Mark all whole grain-rich foods on your food list Foods that are marked as whole grain-rich on the food list default to whole grain-rich when centers select it on menus However, only mark foods that are always whole grain-rich Centers can mark any bread/alternate as whole grain-rich when the meal is recorded
Examples of whole grain-rich foods that you can mark as whole grain-rich in the food tool:
Whole wheat
Brown rice
Wild rice
Oatmeal
Bulgur
Whole-grain corn
Quinoa
Examples
A center selects tortilla as the bread/alternate item. They can indicate when recording the tortilla that it was whole grain-rich Tortillas may or may not be whole grain-rich, so let the center indicate whether it was when the meal was recorded Do not mark tortillas as a whole grain-rich food in the food tool
A center selects brown rice as the bread/alternate item Brown rice is always a whole grain-rich food Mark brown rice as whole grain-rich in the food tool so that it automatically defaults as whole grain-rich when the center records the meal.
To mark a food as whole grain-rich:
1 Click the Administration menu and select Manage Foods KidKare opens in a browser
2. Log in using the same credentials you use to access Minute Menu CX.
3 From the menu to the left, click Foods
4. Click Food List.
5 Click Bread/Alt at the top of the page to filter to just your breads/bread alternates
6. Click the food you need to mark. The Edit Food page opens.

7. In the Nutritional Information section, click next to Whole Grain-Rich to set it to Yes.
8 To lock the slider in the on/off position, click the lock icon For example, you can lock the slider to Off for foods like white bread and club crackers, or you can lock it to On for foods like brown rice or whole wheat pancakes

Centers should be trained to know how to identify whole grain-rich foods and verify that the whole grain-rich option is selected or deselected accordingly when recording the meal, regardless of how the food defaults
Limit Juice
Juices are limited to once per day for non-infants and not allowed at all for infants
As such, you need to ensure that you do the following:
Mark all juices as juice in the food tool.
Ensure that all juices are set to Disallow for infants
Ensure that juices are all stored in the Juices category.
To do so:
Last Modified on 05/21/2020 1:17 pm
1. Click the Administration menu and select Manage Foods. KidKare opens in a browser.
2 Log in using the same credentials you use to access Minute Menu CX
3. From the menu to the left, click Foods.
4 Click Food List
5. Click the Name box and type juice to filter to the majority of juices. You may also need to search for cider or any other juice that does not have the word juice in the name later You can also click Vegetables and Fruit at the top of the page to limit to all foods in those categories, and then search within those categories
6 Click the juice to update
7 Click the Category drop-down menu and assign the juice to your Juice category
8 Ensure that the Food Type is correct For example, apple juice should be a fruit, and carrot juice should be a vegetable

9 Click next to Juice to mark this as a juice The Infant 6-11and Infant 0-5 boxes in the Approvals section are automatically set to Disallow and cannot be changed.
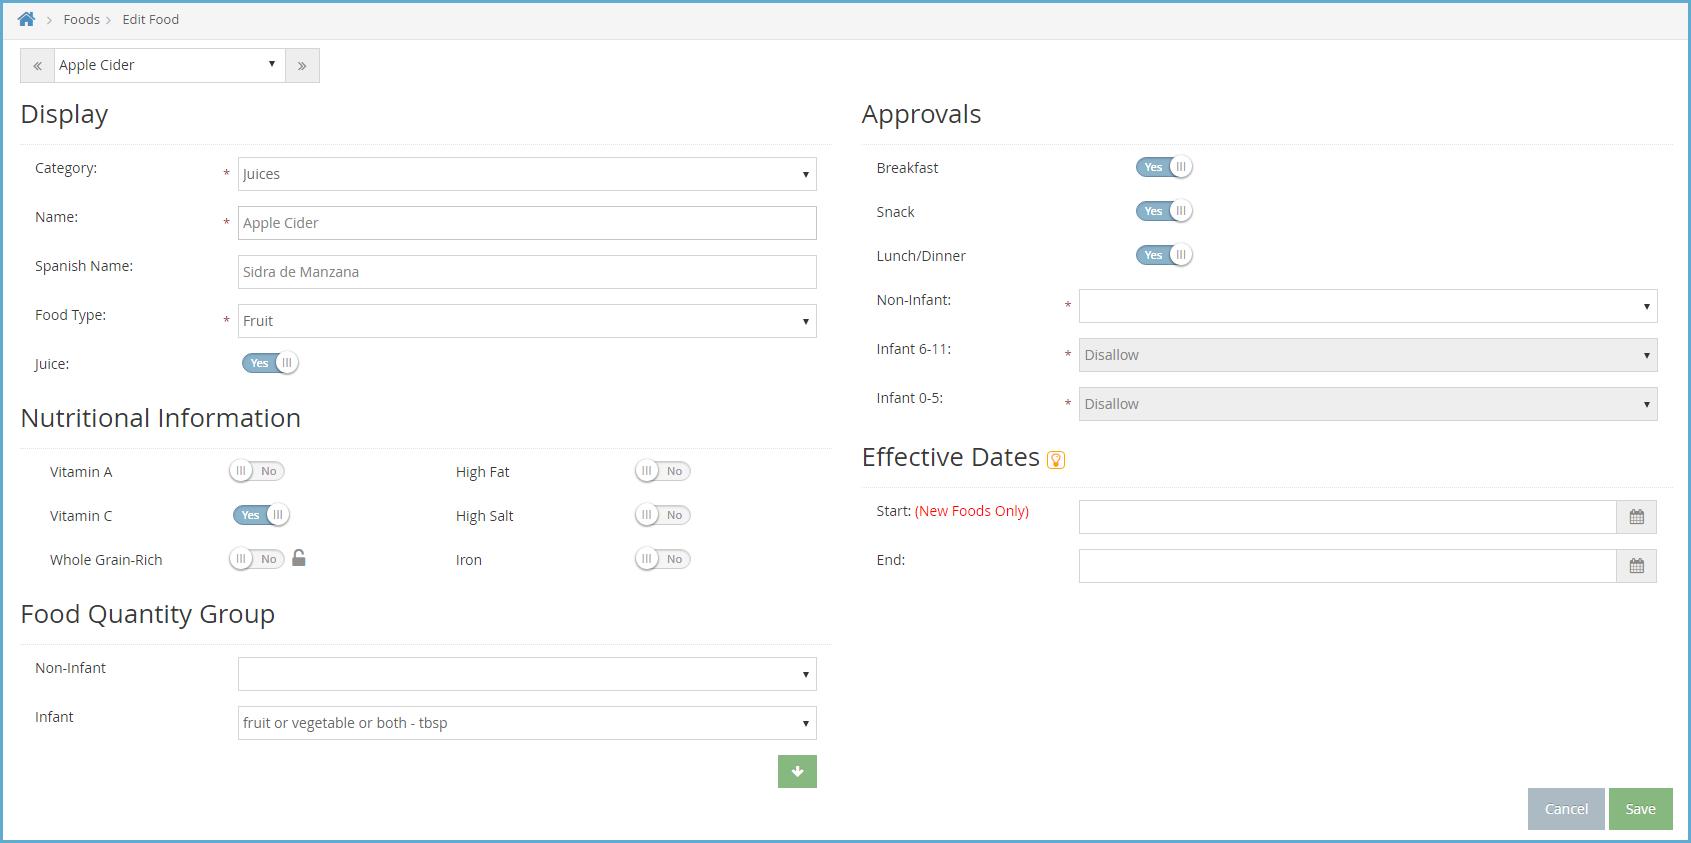
11. Click to move to the next juice on your list.
Manage Formula Types
Use the Manage Formula Types window to create formula options you can select when creating child records and recording infant menus
Last Modified on 05/21/2020 1:34 pm
1. Click the Tools menu and select Manage Formula Types. The Manage Formula Types window opens.

2. To add a formula type:
a Click Add An empty row displays
b. Click the row that was added and type the name of the formula.
c Click Save
d Click OK at the Save Success message
3 To change a formula type:
a Click the line to change
b Enter the new formula name over the existing name
c Click Save
d Click OK at the Save Success message
4 To delete a formula type:
a Click the line to remove
b Click Delete
Note: Ensure that you have selected the correct formula type to remove There is no confirmation message, and the formula type is removed immediately
c Click OK at the Delete Success message
Enable Individual Infant Menu Reporting
Last Modified on 06/30/2021 9:12 am
Individual infant reporting allows your centers to record menus for each, individual infant in KidKare This not only may meet a state reporting requirement, but it also allows centers to account for infants at differing developmentally ready status When you enable this feature, the Infant Menu set on the Daily Menu page in KidKare or in the Record Menu window becomes the default menu for all infants marked in attendance at a meal. Centers can then make adjustments, as needed, when recording meal counts on the Attendance & Meal Counts page in KidKare
Once infant meal counts and menus are recorded in KidKare, you can print the Infant Feeding report in Minute Menu CX. This report lists the menu served to each infant at each meal for the day, and each infant is listed on a separate page.
Note that individual infant menus do not affect claims processing The default infant menu will be the menu used for processing claims and determining disallowances The only claim error that individual infant menus affect is Error 103 Changes made to individual infant menus must be made directly in KidKare
To enable this requirement:
1 Click the Administration menu and select Manage Policies The Manage Policies window opens
2. Scroll to the M. Menus category, and click + to expand it.
3 Set policy M.16 to Y.
4. Click Save.
Infant Menus Video Tutorial
Watch the video below to learn more about how your centers can use this feature in KidKare Note that this video covers a KidKare setting for independent centers that do not apply to your centers This is clearly stated in the video All other functionality applies
Center Documentation
If you enable this feature for your centers, we recommend provide them with links the following Knowledge Base articles to help get them started with infant menu reporting:
Record Individual Infant Menus
Print the Infant Feeding Report
Manage Menu Footers
You can add footers to infant and non-infant menus from the Manage Menu Footers dialog box The text you enter here prints on the following reports:
Last Modified on 05/21/2020 1:41 pm
Center Monthly Menu Plan
Center Weekly Menu Plan
Center Weekly Menu - Non-Infants Only
Center Weekly Menu - Infants Only
Master Menu Monthly Plan - Non-Infants Only
Master Menu Monthly Plan - Infants Only
Note that the footer will also print on the center version of these reports.
To add menu footers:
1 Click the Tools menu and select Manage Menu Footers The Manage Menu Footers dialog box opens
2 Click the NonInfant Menu Footer box and enter notes for your non-infant menus
3 Click the Infant Menu Footer box, and enter notes for your infant menus
Note: You can enter up to 150 characters in each box
4 When finished, click Save The text you enter will now display on your menus

Create Master Menus
Last Modified on 08/17/2020 10:19 am
You can create centralized menus for individual site use First, create one or more master menu plans Then, release them to the sites you choose Once sites receive the master menu, they can print the Menu report and post it in their center for staff and parents to see
The master menu feature was designed to be used for multiple sites that are using the same menu, such as those with a central kitchen, to make menu planning easier If an individual center has its own menu plan that differs from other sites, there is no need to create master menus Your center can plan their own menus from their own account
Adding Master Menus
1 Click the Menus/Attendance menu and select Master Menu Calendar The Master Menu Calendar window opens
2. Click Add/Edit. The Master Menus dialog box opens.
3 Click Add A blank line is added to the top of the list
4. Click the blank line and enter a name for this menu.

5 Click Save A confirmation prompt displays, and the Master Menus dialog box closes
6. Now, click the Select Menu drop-down menu and select the menu you just created. A calendar displays.
7 Double-click the date on which this menu should be served
8. At the Select Meal prompt, select the meal you are planning. For example, if you are creating a lunch menu, you would select Lunch The Plan Master Menu window opens

9. Click next to each meal component to select a food. You can also click Use Menu Template to select a saved menu template

10 When finished, click Save You can now select a new day and/or meal to create a new master menu
11 Click Close to return to the Master Menu Calendar window The menu(s) you created display on the calendar Menus that are missing components display in lower case letters (b, a, l, p, d, or e) and Menus with no missing components display in uppercase letters (B, A, L, P, D, or E)
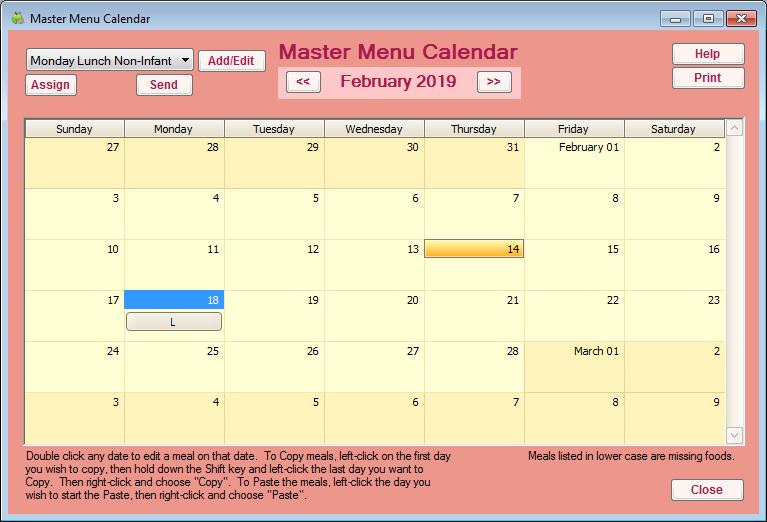
Copying and Pasting Master Menus
You can copy and paste master menus one day, several days, one week, or one month at a time
1 In the Master Menu Calendar window, click and drag your mouse across the days you are copying
2. Right-click the highlighted area and select Copy.
3 Right-click the day on which to begin pasting and select Paste
Assigning Master Menus to Centers
To assign a Master Menu to a center:
1 In the Master Menu Calendar window, click the drop-down menu and select the menu to assign
2. Click Assign. The Select Centers For dialog box opens.
3 Check the box next to each center to which to assign this menu You can also click Select All to select all listed centers. Click Deselect to clear your selections.
4 When finished, click Save
Sending Master Menus to Centers
When you are ready to send master menus to centers, we recommend that you review the menu first Once you send menus to centers, changes to the existing master menus will not update the center menus. If any changes are needed, you must make them for each center individually. Centers should also be trained to enter any food substitutions made
When you are ready to send menus:
1. In the Master Menu Calendar window, click the drop-down menu and select the menu to send.
2 Click Send
3. Respond to the confirmation prompt. The menus are sent to all centers to which they were assigned. These menus display in the Record Menu window and in the Menu Calendar window for both centers and sponsors.
Create Menu Templates
Last Modified on 05/21/2020 1:54 pm
Menu templates are reusable menus that are not specific to the day or meal Both sponsors and centers can create and use menu templates Any center-created templates are only visible to the center that created them (and the sponsor) You can create templates for both infants and non-infants You can also use menu templates to build your master menus.
To create Menu Templates:
1 Click the Menus/Attendance menu and select Manage Menu Templates The Manage Menu Templates window opens.
2 Click Breakfast, Lunch/Dinner, or Snack
3. Click Add under Non-Infant Menus or Infant Menus. The Record Menu Template dialog box opens.
4 Click the Title box and enter a name for this template This name displays on the Center Monthly Menu Plan report.

5 Click next to each meal component to select foods
6. When finished, click Save. You can also click Save and Add to save this template and immediately begin creating a new template
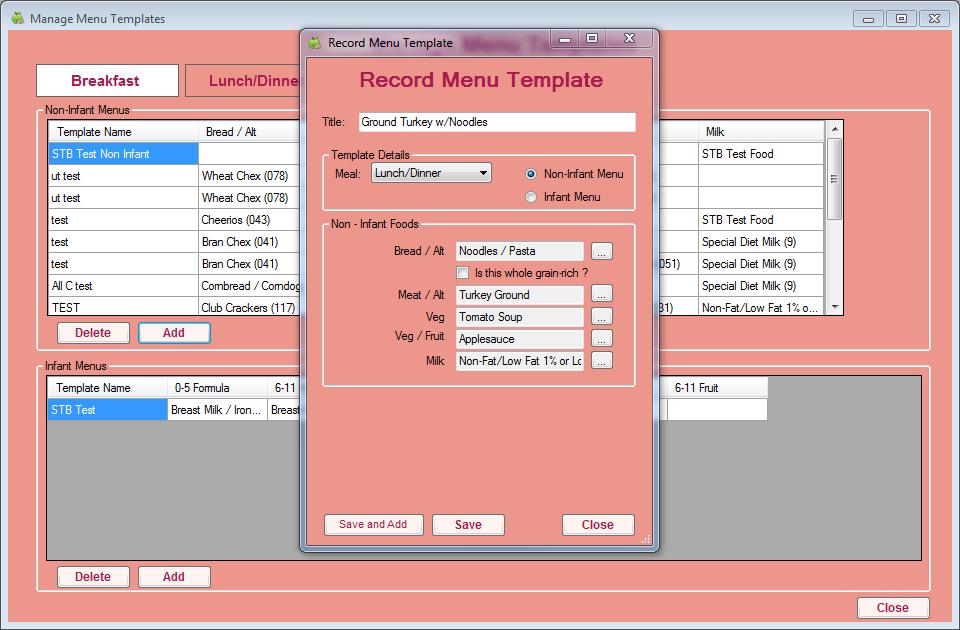

Note: You can toggle between Non-Infant Menu and Infant Menu while creating templates. However, if you switch menu types without saving, your changes are lost
[VIDEO] Print the Menu Production Record
The Menu Production Record lists the amount of food centers need to serve and purchase to adequately serve children in their care It may also include actual quantities served and leftover quantities, if recorded (subject to policy M 01 and policy M 01f) Before printing this report, centers/sponsors should record center menus and estimate attendance (at least). Estimating attendance allows centers to plan ahead of time so they can purchase the appropriate quantities of food (as listed on the report) If you print this report after recording actual attendance and/or actual quantities served, the quantities needed based on actual attendance display on this report, as do the actual quantities prepared
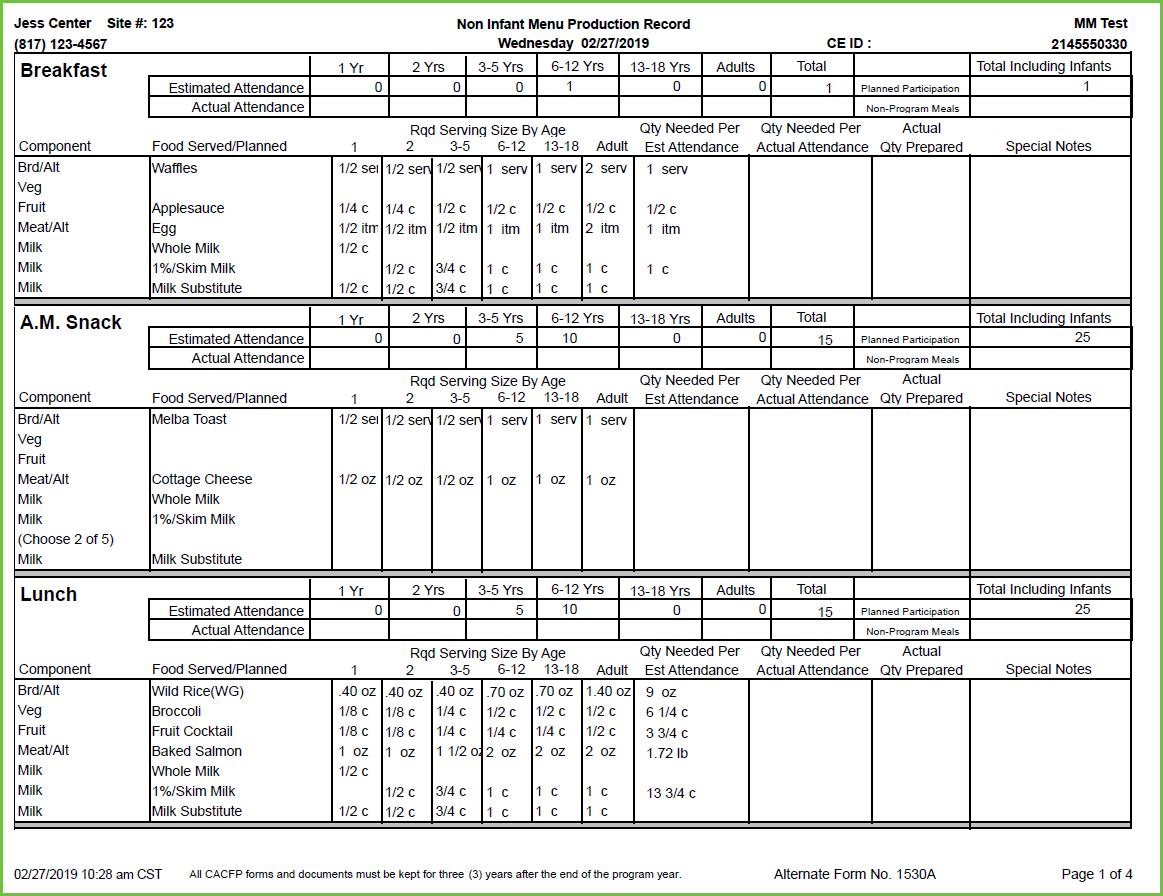
Sponsors can use this report when auditing centers to ensure that the correct amounts of food are being prepared and served

Notes: Sponsors should ensure that they have selected the correct Food Quantity Type in the Food Tool, as this affects the units of measure used on the Menu Production record when calculating quantities For more information about selecting a Food Quantity Type, see Add a New Food
If you are recording individual infant menus, the Menu Production Record for infants only shows quantities for the default infant menu For infant quantities on individual infant menus, see Print Individual Infant Menus
Printing the Menu Production Record From the Record Menu Window
1. Click the Menus/Attendance menu and select Record Center Menus.
2 Click the Select Date box and select the date
3. Click the Meal drop-down menu and select the meal.
4 Record meal components
5. When finished, click Save.
6 Record as many meals, as needed
7. When finished, estimate attendance.
a Click Estimate Attendance The Estimate Attendance window opens
b. In the Auto Calculate section, select Estimate Attendance from Last Monday or Estimate From Most Recent Attendance
c. Click Auto Calculate.
d Click Save
e. Click Close.
8 Click Menu Production Record A PDF is generated You can return to this window, record actual quantities (subject to policy M.01), and print the Menu Production Record again to ensure that the correct quantities were served
Note: You can also click Print Menu Production Record in the Estimate Attendance window
Printing the Menu Production Record from the Reports Menu
1. Estimate attendance. Sponsors can skip this step as long as the center(s) for which they are running the report have estimated attendance and/or recorded actual attendance and actual quantities served (subject to policy M.01).
a Click the Menus/Attendance menu and select Estimate Attendance The Estimate Attendance window opens.
b In the Auto Calculate section, select Estimate Attendance from Last Monday or Estimate From Most Recent Attendance.
c Click Auto Calculate
d. Click Save.
e Click Close
2. Click the Reports menu, select Menus, and select Menu Production Record. The Select Date Range dialog
box opens
3 Click the Starting Date box and select the report start date
4 Click the Ending Date box and select the report ending date
5 Click Continue
Note: You can also click Print Menu Production Record in the Estimate Attendance window
Print Scheduled Center Menus
We recommend you periodically review your sites’ planned menus to ensure that they meet meal pattern requirements each day
Printing the Center Monthly Menu Report
1. Click the Reports menu, Menus, and select Center Monthly Menu Plan. The Report dialog box opens.
2 Select one of the following options:
Selected Center: Print the report for the center shown in the Select Center box at the top of the window
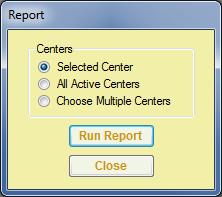
All Active Center:Print the report for all of your active centers. Choose Multiple Centers: Print this report for centers you select
3. Click Run Report. If you selected the Selected Center or All Active Center option, go to Step 5. If you selected the Choose Multiple Centers option, the Center Filter dialog box opens
4 Set filters for the centers to include on the report You can specify the status, start dates, claim dates, state, and so on When finished, click Next
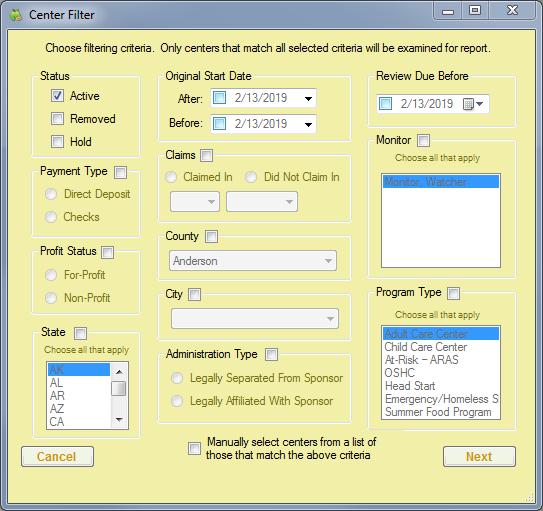
5 The Select Date dialog box opens Click the drop-down menu and select the date for which to print the report

6 Click Continue A PDF is generated You can save the PDF or print it
Reviewing the Center Monthly Menu Report
When reviewing center menus, make sure that:
Juice is only planned for once per day
There is a vegetable planned at each lunch and dinner
A whole grain-rich food is planned for at least once per day
There are no grain-based desserts present
Record Center Menus
You can record menus for any selected center, if needed Note that these are the same steps a center would follow to record menus themselves in Minute Menu CX, save for Step 1
Last Modified on 12/22/2020 7:43 am CST
1. Click the Select Center drop-down menu at the top of the window and select the center for which to record menus
2. Click the Menus/Attendance menu and select Record Center Menus. The Record Menu window opens.

3. Click the Select Date drop-down menu and select the date for which you are recording a menu.
4 Click the Meal drop-down menu and select the meal you are recording

5 Click next to each meal component to select a food You can also click Use Menu Template to select a saved menu template If this center also serves infants, make sure you complete the Infant Foods section, as well
6 If the center has participants over the age of 18, enrolled, the Adult Meal Pattern Substitutions section displays
Check the Was yogurt substituted for milk? box if the center substituted yogurt for milk at this meal
Check the Was milk served to adults?box if milk was served to adults at this meal
Notes: You can only select one option When you select an option, the other is immediately set to No Milk and yogurt substitutions are reflected on the Menu Production Record
7. In the Special Notes section, enter any notes about this meal in the appropriate box (Non-Infants and/or Infants)
8. Click Estimate Attendance to estimate attendance for this meal.
9 Click Save
Print Individual Infant Menus
Last Modified on 06/07/2021 8:40 am
If you have enabled individual infant menu reporting, you can print individual infant menus The Infant Feeding Report lists menus for each infant served and includes the following for each meal:
Meal Components
Food Served by Component
Quantity Required by Component
Quantity Served by Component
Note: Quantity served is only included if you have set policy M 01 to Y
This report also includes information such as, the center's name and site number, whether the parent accepts center formula and/or food, the infant's age in months, the infant's date of birth, and more
Each infant is listed on a separate page This report is sorted by child name, and you can print it for all active centers or for your selected center
To print this report:
1 Click Reports, select Menus, and click Infant Feeding Report The Centers dialog box opens
2. Select the Selected Center option or the All Active Centers option.
3 Click Continue The Select Date Range dialog box opens
4. Select the date range for which to run the report. To run this report for a single day, set the same date in the Starting Date and Ending Date boxes
5 Click Run Report
Manage Ounce Equivalents on Menus
Last Modified on 08/19/2021 6:55 am
As of October 1, 2021, the USDA requires that all grains served be recorded using ounce equivalents instead of standard units of measurement This requirement applies to both the Bread/Alt and Infant Cereal components To accommodate this policy and ensure accurate quantities reporting, you must save an ounce equivalent calculation for all Bread/Alt and Infant Cereal foods to your food list. Learn how to do that here.
However, there are several other tools to help you and your center manage the ounce equivalent requirement in Minute Menu CX, including:
Overriding the default food list calculation.
Switching Bread/Alt item quantities to ounce equivalents
Click a link below to jump to a specific topic.
Override the Default Food List Calculation
You can override the ounce equivalent calculation saved to your food list as long as you have not locked the equation for the selected Bread/Alt or Infant Cereal item This helps you and your centers account for weight differences between brands of the same food when determining required quantities
Let's look at an example.
Your food list has an entry for Brand A Bread The serving information saved for this item 1 slice = 28g = 1 oz eq
However, this week, Center X is serving Brand B bread Brand B bread's nutrition label shows the following information: Serving Size: 1 slice (45g). This means that one slice of Brand B bread weighs 45 grams, so the the ounce equivalents present in Brand B bread will not match what is saved to your food list for Brand A.
1 Click the Select Center drop-down menu at the top of the window and select the center for which to record menus.
2 Click the Menus/Attendance menu and select Record Center Menus The Record Menu window opens
3. Record menus as you normally would.
4 Click Calculate Oz Eq for Bread/Alt or Calculate Oz Eq for Infant Cereal The Ounce Equivalent Calculator dialog box opens.
5 Click the Serving Size box and update the common serving size, if needed Following our example above, we'll leave this set to 1 Slice.
6 Click the Serving Weight box and update the serving weight as stated on the nutritional label for your food In our example, we need to change this to 45
7 Use the corresponding drop-down menu to select the weight unit This will typically be grams (g), but some labels may give the serving weight in ounces If this is the case, select ounce (oz) Once you set the new
weight, the 1 Serving = box updates and displays the total ounce equivalents in one serving of your food item Continuing our Brand B example, you'll see that Brand B contains 1 5 oz eq in one serving vs the 1 oz eq saved to the food list for Brand A
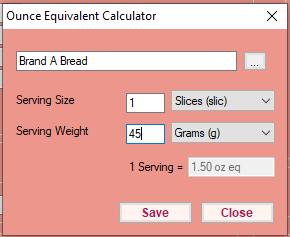
8 Click Save
Switch Bread/Alt Items to Ounce Equivalents
Once you enable ounce equivalents and update Bread/Alt items on your food list with the appropriate calculations, you can convert items recorded prior to August 18, 2021 to ounce equivalents, if needed
1 In the Record Menu window, select a menu recorded before August 18, 2021
2 Click Switch to Oz Eq for the Bread/Alt item.
If the recorded quantity matches the quantity saved to your food list and an ounce equivalents calculation exists, the quantities are converted to match what you have input on your food list. If the recorded quantity does not match, CX cannot convert the item to ounce equivalents and you are prompted to either update your food list or use the override calculator to convert to ounce equivalents This is to prevent impacts to claims processing
Ounce Equivalents for Centers
Once you enable policy M.17 to use ounce equivalents in CX and KidKare and update your food list, your centers will be able to:
Last Modified on 08/20/2021 8:16 am
Override the ounce equivalents calculation saved to the food list when recording menus in CX and KidKare. View all estimated and actual quantities required in ounce equivalents
Record actual quantities and leftover quantities in the common unit or in ounce equivalents (depending on your setting for M 01g)
Provide the information and links in this article to your centers to help them implement ounce equivalents at their location
Override the Food List Ounce Equivalents Calculation
This feature is available both in Minute Menu CX and in KidKare for centers Click here to view how to override this calculation in KidKare. The instructions below cover how to override the calculation in Minute Menu CX

Note: If you lock the calculation on the food list, your centers will not be able to override it in the Record Menu window or on the Daily Menu page in KidKare
1 Click the Menus/Attendance menu and select Record Center Menus The Record Menu window opens
2 Record menus as you normally would
3. Click Calculate Oz Eq for Bread/Alt or Calculate Oz Eq for Infant Cereal. The Ounce Equivalent Calculator dialog box opens
4. Click the Serving Size box and update the common serving size, if needed. Following our example above, we'll leave this set to 1 Slice
5. Click the Serving Weight box and update the serving weight as stated on the nutritional label for your food. In our example, we need to change this to 45
6. Use the corresponding drop-down menu to select the weight unit. This will typically be grams (g), but some labels may give the serving weight in ounces If this is the case, select ounce (oz) Once you set the new weight, the 1 Serving = box updates and displays the total ounce equivalents in one serving of your food item Continuing our Brand B example, you'll see that Brand B contains 1 5 oz eq in one serving vs the 1 oz eq saved to the food list for Brand A.

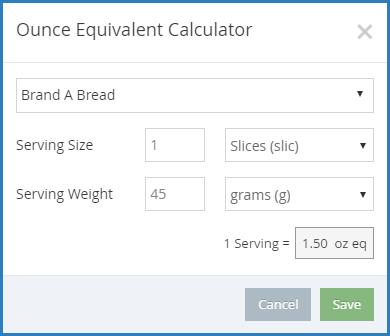
Click
When ounce equivalents are enabled, the Record Menu window in CX and the Daily Menu page in KidKare list quantities in the following format: Common Unit - #.## oz eq. For example, this could be 1 slice - 1.5 oz eq.
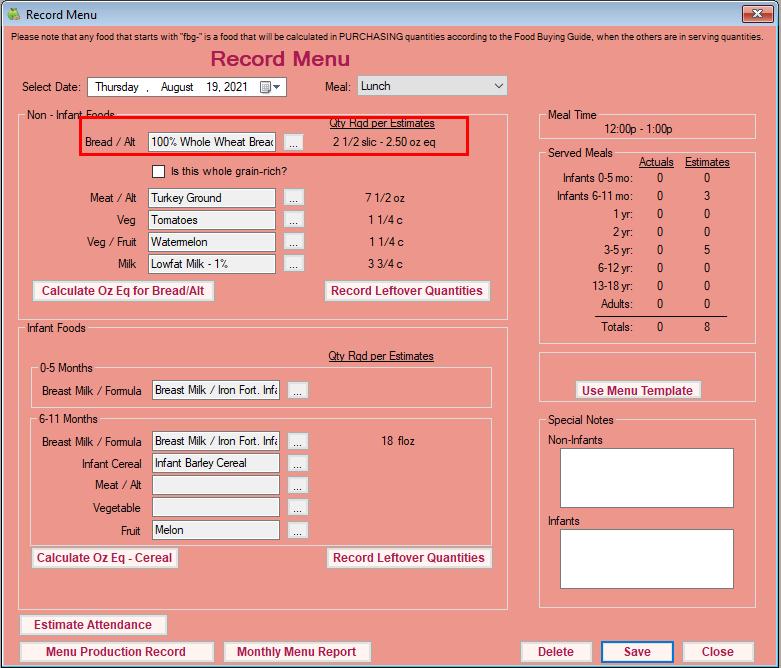
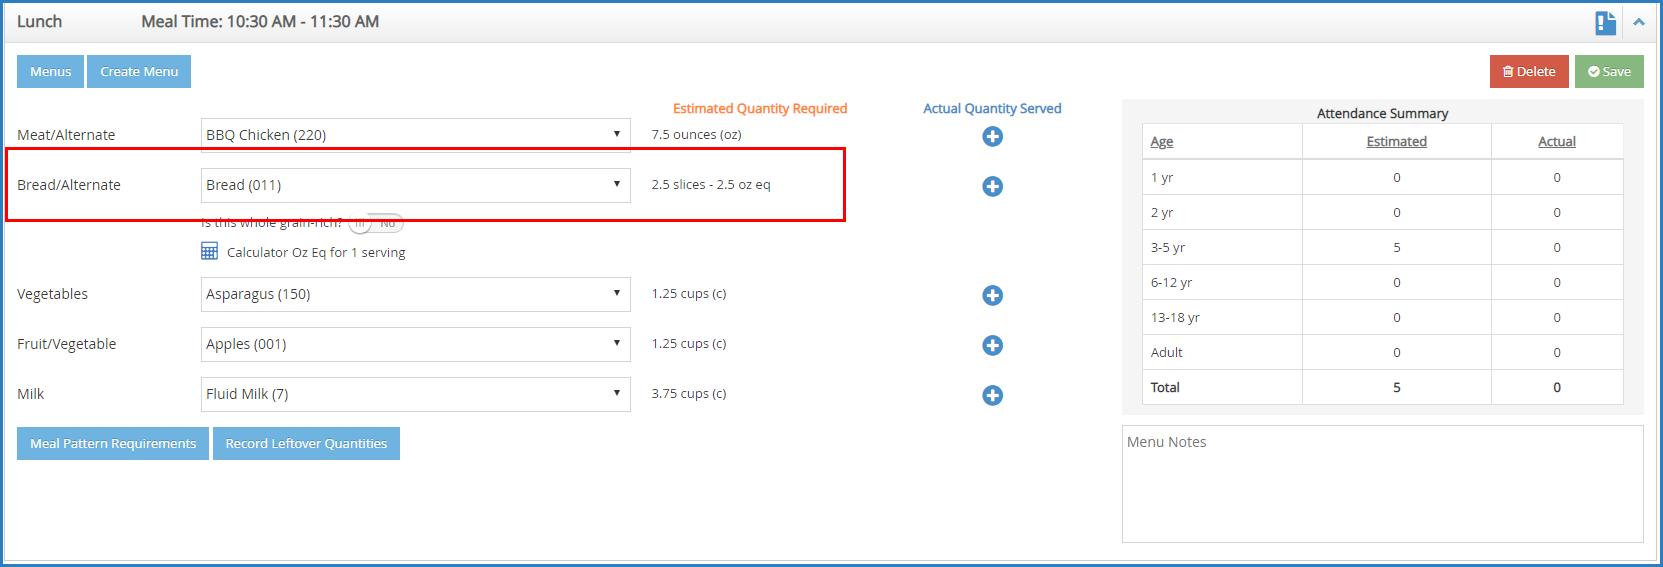
If you require your centers to enter actual quantities served and set policy M.01g to N, they will only see ounce equivalents reflected in the Record Menu window and on the Daily Menu page
Record Actual Quantities & Leftover Quantities
If you have set policy M 01 to Y, your centers must record quantities served You may also require them to record leftover quantities. Once you enable ounce equivalents, you have an additional option for your centers: M.01g. This policy dictates whether the center can enter quantities using a common unit of measurement and have CX/KidKare calculate ounce equivalents based on your food list, or whether they must simply enter quantities directly in ounce equivalents
If M 01g is set to Y (default), the center simply enters quantities as they normally would:

And Minute Menu CX or KidKare does the conversion for them The common unit and the ounce equivalents display

If M.01g is set to N, the center must enter all quantities in ounce equivalents. They are unable to change the unit of measurement


The quantities added show in ounce equivalents


Center Resources for KidKare
If your centers use KidKare for their food program activity, you can link them to our Grains Ounce Equivalents category on the KidKare Knowledge Base. This page contains links to all knowledge content for grains ounce equivalents and how it applies to the center user. Please note that some of the content in this category does apply to independent centers only and we've called it out where it exists
Override Calculator Infographic
Your centers can print this useful infographic to learn how to use the override calculator in KidKare! Click the image to view the full size version
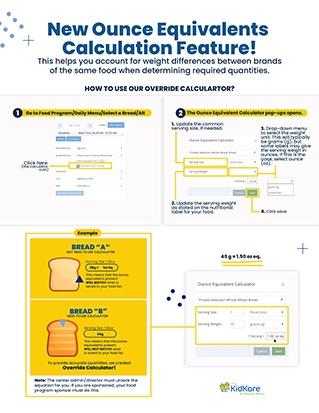
Record Actual Quantities
Last Modified on 05/21/2020 2:53 pm
If you set policy M.1 to Y, centers must record actual quantities served at meals If your centers use Minute Menu CX, they can follow the instructions below to record actual quantities If they use KidKare, direct them to the Record Actual Quantities Served article at help kidkare com
1. Click the Menus/Attendance menu and select Record Center Menus. The Record Menu window opens.
2 Ensure the correct date and meal are selected

3. Click next to each meal component to select foods.
4 Click Save
5. After the meal is served, click Record Actual Quantities. The Record Actuals dialog box opens.
6 Click the Qty column and enter the amount served
7. Click the corresponding drop-down menu and select the unit of measurement.

8 Click Save
Record Leftover Quantities
Last Modified on 05/21/2020 2:57 pm
Certain states require centers to record leftover quantities for each meal When your centers record these quantities, they are added to the Menu Production Record Centers can only record leftover quantities for meals for the current date or past date they cannot record them for future dates Leftover quantities do not affect claims processing.

Note: You must set Policy M.01f to Y to enable this feature For more information about changing policies in Minute Menu CX, see Set Policies
If your centers use Minute Menu CX, they can use the instructions below to record leftover quantities If they use them KidKare, direct them to the Record Leftover Quantities article at help.kidkare.com
1 Click the Menus/Attendance menu and select Record Center Menus
2 Ensure the correct date and meal are selected

3 Click next to each meal component to select foods for each age group
4. Click Save.
5 Click Record Leftover Quantities in the Non-Infant Foods or Infant Foods section The Record Leftovers window opens.
6. Click the Qty box for each food listed and enter the amount of food left after the meal. You can only enter leftover quantities for the meal components selected in Step 3
7. When finished, click Save.
8 Repeat Steps 5-7 for the remaining age group For example, if you recorded leftover quantities for noninfants, you must now do the same for infants
How Leftover Quantities Impact the Menu Production Record
If you enable this feature, the Leftover Qty column is added to the Menu Production Record between the Actual Qty Prepared and Special Notes columns This column will only contain data if a center records leftover quantities For more information about the Menu Production record, see Menu Production Record
Update Your Login Information
Update your login information whenever you need in the Change Login Info dialog box You access this feature from the Administration menu
Last Modified on 05/22/2020 9:22 am
1. Click the Administration menu and select Change Your Login Info. The Change Login Info dialog box opens
2. Click the Username box and update your username, if needed.
3 Click the Password box and enter a new password over the existing password
4. Click Save.
Update Your Company Information
Last Modified on 05/22/2020 9:31 am
It’s important that your company information is correct, as it prints on various reports Check and update this information in the Manage Client Info window
1. Click the Administration menu and select Manage Client Information. The Manage Client Info window opens
2 Confirm that the displayed information is correct If you have a Vendor # and/or a State Assigned #, they should also be present in this window
3 If you made any changes, click Save
Set Policies
Last Modified on 05/22/2020 9:47 am CDT
Minute Menu CX is designed to be highly customizable to meet a variety of business needs The Manage Policies window allows you to customize CX and control many aspects of the program, such as edit checks, user preferences, general behavior, and so on Review your policies to ensure that CX is set up to meet your agency's needs and expectations.
Note: If you operate in multiple states, you can set policies for separate states
Policies should only be changed by the main decision makers of the company and/or those with the authority to do so Changes to policies could impact claims You can control access to policy settings with user permissions and staff types
1 Click the Administration menu and select Manage Policies The Manage Policies window opens
2 Click + to expand categories/subcategories Click - to collapse them again
3 Double-click a preference description to view it in a larger pop-up Click OK to close it
4 Double-click the Policy Value column to update the setting for a particular preference See the Error Options heading below for a description of the options you can set for the various edit checks
5 When finished, click Save You may need to close and re-open CX for changes to take effect
Note: Click Export to export all policies, descriptions, and their current settings to a spreadsheet
About Edit Checks
Meal counts, attendances, menus, and more are entered into Minute Menu CX throughout the month The software needs to process this data at the end of each month When a claim is processed, the system applies edit checks to the submitted meal count, menu, and enrollment data It creates an error for any edit check that does not pass Each error is documented on the Office Error Report (OER)
For example, the system checks to ensure that an individual child is not reimburse for more than 2 Snacks + 1 Meal or 2 Meals + 1 Snack If a child is in attendance at additional meals, the extra meals are automatically disallowed, and the OER contains a claim error noting each disallowance

Note: Minute Menu CX automatically selects the meals with the highest reimbursement rate to include on the claim Meals with the lowest reimbursement rate are disallowed
Some policies cannot be changed within the software, such as those policies mandated by the federal government. Such policies apply to all traditional center claims. However, local and state regulations (which vary from state to state) are controlled by the Manage Policies window. Each policy usually has three to four options
that determine which errors are generated on the OER, as well as the outcome of those errors
Error Options
Each policy that controls an edit check usually has three options:
Disallow: The processor automatically deducts meals based on the edit check that was violated For example, if a child enrollment form has not been received, claiming that child is out of compliance with regulations CX can automatically disallow reimbursement for any meal in which the child was claimed These meals an be added back later, if needed However, if you would disallow most of the time, choose this option
Ignore: The processor does not complete the edit check, and the error is not noted on the OER. For example, if checking to see if a child is claimed on a day or for a meal for which they are not enrolled is not a required edit check, you could set that policy to Ignore
Warn: The error does not deduct from the reimbursement, but should be researched to ensure that proper documentation was received or that procedures were followed These errors do show on the OER For example, if a child noted with a special diet is served a meal and the Special Diet Statement has not been marked as received in CX, the processor notes Allow/Warn on the OER for this child's meals. This allows your staff to find out if the Special Diet Statement was received and correct the error in CX or disallow the meals Note that this warning only shows when the claim is processed not when the center is recording their claim
There may also occasionally be additional options available
Enable Grain Ounce Equivalents
Last Modified on 08/19/2021 6:50 am
A grain ounce equivalent is the amount of food product considered to equal one ounce from the grain group As of October 1, 2021, all food program participants must use grain ounce equivalents when serving Bread/Alt and Infant Cereal food items This is to account for different levels of water content in different grains, which affects the amount of actual grain content in the food. For example, cooked pasta and rice has higher water content than crackers or bread. Ounce equivalents aims to ensure that the appropriate amounts of grains are served
You can enable this requirement in your policies Once you enable grains ounce equivalents, the following changes will be applied to Minute Menu CX and KidKare:
Your will be able to add grain ounce equivalent calculations to Bread/Alt and Infant Cereal food items on your food list Each food that falls into these two meal components must have an equation on file Error # will display on the Office Error report for claimed Bread/Alt and Infant Cereal foods that do not have an equation saved to the food list
All quantities for Bread/Alt and Infant Cereal food items will reference grain ounce equivalents when estimating required quantities, recording actual quantities and leftover quantities (if you do so), and when viewing reports such as the Menu Production Record, Weekly Quantities Required report, and the Infant Feeding report Claims processing will also reference the new ounce equivalent serving requirements as outlined by the USDA.
To enable the grains ounce equivalents requirement:
1. Click the Administration menu and select Manage Policies. The Manage Policies window opens.
2 Set policy M.17 Use Ounce Equivalents for Bread/Alt & Infant Cereal Foods to Y If you do not require centers to report actual quantities served, go to Step 4. If you do, continue to Step 3.
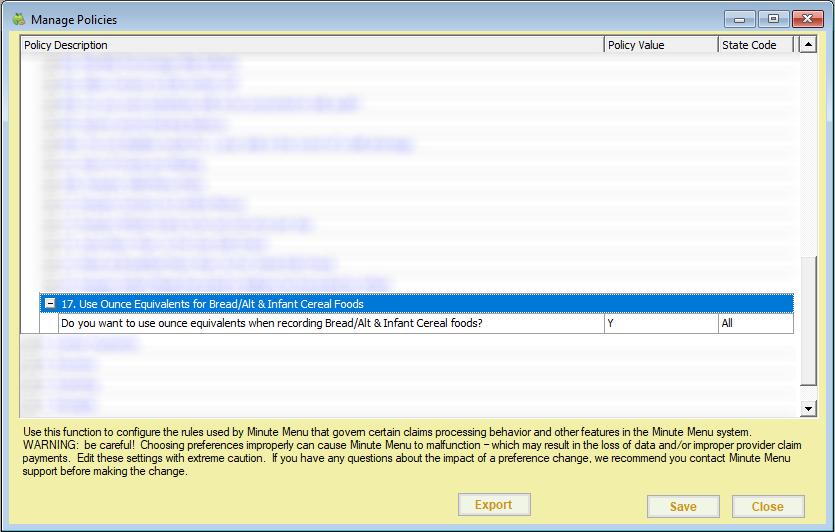
3. If policy M.01 is set to Yes to require actual quantities, you can specify how your centers record ounce equivalents Policy M.01g How do you Want to Handle Recoding Bread/Grain & Infant Cereal Food Components is set to Y by default to use the calculation saved to your food list when recording quantities. Set this policy to N to require your sites to record bread/grain quantities in ounce equivalents only If this policy is set to Y, your centers will record quantities in a common unit of measurement that is
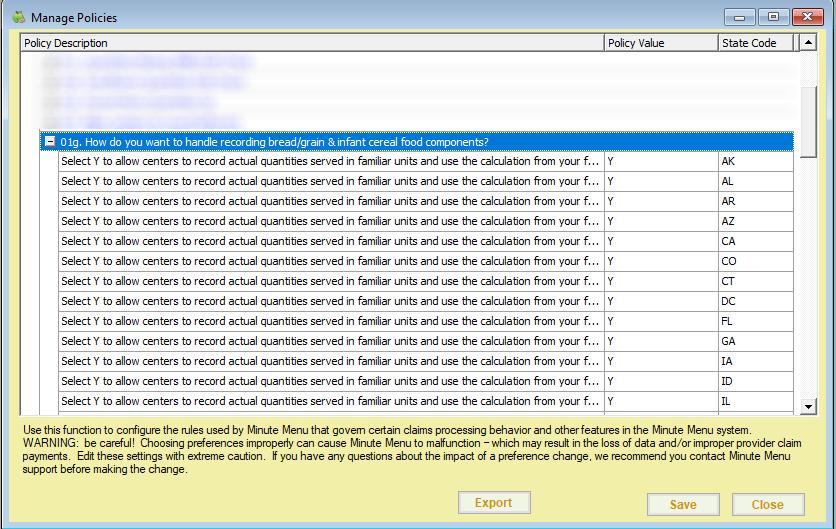
then calculated to ounce equivalents:


If this policy is set to N, your centers will record quantities in ounce equivalents only


[VIDEO] Create Staff Types
You can create staff types with customized permissions This allows you to set default permission levels for specific staff groups For example, you can set up administrators, managers, claims processors, monitors, volunteers, and so on Then, when you create a new staff account, you can simply select the staff type and assign that type's permissions to the user.
1 Click the Tools menu and select Sponsor Staff Types The Manage Staff Types dialog box opens

2 Click Add A blank line displays
3 Click the blank line and enter the name of the staff type For example, if you are creating a monitor type, you could type Monitor
4 Click Save
5 Continue to add as many staff types, as needed
When finished, set permission levels for the new staff type(s)
1 Click the Tools menu and select Sponsor Staff Permissions The Manage Sponsor Staff Access dialog box opens
2 Click the Staff Type drop-down menu and select the staff type A list of permissions displays

3 Check the box next to each permission to give this staff type You can also click All to select all permissions, and then clear the boxes next to each permission to remove Click None to clear all of your selections.
4 When finished, click Save
[VIDEO] Create Staff Accounts
All sponsor/back-office staff members should have their own, unique login ID and password with which to access Minute Menu CX You can assign permissions to each individual user, or you can create staff types You can customize permissions for each staff type and then assign that type to the users you create However, if you have a small staff or want to set permissions for each individual staff member, you do not have to set up staff types For more information about setting up staff types, see Staff Types
To add a new staff member:
1. Click the Tools menu and select Manage Sponsor Staff. The Manage Sponsor User window opens.
2 Click Add New
3. Click the Last Name box and enter the staff member's last name.
4 Click the First Name box and enter the staff member's first name
5. Click the Current Status drop-down menu and select Active, if it is not selected already.
6 If this user is a monitor, check the Monitor box
7 Complete the remaining information in the window, as needed
8 Check the Check to Toggle User Login box
9 Accept the system-generated login information, or change it to something easier to remember
10 Now, select user permissions You can do this two ways: In the box to the right, check the box next to each feature the user should be able to access If you have set up staff types, click the Sponsor Staff Type drop-down menu and select the staff type to assign to this user Then, click Apply Staff Type Default Permissions
11 When finished, click Save

Set Staff Permissions
Last Modified on 05/22/2020 11:06 am
Staff permissions allow you to determine who can access what portions of Minute Menu CX For example, you can restrict certain users from accessing and editing your food list You can either set default permissions when creating specific staff types, or you can customize individual user permissions from the Manage Sponsor Center window. This article covers setting permissions in the Manage Sponsor Center window. See Create Staff Types for more information about creating staff types with default permissions.
1 Click the Tools menu and select Manage Sponsor Staff The Manage Sponsor User window opens
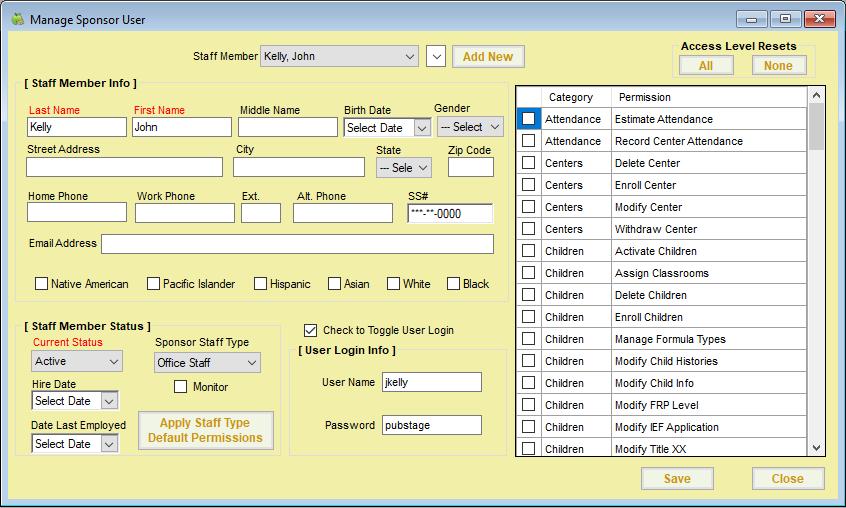
2 Click the Staff Member drop-down menu and select the staff member for whom to add permissions
Note: The Check to Toggle User Login box must be checked before you can edit individual permissions
3. Check the box next to each permission to give this user. Click the Category or Permission headers to sort the permissions
Permissions are divided into the following categories: Attendance Centers Children Claims KidKare Log Messages Menus
4 When finished, click Save

Note: Users will inherit the permissions associated with the Sponsor Staff Type to which they are assigned You can further customize their permissions by checking or clearing the boxes in the permissions list
Manage Admin Rates
Minute Menu CX allows you to manage any administration fees you charge for processing center claims These charges can then be factored into issued payments when you distribute payment to your centers
Last Modified on 01/24/2022 1:55 pm CST
Manage Federal Admin Rates
1 Click the Administration menu and select Manage Admin Rates The Manage Admin Rates dialog box opens Any rates you currently have set up display according to program type The effective claim month is also listed next to each program type
Note: If you are a sponsor operating in the State of California, click Administration and select Manage Federal Admin Rates
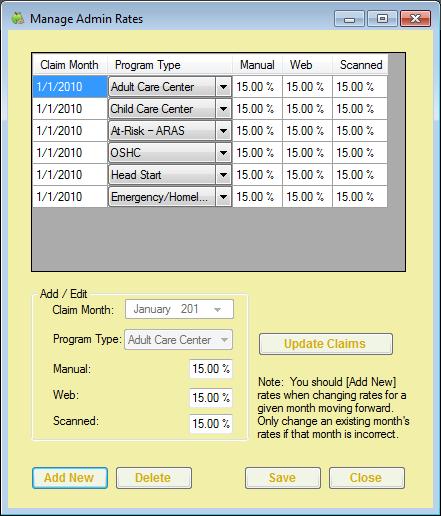
2 To add a new rate:
a. Click Add New. A new line displays in the table, and the Add/Edit section becomes available for changes

Note: You should only add new rates when changing rates for a given month going forward You should only change an existing month's rate if that month is incorrect.
b. In the Add/Edit section, click the Claim Month drop-down menu and select the effective claim month. This defaults to the current system claim month
c. Click the Program Type drop-down menu and select the program type to which this rate applies. You can choose from the following:
Adult Care Center
Child Care Center
At-Risk ARAS
OSHC
Head Start
Emergency/Homeless
Summer Food Program
d Click the Manual, Web, and Scanned boxes, and enter the percentage you charge per manual, web, and scanned claim.
e Click Save
f. Click Update Claims. A confirmation prompt displays. Be sure that you have entered the correct information, as all unpaid claims for the claim month you selected will have their admin rates and amounts recalculated.
g Respond to the confirmation prompt
3 To remove a rate:
a Click a rate configuration to select it
b Click Delete

Note: Ensure that you have selected the correct rate configuration to remove There is no confirmation prompt, and all deletions are saved automatically If you delete a rate configuration in error, you must manually add it again
Manage State Admin Rates (California Sponsors Only)
If you are a sponsor operating in the State of California, you must enter state admin rates separately from the federal admin rates. To do so:
1 Click the Administration menu and select Manage State Admin Rates The Manage State Admin Rates dialog box opens Any rates you currently have set up display according to program type The effective claim month is also listed next to each program type
2 To add a new rate:
Note: You should only add new rates when changing rates for a given month going forward You should only change an existing month's rate if that month is incorrect
a. Click Add New. A new line displays in the table, and the Add/Edit section becomes available for changes
b In the Add/Edit section, click the Claim Month drop-down menu and select the effective claim month This defaults to the current system claim month
c Click the Program Type drop-down menu and select the program type to which this rate applies You can choose from the following:
Adult Care Center
Child Care Center
At-Risk ARAS
OSHC
Head Start
Emergency/Homeless
Summer Food Program
d. Click the Manual, Web, and Scanned boxes, and enter the percentage you charge per manual, web, and scanned claim
e. Click Save.
f Click Update Claims A confirmation prompt displays Be sure that you have entered the correct
information, as all unpaid claims for the claim month you selected will have their admin rates and amounts recalculated
g. Respond to the confirmation prompt.
3 To remove a rate:
a. Click a rate configuration to select it.
b Click Delete

Note: Ensure that you have selected the correct rate configuration to remove. There is no confirmation prompt, and all deletions are saved automatically If you delete a rate configuration in error, you must manually add it again.
Admin Rate Limits
The federal maximum for admin rates is 15% However, some states allow flexibility to this rule In such states, sponsors can increase and decrease the admin rate as long as it does not exceed an average of 15% for the entire year
By default, you cannot enter admin rates exceeding 15% in the Manage Admin Rates window. If you operate in a state that allows the flexibility for the 15% rule, you can set policy B.6 to Yes When you enable this policy and enter an admin rate exceeding 15%, you are prompted to confirm your changes before saving the rates
View Reimbursement Rates
You can view current reimbursement rates for CACFP claims in Minute Menu CX
Last Modified on 05/22/2020 11:11 am
1 Click the Administration Menu and select View Reimbursement Rates The View Reimbursement Rates dialog box opens
2 Click the State Type drop-down menu and select 48 Contiguous (default), Alaska, Hawaii, or Washington DC
3 Click the Effective Month drop-down menu and select the effective month to view Free, Reduced, and Paid reimbursement rates display for all meal types
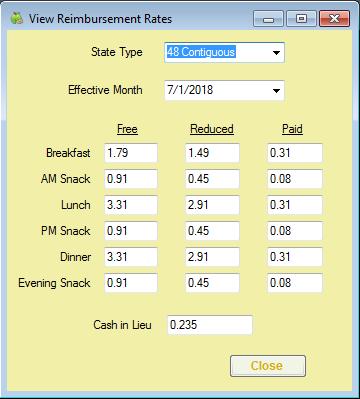
4 When finished, click Close
View IEF Poverty Rates
To view current IEF poverty rates provided by the USDA:
Last Modified on 05/22/2020 11:15 am
1 Click the Administration menu and select View IEF Poverty Rates The View IEF Poverty Rates window opens
2 Click the State Type drop-down menu and select 48 Contiguous, Alaska, Hawaii, or Washington DC
3 Click the Effective Month drop-down menu and select the month to view

4. When finished, click Close.
Add Meal Disallowance Reasons
Last Modified on 05/22/2020 11:30 am
When you manually disallow meals, you can select a disallow reason You must first set up meal disallowance reasons These reasons populate the Disallowance Reason drop-down menu in the Manually Disallow Meals window
1. Click the Tools menu and select Manage Meal Disallowance Reasons. The Manage Meal Disallowance Types dialog box opens
2. Click Add. A blank line displays.
3 Click the new line and enter the disallowance reason
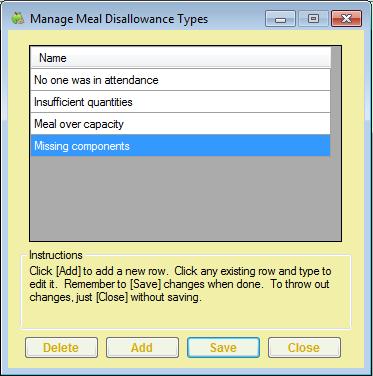
4 Click Save
5. Repeat Steps 2-4 to add as many disallowance reasons as needed.
6 When finished, close and re-open Minute Menu CX to apply your changes to the Disallowance Reason dropdown menu in the Manually Disallow Meals window.
Manage Review Disallow Reasons
Monitors can select disallowances on reviews, if needed To do so, you must first set up disallowance reasons Examples of why you may disallow during a review:
Last Modified on 05/20/2019 9:54 am
Meal was over capacity.
Not enough food served/insufficient quantities
Meal counts not recorded at point of service.
Incorrect components served
Missing components.
Improper sanitation
Add as many disallowance reasons, as needed.
1 Click the Tools menu and select Manage Review Disallow Reasons The Manage Review Disallow Reasons dialog box opens.
2 Click Add A blank row is added to the list
3 Click the new row and enter the disallowance reason
4 Click Save
5 Continue to add as many reasons, as needed

These reasons populate the Disallow Reason drop-down menu in the Add New Review Disallow tab
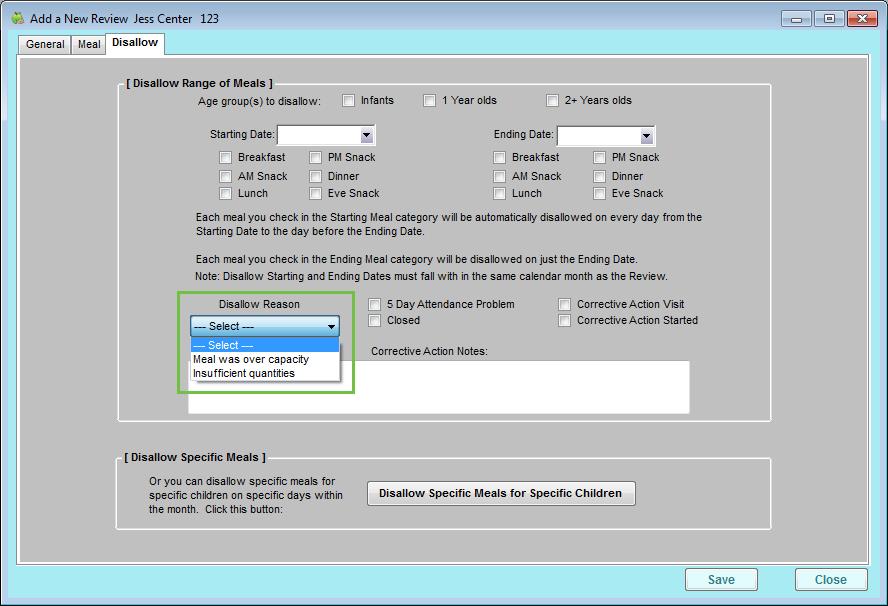
Manage Block Claim Legitimizing Reasons
1 Click the Tools menu and select Manage Block Claim Legitimizing Reasons
The Manage Block Claim Legitimizing Reasons window opens.

2. To add a reason:
a Click Add A blank line displays
b Click the new line and enter the reason
c Click Save
d Click OK at the Save Success message
3 To change a reason:
a Click the line to change
b Enter the new reason over the existing reason
c Click Save
d Click OK at the Save Success message
4 To delete a reason:
a Click the line to remove
b Click Delete
[VIDEO] Add Vendors
Vendors are typically stores from which sites purchase food You can also add center staff as vendors to track their labor as receipts You must add vendors before you can enter receipts for your sites
Both sponsors and centers can add vendors to Minute Menu CX (subject to policy T.1). The instructions in this article are applicable to both user types However, if you are a center, begin at Step 2
1 Click the Select Center drop-down menu and select a center
2. Click Tools and select Manage Vendors. The Manage Vendors window opens.
3 Click Add New The boxes in the Vendor Details section are cleared
4. Click the Name box and enter the vendor's name. This is the only required box.
5 Enter the vendor's address and contact information, if needed
6. (Sponsors) Click the Center drop-down menu and select the center to which to limit this vendor. To apply this vendor to all centers, select All Centers

7 Click Save
[VIDEO] Add Receipts
Last Modified on 06/08/2023 1:34 pm
Enter receipts into Minute Menu CX to ensure that centers are running a non-profit food service This is also a required step for completing the Milk Audit Both sponsors and centers can enter receipts (subject to policy T 1) The instructions in this article are applicable to both user types However, if you are a center, begin at Step 2 under each heading.
If you allow sites to enter receipts, you, the sponsor, should use the verification process to ensure receipts were categorized correctly For more information, see Verify Receipts
Note: You must add vendors before you can enter receipts. See Add Vendors for more information.
Quick Entry
1 Click the Select Center drop-down menu and select the center
2. Click the Tools menu and select Manage/Verify Receipts. The Manage Receipts page opens in an Internet browser
3. Click Add Receipts. The Add Receipt Quick Entry page opens.
4 Click the Date box and select the date on the receipt
5 Click the Vendor drop-down menu and select the vendor
6 Click the Receipt Total box and enter the total amount on the receipt
7 Click the Description box and enter a description of this purchase This box is optional However, information entered here prints on reports
8 In the Milk section, enter the quantity of each milk type purchased
Click to use the Gallons Converter to calculate the amount of gallons purchased.
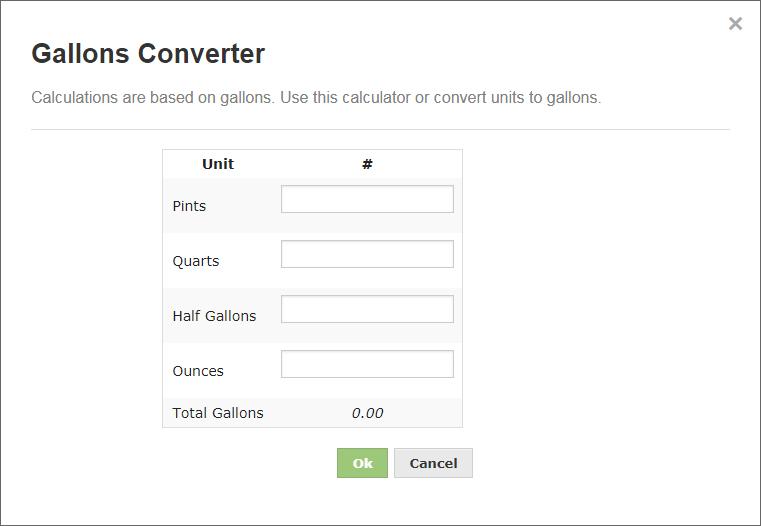
Enter any milk that is not cow's milk (such as, almond milk, soy milk, and so on) in the Substitute box
9. In the Expenses section, enter the expenses from the receipt. Expenses are arranged in the following categories:
Unapproved: Items that are non-food program approved, such as office supplies.
Supplies: Food-program related supplies, such as paper plates, spoons, and so on
Food: Food items.
Labor: Amount paid x hours worked for the food program For example, if you are entering a receipt for a cook, you would put what you paid them in this category
Other: Taxes This is required by some states
Utilities: Utility charges, such as electricity, water, and so on
Mileage: Miles driven to the vendor and back
10 When finished, click Save and Exit to save this receipt and exit, or click Save and Add to save and add another quick entry receipt


Notes: As you enter expenses, the Running Total field updates automatically. This value and the Balance must match before you can save the receipt. Type / (forward slash) in a category box to automatically apply the remaining balance to that category
Itemized Entry
1 Click the Select Center drop-down menu and select the center
2. Click the Tools menu and select Manage/Verify Receipts. The Manage Receipts page opens in an Internet browser
3. Click Add Receipts. The Add Receipt Quick Entry page opens.
4 Click Switch to Itemized Entry
5. Click Add Receipts. The Add Receipt Quick Entry page opens.
6 Click the Date box and select the date on the receipt
7. Click the Vendor drop-down menu and select the vendor.
8 Click the Receipt Total box and enter the total amount on the receipt
9. Click the Description box and enter a description of this purchase. This box is optional. However,
information entered here prints on reports
10 In the Receipt Items section:
a Click the Category drop-down menu and select the category for this line item Refer to Step 9 under the Quick Entry heading (above) for category descriptions
b Click the Amount box and enter the price for one unit of the line item
c Click the Quantity box and enter the amount of the item purchased The Total box updates automatically.
d Click the Item Description box and enter the name of the item
e. Click Add and repeat Steps 10a - 10e for each line item on the receipt. Click Remove next to a line item to remove it
Note: If you select a Milk category in Step 10a, click to use the Gallons Converter.
11. When finished, click Save and Exit to save this receipt and exit, or click Save and Add to save and add another itemized receipt
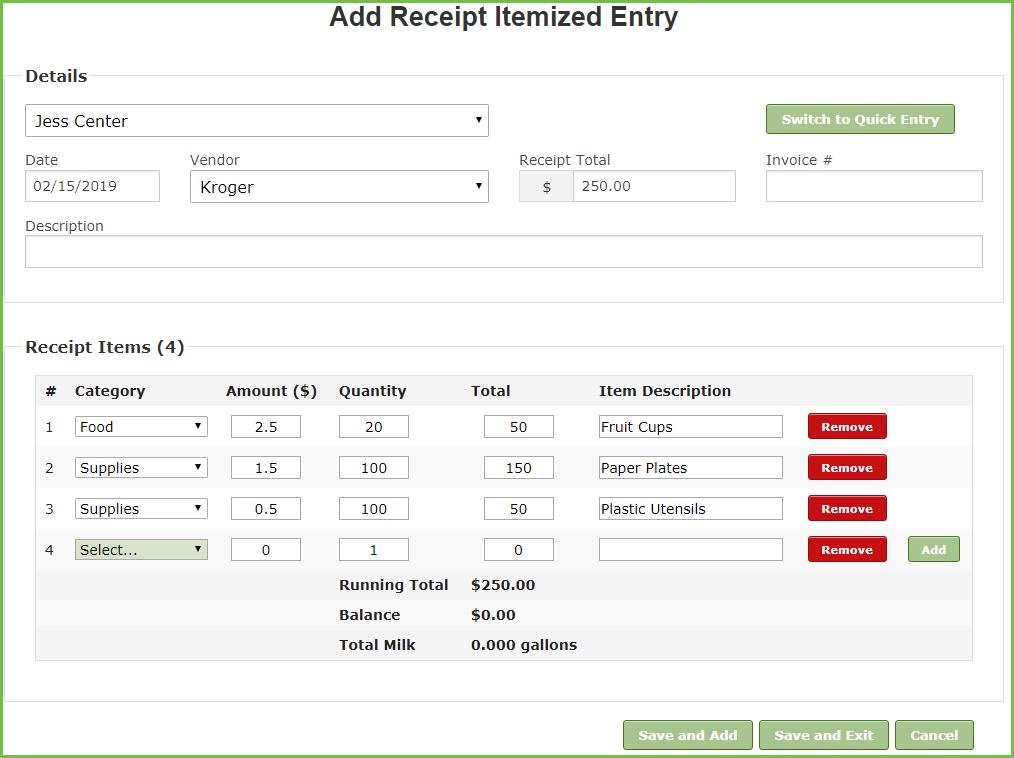
Verify Receipts
Last Modified on 05/26/2020 4:02 pm
Verifying receipts allows you to track which sites have sent you receipts and confirm the data is correct Even though this step is optional, we recommend you complete it if you allow sites to enter their own receipts
1. Click the Select Center drop-down menu and select a center.
2 Click the Tools Menu and select Manage/Verify Receipts The Manage Receipts page opens in an Internet browser.
3 Click the Select Date Range drop-down menu and select a date range to view You can choose from the following:
Last 90 Days
Last 60 Days
Last 30 Days
Current Month
Previous Month
Select Date Range
4 Click a receipt line to view the receipt details in the Receipt Details section
5. Click Edit to edit receipt details. When finished, click Save and Exit.
6 When finished, check the Verify box next to the receipt(s) to verify You can also click Verify All to verify all displayed receipts.

7. Click Delete next to a receipt to delete receipts that cannot be verified. This is permanent.
Review the Milk Audit in CX
Use the Milk Audit to compare the amount of milk purchased with the amount of milk needed, based on menus and meal counts Before using this feature:
Enter receipts. For more information, see Add Receipts.
Record menus
Record meal counts.
Milk Audit Policies
There are several specific configuration choices that impact how the milk audit determines shortages and what disallowances are made when a shortage is found You can adjust these policy settings in the Manage Policies window Policies related to the milk audit start at policy M 6
Viewing the Milk Audit
Once you are ready to perform the Milk Audit:
1. Click the Select Center drop-down menu and select the center.
2 Click the Claims menu and select Milk Audit The Monthly Overview Milk Audit window opens
3. Click the Claim Month drop-down menu and select the claim month to view. The monthly totals for each milk type display, as do totals for each type
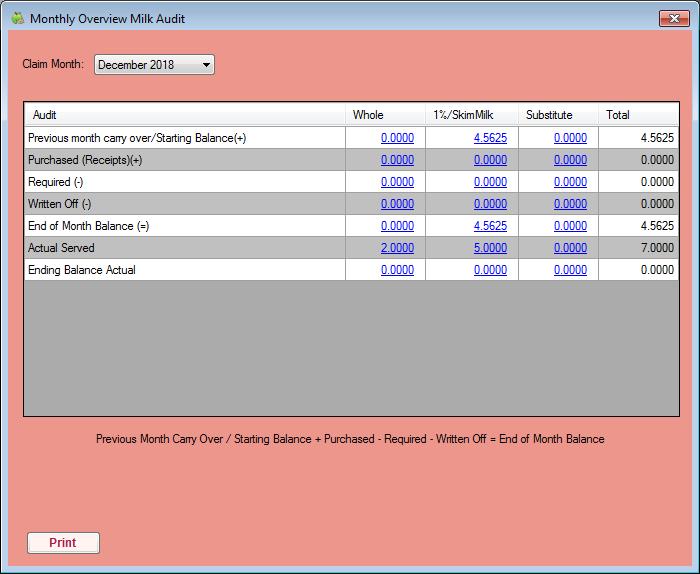
4 Click the link in each column to view the daily milk overview The Daily Overview Milk Audit window opens

5 In the Daily Overview Milk Audit window:
Click the Claim Month drop-down menu to select a different claim month
Click the Milk Type drop-down menu to view a different milk type
6 The following information displays for the selected month and milk type:
Starting Balance: This may be the ending balance from the previous month (depending on your specific policy settings) You can click this field to edit the starting balance
Purchased (Receipts): This is the amount of milk purchased, based on receipt date
Required: This is the amount of milk required based on menus and meal counts
Written Off: Click this box and enter the amount of milk that was written off for a specific day This is for cases in which the milk was spilled, spoiled, and so on.
Ending Balance: This is the amount of milk leftover at the end of each days Shortages are highlighted in red.
7 Click Print to print the Milk Audit report A PDF is generated
8. Click Export to print the Milk Audit report as an XLSX (spreadsheet) file.
Review the Milk Audit in KidKare
You can now run the Milk Audit in KidKare, in addition to running it in Minute Menu CX Sponsors accomplish this through Observer Mode
Last Modified on 06/11/2020 9:55 am

Are you a center? See Milk Audit at help.kidkare.com for instructions. Sponsors must enable this feature for you
1 Log in to app.kidkare.com Use the same credentials you use to access Minute Menu CX The Observer Mode page opens
2 Use the filters to locate the site for which to run the Milk Audit For instructions, see Observer Mode
3 Click the center's name to view the center
4 From the menu to the left, click Food Program
5 Click Milk Audit The Milk Audit page opens
6 Click the Month box and select the claim month to view
7. Select Calculated to view view milk audit information based on calculated quantities (attendance x required quantities), or select Calculated + Actual Served to view milk audit information based on calculated and actual served quantities.
Note: This option may not display according to your settings If this is the case, the numbers you are viewing are the Calculated numbers.
8 The following information displays in the table for the selected month: Previous Month Carry Over/Starting Balance: This may be the ending balance from the previous month (depending on your specific policy settings). To edit starting balances, click , enter the
new amount, and click Note that this option may not be available according to your preferences or the preferences your food program sponsor set (if you are a sponsored center).
Purchased: This is the amount of milk purchased, based on receipt date
Required: This is the amount of milk required based on menus and meal counts.
Written Off: This is the amount of milk written off for the month For example, this number accounts for cases in which the milk was spilled, spoiled, and so on.
End of Month Balance: This is the amount of milk leftover at the end of the month
Actual Served: This is the actual total of milk served during the selected month based on meal records This row only displays if you select Calculated + Actual in Step 4
Actual End of Month Balance: This is the actual end of month balance based on the following formula: Carry Over + Purchased - Written Off - Actual Served This row only displays if you select Calculated + Actual in Step 7.
9 Click Print and choose a report to print You can choose Summary Report or Detailed Report Both reports download as PDFs.
Using the Daily Calendar
Use the Daily Calendar to view and/or add milk events, such as purchases or write offs
1 Click Show Daily Calendar The Daily Calendar displays at the bottom of the window The Calculated version is shown in the figure below. 2. Click the drop-down menu and select the milk type. You can choose from Whole, 1%/Skim, or Substitute.

3 To add a write off:
a. In the Draggable Events section, click the Write Off event and drag it to the calendar.
b Drop it on the day on which to apply it The Milk Write Off pop-up opens

Notes: A day can only have one write off event at a time You cannot change the date in the Milk Write Off pop-up If you are a sponsored center, your food program sponsor must enable this feature
c. Click the text box and enter the amount of milk you are writing off.
d Click the corresponding drop-down menu and select Gallons, Pints, or Quarts All units of measure are converted to gallons once you save.
e Click Save
f. To add a purchase:
i In the Draggable Events section, click the Purchase event and drag it to the calendar
Note: You must have the Vendor/Receipts permission enabled on your account to access and work with Purchase events If you are a sponsored center, your food program sponsor must enable this feature
ii. Drop it on the day on which to apply it. The Add Expenses pop-up opens.
iii Select Quick Entry or Itemized Entry
iv Enter your milk quantities For instructions, see Itemized Entry or Quick Entry
v Click Save
g To edit an event:
i Click the event to edit A pop-up opens
ii Enter new information over the existing information Note that you cannot change the event date
iii Click Save
h To remove an event:
i Click the X in the right corner of the event banner
ii Respond to the confirmation prompt
4. Additional Calendar Items
The following items also display on the calendar:
Required: Required amounts display for each day where an calculated or calculated + actual calculation is present You cannot add, move, or remove these markers
Milk Shortage (Calculated): This icon displays on each day for which the daily ending balance value is calculated to be negative. Click this icon to view the anticipated shortage amount.


Milk Shortage (Actual): This icon displays on each day for which the daily ending balance based on the calculated values is negative Click this icon to view the actual shortage amount
Shortage Analysis: This section displays the calculated total amount of gallons you are short by day or by claim This is determined by how your system is set up For sponsored centers, your food program sponsor makes this distinction. If you selected Calculated + Actual at the top of the page, the actual shortages display as well


Change the Claim Month
Last Modified on 05/26/2020 4:42 pm
Minute Menu CX tracks claim month-specific information independent of your computer’s date This should be the month immediately before the calendar month (in most cases) and is the claim month on which you are working
You can view the claim month in the title bar of the software, as shown below.
Only one person needs to advance the claim month for each account Once the month has been changed in the account, other users must log out and log back in to the software before they see the change

Note: The current claim month for center accounts are independent from all other accounts (both other center and sponsor accounts) Please see the Center Account Claim Month heading below
Changing the Current Claim Month
To change your current claim month:
1 Click the Claims menu and select Advance Claim Month The Change Claim Month dialog box opens


2 Click to advance the claim month, and click to move the claim month back
3 Check the Automatically Withdraw Expired Enrollments option to mark all children with expired enrollments as withdrawn as of their enrollment expiration date

Note: Enrollment expiration dates ensure that children who aren't re-enrolled are not reimbursed more than one year after their date of enrollment (subject to policy D 1) However, children remain active even once their enrollment expires, unless you withdraw them in the Manage Child information
window Checking the Automatically Withdraw Expired Enrollments box when changing the claim month automatically marks children with expired enrollment as withdrawn
4 Click Save
Center Account Claim Month
The current claim month also displays in the title bar for center accounts The center account's current claim month is separate from the sponsor's claim month The center claim month should be set to the current calendar month For example, if it is currently June, then the center's claim month should also be June Centers cannot record attendance or meal counts in Minute Menu CX unless their account is set to the current month.
Minute Menu CX sets the claim month whenever a center accesses their account for the first time After a center submits a claim, the current claim month advances automatically For example, when a center submits their June claim, the claim month advances to July However, if a center does not use Minute Menu CX to record their claim that month, the sponsor must advance the claim month manually To do so, log in as the center and follow Steps 1-4, above.
If your centers do not have access to the Advance Claim Month function, you must enable them in the Center Administrator Permissions window
1. Click the Tools menu and select Center Administrator Permissions. The Center Administrator Permissions window opens
2 Scroll to the Claims permissions
3 Check the Change Claim Month box

4. Click Save.
Unsubmit Center Claims
If a center submits their claim but needs to edit it for some reason, you can unsubmit the claim for that center
If the center claim has NOT been processed, follow the steps below:
1 Click the Tools menu and select Un-Submit Center Claims The Unsubmit Center Claims dialog box opens

2 Verify that the correct claim month is selected
3 Check the box next to the center for which to un-submit claims
4 Click Unsubmit The center can now access and edit their claim again The center must submit their claim again once they are done making changes
If the center claim HAS already been processed, follow the steps below:
1 Click on the Claims menu and select List Claims.
2 Click on View next to the center that needs to be un-submitted
3 Click on Delete Claim in the bottom left corner
4 At the confirmation prompt, choose Claim ONLY and then click Delete
5 Next, Click the Tools menu and select Un-Submit Center Claims The Un-submit Center Claims dialog box
opens
6 Verify that the correct claim month is selected
7 Check the box next to the center for which to un-submit claims
8 Click Unsubmit The center can now access and edit their claim again The center must submit their claim again once they are done making changes
[VIDEO] Track Received Claims
Last Modified on 08/06/2020 9:30 am
The Track Received Claims feature allows you to see which sites have submitted claims for processing
1 Click the Claims menu and select Track Received Claims The Track Received Claims window opens The information in this window is divided into two tabs: Overview and Not Received If a claim has been received for the selected month, a day and time displays in the Received Online column in the Overview tab
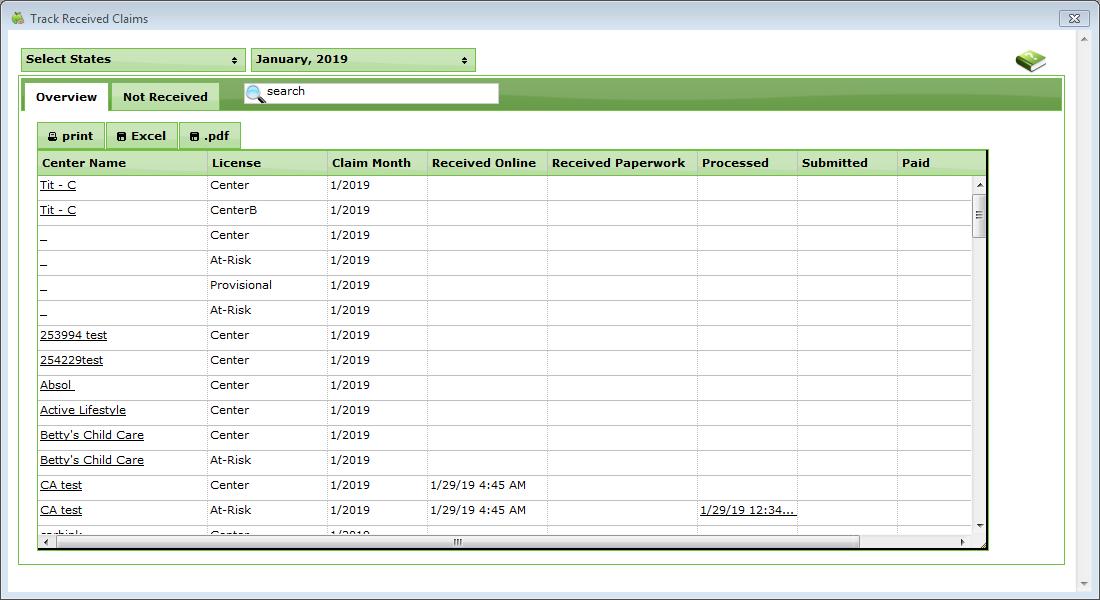
2 Click the Month drop-down menu and select the month(s) to view
3 Click the Not Received tab to view centers that have not submitted claims for the selected month(s)
4 You can print this information, export it to a spreadsheet file (XLSX), or export it to PDF
Understand the Whole Grain-Rich Edit Check
Last Modified on 04/16/2021 12:23 pm
Child care centers/sites serving a meal or multiple meals in a day that include the grain component need to make sure that at least one of the grains served that day is whole grain-rich and indicate them as such in CX to receive the maximum reimbursement
Not all meals require the grain component, such as a snack where two other components, or breakfast if the grain component is replaced with a meat/alternate If the grain component is served, there must be a least one meal that day in which the grain was whole grain-rich If one or more grain components are served, but none of them are marked as whole grain-rich, the meal with the lowest reimbursement that included grains will be disallowed (i.e. snacks will be disallowed before breakfast, breakfast will be disallowed before lunch and dinner).
Sponsor Preferences
Sponsor Policy M.13. controls this edit check. This preference can be set to disallow, warn, or ignore. The edit check will only evaluate meals if this preference is set to disallow or warn.
Edit Check
Error 100 displays on the Office Error Report (OER) when claims are processed if meals for non-infants include bread/grain components, but none of the recorded breads/grains were marked as whole grain-rich Infants are not included in this requirement
Meals Disallowed
If only one meal was served in a day and the meal did not include a grain, the error is not generated.
Example
The only meal served that day was a snack of apples and milk The snack did not include the grain component. The meal is reimbursable, and the whole grain-rich edit check is not generated.
If only one meal was served in a day and the meal did include a grain, but the grain was not marked as whole grain-rich, then error 100 is generated on the OER
Example
The only meal served that day was a snack of apples and crackers If the crackers were marked as whole grain-rich the meal will be reimbursable If the crackers were not marked as whole grain-rich, the meal will be disallowed.
If multiple meals were served and meals did not include a bread/grain, the meal with the lowest reimbursement that contained the grain component will be disallowed.
Example 1
Breakfast, Lunch, and a PM Snack were served Breakfast and Lunch both had a grain component, but neither were marked whole grain-rich In this case, Breakfast would be disallowed The PM Snack
would not be disallowed in this scenario, since the grain component was not served Breakfast was disallowed before Lunch, since it has a lower reimbursement rate
Example 2
Breakfast, Lunch, and a PM Snack were served. Lunch was the only meal that included a grain, and it was not marked whole grain-rich. The center/site chose to serve a meat/alternate instead of a grain for breakfast that day Therefore, the lunch is the only meal that included a whole grain, and it was not marked as whole grain-rich, so lunch would be disallowed
The whole grain-rich edit check will run after all other edit checks. So, if a meal that included a grain has already been disallowed for another reason, one of the remaining meals that contained the grain component would be disallowed
Example
Breakfast, Lunch, and a PM Snack were served The grain component was served at all three meals, but none were marked as whole grain-rich The PM Snack was disallowed for an unrelated reason The processor then disallowed the next available meal that included the grain component. In this example, Breakfast was disallowed.
If the meal that was marked as whole grain-rich was disallowed for another reason, the whole grain-rich food satisfies the requirement, and another meal would not be disallowed.
Example
Breakfast, Lunch, and a PM Snack were served, and a whole grain-rich food was served at the PM Snack. The PM Snack was disallowed for an unrelated reason. The whole grain-rich food served at the PM Snack satisfies the requirement, therefore there would not be any additional disallowances.
[VIDEO] Process Claims
Once a site submits a claim, process it in Minute Menu CX When a claim is processed, Minute Menu CX looks at the data entered into the program and ensures that it meets CACFP requirements
Watch the video below, or scroll down for text instructions.
Before You Begin
Before you begin processing claims, make sure that:
Center data is accurate
Pending children have been activated (if the signed enrollment form has been received).
Site visits/reviews have been entered (if applicable)
Receipts have been entered (if applicable).
School out days have been entered on the school calendar (if applicable)
It is okay if these tasks are not complete by processing time, as errors display for any disallowances once the claim is processed However, you will save time by ensuring that all data is entered and accurate before you process claims
Processing Claims
1. Click the Claims menu and select Process Claims.
2 Click the Claim Month drop-down menu and select the correct claim month
3. Check the Calculate Blended Rates box, if applicable.
4 Check the Print OER box, if needed
5. All claims are selected by default. Clear the box next to each claim you do not need to process.
6 Click Process The Office Error Report (OER) opens
Review Errors
Review each error on the OER. Each error results either in an Allow/Warn or Disallow message. Errors resulting in a disallowance are deducted from the reimbursement. Errors resulting in a warning are notification messages that do not deduct from the reimbursement but need to be researched If there are no claim errors, a Congratulations message displays
You can correct some errors and re-process the claim
Reprocessing Claims
1 Click the Claims menu and select Process Claims
2 Click the Claim Month drop-down menu and select the correct claim month
3 Select the Reprocess Existing Claims option
4 Check the Calculate Blended Rates box, if applicable
5 Check the Print OER box
6 Check the box next to the claim(s) to reprocess
7. Click Process.
Some errors may be legitimate and should cause a disallowance For example, Error 31 (Child served more than 2 meals and a snack or 2 snacks and a meal) is generated for children claimed over two (2) snacks and one (1) meal or two (2) meals and one (1) snack. The software automatically disallows the extra meals/snacks. This is a legitimate error and should be left as-is In this example, move to the next error
Process Claims Without Paper
Minute Menu CX has tools that can help you process and monitor claims without printing reports to paper Most reports in Minute Menu CX print to PDF automatically, so there is no need to export or update your printer settings to a PDF writer Ensure you have a PDF reader, such as Adobe Acrobat Reader or Cute PDF, installed to your machine. Adobe Acrobat Reader and Cute PDF are both free to download and install.
Stop the Office Error Report From Printing Automatically
Typically, the Office Error Report is sent to your printer by default during claims processing If you do not have a printer available, or if you no longer wish to print physical copies of the Office Error report, you can process claims without printing this report Don't worry you can print it to PDF later See Generating and Saving the Office Error Report heading, below
1. Click the Claims menu and select Process Claims. The Process Claims window opens.
2 Click the Claim Month drop-down menu and select the correct claim month
3. Check the Calculate Blended Rates box, if applicable.
4 Clear the Print OER box

5. Complete claims processing as you normally would. For details, see Process Claims.
Generate and Save Error Reports
Even if you skip automated printing during claims processing, you can generate the Office Error report and save a digital copy to your computer. There are several ways you can do this:
Reports Menu: Click the Reports menu, select Claims, and click Office Error Report For more information, see Print the Office Error Report (OER).
List Claims Window: Click the Claims menu and select List Claims. Click OER for the claim for which to print the Office Error report.
Generate & Save Center Error Letters
You can also generate a center error letter and save or send it digitally
1. Click the Reports menu, select Claims, and click Center Error Letter.
2 Select Selected Center, All Active Centers, or Select Multiple Centers
3. Click Run Report. If you selected Select Multiple Centers in Step 2, you can set additional filters to retrieve specific centers Otherwise, the Select Date dialog box opens
4. Select the claim month for which to run the report.
5 Click Continue The PDF is generated and you can save a copy to your machine
Re-Process Claims
Re-processing claims is sometimes necessary if you process a claim, but some piece of information was incorrect when the claim was processed initially
Last Modified on 06/16/2020 11:06 am

Note: Re-processing claims wipes out any previous claim information including any adjustments you have made to claim counts and meal disallowances
1 Click the Claims menu and select List Claims The List Claims window opens
2 In the Center section, select All Centers or Selected Center If you do not already have a center selected in the toolbar, this filter defaults to All Centers and cannot be changed
3 In the Month section, select the Selected Month option or the All Month option If you choose Selected Month, click the corresponding drop-down menu and select the month for which to view claims
4 If you operate in multiple states, click the State drop-down menu and select the state to view
5 Click Refresh Display Claims that meet the limits you set display
6 Click View in the Details column for the claim to re-process The Manage Claim Details window opens
7 Click Reprocess
Calculate Blended Rates
Minute Menu CX is built to process claims that are ready to be submitted to your state agency When a claim is processed, the system must do two primary things:
Last Modified on 05/27/2020 9:28 am
1. Apply all USDA edit checks to submitted meal count, menu, and enrollment data.
2 Determine the appropriate meal count and free/reduced/paid (FRP) participation and attendance totals for the claim. This is so the claim can be submitted to the state agency. Minute Menu CX can also calculate the dollar totals associated with those claims
This article focuses on how FRP participation totals are determined and how those totals affect meal counts and computed claim dollar amounts Each state uses its own rules when calculating reimbursement levels, and the differences between two states can be substantial As a result, the procedures you follow when calculating claims in Minute Menu CX can vary from state to state While this article was written to be general and useful to child care centers and sponsors in every state, you may need to skip sections that are not relevant in your state
Actuals vs. Blended
State agencies approach meal count calculations in one of two ways:
1 Actuals: Each child has an FRP status, and each child is tracked per meal Totals per-child by meal are taken for the month so, the monthly totals include the counts of meals by FRP status Example: Total Free Breakfasts, Total Reduced Breakfasts, and Total Paid Breakfasts (repeat for each meal type served).
2 Blended: Rather than counting each child by day by meal, arrive at counts of the total number of meals that are served in a month. Example: Total Breakfasts, Total Lunches, and so on. The total counts of FRP children enrolled and/or participating are also taken into account A percentage is determined based on these FRP counts, and that percentage is then applied to each of the total meal counts in the month.
Minute Menu CX can work either way The configuration is generally set automatically when you first begin using the software, but you can contact Minute Menu CX Support when you try to process your first claim to ensure that the software is configured properly. This configuration is governed by policy F.1. You can check your current policy setting in the Manage Policies window
Using Blended Rates
Minute Menu CX automatically computes blended rates for you The system can do this when you process claims, or it can do it before claims are processed How you use Minute Menu CX depends on how frequently you choose to calculate rates in your agency
Calculating Blended Rates Monthly
Some agencies are in states that require them to calculate rates each month If you fall in this category, you can use Process Claims to calculate blended rates each time you process your claims Check the Calculate New

Calculating Blended Rates Less Frequently Than Monthly
Some states allow agencies to calculate less frequently than monthly If you call into this category, use the Calculate Blended Claim Rates window to calculate rates. To access this window, click the Claims menu and select Calculate Blended Claim Rates.

Do NOT calculate rates each time you process claims. When you use the Process Claims function, do not check the Calculate New Rates While Processing box.

Note: For-Profit centers must still be verified as being above the 25% threshold each month This happens automatically when processing claims, even if you don’t calculate new blended rates
Calculating Blended Rates
The Calculate Blended Rates function creates a saved rates level for any individual center in your agency. When you click Calculate, it examines every child that is enrolled in the center, effective that month, to determine the appropriate FRP blended percentage to apply to that month’s claim The results display in the window If no rates exist for the current month, it displays the most recent month for which rates exist
Historic results are also listed in Manage Center Information Oversight tab To view them, click Show Rates You can also use the Manage Center Information page to manually edit rates if necessary.
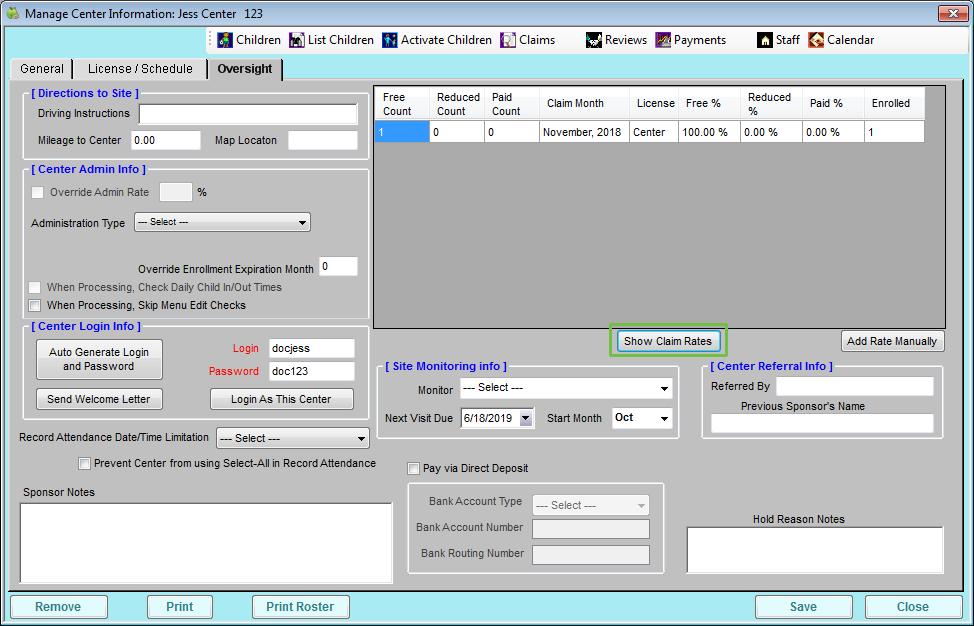
The rates calculated with the Calculate Blended Rates function are saved. When a claim is processed, the system applies the most recent set of available rates to that month's claim even if those rates are not for the claim month For example, if you're in a state where you're supposed to recalculate blended rates every October, you would only run the Calculate Blended Rates function once per year (in October) Every time you process claims, the October rates are applied to the participation totals for the claim you are processing
Child Roster & Blended Rates
The rates calculated by the Calculate Blended Rates function print on the Child Roster In fact, two different sets of rates print at the top of the Child Roster:
From Roster: The From Roster rates provide the counts of FRP children as printed on the roster These rates reflect the information currently in Minute Menu CX for the center and the month in question
From Calc Blended: The Calc Blended rates are an exact duplication of the information you see in the Calculate Blended Rates window These rates show what was saved when you last calculated rates

Maximizing Your Rates
In some states, you can choose to calculate your rates as often as you like This means that if your rates are better in November than they were in October, you can use November’s rates. If not, you can stick with October’s rates. This can add up to a substantial difference by the end of the fiscal year as center enrollments change over time
To do this:
1. Run the Calculate Blended Rates function every month.
2 When finished, click Rate Summary to print the Rate Summary report for the new month
3. If the new month's rate is worse than the prior month's rate, select all centers and click Delete to delete the rates for the current month The system then reverts back to the rates that were in effect before you calculated blended rates.
How Rates Apply to Claims
Note that when rates for one month are applied to a claim for a different month, the system applies those rates to the participated total in the new month This can give the appearance that the new month’s claim rates are slightly different than the prior month’s rate, but it’s a consequence of changing overall participation counts
Here's an example:
50 children were enrolled in October 20 were free, 10 were reduced, and 20 were paid This gives you a claim rate moving forward of 40% free, 20% reduced, and 40% paid
In November, 3 new children were enrolled So now, there are 53 children enrolled If we take October’s rate percentages and apply them to the new month, we see the following:
53 x 40 0% free = 21 2 children
53 x 20 0% reduced = 10 6 children
53 x 40 0% paid = 21 2 children
You can't have part of a child, so we round these numbers to:
21 free children
11 reduced children
21 paid children
If we then compute percentages for these new totals, we get:
39 6% free
20 8% reduced
39 6% paid
The percentages appear to be slightly different. We based the breakdown of FRP in the new month on the rates in effect in the old month, but because the child participation count changed, the math causes the rates to
appear slightly different This won’t always happen, but it does happen
Similarly, sometimes when you’re able to re-calculate rates as often as you like, you’ll see a slight improvement in rates, but the percentage won’t be big enough to make a difference in the actual breakdown of FRP children It’s helpful to keep this in mind as you use the system to help prevent confusion.
Who is Counted When Calculating Rates
One of the keys to calculating rates properly is knowing which children are counted when rates are calculated. The list of children counted by the Calculate Blended Rates function is always the same as the list of children you see on the Child Roster (except when dealing with centers that operate an At-Risk program) So, if you calculate blended rates and immediately print the Child Roster, the two will always have identical information
However, child information can change as time passes. The roster always reflects current child information, but the saved rates reflect the roster when the rates were last calculated. If you ever see a discrepancy between the two, it’s generally because child information has changed since you last calculated rates
The specific rules governing which children appear on the roster and which children are counted when calculating blended rates are quite complex In some states, you only count claimed children In others, you can count any children whose enrollment forms cover the month in question. Policy F.6 determines this setting.
When counting claimed children, you can further limit to only those children who were actually served a meal, or you can include children who may have been in attendance, but were never served a meal in the month This is governed by policy F6b
If you are concerned about the accuracy of the blended rate calculation, contact Minute Menu Support at cxsupport@minutemenu.com for assistance.
Print the Office Error Report (OER)
You can view and print the Office Error Report from the Reports menu or the List Claims window once you’ve processed claims
Printing the OER from the Reports Menu
1. Click the Reports menu, Claims, and select Office Error Report.
2 Click the Month drop-down menu and select the month for which to print the report
3. Select the Selected Center option or the All Active Centersoption.
4 Click Run Report
Printing the OER from the List Claims Screen
1 Click the Claims menu and select List Claims The List Claims window opens
2. In the Center section, select Selected Center or All Centers.
3 In the Month section, click the Selected Month option and select the month, or select the All Months option
4 Click Refresh Display
5 Click View in the Details column next to the claim The Manage Claim Details window opens
6 Click Office Error Report

Scanning Overview
Last Modified on 05/27/2020 11:19 am
You can scan Weekly Attendance + Meal Counts forms that centers print and complete Using this method, centers take point-of-service meal counts on paper and then submit those original records to their food program office/sponsor to scan An overview of the scanning process is below:
1. Centers print the Weekly Attendance + Meal Count report each week and record daily attendance and meal counts at point-of-service
2. Centers send the original report to their food program office/sponsor weekly, twice monthly, or monthly.
3 Sponsors spot-check the forms prior to scanning This includes checking for stray marks, tears, potential issues, and so on.
4 Sponsors can the documents with specific settings and save them to a specific folder
5. The documents are scanned with Minute Menu CX.
6 Sponsors correct any scan errors
7. The claim is marked as Submitted and is ready for processing.
Before you can begin using scanning, you must complete several set up steps For more information, see Setup Scanning

Note: We suggest that you perform an internal audit of at least 10% of your scanned claims each month to ensure that everything is working as expected
[VIDEO] Scanner Setting Requirements
You must use specific settings when scanning the Weekly Attendance + Meal Count reports If you do not use the settings below, the forms will still appear to scan, but the accuracy is compromised Some scanners allow users to set up a Scanning Profile, so you do not have to remember each of these settings every time you scan If this option is not available, ensure you are selecting each specific setting every time you scan.
Save the image as a TIF
Scan in black and white (not grayscale).
Use 400dpi or higher
Use 8 5 x11 document size
Set Up Scanning
Last Modified on 05/27/2020 11:28 am
You can use any image-based scanner to scan the Weekly Attendance + Meal Count report into Minute Menu CX For example, you can use network copiers as a scanner Multi-function scanner/printer/faxers also work
The system reads the X's marked on the Weekly Attendance + Meal Count report and saves that information in Minute Menu CX to process the claim In addition, Minute Menu CX saves the scanned image of that same report to a historic directory in your computer or network file server permanently
Setting Up Scanning at Your Agency
1. If the Scanning menu at the top of the page is not visible, contact Minute Menu CX support to enable the Scanning feature
2 If you already have children enrolled, verify that there are no duplicate child numbers To do so, click the Scanning menu and select Verify Child Numbers If you do not have any children enrolled, skip this step
3 Set up your scanning configuration For more information, see Scanning Configuration
4. Make sure the scanner you plan to use meets requirements. For more information, see Scanner Setting Requirements
Center Training
Advise centers to print the Weekly Attendance + Meal Count report with high-quality ink. Do not print these forms in ink-saver or economy mode. Also teach center staff to fill out forms correctly. Forms that are not filled out correctly must be fixed before scanning or entered by hand
Configure Scanning
Before scanning, use the Scanning Configuration window to specify where scanned images are stored, as well as other important settings
Last Modified on 05/27/2020 11:29 am
1. Click the Scanning menu and select Scanning Configuration. The Scanning Configuration window opens.

2 Make sure that the ISIS Scanner and TWAIN Scanner boxes are clear

3 Click next to Scan Images To and select the folder in which you will save scanned images Minute Menu CX will look in this folder for images to scan You can configure your scanner to automatically save images in this folder, or you can move them to this folder once scanned

4. Click next to Historical Path and select a folder in which images will be moved after they are scanned by Minute Menu CX We strongly recommend that you create backups of this folder often
5. In the Historical Image Storage section, specify how to organize historical folders. For example, if you select the Save by Claim Month option, the folders are organized by claim month
6. In the Storage Naming section, specify the naming convention to use for historical folders. You can select Use Center # or Use Center Name
7. Click Save.
8 If you are missing required drivers, click Download Drivers Missing drivers are listed to the left of this option in the Scanning DLL Version Information section.
[VIDEO] Correct Scan Errors
Last Modified on 08/06/2020 9:27 am
Once you have scanned forms into Minute Menu CX, the program notifies you of errors Review all scanned errors and correct them
To correct scan errors:
1 Select the option to see errors after forms are scanned If you need to do this later, click the Scanning menu and select Fix Scanned Errors. The Fixed Scanned Errors window opens.

2. Click a row.
3 Click View Image at the bottom of the window The image displays
4. Locate the row with the error and try to determine why the error was received. For example, a child's name may have been written on the wrong row In this case, you would need to match the child's name with the attendance.
5 When finished, close the image
6. Click Fix.
7 Make the corrections If the error was caused because a name was written on the form, locate that child's name in the drop-down menu. If you don't see the child, select the Pending or Withdrawn option and try again
8 When finished, click Save Once the error is resolved, it is automatically removed from the list
View Claims
Last Modified on 06/18/2020 7:35 am
Once you have created claims in Minute Menu CX via the Process Claims function or by manually entering claims, they are added to the List Claims window Access this window to review, manage, and update claims as needed You can also re-process claims from this window
1. Click the Claims menu and select List Claims. The List Claims window opens.
2. In the Center section, select All Centers or Selected Center. If you do not already have a center selected in the toolbar, this filter defaults to All Centers and cannot be changed
3. In the Month section, select the Selected Month option or the All Month option. If you choose Selected Month, click the corresponding drop-down menu and select the month for which to view claims
4. If you operate in multiple states, click the State drop-down menu and select the state to view.
5 Click Refresh Display Claims that meet the limits you set display
6. Click each column to sort information in ascending or descending order.
7 You can do the following in this window:
Click Print to print the Claim Totals by Center report for the selected month. A PDF is generated.
Click View in the Details column to view details for the listed claim
Click OER to print the Office Error report (OER) for the listed claim
Understand Specific Columns in the List Claims Window
The following is a definition of specific columns found in the List Claims window:
#: This column displays the number assigned to the center who submitted the claim
Center Name: This column displays the name of the center who submitted the claim.
Month: This column displays the claim month for which the claim was submitted
License: This column displays the center's license for which the claim was submitted
Details: Click View in this column to view claim details
Free %/Reduced %/Paid %: These columns indicate the percentage of children on the claim who are reimbursed at Free, Reduced, or Paid rates
ADA: This column lists the average daily attendance reported on the claim
Total: This column lists the total dollar amount of the claim
Submitted: This column indicates whether or not you've marked this claim as submitted to the state
Paid: This column indicates whether the listed claim has been paid
Adjusted: This column indicates whether you've made any adjustments to this claim.
View Claim Details
The Manage Claim Details window displays detailed information about claims you have processed This includes the claim source, totals, and rates
1. Click the Claims menu and select List Claims. The List Claims window opens.
Last Modified on 06/16/2020 11:06 am
2 In the Center section, select All Centers or Selected Center If you do not already have a center selected in the toolbar, this filter defaults to All Centers and cannot be changed.
3 In the Month section, select the Selected Month option or the All Month option If you choose Selected Month, click the corresponding drop-down menu and select the month for which to view claims.
4 If you operate in multiple states, click the State drop-down menu and select the state to view
5. Click Refresh Display. Claims that meet the limits you set display.
6 Click View in the Details column The Manage Claim Details window opens
7. You can do the following in this window:
Click Reprocess to re-process this claim For more information, see Re-Process Claims
Click Delete Claim to delete this claim. Only delete claims that are a result of data entry, and do not delete claims that have been marked as submitted or paid For more information, see Delete Claims
Click Adjust Claim Counts to adjust claim counts. For more information, see Adjust Claim Counts.
Click Disallow Meals to manually disallow meals For more information, see Manually Disallow Meals
Click Review Attendance to review attendance for this center The Record Attendance window
opens
Click Review Menus to review menus for this center The Center Menu Calendar opens
Click Attendance Detail, Served Meals, Paid Served Meals, and/or Office Error Report to view reports
Adjust Claim Counts
Last Modified on 05/27/2020 10:00 am
You can manually adjust claim counts in the Manually Adjust Claim window You can add or subtract from the pre-adjustment totals This results in a recalculation and adjustment to the claim Adjustments made here are not specific to a particular child/class/age group
1. Click the Claims menu and select List Claims. The List Claims window opens.
2 Click View next to the claim to adjust The Claim opens
3. Click Adjust Claim Counts. The Manually Adjust Claim window opens.
4 Add adjustments for meals, attendance, and days claimed, as needed Note that the Adjusted Meals section is updated as you make changes.
Click the Additions box for the appropriate row and enter the amount to add
Click the Subtractions box for the appropriate row and enter the amount to deduct.
5 Click the Description box and enter a reason for the adjustment
6 Click Save Each adjustment you make to the claim is stored in the Claim Change Log section of the window
Manually Disallow Meals
Last Modified on 05/27/2020 10:45 am
Sometimes, you may need to manually disallow meals based off of an error on the Office Error Report (OER) For example, the OER may warn a meal, you investigate the error, and you discover that the meal should be disallowed instead You can manually disallow this meal in the Manually Disallow Meals
1. Click the Select Center drop-down menu and select a center.
2 Click the Claims menu and select Manually Disallow Meals The Manually Disallow Meals window opens
3. Click Add Disallow.
4 In the Select Children Affected section, select the children this affects
To apply the disallowance to an age group, check the box next to each age group to disallow.
To apply the disallowance to specific children, check the Specific Children box, click Select Children, and then check the box next to each affected child.
5 Double-click the day of the month you are disallowing The Disallow Meals dialog box opens

6. Check the box next to each meal to disallow.
7 Click Apply + Close
8. Click the Disallow Reason drop-down menu and select the reason you are disallowing this meal. You set up disallow reasons in the Manage Meal Disallowance Types dialog box For more information, see Add Meal Disallowance Reasons.
9 Click Save

10 Reprocess the claim See Process Claims for instructions The new disallowances display on the Office Error Report.
Delete Claims
Last Modified on 06/16/2020 10:35 am
Typically, when you delete a claim it is the result of a data entry error If the claim you need to remove has not yet been submitted to the state, you can completely delete the claim from your system

Wait! Has this claim been submitted and/or paid? If so, do not delete it You must zero the claim amounts, instead
1 Click the Claims menu and select List Claims The List Claims window opens
2. In the Center section, select All Centers or Selected Center. If you do not already have a center selected in the toolbar, this filter defaults to All Centers and cannot be changed
3. In the Month section, select the Selected Month option or the All Month option. If you choose Selected Month, click the corresponding drop-down menu and select the month for which to view claims
4. If you operate in multiple states, click the State drop-down menu and select the state to view.
5 Click Refresh Display Claims that meet the limits you set display
6. Click View in the Details column for the claim to delete. The Manage Claim Details window opens.
7 Click Delete Claim
8. At the Are You Sure prompt, select the Claim ONLY option or select the Attendance and Claim option.

9. Click Delete.
Submit Claims to the State
Last Modified on 05/27/2020 11:34 am
After claims are processed and reprocessed as needed, and the claims are ready to be submitted, you can use either an upload file (only available in some states) or access claim reports that will help you enter the data into your state website

Note: Minute Menu CX does not relay information directly to your state agency An upload file may be available in some states However, you must still generate the file in Minute Menu CX, save it, and then upload it to your state agency website (if available) Even when you use an upload file, you must still mark your claim as submitted in Minute Menu CX.
Generating State Upload Files & Claim Reports
To access the upload file and/or to view claim reports:
1 Click the Claims menu and select Submit Claims to State The Submit Claim to State dialog box opens

2 Ensure that the correct claim month is selected
3 Click the Reports drop-down menu and select the report to print Use the report that works best for you
The most commonly used reports are the Center Claim Totals report and the State Summary report
4 Click Print
5. If an upload file exists in your state, State Claim File displays in the Export Files section.
If you do not see this option, an upload file does not currently exist in your state
If you do see this option and this is your first time generating an upload file, contact Minute Menu CX support, as some setup is required before you can successfully upload your claim
If you have already completed the initial setup, click Generate, and select the location in which to
save the file Do not change the name of the file
6. If you generated an upload file, log in to your state agency's website and upload it.
Marking Claims as Submitted
When you have filed a claim or are about to file a claim with your state agency, mark the claim as submitted in Minute Menu CX When you mark claims as submitted, all processed claims are bundled together in a submission batch with the current date If you later need to adjust any of these claims, or if any claims come in late, those claims are kept in a separate submission batch. This way, you can easily separate your original claim from any amended claims submitted to the state agency. This is helpful for audits.
To mark claims as submitted:
1 Click the Claims menu and select Submit Claims to State
2 Ensure that the correct claim month is selected
3 Click the Submission Batch drop-down menu and select Not Yet Submitted
4 Click Mark as Submitted
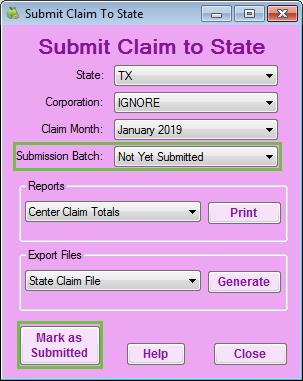
Once you mark a claim as submitted, all claim records associated with the claim are locked Any changes made to the claim after you mark it as submitted are considered adjustments You can filter reports printed from the Submit Claim to State dialog box by submission batch or submission status If you have multiple submissions to the state, mark each batch as submitted in Minute Menu CX immediately before or after you submit it to the state.
Viewing Claim Submission Status
You can view which claims have been submitted to the state in the List Claims window.
1 Click the Claims menu and select List Claims The List Claims window opens Claim submission status is
listed in the Submitted column:
Yes: The claim has been marked as submitted
No: The claim has been processed, but has not been marked as submitted
Partially: An adjustment was made to the claim after it was submitted to the state
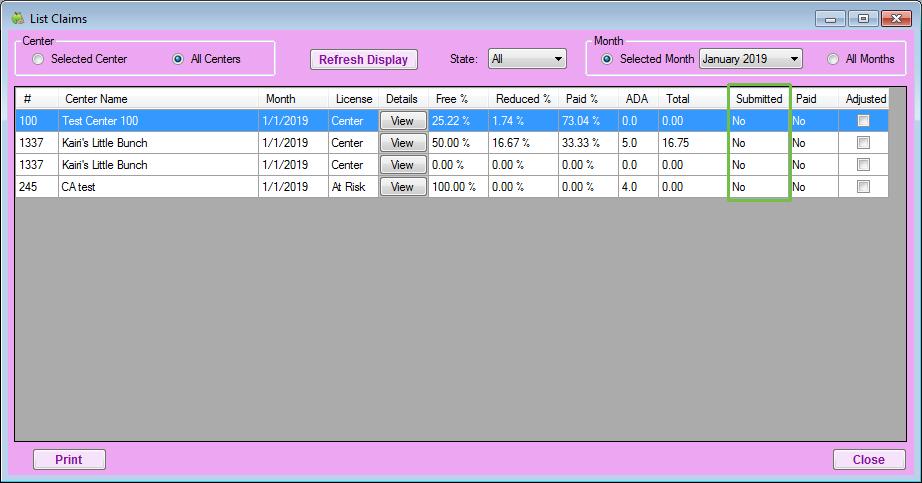
Balance State Funds
Last Modified on 10/22/2019 4:45 pm
The Balance State Funds tool allows you to enter the amount received of money that you received from the state and allocate it proportionally to each center This is useful if the amount of money from your state agency is different than the amount of money calculated in CX

Note: Claims must be marked as submitted to the state and remain unpaid to be included in the Balance State Funds function
To balance state funds:
1 After you submit your claim to the state for reimbursement each month, mark the claim as submitted in Minute Menu CX. For instructions, see Submit Claims to the State.
2 After you receive funds from the state:
a. Click the Claims menu and select Balance State Funds. The Balance State Funds window opens.
b Click the Total Reimbursement From State Agency box and enter the dollar amount you are receiving from the state.


Notes: If you receive money from your state for an amendment, enter the total dollar amount of the original claim + the amendment For example, if the state sent $5,000 for the original claim, then they sent $2,000 for an amendment, you would enter $7,000 in this box This function only
updates claims that are marked submitted, but not yet paid So, if an original claim was already updated via the Balance State Funds function, those claims must be paid before you can update the amended claim

c Click Change Center Reimbursement
3 Print the Center Claim Totals report The new dollar totals should be reflected for each center
4 Pay centers For more information, see Issue Payments
FAQ's
Why would I run the Balance State Funds function, and when would I run it?
Run this function to redistribute funds proportionally when you receive funds from the State and the amount does not match the exact amount you requested You should run this function when you receive funding from your state.
Which claims are adjusted when I run this function?
Any claim that has been marked as Submitted to the state and is unpaid.
What do I need to do before I run this function?
Ensure that all claims are completely up-to-date and accurate in Minute Menu CX Make any needed changes before you submit the claim to the state for reimbursement After you submit the claim to the state, mark it as submitted For more information, see Submit Claims to the State
What do I need to do immediately after I run the Balance State Funds function?
Pay your centers Regardless of whether you issue checks/direct deposits from CX or another system, you must run payments with the Issue Payments function in CX to mark those claims as Paid.
How are claim adjustments entered into the Balance State Funds function?
Any time you have an adjustment for a claim, enter the running total amount that you've received from the state for all claims not just the adjustment Unpaid adjustments are not included by default If the funding you received from the State included money for claim adjustments, check the Include box next to the Paid Centers with Unpaid Adjustments box
Print the Center Claim Totals Report
1 Click the Claims menu and select Submit Claims to State The Submit Claim to State dialog box opens.
2 In the Reports section, click the drop-down menu and select Center Claim Totals

3. Click Print.
Unbalance State Funds
Follow the steps below to undo the Balance State Funds function, when needed
Last Modified on 10/22/2019 4:43 pm
1 First, make sure that none of the affected claims are paid If you have paid these claims, void any of the payments For more information about this process, see Void Payments
2 Un-mark the claims as submitted to the state For more information, see Unsubmit Center Claims
3 Click the Claims menu and select Calculate Blended Rates The Calculate Blended Rates window opens
4 Check the Apply New Rates to Existing Claims box This will update the claims and set them back to the value determined by Minute Menu HX when the claim was processed
5 Check the Don't Recalculate Blended Rates box This ensures that the claim amounts stay as they were originally even if child information has changed

6 Click Calculate
7 Re-run the Balance State Funds function, if needed
Error Codes 1-33
Last Modified on 07/17/2020 9:29 am
Click a link in the table of contents below to jump to a specific definition When finished, click the green and white arrow to the bottom-right to return to the table of contents
Error Codes in This Article
Error 1
Center License is Missing
The center does not have a license on-file in the Manage Center Information License/Schedule tab
Error 2
Meals Were Claimed on Dates that Fall Before this Center's CACFP Original Start Date (Or Date is Missing)
The center claimed meals on a date that is before the date entered in the Original Start Date box in the Manage Center Information General tab, or this box is blank
Error 3
Meal Claimed Before Center's CACFP Allowed Start Date
The center claimed a meal before the date entered in the Allowed Start Date box in the Manage Center Information General tab Policy C.4 controls whether Minute Menu CX checks this date and whether the meal is disallowed or warned
Error 4
Meal Claimed Before Center's CACFP Current Start Date
The center claimed a meal before the date entered in the Current Start Date box in the Manage Center Information General tab. Policy C.5 controls whether Minute Menu CX checks this date and whether the meal is disallowed or warned
Error 5
Meals Were Claimed on Dates that Fell After This Center's Current End Date
The center claimed a meal after the date entered in the Current End Date box in the Manage Center Information General tab. Policy C.6 controls whether Minute Menu CX checks this date and whether the meal is disallowed or warned.
Error
6
Meals Were Claimed on Dates that Fall Before This Center's License Start Date
The center claimed a meal before the date entered in the License Start Date box in the Manage Center Information License/Schedule tab Any meals claimed before this date are always disallowed, unless you do not enter a date in the License Start Date box
Error
7
Meals Were Claimed on Dates that Fall After This Center's License End Date
The center claimed a meal after the date entered in the License End Date box in the Manage Center Information License/Schedule tab. Policy C.3 controls whether Minute Menu CX checks this date and whether meals or disallowed, warned, or warned for several months before being disallowed.
Error 8
Meals Were Claimed on Dates that Fall After the Center's Removal/Withdrawal Date
The center claimed a meal after the date entered in the Withdrawal Date box when you withdrew them from your agency Meals claimed after this date are automatically disallowed
Error 10
Meals Claimed on Dates After Center's Fire Inspection Certification Expired
The center claimed a meal after the date entered in the Fire box in the Manage Center Information General tab This error is also generated if you checked the Fire box and did not provide an expiration date.
Error 11
Meals Claimed on Dates After Center's Health Inspection Certification Expired
The center claimed a meal after the date entered in the Health box in the Manage Center Information General tab This error is also generated if you checked the Health box and did no provide an expiration date
Error 12
Meals Claimed on Dates After Center's Sanitation Inspection Certification Expired
The center claimed a meal after the date entered in the Sanitation box in the Manage Center Information General tab This error is also generated if you checked the Sanitation box and did not provide a date
Error 13
Center is not Approved to Serve Meals on a Day of the Week When Meals Were Served
The center claimed a meal for a day of the week for which they are not approved, according to your selections in the Manage Center Information License/Schedule window Policy C 1 controls whether these meals are warned or disallowed.
Error 14
Center is not Approved to Offer a Particular Meal that was Served
The center claimed a meal for which they are not approved, according to your selections in the Manage Center Information License/Schedule window Policy C.2 controls whether these meals are warned or disallowed
Error 15
A Menu was Recorded, but no Children were Recorded in Attendance
This error is generated as a warning message when menus are planned, but no meal counts are marked for the planned menus.

Note: This error also displays on the Center Error report, even though it is only a warning This is to highlight any potential data entry errors for the center For example, they may have forgot to record attendance
Error 16
No Foods Were Served but Child(ren) Were in Attendance for the Given Meal(s) for the Listed Age Group
This error disallows children when menus are recorded, assuming that menu edit checks are not skipped per Policy M.02. Menus must be recorded specific to the child's age group, so the disallowance may apply to one age group and not others
Error 17
The Food Cannot be Served to Children of Given Age
This error disallows meals with bad foods recorded, assuming menu edit checks are not skipped per Policy M.02. In most cases, unapproved foods cannot be selected when setting up menus, but if a food was previously approved and then changed to unapproved, those menus can theoretically get reused, and the meal would receive this error
For more information about managing foods, see Food Tool
Error 18
The Food is Not Recommended for Children of Given Age
This warning is generated if a center serves a food that is allowed but is set to Warn, assuming menu edit checks aren't skipped per Policy M.02 For more information about managing foods, see Food Tool
Error 19
The Food Cannot be Served to Children of that Age Group at the Given Meal Type
This error is generated when a center serves a food at a meal for which the food is not approved, assuming menu edit checks aren't skipped per Policy M.02. For example, if a center serves potatoes at Breakfast, but potatoes are not approved for Breakfast, this error displays on the OER. In most cases, centers cannot select foods at meals for which they aren't approved, but if a food was previously approved and then changed to unapproved, those meals can be reused, and this error would display
For more information about managing foods, see Food Tool
Error 20
The Food is Not Approved as Given Meal Component Type at Non-Infant Meal
This error is generated when a food is marked but is not approved, assuming menu edit checks aren't skipped per Policy M.02. In most cases, centers cannot select unapproved foods when setting up menus, but if a food was previously approved and then changed to unapproved, those menus can theoretically get reused and the meal would receive this error
For more information about managing foods, see Food Tool
Error 21
A Meal Component was Missing from the Non-Infant Meal
This error is generated when Breakfast, Lunch, or Dinner is missing one or more components, assuming menu edit checks aren't skipped per Policy M.02
Error 22
At Least Two Valid Foods Must be Served at Snacks
This error is generated when a snack does not have at least two valid components, assuming menu edit checks aren't skipped per Policy M.02.
Error 23
Snacks Cannot Include only Milk and Juice, Another Food Must be Present
This error is generated when a snack only has a milk and a juice, assuming menu edit checks aren't skipped per
Error 24
The Same Food was Served Twice in the Same Meal
This error is generated if a center serves the same item twice in one meal, assuming menu edit checks aren't skipped per Policy M 02 This is common when serving the same fruit/vegetable item twice, or when serving something like baked beans as a meat and as a fruit/vegetable.
Error 27
Two Juices Were Served at the Meal(s)
This error is generated if two juices are served as the fruit/vegetable/juice component at Lunch/Dinner, assuming menu edit checks aren't skipped per Policy M.02
Error 28
A Juice was Served at the Given Meal(s)
This error is generated if a juice is served at Lunch or Dinner, assuming menu edit checks aren't skipped per Policy M.02. This error is also subject to Policy M.03.
Error 29
An "Other" Food was Served in the Given Meal. Verify Nutritional Components
This error generates a warning if a center serves a food described in Other food, such as Other Bread, assuming menu edit checks aren't skipped per Policy M.02 This error is also subject to Policy M.05b
Error 33
Snacks Served to 8-11 Month-Old Infants Require Either Juice or Formula/Breast Milk to be Served
This error is generated if a center serves an infant snack without the required components, assuming menu edit
checks aren't skipped per Policy M.02
Error Codes 38-66
Last Modified on 07/17/2020 9:40 am
Click a link in the table of contents below to jump to a specific definition When finished, click the green and white arrow to the bottom-right to return to the table of contents
Error Codes in This Article
Error 38
A Meal Component was Missing from the Infant Meal
This error is generated when Breakfast, Lunch, or Dinner is missing one or more components, assuming menu edit checks aren't skipped per Policy M 02
Error 39
A Dr's Statement has not Been Received for the Special Diet Child(ren) Served During the Month
This error is generated when a child is marked as having special diet in the Manage Child Information Child tab, but the Diet Statement on File box is not checked. This error is subject to Policy D.05.
Error 40
Special Diet Statement on File for Given Child(ren) is Expired
This error is generated when a child is marked as having a special diet in the Manage Child Information Child tab, but the child is claimed on dates that fall after the date entered in the Diet Expiration Date box (in the same tab) or if the Diet Expiration Date box is blank This error is subject to Policy D 06
Error 41
The Child was not Yet Enrolled as of Meal Date
This error is generated if a child is claimed on dates that come before the Original Enrollment Form Date/First Day in Care date (or the first of the month, depending on policy) This error is subject to Policy D.20
Note: This edit check is skipped for At-Risk centers and the At-Risk portion of a claim for regular centers that also operate At-Risk programs.
Error 42
The Child is Not Yet Born as of Meal Date(s)
This error is generated if a child's birth date falls after a meal date This typically would only happen if data is changed for a child after the child has been claimed
Error 43
The Child was Claimed After the Child was Withdrawn from Care
This error is generated if a child is claimed after the date on which they were withdrawn from care. When withdrawing children, you enter an effective date, which is the last date a child can be claimed (if Policy F.6 is set to Enrolled and Policy F.6c is set to N or Not Set)

Note: Children stay in the system when being withdrawn. Instead of being removed, they are changed to Withdrawn status This error is generated for all non-At-Risk meals if a child is claimed after the child's withdrawal effective date This edit check is skipped for At-Risk-only centers and emergency shelters
Error 44
A Pending Child was Claimed — No Signed Enrollment is on File
This error is generated when a center claims a pending child. Pending children are disallowed by default. These are children who were enrolled by centers, but who have not yet been activated (by the sponsor or by the center, subject to Policy F.2b) If you set Policy D.19 to Yes, this error does not generate for pending children unless Policy F.4 is also set to Yes If this is the case, the child is disallowed by Error 62
Note: This edit check is skipped for At-Risk meals for dual-licensed centers.
Error 45
The Child is Older than the Center's License Allows
This error is generated if the center claims a child who is over the age of 13 as of the claimed date Migrant workers' children and children marked as special needs are exempt from this requirement Also, children in AtRisk programs are allowed until they turn 18 as of the beginning of the school year (so they could be claimed at 19 in some cases).
Error 46
The Special Needs Child is Older than
the
State's Max Allowable Age for Special Needs Children on the Given Meal Dates
This error is generated if a special needs child is older than the state-defined policy for maximum age. There is no limit by default, but some states restrict participation to those under 18
Error 47
Special Needs Child was Claimed, but Documentation is not On-File
This error is generated if a special needs child is claimed and the child is over the age of 13 This error is subject to Policy D 07 if the Special Needs Statement on File box is not checked in the Manage Child Information Child tab.
Error 48
The Migrant Child is Over 15 Years of Age
This error is generated if a center claims a migrant worker's child who is over the age of 15 as of the claimed date

Note: This edit check is skipped for At-Risk centers/the At-Risk portion of a claim for regular centers that also operate At-Risk programs
Error 49
A Child was Served After the Child's Enrollment Expiration Date was Reached
This error is generated if a child is claimed after the enrollment expiration date or after the current expiration date, subject to Policy D.01. The child is also excluded from counts if Policy F.6 is set to Enrolled or if Policy F.6c is set to N.

Notes: This edit check is skipped for At-Risk centers/the At-Risk portion of a claim for regular centers that also operate At-Risk programs. The Enrollment Expiration Date and Current Enrollment Date values are set in the Manage Child Information Child tab, subject to Policies D.01a - D.01d. If Use History is enabled, the Enrollment Expiration Gap and Gap Effective Date values are used
Error 50
School Aged Child Served a Meal when Child Should Have Been in School
This error is generated if a child is determined to be school-aged and is served an AM Snack or Lunch on a weekday, subject to Policy D.02. This edit check is skipped if you indicate that the child is out of school for that day (check the Sick or Sch Out box in the Record Daily Attendance + Meal Counts window, or use the Manage School Calendar) Using the Manage School Year for At Risk calendar has no impact on this edit check

Note: Each state has its own logic for determining what defines a school-aged child. For example, this could be children five (5) years of age and older as of the date of the meal. Minute Menu CX has been configured with rules specific to your state(s) Typically, but not always, you can also overrule this setting by designating a child as School Aged (and sometimes as participating in Kindergarten) via the Type/Level drop-down menu in the Manage Child Information Child tab
Error 51
Child Served More than 2 Meals & a Snack or 2 Snacks & a Meal
This error is generated if a child is served more meals/snacks than is allowed in a given day Minute Menu CX disallows snacks before a meal, and it disallows Breakfast before Lunch or Dinner to maximize the amount of money received
Error 52
Meal Over Capacity
This error is generated if more children are claimed at a meal than are allowed based on the Cap value recorded
in the Manage Center Information License/Schedule tab It disallows children in excess of capacity unless you check the Waiver box in the License/Schedule tab If this box is checked, this is only a warning
Error 53
For-Profit Center Does not Have at Least 25% Free or Reduced
Any center that is not specifically designated with a profit status of Non-Profit (set in the Manage Center Information General tab) is subjected to this edit check. When determining which children factor into analysis, the system uses the same rules as to whether a child is participating The relevant policies include:
F 4
F.6
F 6b F.7
D 20
D.19
D 01
Policies F.5 and F.7b can also play a role.
Note: This edit check is skipped for At-Risk-only centers and emergency centers
Error 54
Child Birth Date is Missing
This error is generated for any child who does not have a date of birth on file
Error 55
No Blended Rate is on File for This Center
If Policy F.1 uses a blended rate (i e , not Actuals), the system requires you to have calculated blended rates at least one time before processing the claim This can happen automatically if you check the Calculate Blended Rates While Processing box in the Process Claims window. This can also happen if you use the Calculate Blended Rates function.
If neither has ever been done for a center, the system does not know what rates to apply to the claim, and this error is generated.
Error 56
Child Enrollment Date is Missing
This error is generated for any child who is missing an Original Enrollment Form Date/First Day in Care date in the Manage Child Information General tab
Error 58
A Child was Claimed at a Meal that is not Approved on the Child's Enrollment Form/File
This error is generated for children claimed for a meal that isn't checked in the Manage Child Information Child tab, subject to Policy D 04

Note: This edit check is skipped for At-Risk only centers, emergency shelters, and At-Risk meals for children enrolled in dual-licensed centers
Error 59
A Child was Claimed on a Day of Week that is not Approved on the Child's Enrollment Form/File
This error is generated for children claimed for a day that isn't checked in the Manage Child Information Child tab, subject to Policy D.03.

Note: This edit check is skipped for At-Risk only centers, emergency shelters, and At-Risk meals for children enrolled in dual-licensed centers
Error 60
Quantity of Food Prepared was not Recorded with the Menu
The system can be configured to allow users to record actual quantities prepared/offered at any given meal service via Policy D.01. This error is generated for any meal where a food doesn't have prepared/offered quantities recorded, subject to Policies M.01b and/or M.01c. Note that this error does not indicate any kind of adequate value has been recorded for these quantities, only that these quantities were not recorded at all
Note: This edit check is skipped if Policy M.02 is set to Y.
Error 61
No Receipts are on File for Center This Month
This error is generated as a warning message only to remind you to enter receipts (if it is part of your process) This warning also displays on the Center Error report by default The reason for this is to remind the center in case they forgot to send in receipts
Error 62
Child is Missing an F/R/P Application
If Policy F.4 is set to Yes, this error is generated for children who do not have a F/R/P Reimbursement Level specified in the Manage Child Information Oversight tab If Policy F.4 is not set to Yes, these children are assumed to be at Paid status

Note: This edit check is skipped for At-Risk-only centers, emergency shelters, and At-Risk meals for children enrolled in dual-licensed centers, as these children are always reimbursed at the Free level
Error 63
Block Claim Detected
This error is generated if a block claim pattern is identified in the claim. A block claim is any claim where the same number of children are served any given meal or snack for 15 consecutively claimed days. When block claims are detected, sponsoring organizations/back offices must perform a site visit within 60 days to verify that information submitted for the center is accurate
Error 64
Meal Disallowed by Monitor
This error is generated for any meals claimed within a range of meals disallowed by the Monitor during a a center review
Error 65
Count of Children Served in Review File is Different than Count as Recorded by Center
When you record a review in Minute Menu CX, you document the number of children served at the meal being reviewed This error can be generated if this count is different than the count of children as determined when comparing the totals from Record Daily Attendance + Meal Counts. It is always a warning if the monitor sees more children than were recorded by the center
It can disallow or warn children claimed in excess of the monitor's count, as determined by Policy R.2
Error 66
Foods Seen by Monitor were Different than Foods Recorded by Center
When you record a review in Minute Menu CX, you can document what foods the monitor saw were offered by the center. If these foods are different than the foods found in Record Menus, this error can be generated as a disallowance or a warning, subject to Policy R.3

Note: This edit check is not performed if no information is recorded in the Review or if Policy M 02 is set to Y.
Error Codes 67-105
Last Modified on 07/08/2024 1:51 pm
Click a link in the table of contents below to jump to a specific definition When finished, click the green and white arrow to the bottom-right to return to the table of contents
Error Codes in This Article
Error 67
Child not Participating in CACFP has been Removed from Claim Totals
You can enroll children who are specifically designated as not participating in the CACFP Policy D.10 will enable the Participates box in the Manage Child Information Oversight tab Children who do not have this box checked will specifically be excluded from claim totals, and, unless Policy D.10b is set to Yes, these children are also excluded from any FRP participation counts/blended rates.

Note: This edit check is skipped for At-Risk-only centers and the At-Risk potion of a claim for regular centers that operate At-Risk programs (and these children are reimbursed)
Error 68
School Aged Child Served Breakfast without Documentation
This error is generated if a school-aged child is served Breakfast and does not have a check in the School Aged Documentation box in the Manage Child Information Oversight tab This is subject to state policies (some states require special documentation for school aged children who are served breakfast) and Policy D 18
Error 69
Child Claimed after IEF Expired. Child Reimbursed as Paid, Regardless of Classification
You can configure Minute Menu CX to record an Income Eligibility Expiration Date that is distinct from the enrollment form. Normally, this isn't necessary, as the enrollment and income eligibility forms are received/updated simultaneously However, if you need to record distinct dates, you can do so via Policy F.8 This will enable an IEF Expiration date box in the Manage Child Information Oversight tab
If a child is claimed in a month in which this date expires (unless the date expires on the last day of the month), that entire month and any month thereafter, the child is treated as Paid, regardless of what FRP Reimbursement Level the child has.

Note: This may be changed subject to update guidance from the USDA, such as that the child keeps their existing FRP Reimbursement Level for the month in which the IEF expires and reverts to Paid only in subsequent months.
This edit check is skipped for At-Risk-only centers or the At-Risk portion of a claim for regular centers that also operate At-Risk programs, as all At-Risk children are classified as Free

Note: This warning also displays on the Center Error report by default This is to remind centers to get new income eligibility forms
Error 70
Child's In/Out Times Indicate Child Not Present at Meal
This error is generated if a child's In/Out times don't cover the time of meal service, subject to Policy L.4. For example, a Breakfast may be scheduled for 8AM - 9AM, but the child does not arrive until 11:00AM and is marked at Breakfast In/Out time data is entered via the Record Daily Attendance + Meal counts function If the Skip box is checked for the child, this edit check is skipped
This error can sometimes also be generated when there is bad meal time data in the Manage Center Information License/Schedule tab. For example, lunch times starting at 11:30PM or ending at 12:30AM can generate erroneous messages on the OER
Error 71
A Meal was Claimed for a Meal Missing a Start/End Time Pair in the Center's File
This error is generated any time a meal doesn't have a properly defined starting and ending time in the Manage Center Information License/Schedule tab, subject to Policy L.4
Error 72
Child's In/Out Times were Missing or Incomplete for the Day
This error is generated if a child is noted as In, but does not have an Out time (or vice versa) recorded in the Record Daily Attendance + Meal Counts window, subject to Policy L.4 If the Skip box is checked for the child, this edit check is skipped
Error 73
Child wasn't Claimed for a Meal, but In/Out Times Show Child was Present During Meal Service
If Policy L 4 is set to Yes, this error will list any child not marked as served at a meal, but who should have been, based on the child's In/Out times as entered for the day. For example, if a child has an In/Out pair of 7:00AM4:00PM, Breakfast is noted as being served from 8:00AM - 9:00AM, and the child isn't marked as present in the Record Daily Attendance + Meal Counts window, the child is listed here This error is a warning only, since it indicates possible accidental under-counting

Note: This warning is listed on the Center Error report by default. This is to highlight any potential data entry errors to the center
Errors 74-76, 80, 84-86, & 90
Meal Over Age Group Capacity
Some states require age group-specific capacity checking. If your state does require this, additional capacity fields display in the Manage Center Information License/Schedule tab. For example, you may have an Inf, Tod, Pre, or Sch field to record specific capacity values
When recording age group-specific capacities, the system allows you to designate that groups can be combined for capacity purposes by including a negative sign for the capacity value For example, a license may indicate that a total of 20 infants and toddlers and 30 preschoolers and school-age children can be recorded, for a total of 50 children overall. You would document this as follows:
Error 77
The Child was Claimed After Previous Enrollment Expired and Before
New Enrollment Became Effective
The process of using historic data, controlled by Policy D.22, makes it possible for agencies to track a gap in enrollment periods, where one year's enrollment form expires and a month passes before a new one is received This gap is visible by accessing the Manage Child Information window and selecting the relevant historic claim month. The Old Dates section displays, as does a value for the old enrollment's Expiration. Compare this to the new Current Enrollment Form date.
This error is generated for any dates claimed in between those two values
Error 78
Quantity of Food Prepared was Less Than Quantity Required
This error is controlled by Policy M 01d (assuming Policy M 02 is set to Y) and only works properly if users are allowed to record actual quantities offered/prepared is less than the value required as computed by Minute Menu CX This error is generated if the value users record in Record Menus for actual quantities offered/prepared is less than the value required as computed by Minute Menu CX
To compare the two values, print the Menu Production Record and compare the Quantity Needed Per Actual Attendance field with the Actual Qty Prepared field. The Actual Qty Prepared field represents the value a user entered and must be higher than the value in the Quantity Needed Per Actual Attendance field.
Error 79
Quantity of Food Prepared was Recorded with a Measurement Type Inconsistent with the Quantity Required
This error is generated when the quantity measurement type entered by the user cannot be compared against the the quantity as computed by Minute Menu CX This is typically the result of user error For example, someone may have recorded that they served four gallons of ground beef, when they meant to enter pounds This error is controlled by the following policies: M 01, M 01d, and M 02
Error 81
No Infant Form on File
This error is generated if an infant is claimed and the Infant Form on File box is not checked in the Manage Child Information Child tab, subject to Policy D.24
Error 82
A Withdrawn Child is Claimed Prior to the Date of Withdrawal, but the Child was Never Activated Before Being Withdrawn
This error is generated when a withdrawn child who was never activated is claimed prior to the withdrawal date For example, a center enrolls a child and the sponsor never activates the child. The center begins claiming the pending child, but the child withdraws from care a few days later. So, the center withdraws the pending child and designates a withdrawal date as the last date the child was in care When the center submits their claim, the child is claimed prior to the withdrawal date, but was never activated
If you've received a valid enrollment for for the child and want to activate them, use the Activate New Children function to do so. Ensure you check the Include Withdrawn Children Who Were Never Activated box.
Error 83
Menu Notes/Comments Have Been Supplied
This warning is generated if infant/non-infant special notes are added to Record Menus This is to advise you to look at the notes This warning is not generated if Policy M.05 is set to Y To review menu notes, click the Reports menu, select Menus, and click Menu Notes Report
Error 87
Milk Audit Resulted in Milk Shortage
This error is generated in the event that Milk Audit edit checks are set to warn or disallow via Policy M 06, and milk audit disallowances are set to be applied using a monthly percentage and not to specific meals via Policy M.06f It notes a shortage and a the number of meals disallowed as a result For more information about the milk audit, see Review the Milk Audit
Error 88
For-Profit Center Does not Have at Least 25% Free or Reduced (At-Risk Still Allowed)
This is a variation of Error 53 This variation occurs if a dual child care center + At-Risk facility is prevented from filling the child care center claim only.
Error 89
Review Checked for Over Capacity
This error is generated on the claim if you checked the Over Capacity box in the Meals tab when editing a review.
Error 91
Infant Served Whose Parent Refuses Food
n most cases, infants can be reimbursed regardless of whether the parent brings food or not This is because the labor involved with providing breast milk to infants is such that USDA policy reimburses the meals However, Policy D.27 allows you to configure Minute Menu CX to disallow reimbursement for any infant for whom the parent refused the food offered by the center. You can apply this to an infant of any age or to infants that are 8-11 months old, since younger infants only require breast milk or formula
Error 92
A Pending Child was Claimed—No Signed Enrollment is on File—But the Child has an F/R/P Application
This error is generated if a Pending child who does not have a FRP reimbursement level set is claimed, but only if Policy F.5b is set to including Pending children in the rate for the claim (as Paid)

Note: The error behavior seems to be the opposite of error language. Contact Minute Menu CX support if you receive this error
Error 93
This error is exactly like Error 92, except it applies to children who were withdrawn and never activated
Error 94
A Child has Neither an Enrollment Form nor an F/R/P Application on File
This error is generated if a child is Pending and the child does not have an FRP reimbursement level set, but only if Policy F.4 is set to B (Both No App & No Enrollment).
Error 95
At-Risk children served outside of school year.
This error is generated when an At-Risk child is served an At-Risk meal on a date prior to the school Start Date, or after the school End Date set on the Manage School Calendar screen for the specified child or center, school, district, or for all children, all centers To view or edit the At)Risk Program school dates, go to Menus/Attendance > Manage School Calendar.
Error 96
At-Risk children served more than 1 meal & 1 snack.
This error is generated if an At-Risk center claims more than one meal and one snack per day to an At-Risk child outside of regular school hours during the school year.
Error 97
At-Risk children served a meal when child should have been in school.
This error is generated if a child has been fed a meal during normal school hours during the school year and a School Out designation has not been created for that day on the Manage School Calendar for the specific child or center, school, district, or all children, all centers.
To resolve this, mark school out on the days the At-Risk children are not attending school See Manage School Out Days
Error 98
Food was Claimed on a Date that Fell After the Food's Effective End Date
This error is generated when foods are claimed after their effective End dates These foods are automatically
disallowed For more information about managing your foods, see Manage Your Food List
Error 99
Food was Claimed on a Date that Fell Before the Food's Effective Start
Date
This error is generated when foods are claimed before their effective start date These foods are disallowed For more information about managing your foods, see Manage Your Food List
Error 100
At Least 1 Serving of Bread/Alternate Per Day Must be Whole Grain-Rich
This error is generated if none of the bread/alternate servings for a given day were marked as whole grain-rich. The meal pattern requires that at least one serving of bread/alternate must be whole grain-rich. Policy E.3 determines whether this error is generated as a warning or a disallowance The meal with the lowest reimbursement will be the meal with an error For example, a snack will be found in error before meals, and breakfasts will be found in error before lunches and dinners Only those meals and snacks that included a bread/alternate are included
Error 101
A Particular Type of Food was Served too Often. Consider Other Foods for a Better Variety
This error is generated if food served violates a food rule you have set up. Each of your food rules can be set to warn or disallow. For more information about managing food rules, see Create Food Rules.
Error 102
An Insufficient Combination of Foods were Served at the Given Meal(s)
This error is generated if food served violates a food combination rule you have set up Each of your food rules can be set to warn or disallow For more information about managing food rules, see Create Food Rules
Error 103
A Meal was Served in which Two or More components May Have Been Provided by the Parent
This error is generated if an infant's record indicates that the parent supplies formula/food and the center serves a meal that contains two or more meal components (excluding formula/breast milk) Policy D.27b determines whether this error is generated as a warning or as a disallowance
Error 104
The Child's Infant Feeding Form Indicates Parent Supplies Formula and Food
This error is generated if an infant's record indicates that the parent supplies formula/food and the center serves a meal that contains two or more meal components (excluding formula/breast milk) Policy D 27b determines whether this error is generated as a warning or as a disallowance.
Error 105
Juice Cannot Be Served More than Once per Day to Non-Infants
This error is generated if a center serves juice to non-infants twice in a day Policy M.14 determines whether this error is generated as a warning or as a disallowance
Error Codes 106-112
Last Modified on 07/08/2024 2:36 pm
Click a link in the table of contents below to jump to a specific definition When finished, click the green and white arrow to the bottom-right to return to the table of contents
Error Codes in This Article
Error 106
Some children claimed have a current enrollment form date that is in a future month. These children may not be included in the OER counts.
This error is generated if policy D.20b is set to Y, policy F.6 is set to Enrolled, and policy F.6c is set to Y, children who's enrollment form date is set after the last day of the claim month
Error 107
Grains Without an Ounce Equivalent Calculation Were Claimed
This error is generated if you have enabled ounce equivalents (policy M 17) and a site claims a Bread/Alt that does not have an ounce equivalents calculation saved to the food list. This is a warning only and does not impact claims reimbursement.
Error 108
Infant Cereal Without an Ounce Equivalent Calculation Were Claimed
This error is generated if you have enabled ounce equivalents (policy M 17) and a site claims an Infant Cereal that does not have an ounce equivalents calculation saved to the food list This is a warning only and does not impact claims reimbursement.
Error 109
The Child is Younger Than the Center License Allows
This error is generated if a site claims a participant that is younger than the center's license allows This edit check references the license Starting Age in the Manage Center Information License/Schedule tab
Error 110
Infant previously served developmental foods was not served solid foods.
This error is generated if an infant is marked as developmentally ready for solid foods and is served solid foods in a prior claim months, but is not served solid foods during the current claim month
Error 111
Insufficient foods served for developmentally ready infants.
This error is generated if an infant is marked as developmentally ready for solid foods, but is not served enough meal components for a specific meal. This error only appears when policy M19 is set to disallow.
Error 112
Quantity of food prepared was less than quantity required for infants.
This error is generated if the actual quantities served to an infant are insufficient based on their age, if they are developmentally ready for solid foods, and the USDA meal pattern requirements for infants. This error will occur no matter how policy M16 is set.
At-Risk After School Options
There are two options for entering At-Risk After School (ARAS) meals in KidKare
Enroll children, and take child-specific meal counts
Do not enroll children, and record meal count and attendance totals only
Children are Enrolled
Last Modified on 11/10/2022 7:43 am
If children are required to be enrolled for an ARAS site (closed-enrolled), or if the site serves both regular and ARAS meals, the center can record meals, meal counts, and attendance just as other sites do. However, the child should be marked as At-Risk in the Child tab in the Manage Child Information window The center license must also be set up for ARAS See Enroll Centers for ARAS for more information
Children are Not Enrolled
If children are not required to be enrolled, sites can use the ARAS-only features in KidKare This function should be used by those sites that claim At-Risk meals only Sites that serve At-Risk and regular CACFP meals should enroll children.
[VIDEO] Enroll Centers for ARAS
When enrolling centers for ARAS, you must first determine whether a center claims At-Risk After School (ARAS) meals only, or whether they claim both ARAS and regular CACFP meals Each type is set up differently in Minute Menu CX See the appropriate heading below
Enroll Centers that Claim ARAS
MealsOnly
1 Click Enroll Center from the toolbar at the top of the window The Enroll New Center window opens
2. Complete all required information in the General tab. Required fields are red. For more information see, Enroll Centers
3 Click Next The License/Schedule tab opens
4 In the License Type section, click the Program Type drop-down menu and select At-Risk - ARAS
5 In the At-Risk/SFSP section, check the box next to each meal that is approved forARAS Note that the AtRisk/SFSP box is checked by default when you select the At-Risk - ARAS program type
6 In the Meal Schedule section, enter the meal times for the ARAS meals

7 Complete the remaining required information and any additional information needed
8. Click Next.
9 Click Save
1 Click Enroll Center from the toolbar at the top of the window The Enroll New Center window opens
2 Complete all required information in the General tab Required fields are red For more information see, Enroll Centers
3 Click Next The License/Schedule tab opens
4 Click the Program Type drop-down menu and select Child/Adult Care Center or another program type Do not select ARAS This option is for sites that serve At-Risk mealsonly
5 Check the At-Risk/SFSP box
6 In the At-Risk/SFSP section, check the box next to each meal that is approved for ARAS
7. In the Meal Schedule section, enter the meal times for those ARAS meals.

8 Complete the remaining required information and any additional information needed
9 Click Next
10 Click Save
Manage Centers Who do ARAS & SFSP
Last Modified on 05/27/2020 3:29 pm
If a site operates as an At-Risk After School (ARAS) program during the school year and as a Summer Food Service Program (SFSP) during the summer, enroll the site as two separate sites instead of just changing the license type
1. During the summer, set the ARAS site to Remove. To do so, click Remove in the bottom-left corner of the Manage Center Information window
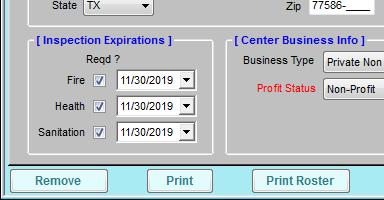
2 Enroll the site as SFSP It may be helpful to add SFSP to the end of their center name when enrolling them
For more information, see Enroll Centers for SFSP
3 At the end of the summer, remove the SFSP site and reactivate the ARAS site
Enroll Children for ARAS

Note: Before enrolling children as At-Risk After School (ARAS), make sure that you have set up the appropriate center to claim ARAS For more information, see Enroll Centers for ARAS
1 Click the Select Center drop-down menu and select the center in which to enroll children
2 Click Enroll Child from the toolbar at the top of the window The Enroll New Child window opens to the Child tab
3 In the Specials section, check the At-Risk Child box This box must be checked before you can claim the child as At-Risk

4 Complete the remaining fields (marked in red) For more information, see Enroll Children
5. When finished, click Save.

Note: Children who are claimed for both At-Risk and regular CACFP meals are claimed as At-Risk first. Any remaining meals are claimed on the regular CACFP claim
For example, a center is approved to serve regular meals and ARAS meals for the PM snack A child marked as ARAS and claimed at PM snack is claimed as At-Risk for the PM snack Any meals the child attends that are not approved for ARAS are claimed as regular meals (limited to two (2) meals and one (1) snack, or two (2) snacks and one (1) meal)
Menu Planning for ARAS-Only Sites
Entering menus is optional for ARAS-only sites that use KidKare to enter their claims
Last Modified on 11/10/2022 7:44 am CST
At this time, Minute Menu CX does not provide edit checks on menus for ARAS-only sites that have entered meal counts on KidKare However, entering menus can still be beneficial when planning how much food to buy and prepare or for printing a monthly menu.
If most or all sites use the same menu, consider creating a master menu for those sites For more information, see Master Menus
If an ARAS-only center would like to enter menus into Minute Menu CX, they must download the full version of the program. This cannot be done from KidKare.
Access the ARAS Feature
Last Modified on 11/10/2022 9:25 am

Note: In order to access the new ARAS feature from MinuteMenuCX, you must first upgrade your software to the most current version
Note: You can now enter ARAS Meal Counts in KidKare. Use this feature for At-Risk sites where children are not enrolled If you have an At-Risk site with enrolled children, you will use KidKare Attendance and Meal Counts for centers
Access the ARAS Feature
1. Login to CX and choose the ARAS center in the Select Center drop down at the top of the screen.
2 Click the Menus/Attendance menu and select Record Meal Counts (SFSP/ARAS) The Meals and Attendance screen in KidKare opens in a web browser.
3 From here, you can view or edit meal counts See Record Attendance and Meal Counts for more details on how to do this

Note: You can also open a browser and go directly to KidKare You will login with the same credentials you use for CX.
How to Access Additional Sites in KidKare
1. From the screen above, Click on Exit Observer Mode in the top right corner
2 A full center list appears Select the next center you would like to view by clicking on the name of the center.

ARAS Custom Field Settings
ARAS/SFSP settings can only be accessed through KidKare
1. Login to KidKare using your CX credentials.
2 Click on the gray gear icon on the to left of the main menu
3. Scroll down to the ARAS/SFSP Settings section.
4 Add up to 3 custom fields on the Attendance and Meal Count screen but moving the toggle to yes and typing in the name of the custom field
5 Click SAVE


Note: When you change custom fields in the settings, the new fields will not show up in KidKare until the 1st of the following month. For example: Custom Field 1 is titled as "Hot Meals Served". On the 15th of the month the setting is changed it to say "Cold Meals Served" The change to "Cold Meals Served" will not reflect in KidKare until the 1st of the following month.
Data Entry Options
ARAS Sites have the following data entry options:
Record meal counts directly into the program during the meal service on a tablet, smartphone, or computer
Record point-of-service meal counts on paper and transfer them into KidKare later
Record point-of-service meal counts on paper and turn that information into their sponsor The sponsor can then enter the information into the program
Save ARAS Claims
Spot-Checking Meal Counts
To spot-check meals:
1 Log in to KidKare using your CX login credentials
2. From the menu to the left, click Attendance-Bulk Entry.
3 Change Meal Type and Date to reflect the data you want to see
4. You will see all meal counts and attendance entered on site for all locations.
5 You can edit the Ordered or Delivered fields if needed
6. You can export the data for multiple days at a time by clicking on the blue Export button on the top right. This generates an excel report for you

Edit the Claim
In order to make edits to a claim before it is submitted to the state or on behalf of the ARAS/SFSP site:
1 Login to KidKare using your CX credentials
2. Select the name of the center you are needing to edit.
3 Click on Claims in the main menu
4 Click on the month of the claim you want to edit
5 Click Edit as shown in the image below
6 This takes you to the Attendance and Meal Count screen From here you select the meal type and date that needs to be edited, adjust the numbers, and click Save
7 Complete any edits needed, then go to the Claims page as shown below and the numbers show as
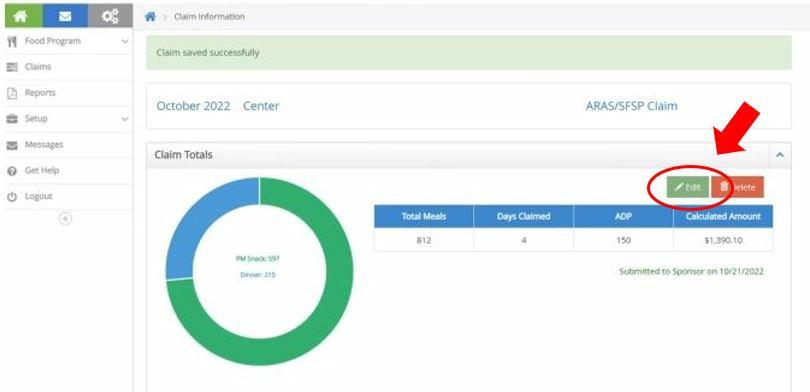
End of the Month
Once the claim has been submitted to the state, mark it as submitted in Minute Menu CX For more information, see Submit Claims to the State
[VIDEO] Use the ARAS Feature (Centers)
Sponsors: Train Sites to Access the ARAS
Feature
1 Provide sites with their login ID and password You can find this information in the Manage Center Information Oversight tab
2 Advise sites to go to KidKare Sites can access this website on smart phones, tablets, and computers They can log in with the information you provide to them
You can use this video to help train your sites
You can also use the following articles as training materials
Record Attendance and Meal Counts
1 From the Attendance and Meal Count Screen, select the Meal Type being entered and the correct Date

2 There are 2 ways to enter the Meals Served:
a. Meal Counter:
i Use the red "" to remove meal or attendance counts
ii. Click the green " + " next to each field each time you add a meal or attendance count.
b Manual Entry:
i. Click in the blank number field and manually type in the totals.
3 Complete all fields required to be completed by your sponsor
4. Click SAVE.
For more details on this function, see Record Attendance and Meal Counts
Note: Centers can click Meal Counter to take attendance and children come through the line to get their foods.

Print Sign In Sheets
1 From the Attendance and Meal Count screen, click the orange button that says Sign in Sheets
2 Select Daily or Weekly in the top field
3 Select Blank Sign in Sheet in the bottom field
4 Click OK The sign-in sheet is generated
For more details on Sign-in Sheets and other reports, see ARAS Reports and Sign-In Sheets
Submitting Claims
Centers submit their ARAS Claims through KidKare each month
1 Login to KidKare
2 Click on Claims in the main menu
3 Click on the month of the claim you want to edit
4 Click Submit as shown in the image below
5 Once submitted successfully, it will say Submitted to Sponsor on mm/dd/yyyy below the claims numbers
For more details on Sign-in Sheets and other reports, see Send Claims to Sponsor
Enroll Centers for SFSP
1 Click Enroll Center from the toolbar at the top of the window The Enroll New Center window opens.
Last Modified on 05/27/2020 3:30 pm
2 Complete all required information in the General tab Required fields are red For more information, see Enroll Centers.
3 Click Next The License/Schedule tab opens
4. Click the License Type drop-down menu and select Center.
5 Click the Program Type drop-down menu and select Summer Food Program The At-Risk/SFSP box is checked automatically.
6 In the At-Risk/SFSP section, check the box next to each meal that is approved for SFSP
7 In the Meal Schedule section, enter the meal times for the SFSP meals you selected

8 Finishing entering any other information in the License/Schedule and Oversight tabs
9. When finished, click Save.
Manage Centers Who do ARAS & SFSP
Last Modified on 05/27/2020 3:29 pm
If a site operates as an At-Risk After School (ARAS) program during the school year and as a Summer Food Service Program (SFSP) during the summer, enroll the site as two separate sites instead of just changing the license type
1. During the summer, set the ARAS site to Remove. To do so, click Remove in the bottom-left corner of the Manage Center Information window

2 Enroll the site as SFSP It may be helpful to add SFSP to the end of their center name when enrolling them
For more information, see Enroll Centers for SFSP
3 At the end of the summer, remove the SFSP site and reactivate the ARAS site
Menu Planning for SFSP Sites
Last Modified on 11/10/2022 7:49 am CST
Entering menus is optional for SFSP sites that use KidKare to enter their claims At this time, Minute Menu CX does not provide edit checks on menus for SFSP sites that have entered meal counts on KidKare However, entering menus can still be beneficial when planning how much food to buy and prepare or for printing a monthly menu.
If most or all sites use the same menu, consider creating a master menu for those sites For more information, see Master Menus
If an SFSP center would like to enter menus into Minute Menu CX, they must download the full version of the program. This cannot be done from KidKare.
Access the SFSP Feature (Sponsor)

Note: In order to access the new SFSP feature from MinuteMenuCX, you must first upgrade your software to the most current version
Note: You can now enter SFSP Meal Counts in KidKare. Use this feature for any SFSP sites where children are not enrolled If you have a SFSP site with enrolled children, you will use KidKare Attendance and Meal Counts for centers
Access the SFSP Feature
1 Login to CX and choose the ARAS center in the Select Center drop down at the top of the screen
2 Click the Menus/Attendance menu and select Record Meal Counts (SFSP/ARAS) The Meals and Attendance screen in KidKare opens in a web browser
3 From here, you can view or edit meal counts See Record Attendance and Meal Counts for more details on how to do this

Note: You can also open a browser and go directly to KidKare. You will login with the same credentials you use for CX
How to Access Additional Sites in KidKare
1 From the screen above, Click on Exit Observer Mode in the top right corner
2 A full center list appears Select the next center you would like to view by clicking on the name of the center

SFSP Custom Field Settings
ARAS/SFSP Settings can only be accessed through KidKare
1. Login to KidKare using your CX credentials.
2 Click on the gray gear icon on the to left of the main menu
3. Scroll down to the ARAS/SFSP Settings section.
4 Add up to 3 custom fields on the Attendance and Meal Count screen but moving the toggle to yes and typing in the name of the custom field
5 Click SAVE


Note: When you change custom fields in the settings, the new fields will not show up in KidKare until the 1st of the following month. For example: Custom Field 1 is titled as "Hot Meals Served". On the 15th of the month the setting is changed it to say "Cold Meals Served" The change to "Cold Meals Served" will not reflect in KidKare until the 1st of the following month.
Data Entry Options
SFSP Sites have the following data entry options:
Record meal counts directly into the program during the meal service on a tablet, smartphone, or computer
Record point-of-service meal counts on paper and transfer them into KidKare later
Record point-of-service meal counts on paper and turn that information into their sponsor The sponsor can then enter the information into the program
Save SFSP Claims
Spot-Checking Meal Counts
To spot-check meals:
1 Log in to KidKare using your CX login credentials
2. From the menu to the left, click Attendance-Bulk Entry.
3 Change Meal Type and Date to reflect the data you want to see
4. You will see all meal counts and attendance entered on site for all locations.
5 You can edit the Ordered or Delivered fields if needed
6. You can export the data for multiple days at a time by clicking on the blue Export button on the top right. This generates an excel report for you

Edit the Claim
In order to make edits to a claim before it is submitted to the state or on behalf of the SFSP site:
1 Login to KidKare using your CX credentials
2. Select the name of the center you are needing to edit.
3 Click on Claims in the main menu
4 Click on the month of the claim you want to edit
5 Click Edit as shown in the image below
6 This takes you to the Attendance and Meal Count screen From here you select the meal type and date that needs to be edited, adjust the numbers, and click Save
7 Complete any edits needed, then go to the Claims page as shown below and the numbers show as

End of the Month
Once the claim has been submitted to the state, mark it as submitted in Minute Menu CX For more information, see Submit Claims to the State
This article contains useful information for your SFSP sites Click the link in the table of contents below to jump to a specific section
Sponsors: Train Sites to Access the SFSP Feature
1. Provide sites with their login ID and password. You can find this information in the Manage Center Information Oversight tab
2. Advise sites to go to cx.minutemenu.com. Sites can access this website on smart phones, tablets, and computers They can log in with the information you provide to them
Recording Meal Counts
1 Log in to cx.minutemenu.com
2 From the menu to the left, click Attendance
3 Click Record Served Meals (SFSP/ARAS) The Record Served Meals page opens
4 Click each box in the Served Meals column and enter the total number of meals served for each meal time
5 Click each box in the Total Attendance column and enter the total number of children served for each meal time
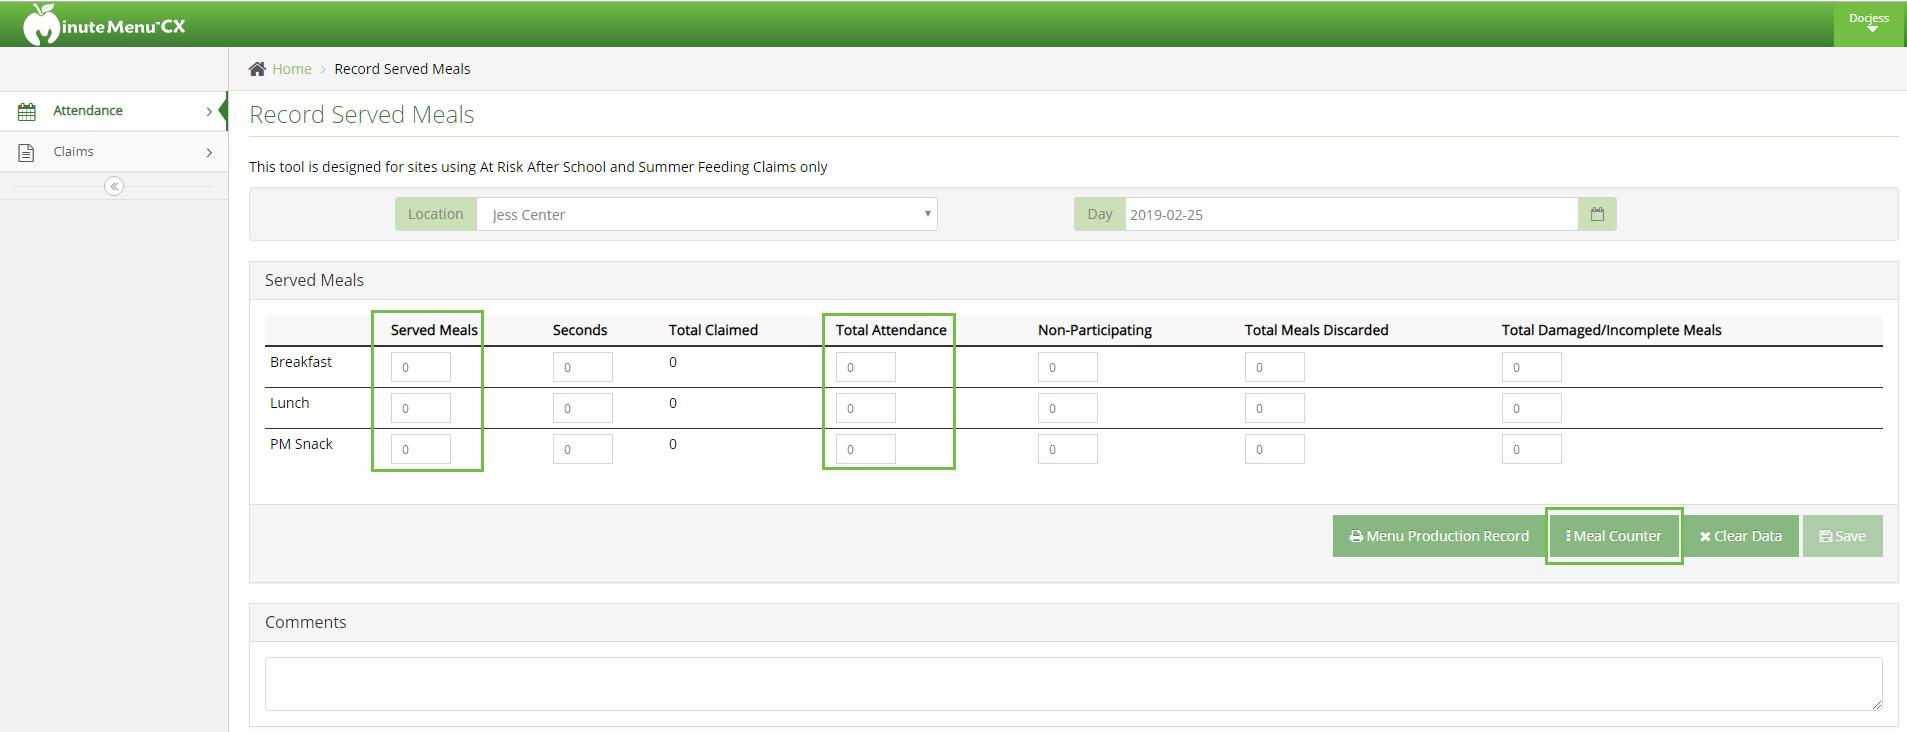
6. Enter counts in the remaining columns, as needed.
7 When finished, click Save

Note: Centers can click Meal Counter to take attendance and children come through the line to get their foods
Print Sign In Sheets
1. Centers can print sign-in sheets from cx.minutemenu.com.
2 From the menu to the left, click Attendance
3. Select Printable Sign In Sheets. The Print Sign In Sheets page opens.
4 Click the second drop-down menu and select Daily or Weekly
5. Click the third drop-down menu and select Blank Sign In Sheet or Pre Filled Using Enrolled Children.

6. Click OK. The sign-in sheet is generated.
Submitting Claims
Centers submit their ARAS Claims through cx.minutemenu.com each month.
1 From the menu to the left, click Claims
2. Click SFSP/ARAS Claims. The Enter Claims page opens.
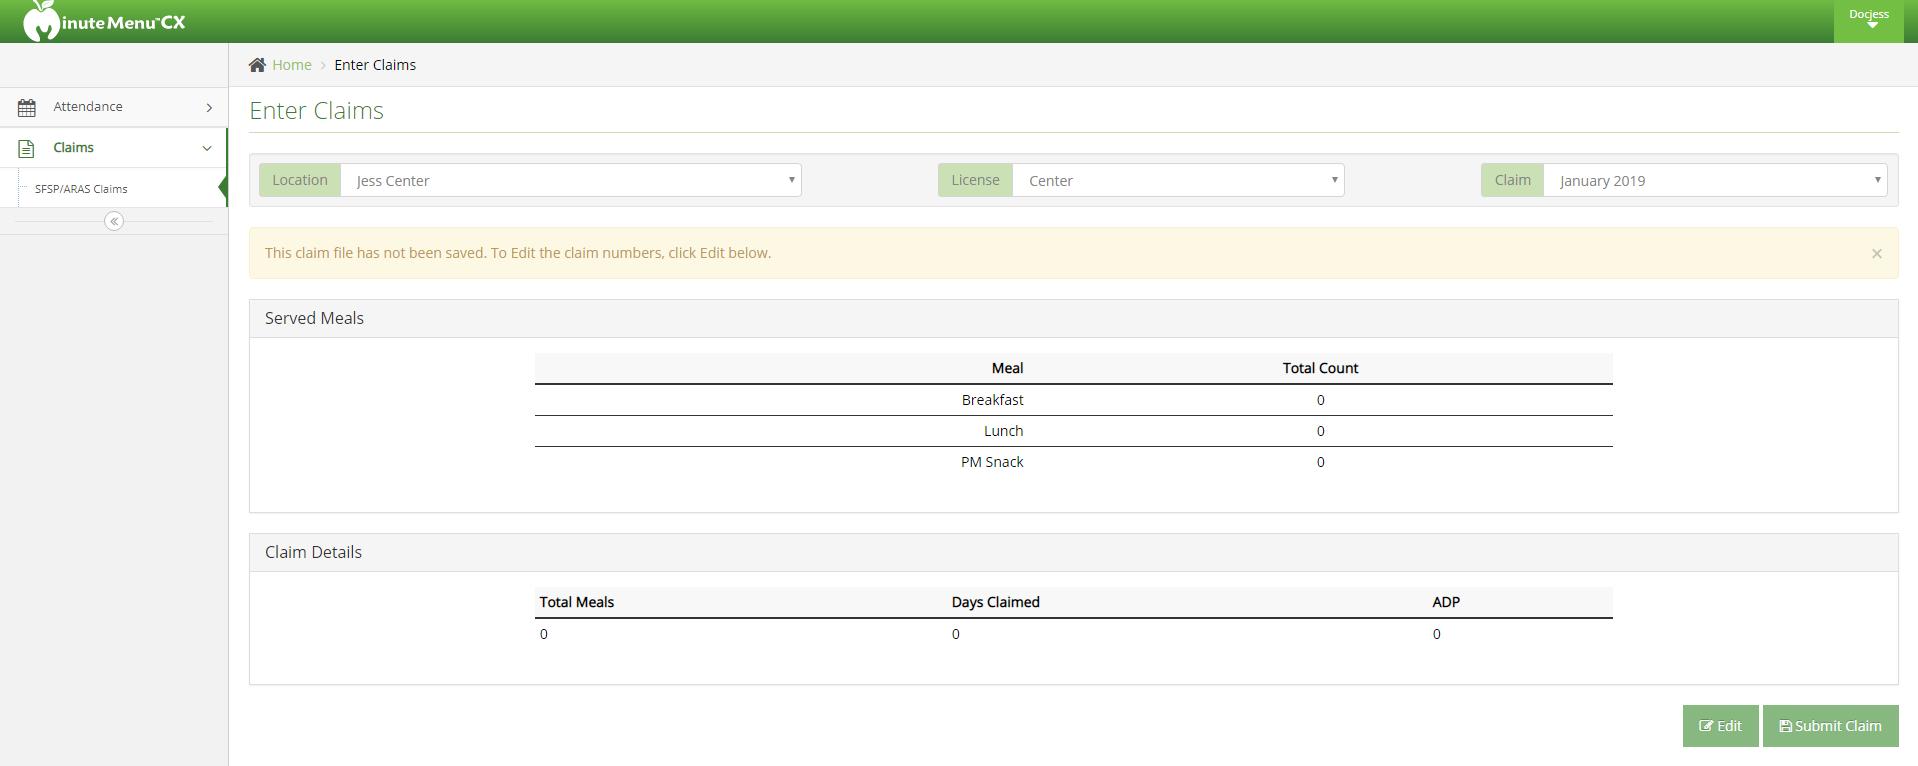
3. Review meal counts and verify their accuracy.
4 Click Submit Claim
Attendance Reports
The following Attendance reports are available This list is not comprehensive To access these reports, click the Reports menu, select Attendance, and then select the appropriate report
Last Modified on 03/02/2022 11:33 am CST
Weekly Attendance + Meal Count Report: This report lists weekly attendance and meal counts for multiple center or a specific center (according to how you filtered the report) Note that attendance for one (1) yearolds is underlined and in bold. This provides a quick visual reference as to how many children are in the one year old age group, since this age group must be served whole milk
Daily Attendance + Meal Count Report: This is a worksheet that can be used to record daily attendance and meal counts This includes a space for parents to sign off on each day Centers can also print this report in their version of Minute Menu CX.
Blank Attendance + Served Meals Worksheet: This is the same report s the Weekly Attendance + Daily Meal Count Worksheet, only it does not list any children. Centers can also print this report in their version of Minute Menu CX
Monthly Claimed Attendance Only Report: This report includes claimed attendance for the selected claim month Centers can also print this report in their version of Minute Menu CX
Monthly Claimed Meal Count Summary/Monthly Claimed Meal Count Summary ARAS: These reports list the total number of meals claimed for a selected claim month Centers can also print these reports in their version of Minute Menu CX
Monthly Paid Attendance Only: This report lists paid attendance for a selected claim month It also includes classroom totals Centers can also print this report in their version of Minute Menu CX
Monthly Paid Meal Counts by Age Group: This report lists paid meal counts for a selected claim month by age group It also includes totals for each age group Centers can also print this report in their version of Minute Menu CX
Monthly Paid Meal Counts by Child: This report lists paid meal counts for a selected claim month by child It includes totals for Free/Reduced/Paid meals, as well as At Risk Totals. Centers can also print this report in their version of Minute Menu CX
Monthly Paid Meal Count Summary: This report lists all paid meals for a selected claim month. It is broken down by meal type
Weekly Paid Attendance + Meal Counts: This report lists weekly attendance, broken down by attendance and meal Centers can also print this report in their version of Minute Menu CX
Estimated Meal Count Summary:This report lists estimated meal counts for a selected mount.
Monthly Paid Attendance Only: This report lists paid attendance for a selected claim month It also includes classroom totals. Centers can also print this report in their version of Minute Menu CX.
Actual vs Estimate Meal Count Summary:This report compares actual meal counts with the estimated meal counts, broken down by meal. Centers can also print this report in their version of Minute Menu CX.
In/Out Times Daily Report: This report lists all child in/out times for the selected day It also includes meal counts for each child Centers can also print this report in their version of Minute Menu CX
In/Out Times Weekly Report: This report lists all child in/out times for the selected week It also includes meal counts for each child Centers can also print this report in their version of Minute Menu CX
Daily FRP Report: This report provides a Free, Reduced, and Paid breakdown of all meals claimed each day in the selected claim month
Centers Reports
Last Modified on 05/28/2020 10:00 am
The following Center reports are available This list is not comprehensive To access these reports, click the Reports menu, select Centers, and then select the appropriate report
Centers List Export: This is a CSV list of centers and center details.
Center Info Report: This PDF report lists centers and center details
Center Enrollment Statistics: This is a CSV list of centers that includes enrollment statistics broken down by Free/Reduced/Paid It also includes numbers for missing enrollments, as well as total enrollment
Centers Disallowance Export: This is a CSV list of centers with disallowances for the selected claim
month It lists the center name, disallow reason, and the total number of disallowances for that center
Centers Error Summary Export: This report provides a summary of errors for your centers for a specific claim month
Centers Invoice Export: This is a CSV list of centers with outstanding invoices as of the selected claim month
Centers Summary Export: This is a CSV list of centers that includes any assigned monitors, number of pending children, expiring enrollments and enrollment forms, and so on
Children Reports
The following Children reports are available This list is not comprehensive To access these reports, click the Reports menu, select Children, and then select the appropriate report
Last Modified on 05/28/2020 9:49 am CDT
Child Roster: This report lists all children for a selected center or for all centers. It includes F/R/P counts and percentages, F/R/P basis, as well as basic demographic information and enrollment dates for the listed children. For more information, see Child Rosters.
Child Roster [Center Version]:This report lists children for a selected center or for all centers However, it does not include information beyond basic demographics and enrollment dates. Centers can print this version of the Child Roster from their own copy of Minute Menu CX For more information, see Child Rosters.
Child List Export: This is a CSV list of all children Centers can print this report from their own copy of Minute Menu CX.
IEF List: This report summarizes income eligibility form information saved to child records for a selected claim month It includes household information if such information was saved to the child profile Each center included prints on a new page
Blank Child Enrollment Form (English/Spanish): This prints a blank enrollment form for your state You can also print a Spanish version, if available Centers can print this report from their version of Minute Menu CX
Child IEF/Enrollment Report: This report prints enrollment and/or income eligibility forms for selected children You must select a center before you print this report Centers can also print these forms from their version of Minute Menu CX
Verify FRP Consistent Within Family: This report lists the FRP status of related children enrolled in the selected center
Child Racial Count Summary - Per Center: This report provides a count of children broken down by race and ethnicity for a specific center. Centers can print this report form their version of Minute Menu CX.
Child Racial Count Summary - All Centers: This report provides a count of children broken down by race and ethnicity for all centers.
School Age Breakfast Approval: This is a printout that parents can sign to indicate that they allow the center to serve breakfast to their child. Centers can also print this report from their version of Minute Menu CX
Children Claimed Without Absence: This reports lists children claimed for the selected claim month without any absences Centers can also print this report from their version of Minute Menu CX
Children Not Claimed: This report lists active children who were not claimed for a selected claim month. Note that this report does not take attendance into consideration it only checks whether an active child was claimed for that month. Centers can also print this report from their version of Minute Menu CX.
Checkbook Reports
The following Checkbook reports are available This list is not comprehensive To access these reports, click the Reports menu, select Checkbook, and then select the appropriate report
Last Modified on 05/28/2020 10:02 am CDT
Year End Tax Summary: This report report provides a statement of claim reimbursements issued and allowable expenses Centers can also print this report from their version of Minute Menu CX For more information, see Print the Year-End Tax Summary.
Date Range Tax Summary: This report contains the same information as the Year End Tax Summary, but is filtered to a specific date range. You can print this report as a PDF or export it to Excel. Centers can also print this report from their version of Minute Menu CX
Claims Reports
The following Claims reports are available This list is not comprehensive To access these reports, click the Reports menu, select Claims, and then select the appropriate report
Last Modified on 05/28/2020 9:53 am CDT
Claims List Export: This is a CSV list of claims and claim details.
Rate Summary: This report summarizes F/R/P rates for your centers It also includes child enrollment numbers based on child rosters in effect as of he date the blended rates were calculated for each center.
12 Month Claims Summary: This report summarizes claim reimbursements for a selected year
Office Error Report: This report provides a quick claim overview and lists specific errors that occurred when processing the claim This report also prints after you process claims For detailed information about the errors that may appear on this report, see Error Codes.
Center Error Letter: This report provides a quick claim overview and lists certain errors that occurred wen processing claims for a specific center.
Monthly Milk Audit Summary: This report summarizes milk totals entered via the Milk Audit feature You can print this report as a PDF, or you can export it to a spreadsheet file
Claims Roster: This report lists children, enrollment information, FRP status, basis, and so on
Menus Reports
Last Modified on 06/02/2021 11:32 am
The following Menus reports are available This list is not comprehensive To access these reports, click the Reports menu, select Menus, and then select the appropriate report
Centers can also print these reports in their version of Minute Menu CX.
Center Monthly Menu Plan: This report prints your centers' menu plans for the selected claim month
Center Weekly Menu/Non-Infants Only/Infants Only: This report prints a single center's weekly menu plan
You can print this for a single week or the entire month
Master Monthly Menu Plan/Non-Infants Only/Infants Only: This report prints master menus for the selected claim month
Menu Production Record: This report lists the amount of food centers need to serve and purchase to adequately serve children in their care For more information about this report, see Print the Production Record
Weekly Quantities Required Per-Center/All Centers: This report lists the amount of food required weekly for the selected center/all centers
Menu Notes Report: This report prints any notes centers entered when recording menus. It is divided into non-infant notes and infant notes
Daily Transportation Log: This report is a blank log for food transportation. It provides space to record the driver, route number, food temperatures, delivery times, and so on
Receipt Reports
Last Modified on 05/28/2020 9:59 am
The following Receipts reports are available This list is not comprehensive To access these reports, click the Reports menu, select Receipts, and then select the appropriate report
Non-Profit Status Report: This report lists your centers and their claim amounts, reimbursement amounts, and any possible profits This allows you to assess whether the centers listed meet non-profit status You can print this report to PDF or to a spreadsheet.
Center Receipts Journal: This report lists your centers' receipt entries for the selected claim month Centers can print this report for their own center in their version of Minute Menu CX.
Monthly Receipt Totals: This report lists totals for each receipt category for all centers for the selected claim month.
Labor Tally Sheet/Blank Labor Tally Worksheet: These reports provides a way for center staff to record time spent on CACFP tasks, such as menu planning, purchasing food, and so on. Centers can also print this report in their own version of Minute Menu CX
Receipts List Export: This is a CSV list of center receipts Centers can print this report in their own version of Minute Menu CX

Note: All receipts are included on all of these reports, regardless of verification status We recommend you delete those receipts you cannot verify before running any of these reports
Reviews Reports
The following Review reports are available This list is not comprehensive To access these reports, click the Reports menu, select Reviews, and then select the appropriate report
Last Modified on 05/28/2020 10:16 am CDT
Review List Export: This is a CSV list of center reviews entered in your system.
Review History + Status List: This report lists your centers' review due date, as well as dates for the last four completed reviews, and the total number of reviews completed.
Sponsor Review Summary: This report summarizes information about a center Monitors should print this report and take it with them on site reviews. For more information, see Print the Sponsor Review Summary Report.
Payments Reports
The following Payment reports are available This list is not comprehensive To access these reports, click the Reports menu, select Payments, and then select the appropriate report
Last Modified on 05/28/2020 10:03 am CDT
Non-Claim Payment Adjustments: This report lists all non-claim payment adjustments you've made for your centers You can print this report to PDF or to a spreadsheet For more information, see Non-Claim Payment Adjustment.
Print the Year-End Tax Summary
Last Modified on 05/28/2020 10:03 am
The Year End Tax Summary report provides a statement of claim reimbursements issued and allowable expenses As long as Minute Menu CX was used to issue payments by check or direct deposit and expenses were documented in the Receipts tool, the Year End Tax Summary will be accurate
To access this report:
1 Click the Select Center drop-down menu and select a center This step is optional If you do not select a center now, you cannot choose the Selected Center option when specifying the centers to include the report
2. Click the Reports menu, select Checkbook, and click Year End Tax Summary. The Select Year dialog box opens
3. Click the drop-down menu and click the year for which to print the report.
4 Click Continue
5. Select the centers for which to print the report. You can choose from Selected Center, All Active Centers, or Choose Multiple Centers
6. Click Run Report.
If you selected Selected Center, a PDF is generated This completes the process If you selected All Active Centers, go to Step 8
If you selected Choose Multiple Centers, continue to Step 7
7 If you selected Choose Multiple Centers in Step 5, set filters for the centers to include, and click Next
8 The Sort Preference dialog box opens Select Center Name or Center Number
9 Click Continue A PDF is generated
Center Daily Meal Count Report
Last Modified on 05/28/2020 10:17 am
The Center Daily Meal Count report provides meal count totals by meal for each for your sites for a single day It also totals all meal counts for each, individual center, as well as provides an overall total for all centers
To run this report:
1 Click the Reports menu, select Attendance, and click Center Daily Meal Count Report The Select Date Range dialog box opens.
2 Click the Start Date and End Date boxes and select the date range for which to run the report To run the report for one day, select the same date each box.

3. Click Continue. If you do not operate in multiple states, the Sort Preference dialog box opens. Go to Step 6 If you operate in multiple states, the Select State dialog box opens
4. Click the State drop-down menu and select the state for which to run the report.
5 Click Continue The Sort Preference dialog box opens
6. Select the Center Name option to sort by center name, or select the Center Number option to sort by center number
7 Click Continue The report is generated

[VIDEO] KidKare Q3 2020 Webinar: Looking to the Future
Click here to view the Looking to the Future: Growth, Change, and Opportunities recorded webinar.
Watch our third quarterly webinar this year where we provide some general company updates, highlight some of the new features that have been released, see what's coming, and share some tips and opportunities.
Click here to download a PDF of the presentation!
[VIDEO] KidKare: Leading Through Crisis
Click here to view the KidKare: Leading Through Crisis recorded webinar.
Watch this quick webinar where we hear from KidKare's CEO, Georgine Muntz, on leading through a crisis. We also update you on the plan for the next year, changes to pricing and billing, and address common questions.
Click here to download a PDF of the presentation!
Share Your Story with the KidKare Community
At KidKare, we want to provide information that might help our clients navigate this unprecedented pandemic. We have created this page for our clients to share their stories on how they are finding creative ways to manage in this environment Click here to share a story that might help our community.
[VIDEO] Intro to the Main Screen
Last Modified on 08/06/2020 9:40 am
This is an introductory video for sponsors of centers/chains who are new to Minute Menu CX
[VIDEO] Sponsor/Main Office Dashboard
Last Modified on 08/06/2020 9:59 am
This video is an introduction to the Sponsor Dashboard in Minute Menu CX
About Grains Ounce Equivalents
Last Modified on 08/19/2021 6:49 am
As of October 1, 2021, all food program participants must use grain ounce equivalents when serving Bread/Alt and Infant Cereal food items The Food and Nutrition Service (FNS) defines an ounce equivalent as “ the amount of food product that is considered equal to one ounce from the grain or protein food groups.”
Grain ounce equivalents aims to account for the different levels of water content in different grains, as higher water content leads to less grain content in the food item For example, cooked pasta and rice has higher water content than crackers or bread This policy also brings CACFP in-line with other federal programs, such as the National School Lunch Program, the School Breakfast Program, USDA MyPlate Food Guidance, US Dietary Guidelines, and the NAM report.
We have implemented extensive changes to Minute Menu and CX and KidKare to accommodate this policy change and ensure that you and your sites are in-line with this new reporting requirement As a sponsor, you can control when you enable the ounce equivalents requirement in Minute Menu CX Once you enable ounce equivalents, several changes take place. These changes are summarized below.
Food List
All Bread/Alt and Infant Cereal foods require an ounce equivalents calculation be saved to the food list. This ensures that Minute Menu CX and KidKare calculates quantities for these items correctly and accurately. A calculation consists of the following:
Exhibit A Grains Group Designation
Serving Size
Serving Weight
This information provides the figures to plug into the formula used by the USDA to calculate the ounce equivalents for one serving of the item you have added This calculator replaces the Food Quantity Group settings that were previously present for Bread/Alt and Infant Cereal food items
Missing Calculation Indicators & New Claim Errors
To help you update your food list, we have added several indicators to the food list itself to show that there are Bread/Alts and Infant Cereals that still need ounce equivalent calculations to be applied
A red banner displays on the Food List page to warn you of missing calculations. You can click this banner to filter to only those items that are missing a calculation
A displays in the table for Bread/Alt and Infant Cereal items that are missing an ounce equivalents calculation [img]
A message displays in the Record Menu window and on the Daily Menu page when you or a center adds a Bread/Alt or Infant Cereal that is missing an ounce equivalents calculation to a menu

We have also added two new errors to the Office Error Report: Error 107 and Error 108 These errors are warnings only and will not otherwise affect claims processing Instead, these are meant to help you locate items being claimed that still need ounce equivalents information on your food list.
To account for weight differences between brands, a new calculator option will display in the Record Menu window and on the Daily Menu page. This allows your centers to input nutrition label information specific to the bread/grain they are serving on any particular day. Your centers cannot access this calculator if you have locked the item to the food list calculation

Quantities
Once you enable ounce equivalents, all quantities referenced for Bread/Alt items will use the new ounce equivalents serving requirements provided by the USDA. Quantities reference the ounce equivalents for one serving of a Bread/Alt as saved to your food list.
For example, suppose there is a 100% Whole Wheat Bread on the food list with the following serving information: 1 slice = 28g = 1 oz eq
1. Center A serves this bread for Lunch.
2 They estimate attendance for this meal to be five 3-5 year old participants
3. Per the USDA, the minimum serving size for a slice of bread for this age group is 0.5 oz eq.
4 The estimated quantity required for this bread will show as: 2 5 slices - 2 5 oz eq


Even though the common unit displays, all claims processing and Menu Production Record information will reference the ounce equivalents value. The common unit is there to help centers determine how much of an item to serve.

Note: If your centers must record actual quantities, you may opt to require them to enter quantities in ounce equivalents using policy M.01g. If you set this policy to N, all quantities for Bread/Alt and Infant Cereal items display in ounce equivalents only, and centers can only record quantities in ounce equivalents.
Enable Grain Ounce Equivalents
Last Modified on 08/19/2021 6:50 am
A grain ounce equivalent is the amount of food product considered to equal one ounce from the grain group As of October 1, 2021, all food program participants must use grain ounce equivalents when serving Bread/Alt and Infant Cereal food items This is to account for different levels of water content in different grains, which affects the amount of actual grain content in the food. For example, cooked pasta and rice has higher water content than crackers or bread. Ounce equivalents aims to ensure that the appropriate amounts of grains are served
You can enable this requirement in your policies Once you enable grains ounce equivalents, the following changes will be applied to Minute Menu CX and KidKare:
Your will be able to add grain ounce equivalent calculations to Bread/Alt and Infant Cereal food items on your food list Each food that falls into these two meal components must have an equation on file Error # will display on the Office Error report for claimed Bread/Alt and Infant Cereal foods that do not have an equation saved to the food list
All quantities for Bread/Alt and Infant Cereal food items will reference grain ounce equivalents when estimating required quantities, recording actual quantities and leftover quantities (if you do so), and when viewing reports such as the Menu Production Record, Weekly Quantities Required report, and the Infant Feeding report Claims processing will also reference the new ounce equivalent serving requirements as outlined by the USDA.
To enable the grains ounce equivalents requirement:
1. Click the Administration menu and select Manage Policies. The Manage Policies window opens.
2 Set policy M.17 Use Ounce Equivalents for Bread/Alt & Infant Cereal Foods to Y If you do not require centers to report actual quantities served, go to Step 4. If you do, continue to Step 3.

3. If policy M.01 is set to Yes to require actual quantities, you can specify how your centers record ounce equivalents Policy M.01g How do you Want to Handle Recoding Bread/Grain & Infant Cereal Food Components is set to Y by default to use the calculation saved to your food list when recording quantities. Set this policy to N to require your sites to record bread/grain quantities in ounce equivalents only If this policy is set to Y, your centers will record quantities in a common unit of measurement that is

then calculated to ounce equivalents:


If this policy is set to N, your centers will record quantities in ounce equivalents only


Manage Grains Ounce Equivalents Calculations
Last Modified on 08/19/2021 6:50 am
As of October 1, 2021, the USDA requires that all grains served be recorded using ounce equivalents instead of standard units of measurement This requirement applies to both the Bread/Alt and Infant Cereal components To accommodate this policy, you must enter an ounce equivalent calculation for all Bread/Alt and Infant Cereal foods. This calculation determines the total ounce equivalents present in the food you are entering. This value will inform all quantities calculations performed for Bread/Alt and Infant Cereal foods in Minute Menu CX and KidKare
Note that there are weight differences between brands of the same food For example, one slice of bread from Brand A may weigh 28g, but Brand B may weigh 45g. Sites can override your saved calculation to account for these differences so the proper amounts are served, unless you lock the calculation on the food list.
To add an ounce equivalent equation to existing grains on your food list:
1 Click the Administration menu and select Manage Foods KidKare opens in a browser
Note: You must have the Manage Foods permission enabled on your account to access the Food Tool For more information, see Set Staff Permissions
2. Log in using the same credentials you use to access Minute Menu CX.
3 From the menu to the left, click Foods
4. Click Food List. The Food List page opens.
5 Filter to the food items to update There are two ways to do this: If there are breads/grains missing the ounce equivalent calculation, a [red calculator] displays next to those items, and a banner displays at the top of the page Click the banner to filter to only those breads/grains that are missing the calculation
Click the Bread/Alt tab to filter to breads and/or the Infant Cereal tab to filter to infant cereals Items missing a calculation have a next to them
6. Click the item to update. The Add/Edit Food page opens.
7 In the Food Quantity Group section:
a. Click the Grains Group drop-down menu and select the Exhibit A grains group to which this item belongs You can view Exhibit A here Note that if you are updating an Infant Cereal, this drop-down menu is locked to Group I (ready-to-eat cereals).
b Click the Serving Size box and enter the standard serving size for this item For example, if you are updating Brand B bread and the nutrition label says that one serving is one slice, you would type 1 in this box
c. Click the corresponding drop-down menu and select the serving unit. Following our example, you would select slice You can also click and enter a custom unit
d Click the Serving Weight box and enter the serving weight from the nutrition label in grams or
ounces Then, click the corresponding drop-down menu and select grams (g) or ounces (oz) In our example, a serving of Bread A weighs 45g, so we enter 45 and select grams (g) Once you enter this information, the 1 Serving = box displays and shows the amount of ounce equivalents in one serving of this item

e Click to lock this calculation and prevent sites from overriding it on the Daily Menu page in KidKare and the Record Menu window in CX, if needed Click to unlock it again
8. Click Save. Repeat for each food you need to update.
Manage Ounce Equivalents on Menus
Last Modified on 08/19/2021 6:55 am
As of October 1, 2021, the USDA requires that all grains served be recorded using ounce equivalents instead of standard units of measurement This requirement applies to both the Bread/Alt and Infant Cereal components To accommodate this policy and ensure accurate quantities reporting, you must save an ounce equivalent calculation for all Bread/Alt and Infant Cereal foods to your food list. Learn how to do that here.
However, there are several other tools to help you and your center manage the ounce equivalent requirement in Minute Menu CX, including:
Overriding the default food list calculation.
Switching Bread/Alt item quantities to ounce equivalents
Click a link below to jump to a specific topic.
Override the Default Food List Calculation
You can override the ounce equivalent calculation saved to your food list as long as you have not locked the equation for the selected Bread/Alt or Infant Cereal item This helps you and your centers account for weight differences between brands of the same food when determining required quantities
Let's look at an example.
Your food list has an entry for Brand A Bread The serving information saved for this item 1 slice = 28g = 1 oz eq
However, this week, Center X is serving Brand B bread Brand B bread's nutrition label shows the following information: Serving Size: 1 slice (45g). This means that one slice of Brand B bread weighs 45 grams, so the the ounce equivalents present in Brand B bread will not match what is saved to your food list for Brand A.
1 Click the Select Center drop-down menu at the top of the window and select the center for which to record menus.
2 Click the Menus/Attendance menu and select Record Center Menus The Record Menu window opens
3. Record menus as you normally would.
4 Click Calculate Oz Eq for Bread/Alt or Calculate Oz Eq for Infant Cereal The Ounce Equivalent Calculator dialog box opens.
5 Click the Serving Size box and update the common serving size, if needed Following our example above, we'll leave this set to 1 Slice.
6 Click the Serving Weight box and update the serving weight as stated on the nutritional label for your food In our example, we need to change this to 45
7 Use the corresponding drop-down menu to select the weight unit This will typically be grams (g), but some labels may give the serving weight in ounces If this is the case, select ounce (oz) Once you set the new
weight, the 1 Serving = box updates and displays the total ounce equivalents in one serving of your food item Continuing our Brand B example, you'll see that Brand B contains 1 5 oz eq in one serving vs the 1 oz eq saved to the food list for Brand A

8 Click Save
Switch Bread/Alt Items to Ounce Equivalents
Once you enable ounce equivalents and update Bread/Alt items on your food list with the appropriate calculations, you can convert items recorded prior to August 18, 2021 to ounce equivalents, if needed
1 In the Record Menu window, select a menu recorded before August 18, 2021
2 Click Switch to Oz Eq for the Bread/Alt item.
If the recorded quantity matches the quantity saved to your food list and an ounce equivalents calculation exists, the quantities are converted to match what you have input on your food list. If the recorded quantity does not match, CX cannot convert the item to ounce equivalents and you are prompted to either update your food list or use the override calculator to convert to ounce equivalents This is to prevent impacts to claims processing
Ounce Equivalents for Centers
Once you enable policy M.17 to use ounce equivalents in CX and KidKare and update your food list, your centers will be able to:
Last Modified on 08/19/2021 7:00 am
Override the ounce equivalents calculation saved to the food list when recording menus in CX and KidKare. View all estimated and actual quantities required in ounce equivalents
Record actual quantities and leftover quantities in the common unit or in ounce equivalents (depending on your setting for M 01g)
Provide the information and links in this article to your centers to help them implement ounce equivalents at their location
Override the Food List Ounce Equivalents Calculation
This feature is available both in Minute Menu CX and in KidKare for centers Click here to view how to override this calculation in KidKare. The instructions below cover how to override the calculation in Minute Menu CX

Note: If you lock the calculation on the food list, your centers will not be able to override it in the Record Menu window or on the Daily Menu page in KidKare
1 Click the Menus/Attendance menu and select Record Center Menus The Record Menu window opens
2 Record menus as you normally would
3. Click Calculate Oz Eq for Bread/Alt or Calculate Oz Eq for Infant Cereal. The Ounce Equivalent Calculator dialog box opens
4. Click the Serving Size box and update the common serving size, if needed. Following our example above, we'll leave this set to 1 Slice
5. Click the Serving Weight box and update the serving weight as stated on the nutritional label for your food. In our example, we need to change this to 45
6. Use the corresponding drop-down menu to select the weight unit. This will typically be grams (g), but some labels may give the serving weight in ounces If this is the case, select ounce (oz) Once you set the new weight, the 1 Serving = box updates and displays the total ounce equivalents in one serving of your food item Continuing our Brand B example, you'll see that Brand B contains 1 5 oz eq in one serving vs the 1 oz eq saved to the food list for Brand A.


Click
When ounce equivalents are enabled, the Record Menu window in CX and the Daily Menu page in KidKare list quantities in the following format: Common Unit - #.## oz eq. For example, this could be 1 slice - 1.5 oz eq.


If you require your centers to enter actual quantities served and set policy M.01g to N, they will only see ounce equivalents reflected in the Record Menu window and on the Daily Menu page
Record Actual Quantities & Leftover Quantities
If you have set policy M 01 to Y, your centers must record quantities served You may also require them to record leftover quantities. Once you enable ounce equivalents, you have an additional option for your centers: M.01g. This policy dictates whether the center can enter quantities using a common unit of measurement and have CX/KidKare calculate ounce equivalents based on your food list, or whether they must simply enter quantities directly in ounce equivalents
If M 01g is set to Y (default), the center simply enters quantities as they normally would:


And Minute Menu CX or KidKare does the conversion for them The common unit and the ounce equivalents display


If M.01g is set to N, the center must enter all quantities in ounce equivalents. They are unable to change the unit of measurement


The quantities added show in ounce equivalents


Center Resources for KidKare
If your centers use KidKare for their food program activity, you can link them to our Grains Ounce Equivalents category on the KidKare Knowledge Base. This page contains links to all knowledge content for grains ounce equivalents and how it applies to the center user. Please note that some of the content in this category does apply to independent centers only and we've called it out where it exists
Override Calculator Infographic
Your centers can print this useful infographic to learn how to use the override calculator in KidKare! Click the image to view the full size version

