
H O T O I N S I G
T S
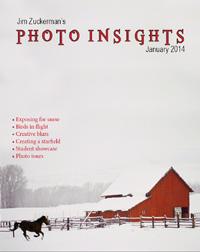
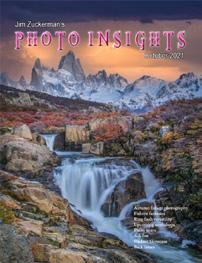
December 2022 Protecting Extremities from the Cold Practicing Graphic Design Insane ISO Settings Photo tours Ask Jim Student Showcase Back issues
P
H
Jim Zuckerman’s
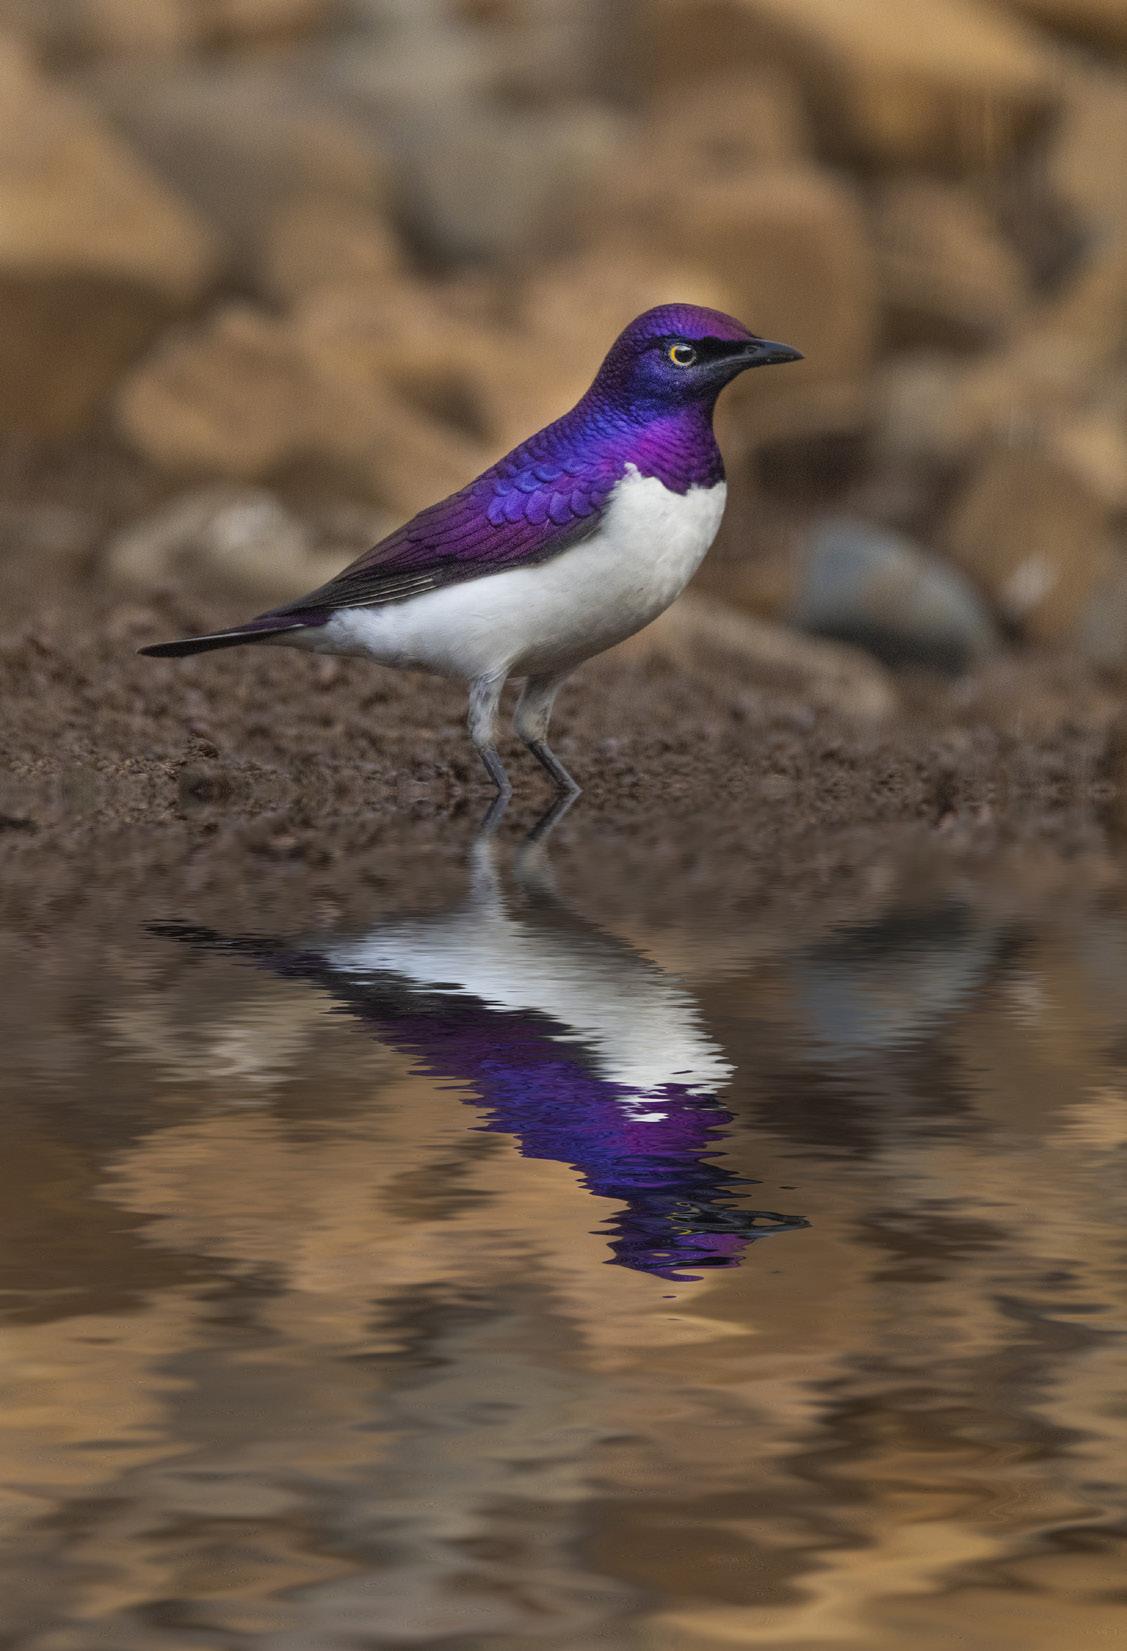
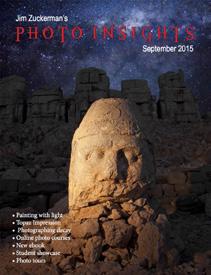
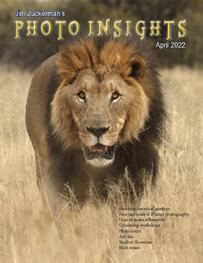
2 On the cover: Jim’s and Dia’s rescued kit ten, Nopi, celebrating Christmas. This page: Violet-backed starling at a waterhole photo graphed from a blind, South Africa. Table of Contents 4. Protecting Extremities from the Cold 9. Practicing Graphic Design 16. Insane ISO Settings 20. Jim’s eBooks 23. What’s wrong with this picture? 25. Short and sweet 27. Ask Jim 28. Photography tours 30. Student Showcase 35. Past issues 42. Subject index
It’s important for a photographer to think about climate, latitude, and temperature before departing for a travel destination. Here’s why.
The climate of the destination has everything to do with the sky. For example, going on an Af rican safari during the dry season means clear skies and beautiful sunrises and sunsets. It also means harsh light in the middle of the day, and this tells you there are basically two hours of good light with which to photograph animals and landscapes: Within an hour after sunrise and in the hour before sunset. The rest of the day is, essentially, down time. If you travel on the cusp of the rainy season, the skies will be mostly overcast and this means good photography can last all day. In addition, you won’t be fighting harsh contrast with its black shadows and too-bright highlights.
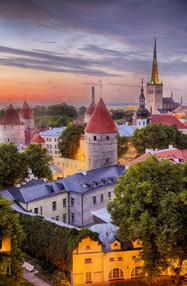
Latitude is important as well. If you really want to photograph the aurora borealis, for example, don’t go to Iceland or Alaska in the summer. You’ll never see it because the sky will be light for 24 hours. I remember waiting to photograph the blue hour in Tallinn, Estonia, which is just south of Finland, on June 30. It didn’t get dark enough to capture the cobalt blue sky until 1:30am! Had I been in northern Finland, the sun would never have set at this time of year. Similarly, if you love photographing the beautiful colors of sunrise and sunset, mid-summer is a good time to visit the northern and southern latitudes because the low angled sunlight lasts for hours -- literally. One summer I was in Alaska and the sunset lasted five hours! On the Equator, sunrises and sunsets last about 10 minutes.
Temperature is important because in cold weather, you’ll need extra camera batteries. Batteries get depleted quicker in low temps. And, of course, you have to take precautions to protect your extremities from the cold. In hot and humid weather, lens fogging is a problem that you have to be aware of. It’s a good idea to place your camera and lenses in ziploc bags over night, especially when staying in an air conditioned room, to prevent fog from forming on the glass, on the view finder, and on the sensor.
Jim
 Zuckerman
photos@jimzuckerman.com www.jimzuckerman.com
3
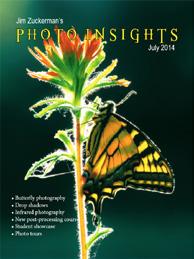
Protecting Extremities from the Cold
Winter is almost upon us, and out door photographers have to change their mindset when shoot ing in the cold. The most important consider ation when engaged in winter photography is not exposure or composition; instead, it’s pro tecting your extremities from the cold. This is particularly important for your fingers, but also for toes and ears. If your extremities hurt from the cold, it’s hard to think about anything else such as exposure and composition. And in extreme cold, frostbite is a serious issue. It must be guarded against before you consider anything else.

Fingers

Photographers need manual dexterity in their hands and fingers to press the shutter button, ply the menus, and replace batteries and flash cards. This is a problem because thick winter gloves and mittens are bulky and inhibit the kind of dexterity needed.
I have tried all kinds of thick, expensive gloves in combination with glove liners plus serious mittens along with one or two hand warmers inserted into the glove. None of them work well because they are just too bulky. You can’t
4
feel the small buttons and dials on the cam era through the thick material. And the hand warmers are usually inserted into a pocket sewn into the glove against the back of the palm. However, it’s not the palm of the hand that gets really cold. It’s the fingers. In addi tion, one or two hand warmers inserted into a glove don’t offer enough warmth largely be cause the lack of air flow usually diminishes or extinguishes the chemical reaction that creates the heat.
Here is the technique I now use, and it’s fantas tic. It works.
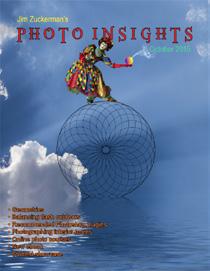
I put six chemical heat packet hand warmers in the right outer pocket of my parka. The heat emitted combines to make the interior of the pocket very hot. Not just warm, but hot. I wear only a glove liner on my right hand so I have complete dexterity with which to shoot,
and when my fingers get too cold (about every minute or two) I simply put my hand inside the pocket, hold the hand warmers tightly, and my right hand is instantly imbued with penetrat ing warmth.
The hand warmers last 6 to 8 hours. Make sure you bring enough warmers to last the number of days you’ll be shooting. The brand I use is Hot Hands. Over time, the potency of the chemical heat packets decreases. I wouldn’t rely on hand warmers I purchased last year. They may not get hot enough, and they might not last throughout the day.
On my left hand, I wear a glove liner, a good glove over that, and then a mitten as a third layer if it’s really cold. I use this hand to sup port the weight of the camera and lens. Finger dexterity is not needed with the left hand, so several layers of gloves can be used.

5
Toes
If your toes become painfully cold when shoot ing outdoors, there are two choices: You can do nothing and suffer, or you can go inside, take off your boots, and warm your toes.
Therefore, it’s important to protect yourself by wearing serious winter boots. For one of my snowy owl workshops, a woman came with fashionable boots made for cold weather when, for example, shopping in New York or Chica go where she would go in and out of various shops. They were not made for outdoor winter activities with a sustained exposure to frigid temperatures.
When you shop for boots, don’t even consider any product that doesn’t have a cold tempera

ture rating. I strongly recommend a rating of at least minus 40 degrees Fahrenheit (this is also minus 40 Celsius). However, these ratings assume you are active in some outdoor activity such as cross country skiing, hiking, building a snowman, etc. As photographers, we often stand in one place waiting for a photo oppor tunity, and this means inactivity. Even in tem

6
Morocco Photo Tour


7
August 29 - September 10, 2023
peratures of zero to minus 20 Fahrenheit, boots rated at -40 F may not be enough to keep your toes warm even if you wear thick socks.
If you expect to be photographing in extreme cold, I would recommend buying boots rated at -100 Fahrenheit (-73 C) or more. I bought boots rated at -100 F about 20 years ago, and I’ve never had cold toes since. It’s true that the boots are large and heavy, and I feel like Godzilla every time I wear them. But when I photographed in Canada when it was -45 F, my toes remained very comfortable. Any boots of fered for less than $180 won’t be warm enough. They must have a temperature rating.
Ears
The bottom tips of our ears stick out away from the sides of our face and therefore they don’t have the advantage of body heat. I wear a very warm hat with ear flaps, and that presses my ears against the sides of my face. Usually that’s enough to keep them warm. If not, I’ll add a thick beanie beneath the hat, and the combina tion of the two layers provides enough protec tion in the coldest of climates. Even on a windy day when the wind cuts like a knife, these two layers keep ear lobes from becoming painful.
When it comes to winter photography, you must protect your extremities no matter the cost. Pain and frostbite must be prevented un der all circumstances. §

8
Practicing Graphic Design
Part 1
Ultimately, successful composi tions come down to graphic de sign. And good graphic design is nothing more than attractive lines in a pleasing arrangement. This applies to ‘art photography’. Pictures with powerful emo tional content, such as war imagery, pictures involving poverty, disasters, crime, etc. are assessed differently. Graphic design in those cases takes a second place to the emotions evoked by the subject matter. However, if the emotionally charged image also has strong graphics like the famous picture of the flag raising on Iwo Jima in World War II, then the photograph becomes a classic.
compositional mess. As a photographer, you must make artistic sense of it. We are con strained by the tools we have -- our lenses -because they don’t reproduce what our eyes see. They come close, but with our eye-brain combination, we never see shallow depth of field, telephoto compression, and wide angle distortion.
This first challenge, then, is to ‘think as your

Many photographers struggle with compo sition. It just doesn’t come easy to them. So, this article is the first in a three part series to help those of you who fall into this category. My goal is to give you visual guidelines so you can identify good graphic design and, therefore, good composition when you are out shooting. The world is a

9
lenses see.’ Before you even raise the camera to your eyes, try to previsualize how a wide angle lens interprets the scene and how a telephoto lens does the same. This is the first step in working toward good composition.
I begin this series with the easiest type of graphic images to recognize and photograph: Architectural detail. Even if your passion in photography is landscapes, birds in flight, people, fashion, macro, or something else, take the time to identify and photograph architec tural details in homes, highrises, and commer cial buildings. Not all architecture has pho tographic potential, of course, but if you start looking, you’ll start to see interesting designs.
What you should look for
1) Reflections in mirrored buildings like the one I captured in Chicago, below.

2) Pronounced diagonal lines like the stairs in a home in Cape Town, South Africa on the next page.
3) Repeating shapes like the elegant lines in the lobby of the Marriott Marquis Hotel in Atlanta on the previous page and the columns of the Plaza de Espana in Seville, Spain, on page 12.
4) Juxtapositions of different kinds of textures like in the shot of modern buildings in Chicago at the bottom of page 13.
5) Bold angles that make a compelling visual statement like the upward perspective on high rise buildings in downtown Los Angeles at the bottom of the next page.
6) Door and window designs such as the image I captured in a small village in County Mayo, Ireland, at the top of page 13.
10
The photography
Let me offer you a few photographic guide lines I use when capturing architectural details. This is subjective, of course, and other photo instructors may disagree with my opinions. However, if you like my style of photography, these guidelines will help you capture similar images strong in graphic design.


First, notice that all of the images in this article are sharp throughout. I believe that architec ture photography requires complete depth of fied in virtually all instances. I can’t think of an example or an exception where portions of a building are soft due to shallow DOF and the image looks good. I find the out of focus areas to be visually annoying. I want to see detail in those parts of the picture that are out of focus, but it’s not possible.
Therefore, I direct my attention to creating complete depth of field and make sure the im ages are sharp from the immediate foreground to the distant background. In some composi tions, like the shot of the yellow windows and red bench on page 13, a small lens aperture isn’t necessary. All of the elements in this image are
11
essentially on the same plane. Therefore, any lens aperture will make the wall, the windows, the flower basket, and the bench sharp. In this instance, I’d use f/8 because it is considered to be the sharpest lens aperture.
In a shot like the one above in which I used a telephoto lens and the camera-to-foreground distance was short, a small lens aperture was necessary to insure everything was sharp. In this case, I used f/16 with a 100mm focal length.
Dead center
When photographing symmetrical archi tectural subjects like the Vermont home at right, it’s important to stand dead center on the structure when you take the picture. This underscores the symmetry and balance of the


subject. If you are even a few inches off center, the image will be skewed and, as a result, the horizontal and vertical lines of the building will not be parallel with the horizontal and vertical sides of the frame.
Telephotos vs Wide angles
Picture taking with wide angle lenses is more
12
challenging than with telephoto lenses. Wide an gle compositions often require you to consider both a foreground and a background, and they have to work together to make a strong image.
An example of this is seen in the shot on the next page taken in Chicago where the lamppost and the skyscrapers are complimentary to each other. Finding the right foreground isn’t always possible.

There might not be a foreground available, but when using a wide angle lens, the first thing I look for is a foreground.
Telephoto lenses, on the other hand, allow you to select a portion of the whole scene or subject and make a graphic shot often with out context, such as a design that’s artisti cally pleasing or that draws the eye because of its complexity, texture, or intrinsic beau ty. The three buildings below that come to gether in an intriguing way are an example.
If you have a tough time finding good com positions, look for architectural detail with a telephoto lens. I think this may help you with all the aspects that go into making good composition -- design, balance, symmetry, repeating shapes, color, visually compelling patterns, and light.

13
Lighting
Architecture can be photographed in every type of outdoor weather and lighting condition: Sun rise/sunset, overcast, midday sunlight, back lighting, and even when it’s raining. There is a caveat, though. On overcast days, or when di rect sunlight is behind the buildings, the sky will typically become overexposed or even blown out (become solid white with no texture or detail) when you expose correctly for the architecture.

Usually, you don’t want a bland or blown out sky in the background. There are two solutions to prevent this. First, use HDR so the entire frame is exposed correctly (if the sky has detail worth seeing). Second, replace the sky in Photoshop using the Edit > sky replacement pulldown menu command. For the shot of the Trump Tower, be low, and Ogrodzieniec Castle in Poland at upper right, I replaced the sky. Notice I used two dif
ferent types of skies. For the highrises in Chicago which were photographed under a clear, blue (but cloudless) sky, I used a unique cloud pattern against blue with the sun situated on the right side of the frame because this represents the direction of light. The buildings are lit from the right side, so it makes perfect sense for the sun to be in that position. For the castle, which was captured under a white sky, I used a shot of dense clouds because this kind of weather condition would create soft light. §

14
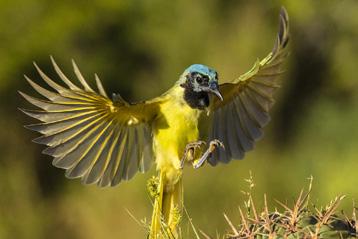
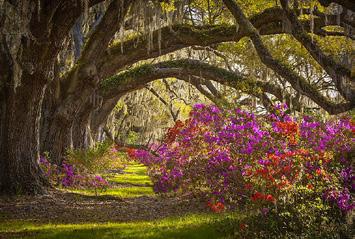
BEST of SOUTHERN NATURE


15
April 1 - 6, 2023
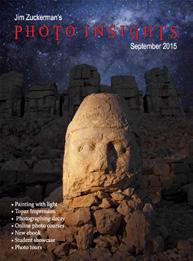
Insane ISO settings
Back in the (seemingly) far dim past when we all shot film, and when noise meant loud sounds rather than unwanted granules in our pictures, 400 ISO was about as high as any photographer wanted to go. For landscapes, portraits, still lifes, weddings, architecture, fashion, and so many other types of image making, we would never consider ISO settings as high as 400 be cause those films were considered too grainy. I shot most subjects with Fujichrome Velvia because the 50 ISO rating meant maximum quality. I used Fujichrome Provia 100 for wildlife because it gave me one extra f/stop of light for a faster shutter.
Never in a million years did it ever occur to us we’d have available ISO settings of 3200 and higher with excellent image quality.
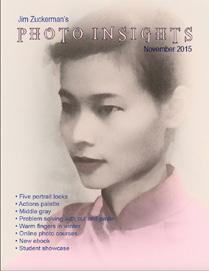
When I photographed the snowy owl, below, with an ISO setting of 12,800 because of the dimin ished light level in the late afternoon, I couldn’t believe it. True, I used noise reducing software (Neat Image in this case) to improve the image quality, but I realized there was no way I could have taken this image in the past given the fast shutter I needed in such muted light.
When I was leading a photo tour to Kazahkstan, I captured a hawk moth (top of next page) in

16
flight, and to freeze its wings without a flash I set the shutter speed to 1/8000 and the aper ture to f/16 for extensive depth of field. That forced the ISO to an incredible 25,600. This time I used Topaz DeNoise AI to mitigate the noise and, again, I was astonished at the qual ity of the image given the astronomical ISO.

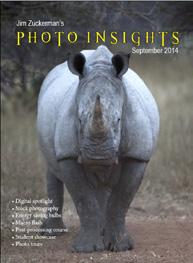
But I was totally blown away by the image be low. I took this shot of a cape buffalo from a blind at dawn in South Africa on a recent photo tour there. I replaced the sky in postprocessing, but the original capture had been done in extremely low light. I was using a long lens and wanted a shutter speed that would freeze the movements of the animal, so I used 1/500. At f/7.1 (the maximum aper ture on the 100-500mm Canon lens when set to 500mm), the ISO was forced to an unbe lievable 40,000! I’d never gone this high be fore, but if I had slowed the shutter to reduce the ISO, I risked getting blurred pictures.
There’s no point in reducing noise if the pictures aren’t going to be sharp. So, I took the shot and then, when I got home, I applied Topaz DeNoise AI and Topaz Sharpen AI and was amazed by the result. Can this stand up against a shot done at 200 ISO? or 1000 ISO? Upon close examination, no, not really. But given the factors I had to work with, this turned out much, much better than I ever expected. §

17
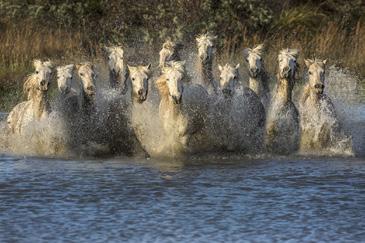
WHITE HORSES of the CAMARGUE

Spectacular photo opportunities of horses in action

May 8- 13, 2023

18
UPCOMING PHOTO WORKSHOPS
Snowy Owl Workshop

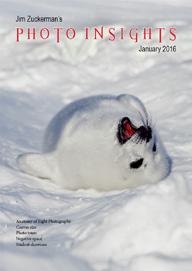
Upclose and personal encounters with these stunning birds in flight. Learn how to expose for white on white wintry conditions.
January 5 - 9, 2023

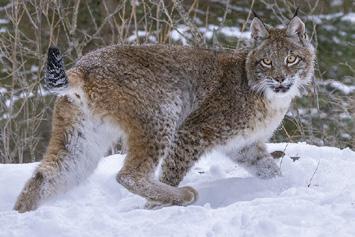
Winter Wildlife Workshop
Photograph beautiful North American mam mals plus a snow leopard in natural environ ments. Mountain lions, red foxes, arctic foxes, bobcats, lynx, wolves and more are in their full winter coats. This is a very special work shop.
January 17 - 21, 2023
Carnival in Venice Workshop

Photograph outrageous costumes in a medi eval environment! Incredible colors, design, and creativity in one of the most beautiful cities in the world. Learn how to use off-cam era flash, photograph models in sumptuous interiors, produce great images at night, and all the while enjoying Italian cuisine. This is a workshop not to be missed!
February 12 - 18, 2023
1919 10 w

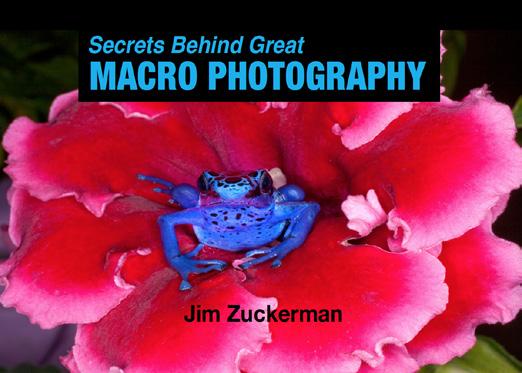
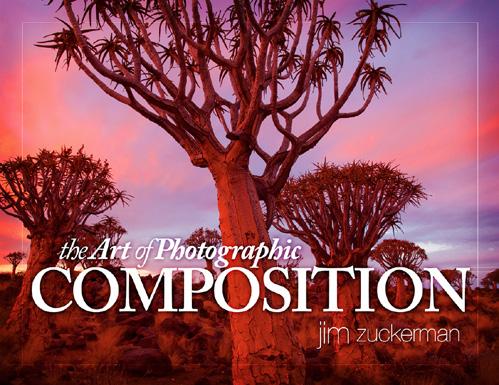
18 Expand your photographic artistry with eBooks
on any ebook to see inside 20
Click

2123 21 1919
eBooks continued Click on any ebook to see inside
WINTER WILDLIFE WORKSHOP
January 17 - 21, 2023

23
22
What’s wrong with this picture?
There are two things wrong with this photograph that stand out to me. First, the image is too blue. In photographic lingo, it’s too cool. Sec ond, and a much bigger problem, the foreground cheetah isn’t sharp. Out of focus foregrounds, especially when the soft portion of the picture is one of the subjects, is simply unacceptable.
My settings for this image were 1/500, f/8, and 3200 ISO. I used a 500mm focal length, and that meant depth of field was very shallow. I was only able to focus on one of the cheetahs, and my ‘Two Subject Rule’ refers to having two subjects in the composition and they both have to be sharp. There were four solutions for this problem. First, I could use a wider angle lens to gain DOF -- but that would make the cats appear further away. Second, I could move further back and refocus, also for an increase in DOF -- but that would make the cheetahs smaller in the frame. Third, I could use a smaller lens aperture like f/16 -- but that would slow the shutter down and blur might result. In addition, given the

23
close proximity to the cats and the 500mm focal length, even f/16 wouldn’t ren der both animals as sharp as I wanted.

The fourth solution is the one I chose. I took two pictures in quick sucession, one where I focused on the foreground cheetah and another in which I focused on the cheetah furthest from the camera. In Photoshop, I opened both images and I cloned from one picture to another. In other words, I cloned a sharp animal over its unsharp counterpart in the other photo. This took, surprisingly, only about 10 seconds to do. Both pictures were taken from the same spot, and because neither cat moved between the two exposures, this worked out perfectly.
To clone from one picture to another, use the clone tool as you normally do. Ac tivate photo one, hold down the option key (on a Mac) or the alt key (on a PC), click the spot from which the cloning will begin, and then release the key, activate photo two, and begin cloning at the corresponding spot. In other words, if the first click on photo one is the tip of the ear, you begin cloning on the tip of the ear on photo two.
To eliminate the bluish color, I brought the final composite back into Adobe Cam era Raw (Filter > camera raw filter) and moved the temperature slider toward the warmer, i.e. more yellow, portion of the scale. §
24
SHORT AND SWEET
1. This small animal is a hyrax. I used a 500mm lens to take this, and it’s commonplace to use a large aper ture and forget about depth of field when there is no background. But with shallow DOF, it’s easy to focus on the eyes and end up with the nose out of focus. Use at least f/11 to insure sufficient focus throughout.


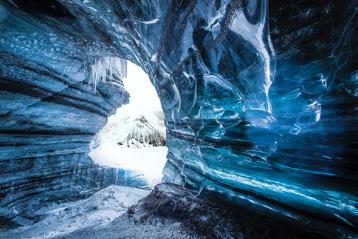
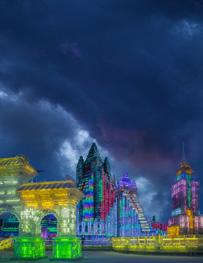
2. As winter approaches, look for beautiful, abstract designs in ice. Make sure the back of the camera, i.e. the plane of the digital sensor, is parallel with the ice when you shoot. This helps maintain complete depth of field so the image is sharp edge to edge. You won’t be happy with anything less.


3. To expose for a subject with off-camera flash where the background is discernable, you have to take two light readings or two test exposures: One for the sub ject, and one for the bacckground. The ambient light exposure is done first to determine the f/stop. Then the flash exposure uses that f/stop.
4. The burn and dodge tools are extremely creative tools in creating drama in photographs. By highlight ing certain areas with the dodge tool to make them light against the rest of the picture, and then to darken other areas creates visually compelling results. I usually use the tools at 50% opacity which gives better control. §
25
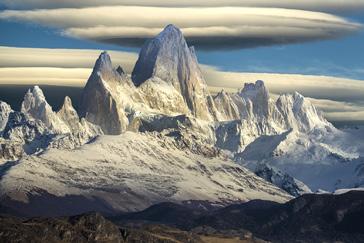
Patagonia Photo Tour April 20 - May 1, 2023


26
ASK JIM
Every month, Jim will answer a question from his online students, from people who participate in his tours and workshops, or from subscribers to this magazine. If you have a question you’d like Jim to answer, please drop him a note at photos@jimzuckerman.com.
Q: Jim . . . Do you ever feel that replacing skies is like cheating a bit? I’m an artist first and foremost... so I’ll certainly swap skies if need be. I have no problem with it. But I’ve been recently starting to feel that the less I do, the better. I definitely see myself starting to do it less, although I still love it. Do you feel it’s unethical or cheating somehow?
Jeremy
Hinskton, Lewes, Delaware
A: I tell the clients who travel with me that you have to make the decision whether you are a photo artist or photo journalist. I am the former. My first involvement in photography way back in 1969 was doing special effects. I did it in the darkroom, I did it in-camera, and now I do it in Photoshop. I’m all about the picture. I don’t care how I get there. If I have to set up a model in a certain location to fulfill a pre-visualized image, I do it. If I have to make it happen in Photoshop, then that’s what I do. There’s no sense in having a really cool image in your mind but you can’t ever create it because manipulation is not part of the equation. It’s akin to asking an impressionist painter, “Why don’t you paint reality?”

27
Being creative means the sky’s the limit
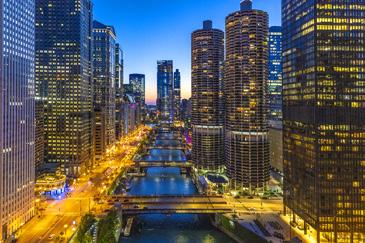

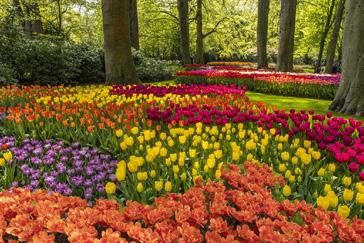
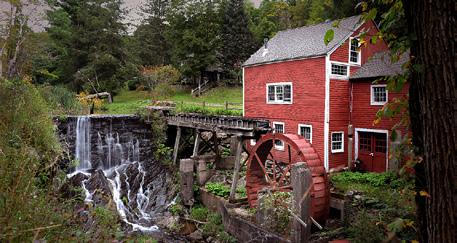
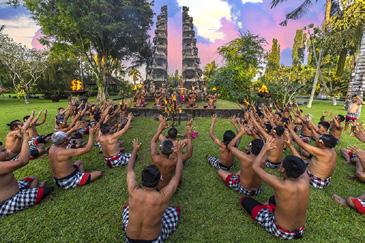
Partial list of Photography Tours 2022 - 2024 For a complete list of all the photo tours/workshops Jim conducts, go to his website: www.jimzuckerman.com. ICELAND in WINTER Dec/Jan 2023 PATAGONIA Apr/May 2023 TEXAS BIRDS/BLUEBONNETS Apr 2023 BEST of SOUTHERN NATURE Apr 2023 WHITE HORSES, FRANCE May 2023 CHICAGO by NIGHT Jun 2023 ENGLAND and WALES Sep 2023 CARNIVAL in VENICE Feb 2023 WINTER WILDLIFE Jan 2023 HOLLAND & BELGIUM Apr/May 2024 HUDSON RIVER VALLEY Oct 2023 INDONESIA Jul/Aug 2024 28
Carnival in Venice
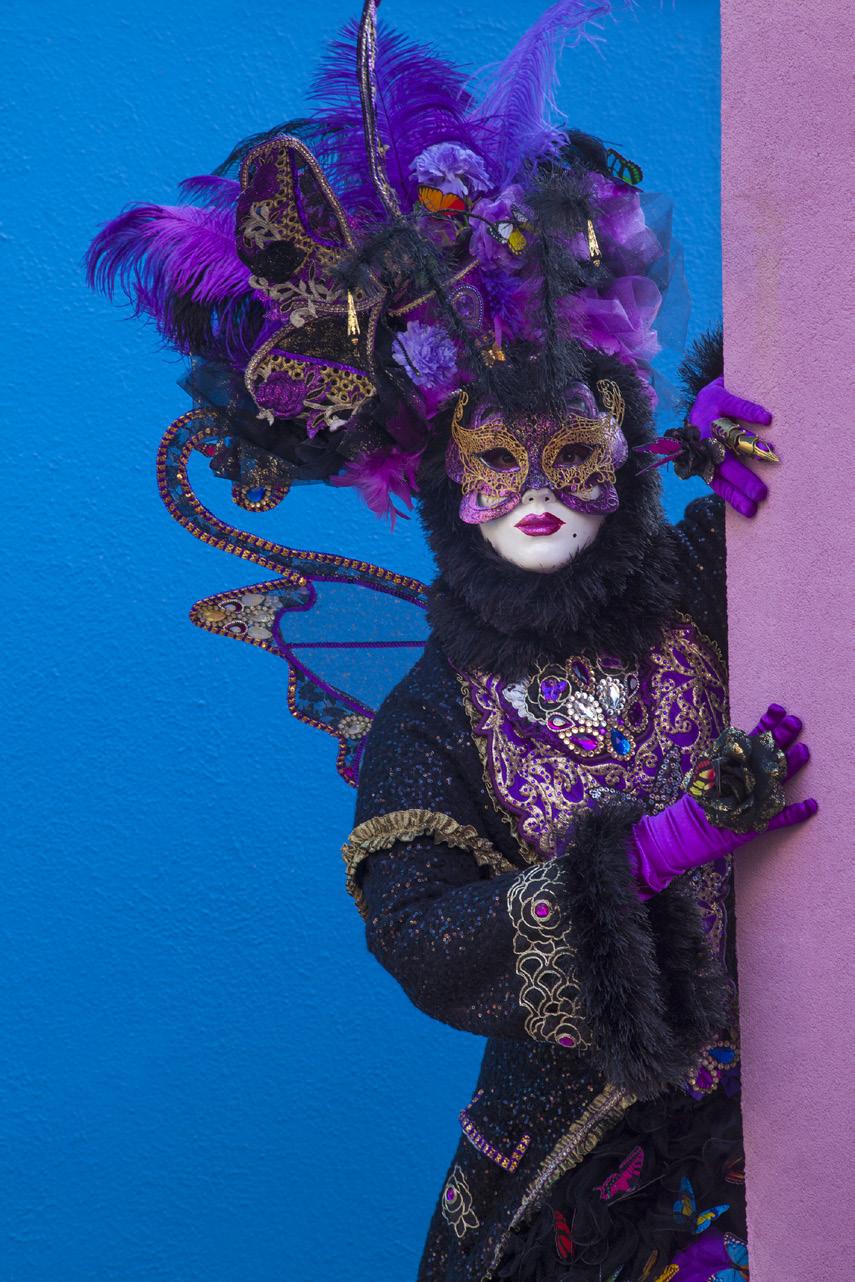
February 12 - 18, 2023
j Stunning costumes in a medieval environment!
29
Student Showcase
Each month, Jim features one student who took beautiful and inspiring images on one or more of his pho tography tours or workshops. It’s really fascinating how photographers see and compose such different im ages even though we may go to the same places. Everyone gets great photographs on Jim’s trips.
30 27 27
30
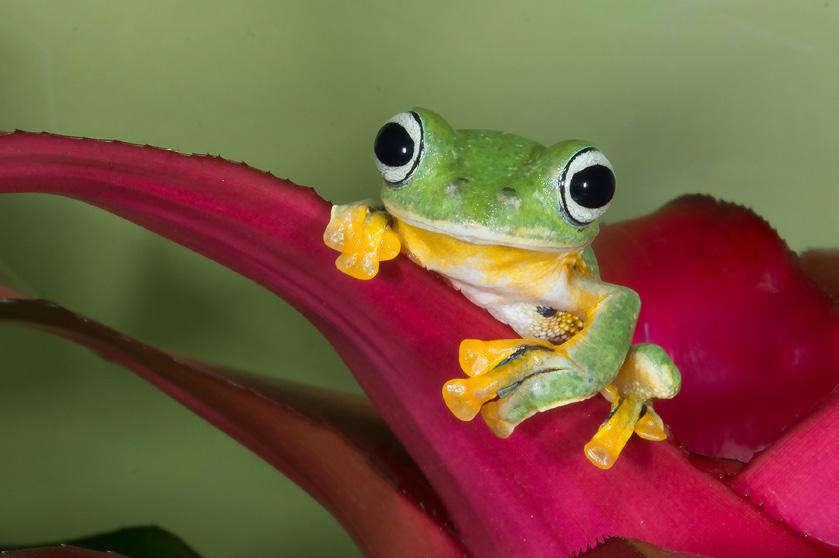
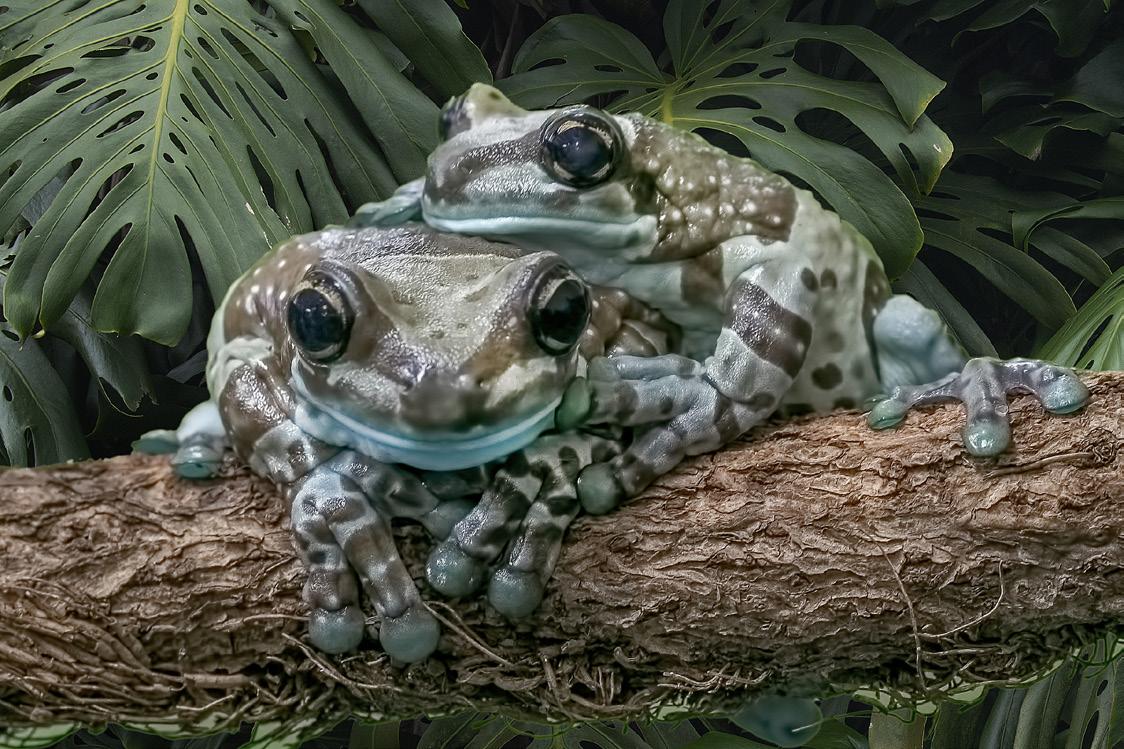
Bill Stark, Narragansett, Rhode Island China photo tour (twice), Indonesia photo tour, Frog and Reptile Workshop.
Student Showcase, continued
31 31 31 29 29
31
Student Showcase, continued

31 29 293129 31 33 35 33 37
32
Student Showcase,
33 33 31 31 33 34
33
continued

&
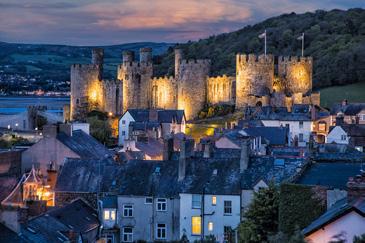
September 12 - 22, 2023 Medieval ruins Quaint villages Awesome architecture 34
ENGLAND
WALES PHOTO TOUR
FROG & REPTILE WORKSHOP
Based in Kansas City, Missouri
Saturday and Sunday, Feb. 25 & 26, 2023
This is a macro photography workshop where you will learn:
-- How to use a ring flash in a macro environment
-- How to focus critically when DOF is extremely shallow
-- How to use off-camera flash for macro subjects
-- How to replace backgrounds with perfection
-- How to obtain perfect exposures with closeup flash
35


Nov. ‘12 Dec. ‘12 Jan. ‘13 Click on the past issues of P H O T O I N S I G H T S you would like to read. Feb. ‘13 Mar. ‘13 Apr. ‘13 May. ‘13 Jun. ‘13 Jul. 13 Aug. ‘13 Sept. ‘13 Feb. ‘14 Mar. ‘14 Apr. ‘14 May ‘14 Jun.‘14 Oct. ‘13 Nov. ‘13 Dec. ‘13 Jan. ‘14 36


Click on the past issues of P H O T O I N S I G H T S you would like to read. Sept. ‘14 Oct. ‘14 Nov. ‘14 Dec. ‘14 May ‘15 Jun ‘15 Jul.‘15 Aug.‘15 Sept.‘15 Oct.‘15 Nov. ‘15 Dec. ‘15 Jan. ‘16 Feb. ‘16 Jan. ‘15 Feb. ‘15 Mar. ‘15 Apr. ‘15


Mar. ‘16 Aug. ‘16 Jan. ‘17 Feb. ‘17 Mar. ‘17 Apr. ‘17 May ‘17 Jun ‘17 Jul. ‘17 Aug. ‘17 Sept. ‘17 Sept. ‘16 Oct. ‘16 Nov. ‘16 Dec. ‘16 Apr. ‘16 May ‘16 Jun ‘16 Jul. ‘16 Click on the past issues of P H O T O I N S I G H T S you would like to read. Oct. ‘17 38


Click on the past issues of P H O T O
N
G
S you would like to read. Nov. ‘17 Dec. ‘17 Jan. ‘18 Feb. ‘18 Mar. ‘18 Apr. ‘18 May ‘18 Jun ‘18 Jul ‘18 Aug ‘18 Sept. ‘18 Oct. ‘18 Nov. ‘18 Dec. ‘18 Jan. ‘19 Feb. ‘19 Mar. ‘19 Apr. ‘19 May ‘19 Jun ‘19
I
S I
H T


Click on the past issues of P H O T O I N S I G H T S you would like to read. Jul. ‘19 Jan. ‘20 Jun. ‘20 July ‘20 Aug. ‘20 Sept. ‘20 Oct. ‘20 Nov. ‘20 Dec. ‘20 Jan.. ‘21 Feb.. ‘21 Mar.. ‘21 Feb. ‘20 Mar. ‘20 Apr. ‘20 May ‘20 Aug. ‘19 Nov. ‘19 Dec. ‘19 Sept/Oct. ‘19 40


41 Apr.. ‘21 May ‘21 Jun.‘21 Jul.‘21 Aug.‘21 Sept. ‘21 Feb. ‘22 Mar. ‘22 Jul. ‘22 Aug. ‘22 Sept. ‘22 Oct. ‘22 Nov. ‘22 Apr. ‘22 May ‘22 Jun. ‘22 Oct. ‘21 Nov. ‘21 Dec. ‘21 Jan. ‘22

42 Dec. ‘22
Subject index for past Photo Insight issues
1/3 focus law Jul. ‘15
3D sphere Mar. ‘16
90 degree finder Mar. ‘13
Abstracts in soap Feb. ‘15
Abstracts, Shooting Mar ‘19
Aerial photography Jun. ‘13
Aerial photography Jan. ‘21
African safari May ‘16
Airplane windows Mar. ‘16
Alien landscapes Jan. ‘13
Anatomy of 8 photographs Jan. ‘16
Angled perspectives Jan. ‘19
Aperture vs. shutter speed May ‘14
Aperture priority Sept. ‘14
Aurora Borealis Apr. ‘17
Auto white balance Dec. ‘13
Autofocus, when it fails Apr. ‘15
Autofocus failure Aug. ‘15
Autofocus failure Jan. ‘17
Autofocus challenges Apr. ‘18
Auto ISO Nov ‘17
Auto White Balance Mar’ ‘21
Autumn Foliage Sep. ‘18
Autumn Color Sep. ‘20
Autumn foliage photography Oct. ‘21
Back button focus Oct. ‘18
Backgrounds, wild Nov. ‘12
Backgrounds, busy Apr. ‘13
Backlighting Apr. ‘16
Backlighting Oct. ‘22
Birds in flight Aug. ‘13
Birds in flight Jan. ‘14
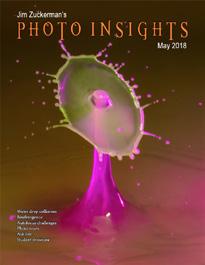
Birefringence May ‘18
Birds in flight Mar. ‘16
Bird Photography Jun ‘19
Blacklight photography Feb. ‘21
Black velvet Mar. ‘14
Black and white conversions Mar. ‘17
Black and white solarization Sep. ‘17
Black and white with color Jan. ‘20
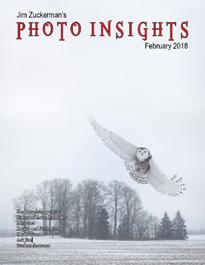
Blown highlights Feb. ‘18
Blue monochromes Jan. ‘22
Black Plexy Aug. ‘22
Blur, field Nov. ‘18
Blur technique Oct. ‘17
Bokeh Jun. ‘15
Botanical gardens, shooting Apr. ‘22
Butterfly photography Jul. ‘14
Camera buying guidelines Dec. 21
Camera setting priorities Jun. ‘17
Canon R5 Mar. ‘21
Capturing lightning Jun. ‘13
Capturing what you don’t see May ‘21
Catchlights Jul. ‘16
Changing perspective May ‘21
Cheap flash stand Apr. ‘13
Children photography Jun. ‘14
Choosing a telephoto lens Dec. ‘20
Chromatic aberration May ‘13
Chrome Dec. ‘18
Cityscapes Aug. ‘14
Cityscapes May ‘16
Clone tool, fixing an issue Sep. ‘17
Clone tool technique Jul. ‘20
Composites and Light Dec. ‘17
Compositing images Apr. ‘19
Compositing, 7 steps Jan. 22
Composition, different approach Jan. ‘15
Content-aware, New Aug. ‘20
Contrast vs. exposure Jul. ‘15
Converting to black and white Mar. ‘22
Correcting keystoning Jun. ‘21
Creating a star field Jan. ‘14
Creating Art out of Motion May ‘22
Creating a Sketch Dec. ‘17
Creative blurs
Jan. ‘14
Dark backgrounds Nov. ‘19
Dawn photography Jan. ‘17
Dawn photography Feb. ‘17
Dead center Jan. ‘13
Dealing with smog Oct. ‘16
Decay photography Sep. ‘15
Define Pattern Sep. ‘18
Depth of field Aug. ‘16
Depth of field confusion Jan. ‘20
Depth of field and distance Dec. ‘18
Depth of field and obliqueness May ‘21
Depth of field, shallow Apr. ‘20
Depth of field vs. sharpness Nov. ‘20
Double takes Apr. ‘20
Drop shadows Apr. ‘19
Dust, Minimizing Aug. ‘19
eBook, how to make Jan. ‘13
Eliminating people from photos Jun. ‘22
Embedded in Ice Oct. 17
Energy saving bulbs Sep. ‘14
Exposing for the sun Sep. ‘16
Exposure, the sun Jul. ‘13
Exposure technique Sep. ‘13
Exposure, snow Jan. ‘14
Exposure triangle Nov. ‘14
Exposure, to the right Apr. ‘15
Exposure compensation Sep. ‘16
Exposure compensation Mar. ‘21
Extension tubes Dec. ‘13
Face sculpting
Apr. ‘21
Face sculpting Feb. ‘22
Festival photography Sep. ‘20
Fill flash Sep. ‘13
Filter forge Feb. ‘13
Fireworks Jul. ‘13
Fireworks, Compositing Jun ‘20
Fisheye lenses May ‘13
Fisheye lenses Feb. ‘15
Fisheye fantasies Oct. 21
Flash backlighting May ‘15
Flash, balancing exposure Oct. ‘15
Flash, balancing off-camera Dec. ‘18
Flat art Sep. ‘16
Flexify 2 Mar. ‘20
Flood fixes problems Nov. ‘19
Floral Portraits, Indoors Aug. ‘21
Flowers May ‘15
43
Subject index for past Photo Insight issues
Flower photography Apr ‘21
Flowers in harsh light Jul. ‘16
Focus on the eyes Dec. ‘20
Focus points Mar. ‘15
Focus points Sep. ‘20
Focus stacking Mar. ‘17
Focus stacking Aug. ‘19
Focusing in the dark Oct. ‘16
Foreign Dancers, Photographing Nov’ 17
Foreign models Jun. ‘13
Fractals, generating Sep. ‘13
Fractals Jul. ‘19
Framing May ‘17
Freezing ultra action May ‘17
From Terrible to Beautiful Aug. ‘19
Fun with paint Oct. ‘16
Fundamental ingredients Apr. ‘13
Fundamentals That Make Great Photos Jan. ‘19
Fun With Christmas Lights Jan. ‘21
Fun with Food
Graphic Design Jul. ‘20
Garish imagery Dec. ‘15
Getting money for used gear Jan. 22
Great subjects Apr. ‘15
Great ceilings & HDR Panos Jul. ‘19
Green screen Mar. ‘13
Ground level shooting Oct. ‘22
Grunge technique Feb. ‘13
HDR, one photo Apr. ‘13
HDR at twilight May ‘13
HDR, realistic Jun. ‘15
HDR, hand held Dec. ‘16
HDR, hand held Nov ‘17
HDR, hand held Jul. ‘18
HDR panoramas Jun. ‘16
HDR, choosing the number of frames Jun. ‘22
High wind Apr. ‘17
Highlights Apr. ‘14
Highlights, overexposed Feb. ‘15
Histograms, Why I Don’t Use Jun ‘19
Histogram problems Apr. ‘20
Hotels with a view Mar. ‘20
Humidity Oct. ‘13
Hummingbird photography Apr. ‘13
Hyperfocal distance Jul. ‘13
Image resizing Aug. ‘18
Implying motion Sept.‘14
Impossible DOF Feb. ‘16
Impossible DOF Jan. ‘17
Indestructible camera bag Dec. ‘14
Infrared photography Jul. ‘14
Insane ISO settings Dec. ‘22
Interiors Oct. ‘15
iPad: Loading photos Aug.‘17
iPhone photography, pros and cons Apr. ‘22
Jungle photography Dec. ‘14
Kaleidoscopic images Jan. ‘15
Kaleidoscopis images Aug. ‘20
Keystoning, correcting Aug. ‘15
L Bracket Feb. ‘18
L Bracket Feb. ‘21
Landscape photography Dec. ‘12
Landscape photography Apr. ‘14
Landscape photography Nov. ‘16
Layer Masks, The Power of Feb. ‘22
Light fall-off Feb. ‘14
Light painting Dec. ‘21
Lighting a face Oct. ‘13
Lightning photography May ‘20
Liquify Feb. ‘18
Liquify Distortions
Sept/Oct. ‘19
Long lens portraits Oct. ‘18
Long Lenses for Flowers Jul. ‘20
Low light photography May ‘15
Luminar 4 Jan. ‘20
Macro flash Nov. ‘12
Macro flash Sep. ‘14
Macro flash Aug. ‘15
Macro flash Aug. ‘22
Macro photography and DOF Feb. ‘22
Macro trick May ‘19
Managing soft focus Jul. ‘21
Mannequin heads Apr. ‘16
Metering modes Nov. ‘16
Meters, How They Work Jul. ‘18
Meters, when they fail Dec. ‘16
Metering situations, Impossible Jul. ‘19
Middle gray Nov. ‘15
Minimizing dust on the sensor Nov. ‘21
Mirrors Jan. ‘19
Model shoot Jan. ‘17
Moon glow Oct. ‘16
Mosaics Jun. ‘17
Mundane to Ideal Nov. ‘19
Museum photography Mar. ‘13
Natural Light Portraits Aug. ‘21
Negative space Jan. ‘16
Neon edges on black Aug. ‘14
Neutral Density filters Jun. ‘18
Neutral Density filters and water Mar. ‘22
Night photography Feb. ‘14
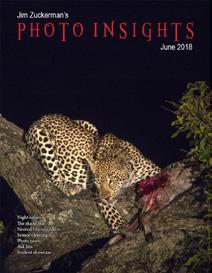
Night Safaris Jun. ‘18
Night to Twilight Dec. ‘17
Noise reduction Feb. ‘17
Oil and water
May ‘20
Optical infinity Jun. ‘16
Organization of photos Mar. ‘18
Out of focus foregrounds Jan. ‘20
Paint abstracts
May ‘13
Paint abstracts Aug. ‘21
Painting with light Sep. ‘15
Panning motion Dec. ‘16
Pano-Mirrors with a twist Jan. ‘18
Parades Sep. ‘13
Parallelism Nov. ‘19
Parallelism and DOF Feb. ‘21
Perspective, Super Exaggeration of Dec. 21
Photo terms Nov. ‘22
Photography to Art Dec. ‘17
44
Subject index for past Photo Insight issues
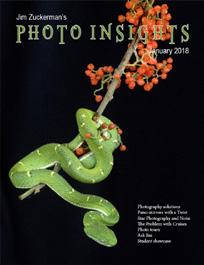
Photography solutions Jan. ‘18
Photoshop, content Aware Nov. ‘12
Photoshop, sketch technique Apr. ‘13
Photoshop, replace background Apr. ‘13
Photoshop, actions palette Dec. ‘13
Photoshop, layer masks Feb. ‘13
Photoshop, the clone tool May ‘13
Photoshop, soft foliage Oct. ‘13
Photoshop, mixer brush tool Sept. ‘14
Photoshop, b & w with color Jun. ‘14
Photoshop, drop shadows Jul. ‘14
Photoshop, creating texture Feb. ‘14
Photoshop, face mirrors Feb. ‘14
Photoshop, liquify Mar. ‘14
Photoshop, face mirrors Aug. ‘14
Photoshop, digital spotlight Sep. ‘14
Photoshop, enlarge eyes Nov. ‘14
Photoshop, darken the periphery Dec. ‘14
Photoshop, mirror images Dec. ‘14
Photoshop, beam of light Apr. ‘15
Photoshop, polar coordinates Mar. ‘15
Photoshop, chrome May ‘15
Photoshop, actions palette Nov. ‘15
Photoshop, cut and paste Nov. ‘15
Photoshop, geometrics Oct. ‘15
Photoshop, plugins Oct. ‘15
Photoshop, multiple selections Apr. ‘16
Photoshop, sharpening Apr. ‘16
Photoshop, Flood plugin Apr. ‘16
Photoshop, Desaturation Aug. ‘16
Photoshop, making a composite Aug. ‘16
Photoshop new tool May ‘20
Photoshop, place one element behind Aug. ‘18
Photoshop, the pen tool Feb. ‘16
Photoshop, canvas size Jan. ‘16
Photoshop, using the earth Jun. ‘16
Photoshop, define patterns May ‘16
Photoshop, paste into Nov. ‘16
Photoshop, b & w with color Feb. ‘17
Photoshop, open a closed door Apr. ‘17
Photoshop, palettes May ‘17
Photoshop, My favorite plugins Jan. ‘20
Portrait options Jan. ‘19
Portrait techniques Nov. ‘15
Portraits Mar. ‘13
Portraits, mixed lighting Aug. ‘14
Portrait Professional Nov. ‘19
Portraits, Lens choice Sept/Oct. ‘19
Portraits, side lighting Sep. ‘17
Portraits, window light Mar. ‘15
Portraits, outdoors May ‘17
Post-processing checklist Dec. ‘13
Post-processing: Contrast Aug. ’17
Practicing graphic design, Part I Dec. ‘22
Predictive Focus Sep. ‘18
Problem/solution Apr. ‘17
Problem Solving in Photoshop May ‘22
Problem with cruises Jan. ‘18
Protecting extremeities from the cold Dec. ‘22
Protecting highlights Dec. ‘12
Puppies Jan. ‘15
Puppy photography Feb. ’18
Reflections Feb. ‘13
Reshaping faces Oct. ‘22
Restoring old photos Jun ‘20
Ring flash, advantages Jul. ‘21
Ring flash versatility Oct. ‘21
Rule of Odds May ‘22
Safari May ‘13
Safari strategies Jul. ‘15
Seeing as the lens does Nov. ‘14
Seeking Cool Snow Photos Jan. ‘21
Selective filtering Mar. ‘18
Selective focus Jun. ‘15
Self-critiques Jul. ‘13
Self-critiques Oct. ‘13
Self-critiques Nov. ‘20
Sensor cleaning Jun. ‘18
Sepia and dark contrast Jun. ‘15
Shade May ‘14
Shady side Jun. ‘18
Shadows, Paying Attention to Mar. ‘18
Sharpness problems Mar. ‘14
Shooting in Inclement Weather Nov. ‘22
Shooting through wire mesh Sept. ‘14
Shooting into the light Jun ‘20
Silhouettes Jun. ‘13
Silhouettes, How to make Apr. ‘22
Silhouettes, Exposing for Sept/Oct. ‘19
Silvered landscapes Mar. ‘20
Sketch, How to Make Jun ‘19
Skies make or break a picture Aug. ‘21
Sky replacement Nov. ‘20
Sky replacement strategies Aug. ‘22
Snow exposure Nov ‘17
Snow exposure Nov. ‘19
Soft light Jan. ‘13
Smart phone photography May ‘19
Stained glass Mar. ‘17
Star photography Jul. ‘16
Star photography and noise Jan. ‘18
Stock photography Sep. ‘14
Sunrise & sunset Jan. ‘19
Tamron 150-600mm
Apr. ‘14
Ten reasons photos are not sharp Jan. ‘19
Texture, Adding Mar ‘19
Texture Mapping in 3D Jul. ‘21
Topaz AI Gigapixel Mar ‘19
Topaz glow Jan. ‘15
Topaz glow Sep. ‘17
Topaz Impression Sep. ‘15
Topaz Remask 5 Oct. ‘17
Topaz Simplify 4 Dec. ‘12
Topaz simplify 4 Jun. ‘14
Topaz Studio Apr. ‘18
Translucency & backlighting Nov. ‘18
Travel photography Feb. ‘13
Travel portraits Mar. ‘14
Travel tips Apr. ‘14
Travel photographer’s guide Jun. ‘17
45
Subject index for past Photo Insight issues
Twilight photography in the rain Apr. ‘19
Tripods Mar. ‘18
Two subject sharp rule May ‘14
Two subject focus rule Jan. ‘20
Two subject focus rule Jun. ‘21
Urban heights Jun. ‘21
Ultra distortion May ‘18
Unusual Panos Nov. ‘22w
Upside Down Reflections Aug. ‘21
Warm fingers in winter Nov. ‘15
Water drop collisions May ‘18
What NOT to do in photography Apr. ‘18
When You Needed a Zoom Aug. ‘21
White on White Dec. ‘20
White vignette Aug. ‘15
White balance Feb. ‘15
White balance, custom Mar. ‘16
Wide angle conundrum May ‘19
Wide angle lenses Mar. ‘13
Wide angle portraits Nov. ‘14
Wide angle lenses Jun. ‘17
Wide angle lenses: Outside the Box Jun. ‘22w
Wide angle keystoning Nov ‘17
Wildlife photos with wide angles Mar. ‘15
Window light Dec. ‘15
Window light portraits Aug. ‘18
Window frames Feb. ‘16
Winter photography Dec. ‘12
Winter bones May ‘13
Winter photography Dec. ‘15
Winter photography Nov. ‘18
Wire Mesh, Shooting Through Jul. ‘18
Workflow May ‘13
46

47
PHOTO INSIGHTS® published by Jim Zuckerman All rights reserved © Jim Zuckerman 2022 email: photos@jimzuckerman.com Edited by: Donald Moore Kubu bucks, South Africa
