5 minute read
Step 6: Box with mitered corners and pegged top

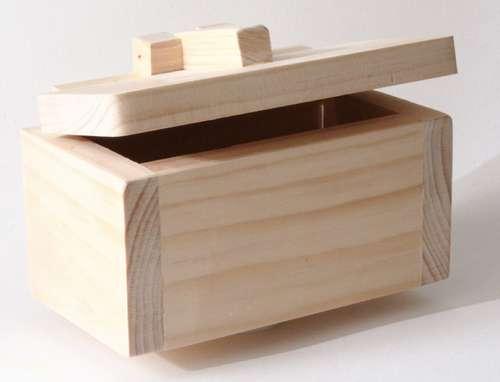
Image Notes
1. After the clamps are tight, remove the screw and 3 inch block. We don't want it glued in place either.
Advertisement
Image Notes
1. After the blocks have dried for a while, screw the 3 inch block back in place and throw some glue on there. Keep the glue away from the back edge. We don't want any to squeeze out on the 7 1/2 inch board or joint.
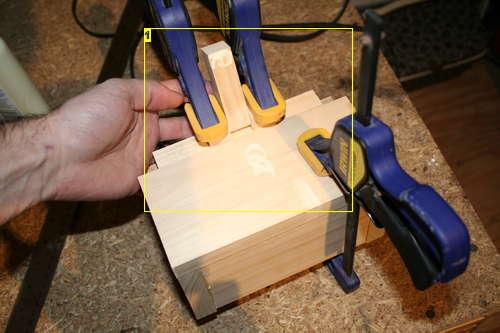
Image Notes
1. Clamp it down. Be careful nothing slides around.
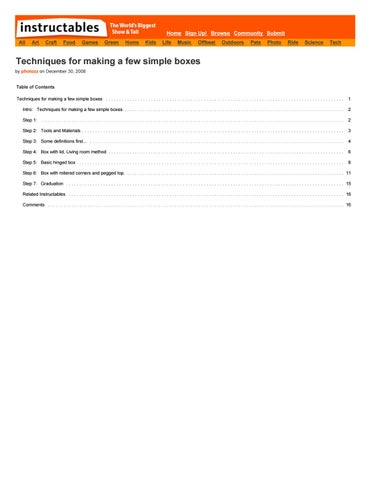
Step 6: Box with mitered corners and pegged top.
Hidley-HO! Thanks for sticking around until the end!
In this section, I will show you the basic construction for a box with miterd corners and a pegged top.
In my opinion, the ability to make mitered corners is one of the core talents that distinguish your wet behind the ears newbie scrub from the polished professional. Professional "what" I won't say, as the rest of the brotherhood would drag me from the house, chain me to a pole and pants me on the interstate.
You can make clean mitres with a miter box, hence the name "Miter box", but in this case I'll be using my miter saw. Mostly out of a sense of laziness and the desire to prove that I don't do everything on my living room floor.
Tools and materials:
ruler or measuring tape Miter box and saw or miter saw Glue Strap clamp or rope wood - one 4 foot 1x2 thin board, 2 squares, 5 inch by 5 inch squares. Dowel, about 1/8th to 1/4 wide. Drill and a bit the same size as your dowel rod. Sand paper
We are going to make a thin, square box this time. The outside dimensions are going to me 5 inches, by 5 inches by 1 1/2 inches.
Construction:
1. Start by cutting your 1/2 into 4 - 5 inch (on the long edge) pieces, all mitered at 45 degrees. Check the pictures for details. If you have gaps, its better to have the gaps on the inside corners instead of the outside. The inside gaps squeeze shut under clamping a lot easier than outside gaps.
2. Lay the pieces out into a square, frame like structure.
6. Un-clamp everything. Check for any squeezed out glue and smooth down the edges
7. Glue up and clamp on one of the 5x5 squares as you see in the pictures.
8, Let dry for a few hours and un-clamp.
9. If your using a hand drill, Place and clamp (no glue) the other square piece on the top, making sure the edges are as straight as possible. If your lucky enough to have a drill press, you can get away with holding the pieces, just go slow.
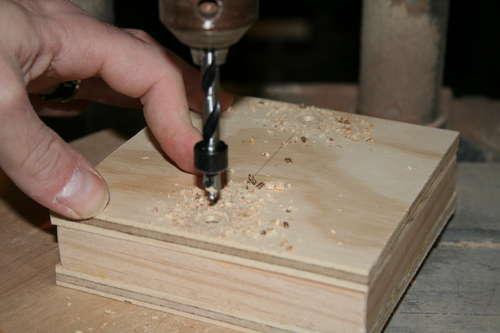
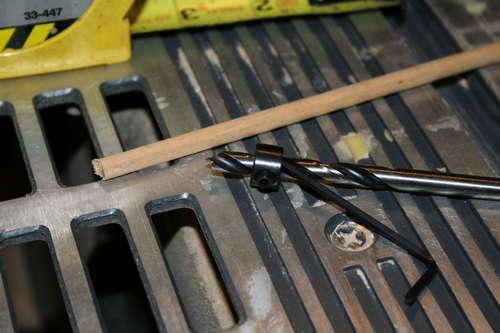
10. Grab your drill and bit. Measure about a half inch up the bit from the tip and make a mark or put a piece of tape around the bit to mark the depth for drilling. **I'm using a special wood bit that has a collar just for this sort of thing. You use the small wrench to loosen the collar and move it to the desired depth. Make sure you tighten the nut back on the bit properly.
11. Measure about halfway along one side (should be 2 1/2 inches), and about a half inch in. Drill two holes through the top piece, as straight as possible.
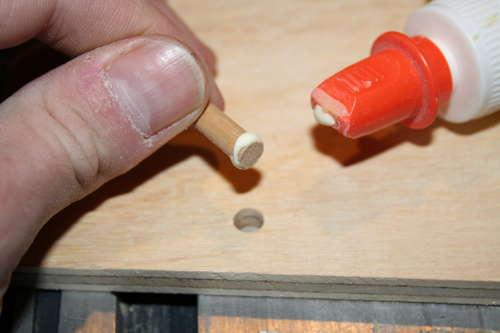
12. Take the dowel and place it in the hole as deep as it will go. It should be a snug, but not tight fit. If its too tight, sand the dowel lightly until it fits.
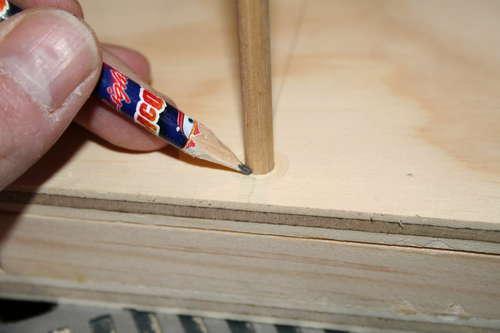
13. Mark the dowel with a pencil where it is flush with the top.
14. Remove the dowel and cut it just a hair longer than your mark. Do the other hole the same way.
15. un-clamp and remove the top piece. Turn it over and spread a little glue on the dowel.
16 Insert the dowels into the top piece, spinning them a little as they go in to spread the glue.
17. Let the dowels dry for an hour or so and check the fit in the box. Sand the dowels as needed to fit.
18. After its all dry, assemble the box and sand all the edges and the dowels (on the outside) flush.
What I learned:
Basic mitered corner construction Peg construction
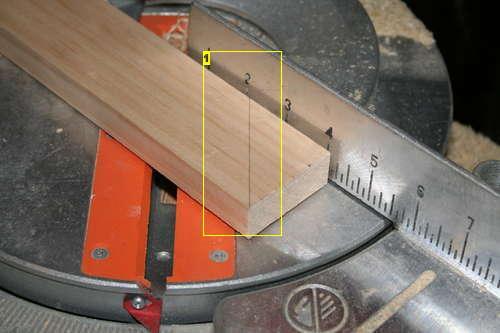
Image Notes
1. Always draw out you 45 degree lines before cutting. I almost always toss at least one board because I cut the 45 the wrong way.
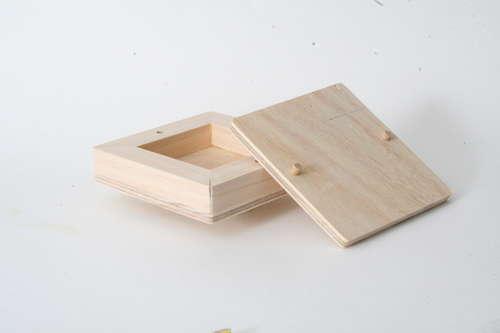
Image Notes
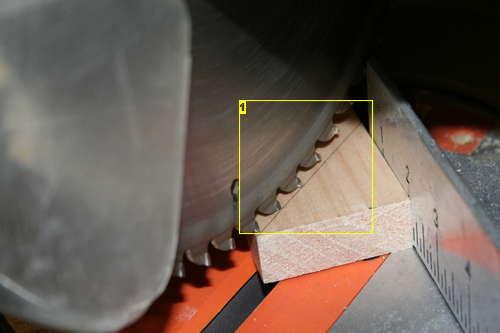
1. When you line up the saw, pay attention to where teeth hit the wood, and what side of the line you are cutting on.
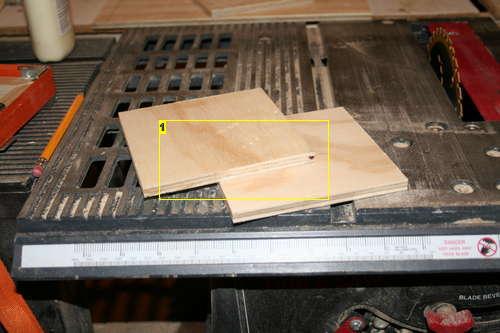
Image Notes
1. 5x5x1/4 inch.
Image Notes
1. Assemble them on the flatest surface you have. The top of my table saw is about the best I can do. 2. I'm using a strap clamp. Of all the corner clamps I have, this one works the best, You can do the same thing with a thick piece of rope and a stick. Tie the rope around and twist it like a tourniquet. 3. Man.. I look like a gorilla here.
Image Notes
1. After all the boards are cut, do a test fit. The corners should be pretty close.
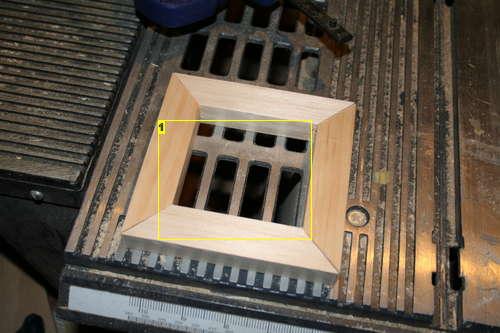
Minor gaps will close up when you clamp it for gluing.
Image Notes

1. Apply glue to both sides of the pieces.
Image Notes
1. Leave the piece clamped up to dry for at least a few hours.
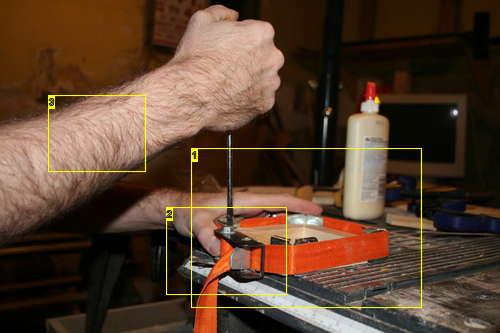
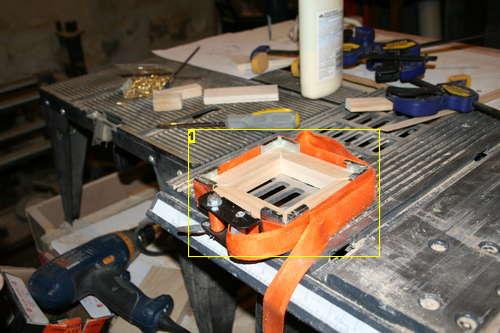
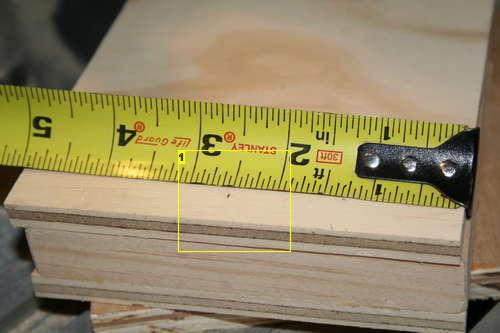
Image Notes
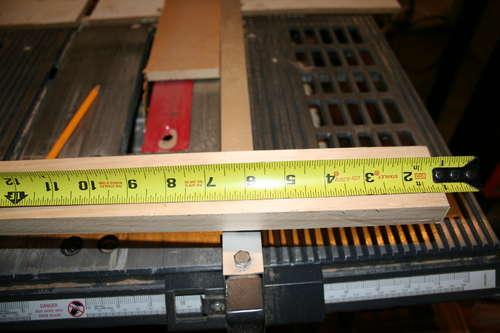
1. Half inch in. I'm using the speed square so I can mark both sides at once.
Image Notes
1. 5 inch box, half way should be about 2 1/2 inches