6 minute read
Step 5: Basic hinged box

Step 5: Basic hinged box
This is a method for making a small box with integrated wood hinges. It's not as scary as it sounds. Actually, I'm terrified, but don't tell anyone. You could do this one in the living room as well, but wait till the wife is not home. The drill tends to scare the cat, and terrified cats running about the house are not the formula for marital bliss. Especially if you have 5 of the little @$%ers like we do.
Advertisement
This will not require any extensive equipment and can be done fairly quickly. The corner joints will be simple lap joints . This time, were going to throw in a small twist. Or rotation, if you want to be technical.
Tools and material:
ruler or measuring tape Miter box and saw or table saw Wood Glue (For this project, I recommend "gorilla glue" for the hinge parts.) Clamps (small) wood - one 4 foot 1x4 (or the remnants of the wood from the previous project) One nail. about 2 inches long. Drill, with two bits. One bit just a tiny bit larger than the screw and one just a little smaller. . Sand paper One spare piece of scrap lumber.
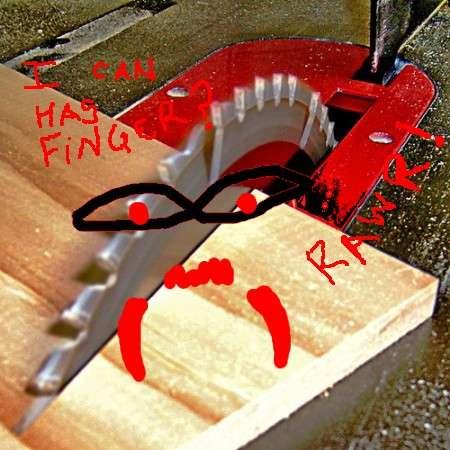
This is where we delve into the risky world of power tools. A few of the steps below will require the use of a drill on small-ish pieces of wood. You should hold the pieces against the scrap of wood and the scrap of wood should be on a floor or table. when drilling, never brace the pieces on your body for several reasons, the least of which is so you do not put the drill through your hand or leg. (in my case.. "again")
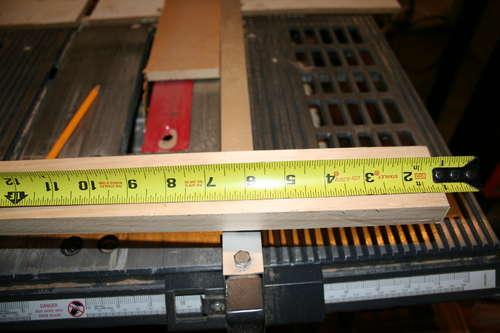
Take the board an cut it into the following pieces:
Box 3 - 6 inch pieces. 2 - 4 1/4 inch pieces 1 - 7 1/2 inch piece.
(now the tricky ones..)
Hinge 2 - 3/4 inch by 3/4 inch blocks 1 - 3 inch x 3/4 inch block. Round one end with a sander or sandpaper.
The construction on this one is a little more jigsaw-puzzle than the last one, but nothing good comes easy. Check the pictures as we go.
Basic box structure :
1. Start with two of the 6 inch pieces. Glue them together in an "L" shape, Making sure you line the edges up carefully. (Check the pictures)
2. Clamp and let fry for at least an hour.
3. Un-clamp the box and glue up the two end pieces on as you see in the pictures.
4. Clamp the ends in place, using the same two clamp technique as in the previous box build. Let dry for at least an hour.
4. Un-clamp the piece and Glue on the last 6 inch piece, making sure to glue all the edges that touch.
5. Give the whole thing a hug with your clamps again, making sure nothing moves. Let dry over night.
Hinge and top construction:
Check the pictures to make sure you understand before you start drilling willy-nilly. I would recommend using Gorilla glue on the hinge pieces if its available. Its just stronger.
1. Take one of the 3/4 inch square blocks and the 3 inch x 3/4 inch block (rounded end) and drill through the center with the larger of the two drill bits.
2. Take the last 3/4 inch square block and drill through the center with the smaller bit. Now, you should be able pass the screw through one square block, the 3 inch block and then tighten it into the last block (with the smaller hole). Its important to pre-drill these holes in this manner. The wood will split if you don't. I guarantee it.
3. Test fit the screw by passing it through the large-hole 3/4 block, the 3 inch block and into the small-hole 3/4 block. don't over tighten anything. All pieces should still spin freely. As long as everything looks good, move on. If anything binds up, drill the holes out with a slightly larger bit.
leave the pieces assembled.
4. Place the 7 1/2 inch piece on top of the finished box so you have a level surface for the hinge assembly.
5. Find and mark the mid-point of the back vertical piece. It should be at 3 inches.
6. Glue the two square blocks in place. Glue ONLY the bottoms of the blocks. You should do your best to keep the glue off the 3 inch block and the 7 1/2 inch top.
7. Place some small clamps in place and tighten. When everything is settled, gently remove the screw, 3 inch block and top piece. This is to keep any squeezed out glue from sticking parts together that don't belong stuck together. I only wish someone had performed the same procedure (metaphorically) with Angelina Jolie and Brad Pitt.
8. After the glue has set up for a while and there are no more wet spots showing, resemble the 3 inch block and top, leaving the clamps in place.
9. Make sure the top is square on the box, and glue the 3 inch block down. Make sure you keep the glue away from the back edge. We don't want it all squeezing out and sealing the top to the back.
10. Let this all dry overnight.
Un-clamp everything and admire. The hinge should work fairly smoothly. Its not uncommon to have a little slop in the fit. It would be better to use two hinges, but .. well.. baby steps people.. baby steps..
What I learned:
Tetris is a fun game Construction of a basic hinge 5 cats is too much for one house.
Image Notes
1. Glue these as such
Image Notes
1. 3/4 inch by 6 inches 2. 3/4 inch by 4 1/4 inch. 3. 3/4 inch by 7 1/2 inch. 4. 3/4 inch bu 3/4 inch
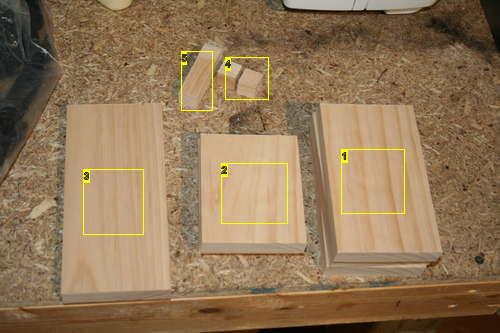
5. 3 inch by 3/4 inch.
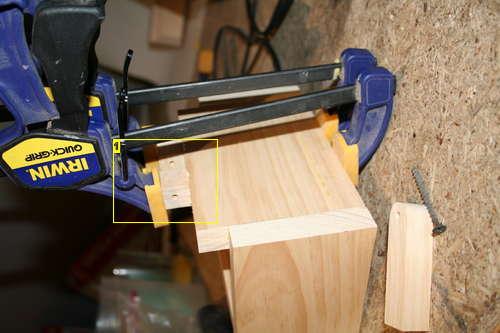
Image Notes
1. Double clamp method. Nice cheat if your clamps are too short to reach. 2. Last 6 inch piece in place just to make sure things line up.
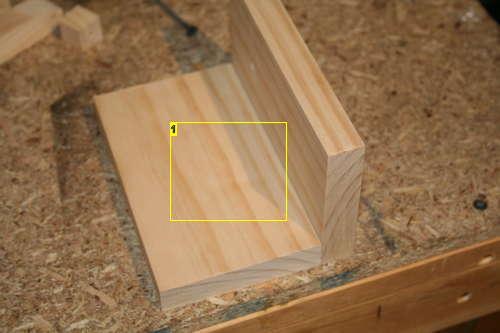

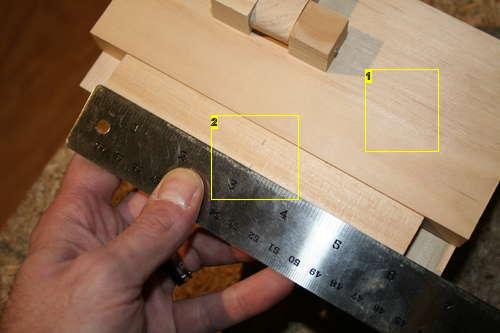
Image Notes
1. Put the 7 1/2 piece on the top 2. Find the mid-point of the back. It should be 3 inches.
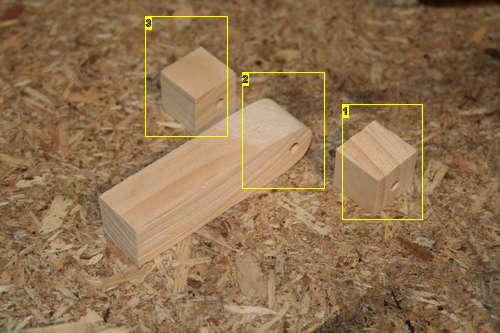
Image Notes
1. Larger bit, down the center. 2. Large bit, down the center 3. smaller bit, down the center
Image Notes
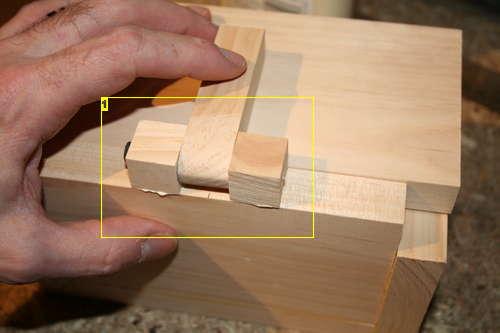
1. Assembled hinge set in place with the two square blocks glued.
Image Notes
1. Rounded the three inch piece on the drilled end. The rounding is important as
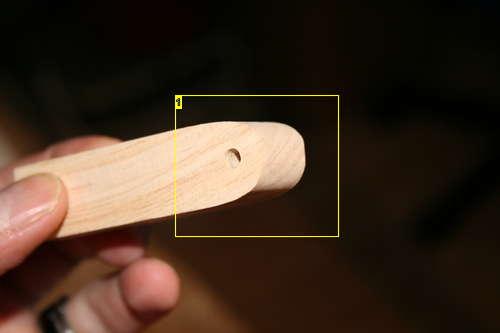
the hinge won't work right if the ends are still squared.
Image Notes
1. Screw is loose in these two pieces
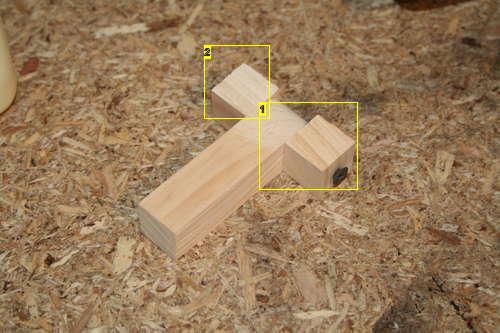
2. Screw is snug here, but still loose enough that all parts can turn freely.
Image Notes
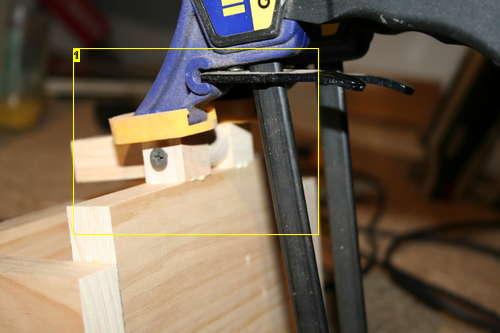
1. Clamp the assembly making sure.. very sure.. that nothing moved. Slide out the 7 1/2 inch board to make sure it does not get glued in place by accident.