CONSIDER


CONSIDER
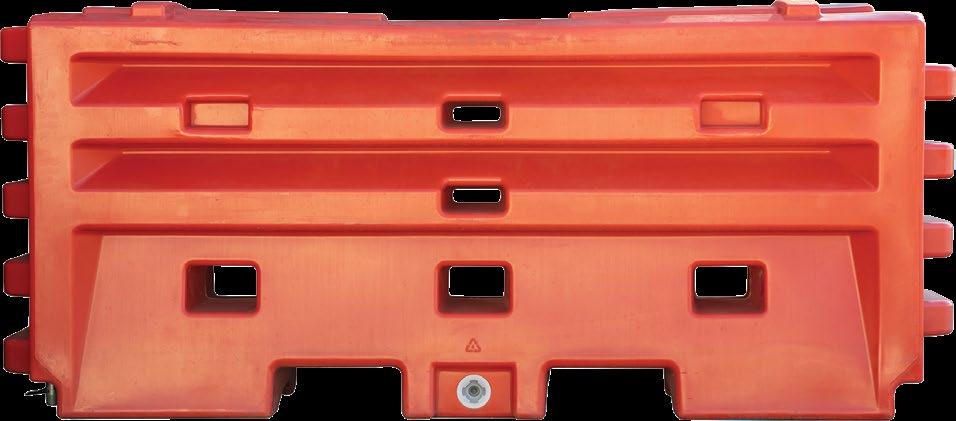
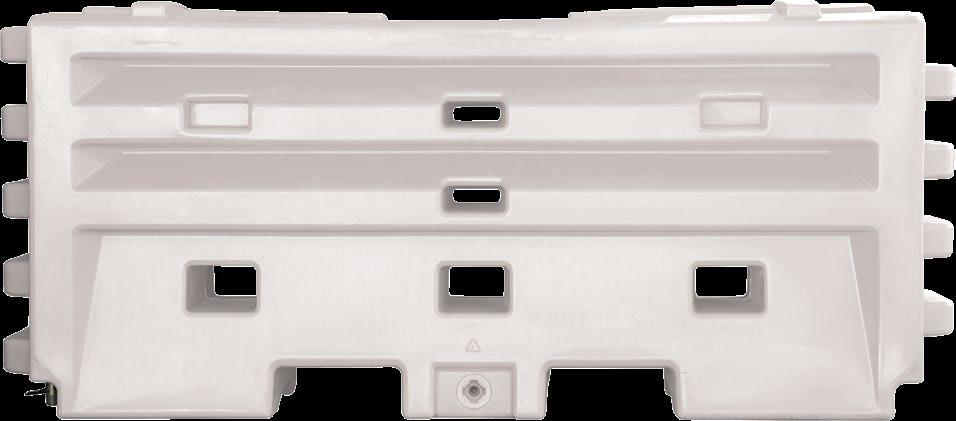
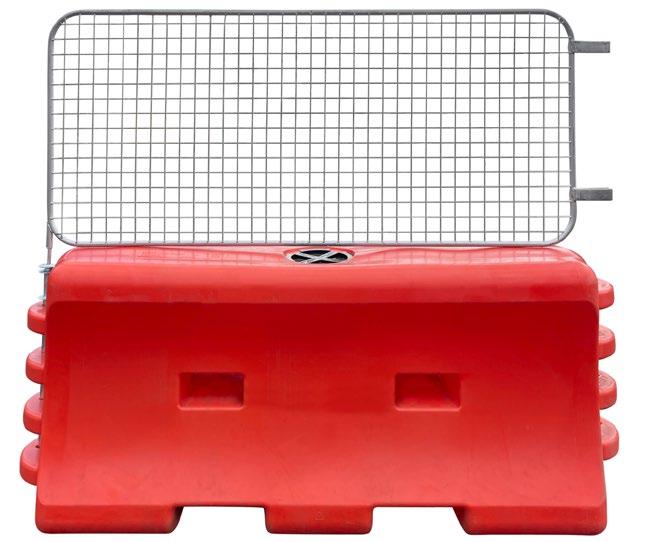
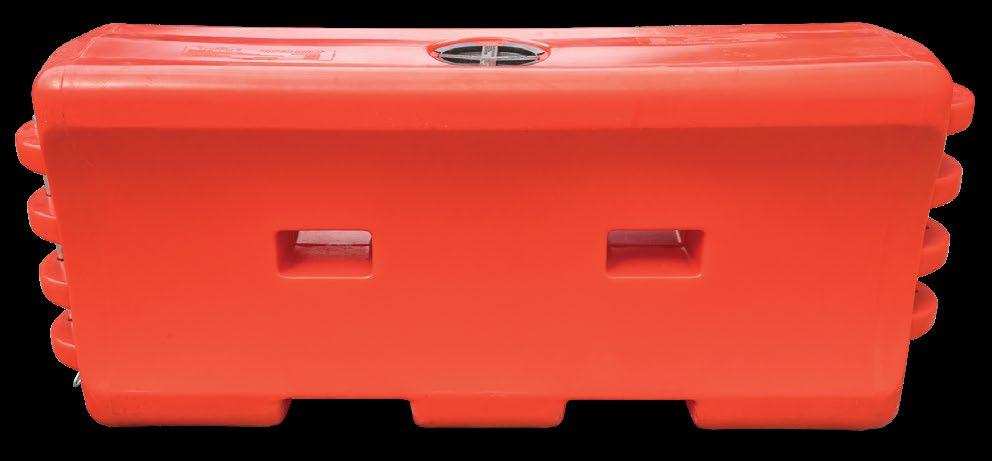
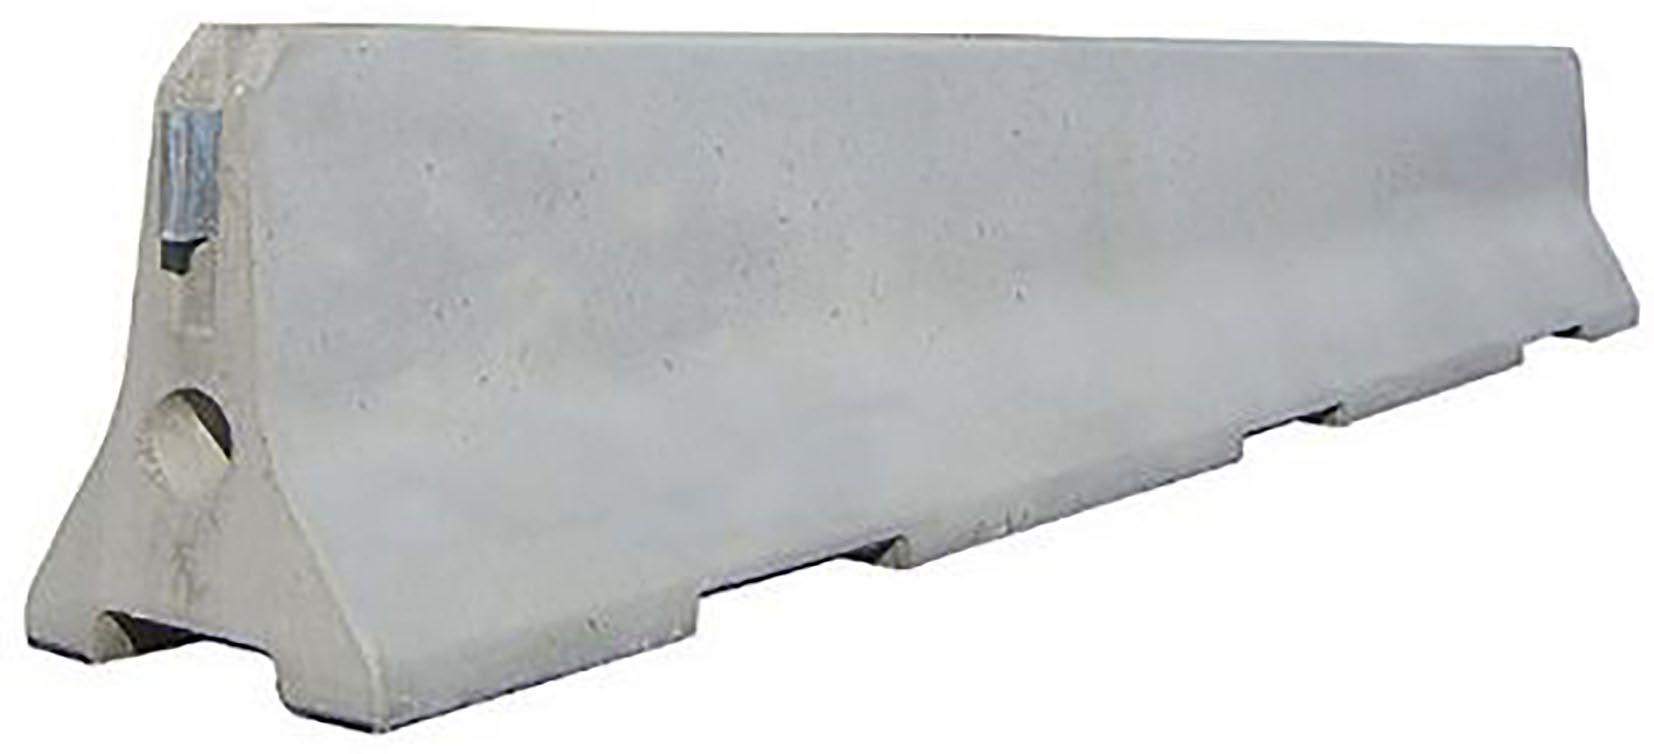
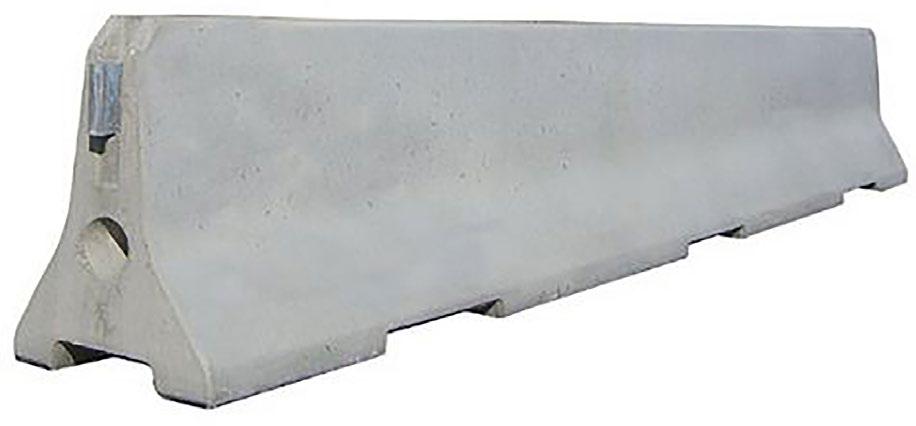
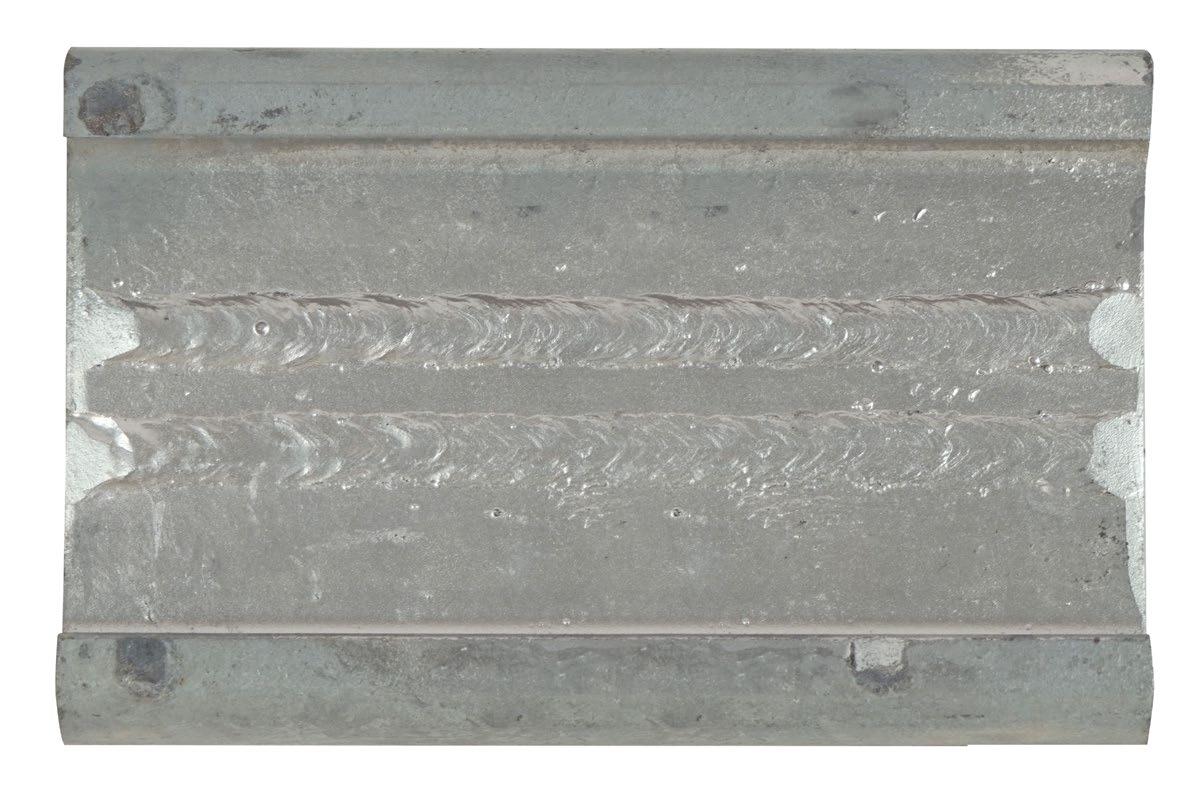
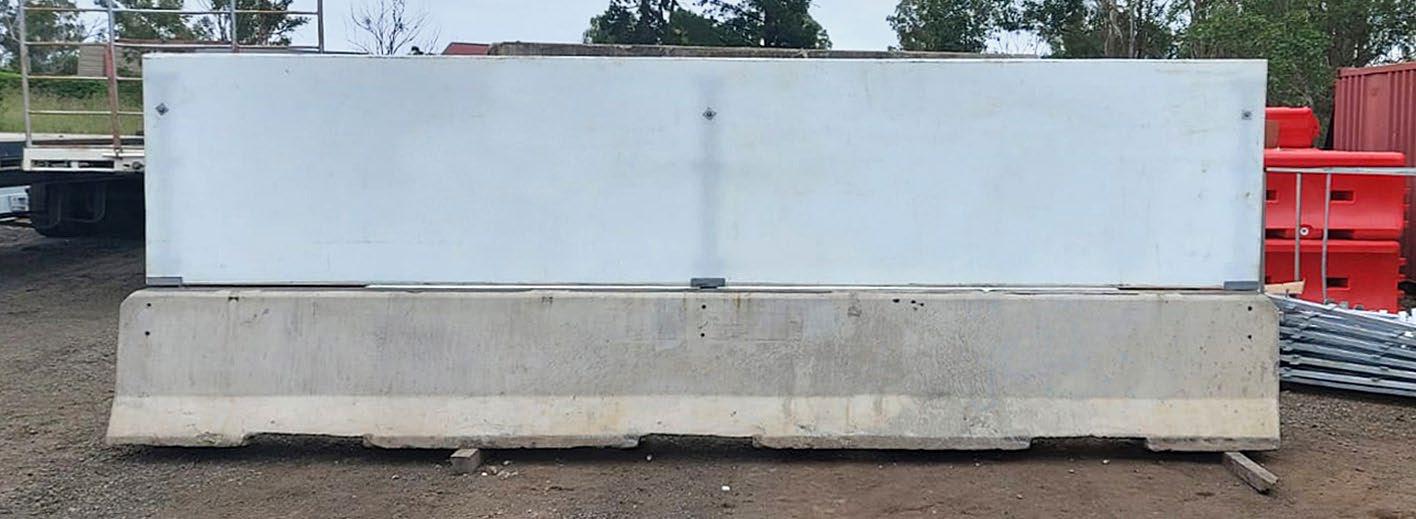
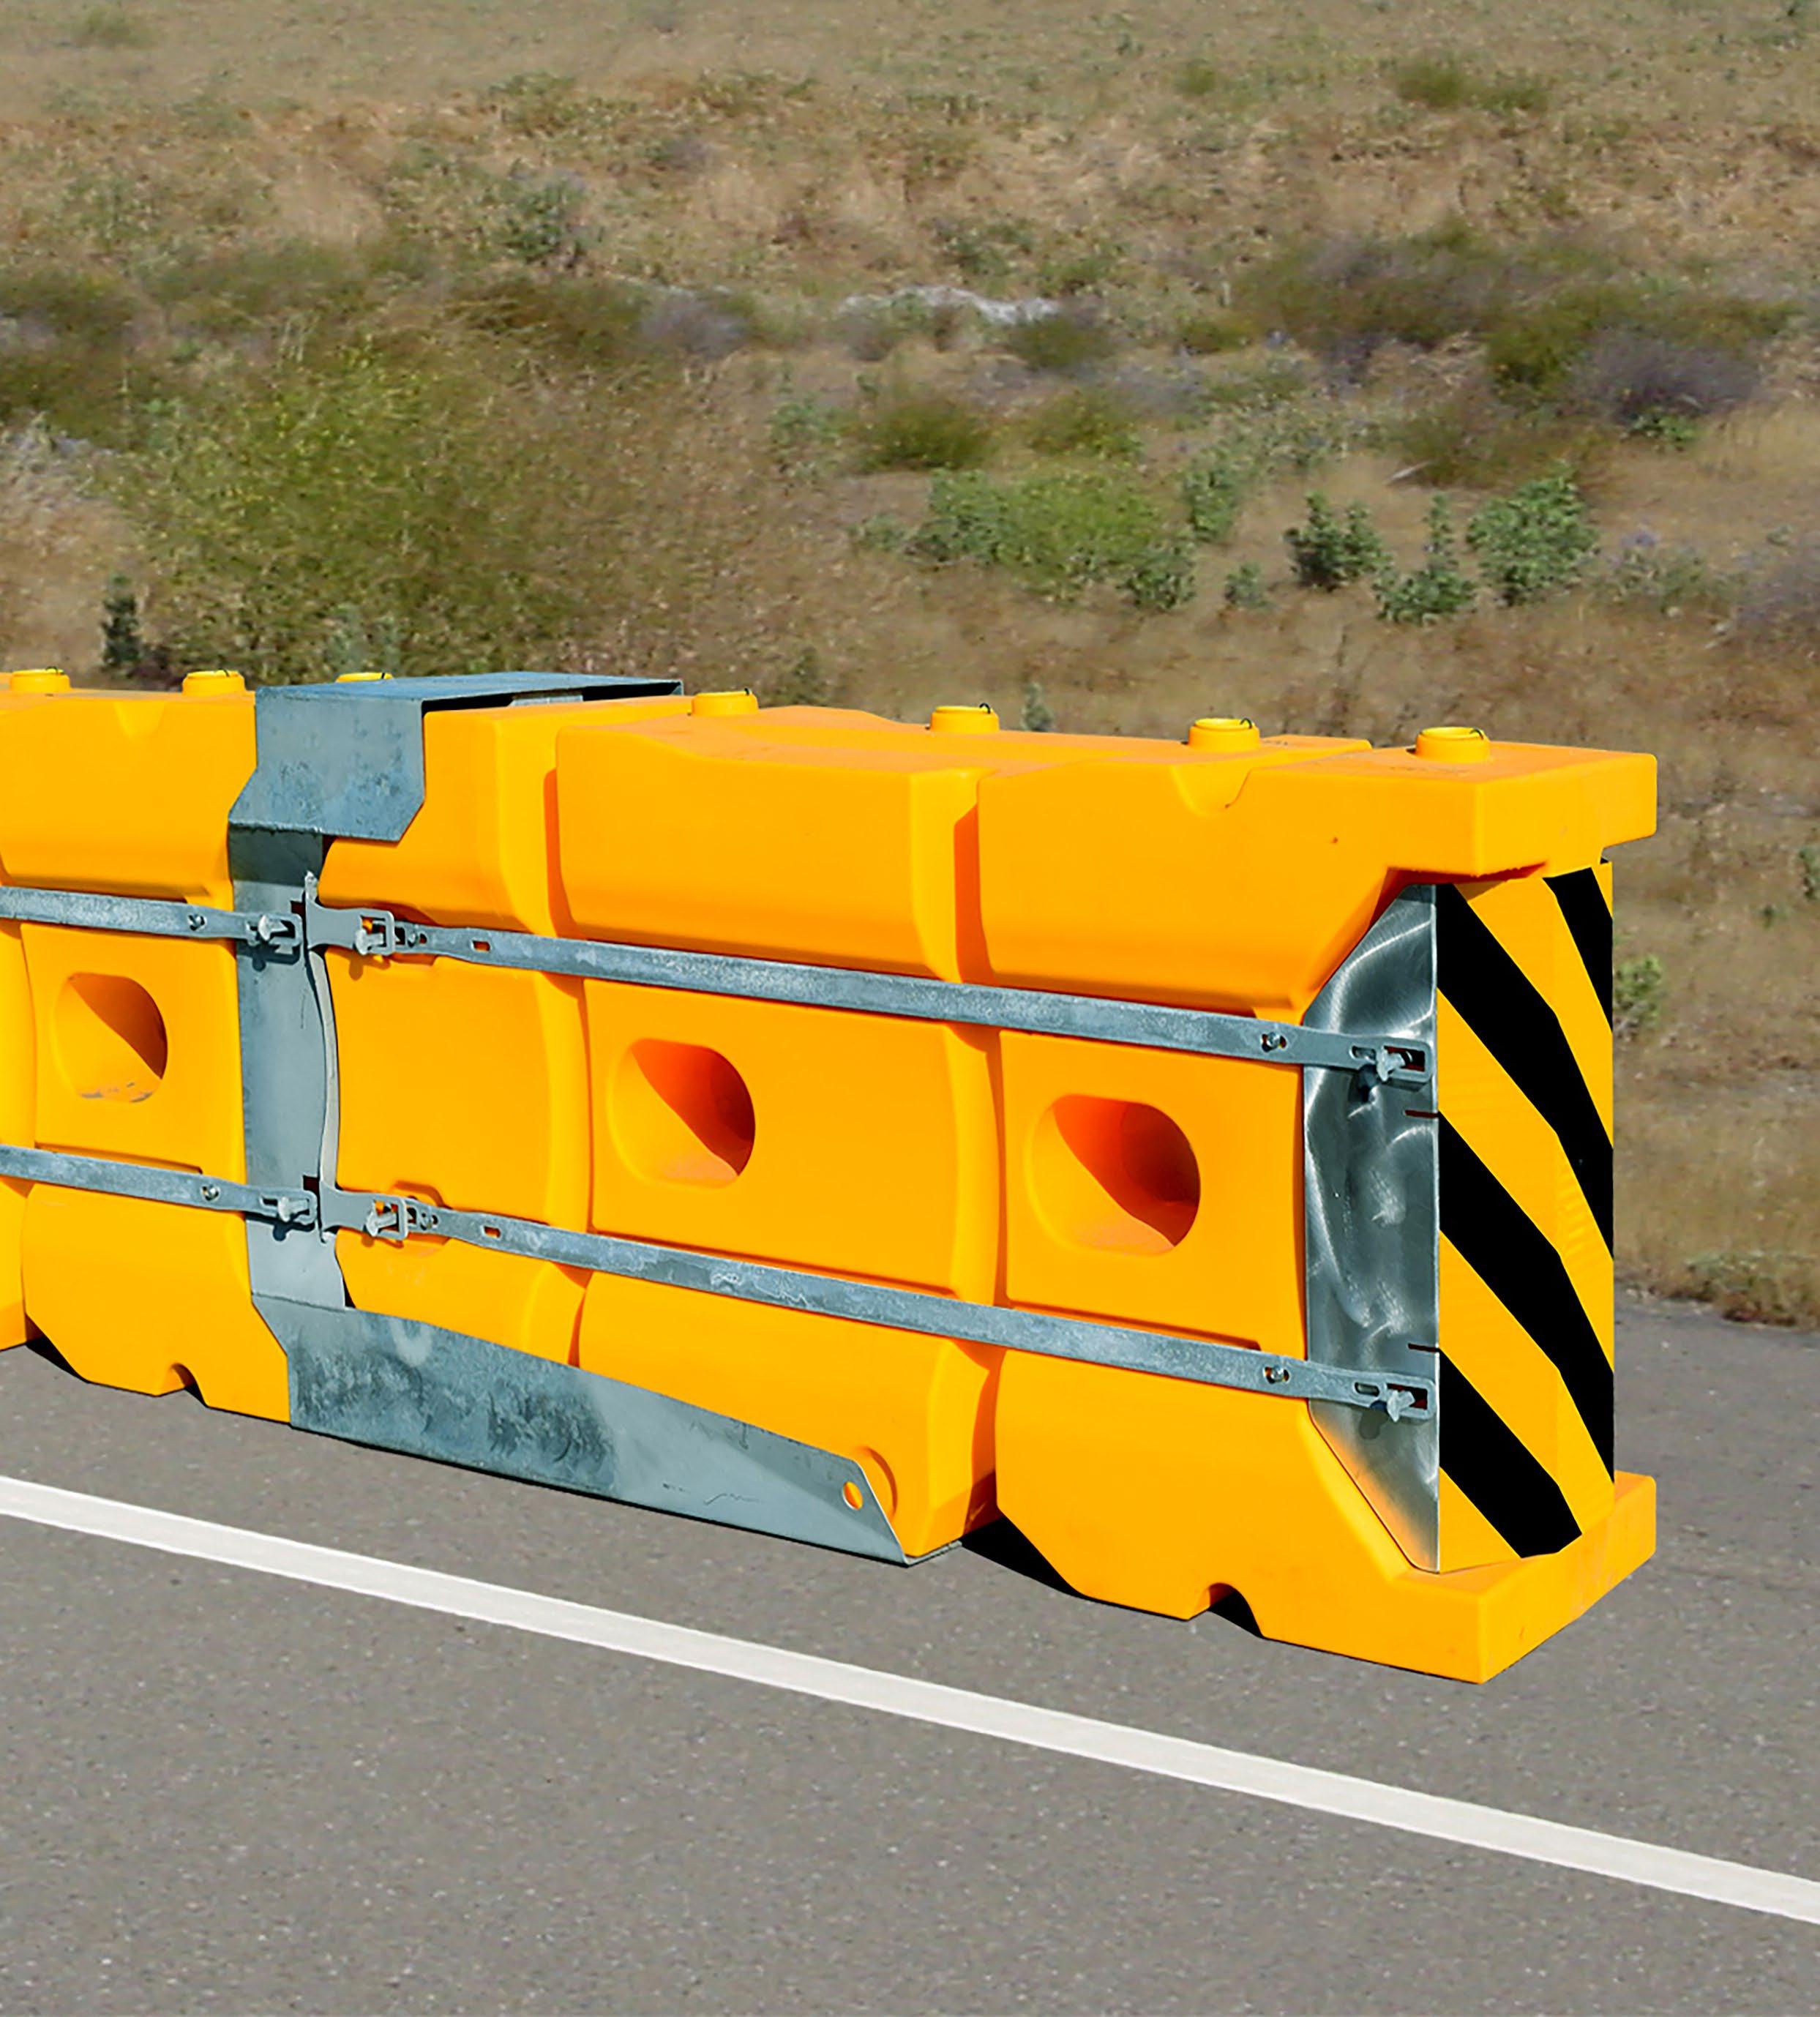
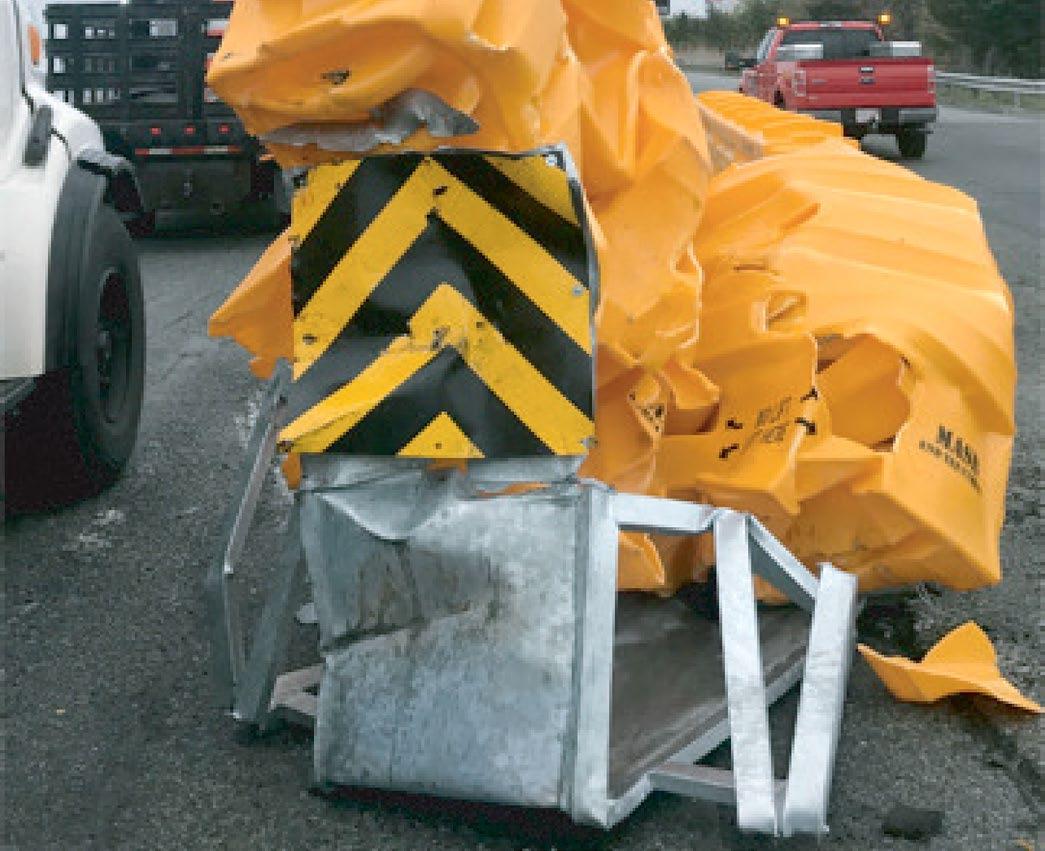
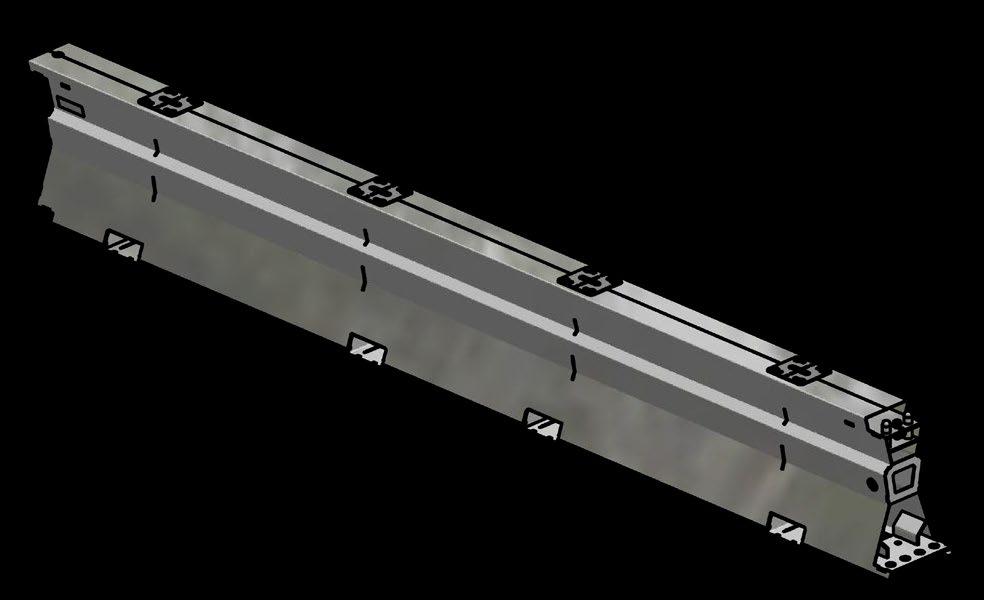
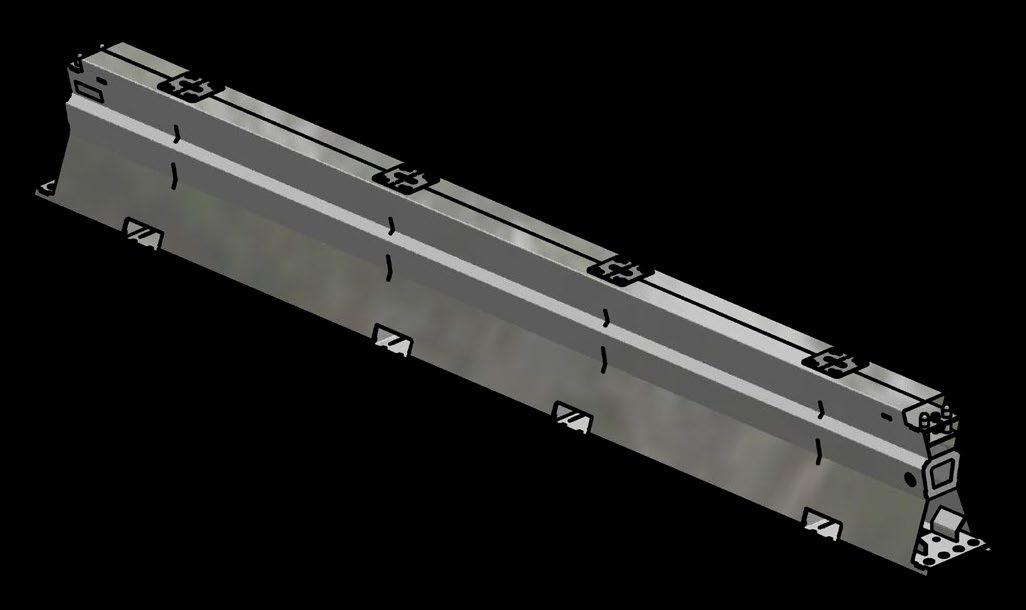
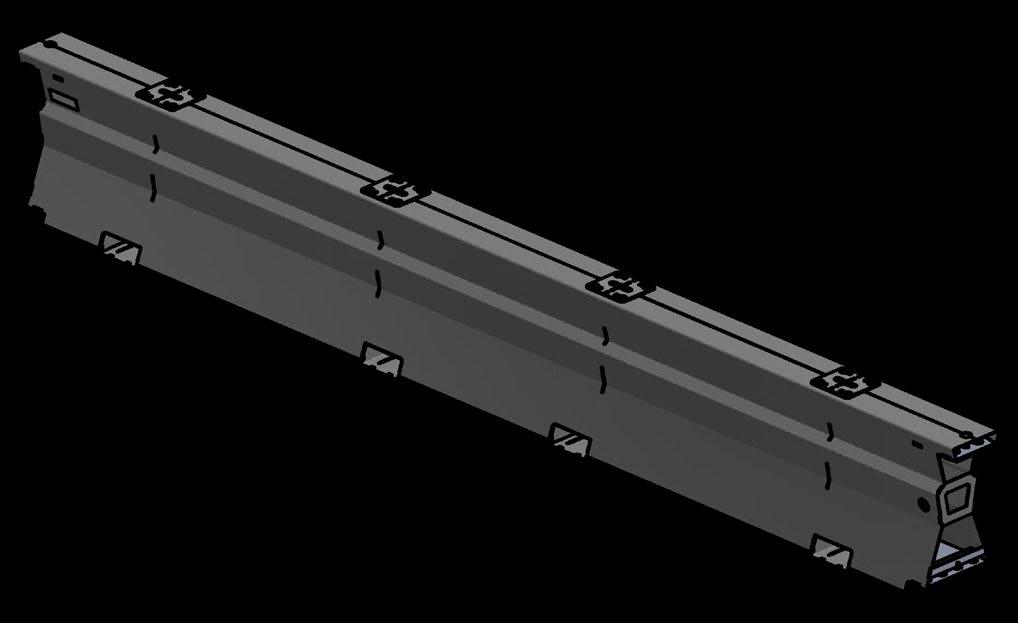
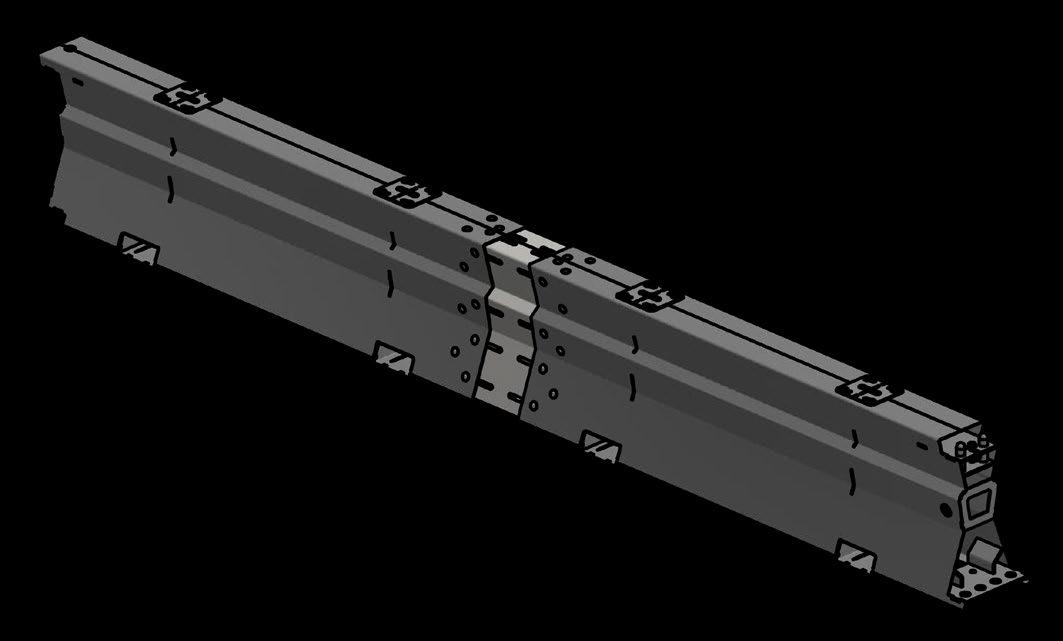
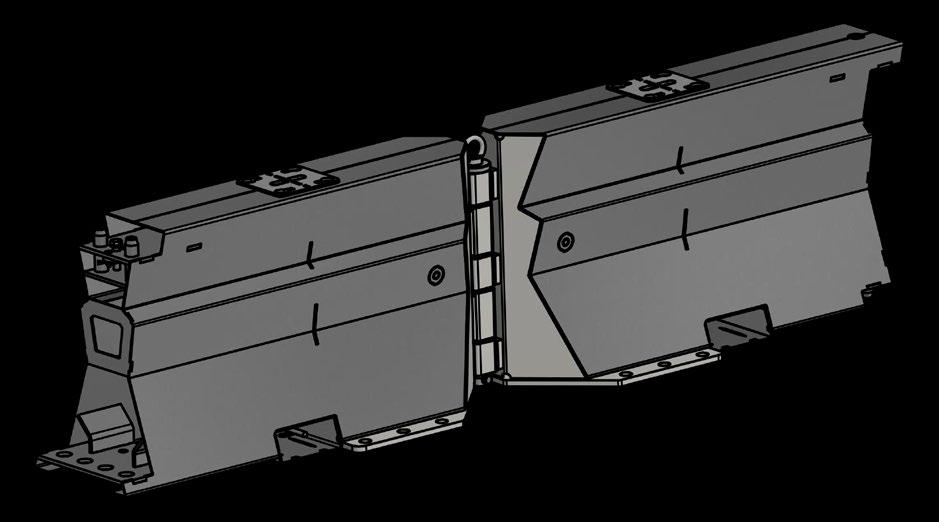
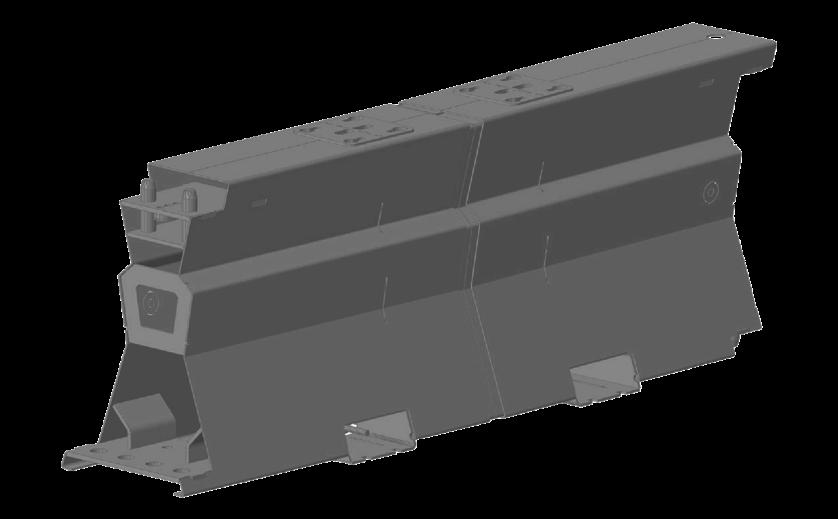
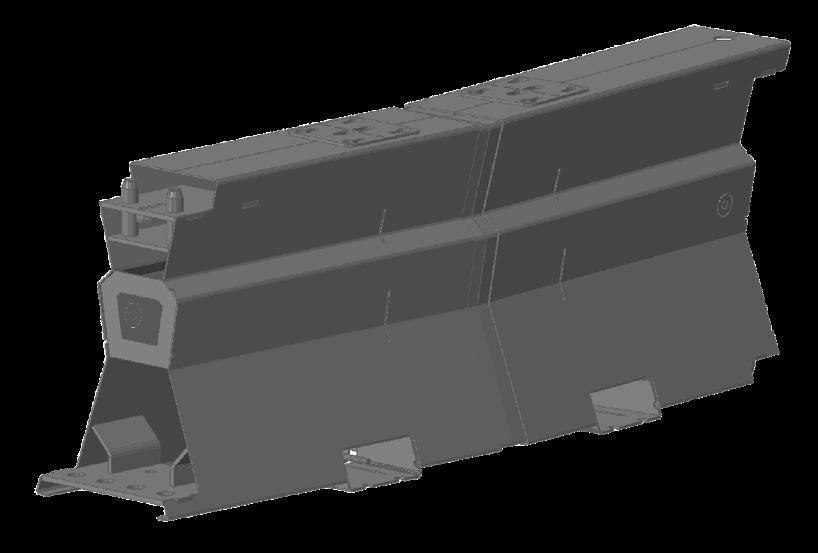
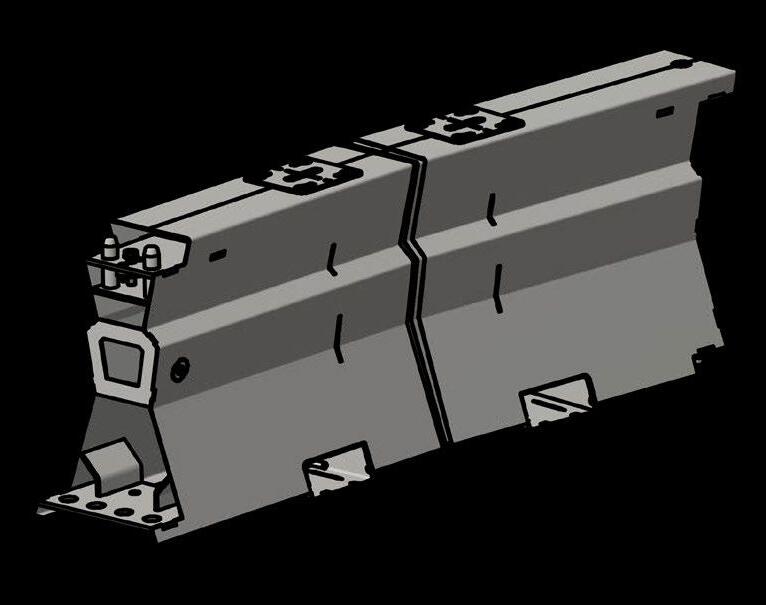
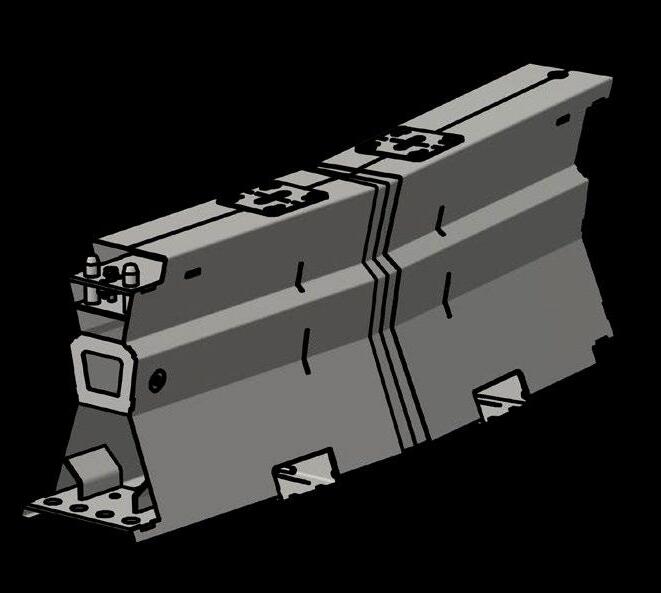
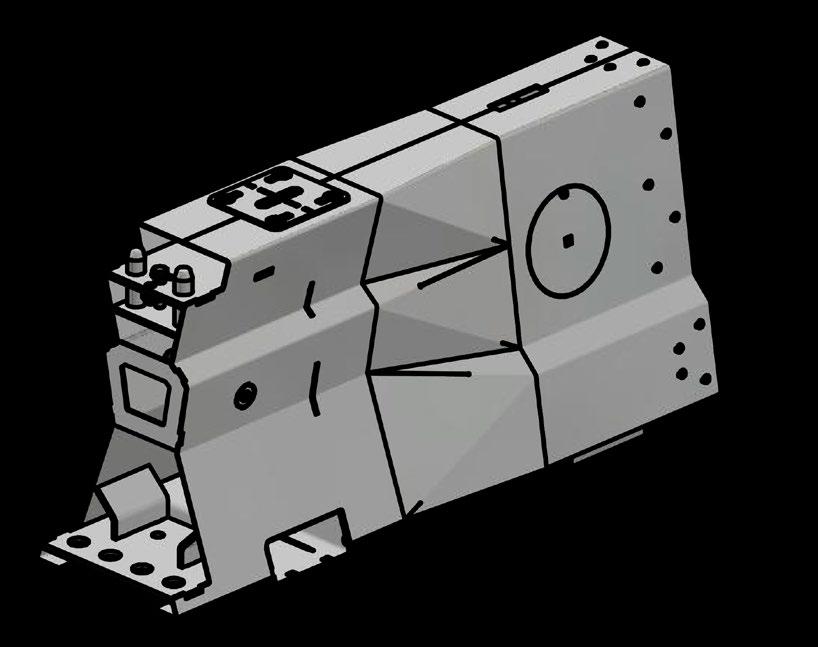
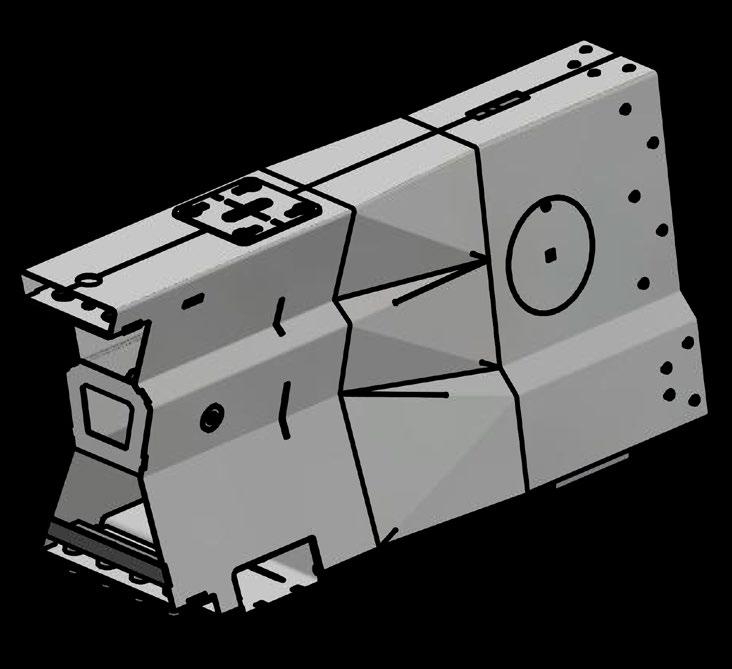
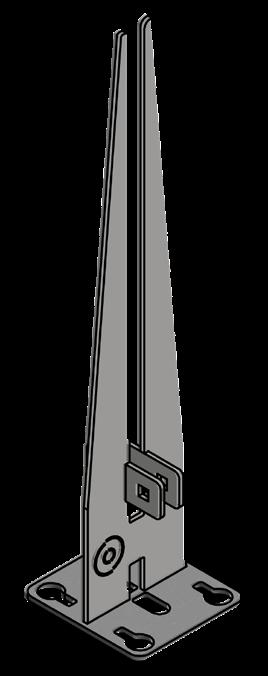
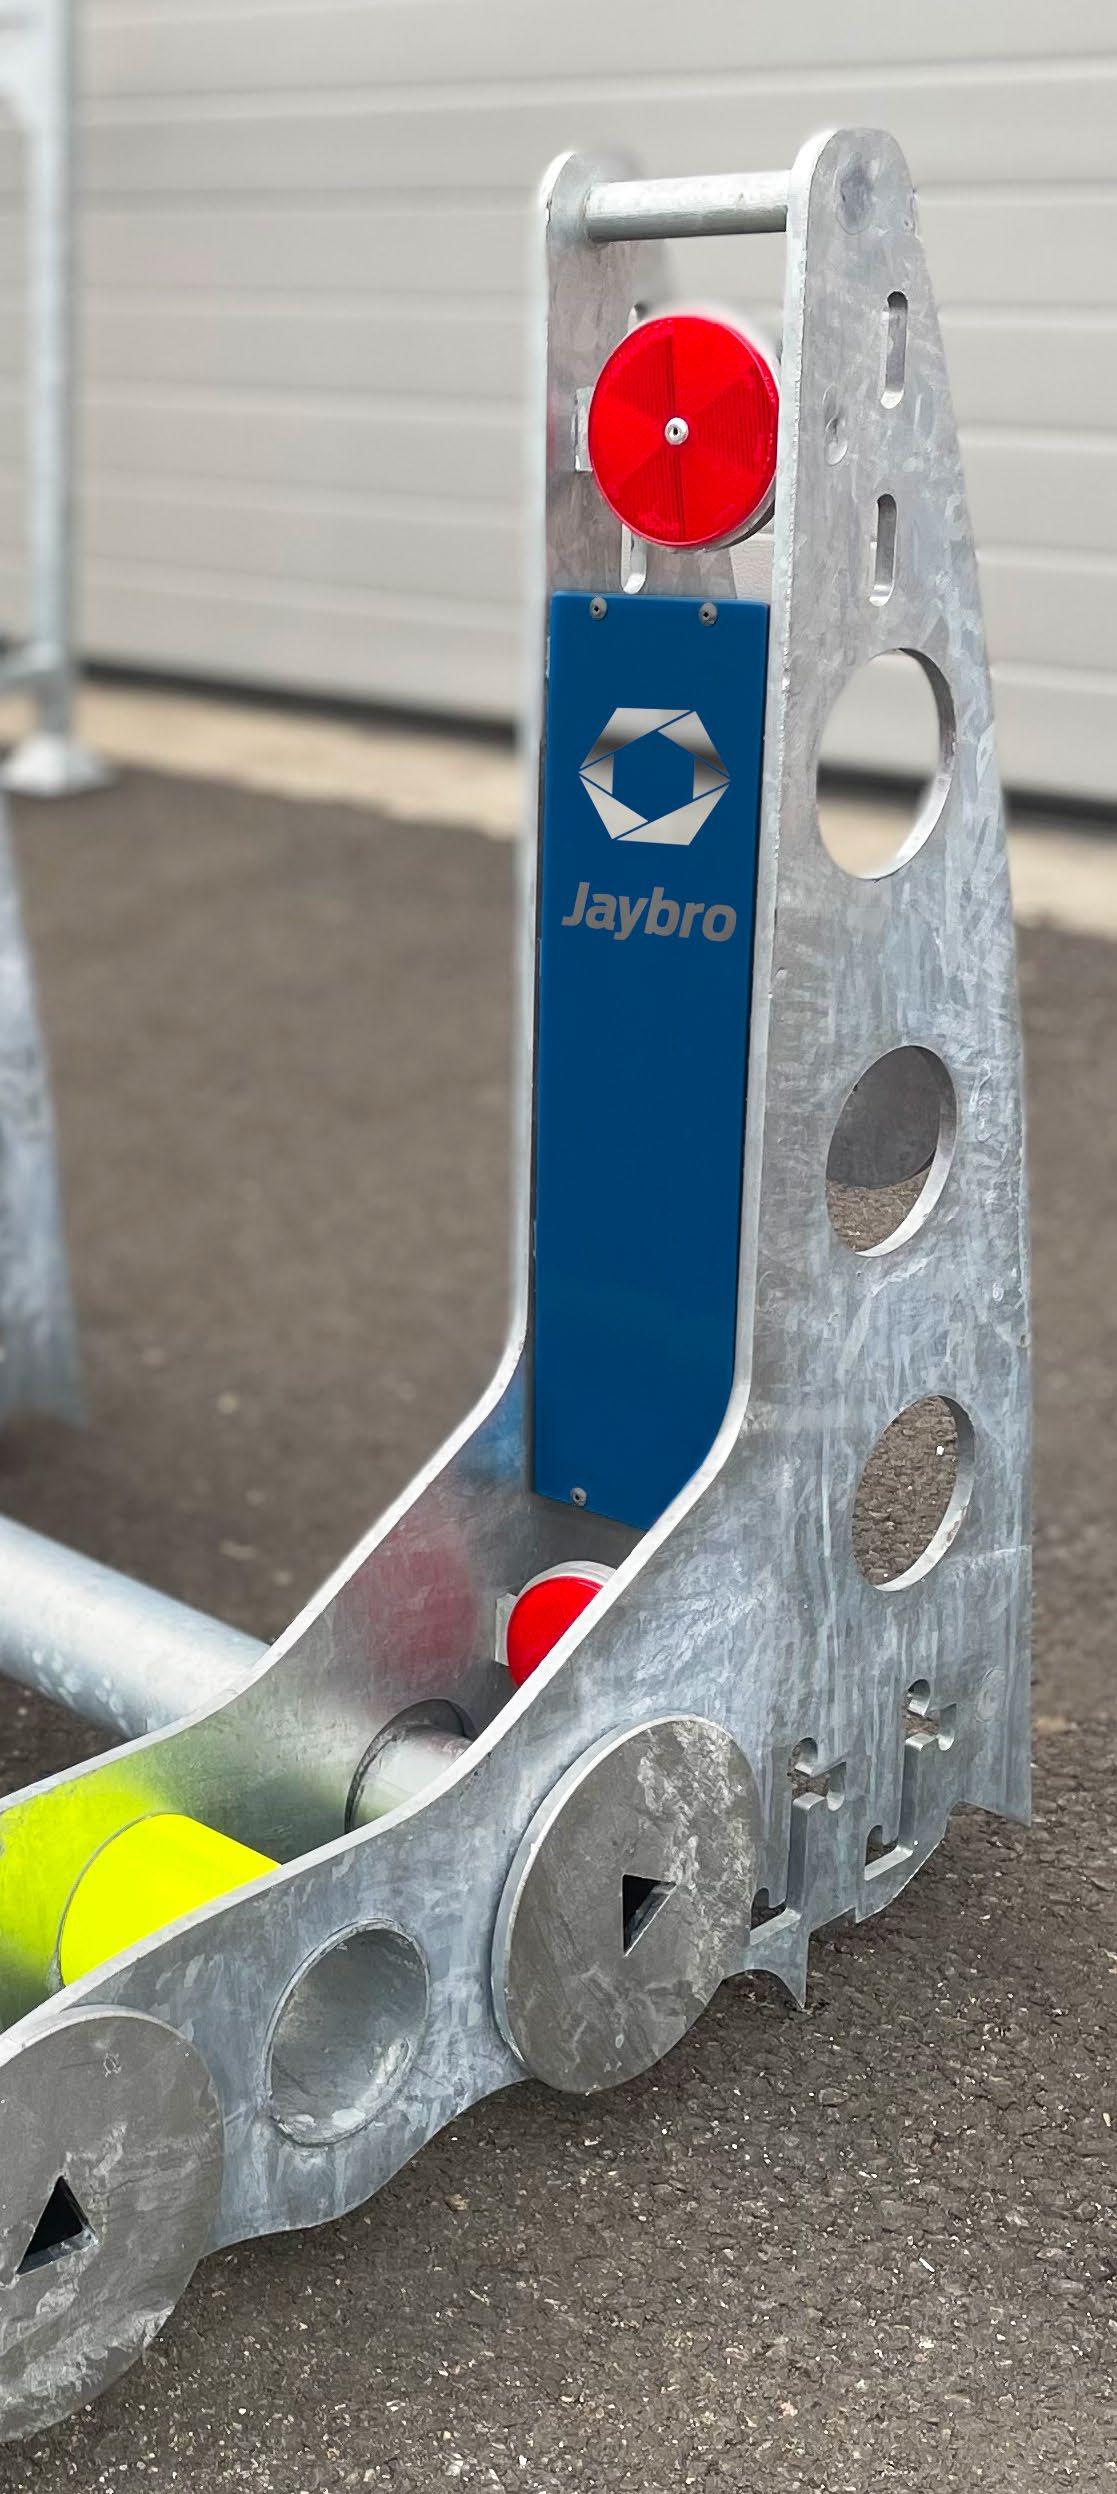
The Lo-Ro has a stout design for maximum stability and durability. This reduces the clear zone requirement which provides an additional margin of safety for workers in the work zone. When full of water it weighs an impressive 726kg, and the lower profile 876mm height provides increased visibility for motorists in urban areas.
Features:
y Availabe in white or red.
y MASH Tested TL-1 (50km/h) & TL-2 (70km/h)
y 3.6 metres deflection at 70km/h
y 1.8 metres deflection at 50km/h
y Weighs 726kg when full
y Weighs 72.58kg when empty
y 1830mm long x 876mm high x 570mm width
y 200mm diameter water fill-hole located on the top surface of each module section
Austroads approved and complies with AS/NZS 3845. Approved for use by:
y NSW RMS
y QLD TMR
y VicRoads
y MainRoads WA
y SA DPTI
y NT DIPL
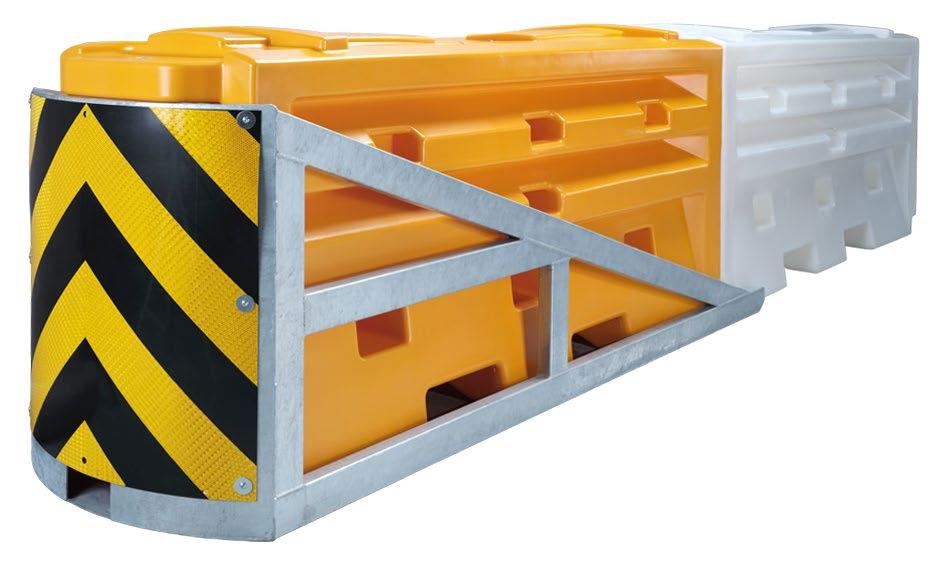
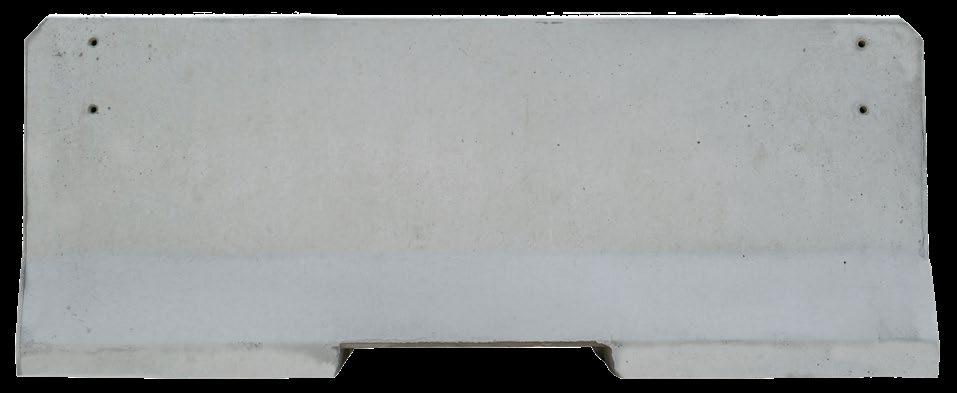
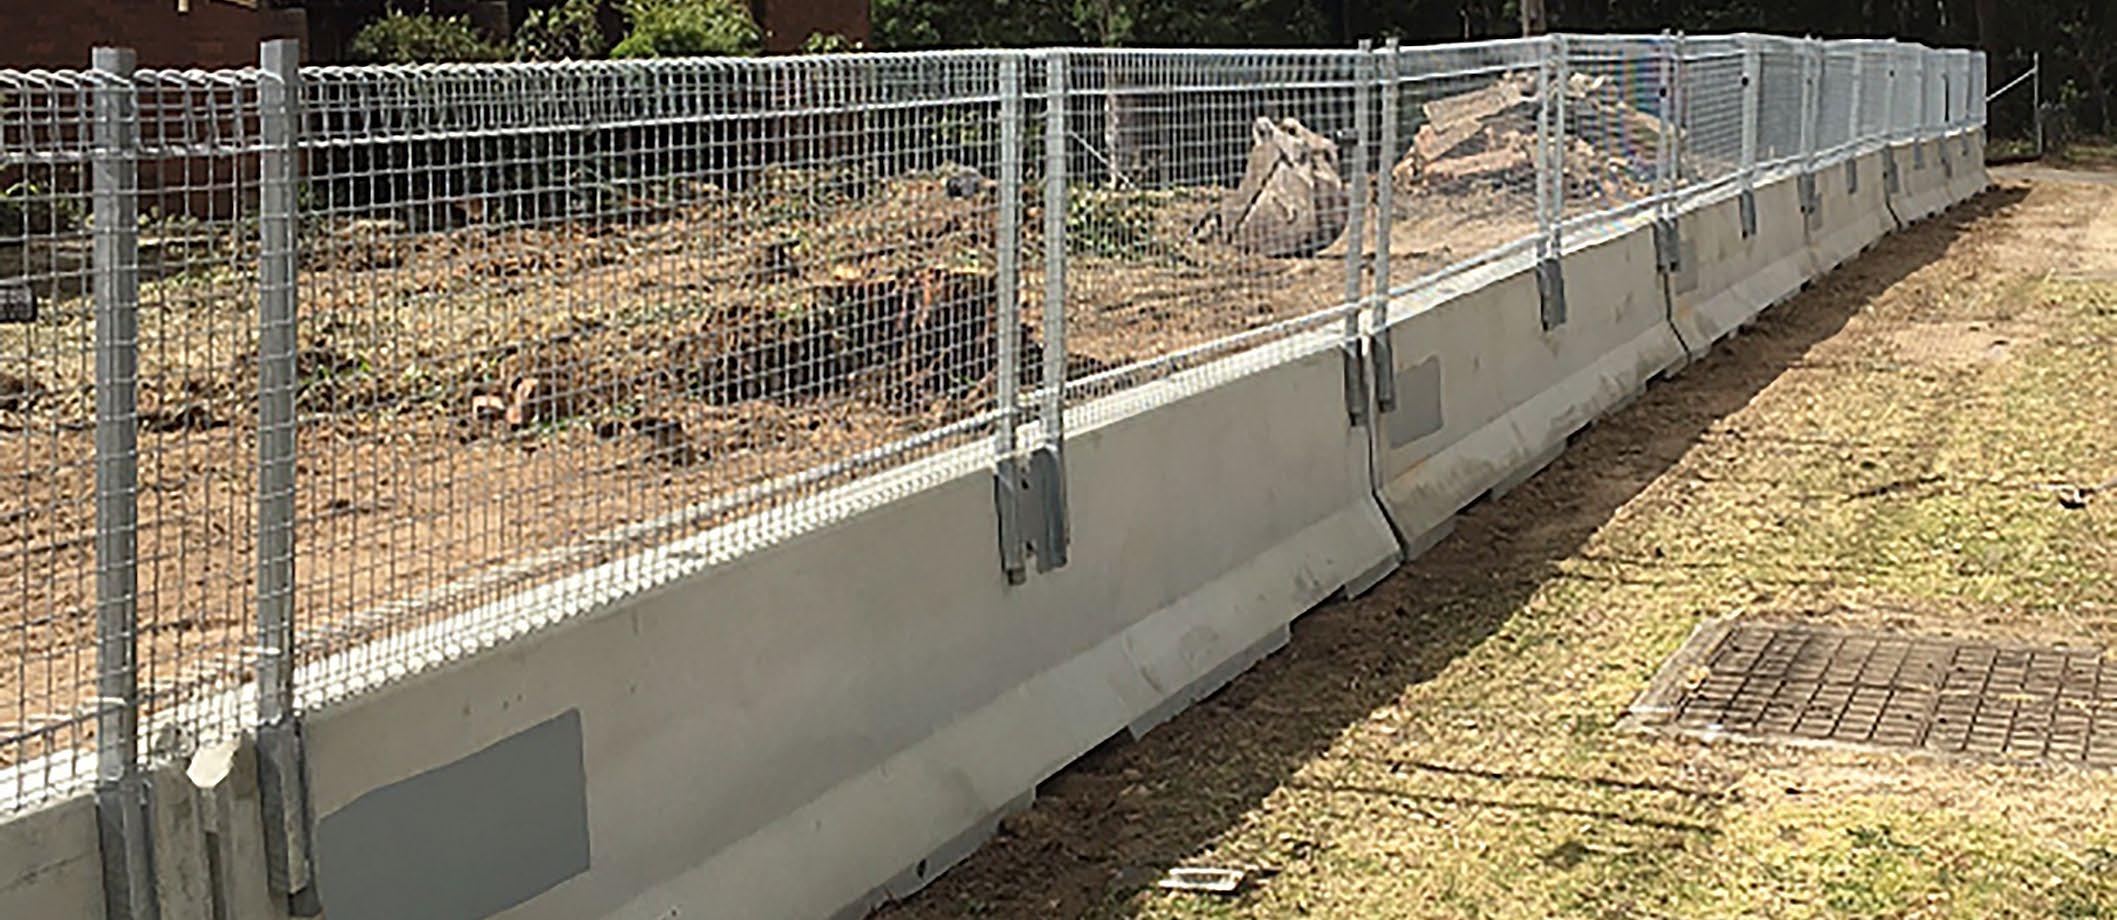
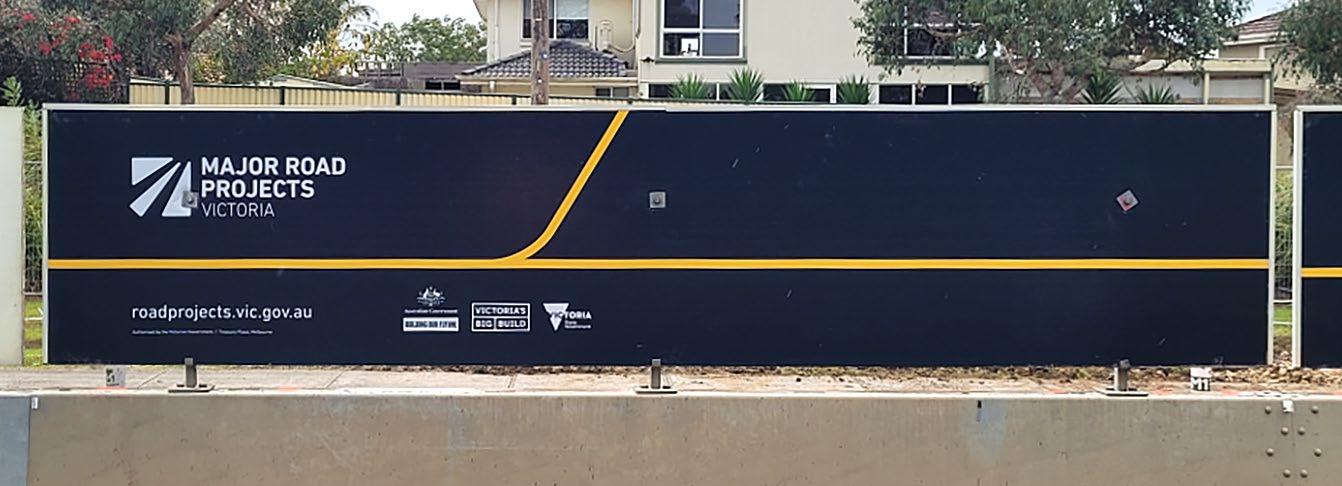
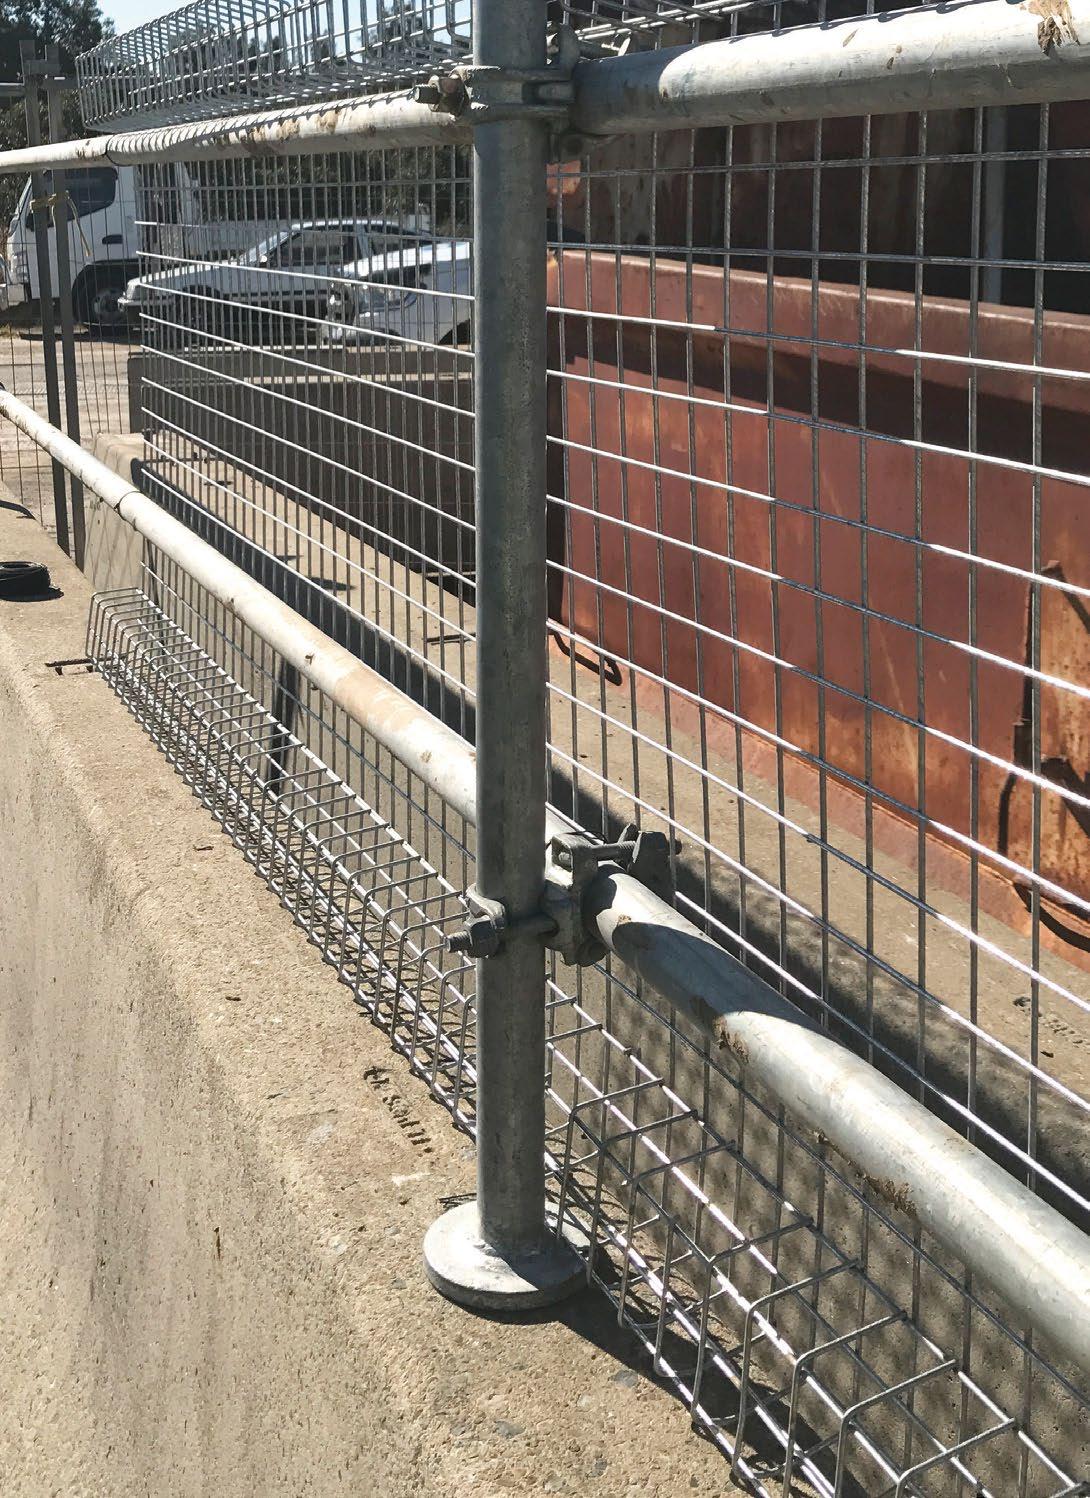
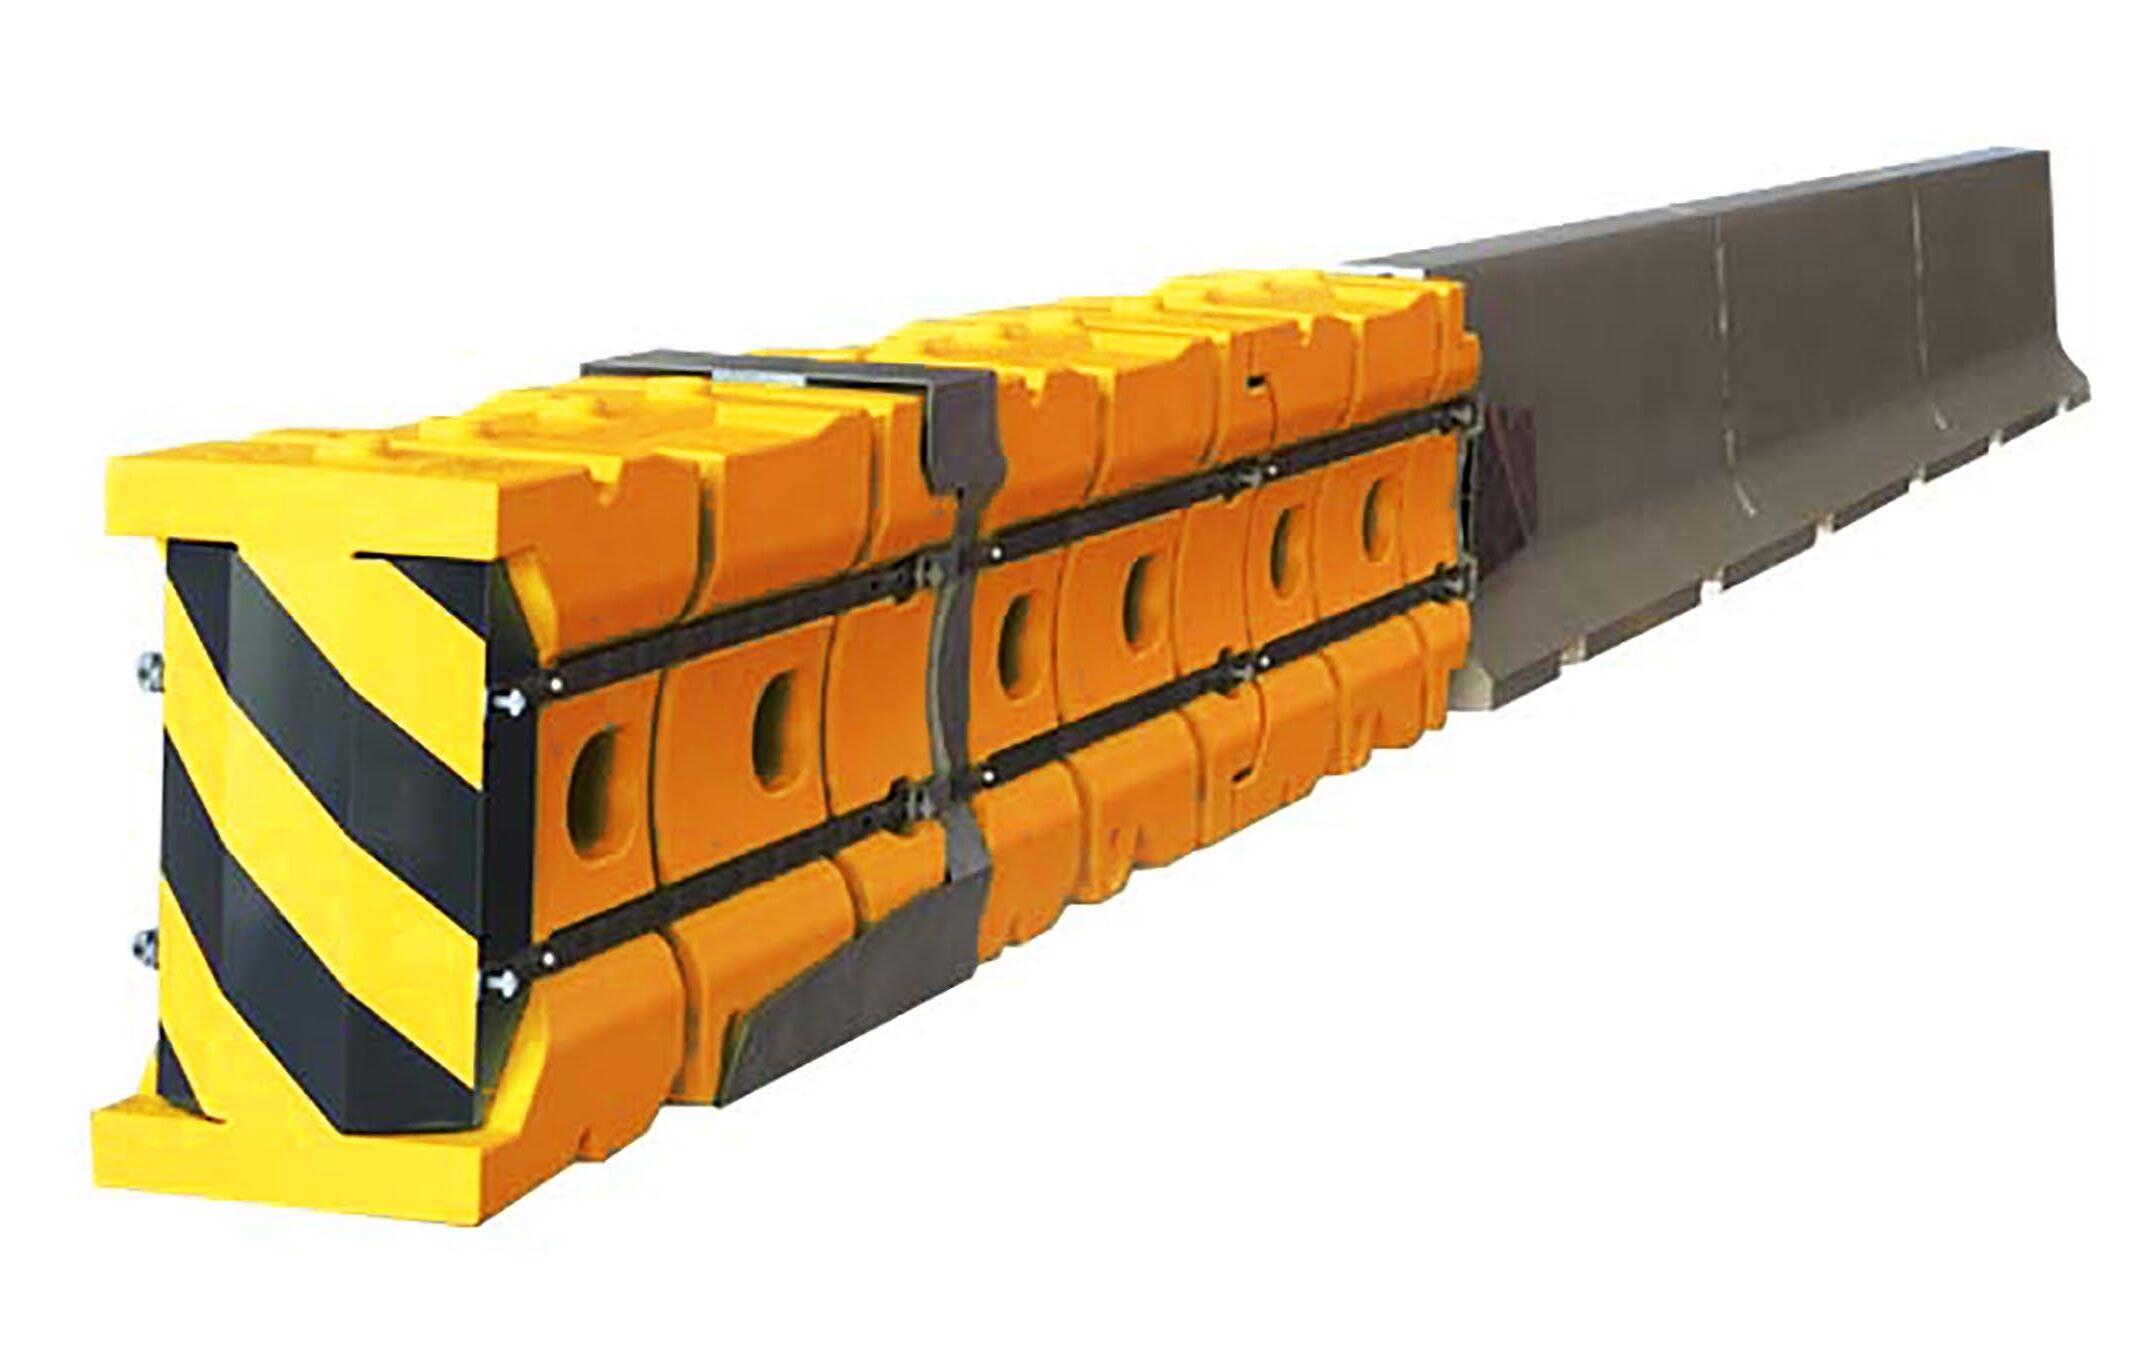
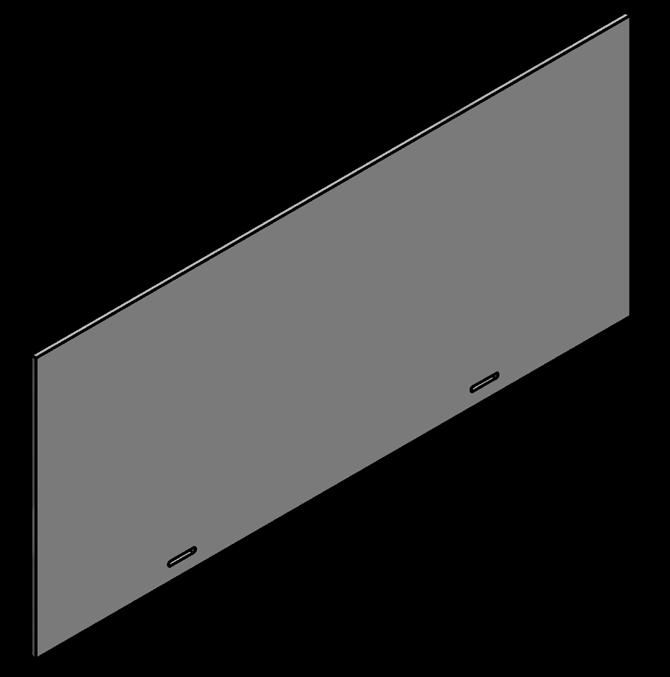
The Lo-Ro anti-gawk screen to suit Lo-Ro water filled crash barriers. Fits easily to the Lo-Ro barrier to provide a more thorough protection around the work site. With the addition of the fence panels, these barriers provide good protection for temporary worksites and other miscellaneous roadside activities.
Features:
y 1880mm x 1066mm
y Mesh Infill
y Galvanised
CODE DESCRIPTION
y Quick Install
y Light weight
y Can attach shade cloth
03-LOROAGS Lo-Ro Anti Gawk Screen
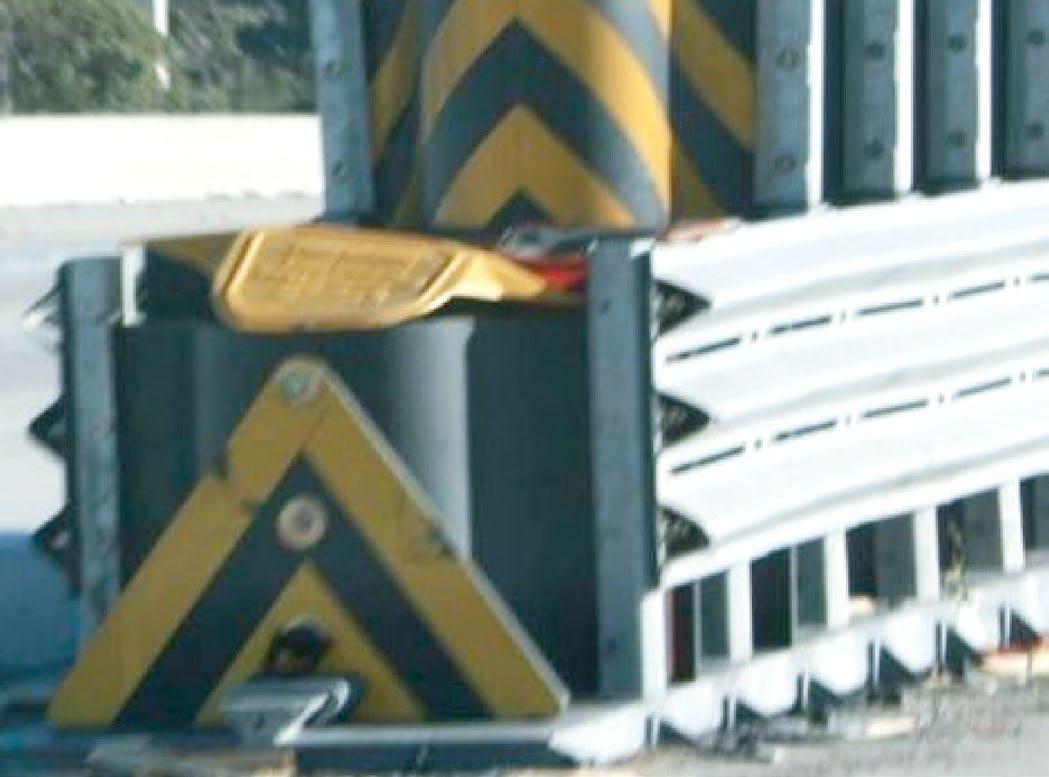
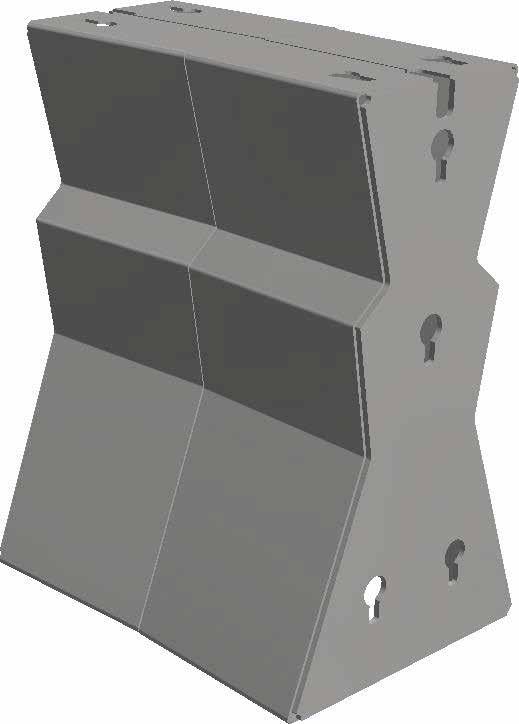
The Lo-Ro SLED End Treatment is the end treatment for the TL-1 and TL-2 Lo-Ro water barrier system. This is a water-filled module with a containment impact sled which helps to contain the ruptured modules upon impact.
Features:
y MASH compliant Lo-Ro TL-2 SLED end treatment
y Contains containment impact sled
y Easily connects to Lo-Ro water barrier
y Fast install
System Conditions
Installation on top of a kerb is not recommended. However, if installed on top of a kerb, all system components must be free to operate.

The Water-Wall is a brand new product to Australia, crash tested to 50km/h and at only 41kg empty it is your safest choice for rapid installation and ease of handling on your next road project.
The Water-Wall barrier is manufactured from durable polyethylene plastic and has three integrally molded corrosion resistant steel cables and six (6) bushings connecting the barrier sections to prevent vehicle breaching.
Features:
y 1800 x 450 x 810 mm
y Double wall knuckle design minimizes breakage at pivoting hinge points
y Hinge design allows for a 30-degree pivot between each of the barriers
y Large 200mm fill hole speeds filling process, includes large 8" twist-lock plastic cap
y New tamper resistant, corner offset drain plug with coarse buttress thread — screws in or out in only 2½ turns
y Includes one steel connection pin that allows sections to be locked together
y Forklift and pallet jack through holes and recesses for easy movement of barriers
y Complies to Australian Standards
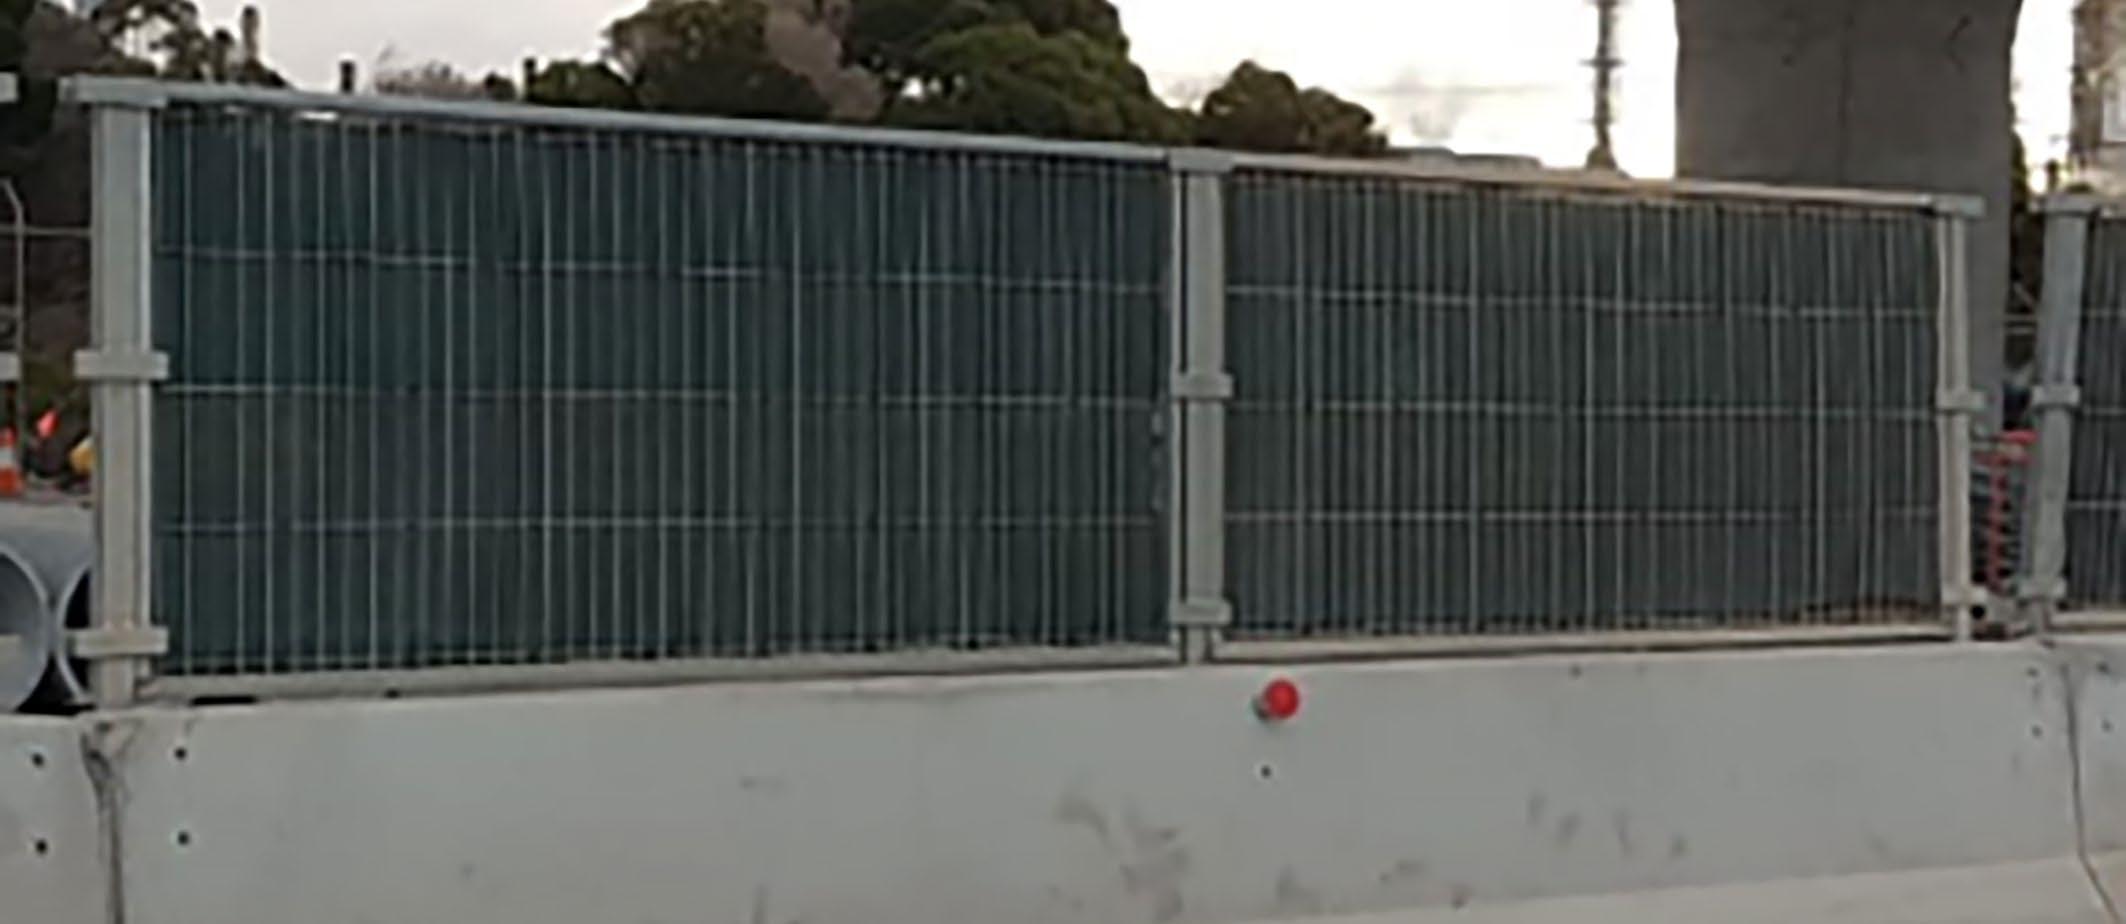
Waterwall anti-gawk screen to suit Waterwall water filled crash barriers. Fits easily to the Waterwall barrier to provide a more thorough protection around the work site. With the addition of the fence panels, these barriers provide good protection for temporary worksites and other miscellaneous roadside activities.
Anti-Gawk Screens are available for many of Jaybro’s water filled barriers including the Waterwall. This anti-gawk fence panel is easy to fit to the MASH tested Water-Wall barrier, using a simple steel pin connection.
The Water-Wall barrier system recently passed MASH testing in the USA to test level 1-11 (TL-1) and complies to Australian & New Zealand Standards AS/NZS 3845.1:2015 - Road Safety Barrier Systems.
This product is designed & crash tested for use on all private, local & Council roads. Please note that this product is not approved by AustRoads for use on state road networks.
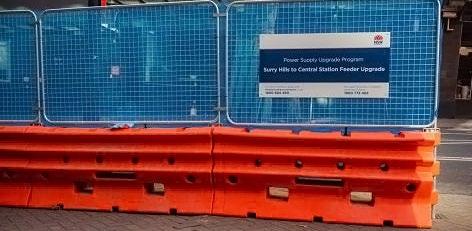
Water barrier anti-gawk screen to suit water filled crash barriers. Fits easily to water barriers to provide a more thorough protection around the work site. With the addition of the fence panels, these barriers provide good protection for temporary worksites and other miscellaneous roadside activities.
Features:
y 1965mm x 1200mm
y Galvanised
y Mash and NCHRP 350 screens available
y Can be fitted with shade cloth
03-MAZAGS Water barrier anti gawk screen
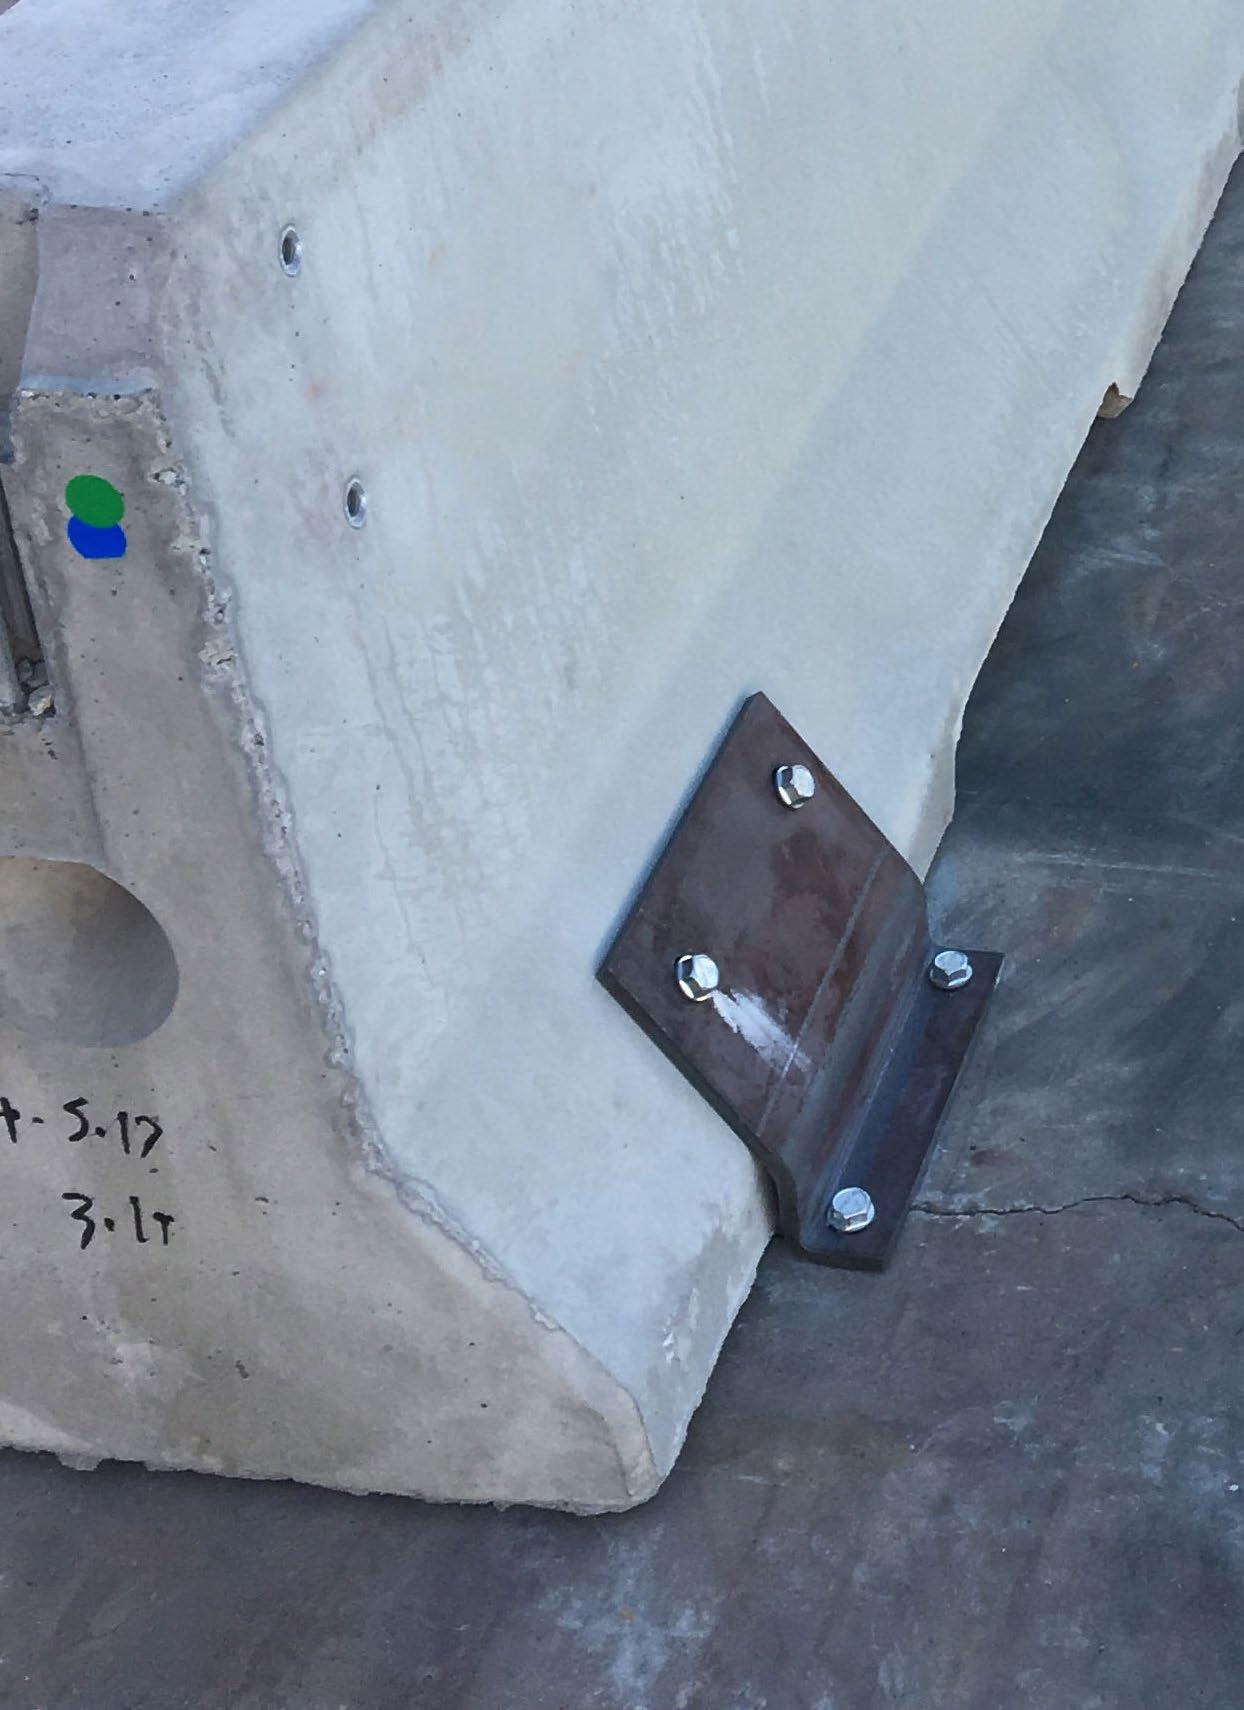
Clips to suit the end of a water barrier run with screens. This clip requires an additional barrier pin to sit in. The prongs on the last panel then fit into this clip, securing it in place.
Features:
y Barrier pin required
y 46mm x 125mm
y Used to stop last anti gawk panel swinging
y Available for all water barriers
CODE DESCRIPTION
15-WBEC End panel bracket
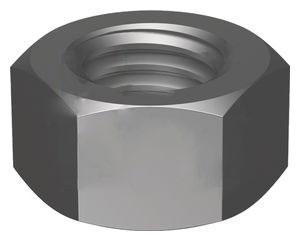
Replacement drain plug for Waterwall, Armorzone, Lo-RO and Trafix 2000 Waterfilled barriers.
Features:
y Barrier Drain Plug - Replacement drain
y Plug for Waterwall, Armorzone, Lo-Ro and Trafix 2000 Waterfilled barriers
CODE DESCRIPTION
15-WWBPLUG Water barrier drain plug
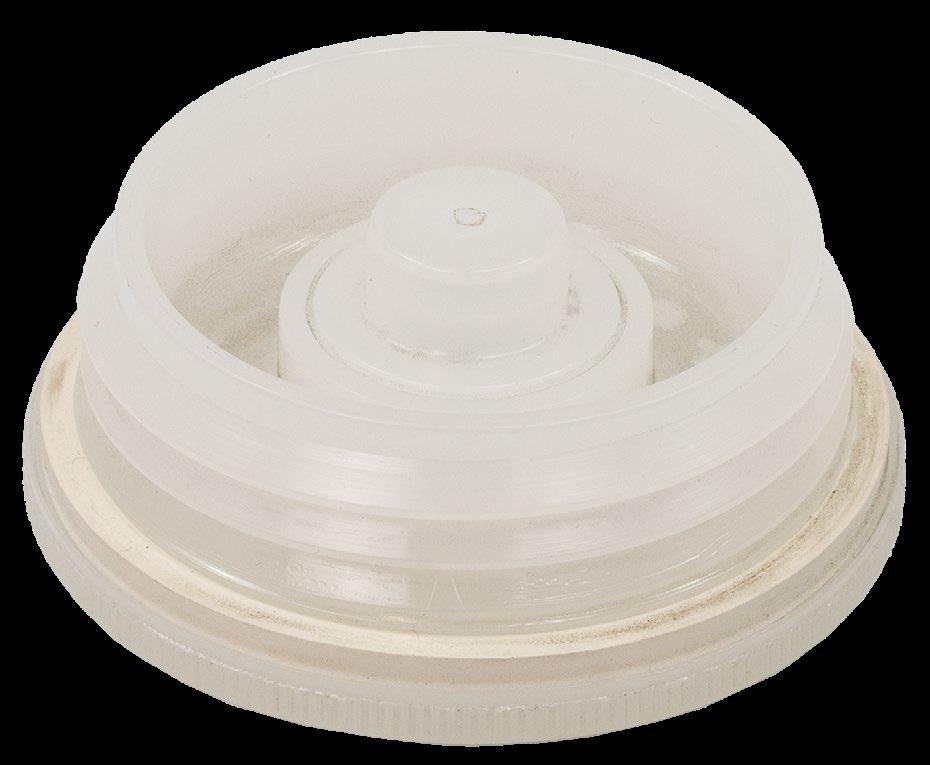
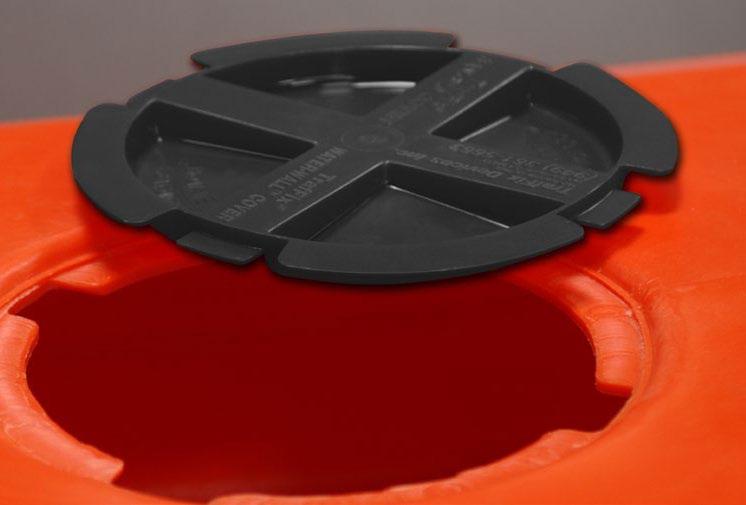
Black lid to suit Lo-Ro or Waterwall barrier.
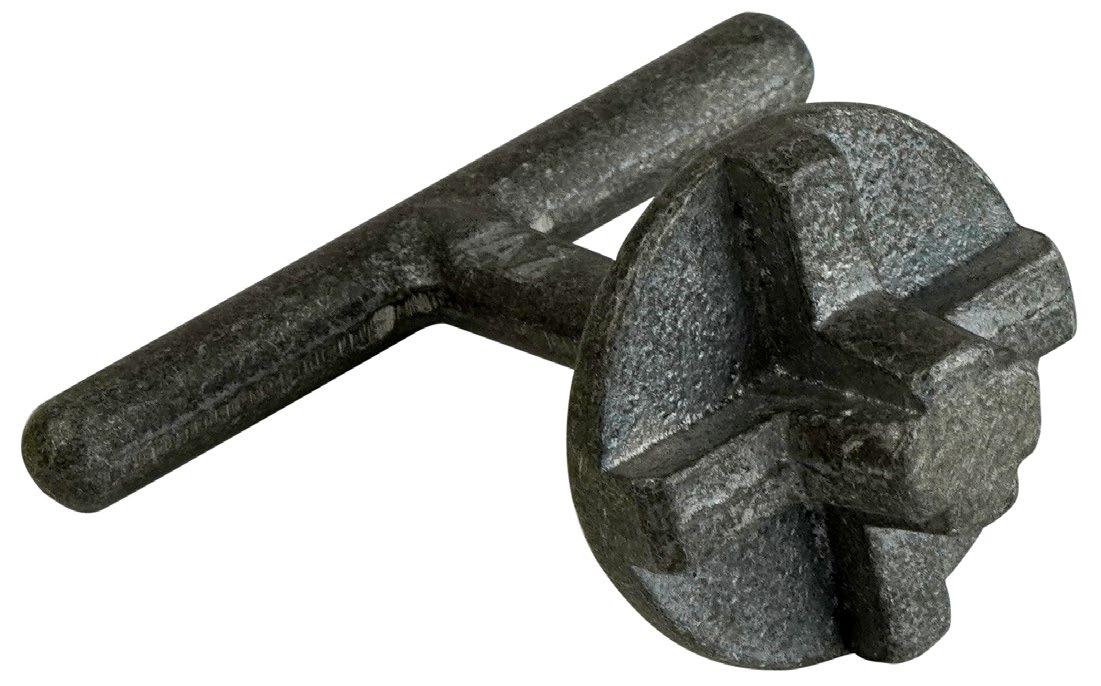
Tool to remove bung from water barriers.
Works with Lo-Ro, Armorzone, Waterwall and Trafix water barrier.
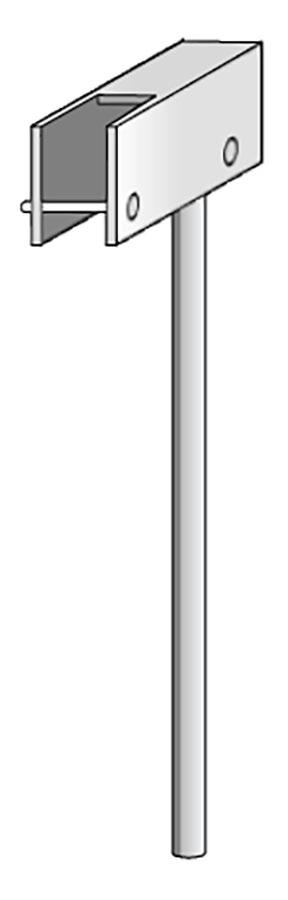
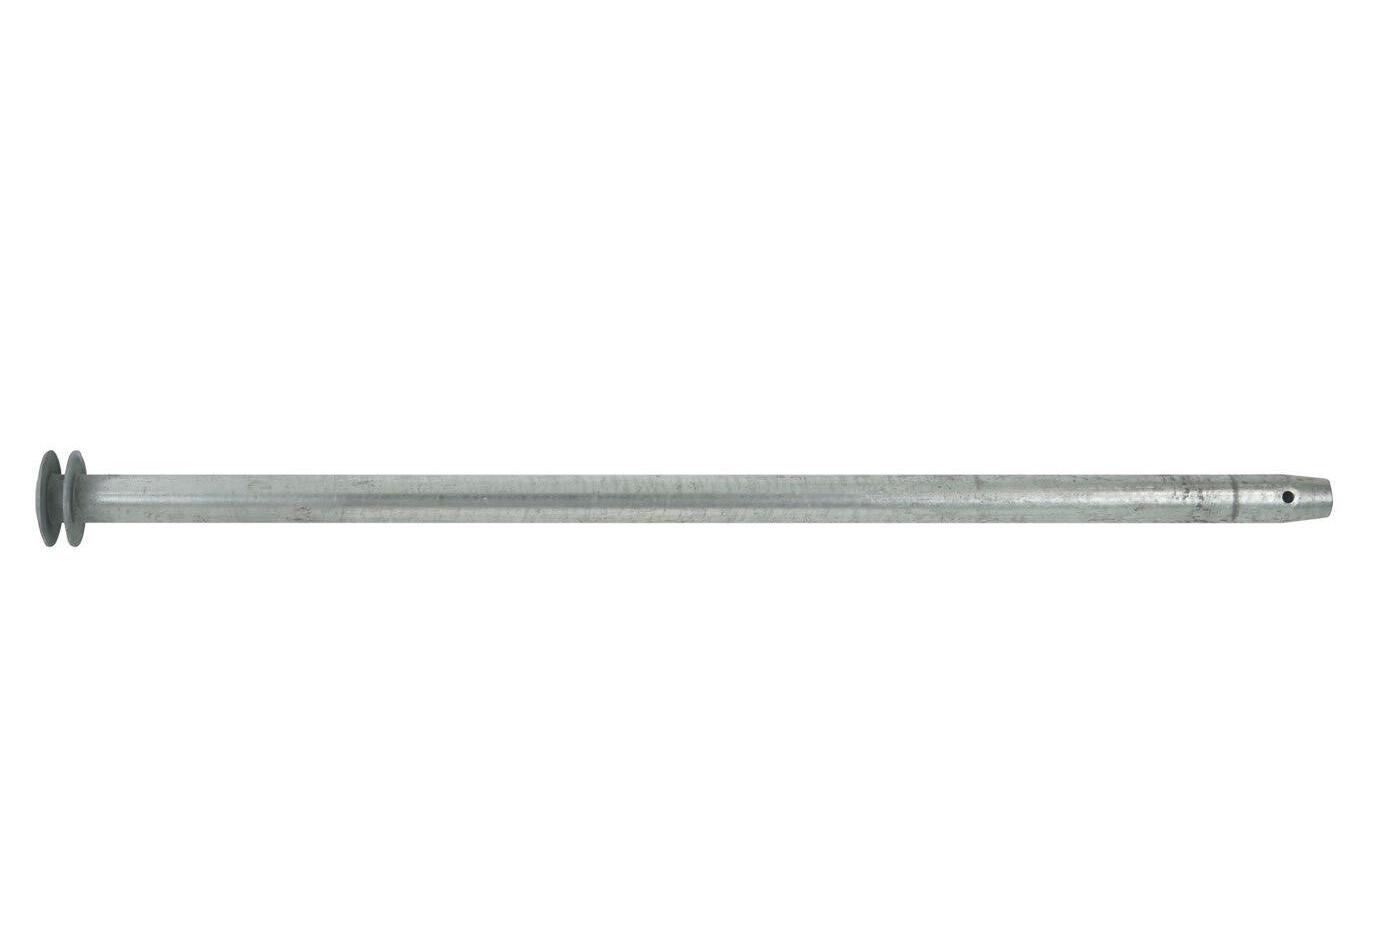
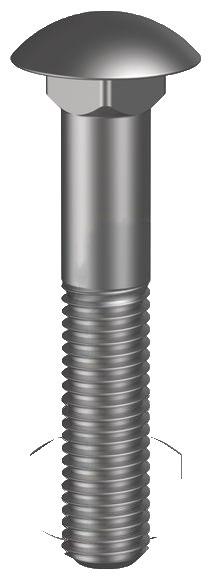
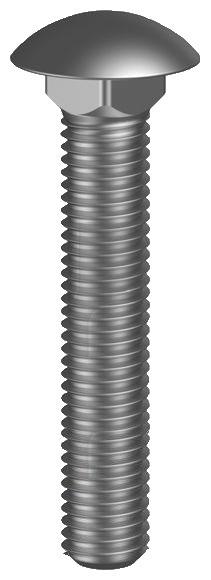
Pins to suit water barriers.
Features:
y Pins to suit Lo-Ro, Armorzone, Waterwall barriers
y Galvanised
By Jaybro
This innovative system is essential for traffic management, featuring many unique characteristics:
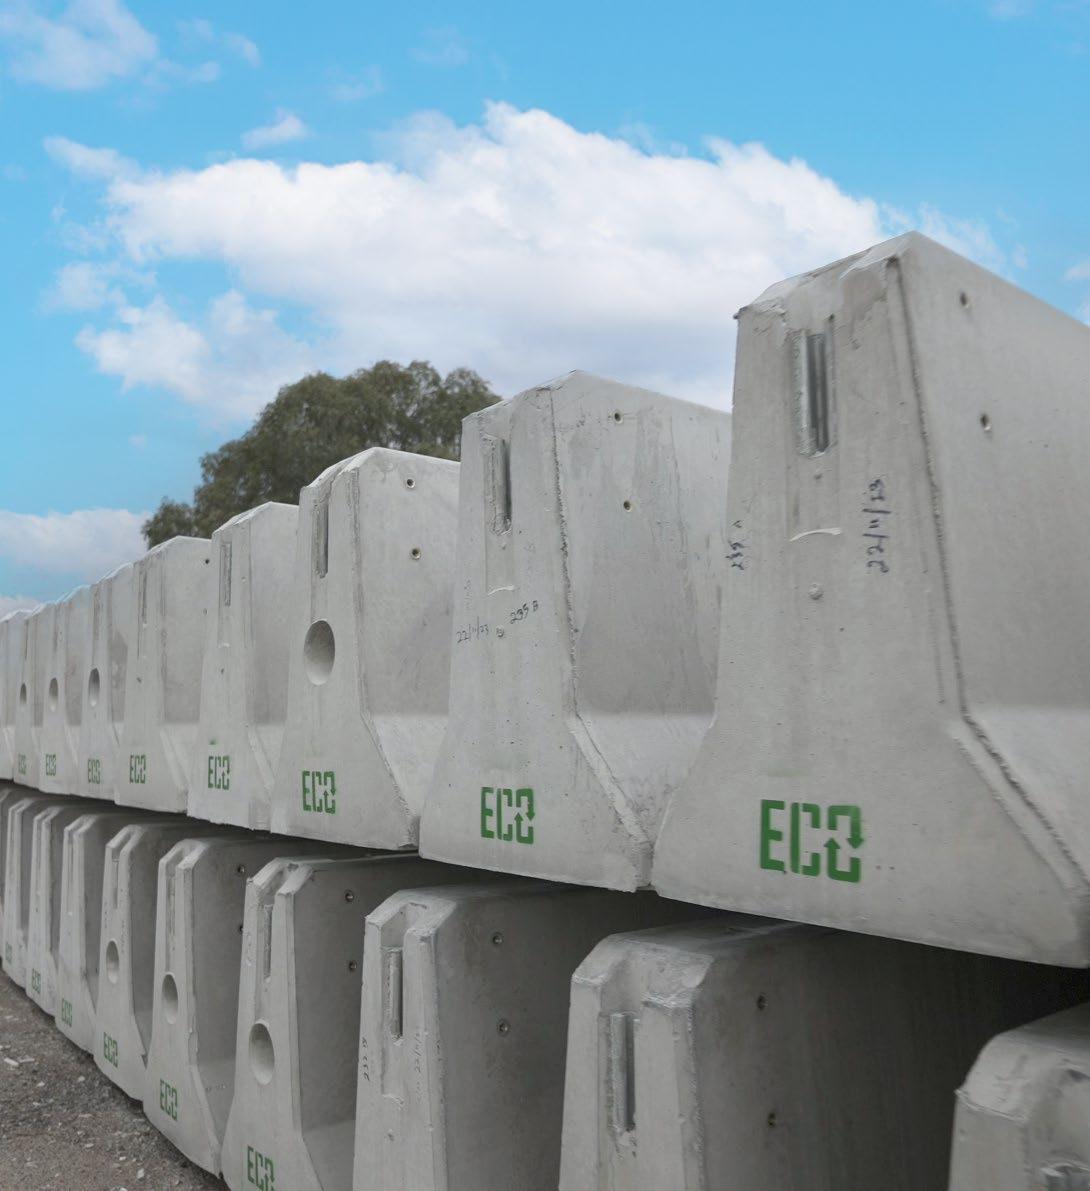
y Australian First Concrete Barrier offering CO2 Reduction.
y 41.2% reduction in CO2 emissions
y 100% reduction possible with Ecopact ZERO carbon offset program
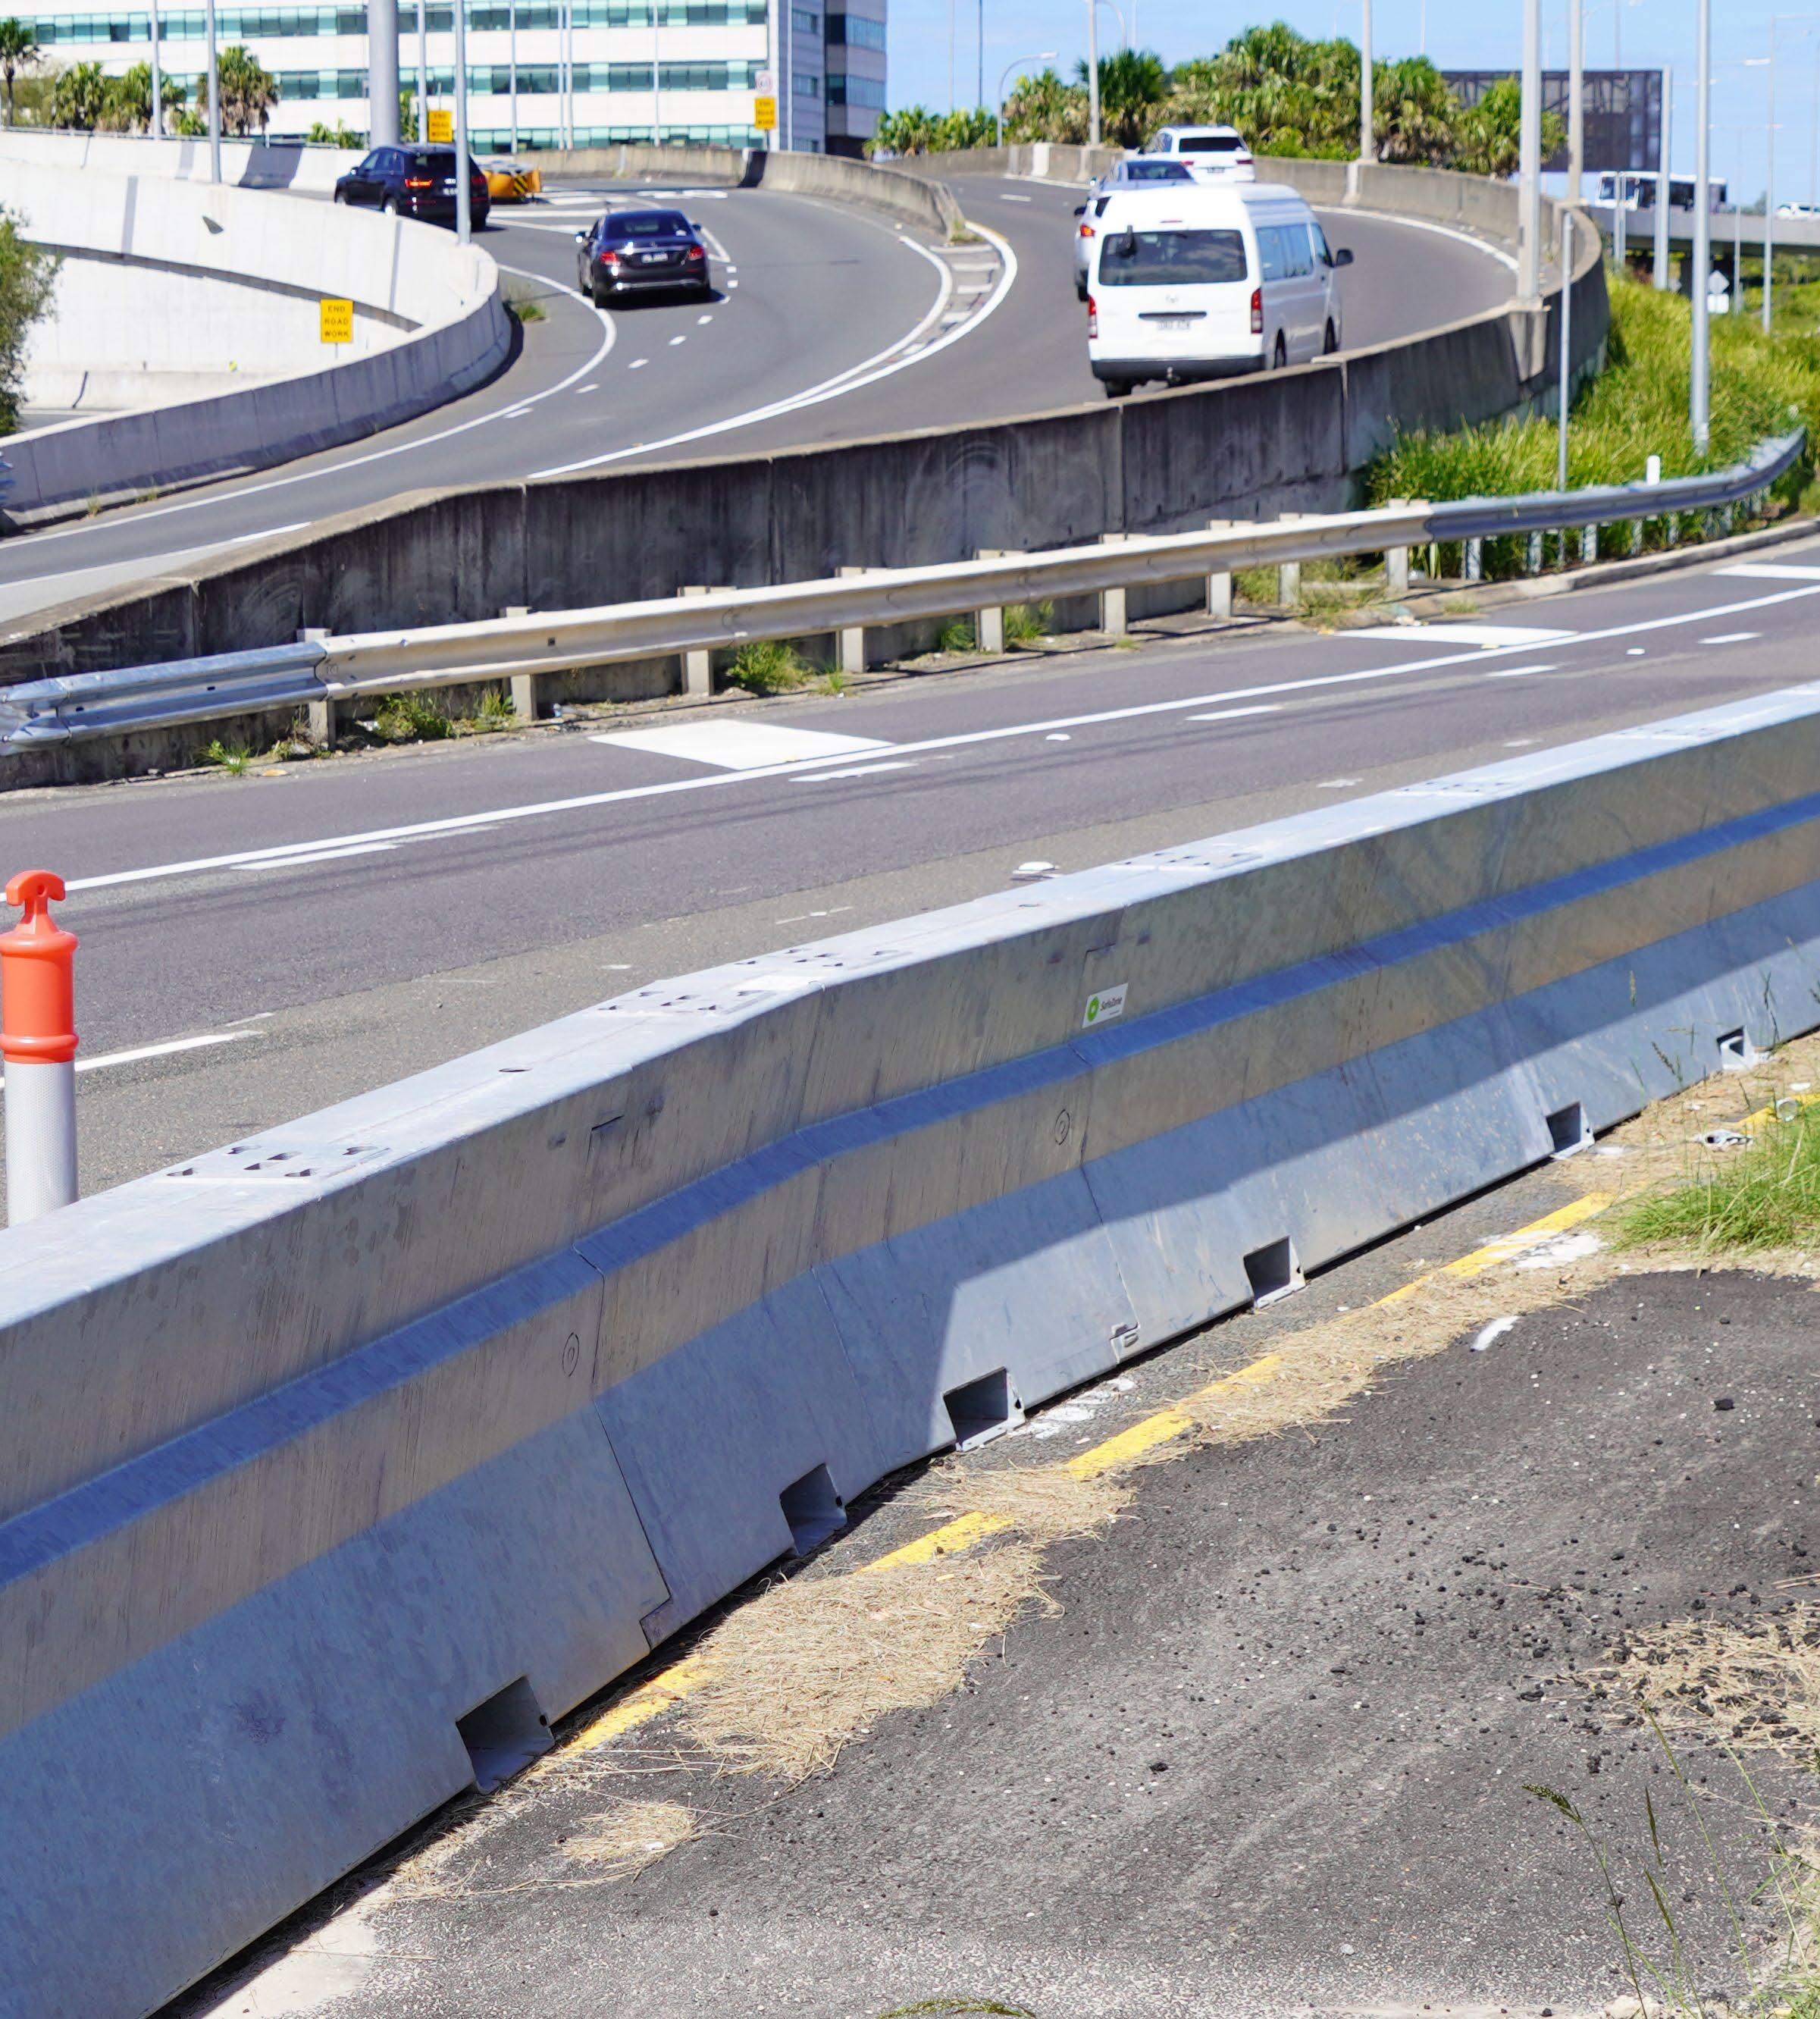
Discover Jaybro’s environmentally conscious road barriers, a significant leap forward in sustainable infrastructure, jointly developed by Jaybro, SVC, and Holcim, merging safety with environmental consciousness.
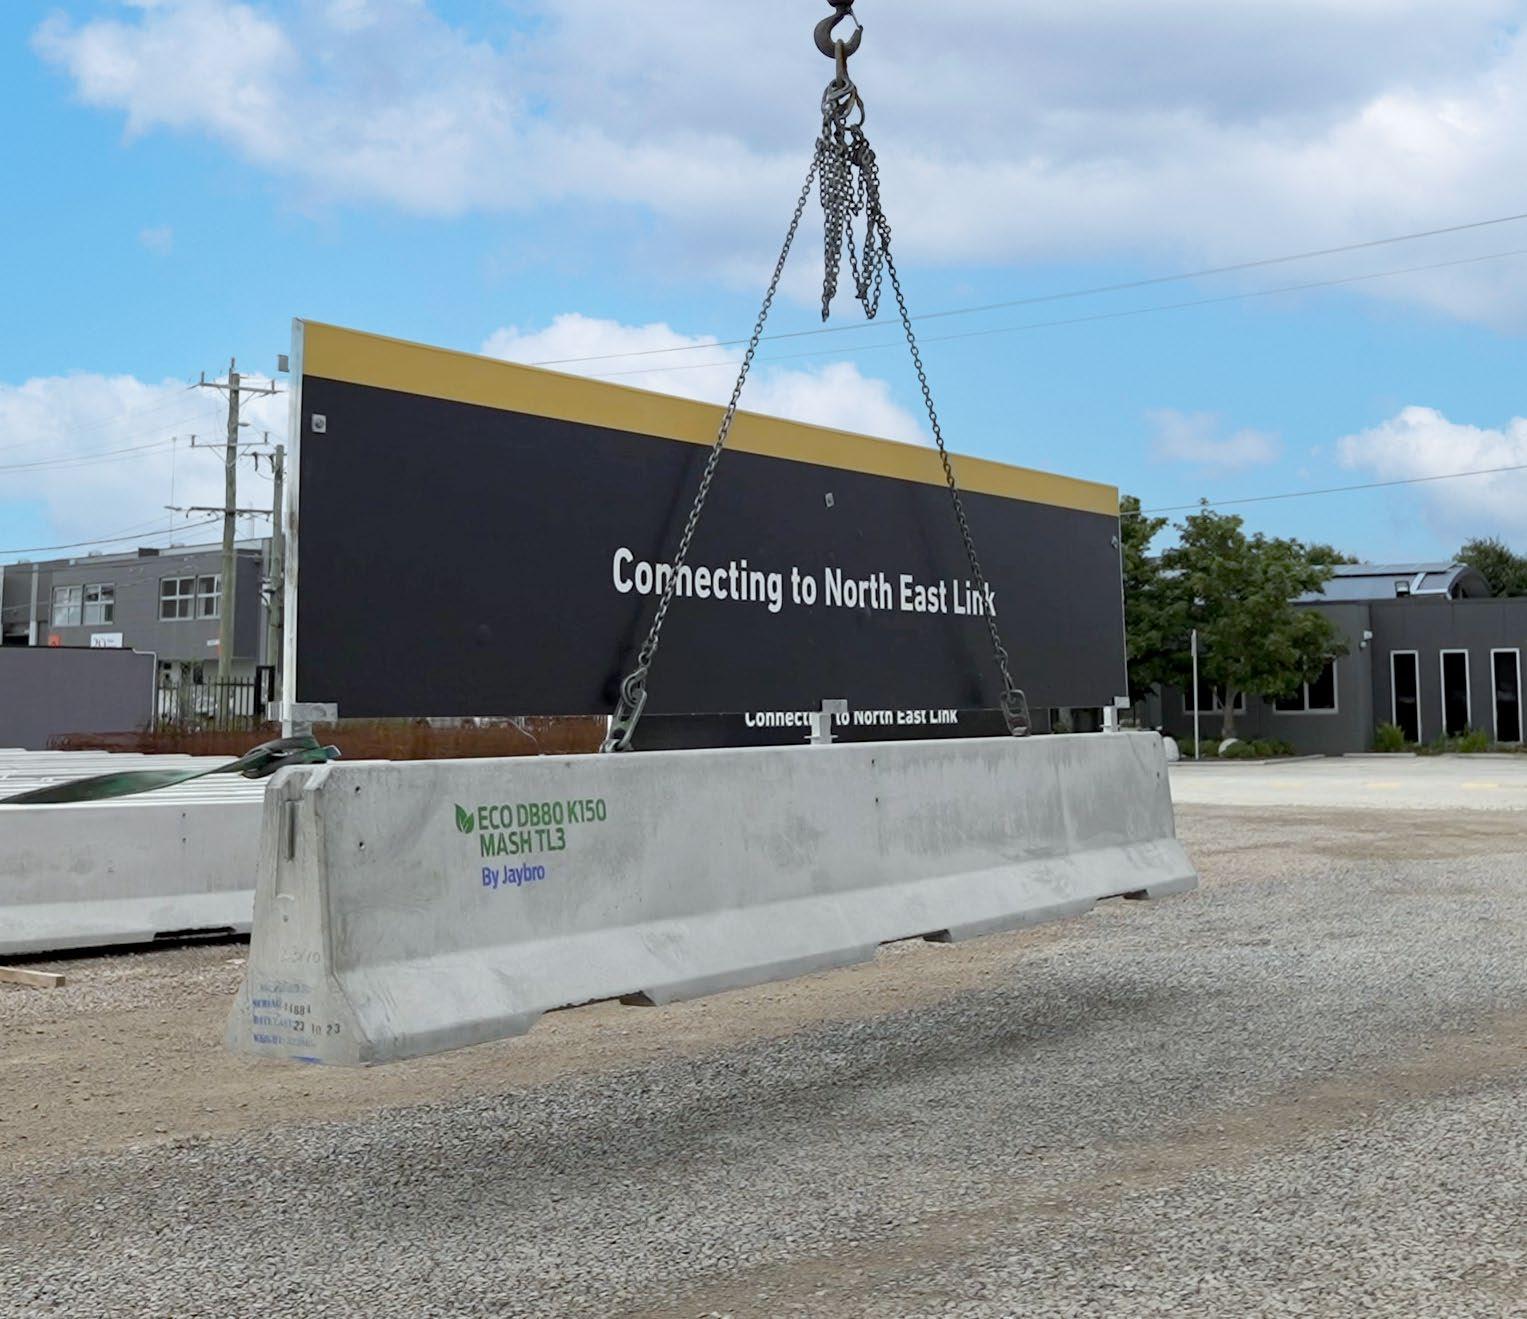
Sustainability meets eco-friendly design with the Australian first DB80 K150 Road Barrier. A major advancement in sustainable infrastructure, developed collaboratively by Jaybro, SVC Products Pty Ltd and Holcim Australia, the ground-breaking DB80 K150 Road Barrier combines safety with environmental awareness.
Our new DB80 K150 Road Safety Barrier System is expertly engineered for the critical task of restraining and redirecting vehicles that have strayed off-course in various circulation areas. MASH compliant, the DB80 K150 Road Barrier is an essential safety component for any traffic management and control strategy.
This innovative system serves as a fundamental component in every traffic management and control strategy, highlighting numerous distinctive characteristics:
y Australian first temporary concrete barrier to offer CO2 carbon emission reductions from using cement reduced concrete.
y The ECOPact mix has a 41.2% CO2 emission reduction from the current AUS LCI baseline for MPa concrete.
y A full 100% carbon reduction is possible by using the ECOPact concrete mix in combination with a certified eligible carbon offset – ECOPact ZERO.
Contact our experienced team to discover the advantages of our Eco-Friendly DB80 K150 road barriers. Find out how these cutting-edge solutions can transform your approach to traffic management, seamlessly blending safety with a dedication to environmental sustainability.
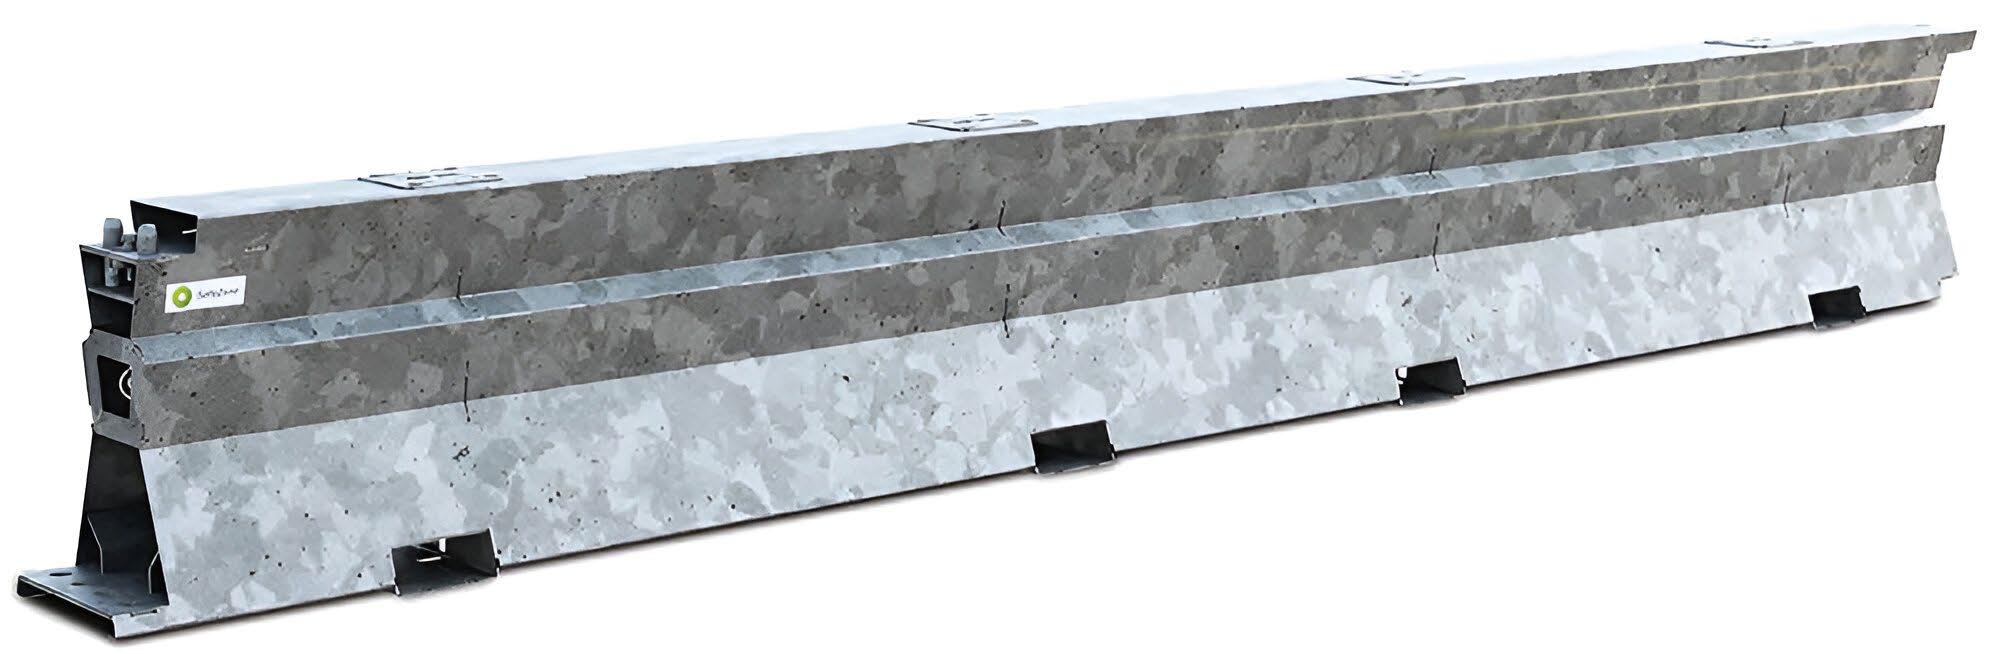
The DB80A/P T150S is a variant of the DB80 T150 free standing system that achieves a lower deflection by anchoring each barrier on the traffic side. The system can be chemically anchored into concrete or pinned into Asphalt. The DB80A/P T150S can be used as the freestanding DB80 T150 system, as both systems have the same internal steel structure.
Features:
y 600cm L / 57cm W / 80cm H
y Concrete foundation or asphalt subsoil
y Mount with connection to the subsoil with anchors
MASH Tested This concrete safety barrier is MASH 2016 tested and certified vehicle restraint system.
The Deltabloc DB80 T150 is the generation 2 to the DB80 Concrete Barrier Range, By utilising smarter steel reinforcement, Male & Female end barrier connection which brings you greater performance.
Remaining Low in weight while still having the ability to utilise 2m & 4m barriers for those inner urban jobs which require tight bends, the DB80 T150 is a breath of fresh air for the road safety industry!
The T150 Barrier is the First ASBAP approved TL-3 & TL-4 approved concrete barrier meaning you can now receive TL-4 Performance from Concrete Barriers rather then having to always needing to go for Anchored Steel Barriers. With an extremely low deflection for concrete barriers (81cm) which is worth boasting about!
mix!
Features: y TL-3 & TL-4 compliant
Length - 6000mm
Weight - 3,125kg y Dynamic Deflection TL-3 & TL-4 - 81cm
Minimum Length - 92 metres
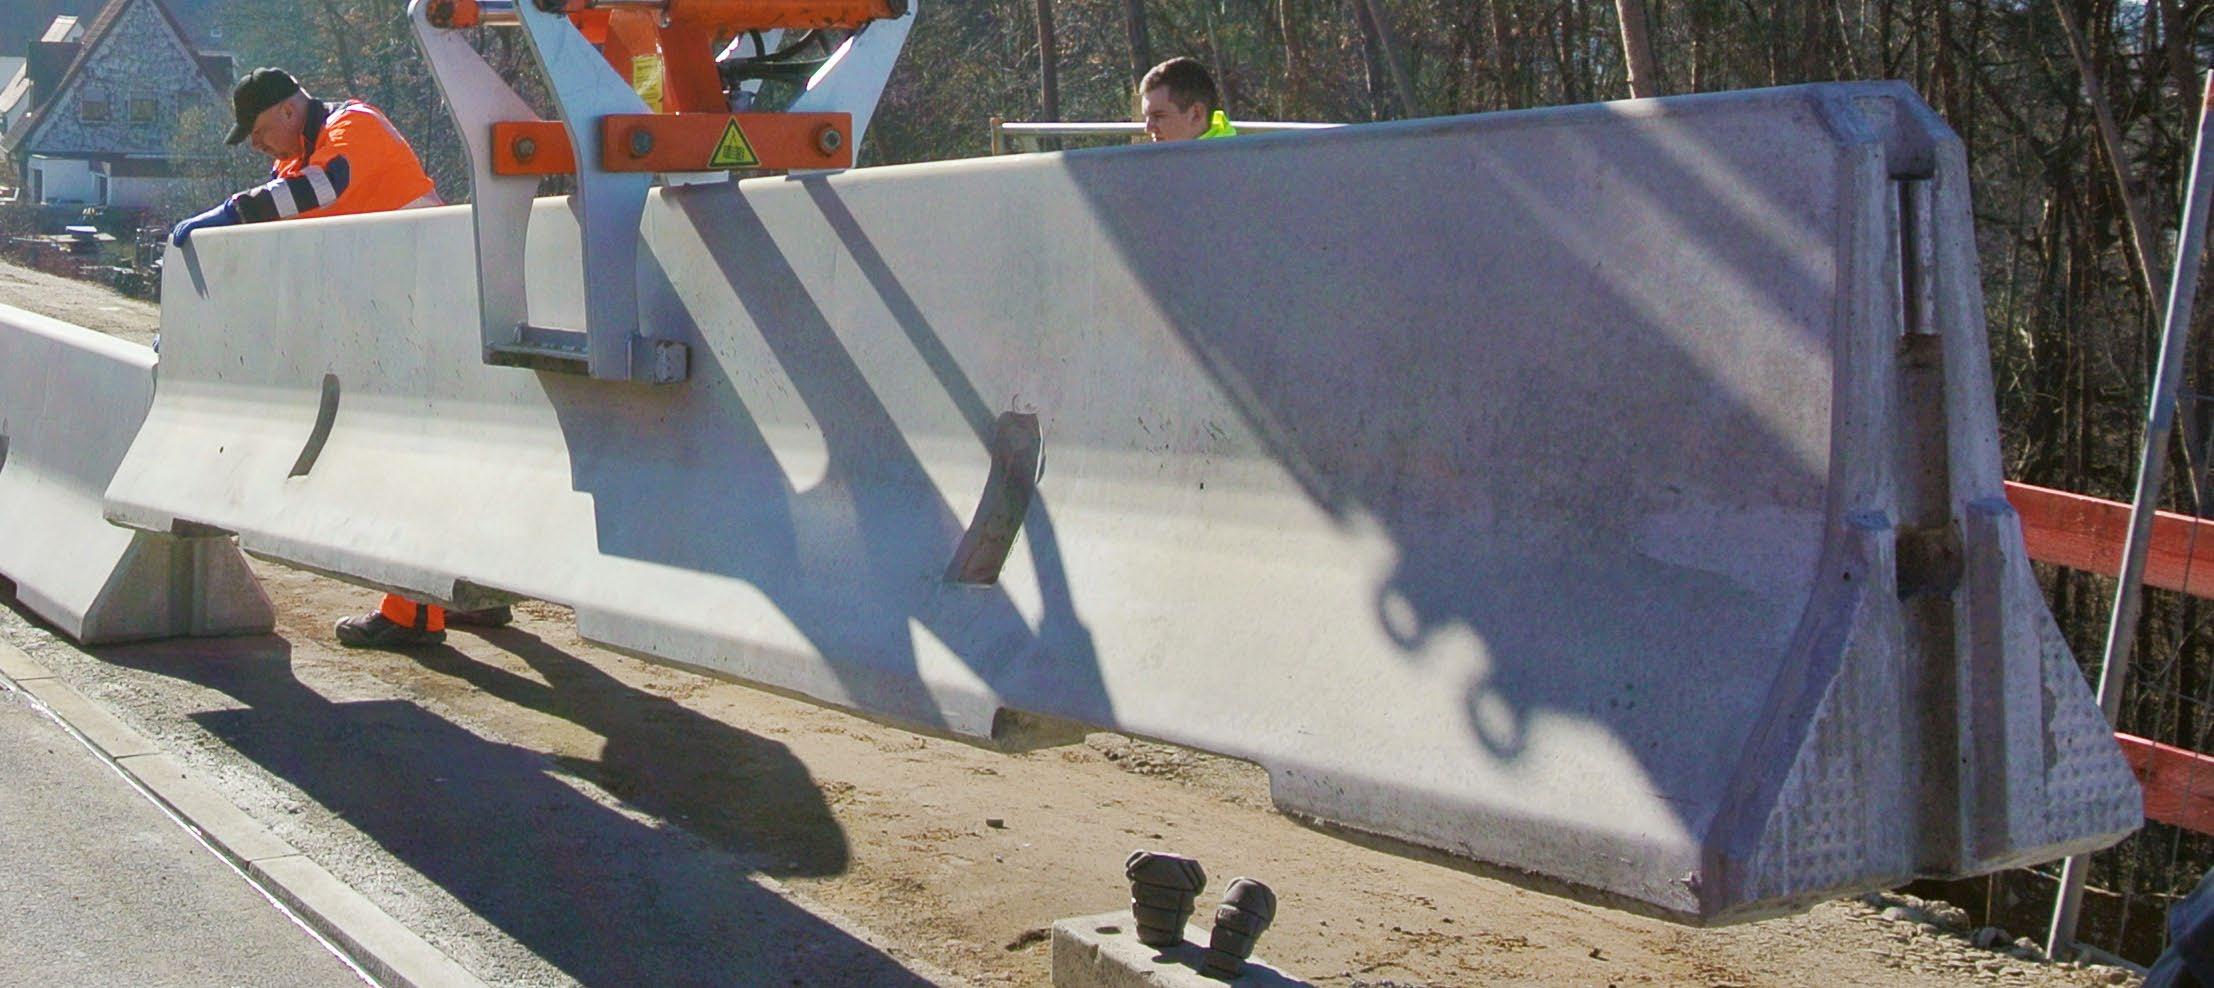
The Deltabloc DB80 is an F-shape steel reinforced MASH approved concrete barrier. With the patented Deltabloc coupling system, the DB80 allows a slight tilting of the impact energy in case of a heavy impact. Elastomer bearings between the single barriers ensure controlled damping of peak loads. This guarantees reliable breakthrough prevention for heavy vehicles and soft impact behaviour for small cars.
Features:
y 6 metre length
y Rated to 100km/h in NSW, TAS, SA, NT, VIC and 80km/h in QLD and WA
y Weighs 525kg per metre
y Easy coupling design
y Can be bolted or pinned in place
y This precast barrier is compatible with all crash cushions available in the market
The Deltabloc DB80 units are demonstrated to meet the requirements of MASH test level TL-3. This means a 2270kg Ute travelling at 100km/h impacting the barrier at an angle of 25 degrees achieves a dynamic deflection of 1.44 metres. Deltabloc technology has been optimised in more than 130 full-scale crash tests, allowing Deltabloc DB80 barriers to deliver the best impact severity results available.
Features:
y 4 metre length
y Rated to 100km/h in NSW, VIC, NT, SA, TAS, NZ
y Rated to 80km/hour in QLD and WA
y Weighs 600kg per metre
y Easy coupling design
y Can be bolted or pinned in place
y This precast barrier is compatible with all crash cushions available in the market.
MASH Tested:
The Deltabloc DB80 units are demonstrated to meet the requirements of MASH test level TL-3. This means a 2270kg Ute travelling at 100km/h impacting the barrier at an angle of 25 degrees achieves a dynamic deflection of 1.44 metres.
Features:
y 2 metre length
y Utlising an extension coupler to allow 2m barrier to achieve 16 metre radius
y Rated to 100km/h in NSW, VIC, NT, SA, TAS, NZ
y Rated to 80km/hour in QLD and WA
y Weighs 600kg per metre
y Easy coupling design
y Can be bolted or pinned in place
y This precast barrier is compatible with all crash cushions available in the market.
MASH Tested:
The Deltabloc DB80 units are demonstrated to meet the requirements of MASH test level TL-3. This means a 2270kg Ute travelling at 100km/h impacting the barrier at an angle of 25 degrees achieves a dynamic deflection of 1.44 metres.
Used to connect concrete barriers. Extended coupler allows for bends and curves when installing longer lengths of concrete barriers.
Features:
97mm Dogbone Coupler
CODE DESCRIPTION
DB80CPL
DB80 Jersey Barrier Coupling K150 97mmStandard Coupler
Used to connect concrete barriers. Extended coupler allows for bends and curves when installing longer lengths of concrete barriers.
Features:
y 117mm dogbone coupler
y To create tighter radius
CODE DESCRIPTION
03-DB80C117
DB80 Jersey Barrier Extended Coupling K150 117mm - Extended Coupler

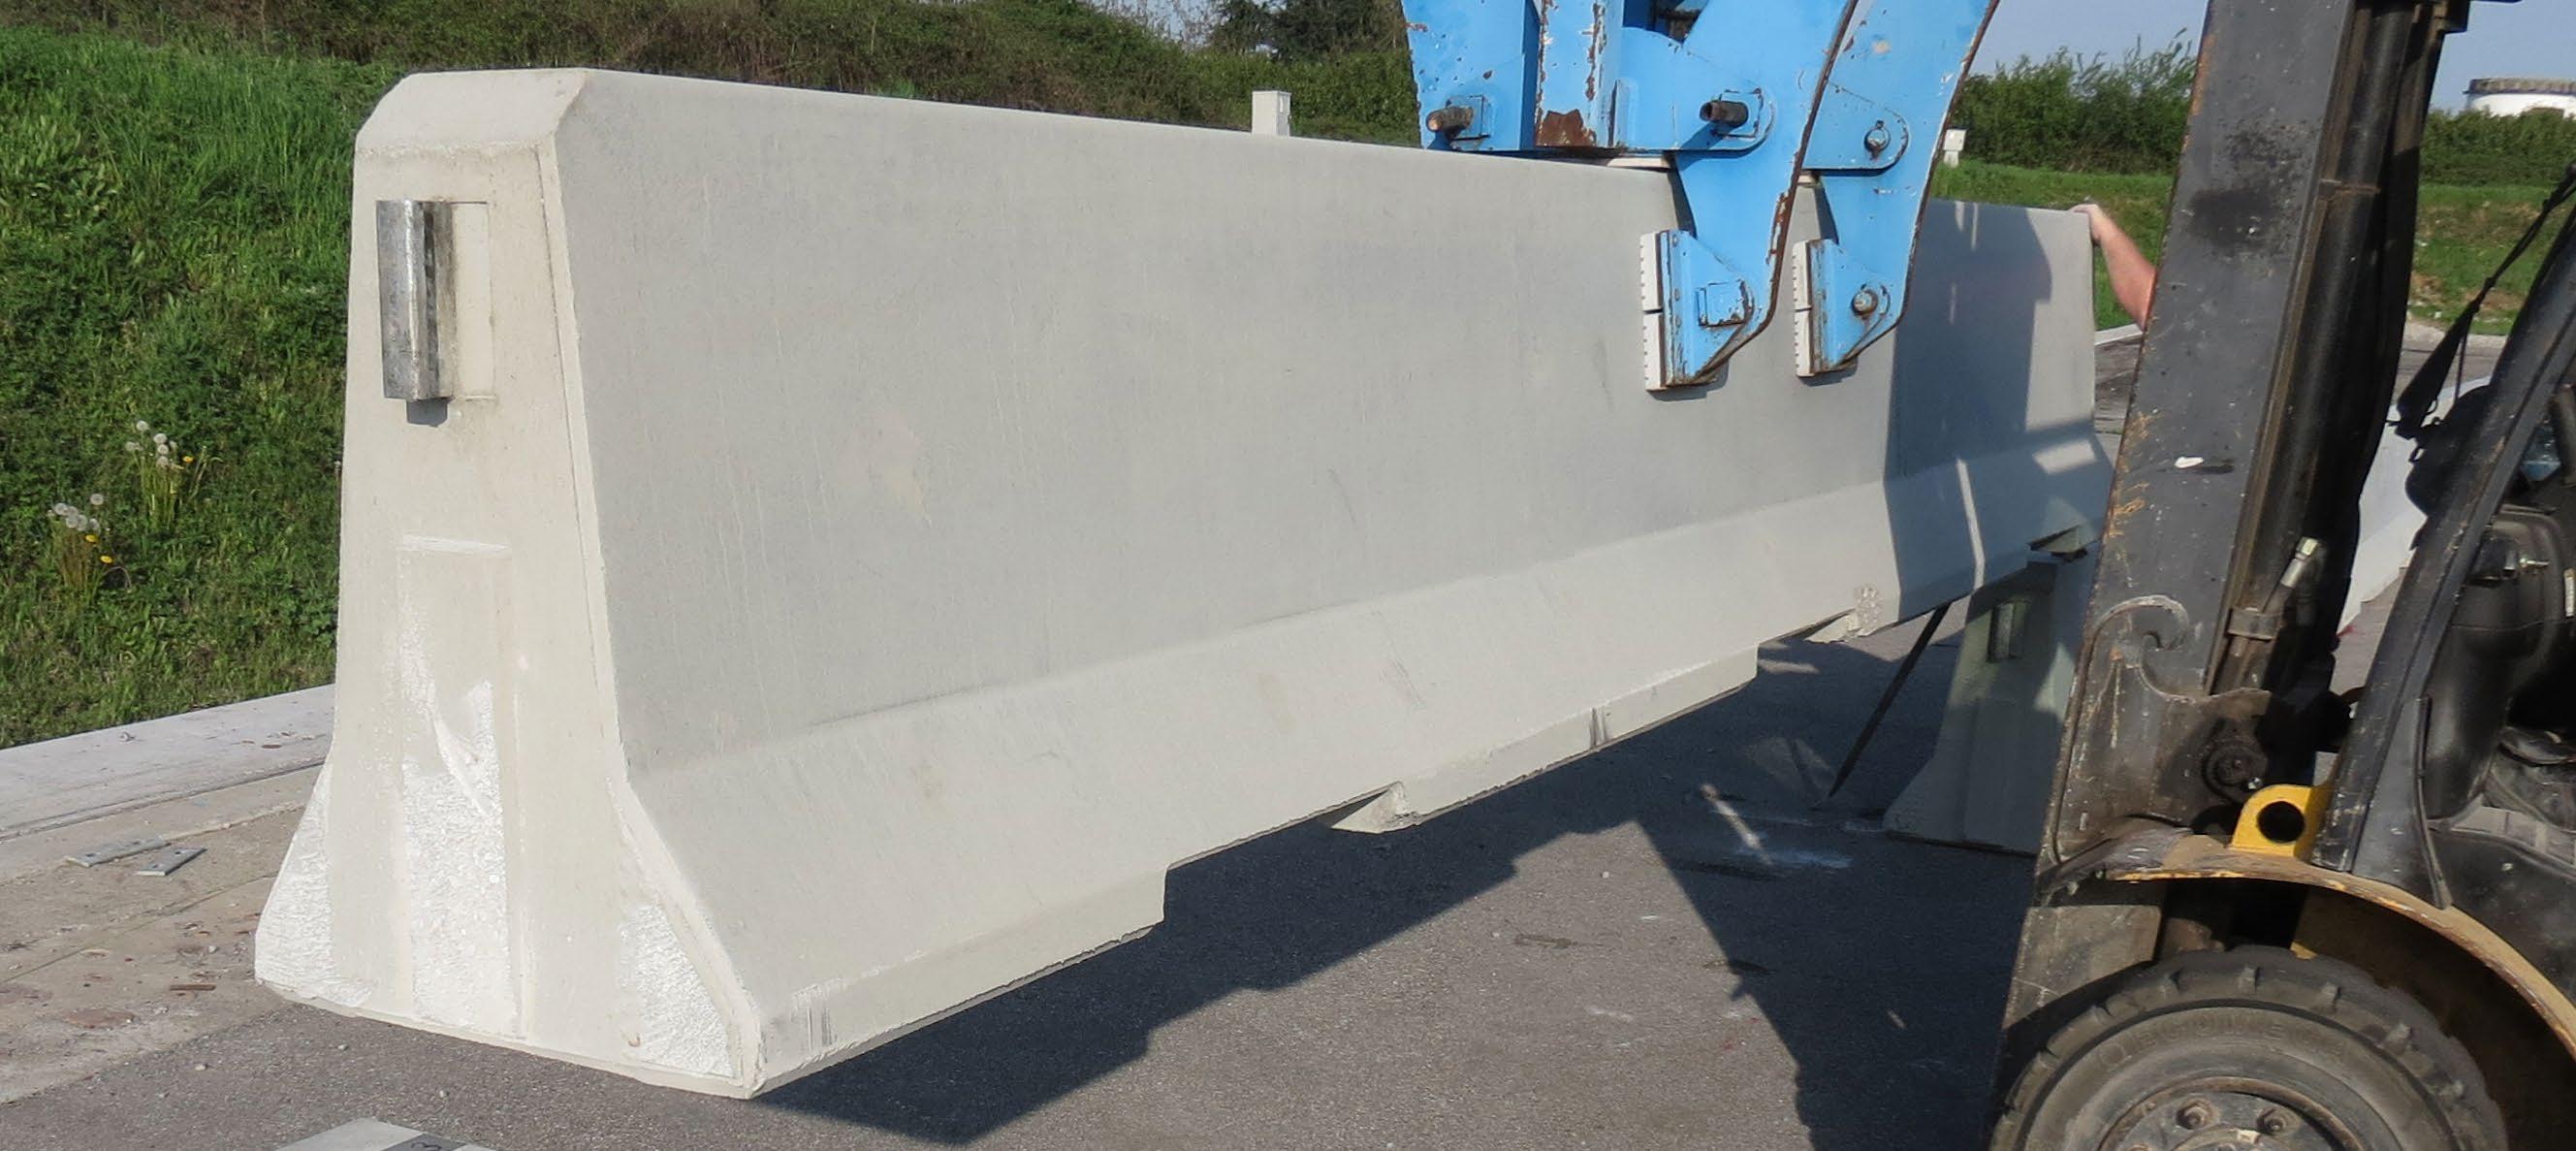
The Jaybro – M220160 Concrete Barrier Lifting Clamp is designed to be attached to a crane, forklift, excavator or similar lifting device to facilitate the lifting of concrete barriers. The unit is a ‘grab type’ device which secures the load by application of force to the sides of the load. The function of the unit does not require manual interaction of the operator therefore removing personnel from the lifting operation.
Features:
y These lifting Clamps are manufactured to comply with AS4991
y Designed for the lifting and transferring of road concrete barriers between 150mm and 300mm in a wide variety of industries such as; shipbuilding, construction, aircraft and offshore applications.
y The Global vertical and horizontal plate clamps are suitable for the lifting and transfer in vertical and horizontal position of non-sagging steel plates.
y These plate clamps are manufactured from high quality steel to guarantee the safety and durability required by industrial applications.
y All clamps have been ergonomically designed to be user-friendly (smaller, lighter and more compact) while not sacrificing strength and durability.
Specifications:
y The lifting clamp is made of steel in the form double tongs.
y The arms and jaws of the device are finished with a polyurethane cover to increase friction.
y When device is clamped on the load during lifting, the loads centre of gravity should be directly under carrier ear, to provide stability.
y Device is equipped with automatic lock
Screen kits to suit 6m, 4m and 2m Deltabloc barriers available
Available in NSW, QLD, WA, ACT
Features:
y Easy anti gawk system
y Posts bolt to cast in ferrules
y Panels slide over the top of posts
Screen kits to suit 6m, 4m and 2m Deltabloc barriers available
Available in VIC, SA
Features:
y HD anti gawk system
y Posts bolt to cast in ferrules
y Panels slide the into posts
100% blockout anti gawk system.
Features:
y Holypan sandwich panel providing 100% block out
y Available to suit 6m , 4m and 2m Deltablocs
CODE DESCRIPTION
03-HDHP Holypan anti gawk kit
Holypan that can be printed with customers logo or message.
Features:
y Custom branded Holypan
y To suit 6m, 4m and 2m Deltablocs
CODE DESCRIPTION
03-HDHPB Branded Holypan
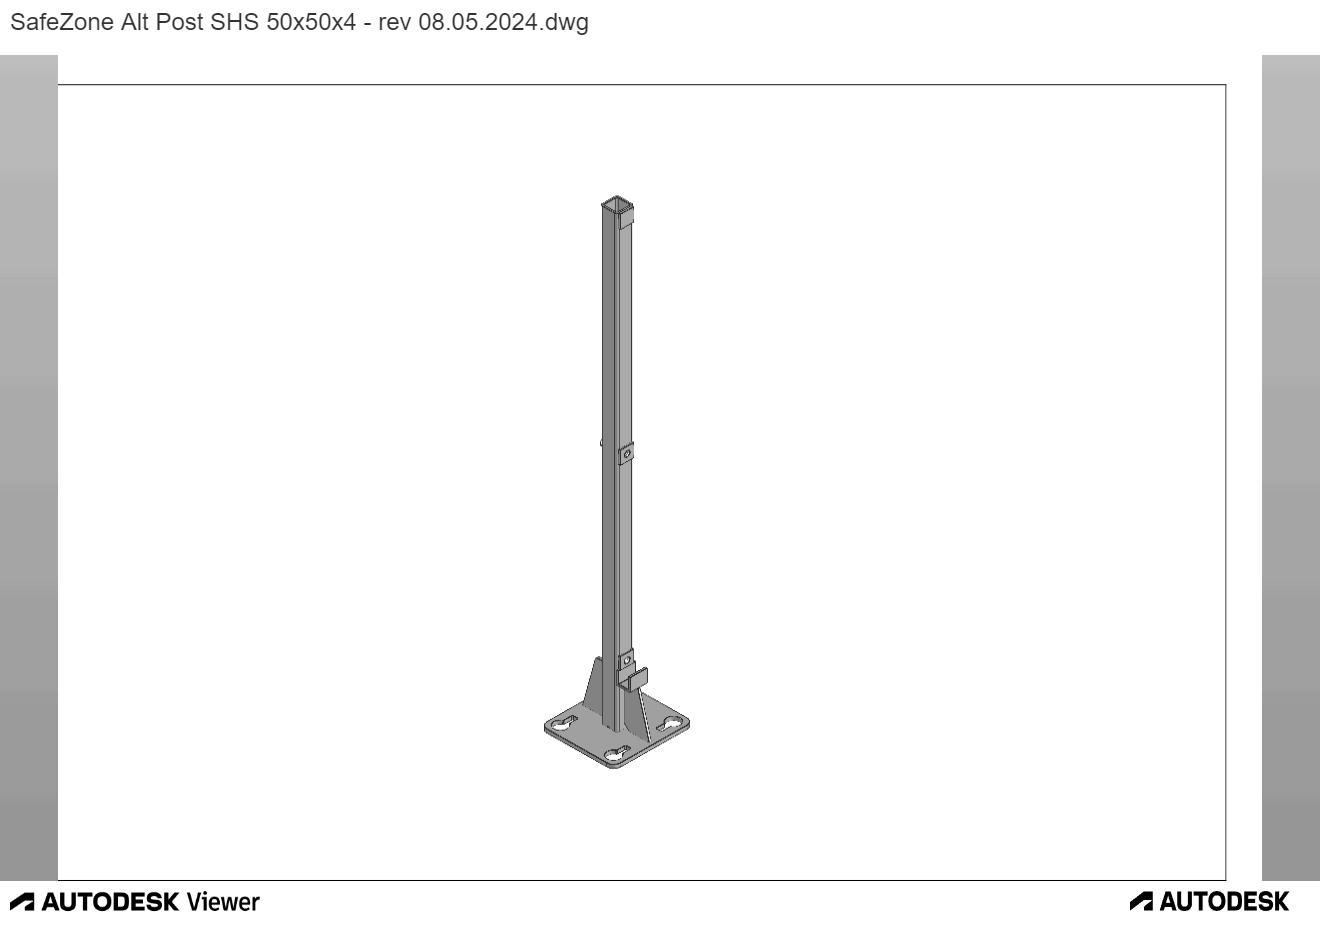
Non-invasive post handrail system for concrete barriers, jersey kerbs and more. Ideal for use during and after construction. Complies to AS/NZS 1170.1 and AS 1657
CODE DESCRIPTION
03-NDGRPOST Non-Drill Guardrail System for Jersey Barriers - Post
Utilised to fix a barrier to the pavement to either reduce deflection or when fitted adjacent to a re-directive crash cushion.
CODE DESCRIPTION
03-CBGP Concrete Barrier Ground Plate for DB80 Barrier
The ABSORB-M™ is a non-redirective, gating, crash cushion designed to meet the latest test standards defined in the Manual for Assessing Safety Hardware (MASH), Second Edition, 2016. The ABSORB-M™ system utilises Tension Straps, a Midnose, a Transition, and water-filled Element Assemblies (Elements) to absorb kinetic energy and safely contain or control the penetration trajectory of impacting vehicles.
The system is comprised of a Nose Plate, Elements, Pin Assemblies (Pins), a Midnose, a Transition, and mechanical anchors. The front Element is always empty with remaining Element(s) full of water. Each Element is pre-assembled with Tension Straps secured with bolts and a thread locking compound.
ABSORB-M™ is designed to accommodate a variety of portable safety shape, constant slope, and other shapes of barrier up to 1067mm height.
Approved
Features:
y 2 Element system rated to 70km/h , 3 Element system rated to 50km/h
y TL-2 Length - 4.46m, TL-3 Length - 6.39m
y Rapid deployment and retrieval
y No ground anchoring required
y Universal transition
y Narrow footprint
y Can be deployed on almost any road surface
y Can be repositioned while filled with water via integrated fork lift ports
y Shortest MASH TL-3 tested non-redirective, anchorless crash cushion
y Durable long-life parts
y Approved for use in work zone locations
System Conditions
y TL2 - Speed restricted to 60km/h on anchored steel barrier systems.
y TL3 - Speed restricted product to 80km/h.
y Exhibits behaviour similar to a gating terminal.
y 18.5 metre x 6 metre clear run-out area is required, measured from the connection to the longitudinal barrier.
y Installation on top of a kerb is not recommended. However, if installed on top of a kerb, all system components must be free to operate.
The Redirective, Non-Gating, Universal TAU-M Crash Cushion is designed to meet MASH TL-3 and TL-2 testing requirements in a compact, partially reusable design. The system is available for concrete and asphalt applications and can shield hazards with widths up to 880 mm. Ease of installation, fast on-site repairs, and numerous transition options make the TAU-M system an ideal crash cushion to shield most roadside and median hazards. The TAU-M system is also available as an upgrade kit to retrofit existing NCHRP 350 TAU-II Systems into MASH TAU-M Systems.
Features:
y MASH TL-2 (70 km/h) & TL-3 (100 km/h) compliant
y AS/NZS 3845.1:2015 compliant
y Approved for recommendation by the Austroads Safety Barrier Assessment Panel (ASBAP)
y Classification - Redirective, Non-Gating, Partially Reusable (R-NG-PR) Impact Attenuator
y TL-3 Length - 6.93 m / 22’ 9”
y TL-2 Length - 4.33 m / 14’ 2”
y Width - 762 mm / 30”
y Height - 8030 mm / 32 5/8”
y Test Level - MASH TL 2 / 3
y Minimum number of anchors needed to secure the system
y Reduced length vs. NCHRP 350 TL-3 system
y Upgraded slider panels for increased durability
y Can be installed over bridge expansion joints
y Concrete and asphalt systems available
y Numerous non-proprietary transition options
y NCHRP 350 to MASH Retrofit kits available
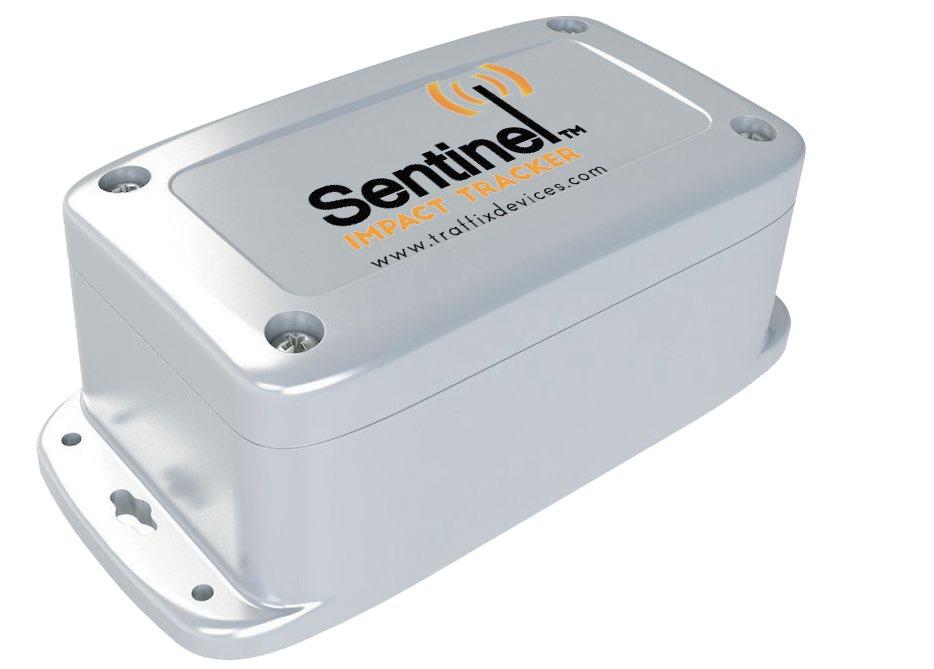
With the Sentinel’s asset tracking and management capabilities, users are able to track and record the attenuator, end terminal, guard rail, sign or any other asset’s installation date, manufacturer’s make and model, site location, installer’s information, impact and inspection history – all from your computer or mobile device with only a small monthly subscription.
Features:
y 24/7 Monitoring of permanent and temporary attenuators
y Easily attaches to most attenuators
y Powered by a 5 year lifespan battery
y Weatherproof & durable
y Updated remotely via cellular download
y Immediate notification via text and/or e-mail, upon impact
y Self-contained compact device
y Reports accelerations above a set threshold
y Tune-able to work with most common permanent & temporary attenuators
y Map of all monitored devices with colored pins.
y Zoom in to specific devices to get: Date of install, Type of device, Serial Number, Maintenance and repair history, Picture of device as installed
y Real Time reporting of incidents / impacts
y Data provided to assist in revenue recovery

SafeZone offers superior protection and maximum performance. It is smartly designed to absorb high levels of impact energy within its deflection range.
Its unique and patented system was tested according to the AASHTO MASH (American Association of State Highway and Transportation Officials Manual for Assessing Safety Hardware) 2016 standards.
The barrier successfully passed performance tests at MASH TL-3 up to MASH TL-4 Limited Deflection. This means that SafeZone responds well to the impact velocity of a 10-ton truck traveling at 56mph (90km/h) and impacting the barrier at a 15° angle.
Rigid standard steel or reinforced concrete transmits impact forces back into the vehicle, rather than absorbing them, which is a possible risk factor for severe or hidden damages or injuries. SafeZone is built to dissolve and absorb vehicle impact forces. It can be applied as a temporary or permanent barrier on bridges, workzones, edges of roads, as well as median barriers on highways.
The small footprint is also an important benefit. SafeZone’s simple, lightweight yet solid design means that it can also be easily transported.
Features:
y Smartly designed to absorb a maximum of impact energy within a built-in deflection range
y Estimated 20-year lifespan
y Removable anchor shoe utilised to reduced damage to the safety barrier
y Easy connection system allows for ultra-quick placement
y Damaged sections can easily be removed or replaced
y Available in Standard Deflection TL3 & TL4, LDS TL3 & TL4, and MDS TL3
y Dimensions: 639mm x 800mm x 5800mm
y Lightweight: only 92kg/m (62 lb/ft)
y Modular elements
y Radius pieces available 5 - 90 degrees
y Standard, limited and minimum deflection
y Lowest deflecting TL4 barrier approved by ASBAT
System Conditions
y Installation on top of a kerb is not recommended. However, if installed on top of a kerb, all system components must be free to operate.
y All offsets are to be measured from the relevant outer edge of the foot. The foot is not trafficable.
System Conditions
y Installation on top of a kerb is not recommended. However, if installed on top of a kerb, all system components must be free to operate.
y All offsets are to be measured from the relevant outer edge of the foot. The foot is not trafficable.
Point of Redirection –
System Conditions
Requires site specific analysis. Refer to Austroads
y Installation on top of a kerb is not recommended. However, if installed on top of a kerb, all system components must be free to operate.
y All offsets are to be measured from the relevant outer edge of the foot. The foot is not trafficable.
y This product is designed for constrained sites ONLY that cannot accommodate the working widths of more flexible systems. While providing lower working width, this product increases the potential for vehicle occupant risk during high-speed impacts.
y Throughout the installation it is recommended to revert to greater pin spacing (LDS, Standard) where there is the accepted working width behind the installation.
y A risk assessment of using this product must be undertaken. Where the risk of high-speed impacts is high, the speed must be limited to not greater than 80 km/h.
SafeZone 5.8 metres section, male/female QuickLink
Incorporated into the barrier run to alternate connections and remove barriers easier.
Incorporated into the barrier run to alternate connections and remove barriers easier.
Built for Bridge Decks to allow for expansions the pavement gradually increases and decreases in size.
The SafeZone Variable angle barrier connected on a hinge has been developed for those areas on site requiring a greater radius then our standard 5 & 10 degree pieces can achieve. This barrier can achieve up to a 90-degree bend.
Collapsible
Male transition piece for Safezone.
Female transition piece for Safezone.
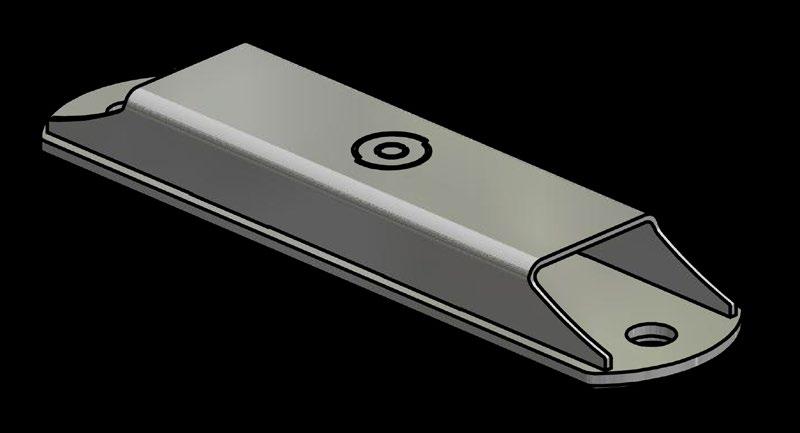
Slides into barrier to anchor to pavement, rather than the generic way of anchoring barriers that are part of the barrier structure. This shoe allows to minimise barrier damage upon impact as it is a separate part to the Safezone Barrier.
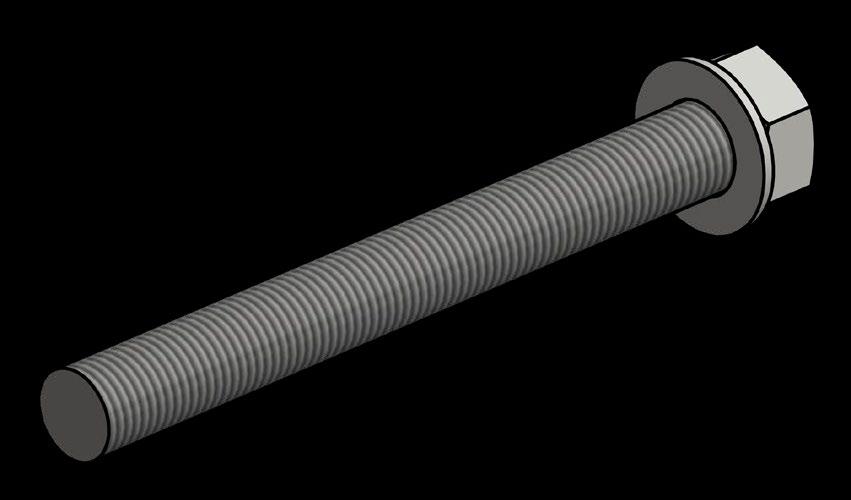
Zinc plated Flat Round Washer
M16 x
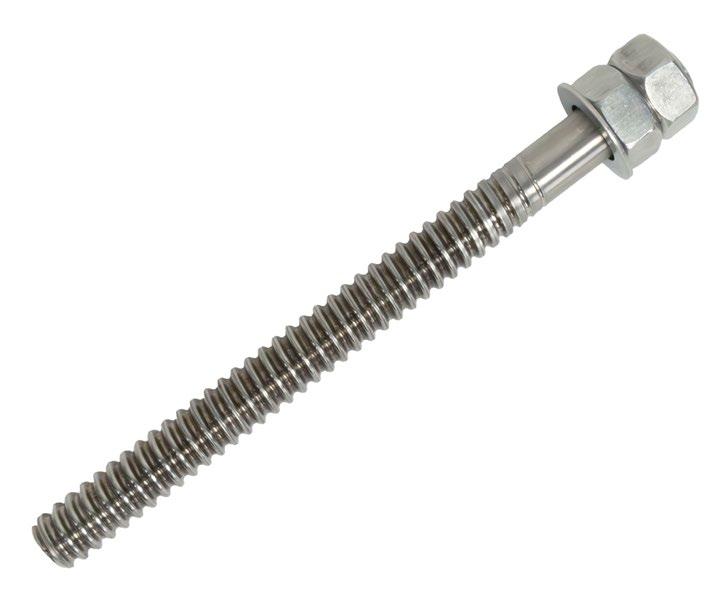
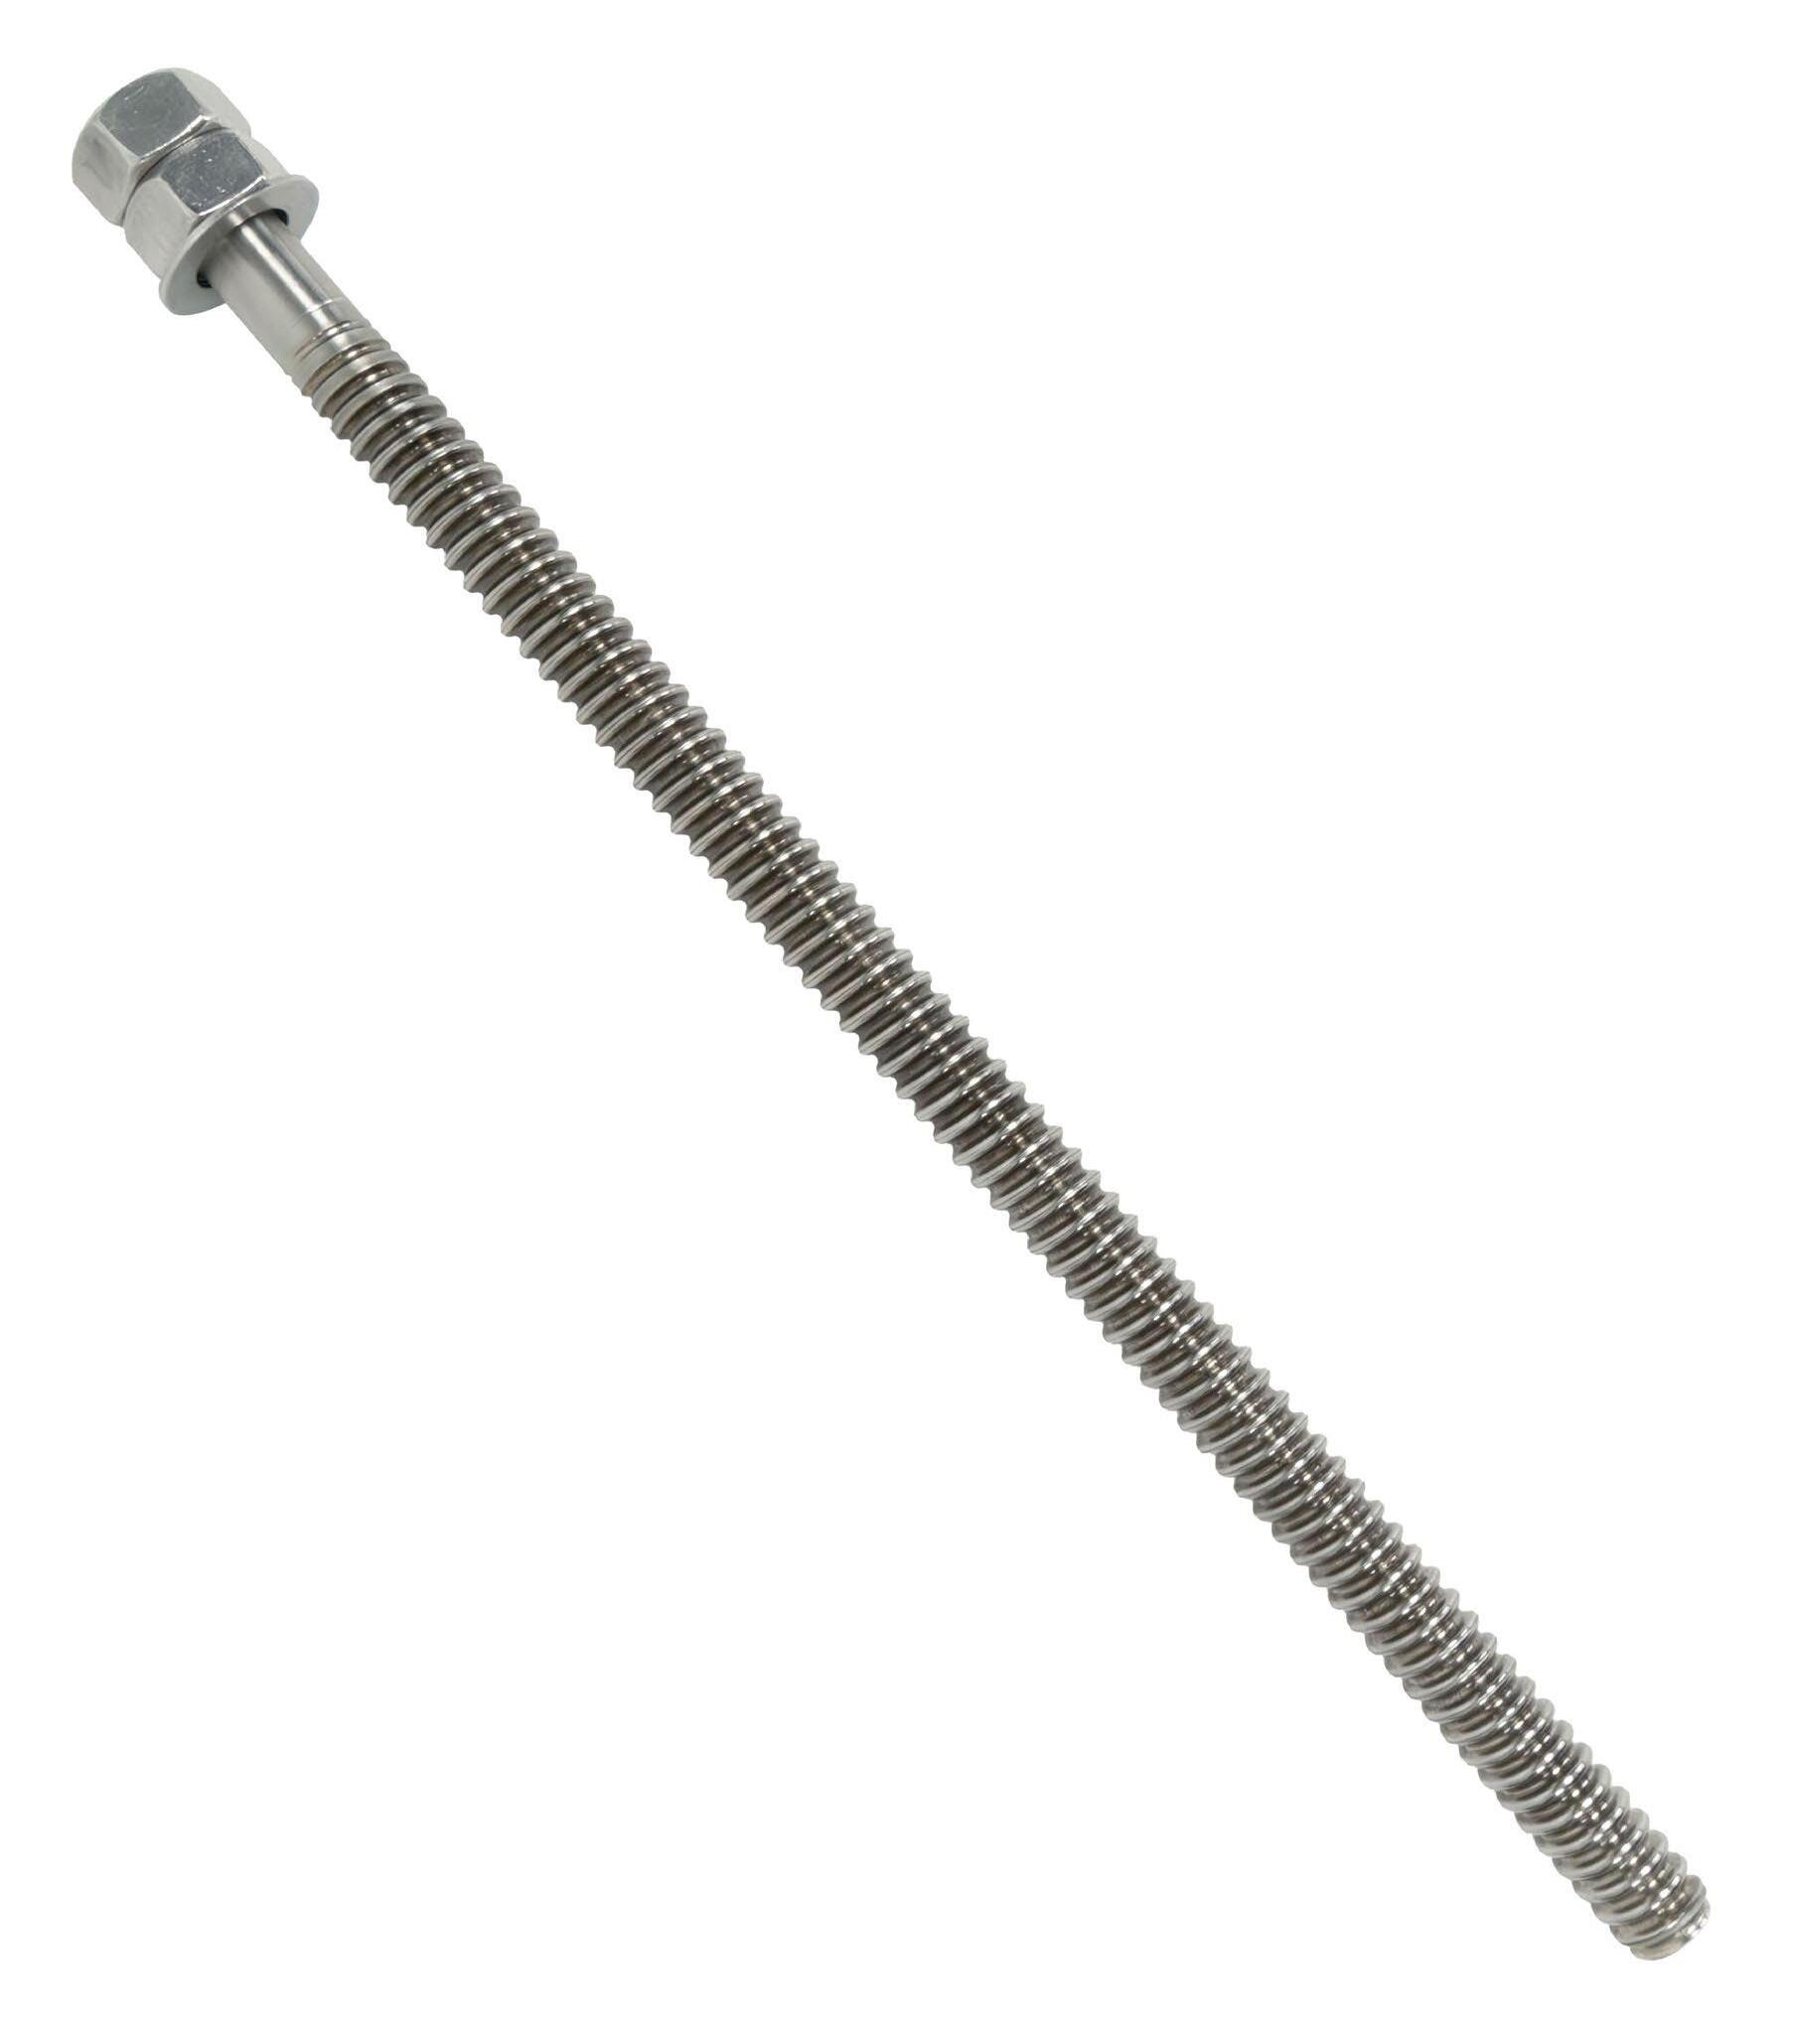
Designed and engineered for use with MASH TL3 and TL4 temporary barrier systems and end treatments, the Gravity Bar Extractable Road Anchor is Australia’s premium road anchoring product produced from high-quality materials to deliver superior function and performance.
M20 and M24
y 250mm long for 200mm embedment
y 396mm long for 330mm embedment
y 450mm long for 400mm embedment
M30
y 315mm long for 250mm embedment
y 395mm long for 330mm embedment
y 465mm long for 400mm embedment
Features
y Reduced footprint
y Australian made
y Easy installation
y Enviromentally friendly
y Workplace safe
y Easy extraction
y Durable (non-corroding)
03-GRAVITYB Type 2 Gravity Bar
Gravity Bar has been designed to alleviate all of the common issues associated with conventional road anchors. The primary objective was to achieve maximum efficiency and productivity by minimising manual handling and time.
Manufactured from 304 Stainless Steel, Gravity Bar Extractable Road Anchors do not corrode, and are designed to persist where other road anchors fail.
Higher productivity, lower cost to install. Gravity Bar is designed to go in fast and easy and expedite system maintenance and alterations by being reusable and functional.
Excellent thread quality at both ends of the anchor means they are easy and fast to assemble and can be wound in and out of the same holes after setting without compromised holding capacity.
No bond breaker is required for installation.
Gravity Bar anchors can be hammered into place without detriment to function where ground conditions warrant some degree of force during installation.
No exposed thread and no sharp or square edges mean they do not pose a tyre puncture risk to traffic.
The average extraction time for a Type 2 Gravity Bar Extractable Road Anchor is 5 seconds.
Due to their superior surface finish, Gravity Bar anchors will retract with minimal rotary friction making extraction easy and quick, with the least possible amount of manual handling and no undue wear and tear to tools.
Superior holding capacity means less Gravity Bar anchors per linear metre than alternative products which equates to considerably higher productivity and significantly lower handling and remediation costs. Less holes to drill, less holes to fill.
M20
M30 GRAVITY BAR EXTRACTABLE ANCHOR
Embedment
Overall Anchor Length 315mm 395mm 465mm
Right Hand Thread Length 47.0mm
Shank 17.0mm x 27.5mm
Nut Dimensions AF46.0mm x H24.0mm (α)
Required Drill Size 35.0mm
Gravity Bar is designed and made in Australia, by people who actually install barrier systems. Beware of second-rate, spurious imitations produced offshore.
Accepted for use in:
• BG800™️ HighwayGuard™️ SafeZone SMART Cushion
Thanks to its high bond strength, Superbond mortar achieves a very high load level for safe use in cracked and non-cracked concrete. The Superbond mortar can even be used at extremely high temperatures of up to +150 °C. This opens up new application fields, where no chemical anchor could be used previously. The Superbond mortar is approved for seismic applications, which ensures safety even under extreme conditions.


Ensure the security of all your public gatherings with the Block’Axess Barrier, offering enhanced protection for events, demonstrations, and high-risk areas. Our scalable barriers, certified at 3.5T for Blax V2 and 7.5T for Blax V3, provide effective defense against terrorist threats, malicious activities, and attacks. Choose peace of mind with our barriers, engineered to withstand speeds of up to 50 km/h.
3.5 T - 50km/h Certified N1
Assembly & Disassembly In 5 Minutes
• Add items by modular length
Thick galvanised steel – Rust resistant
Removable only with special tools
• Installation without machinery
Installation can be complete in only 5 minutes by one person
Easy to store
• Customisable to location
7.5 T - 50km/h Certified N2A
Assembly & Disassembly In 7 Minutes
• Add items by modular length
No fixed support needed
• Rust resistant
• Removable only with special tools
Extra set of reinforced supports
• Installation can be complete in only 7 minutes by one person
• Easy to store
CODE DESCRIPTION
03-BLAXV2 Block Axess V2 Barrier
03-BLAXV3 Block Axess V3 Barrier
Dimensions of the Assembled Barrier
640mm Space between elements (step)
• 4m Length for 7 elements (standard)
250 kgs Weight every 4 meters
772mm Height
• 1100mm Width
120mm Thickness
25kg Weight per block
Dimensions of the Assembled Barrier
520mm Space between elements (step)
• 4.8m Length for 14 elements (standard)
450 kgs Weight every 4.8 meters
• 772mm Height
1100mm Width
120mm Thickness
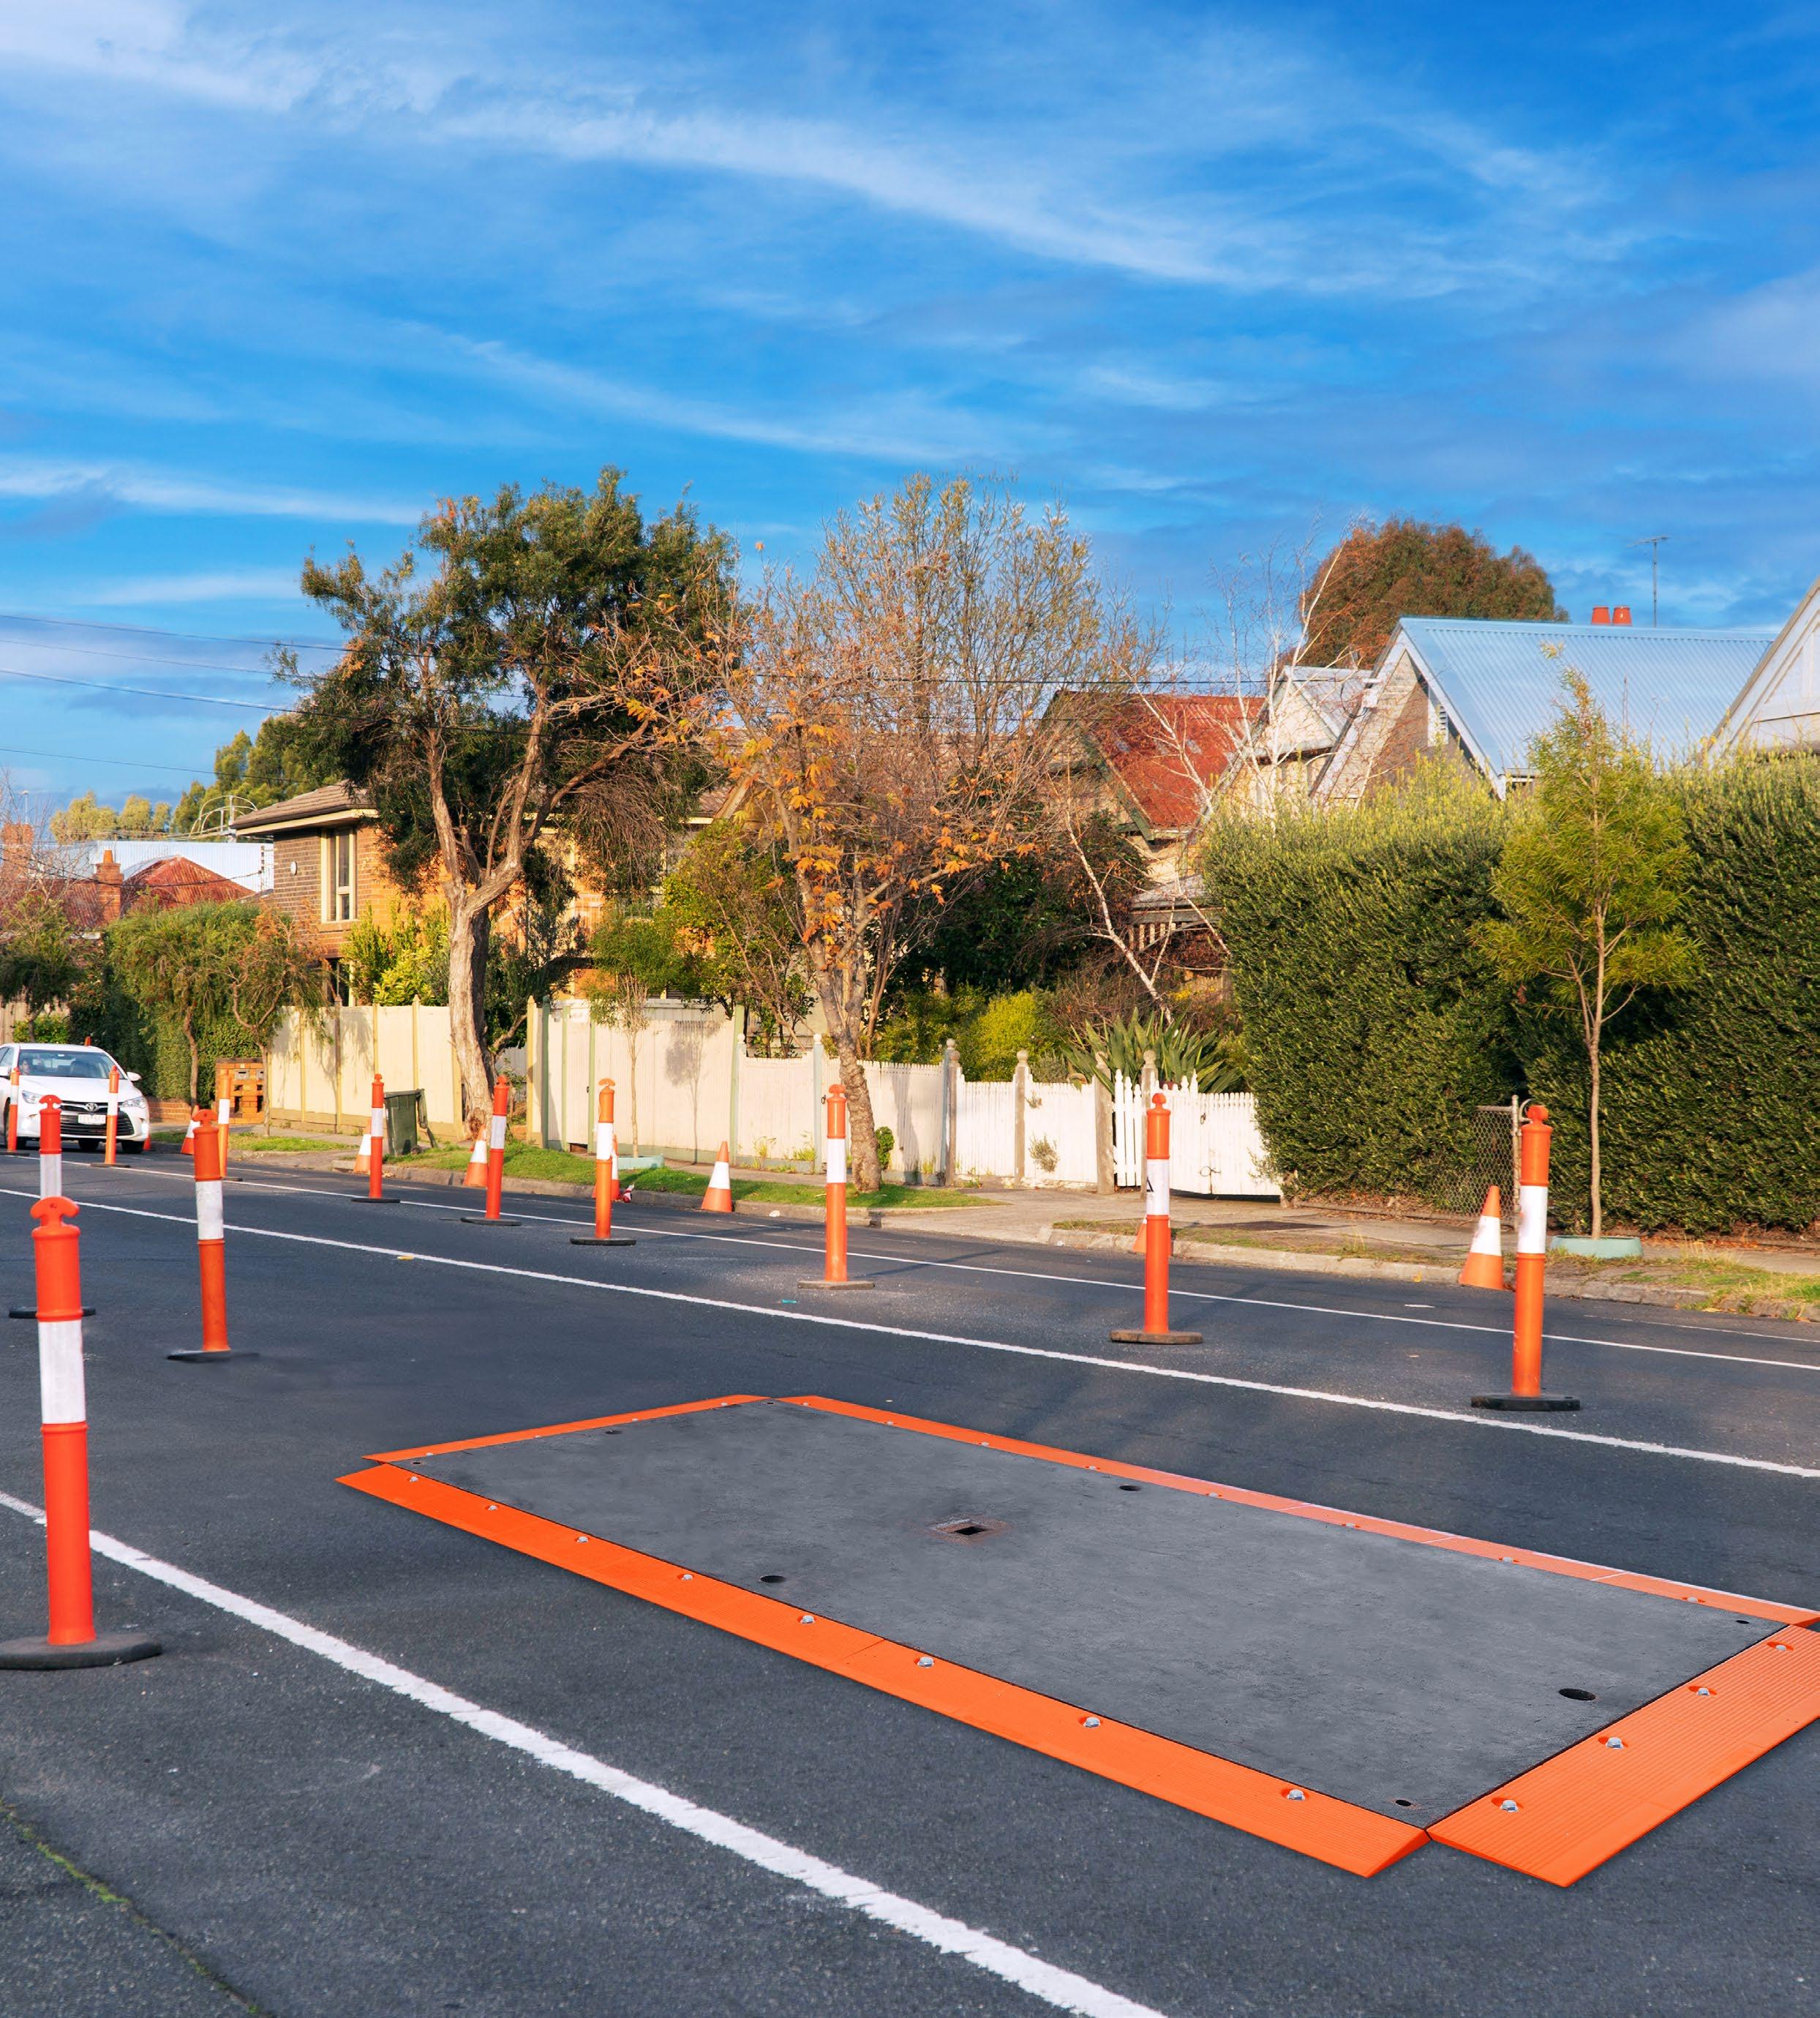
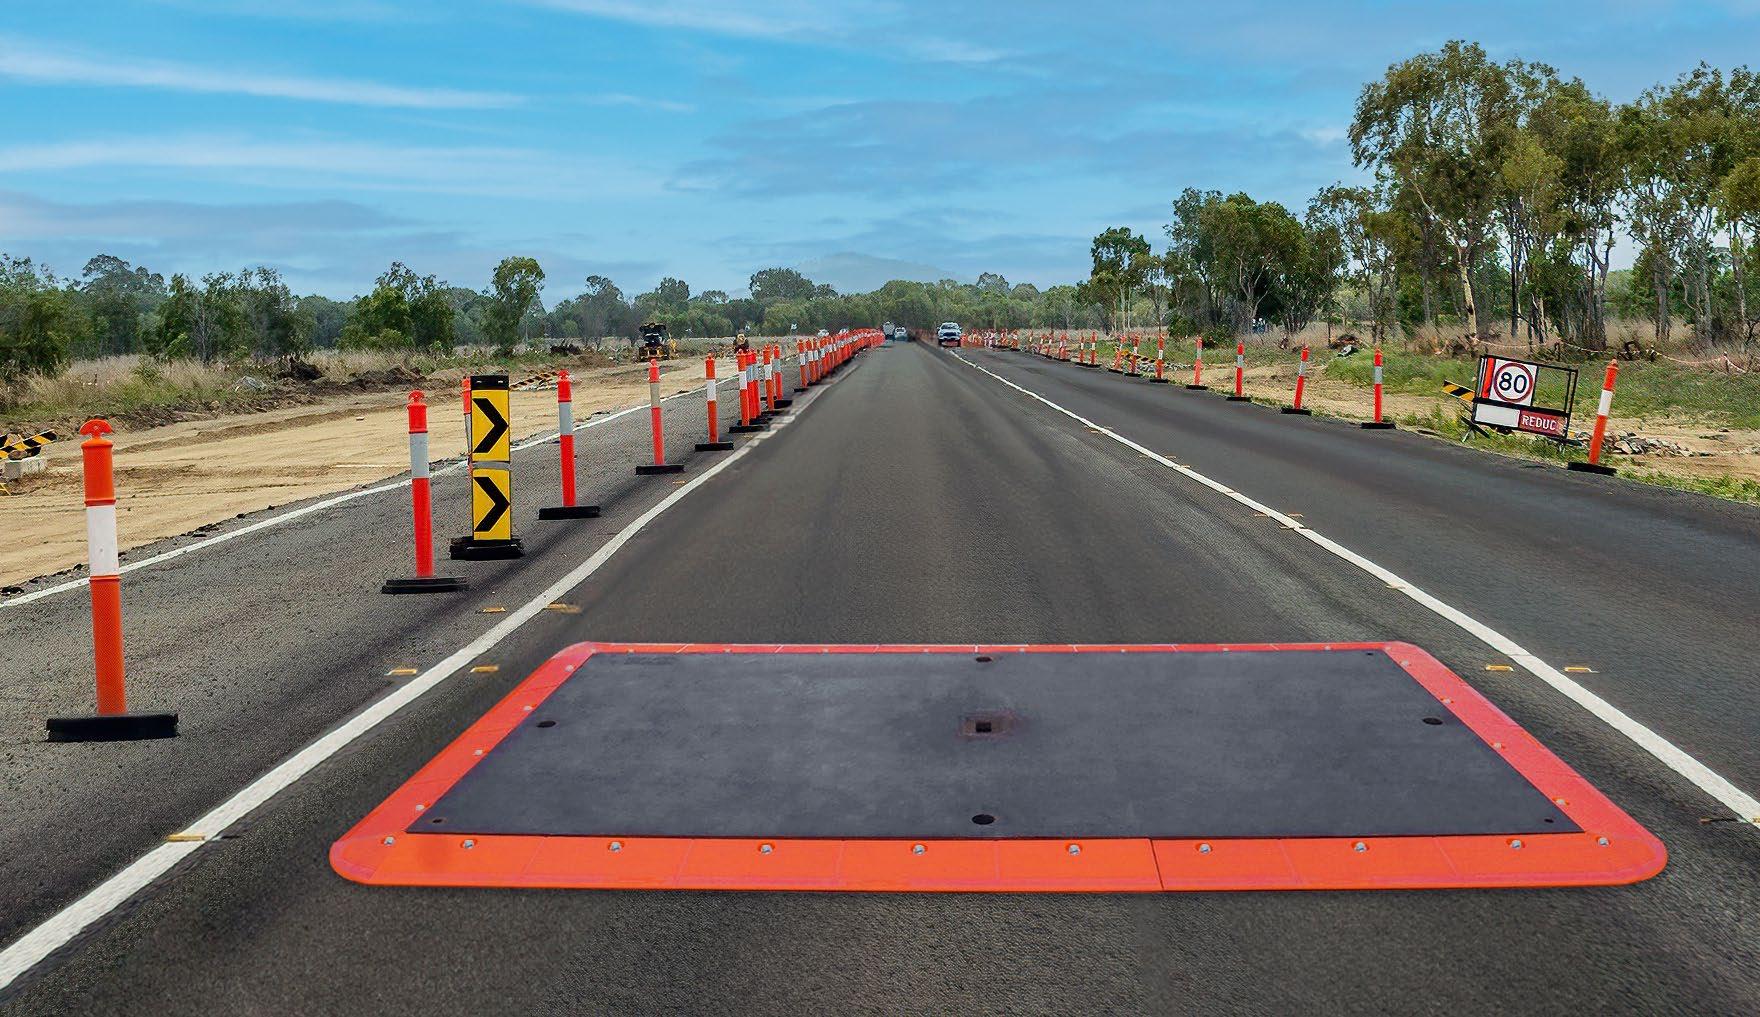
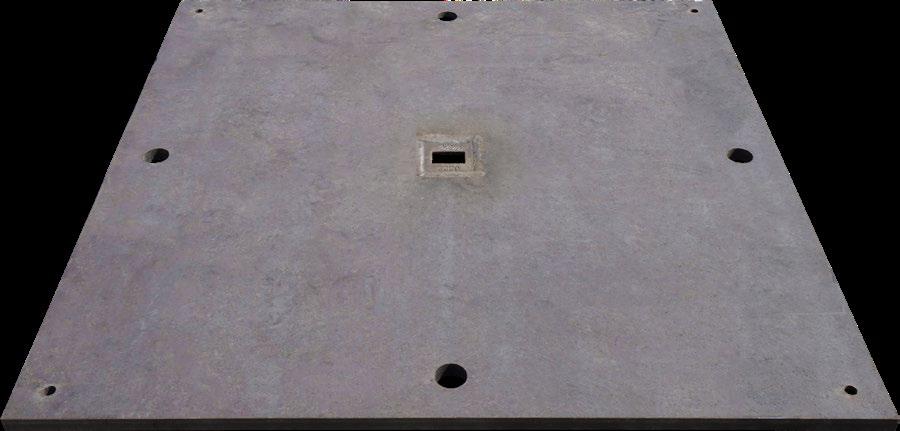
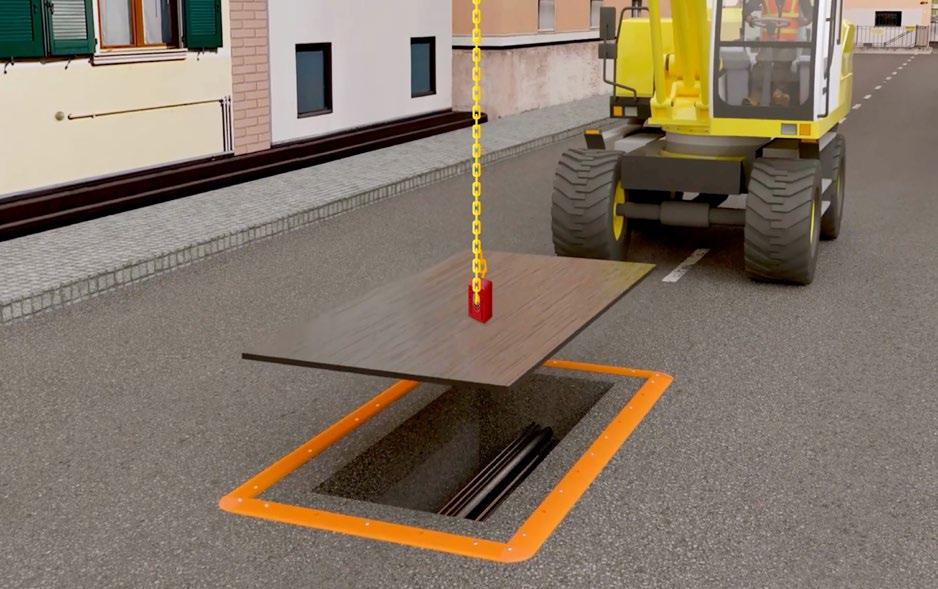
Road Plates can be used for a huge variety of applications, such as driveway access, trench crossings, ground protection, end shoring panels and much, much more.
Jaybro’s Road Plates can be paired with a Road Plate Lifter, which promotes efficient and safe Road Plate installation and removal. The use of the lifting device negates manual handling or the need to use a crowbar to gain access for lifting.
Jaybro’s Plate Lifter is designed specifically for road plates which guarantees stability and precision when lifting and positioning them. By employing the single-point centre lifting principle, you gain absolute control over the process, ensuring the safety of your crew on the construction site.
Features:
y Range of sizes to suit any project
y Centre lifter for safety and ease of use while handling
y Manufactured and certified to meet Australian Standards
y Lifting holes in long and short ends
y Deck pin holes in Corners
03-RP121225 1200mm x 1200mm x 25mm
03-RP241225 2400mm x 1200mm x 25mm
03-RP301225 3000mm x 1200mm x 25mm
03-RP301825 3000mm x 1800mm x 25mm
03-RP401825 4000mm x 1800mm x 25mm
03-RP301832 3000mm x 1800mm x 32mm
03-RP401832 4000mm x 1800mm x 32mm
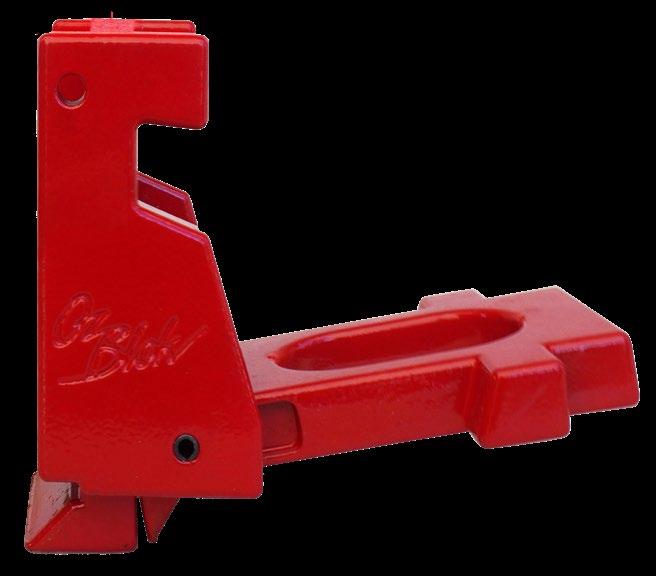
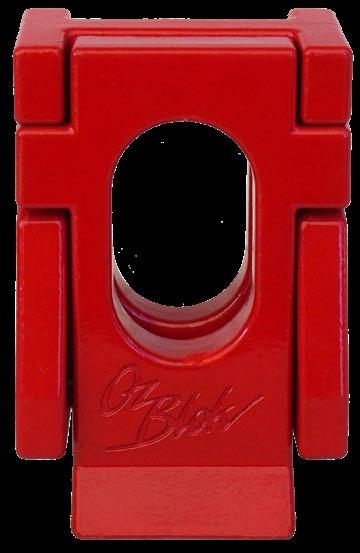
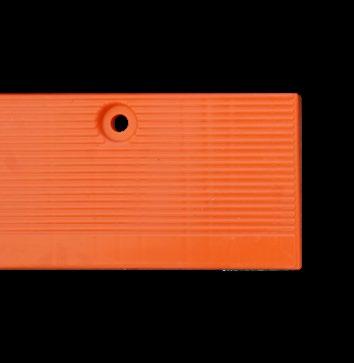
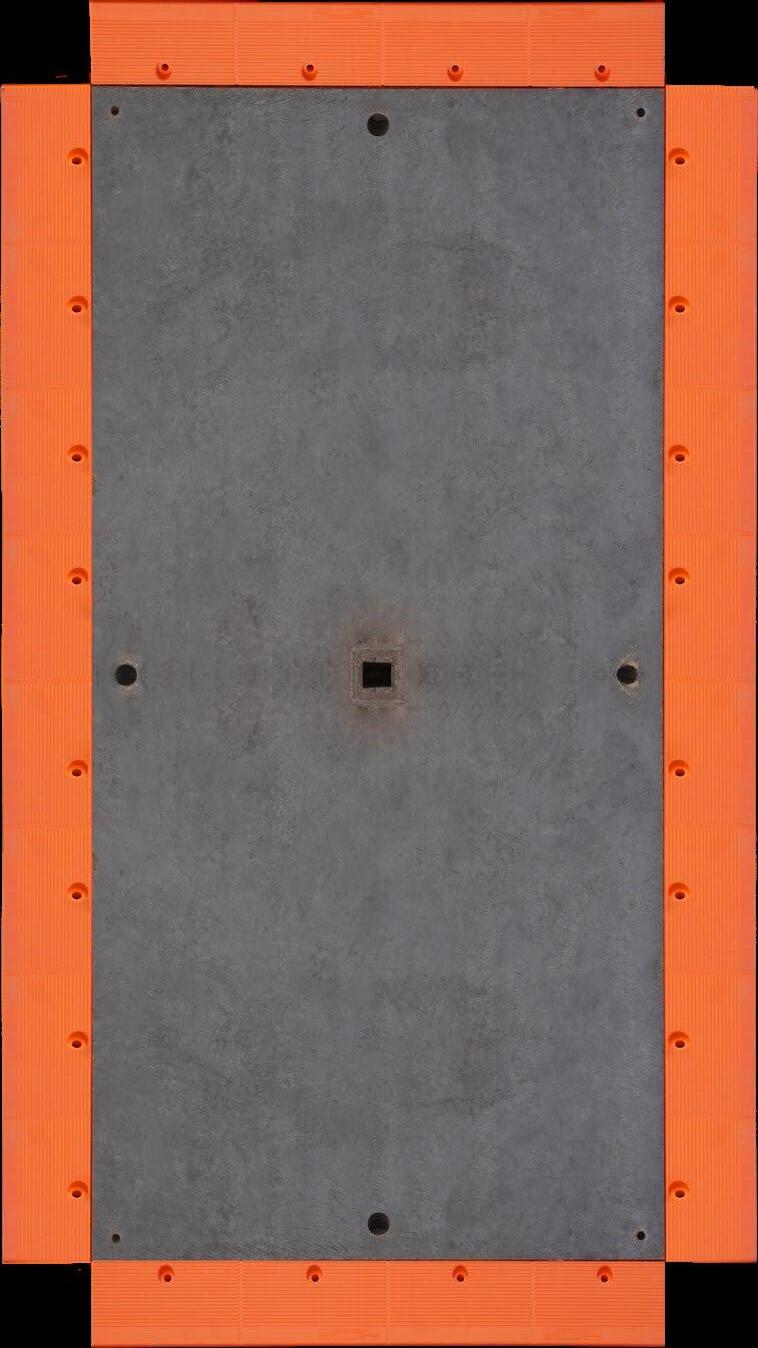
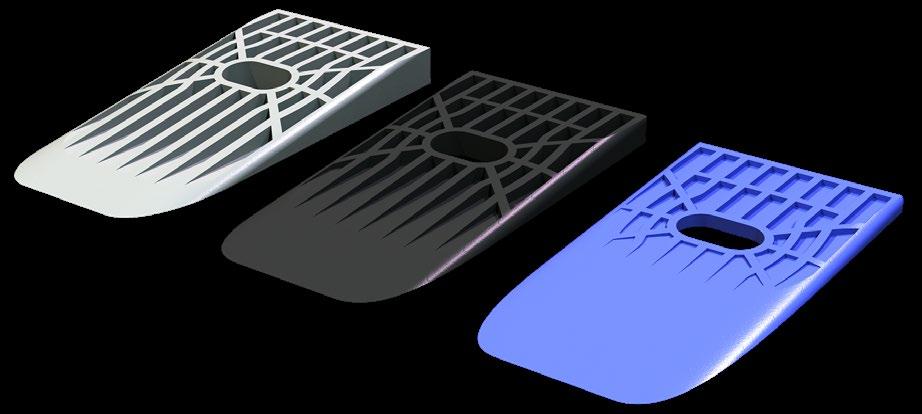
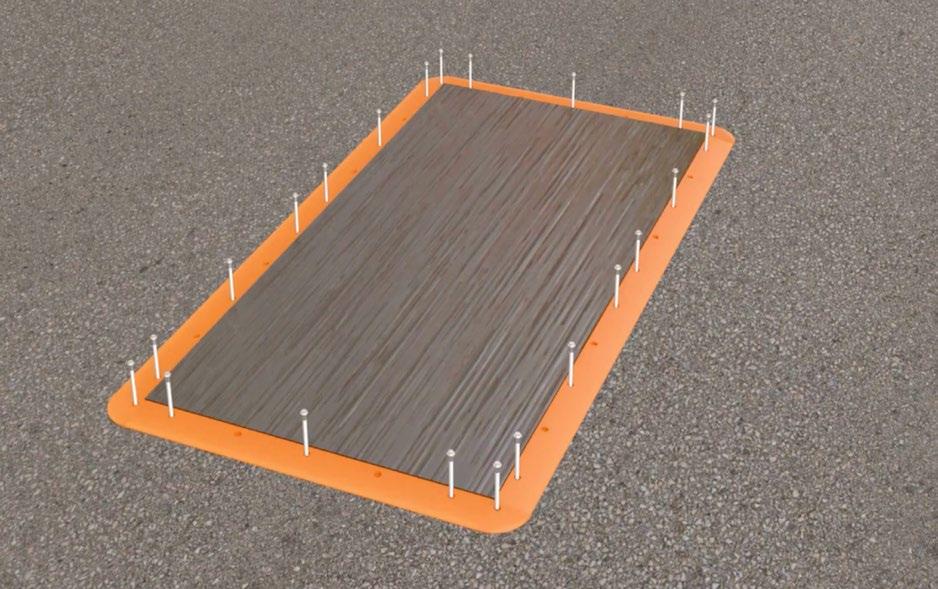
Plate Locks, are a direct replacement to using cold patch asphalt or flush mounting the plate. They are intended to reduce costs, work zone accidents, injuries and contractor liabilities by consistently marking, identifying and securing road construction plates.
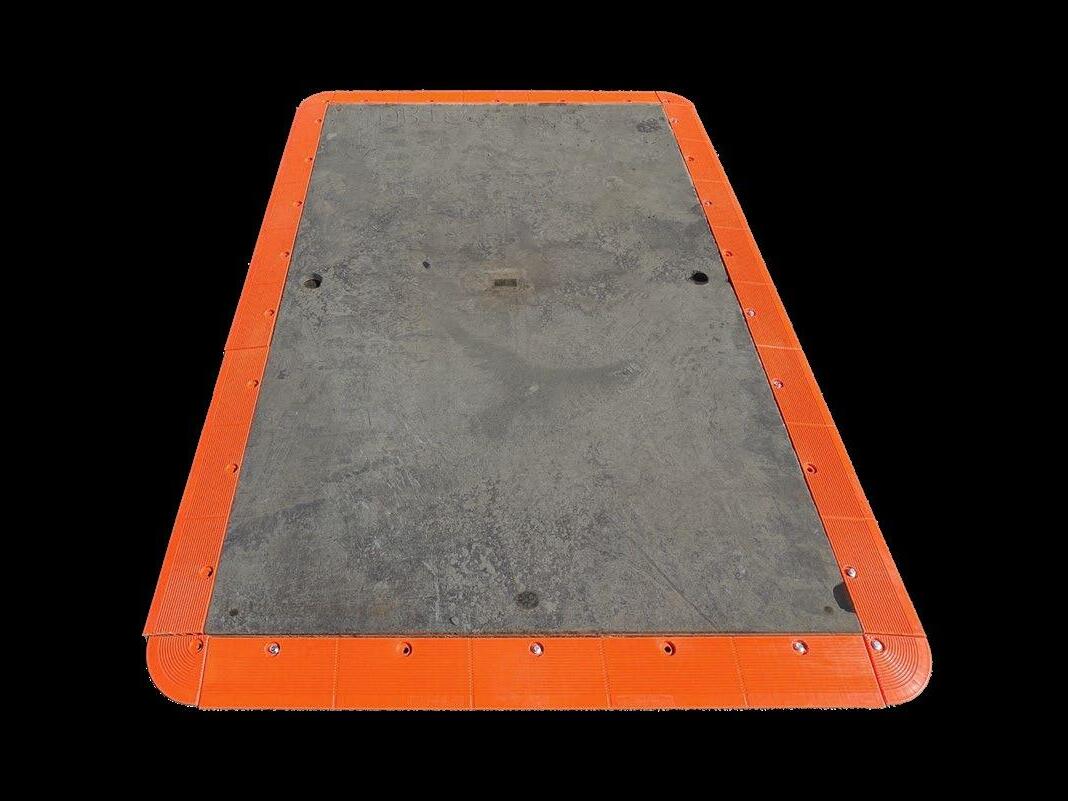
Plate Locks safety orange coloured road plate ramps are placed around the perimeter of the road plate and mechanically fastened to the roadway with concrete anchors. CODE DESCRIPTION
PLK40 Plate locks System - 12m
PLC Plate Locks corner
6mm, 12mm & 20mm Packing shim for Road Plate.
*Included in 12m Plate Lock Kit
PS14 Plate Shim - 6mm
PS12 Plate Shim - 12mm
PS34 Plate Shim - 20mm
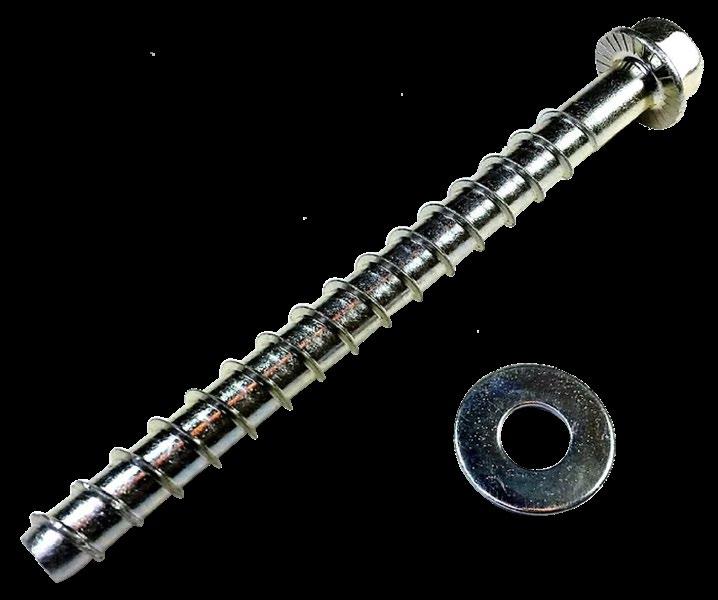
Fixings for Plate Locks.
AW38 Plate locks Anchors and washers (50 pack)
*Included in 12m Plate Lock Kit
Installing your Road Plate & Plate Lock System is simple and safe with Jaybro! In four easy steps you can successfully implement Jaybro’s Plate Lock System into any appropriate enviroment necessary.
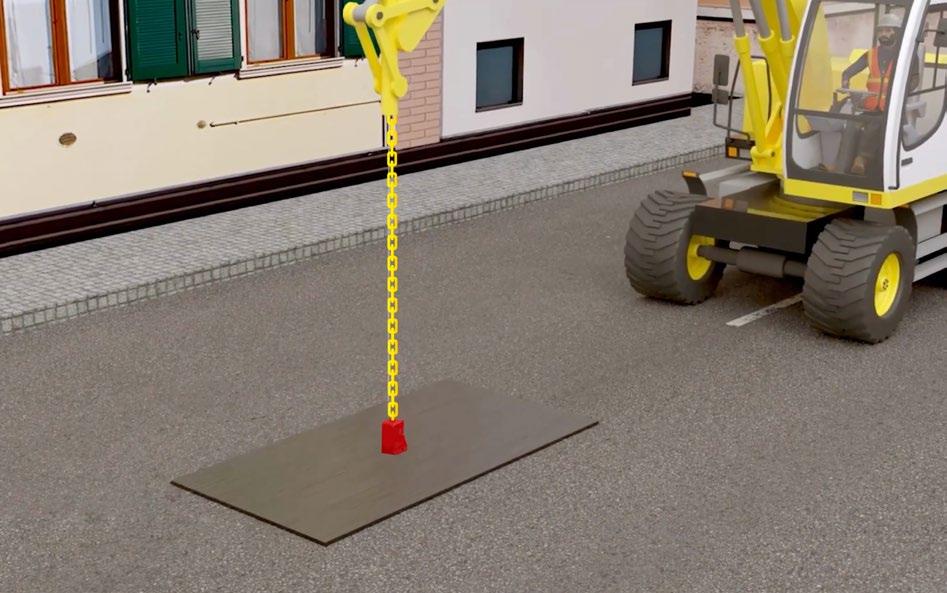
STEP 1 STEP 2
Install your metal Road Plate by using the Road Plate Lifter attachment. Using the Road Plate Lifter ensures precise and safe installation of your Road Plate.
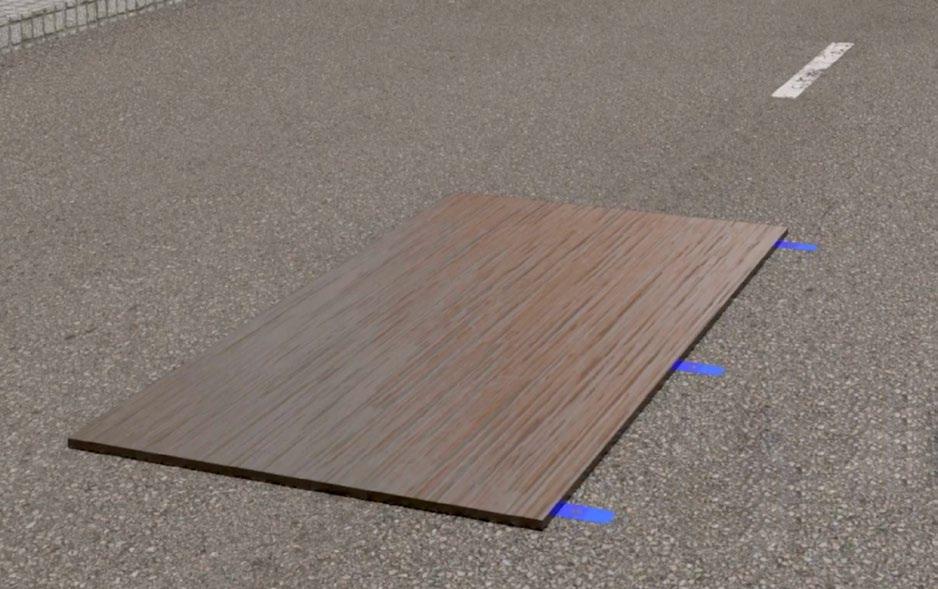
STEP 3
If necessary add the appropriate Plate Shim to level the Road Plate, stabilising it. Plate Shims help reduce shifting, bouncing and noise.
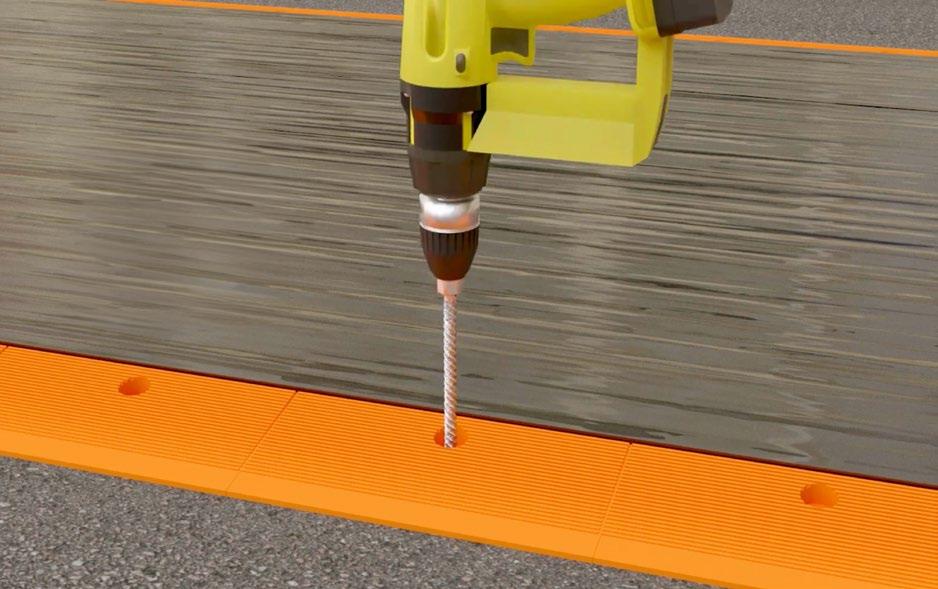
Pre-Drill your holes and sink your anchors to effectively install your Plate Locks.
STEP 4
You can remove the Road Plate using the Road Plate Lifter if necessary and then easily replace the Road Plate into its Plate Lock frame allowing a safe road for vehicles to drive over.
Road Plates and Plate Lock Systems can be simply uninstalled and reused when needed!
SYDNEY
29 Penelope Crescent, Arndell Park, NSW 2148 1300 885 364
MELBOURNE
26 – 34 Aylesbury Drive, Altona, VIC 3018 1300 885 364
BRISBANE 71 Lavarack Avenue, Eagle Farm, QLD 4009 1300 885 364 CANBERRA
3 Daly Street, Queanbeyan West, NSW 2620 1300 885 364
100 Glenwood Drive, Thornton, NSW 2322 1300 885 364
ADELAIDE U1/17 Ceafield Road, Para Hills West, SA 5096 1300 885 364
PERTH
5-7 Hopewell St, Canning Vale, WA 6155 1300 885 364