2 minute read
Neutral Start Switch Tests


Electrical
Mechanical
Advertisement
1.All switches must be in the “OFF” position, then disconnect battery cables at the battery before servicing electrical systems. Failure to do so could result in injury from:
•shorted battery positive (B+), c ausing a burn or an electrical fire.
•contact with moving parts, if the engine is accidentally cranked or started.
2.Move the control handle to the NEUTRAL position. Disconnect the yellow/red lead from the key switch and the yellow/red lead from the instrument wiring harness.
3.To test the continuity, calibrate an ohmmeter on high ohms scale. Connect the ohmmeter to the two leads. The meter should read zero (0).
4.Move the remote control handle to the FORWARD gear position. The meter should read infinity (). Move the remote control handle to the REVERSE gear position. The meter should read infinity ().
5.5. If the meter does not show (), check the ohmmeter connections and test again. Replace the neutral start switch if the meter still fails to show () when the remote control handle is in the FORWARD and REVERSE gear position. Refer to the procedures in Disassembly of Remote Contro l to replace the neutral safety switch.
1.With the boat in water and the remote control in NEUTRAL, turn the ignition key to the start position. The engine should start.
2.Disengage the remote control handle and move it into the FORWARD warm-up position. The engine should start.
3.Disengage the remote control handle and move it into the REVERSE warm-up position. Again the engine should start. Move the remote control handle back into NEUTRAL.
4.Move the remote control handle to the FORWARD gear position. The engine should NOT start. Move the handle to the REVERSE gear position. Again the engine should NOT start.
5.If the engine starts when the remote control handle is in either the FORWARD or REVERSE gear positi on, replace the neutral start switch. Refer to the procedures in Disassembly of Remote Control to replace the neutral safety switch.
Removal of SAE Remote Control Cables
NOTE!Should it become necessary to remove or replace the remote control cables, the attachment at the engine and sterndrive is very important. Follow these steps for removal of remote control cables.
Before beginning, shift remote control handle into NEUTRAL detent position; the propeller should rotate freely.
Throttle Cable From Engine
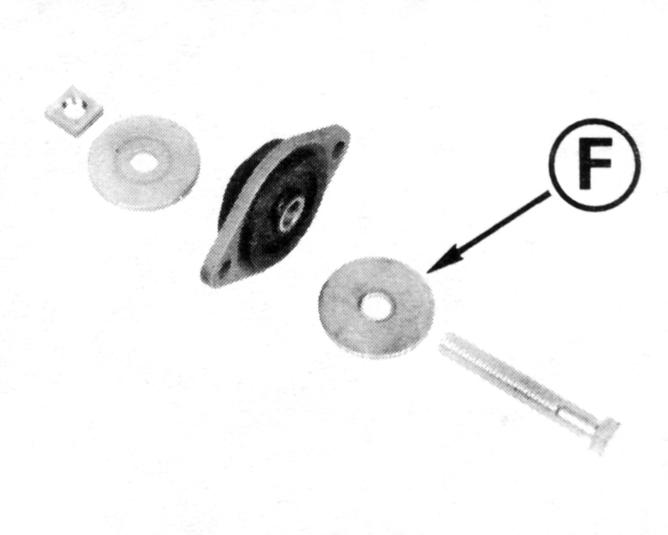
1.Remove cotter pin and flat washer from throttle arm.
2.Loosen anchor retainer nut and rotate retainer away from cable trunnion. Remove throttle cable from throttle arm and anchor bracket.
Shift Cable From Sterndrive
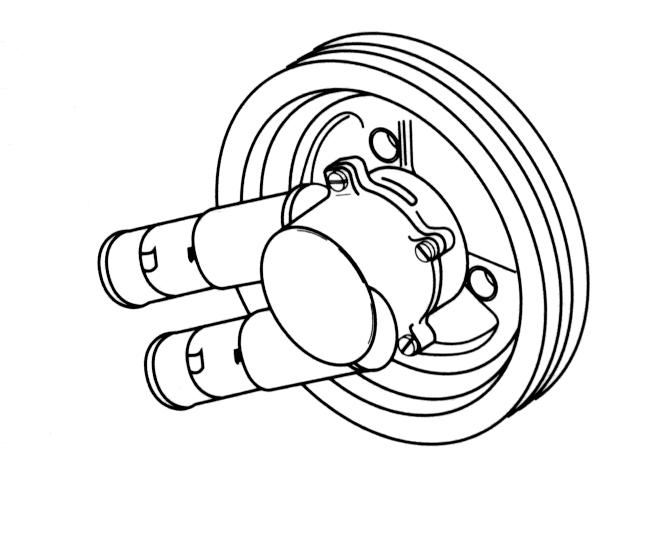
1.Remove drive’s rear cover. Remove cotter pin (1) and flat washer from anchor pin (3). Remove jam nut (2) from shift cable core wire.
2.Remove anchor pin from bell crank slot. Unscrew anchor pin from shift cable core wire.
3.Loosen screw and slide retainer ou t of shift cable anchor groove. Pull the shift cable from drive and transom bracket cable tube.