5 minute read
STORAGE


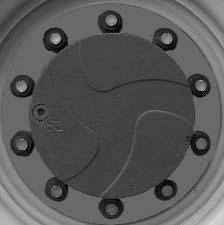
remaining hubs the same way. Refer to the oil specifications found in the LUBRICATION chapter of this manual.
Plug set at fill and check position.
CHANGE ENGINE OILAND FILTER
Change the engine oil and filter using the following procedure:
1.With the engine warm, remove the crankcase drain plug. Some plugs are equipped with a magnet to gather metal particles. Completely clean and flush away all metallic filings from the plug and reinstall it.
IMPORTANT: DO NOT discharge oil onto ground. Catch and dispose of per local waste disposal regulations. 2.The engine oil filter should be changed at every oil change interval. Remove and discard the disposible filter canister. Wipe the gasket sealing area of the block with a clean cloth.
IMPORTANT: Your OEM engine oil filters have special by-pass valves built in. Use only genuine OEM engine replacement filters.
3.Apply a thin coat of clean oil to the new oil filter gasket. Hand tighten. Refill the crankcase with new oil. See page 45 for type and viscosity of new oil.
4.After new oil has been added, run the engine at idle speed until the oil pressure lamp is OFF. Check for leaks at the filter and drain plug. Re-tighten only as much as necessary to eliminate leakage.
CHECK THE BATTERY
The battery furnished in the machine is a 12-volt, wetcell battery. The top of the battery must always be kept clean. Clean the battery with a brush dipped in an alkaline solution (ammonia or baking soda and water). After the foaming has stopped, flush the top of the battery with clean water. If the terminals and cable connection clamps are corroded or have a buildup, disconnect the cables and clean the terminals and clamps with the same alkaline solution.
NOTE: The battery in this machine is warranted by the supplier. See the punch tag on the top of the battery for warranty information.
Jump Starting
If the battery becomes discharged or does not have enough power to start the engine, use jumper cables and the following procedure to jump-start the engine.
WARNING
Explosive gas is produced while a battery is in use or being charged. Keep flames or sparks away from the battery area. Make sure battery is charged in a well-ventilated area. NEVER lay a metal object on top of a battery as a short circuit can result.
Battery acid is harmful on contact with skin or fabrics. If acid spills, follow these first aid tips: 1.IMMEDIATELYremove any clothing on which acid spills. 2.If acid contacts the skin, rinse the affected area with running water for 10 to 15 minutes.
3.If acid comes in contact with the eyes, flood the eyes with running water for 10 to 15 minutes. See a doctor at once. NEVER use any medication or eye drops unless prescribed by the doctor. 4.To neutralize acid spilled on the floor, use one of the following mixtures: a.1 pound (0.5 kg) of baking soda in 4 quarts (4 liters) of water. b.1 pint (0.4 liters) of household ammonia in 4 quarts (4 liters) of water. Whenever battery is removed from the unit, BE SURE to disconnect the negative (-) battery terminal connection first.
IMPORTANT: BE SURE that the jumper battery is also a 12-volt D. C. battery, and the vehicle used for jump starting has a negative-ground electrical system.
WARNING
The ONLYsafe method for jump-starting a disharged battery is for TWO PEOPLE to perform the following procedure. The second person is needed for removing the jumper cables so that the operator does not have to leave the operator’s compartment while the engine is running. NEVER connect the jumper cables directly to the starter solenoid of either engine. DO NOT start the engine from any position other than the operator’s seat, and then ONLYafter making sure all controls are in “neutral.”
Closely follow the jump-start procedures, in the order listed, to avoid personal injury. In addition, wear safety glasses to protect your eyes, and avoid leaning over the batteries while jump-starting.
DO NOT attempt to jump-start the machine if the battery is frozen, because this may cause it to rupture or explode.
1.Turn the keyswitches on both vehicles to “OFF”.
Be sure that both vehicles are in “Neutral” and
NOTtouching.
2.Connect one end of the positive (+) jumper cable to the positive (+) battery terminal on the disabled machine first. DO NOTallow the positive (+) jumper cable clamps to touch any metal other than the positive (+) battery terminals. Connect the other end of the positive jumper cable to the jumper battery positive (+) terminal.
3.Connect one end of the negative (-) jumper cable to the jumper battery negative (-) terminal.
4.Make the final negative (-) jumper cable connection to the disabled machine’s engine block or frame (ground) -- NOTto the disabled battery negative post. If making the connection to the engine, keep the jumper clamp away from the battery, fuel lines, or moving parts.
NOTE: Twist the jumper cable clamps on the battery terminals to insure a good electrical connection. 5.Proceed to start the machine. If it does not start immediately, start the jumper vehicle engine to avoid excessive drain on the booster battery.
6.After the machine is started and running smoothly, have the second person remove the jumper cables (negative (-) jumper cable first) from the jumper vehicle battery, and then from the disabled machine, while ensuring NOTto short the two cables together.
Allow sufficient time for the alternator to build up a charge in the battery before operating the machine or shutting off the engine. NOTE: If the battery frequently becomes discharged, have the battery checked for possible dead cell(s), or troubleshoot the electrical system for possible short circuits or damaged wire insulation.
CHECK AND TORQUE BOOM LEAF CHAINS
Inspect the leaf chains for wear and proper tension. Two of the chains are on the top front of the boom. A third chain is accessible from inside the rear of the boom (see boom illustration).
Run the boom out slowly to inspect. Conditions to look for include cracked or broken plates, protruding or turned pins, excessive wear. With a steel tape, measure 16 links of the strand that flexes over the sheaves. When the distance measures 12.375” (314 mm), the chain should be replaced. DO NOTrepair sections of a chain. Replace the complete chain.
Chain anchors and sheaves also require inspection for wear or broken fingers and worn flanges. If any chain has been replaced, operate under loaded conditions and re-check the torque. Adjust the chains per the following procedure.
One Rear Boom Chain
Two Front Boom Chains
Outer Section Intermediate Section Inner Section