2 minute read
SLEEPER BUNK RESTRAINT


A sleeper bunk restraint provided a means preventing ejection occupant from the sleeper bunk during deceleration the
Danger
T o avoid personal injury , NOT occupy the sleeper bunk unless the restraint completely attached.
Upper Bunk (Optional)
The optional upper bunk not intended used a sleeping area storage area while the vehicle moving not equipped with a bunk
Danger
T o avoid personal injury , NOT occupy the upper bunk use for storage while the vehicle moving.
Danger
T o avoid personal injury , use the bunk restraining strap hold the upper bunk place when the upright (stored) position.
Bunk Restraint Operation
Y our vehicle equipped with either a two - belt restraint system a net restraint
T - Belt Restraint
• Pull each belt across the body and insert the tongue into the buckle until latches.
• Make sure that the tongue securely fastened into the
• T o release the belt, push down the button.
T o Attach Net Restraint
• Facing the arrange the webbing the restraint top the mattress that the side with the two buckles (female ends) faces the rear the sleeper , and the side with the single buckle faces the passenger ’ s side the
• Fasten the two buckles the two corresponding tongues (male ends) attached the rear wall the sleeper .
• Fasten the buckle the left side the restraint the corresponding tongue attached the passenger side wall the sleeper
• Fasten the tongue the right side the restraint the corresponding buckle attached the driver ’ s side wall the sleeper .
• Fasten the three tongues along the nearside the webbing the corresponding buckles attached the front the mattress area.
Bunk Restraint Maintenance
• V isually inspect the buckle and tongue for any damage which would impair latching
• Check all hardware for breakage, distortion, excessive corrosion.
• Ensure that fasteners are securely tightened accordance with
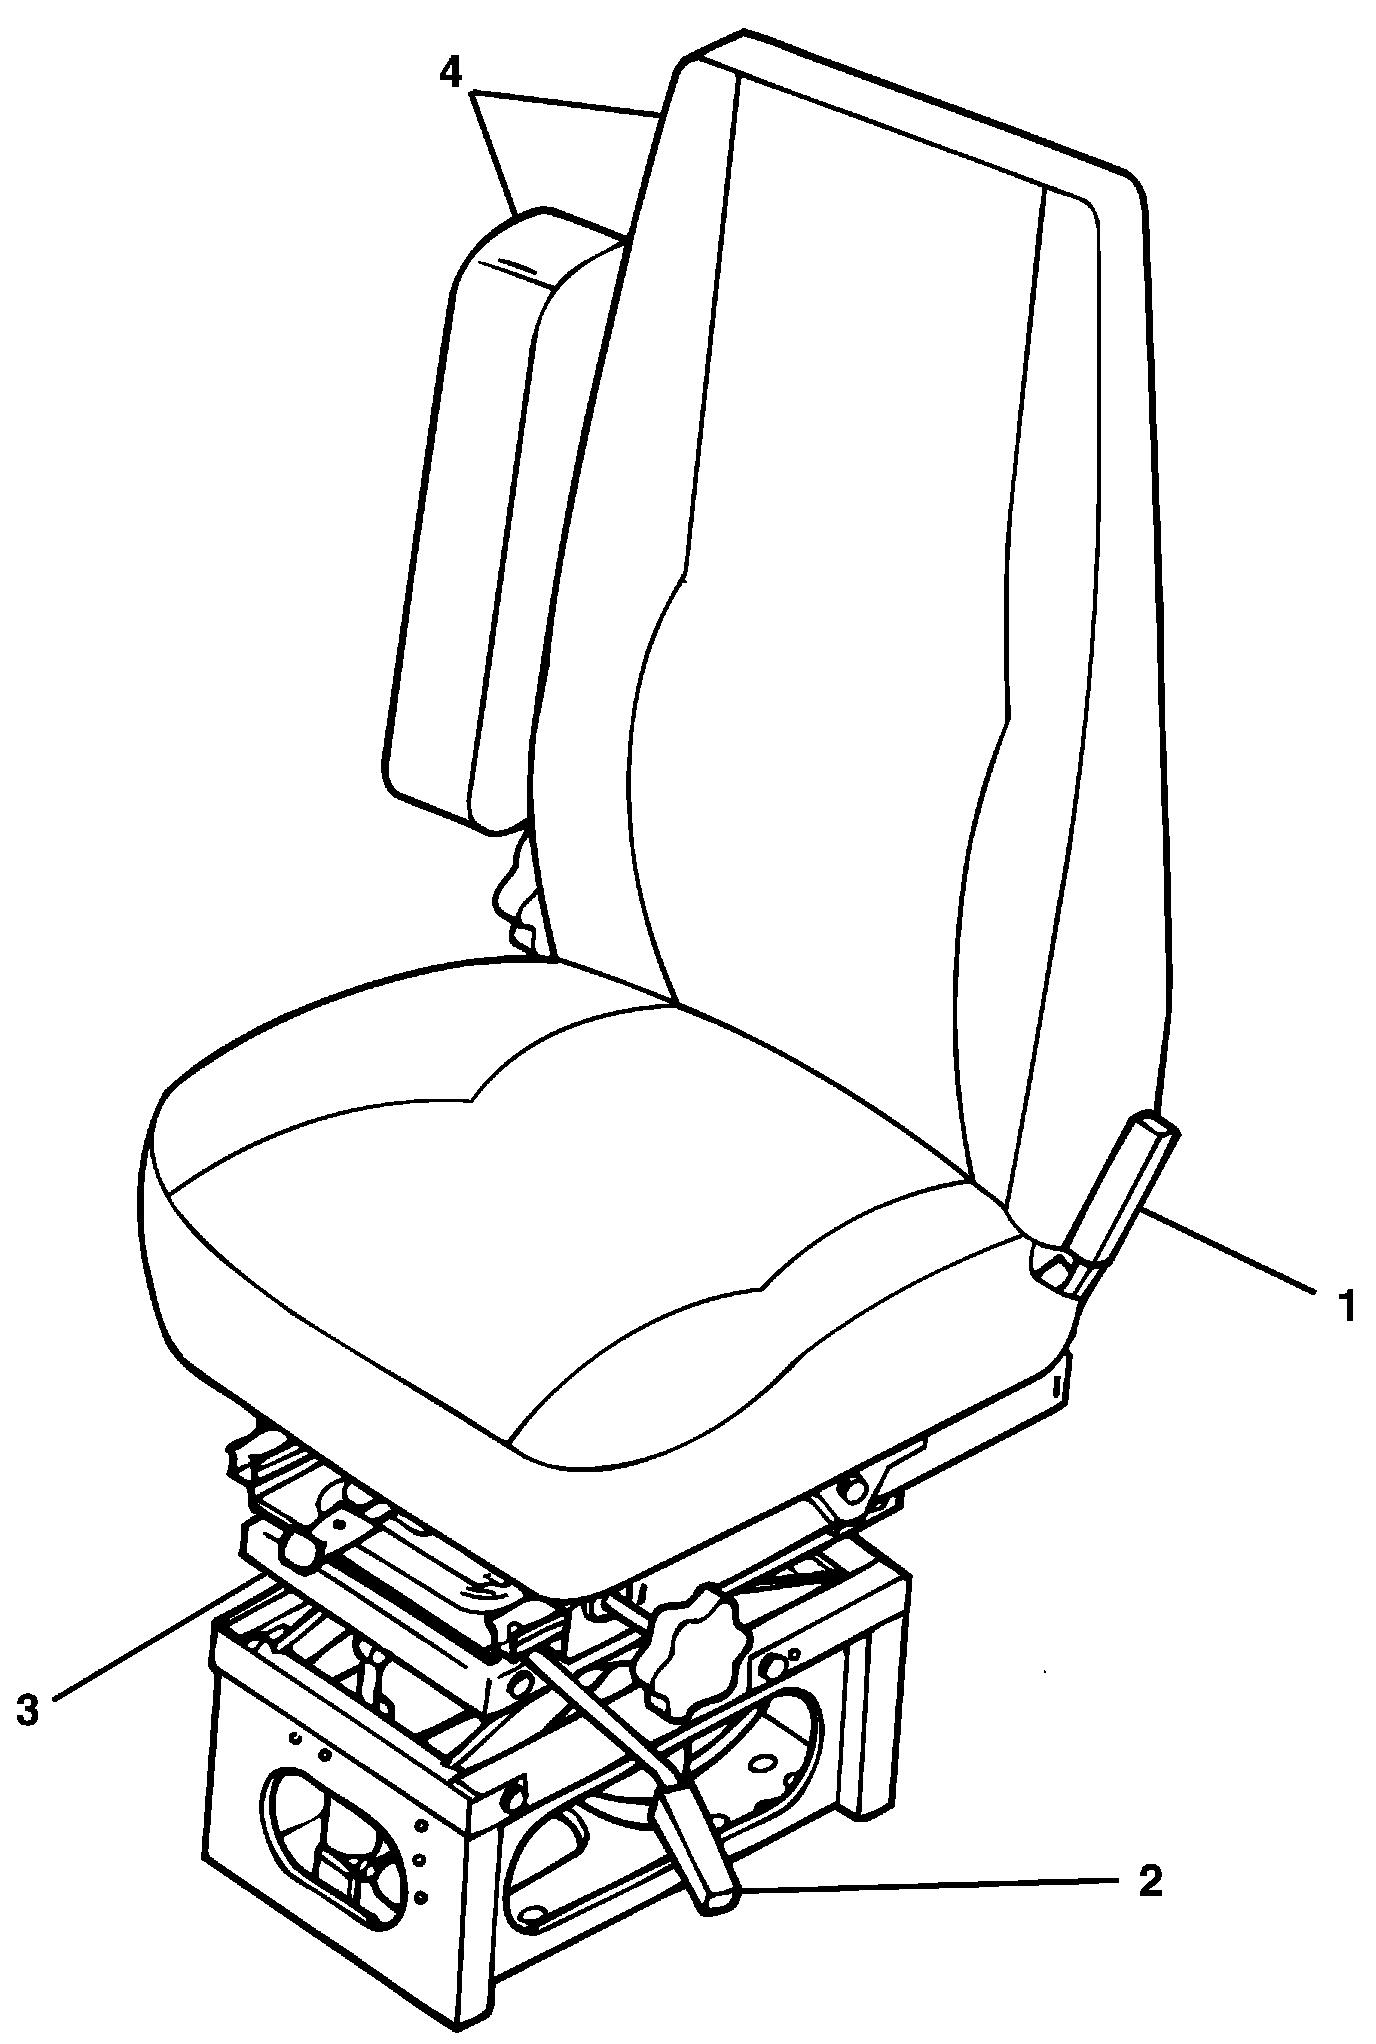
SEA T ADJUSTMENT AND RECLINE (IF EQUIPPED)
W Arning
not adjust the driver ’ s seat while the vehicle moving. After adjusting the seat and befor e driving off, ensur e that the seat firmly latched position.
W Arning
not drive ride with the seat r eclined. case a sudden stop, a person a r eclined position may slide under the seat belt.
HEA TED SEA T (OPTIONAL)
the vehicle equipped with the optional heated seat which available only with the MACK Performance Seat, the controls are located the inboard side the seat.
SWIVEL SEA T (OPTIONAL)
Both the driver - side and passenger - side seats can swiveled 180° inboard. (See drawing and instructions that follow
Recliner Handle — Before attempting adjust the seat back near - vertical position using the lever turn knob After the seat swiveled into the desired the seat back may reclined a more comfortable (Position driver ’ s seat away from steering wheel allow maximum
Swivel Latch — Unlatch moving handle. Swivel inboard 120°. Handle may released after the seat begins swivel.
Caution
your vehicle equipped with a sleeper and you e trying gain access the sleeper the you must first adjust the seat midway between the for e and aft Then adjust the seat back the vertical and finally , swivel the seat a position that will allow easy access the sleeper these instructions e not damage the driver seat and/or door panel can occur
Fore/Aft Adjustment Lever Fore (forward)/aft (backward) adjustment may required provide clearance for the seat Move the adjustment knob slide the seat fore and After seat back and arm rest have cleared B - pillar , seat fore/aft position may require readjustment provide clearance between knees and gearshift dashboard and between seat back and steering
Arm and Back Clearance — the seat begins swivel, check that the seat back and armrest not get hung the curtain shoulder belt, contact the B - pillar door .
W Arning
not adjust the driver ’ s seat while the vehicle moving. After adjusting the seat and befor e driving off, ensur e that the seat firmly latched position.
W Arning
not drive ride with the seat r eclined. case a sudden stop, a person a r eclined position may slide under the seatbelt.