3 minute read
CHAPTER 12 STORAGE

After the harvesting season, store the Disc Mower Conditioner in a dry place where it is not exposed to weather or livestock.
Before Storing
Perform the following preparations on the Disc Mower Conditioner, before placing the unit into off-season storage:
1.Conditioner in transport position and Transport Locks properly installed.
2.Wash off the entire machine. Take special care to remove gum and accumulated dirt from the Cutterbar.
3.Remove trash and debris which may be wrapped around Shafts and/or lodged against Bearings.
4.Repaint any areas where the paint has been worn off or brush motor oil on these areas.
5.Lubricate the entire machine following the information in the Lubrication chapter of this manual. BE SURE to change the Chain Drive, Gearboxes and Cutterbar oils. Apply motor oil to adjusting bolt threads.
6.Apply Shaeffer’s Silver Streak Lube or equivalent to the splined connection between the Upper and Lower Gearboxes. This requires lifting the Upper Gearbox about 6-8 inches (155-205 mm).
7.Apply grease to any exposed Cylinder Rods.
8.Take note of any damaged or missing parts or attaching hardware; order and replace them during the off-season. Replace any damaged Curtains.
9.Check all hydraulic components, hoses and fittings for damage or leaks; make repairs or corrections, as required.
After Storing
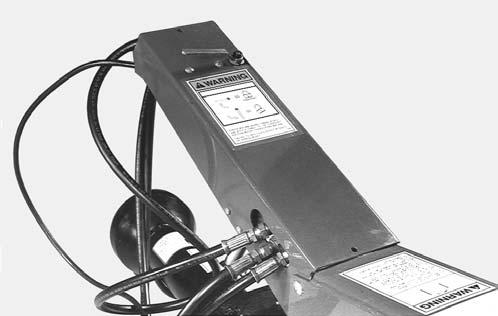
After taking the Disc Mower Conditioner out of storage and before the start of the harvesting season, carefully check the unit over and make the following inspections and preparations: a.Remove one of the Gearbox Steering Side Plates. b.Loosen (but do NOT remove) the six Clutch Bolts (see Fig. 56). c.Place a block of wood between two Cutterbar Discs to prevent rotation. d.Rotate the Driveline by hand until the Clutch slips. e.Tighten the six Clutch Bolts. f.Install the removed Gearbox Steering Side Plate.
1.Replace all Guards, Shields and Covers. Review and re-familiarize yourself with all safety precautions outlined in the Safety chapter of this manual.
2.Remove any trash or debris which may have accumulated on the unit during storage.
3.Check and re-inflate the Tires and re-torque the Wheel lugs.
4.Readjust the Flotation Springs tension.
5.Inspect Cutterbar Knives.
6.Lubricate the entire machine following the information in the Lubrication chapter of this manual.
7.Check Drive Chain tension following the information in the Service chapter of this manual.
8.Perform the Clutch run in procedure as outlined in the Steps below.
Chapter 13 Troubleshooting
NOTE: This Troubleshooting guide presents problems, causes and suggested remedies beyond the extent of loose, worn or missing parts. It was developed with the expectation that the machine is in otherwise good operating condition. Refer to the index at the back of this manual for Chapter and Topic page references. BE SURE to exercise the MANDATORY SAFETY SHUTDOWN PROCEDURE (page 8), BEFORE making any adjustments or repairs.
Miscellaneous Problems
Problem Cause Remedy
Ragged Stubble, uneven mowing or Mower leaving streaks.
Knives dull or bent. Replace Knives.
Use second cutting edge if Knives are NOT cracked or bent.
PTO speed too low or too high. Operate PTO closer to rated 1000 RPM.
Ground travel speed too high or too low.
Slip Clutch frequently slipping.
Machine flotation too light for high ground speed.
Change ground travel speed. Clutch worn. Check with your GEHL dealer’s Service Department.
Increase weight on Skid Shoes by adjusting Flotation Springs or by reducing ground speed.
Cutterbar angle incorrect. Adjust Cutterbar angle.
Header flotation set incorrectly. Set Header flotation.
Area below or between Shoes at front and behind Discs has dirt or crop build-up.
Clean Discs and Cutterbar.
Heavy crop stalk. Add optional Crop Lifters.
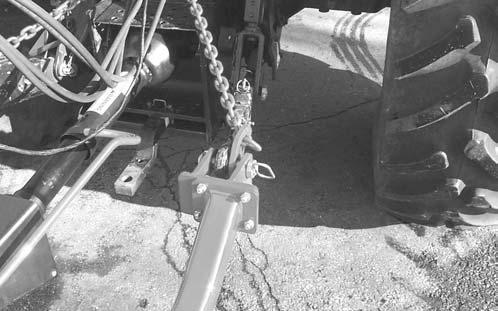
Excessive vibration. Incorrect attachment to the tractor. Detach and correctly reattach the machine to the tractor. MAKE SURE the Drive Line between the tractor and Drawbar Tower is level and in phase. See Preparing for Field Operations chapter of this manual.
Loose hardware. Tighten.
Conditioner Rollers are touching each other.
Improperly formed windrows or Irregular windrows being formed and a banging noise in the machine.
STOP operation immediately and re-time Rollers and adjust clearance between Rollers.
Deflectors are closed too much in heavy crops. Open Deflectors.
MISCELLANEOUS PROBLEMS (Cont.)
Problem Cause Remedy
Improperly formed windrows or Irregular windrows being formed and a banging noise in the machine. (Cont.)
Ground speed too slow. Increase ground speed.
Ground speed erratic. Mow at a constant ground speed.
Excessive Conditioner Roll gap. Check Roll gap.
Crop accumulation in front of the Rollers. Roll pressure too high. Set Roll tension to proper setting as described in the Service chapter in this manual.
Top Roller out of time. Check Roll timing and Chain tension.
Mower unstable in raised cutting position. Driving speed too high. Avoid sharp turns. Do NOT exceed 20 MPH (32 km/h) when towing
Conditioner Rolls plugging. Foreign objects between Rolls. Unplug the Roll following procedure listed in “Unplugging”.
PTO RPM not at rated speed. Maintain1000 RPM PTO speed. Slow crop drying. Excessive Conditioner Roll gap. Check Roll gap.
Low Conditioner Roll pressure. Check Roll pressure.
Insufficient air circulation through windrow. Consider making a wider windrow or swath.
Tractor tire running down windrow. Do not drive on windrow.
Leaves damaged or stripped off of stems.
Excessive Conditioner Roll Pressure. Reduce Roll Pressure. Not enough Roll gap. Increase Roll gap.
Slip Clutch slipping frequently. Slip Clutch worn. Check with your GEHL dealer’s Service Department.
Excessive play in Quick Attach Hitch assembly
Insufficient amount of Shims and/ or 3/4″ side-play Bolts incorrectly adjusted
Add Correct amount of Shims and/or adjust Bolts referring to Preparation for Field Operation chapter
Drawbar Spacer is too small or not installed Install largest Spacer that fits in Drawbar hole