2 minute read
3.6 Lubrication and maintenance operations


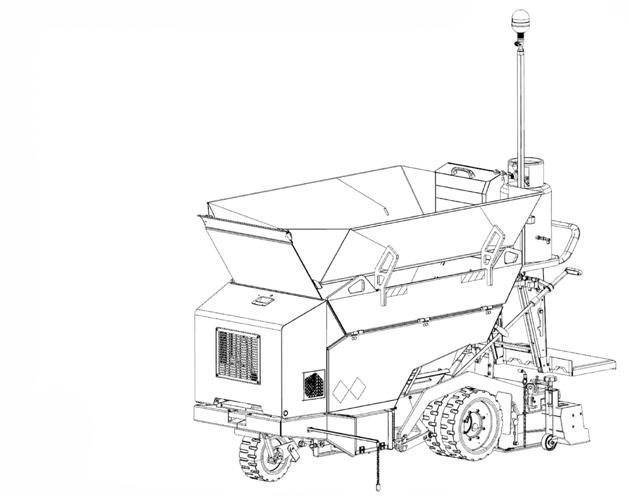
3.6.18 Conveyor chain tensioning
Calculate the sag of the conveyor chain by measuring the distance between the ground and the left conveyor chain (1) or the right conveyor chain (2), always in the central part of the chain.
The chain is correctly tensioned hen there is an approx. 30 – 40 cm sag (1.2 – 1.6 in) in the middle.
Chain sag calculation procedure:
• The procedure is identical for the left (1) and right (2) conveyor chain.
• Measuring the distance between the ground and the chain in the middle part of the chain (1).
• Press the chain upwards in the middle part of the chain (1) and measure the distance between the ground and the chain again.
• Calculate the sag of the chain (1) by deducting the two measured values.
• The chain is correctly tensioned hen there is an approx. 30 – 40 cm sag (1.2 – 1.6 in) in the middle.
Chain tensioning procedure:
• The procedure is identical for the left (1) and right (2) conveyor chain.
• Loosen the lock nut (4).
• Tension the chain using the adjusting nut (5).
• Calculate the sag of the chain (1) by deducting the two measured values according to the procedure above.
• If the calculated sag is in the range of 30 – 40 mm (1.2 – 1.6 in), tighten the lock nut (4).
• Tension the chain equally on both sides of the machine.
Note
• In case of too high chain tension, loosen the lock nut (4) and the adjusting nut (5).
• Calculate the sag of the chain (1) by deducting the two measured values according to the procedure above.
Belt tension check:
• Check chain movement.
- Start the engine.
- Let the conveyor running in the manual mode.
- Check the correct running of conveyor chains.

- Stop the conveyor.
- Turn off the engine.
Perform tensioning of the conveyor chains with the machine parked on a flat and solid surface with the engine and battery disconnecter off.
Wear the prescribed personal protective equipment when tensioning the conveyor chains.
There is a risk of burns from the hot parts of the conveyor. Caution! Tension the chain equally on both sides of the machine.
Every 250 hours of operation
3.6.19 Engine oil replacement
Change the engine oil when the machine is parked on a flat and solid surface, the engine and the battery disconnector are off and the gas bottle is closed.
Engine oil replacement procedure:
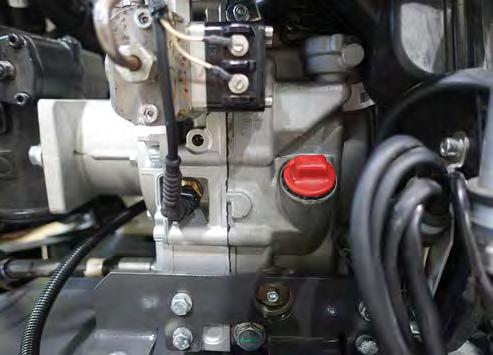
• Open the engine bonnet (1).
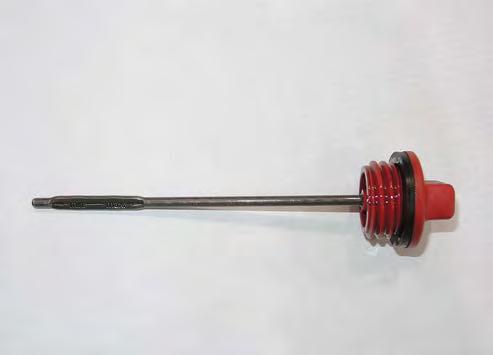
• Remove the engine oil dipstick gauge (3).
• Remove the hose (4) from the holder (5).
• Dismount the plug (6) and let oil drain to a ready container with a minimum capacity of 2.5 l (0.66 US gal).
• Check the plug seal (6) and replace it, if damaged.
• Mount the plug (6).
• Connect the hose (4) to the holder (5).
• Add engine oil through the engine oil filler neck (2).
• The total oil volume is 2.2 l (0.58 gal US).
• Check the engine oil level on the oil dipstick gauge (3).
• The correct engine oil level must be within the MIN and MAX marks on the oil dipstick gauge (3).
• Close the engine bonnet (1).
• After you change the oil, start the engine and let it run at a higher idle speed for 2 – 3 minutes.
• Stop the engine and wait for about 3 minutes until the oil runs into the crankcase, then check the oil level again.
Change the engine oil when the machine is parked on a flat and solid surface, the engine and the battery disconnector are off and the gas bottle is closed. Wear the prescribed personal protective equipment when replacing the oil in the engine. There is a risk of burns from the hot parts of the engine and the engine oil.
The oil level must not exceed the MAX level line on the oil dipstick gauge.
Catch the drained oil and do not let it soak into the ground.
Dispose of the engine oil according to the applicable national regulations.