13 minute read
1000 Hours Service


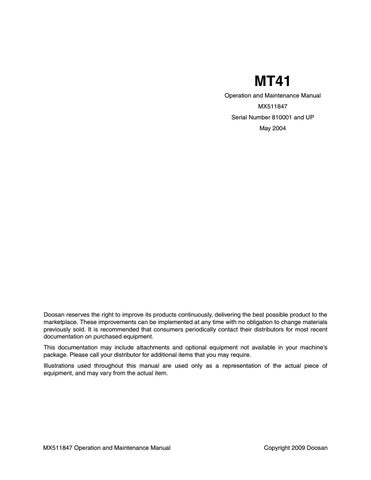
1. Driver's seat
1.1. General safety check
• Check for play in seat gliders. Max. allowed in length or sideways: 1 mm. Grease the gliders. • Check shock absorbers for oil leakages. • Check seat mounting to the dump truck. • Check safety belt and lock mechanism for wear and damage. • Check that no pins are loose / worn in the seat base. • Replace worn/damaged parts.
Fuel filter

Water separating fuel filter
2. Engine
2.1 Replace fuel filter 4*
Replace water separating fuel filter 4*
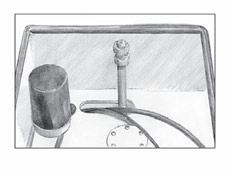
The filters consist of one filter unit each. The filters are located on the left hand side of the engine. The fuel filter in the front of the engine and the water separating fuel filter on the rear of the engine, see ill. 1.Wash the filters externally and unscrew it. Discard the filters according to environmental requirements. 2.Fit the new genuine filters and tighten it by hand. •Never use tools to tighten the filters! The filters may be damaged and the fuel flow hampered. 3.Bleed the fuel system, procedure on next page, item 2.2. 4.Start engine and check for leaks.
CAUTION
Observe extreme cleanliness when working with the fuel system. Otherwise may operational interruption easily occur and the injection equipment may be damaged.
3
1

2
2.2 Bleed the fuel system:
1.Attach a clear plastic hose to the bleeder nipple (1) to channel fuel into a container. The bleeder nipple is located at the end of the fuel manifold at the front of the engine. 2.Open the bleeder nipple (1). 3.Pump with the hand pump (2) until bubble-free fuel flows out of the opened bleeder nipple. •If the system is completely empty, it will take approx. 250 strokes.
•After changing the fuel filters, it will take approx. 170 strokes.
•Approx. 150 strokes are required to bleed the fuel manifold.
4.Close the bleeder nipple and remove the hose. 5. Undo the banjo screw for overflow valve (3) slightly.
Pump the hand pump (2) additional 20 strokes until the overflow valve opens. If the engine fails to start after bleeding: • Open the bleeder nipple again and pump the hand pump until bubble-free fuel flows out.
• Tighten the bleeder nipple. Start the enigne and check for leaks.
WARNING
The engine may be hot! Use gloves when pumping with the hand pump to avoid burning your hands.

2.3. Check batteries, at least once a year 11*
• Checking battery charge shall also be carried out after the first 8 hours of operation. Use a hydrometer to check the density of the electrolyte. The density of a fully charged battery should be: 1.240 at higher than +20 oC 1.280 at +20 oC, 1.294 at 0 oC, 1.308 at -20 oC.
Recharge the battery if the density is lower than 1.20. A discharged battery freezes at -5 oC.
WARNING
The electrolyte level must be correct when charging! During recharge a explosive gas is emitted. Open cell plugs and ventilate properly to avoid explosion!
2.4. Check multi-groove belt condition, at least once a year
• Checking of multi-groove belt condition shall also be carried out after the first 8 and 100 hours of operation. •Stop the engine to inspect the multi-groove belt (1). •Change the belt (1) if damaged or worn. •Check that the automatic belt tensioner (2) is in proper working order and keeps the multi-groove belt sufficiantly tightened.

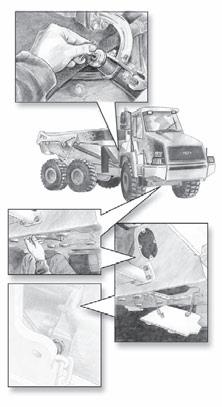
2.5. Air filter 10*
The air filter is located on the top of the engine, under the bonnet.
• Always stop the engine before servicing the air filter. • Open the bonnet and apply the bonnet catcher. • Cleaning and replacement of outer and inner element, see next page.
continue overleaf
Fig. 1
Fig. 2
Fig. 3
Fig. 4
Fig. 5
Outer element:
Clean element every 1000 hours of operation or if the air filter warning light illuminates at full load on the engine. • Replace the outer element after 5 times of cleaning, or at the latest after 2 years. 1.Loosen all clamps and remove the cover (fig. 1). 2.Remove outer element with a light turning movement (fig. 2).
Do not remove inner element when cleaning outer element!
3.To blow out the filter element, use tube with a bent end which is attached to a compressed air gun; the end of the tube must be bent by approx. 90°. It must be of sufficient length to reach down to the bottom of the filter element.
Blow out the filter element using dry compressed air (max. 5 bar) by moving the tube up and down inside the filter element until there is no more dust coming out (fig. 3). •Never wash out or brush out the outer element. When blowing out make sure that no dust is allowed to enter the inside area of the outer element.
4.Punch a mark in the edge of the inner element each time the outer element is cleaned.
5.Check the cleaned element for damage of the paper element and of the rubber seals.
•Cracks and holes in the paper element can be discovered by shining through light from an electric bulb (fig. 4). 6.Never carry on using a damaged outer element. In case of doubt, always fit a new outer element. 7.Reinstall the outer element, the cover, and fasten all the clamps. Turn the cover so that the dust cap is pointed downwards (max angle: 15°).
See also precautions on next page
Servicing the dust cap
The dust cap require very little maintenance. Possible dust packs to be removed by squeezing the cap (fig. 5).
Fig. 6
Inner element:
• Replace element every 5th cleaning of the outer element, or at the latest after 2 year. • Do not clean the inner element and do not reuse it after it has been taken out. Only open the seal in order to
replace the inner element.
1.Loosen all clamps and remove the cover. 2.Remove outer element.
3.Remove the inner element; Use a suitable tool (e.g. screw driver) to push through the seal of the inner element from the inside to the outside and pull both the straps upwards (fig. 6). 4.Use both straps to take hold of the inner element and then pull out with a light turning movement (fig. 7). 5.Install a new inner element into the housing. 6.Install a new or cleaned outer element.
7.Reinstall the cover, and fasten all the clamps.
Turn the cover so that the dust cap is pointed downwards (max angle: 15°).
CAUTION
• Do not attempt to reinstall a cleaned inner element. • Do not clean or replace the elements when the engine is running. • Replace the outer element if small holes or thinner parts are found on the element when it is checked with an electric bulb after cleaning. • Do not use an element in which folds, gasket or seal are damaged. • When cleaning the element, do not hit or hammer it. • Do not dismantle the inner element unnecessarily. • Punch a mark in the edge of the inner element each time the outer element is cleaned.
3. Transmission
3.1. Change oil 20*
Replace filter element 21*
Clean strainer 22* , at least once a year
• Changing transmission oil, replacement of transmission filter and cleaning of the strainer shall also be carried out after the first 100 hours of operation.
Drain oil:
1.The dump truck must be standing on level ground. 2.The oil must be at operating temperature. 3.Unscrew the dip stick (located behind the cab). 4.Access to the drain plug through transmission bottom guard (rear cover). 5.Unscrew drain plug, at the bottom of the transmission and drain the oil into a suitable container.
6.Clean the drain plug with magnetic insert, replace seal if necessary and reinstall the plug. •Tightening torque: 80 Nm.
Drain plug
Replace filter elements (located on the left hand side): Access to the filters through the engine bottom guard
7.Remove the engine bottom guard (front cover) 8.Clean well around the filters.
9.Place a suitable container beneath the filters to catch spillage. 10.Unscrew the filter elements.
11.Check for wear particles in the oil. 12.Apply oil to the seals on the new elements. 13.Screw the filter elements in until contact with the sealing surface is obtained. Tighten the elements firmly by hand.
continued overleaf
Access to remove the strainer
Rear cover
1
2
3
Clean stranier:
14.The strainer is located on the left hand side of the drain plug. 15.Unscrew the three nuts (1) and washers (2). 16.Remove the cover (3). 17.Replace the O-ring on the cover, if necessary. 18.Remove the strainer (4) and clean it. 19.Reassemble and torque nuts to 23 Nm. 20. Remount the all bottom guards and covers.

Fill new oil:
21.Fill new oil, according to the transmission oil list and oil specification sheet (chapter 6), through the dip stick tube.
22.Insert the dip stick again and turn handle clockwise to tighten the sealing.
Check:
23.Start the engine and check oil level (see daily maintenance, for procedure) at low idle. Both too low and too high level can cause serious internal damage! 24.Warm up the oil and check for leaks. Recheck level and adjust if necessary.
NOTE
• Do not overfill! Both too high and too low level can cause serious internal damage! • For rough operation conditions the oil and the filter element must be changed more often (every 500 hours) and the strainer must be cleaned as well.
4. Hydraulic system
4.1. Replace breather element 42*
• Accumulators contain oil under high pressure! Empty the accumulators, before unscrewing the element. Procedure is described in chapter 2, item 27. • Unscrew the old element on the hydraulic tank (under the cover). • Check the o-ring for deterioration, apply oil and screw on a new element.
CAUTION

Fill 4 litres hydraulic oil throguh the oil filler.
4.2. Replace hydraulic return filter element 43*.
• Replacement of hydraulic return filter element shall also be carried out after the first 100 hours of operation. 1. Accumulators contain oil under high pressure! Empty the accumulators, before unscrewing the filter. Procedure is described in chapter 2, item 27. 2. The filter is located on the back of the hydraulic tank. Remove the cover to get into the filter. 3. Clean well around the filter housing. 4. Place a suitable container beneath the draining hose to catch spillage. 5. Use a filter key to unscrew the old filter (counterclockwise). Remove also the old O-ring. The old filter contains 4 litres oil. Discard the filter element, and oil according to environmental requirements. 6. Check for wear particles in the oil. 7. Clean the O-ring groove, apply oil to the new O-ring and install it.
8. Apply oil or grease to the threads and install a new filter element by turning it clockwise until seals make contact. Then tighten by hand 1/4 to 1/3 turn more. 9. Fill 4 litres hydraulic oil, as specified in chapter 6, lubricants, through the oil filler on the top of the filter unit (under the cover on the top of the hydraulic tank). 10.Screw the oil plug back into place and clean off any oil spill. 11.Start engine and check for leaks.
The accumulators will be recharged with oil when the engine is re-started.
CAUTION
1
5. Front differential
5.1 Change oil, at least once a year 30*
• Change front diff. oil shall also be carried out after the first 500 hours of operation. 1.Access to the drain plug through transmission bottom guard. 2.Open level / filling plug (1), special spanner in tool kit. 3.Unscrew drain plug (2). 4.Drain the oil into a suitable container.
5.Clean the drain plug, replace seal if necessary and reinstall. • Tightening torque: 80 Nm. 6.Fill new oil, according to the oil specification sheet (chapter 6), through the level / filling plug, level shall be at lower edge of hole when dump truck is horizontal. 7.Clean the plug, replace seal if necessary and reinstall. •Tightening torque: 80 Nm.
CAUTION
1
6. Rear differential
6.1. Change oil, at least once a year 31*
• Change rear diff. oil shall also be carried out after the first 500 hours of operation. 1.Open level/filling plug (1). 2.Unscrew drain plug (2) underneath the housing. 3.Drain the oil into a suitable container.
4.Clean the drain plug, replace seal if necessary and reinstall. •Tightening torque: 80 Nm. 5.Fill new oil, according to the oil specification sheet (chapter 6), through the level/filling plug, level shall be at lower edge of hole when dump truck is horizontal. 6.Clean the plug, replace seal if necessary and reinstall. •Tightening torque: 80 Nm.
CAUTION
1
7. Front reduction gears
7.1. Change oil, at least once a year 33*
• Change front reduct. gear oil shall also be carried out after the first 500 hours of operation. 1.The dump truck must be horizontal. 2.Turn the hub, so that the plug is pointed downwards. 3.Unscrew the plug (1). 4.Drain the oil into a suitable container.
5.Turn the hub 90o, so that the level indicator is horizontal (2). 6.Fill new oil, according to the oil specification sheet (chapter 6), through level/filling plug, level shall be at lower edge of hole when dump truck is horizontal. 7.Clean plug, replace seal if necessary and reinstall. •Tightening torque: 80 Nm. 8.Recheck oil level after test driving.
CAUTION
8. Electrical system
8.1. Check wiring
The wiring harness must not be damaged. Check that the cables on the articulation hinge and on the rear frame/body are not squeezed, have sharp bends or loose/bad connections.