1 minute read
Control lever installation

from CNH KG1BP514-00 - Multi-Purpose Circuit Proportional Control Kit CX300D Installation Instructions

Removal control lever (right)
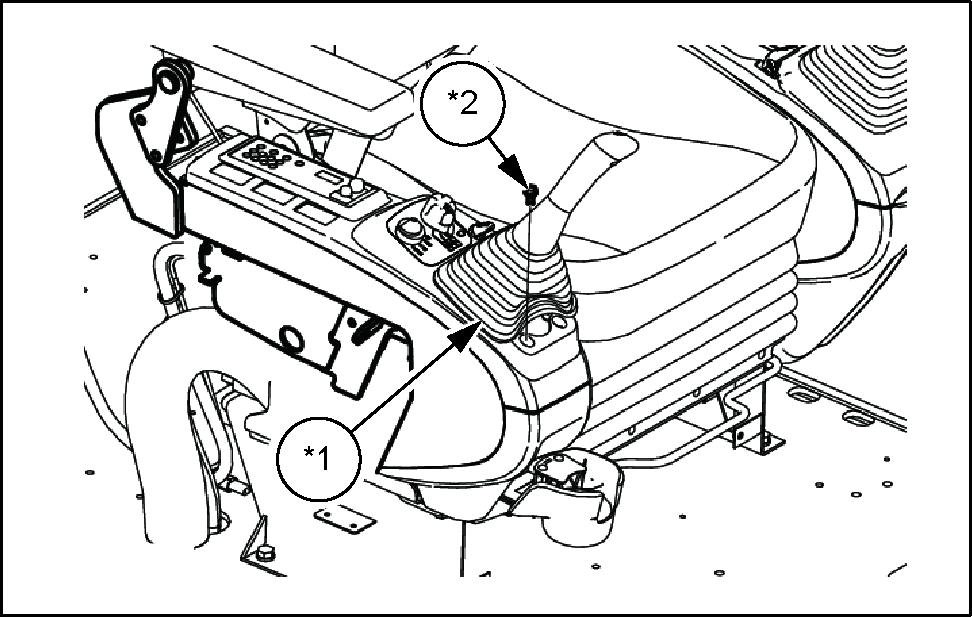
Roll the boot (*1) the control lever and use the Phillips screwdriver box wrench remove the 2 bolts (*2) the console top cover
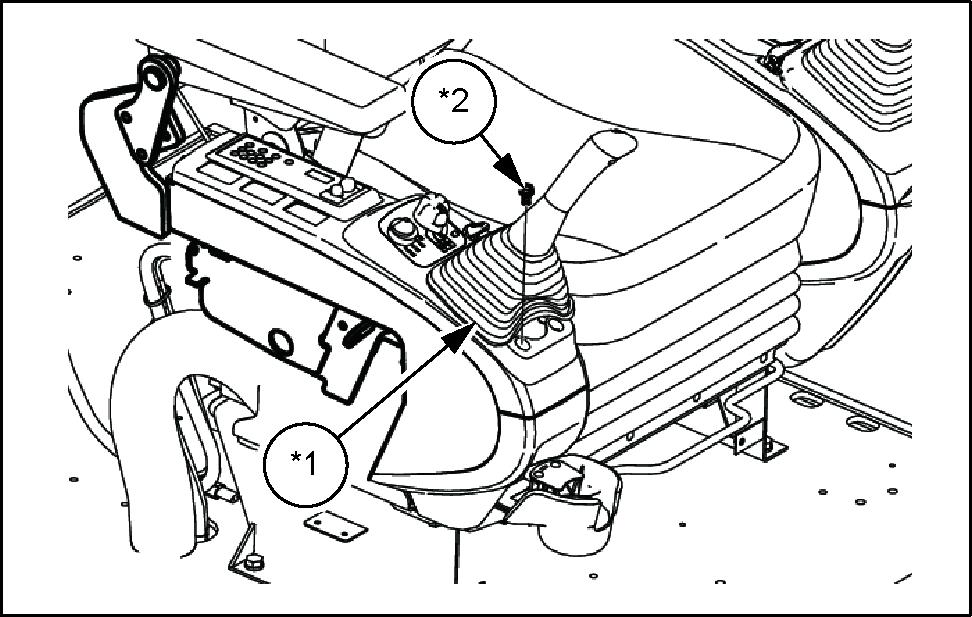
SMIL14II00167AB 1
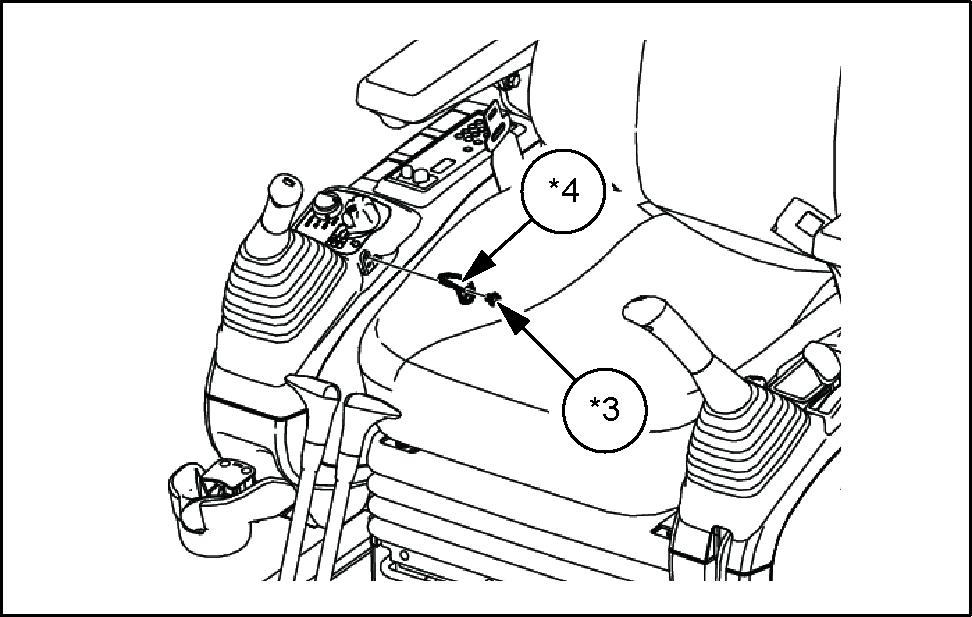
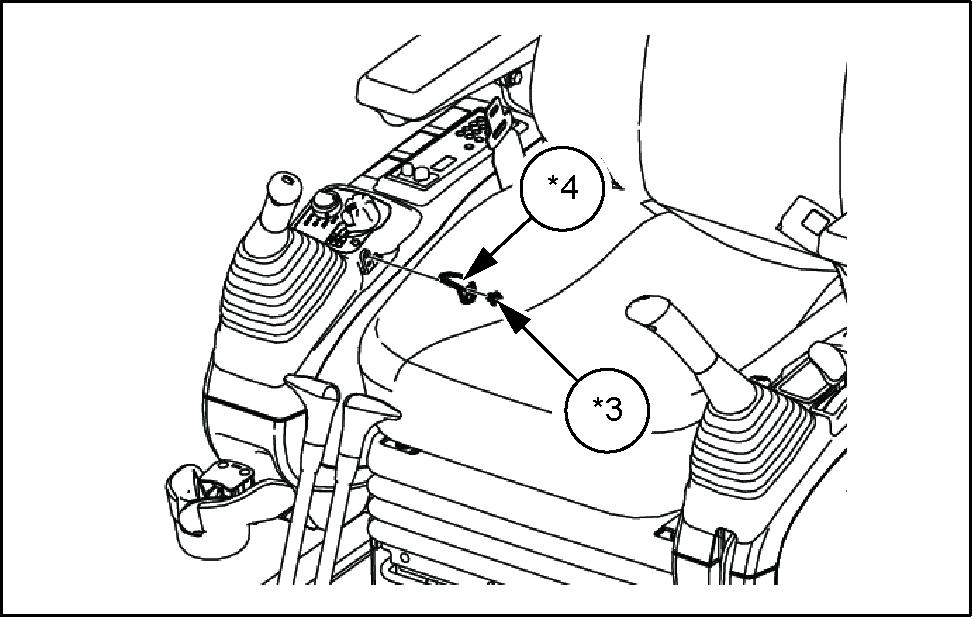
Use the Phillips screwdriver remove the 2 screws (*3) , and then remove the handle the tilt lever (*4)
SMIL14II00168AB 2
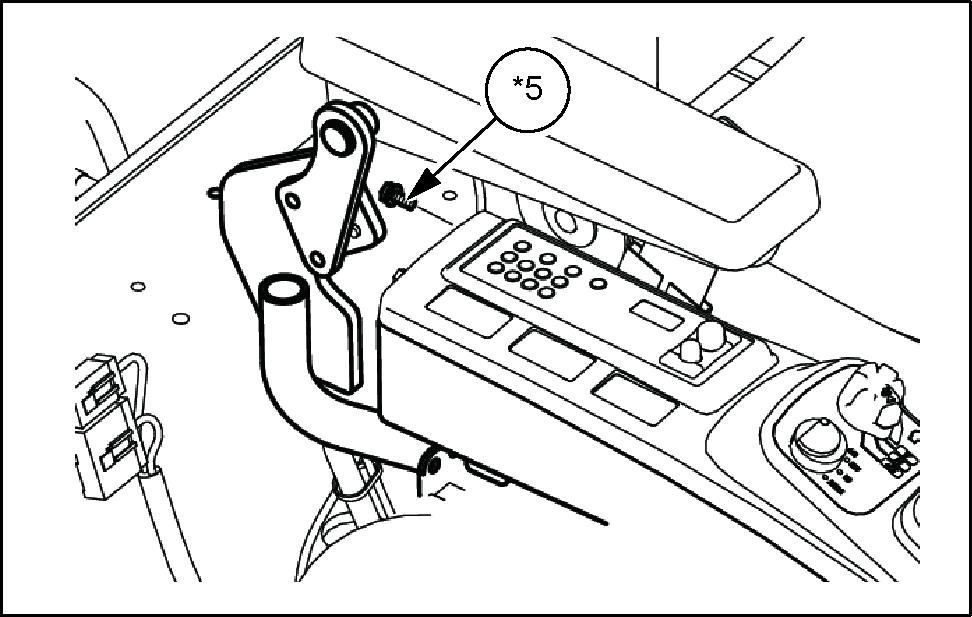
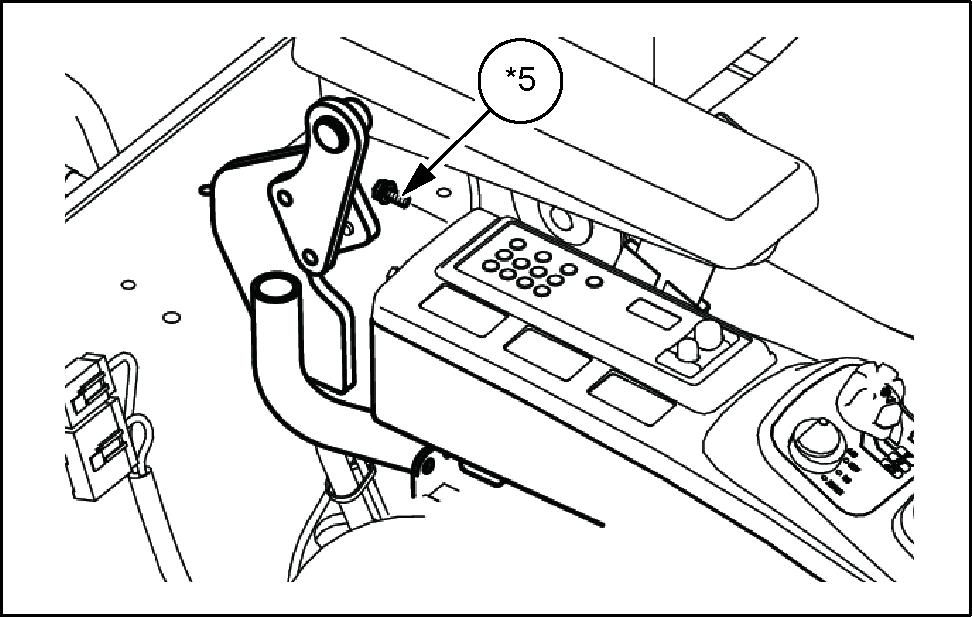
Use the Phillips screwdriver remove the 2 screws (*5) the console top cover .
SMIL14II00169AB 3
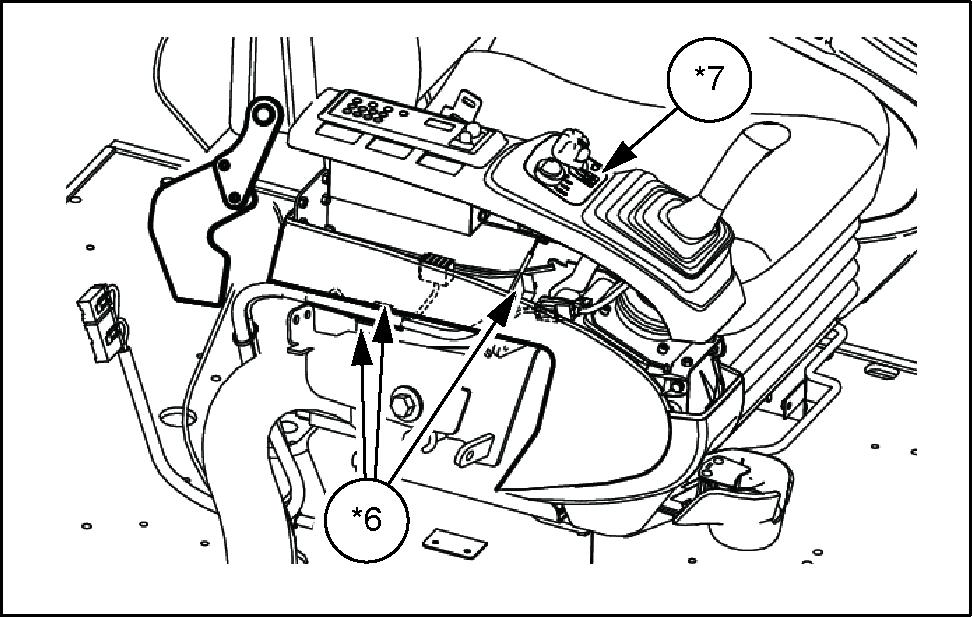
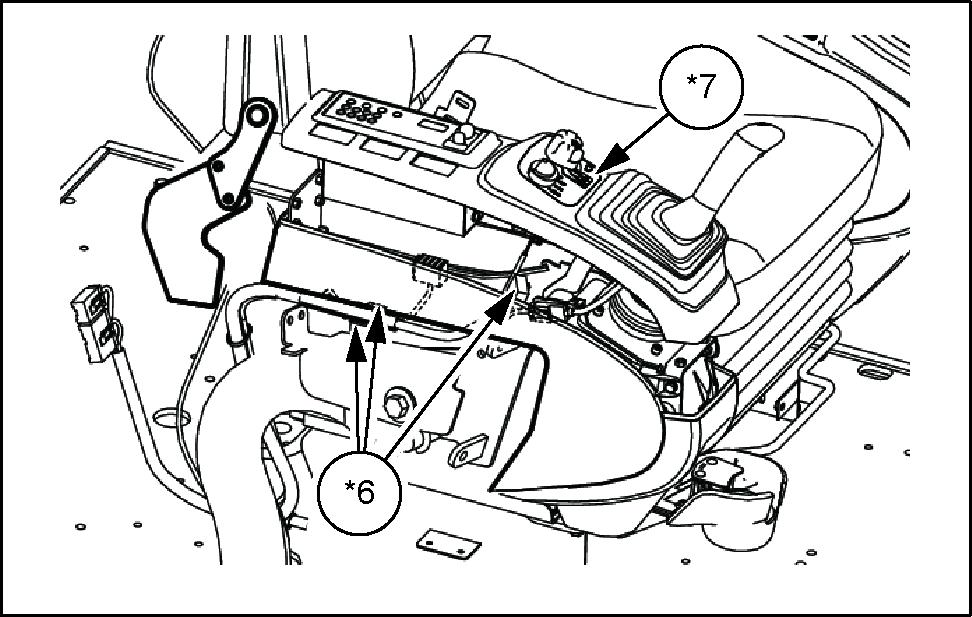
Remove the connectors (*6) and remove the console top cover (*7)
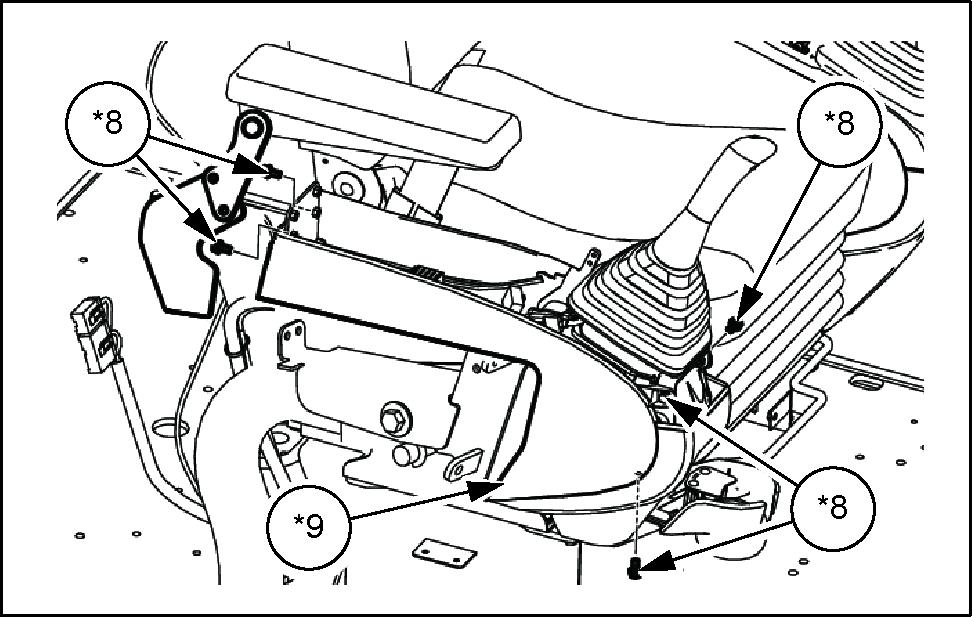
Use a Phillips screwdriver box wrench move the 5 bolts (*8) and remove the cover (*9)
SMIL14II00175AB 5
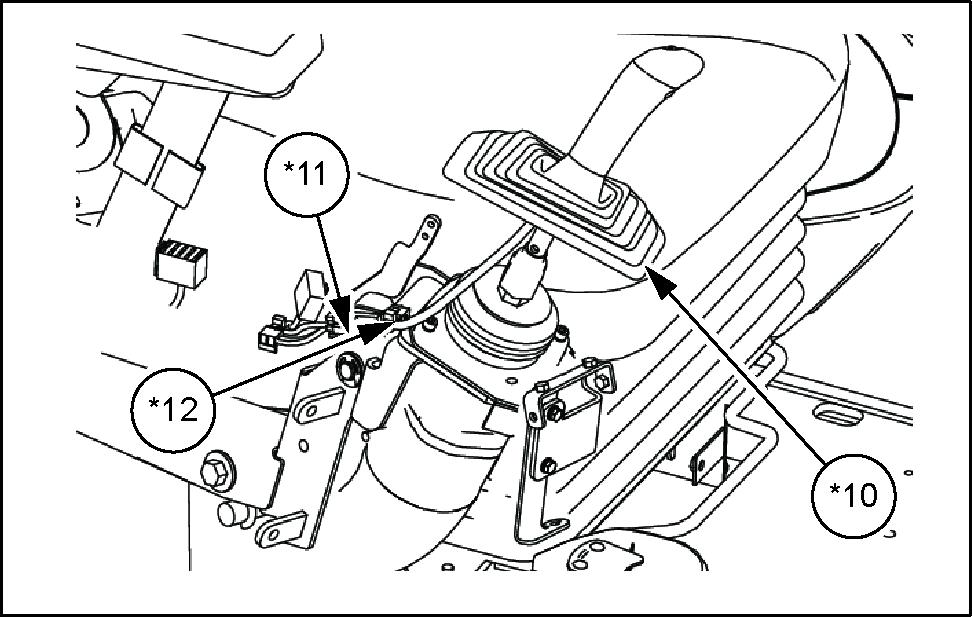
Roll the boot (*10) the control lever , remove the connector (*1 the lever and cut the wire band (*12)
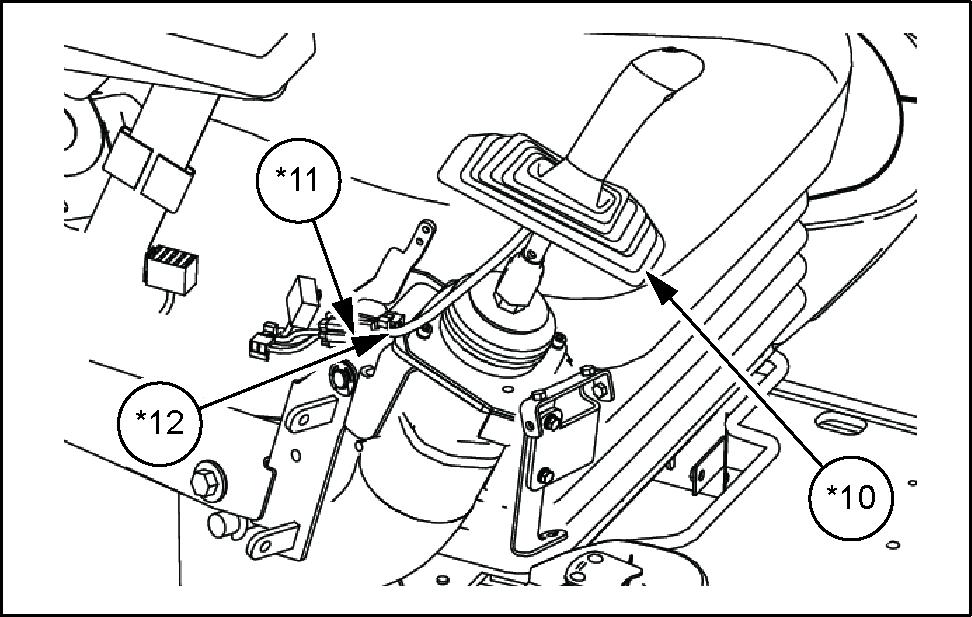
SMIL14II00171AB 6
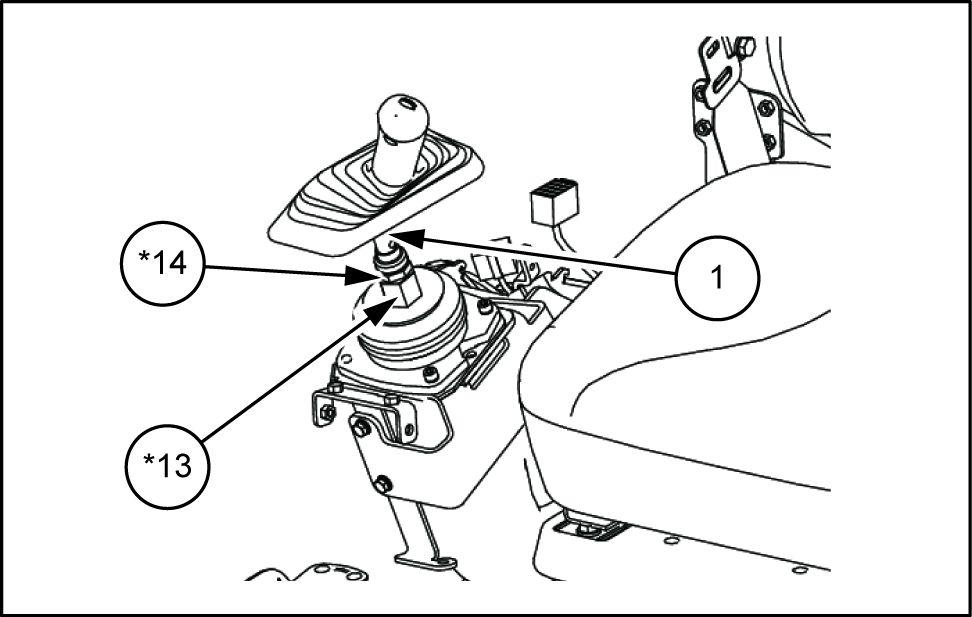
While fastening the nut (*13) with a wrench , use a wrench remove the lock nut (*14) and remove the control lever (*15)
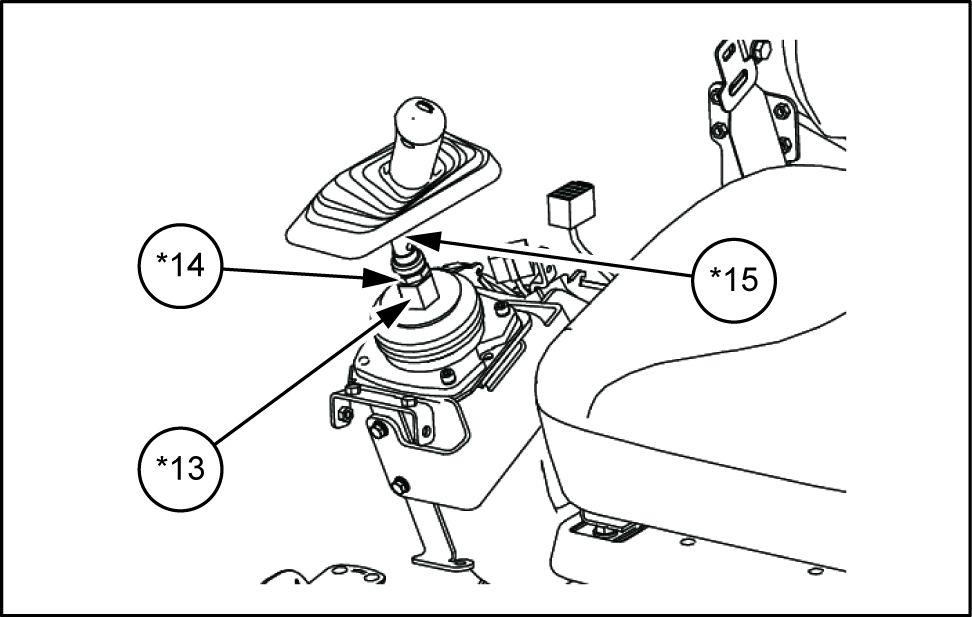
SMIL14II00172AB 7
Installation control lever (right)
After installing the knob (right) (1) , while fastening the nut (*13) with a wrench , use a wrench install the lock nut (*14) .
Lock nut tightening torque: - N·m (32.53 )
Install the horn switch connector (*1 , bundle with the wire band (*12) , and then cover the control lever boot (*10)
SMIL14II00174AB 9
Use a Phillips screwdriver box wrench stall the cover (*9) with 5 bolts (*8)
SMIL14II00175AB
Install the connectors (*6) and install the console top cover (*7)
SMIL14II00176AB 1 1
Use the Phillips screwdriver install the 2 screws (*5) the console top cover
SMIL14II00177AB
Use the Phillips screwdriver install the handle the tilt lever (*4) with 2 screws (*3)
Use the Phillips screwdriver box wrench install the 2 bolts (*2) for the console top cover and cover the control lever boot (*1)