5 minute read
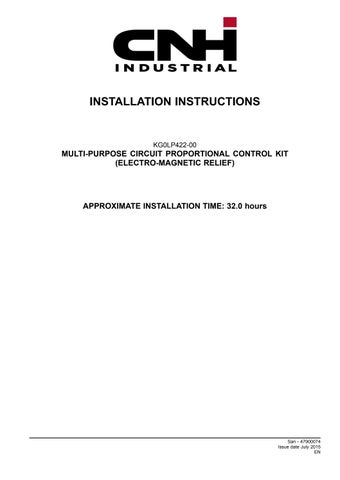
Upper main line installation

from CNH KG1BP514-00 - Multi-Purpose Circuit Proportional Control Kit CX300D Installation Instructions

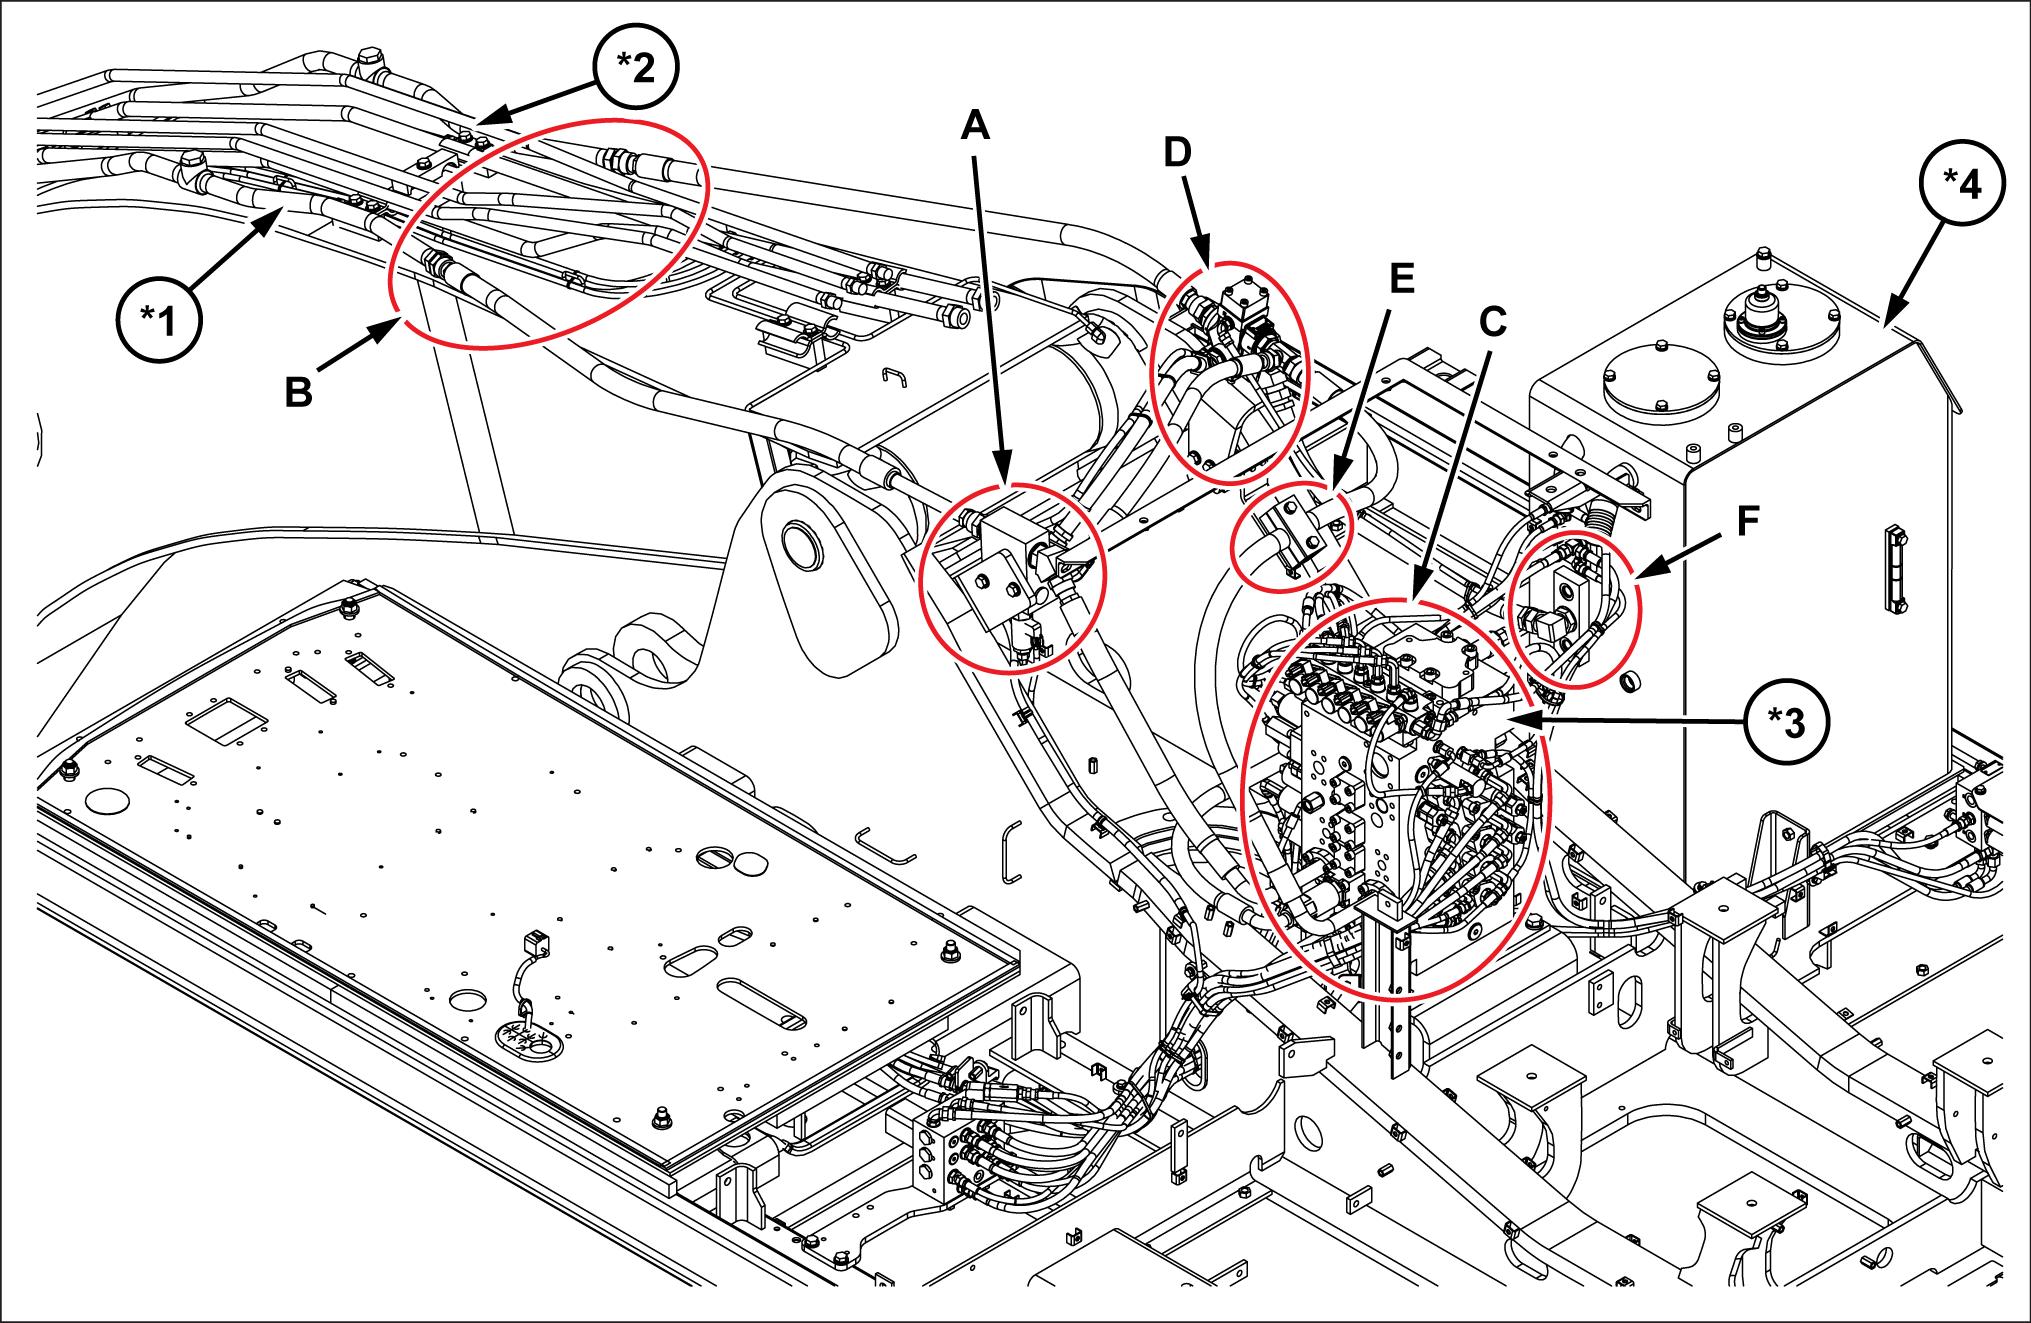
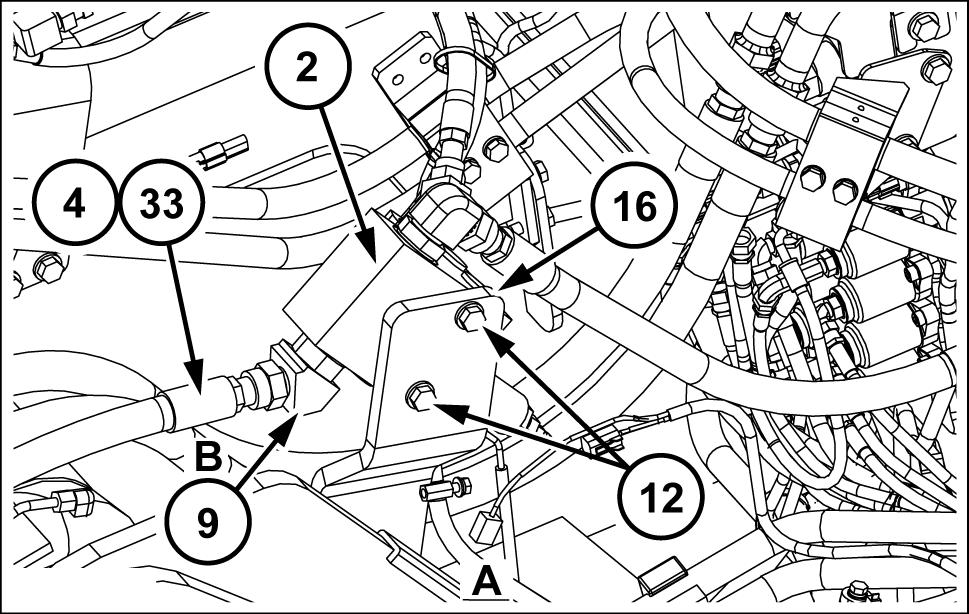
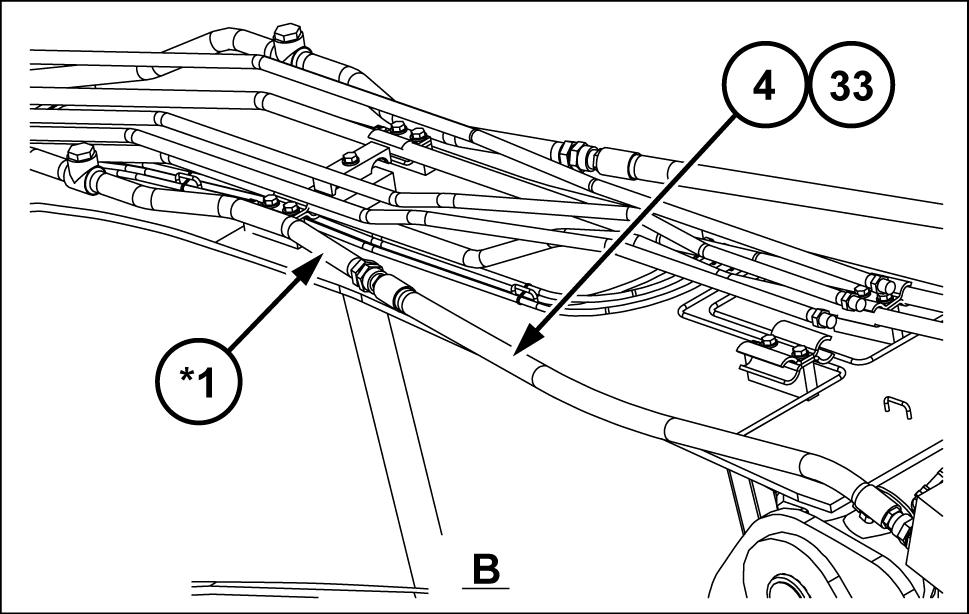
Upper Main Line Installation (left side)
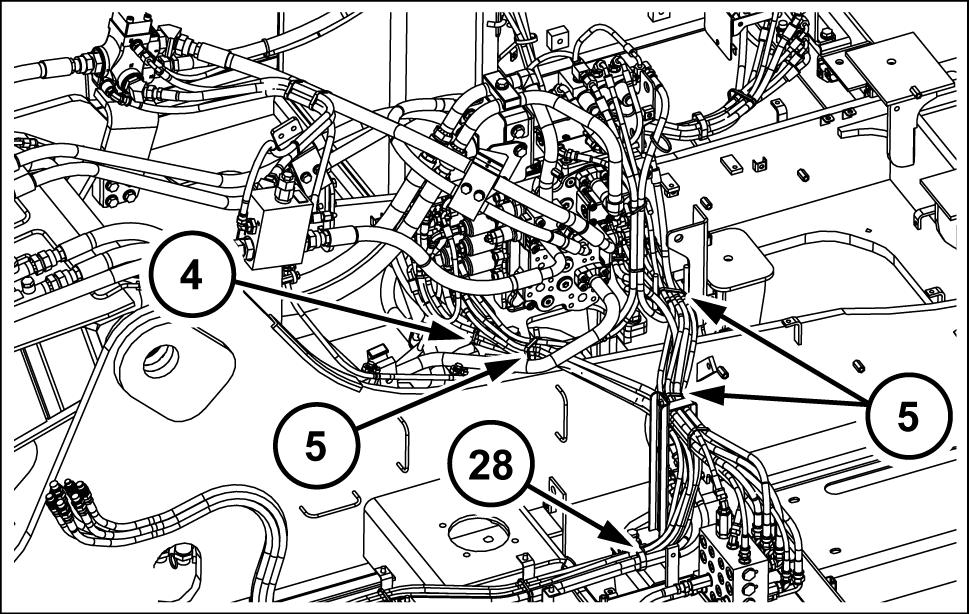
Install the bracket (16) the frame with four sems bolts (12)
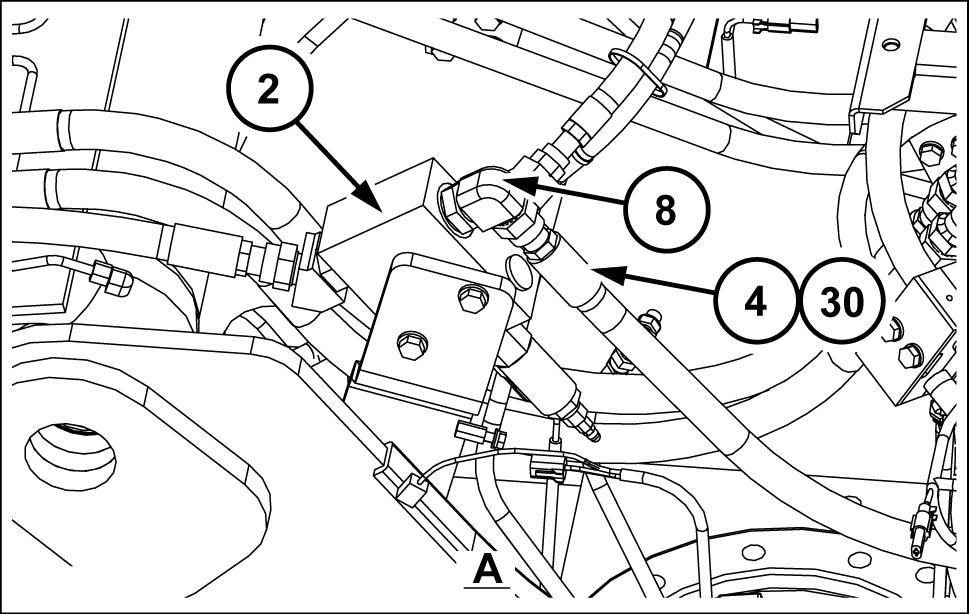
Install the electromagnetic proportional relief valve (2) the bracket (16) with two sems bolts (12) .
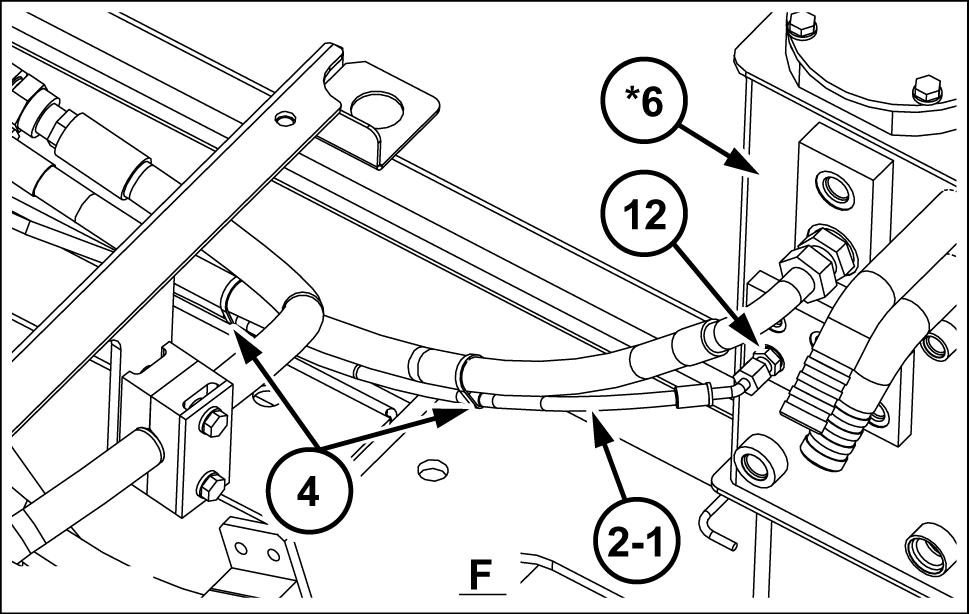
Install the elbow (9) the electromagnetic tional relief valve (2) B
Set the O - ring (4) the elbow (9) and connect the hydraulic hose (33)
• T ightening torque: 157 - 193 ( 1 15.797)
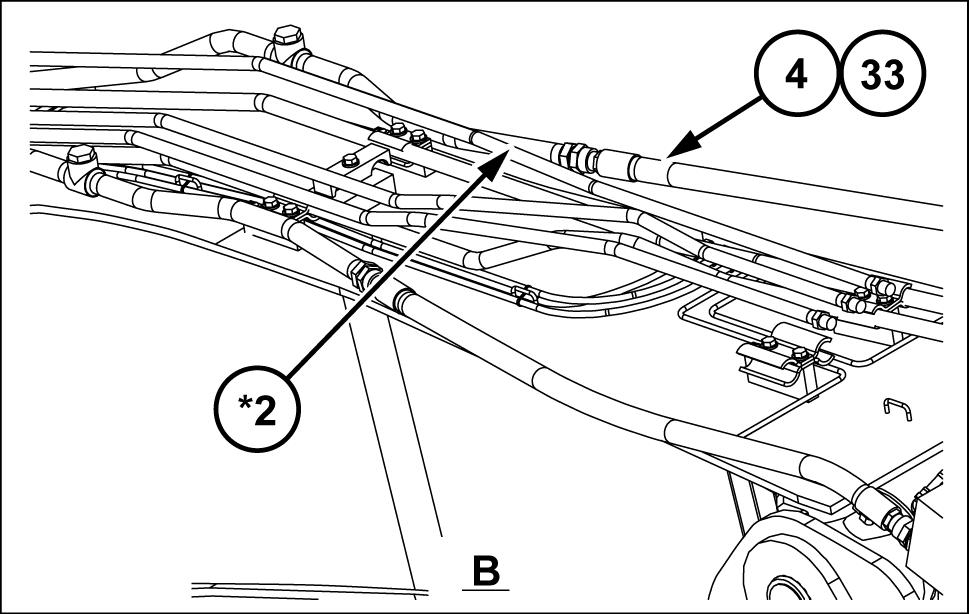
Set the O - ring (4) the line assembly (left) (*1) and connect the hydraulic hose (33)
• T ightening torque: 157 - 193 ( 1 15.797)
SMIL15CEX8803AB 4
Install the elbow (8) the electromagnetic tional relief valve (2) A
Set the O - ring (4) the elbow (8) and connect the hydraulic hose (30)
• T ightening torque: 157 - 193 N·m ( 1142.349 )
SMIL15CEX8804AB 5
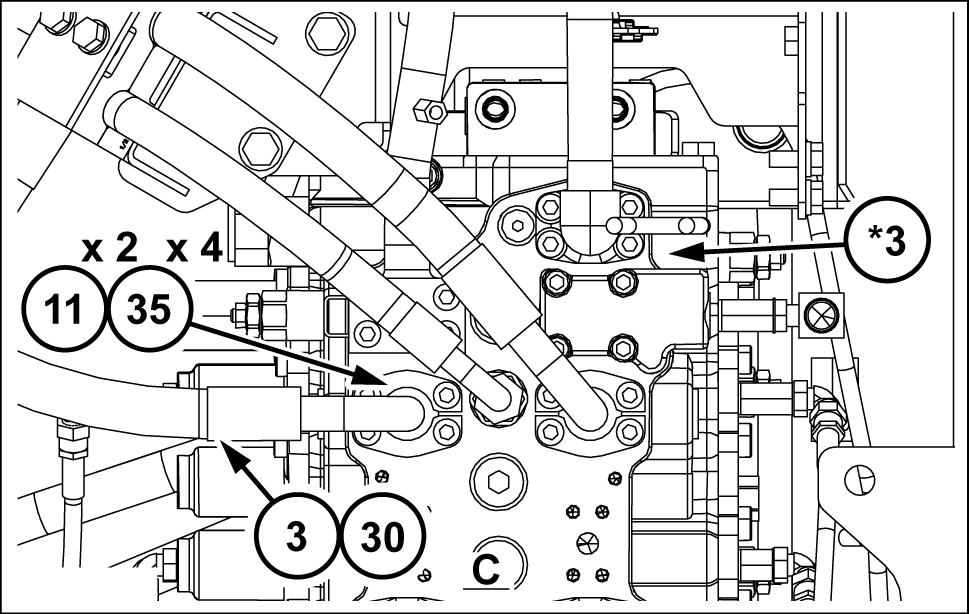
Set the O - ring (3) the control valve (*3) and connect the hydraulic hose (30) with two split flanges and four hexagon socket head bolts (35)
SMIL15CEX8805AB 6
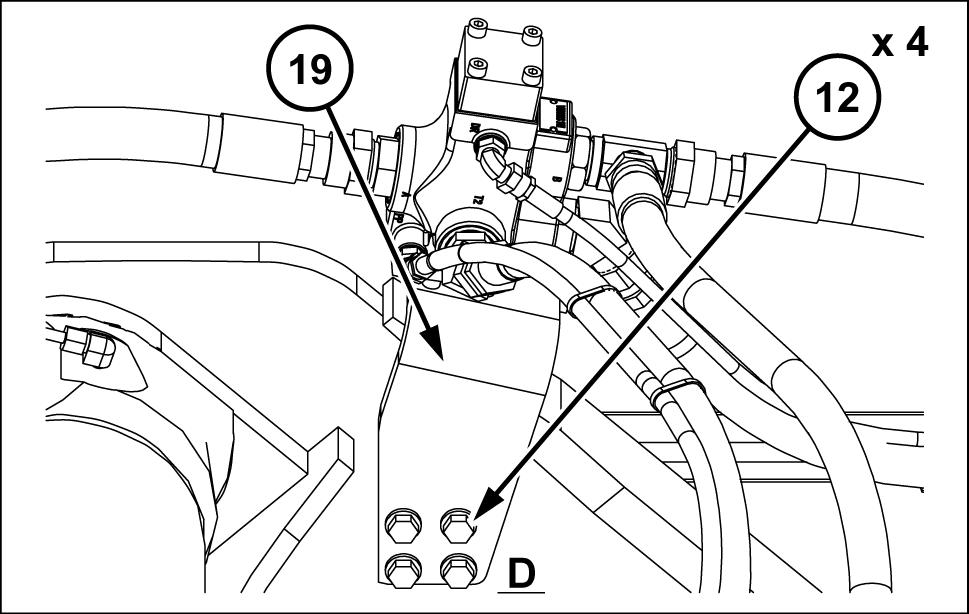
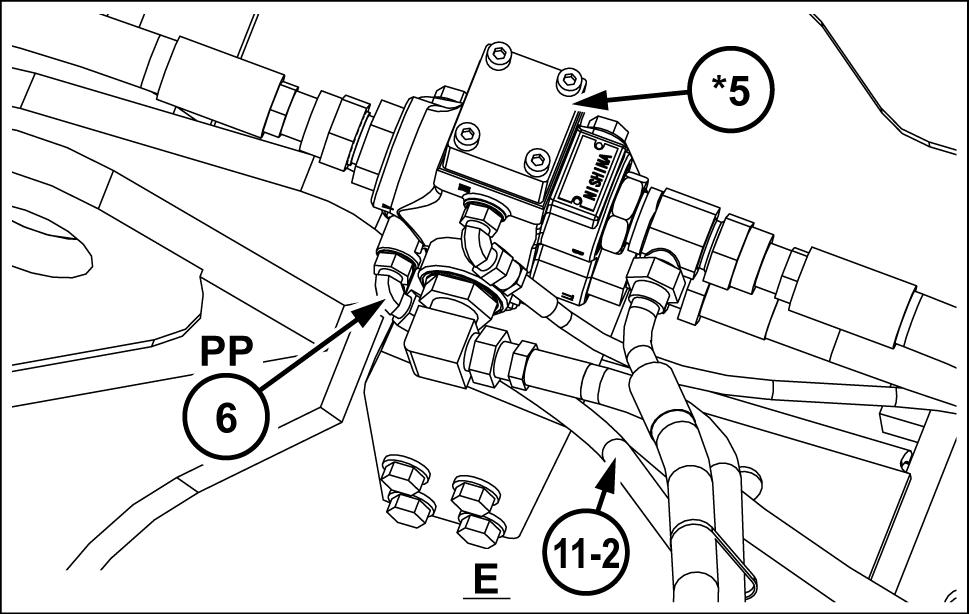
Upper Main Line Installation (right side)
Install the bracket (19) the frame with four sems bolts (12)
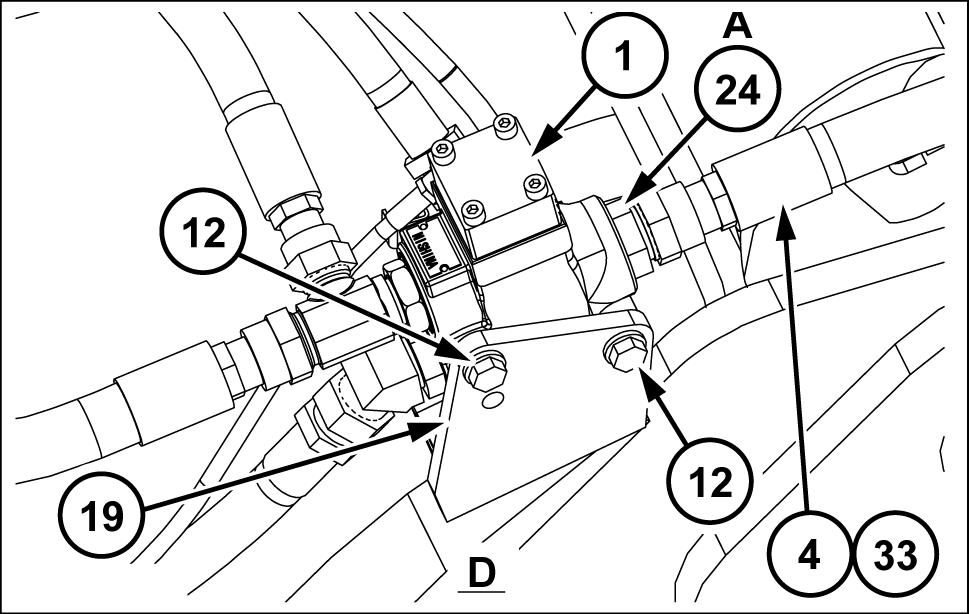
Install the three - direction valve (1) the bracket (19) with two sems bolts (12)
Install the hose adapter (24) the three - direction valve (1) A
Set the O - ring (4) the hose adapter (24) and connect the hydraulic hose (33) .
• Hydraulic hose tightening torque: 157 - 193 N·m ( 1 15.797142.349 )
SMIL15CEX8807AB 8
Set the O - ring (4) the line assembly (right) (*2) and connect the hydraulic hose (33)
• Hydraulic hose tightening torque: 157 - 193 N·m ( 1 15.797142.349 )
SMIL15CEX8808AB 9
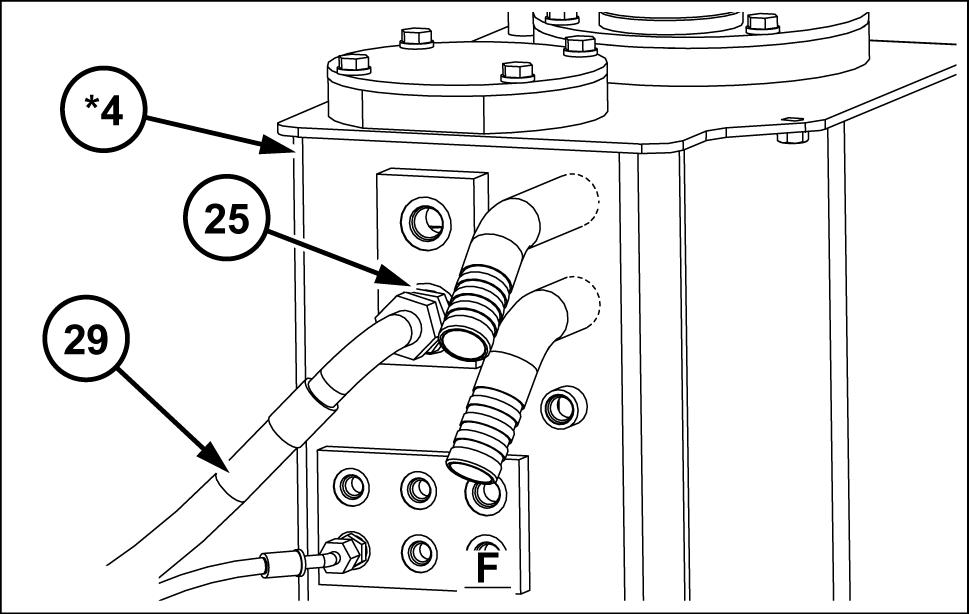
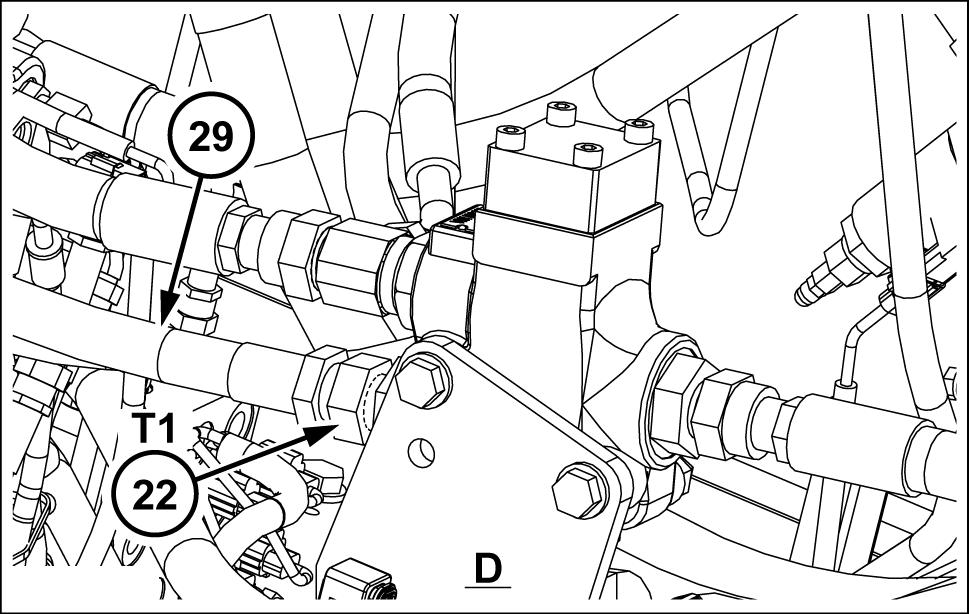
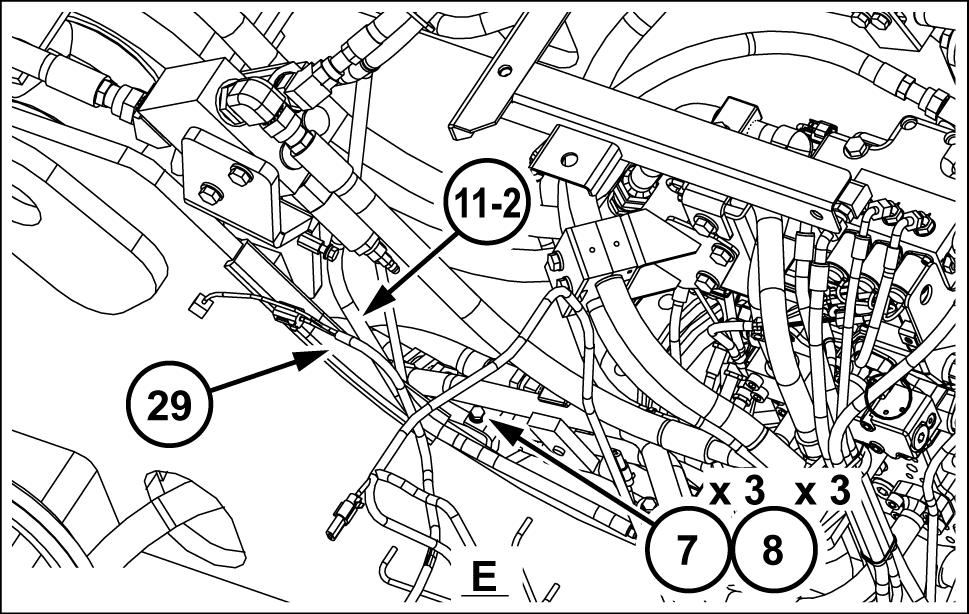
Install the hose adapter (22) the three - direction valve (1) port. Connect the hydraulic hose (29) the hose adapter (22)
SMIL15CEX8809AB
Install the hose adapter (25) the hydraulic tank (*4) Connect the hydraulic hose (29) the hose adapter (25)
• Install the hose adapter (25) with the horizontal angle 45° down. SMIL15CEX8810AB
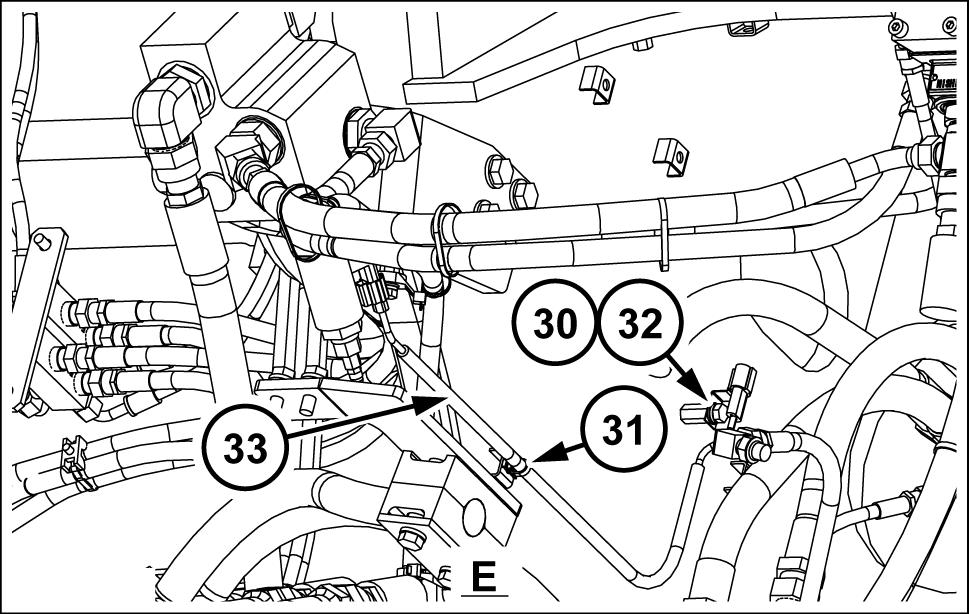
Install the tee (14) the three - direction valve (1) B
Set the O - ring (4) the tee (14) and connect the draulic hose (31)
• Hydraulic hose tightening torque: 157 - 193 N·m ( 1 15.797142.349 ) SMIL15CEX881
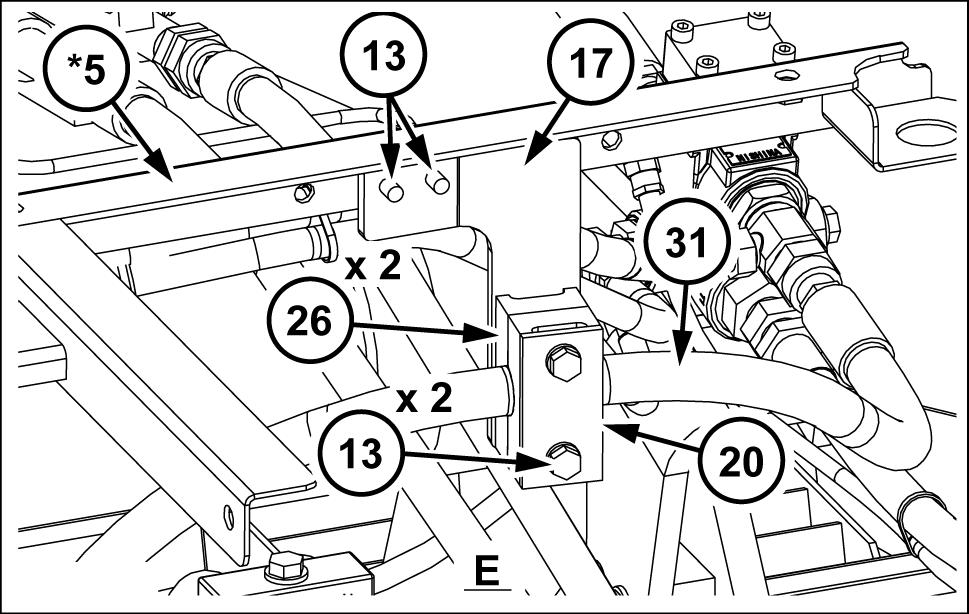
Install the bracket (17) the housing frame (*5) with two sems bolts (13) Sandwich the hydraulic hose (31) with two hose clamps (26) , and then install the plate (20) with two sems bolts (13) order fasten the SMIL15CEX8812AB
Set the O - ring (3) the control valve (*3) and connect the hydraulic hose (31) with two split flanges and four hexagon socket head bolts (35)
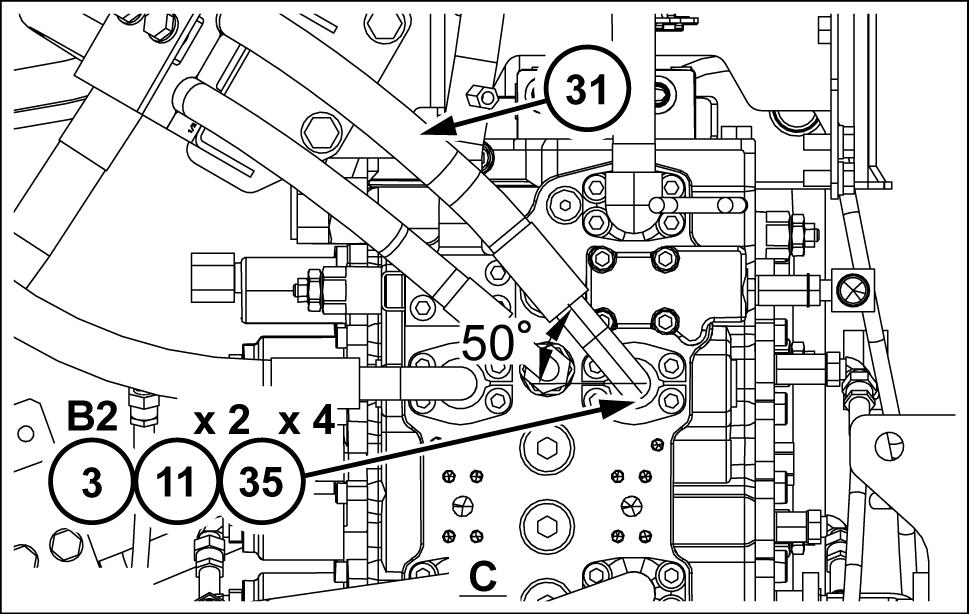
• Connect the hydraulic hose (31) with the horizontal angle 50°

1
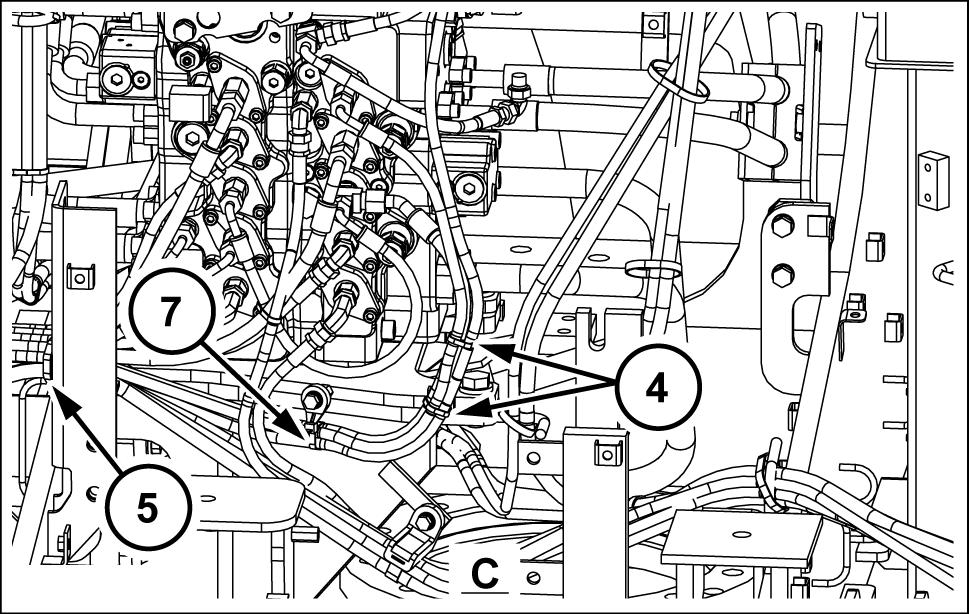
Install the check valve (15) and hose adapter (23) the control valve (*3)
Set the O - ring (5) the hose adapter (23) and connect the hydraulic hose (34)
Install the elbow (7) the control valve (*3) Set the O - ring (5) the elbow (7) and connect the hydraulic hose (34)
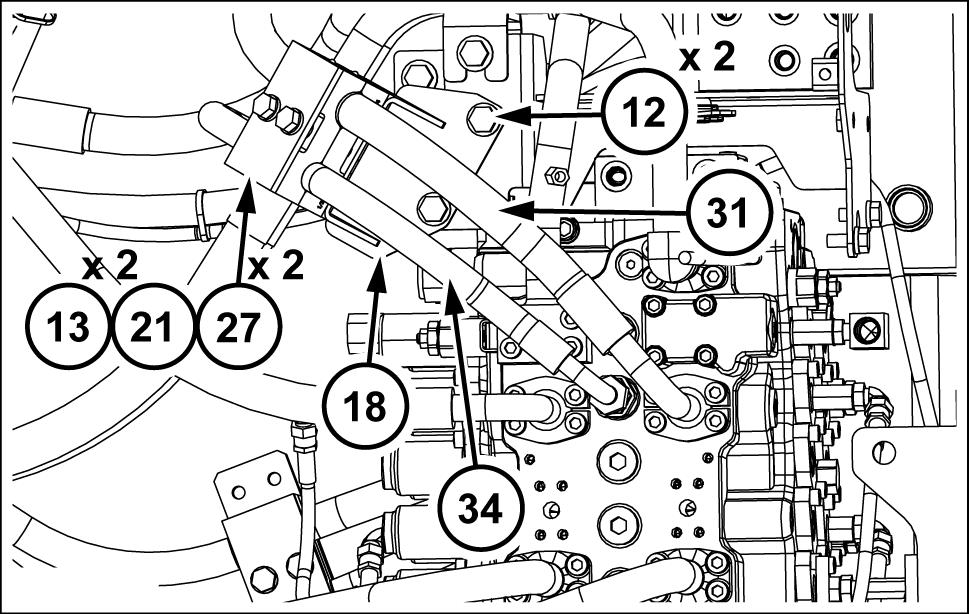
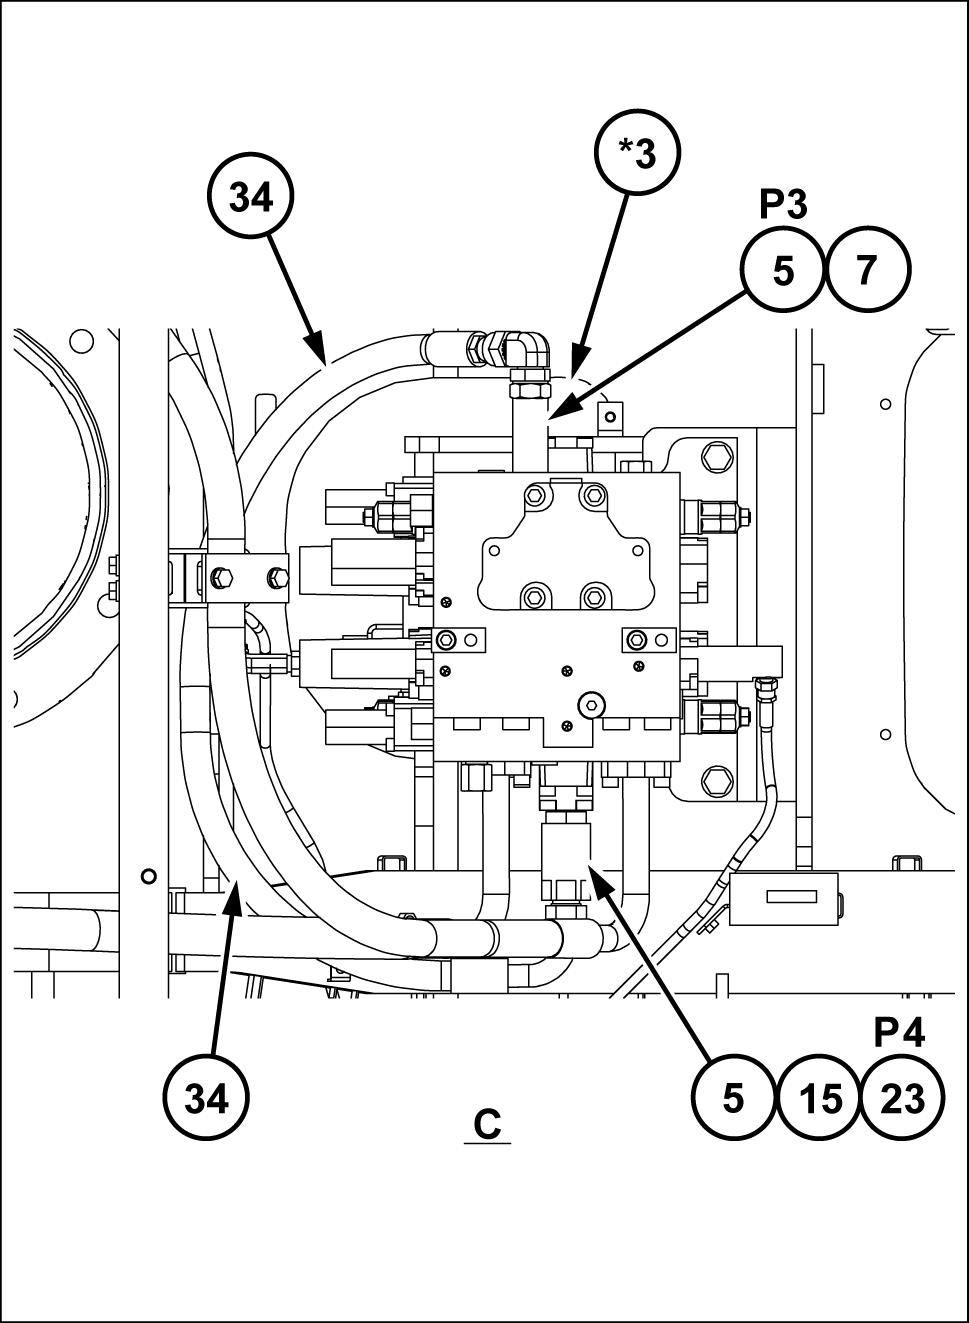
• Hydraulic hose tightening torque: - 102 ( - )
Install the bracket (18) the bracket with two sems bolts (12) .
Sandwich the hydraulic hose (31) and hydraulic hose (34) with two hose clamps (27) , and then fasten with the plate (21) and two sems bolts (13)
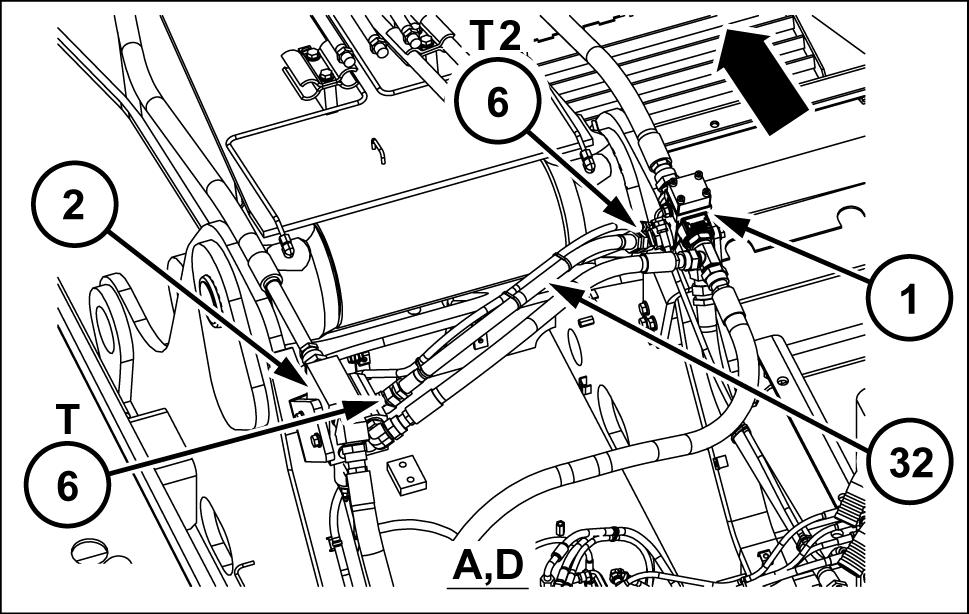
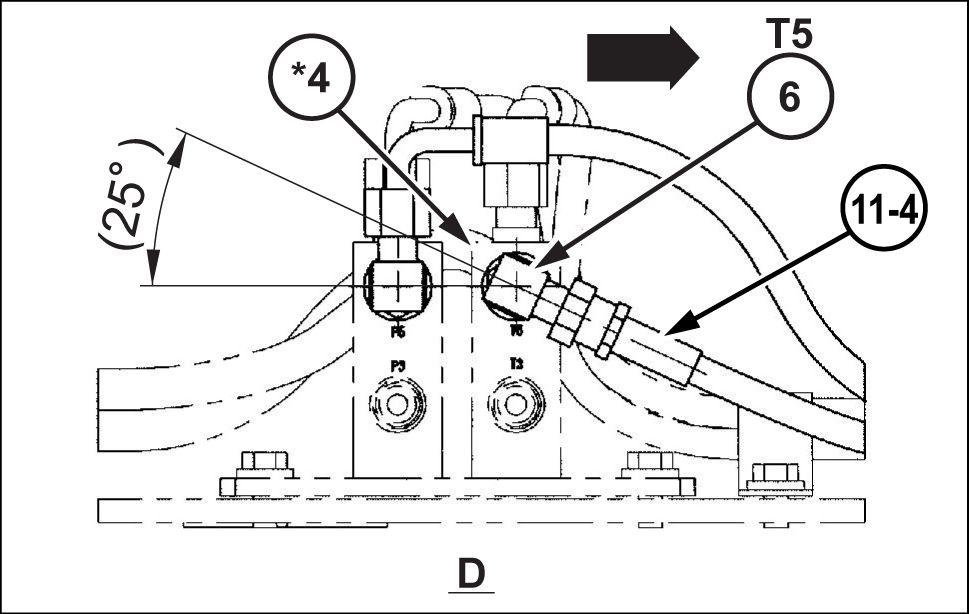
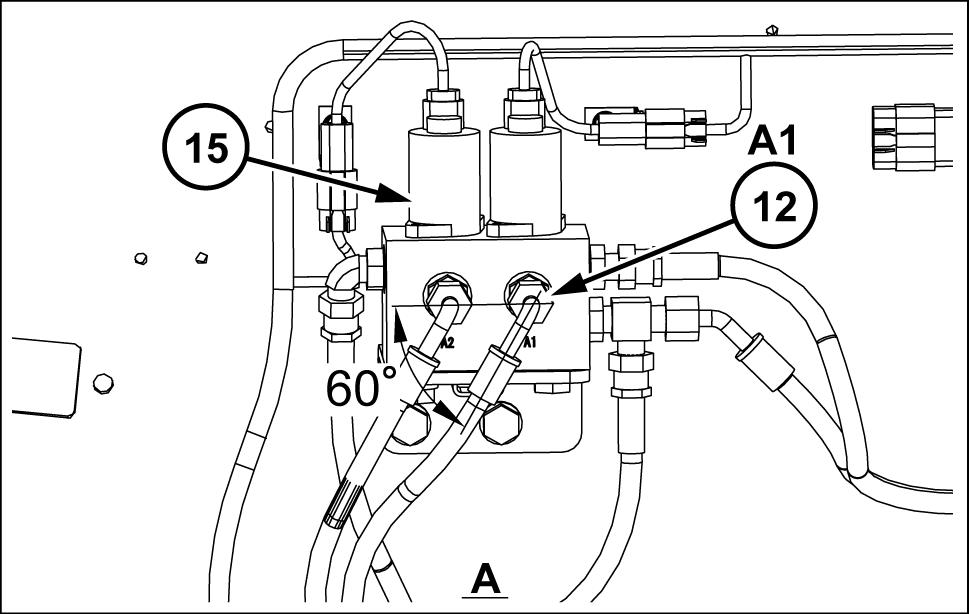
Install the elbow (6) the electromagnetic tional relief valve (2) T
Install the elbow (6) the three - direction valve (1)
Connect the electromagnetic proportional relief valve (2) T port and three - direction valve (1) port with the hydraulic hose (32)
12. Install the elbow (10) the electromagnetic tional relief valve (2) C
Set the O - ring (5) the elbow (10) and connect the hydraulic hose (28)
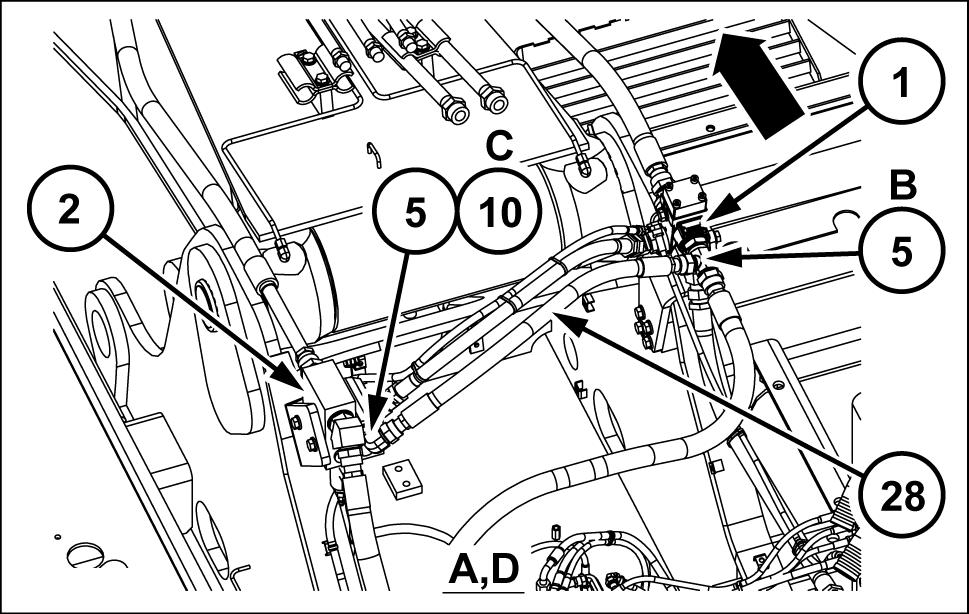
Set the O - ring (5) the three - direction valve (1) B port and connect with the hydraulic hose (28) .
• Hydraulic hose tightening torque: - 102 N·m ( 61.95575.231 )
Pilot line installation - Proportional control
*3. Control valve
SMIL15CEX8820FB 3
*5. Three - direction valve
*4. Manifold *6. hydraulic tank
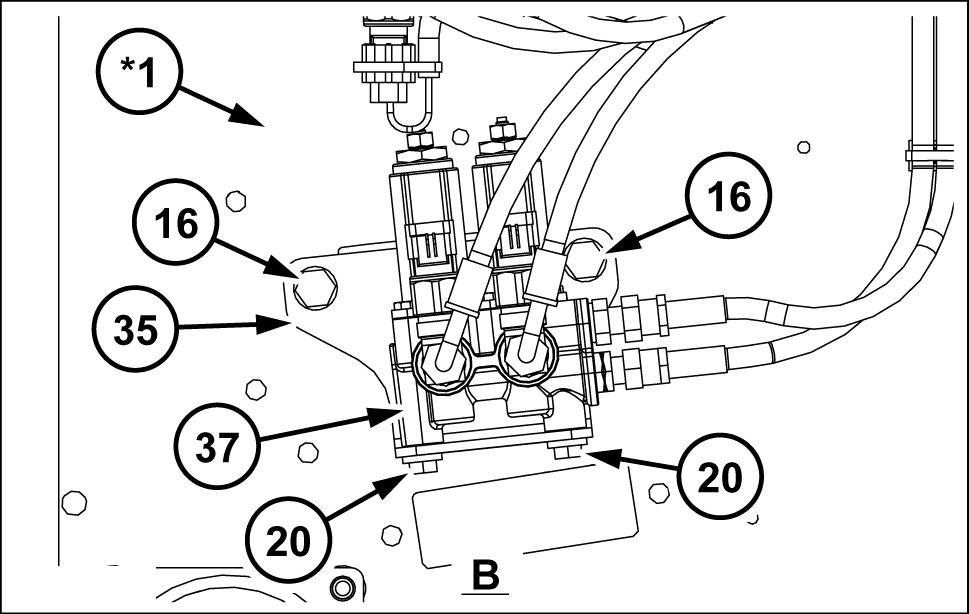
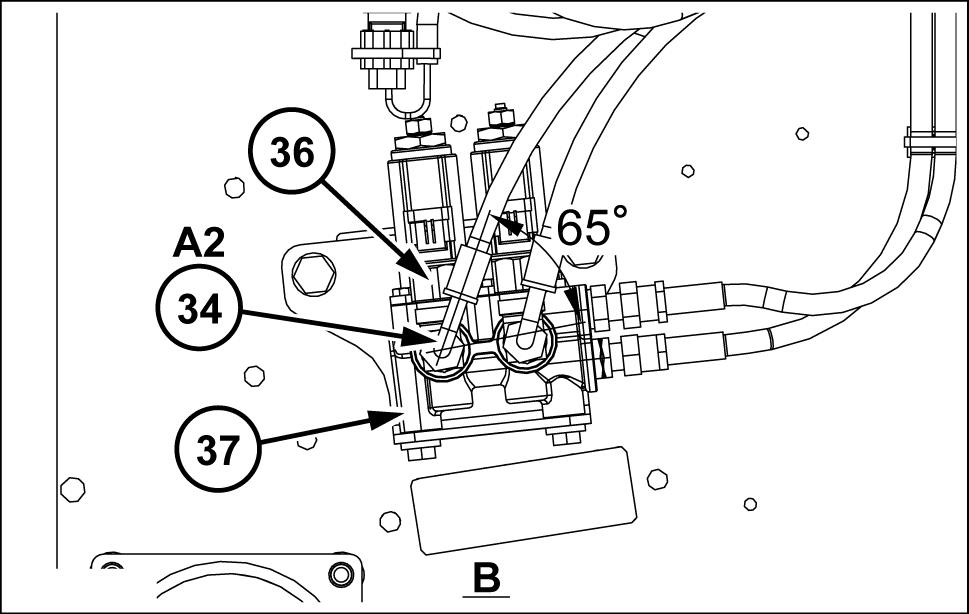
Install the reducing valve (37) the bracket (35) with two sems bolts (20)
Install the bracket (35) the floor (*1) with two sems bolts (16) SMIL15CEX8821AB 4
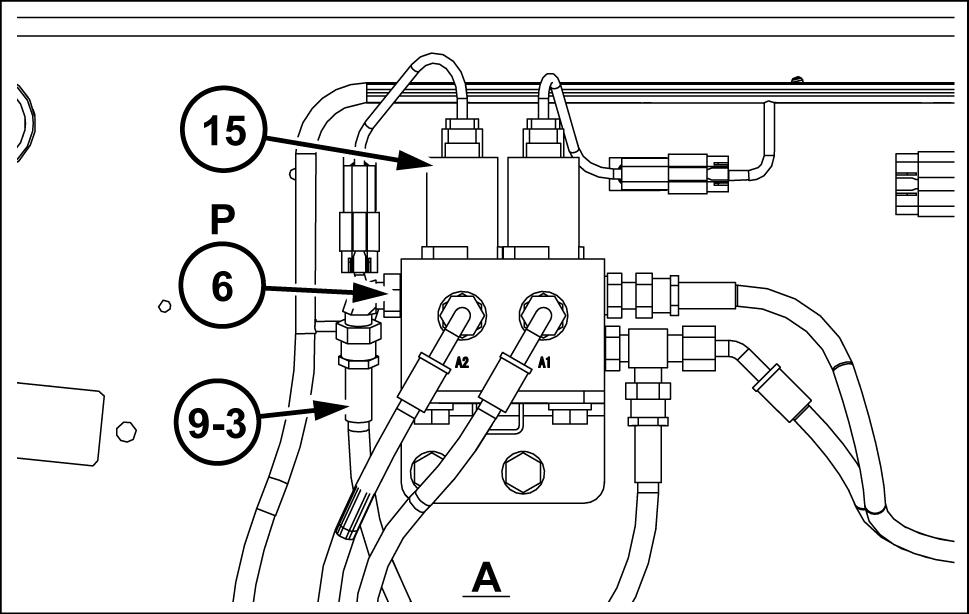
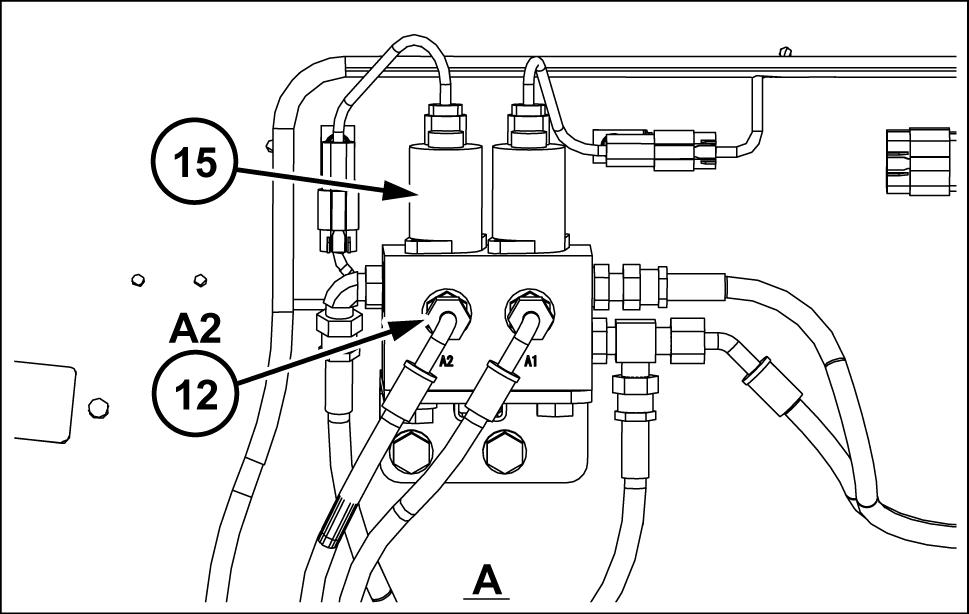
Install the solenoid valve (15) the bracket (21) with two sems bolts (16)
Install the bracket (21) the floor (*1) with two sems bolts (16) .

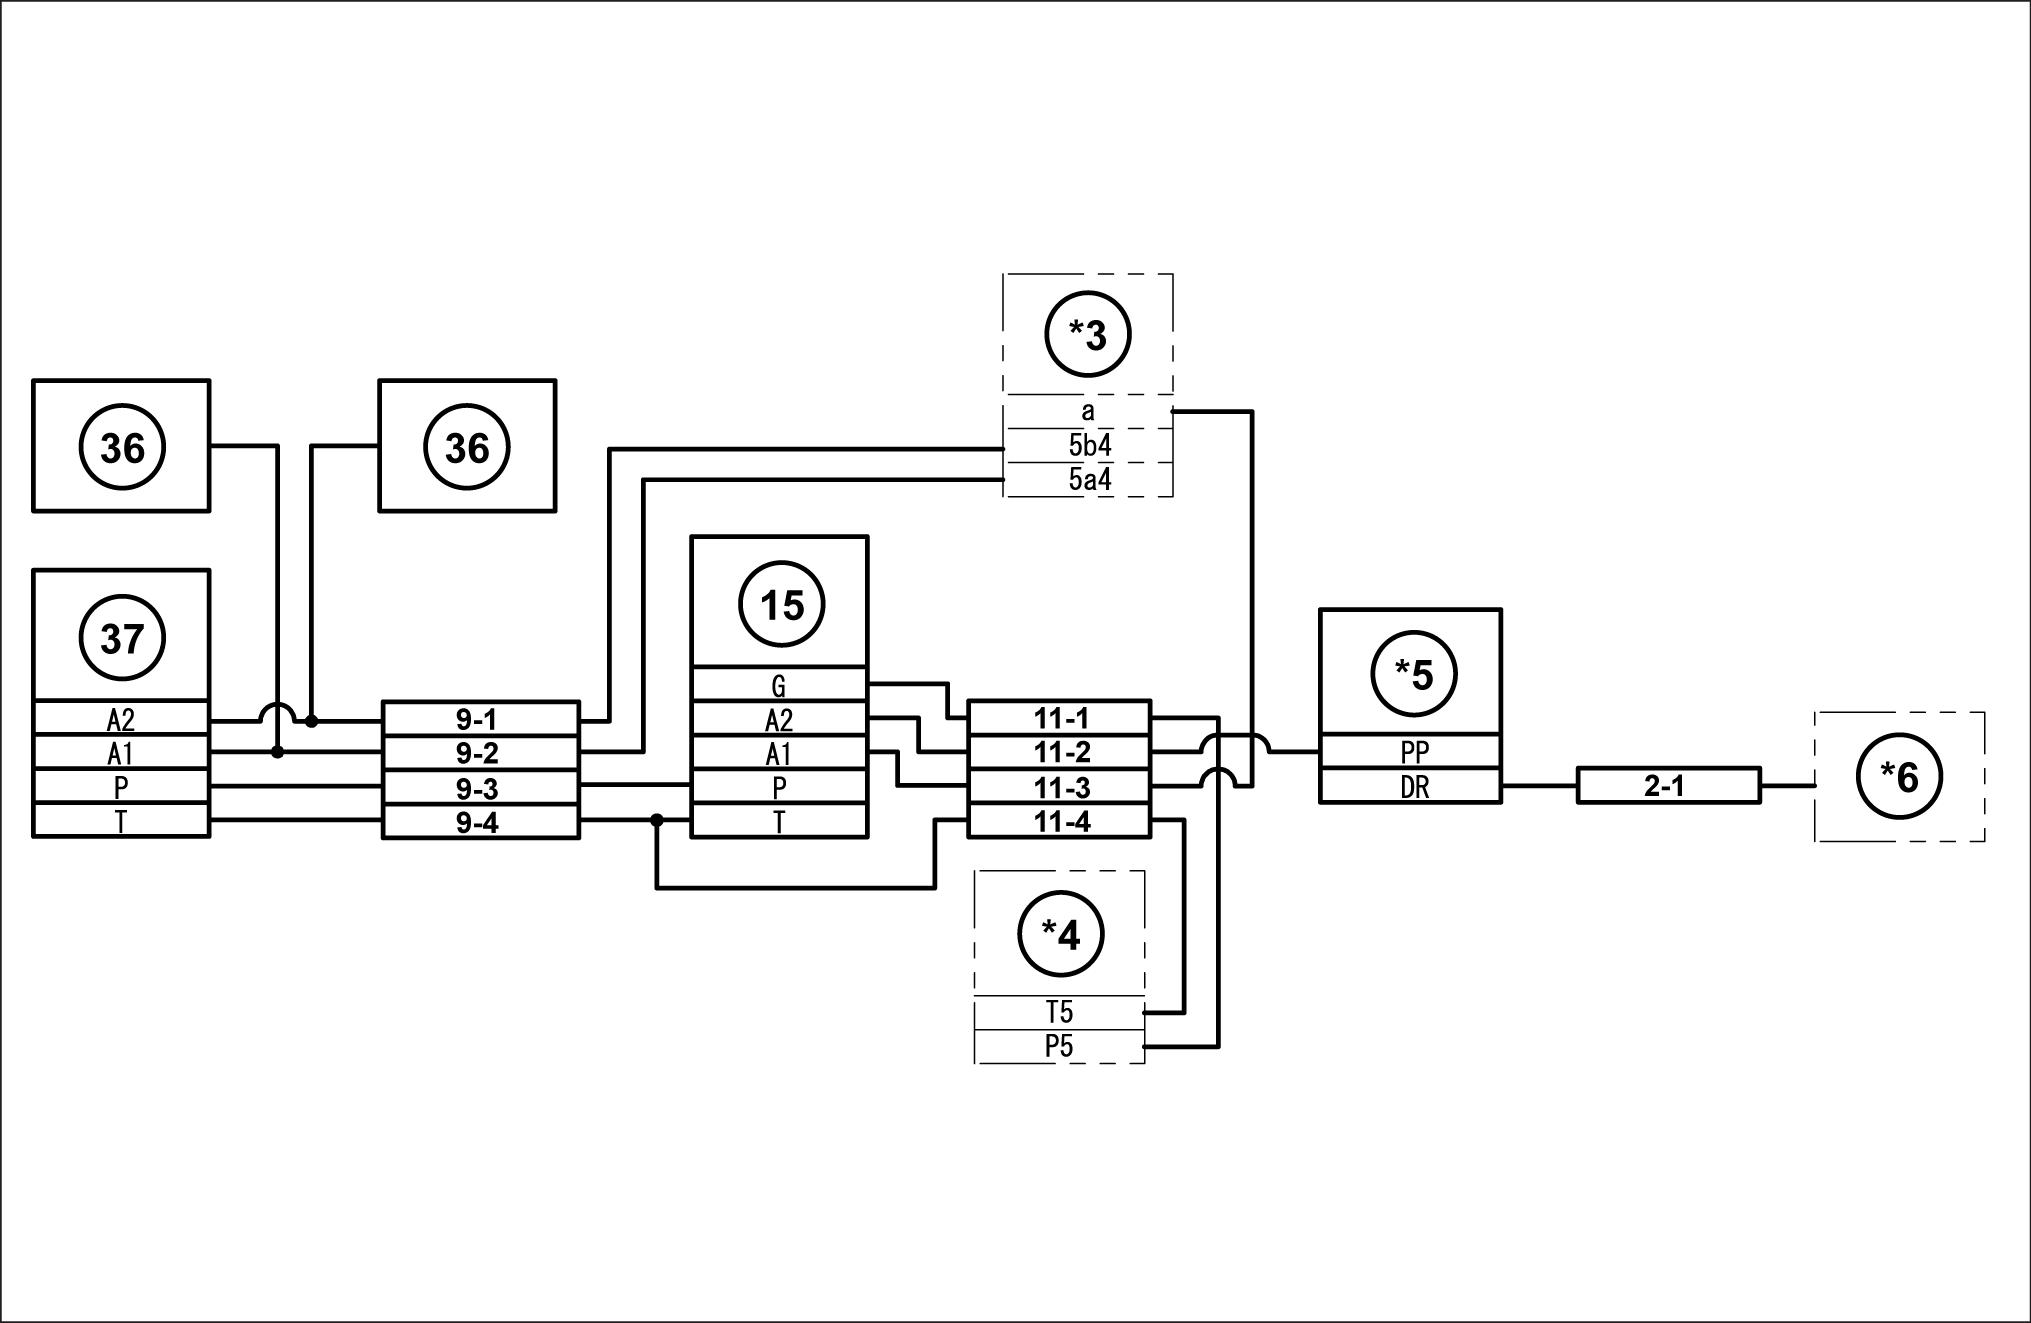
Install the hose adapter (12) the reducing valve (37)
SMIL15CEX8823AB 6
Install the tee (1) the solenoid valve (15) T

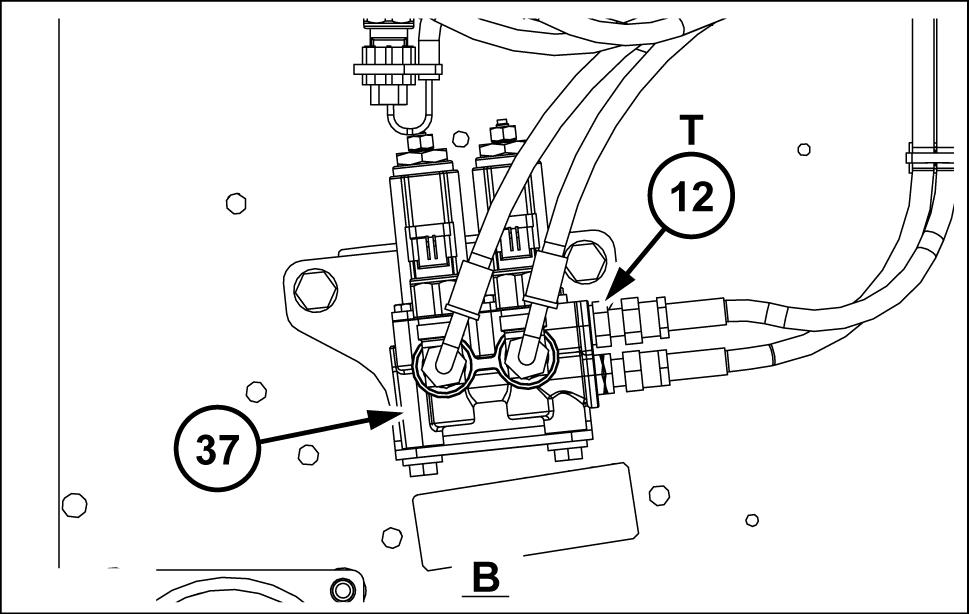
Connect the reducing valve (37) T port and solenoid valve (15) T port with the nylon hose -
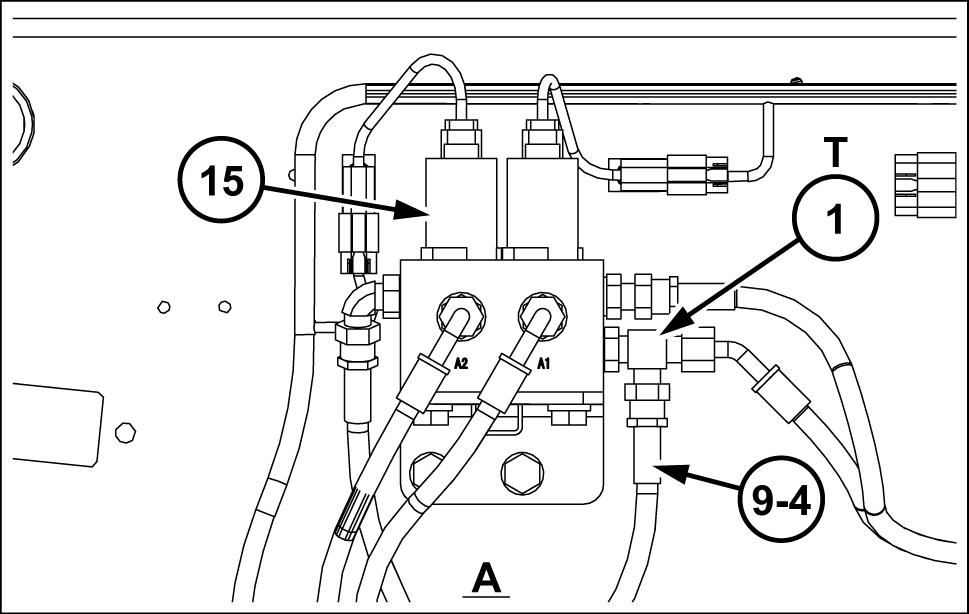
Install the nipple with filter (17) the reducing valve (37) P port.
SMIL15CEX8824AB 7
SMIL15CEX8825AB 8
Install the elbow (6) the solenoid valve (15) P
Connect the reducing valve (37) P port and solenoid valve (15) P port with the nylon hose -
SMIL15CEX8826AB 9
Install the tee (34) and pressure sensor (36) the reducing valve (37)
SMIL15CEX8827AB
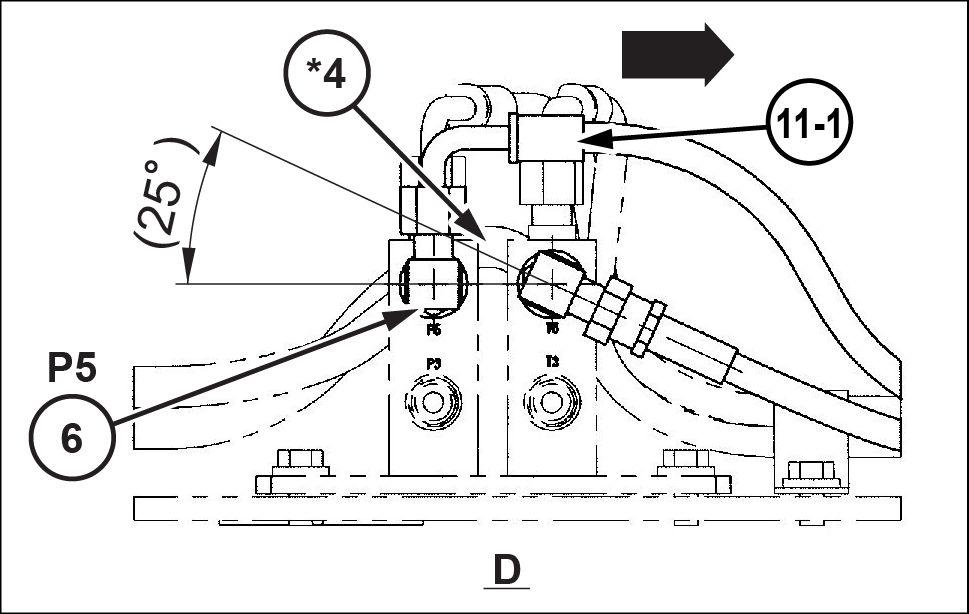
Install the stud (3) and elbow (6) the control valve (*3) 5a4

Connect the reducing valve (37) port and control valve (*3) 5a4 port with the nylon hose. Left
Install the tee (34) and pressure sensor (36) the reducing valve (37)
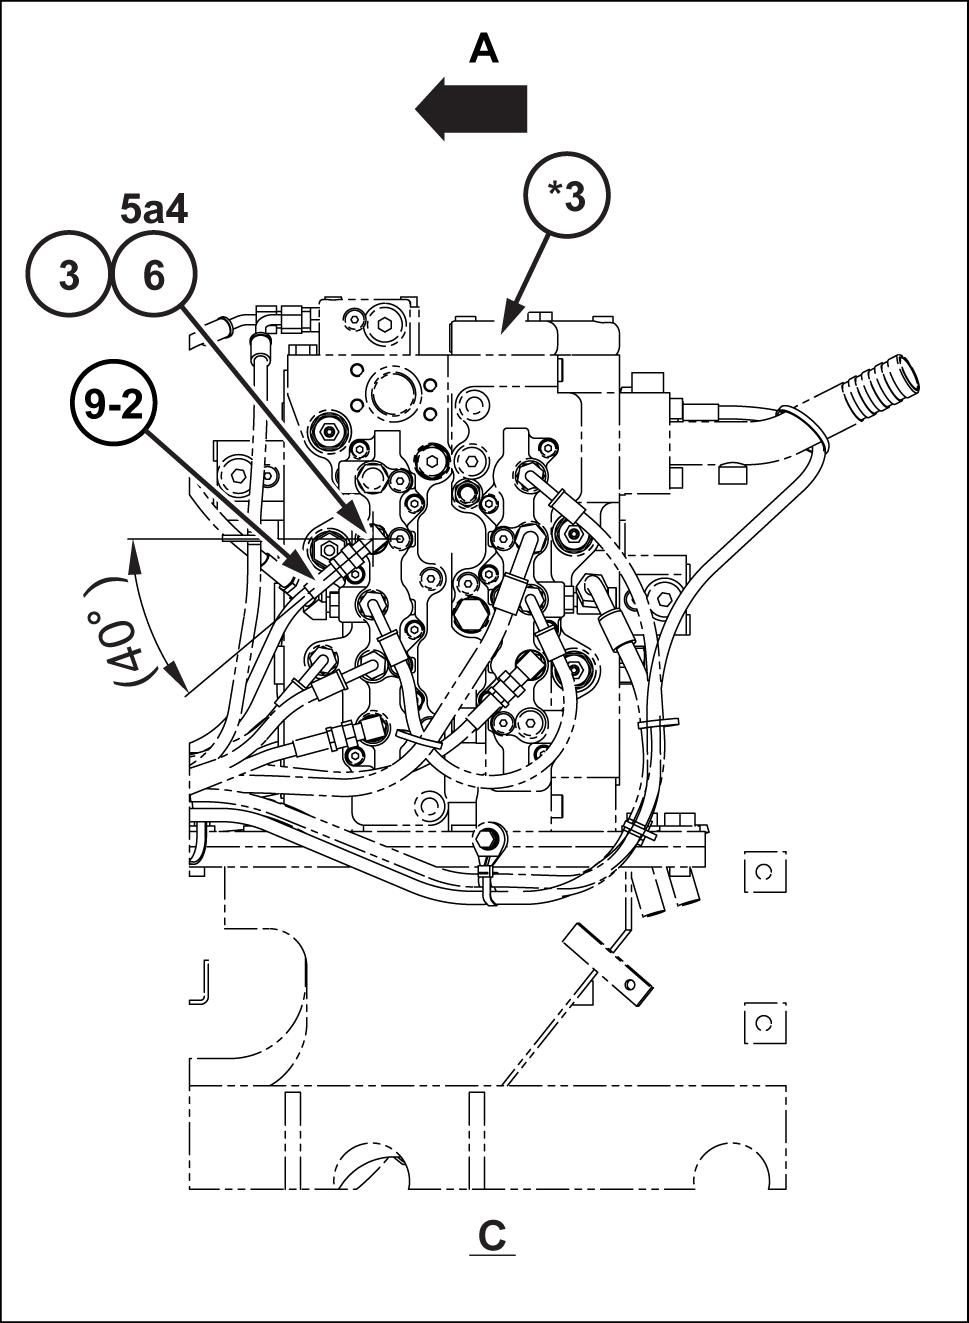
10. Install the long elbow (10) the control valve (*3) 5b4
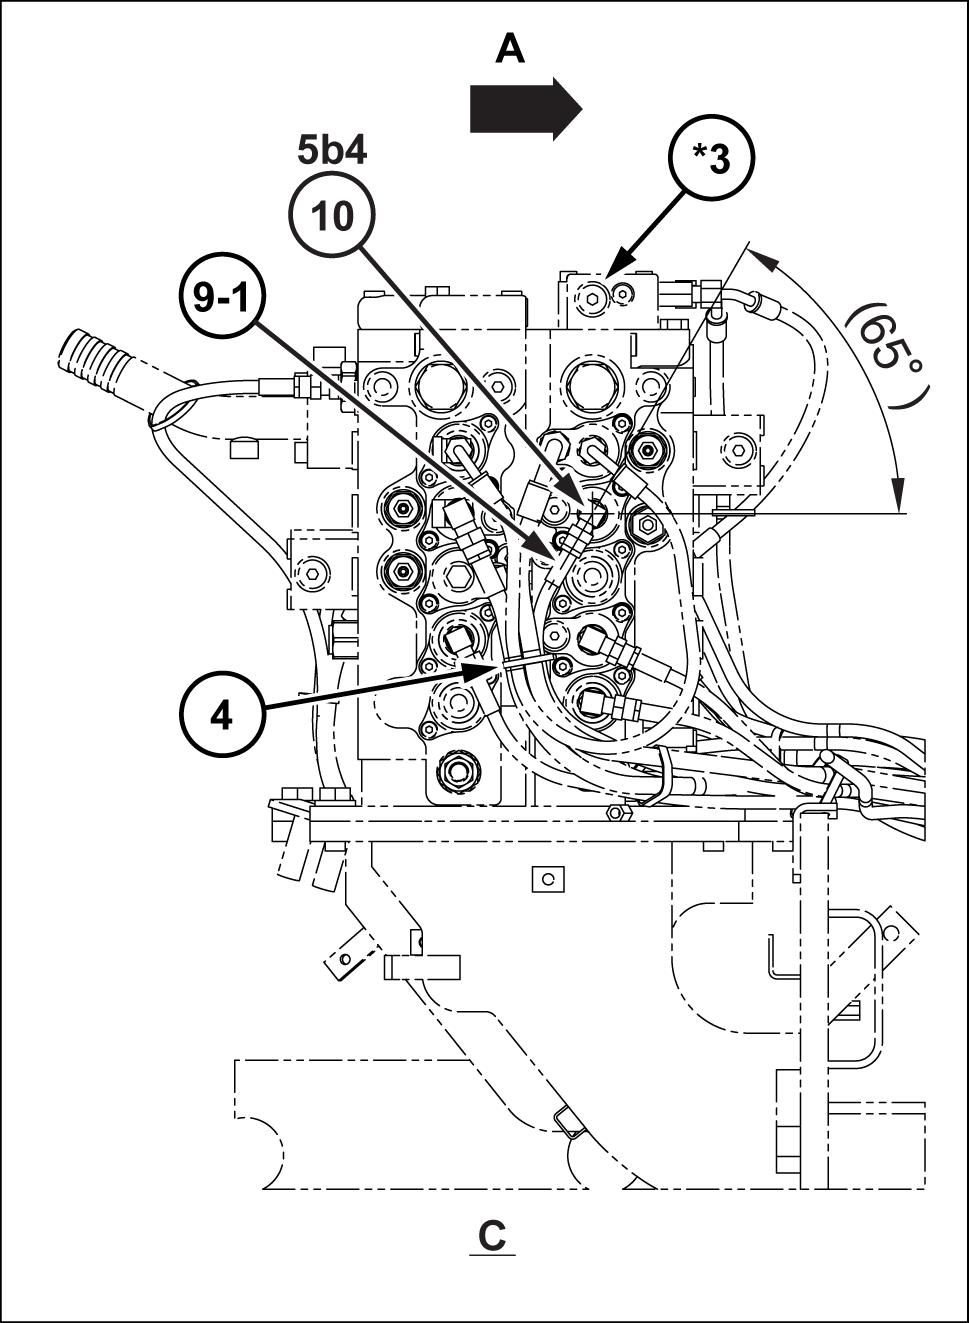
Connect the reducing valve (37) port and control valve (*3) 5b4 port with the nylon hose, and then fasten with the wire band (4)
• Install the long elbow (10) with the horizontal angle 65°
Left SMIL15CEX8830BB
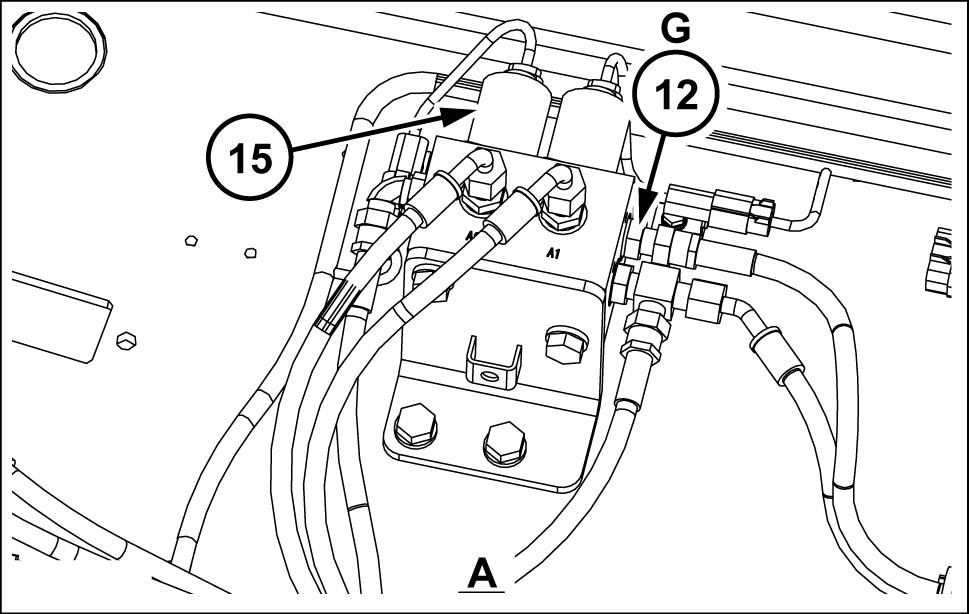
1 Install the elbow (6) the manifold (*4)
Connect the solenoid valve (15) T port and manifold (*4) port with the nylon hose 1SMIL15CEX8831AB
Install the hose adapter (12) the solenoid valve (15) G SMIL15CEX8832AB
13.
Install the elbow (6) the manifold (*4) port.
Connect the solenoid valve (15) G port and manifold (*4) port with the nylon hose 1 -
SMIL15CEX8833AB
Install the hose adapter (12) the solenoid valve (15)
SMIL15CEX8834AB
Install the elbow (6) the control valve (*3) a
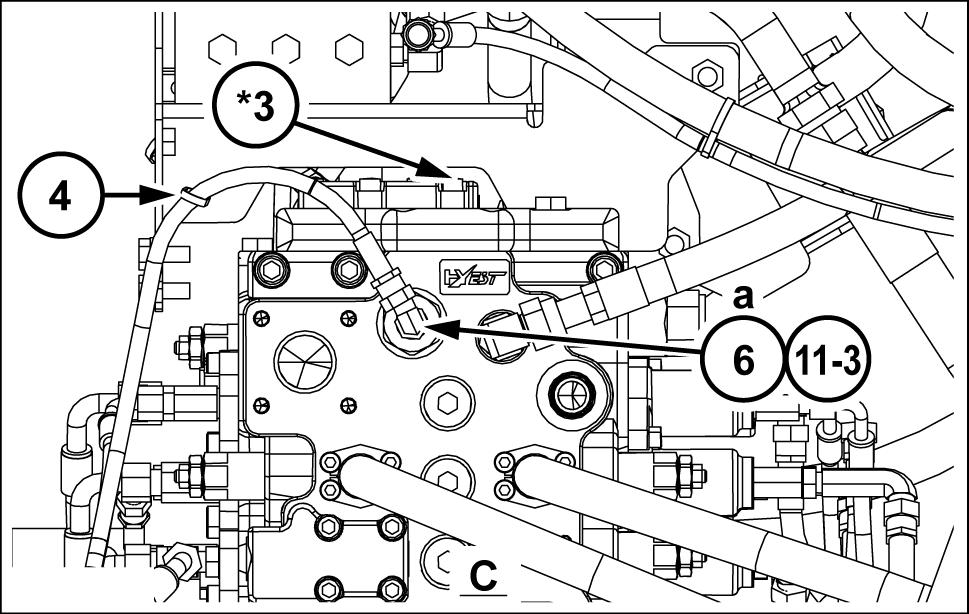
Connect the solenoid valve (15) port and control valve (*3) a port with the nylon hose 1 - and then fasten with the wire band (4)
• Install the elbow (6) with the horizontal angle 65°
SMIL15CEX8835AB
Install the hose adapter (12) the solenoid valve (15)
SMIL15CEX8836AB
17. Install the elbow (6) the 3 - direction valve (*5)
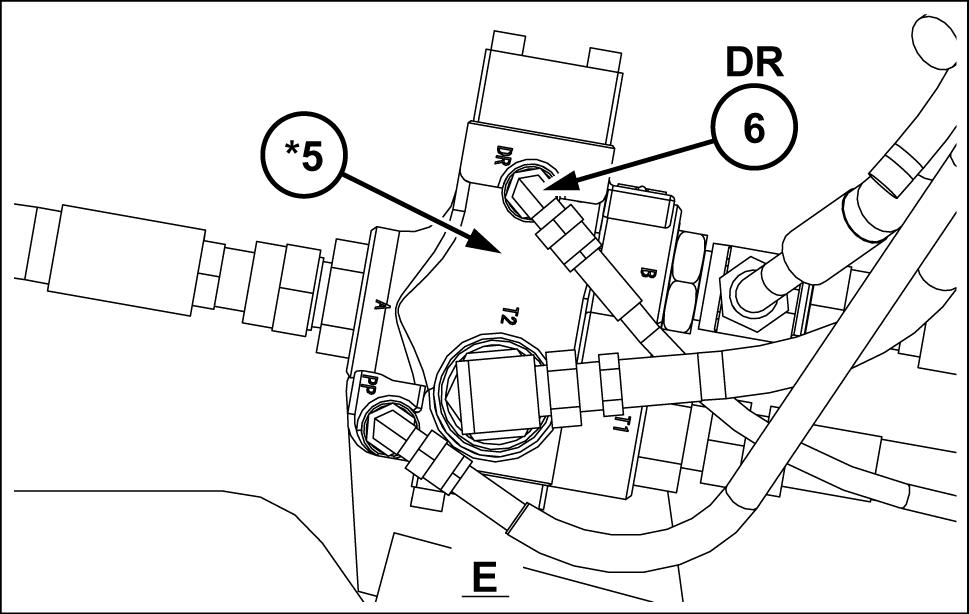
Connect the solenoid valve (15) port and 3tion valve (*5) port with the nylon hose 1 -
SMIL15CEX8837AB
Fasten the nylon hose 1 - three locations with one special bolt (8) each and one clamp with band (7)
Install the rubber cushion (29) .
• T ightening torque: 21.637.2 N·m ( 15.93127.437 )
Install the elbow (6) the 3 - direction valve (*5) port.
• Install the elbow (6) with the horizontal angle 40° down from the
SMIL15CEX8838AB
SMIL15CEX8839AB
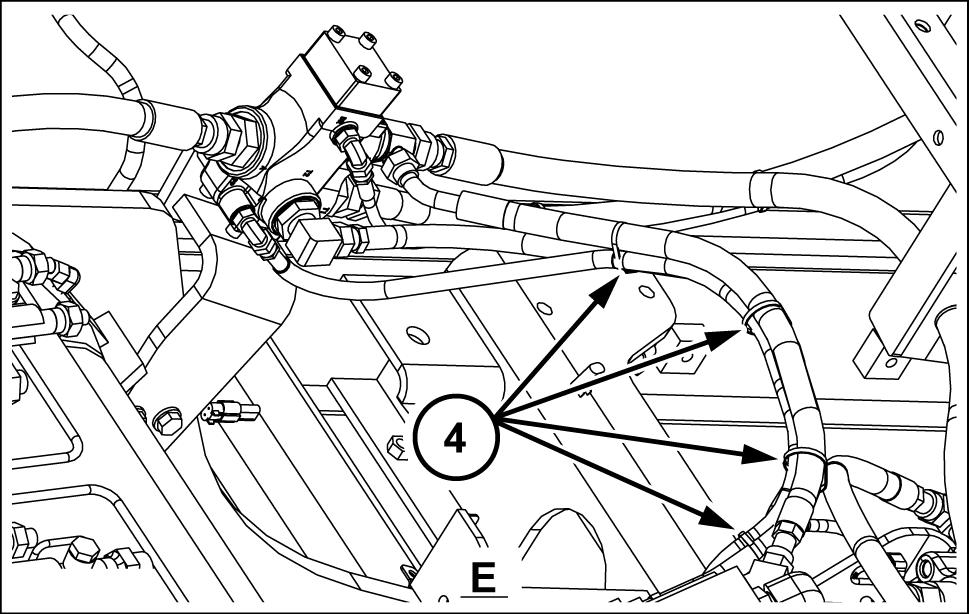
Fasten the assembly hose with four wire bands (4)
SMIL15CEX8840AB
21. Install the hose adapter (12) the hydraulic tank (*6) .
Connect the 3 - direction valve (*5) port and draulic tank (*6) with the nylon hose, and then fasten with two wire bands (4)

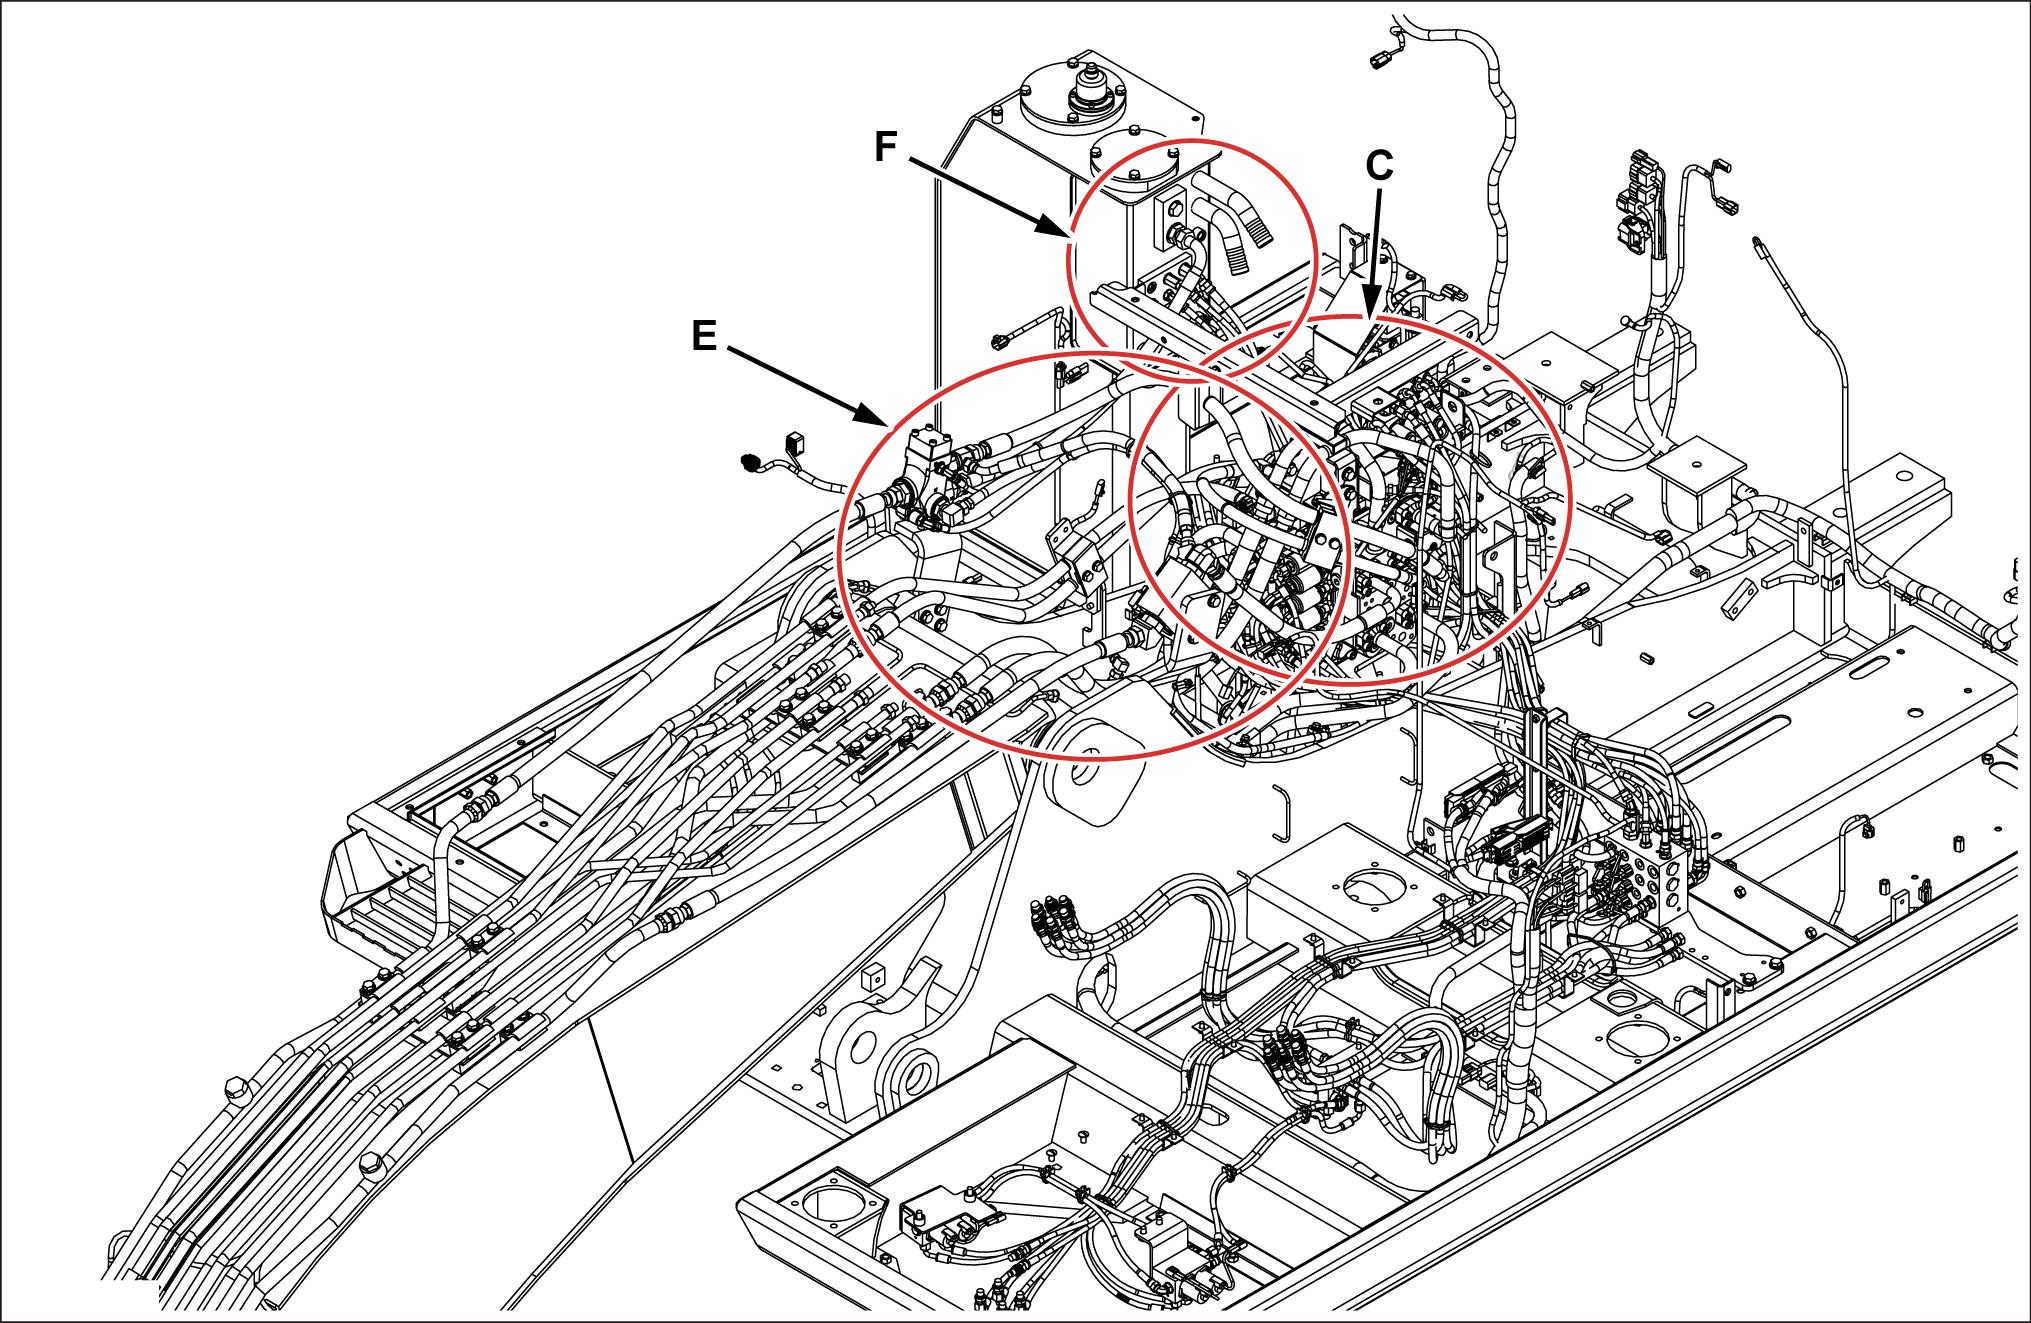
Fasten the assembly hose four locations with one mount clamp (24) one Phillips pan head screw (25) and one wire band (4) each shown the diagram.
Fasten the assembly hose with four wire bands (22)
Fasten the assembly hose with one clamp with band (28) , three wire bands (5) , and one wire band (4) .
Fasten the assembly hose with one clamp with band (7) , one wire band (5) , and two wire bands (4) SMIL15CEX8843AB
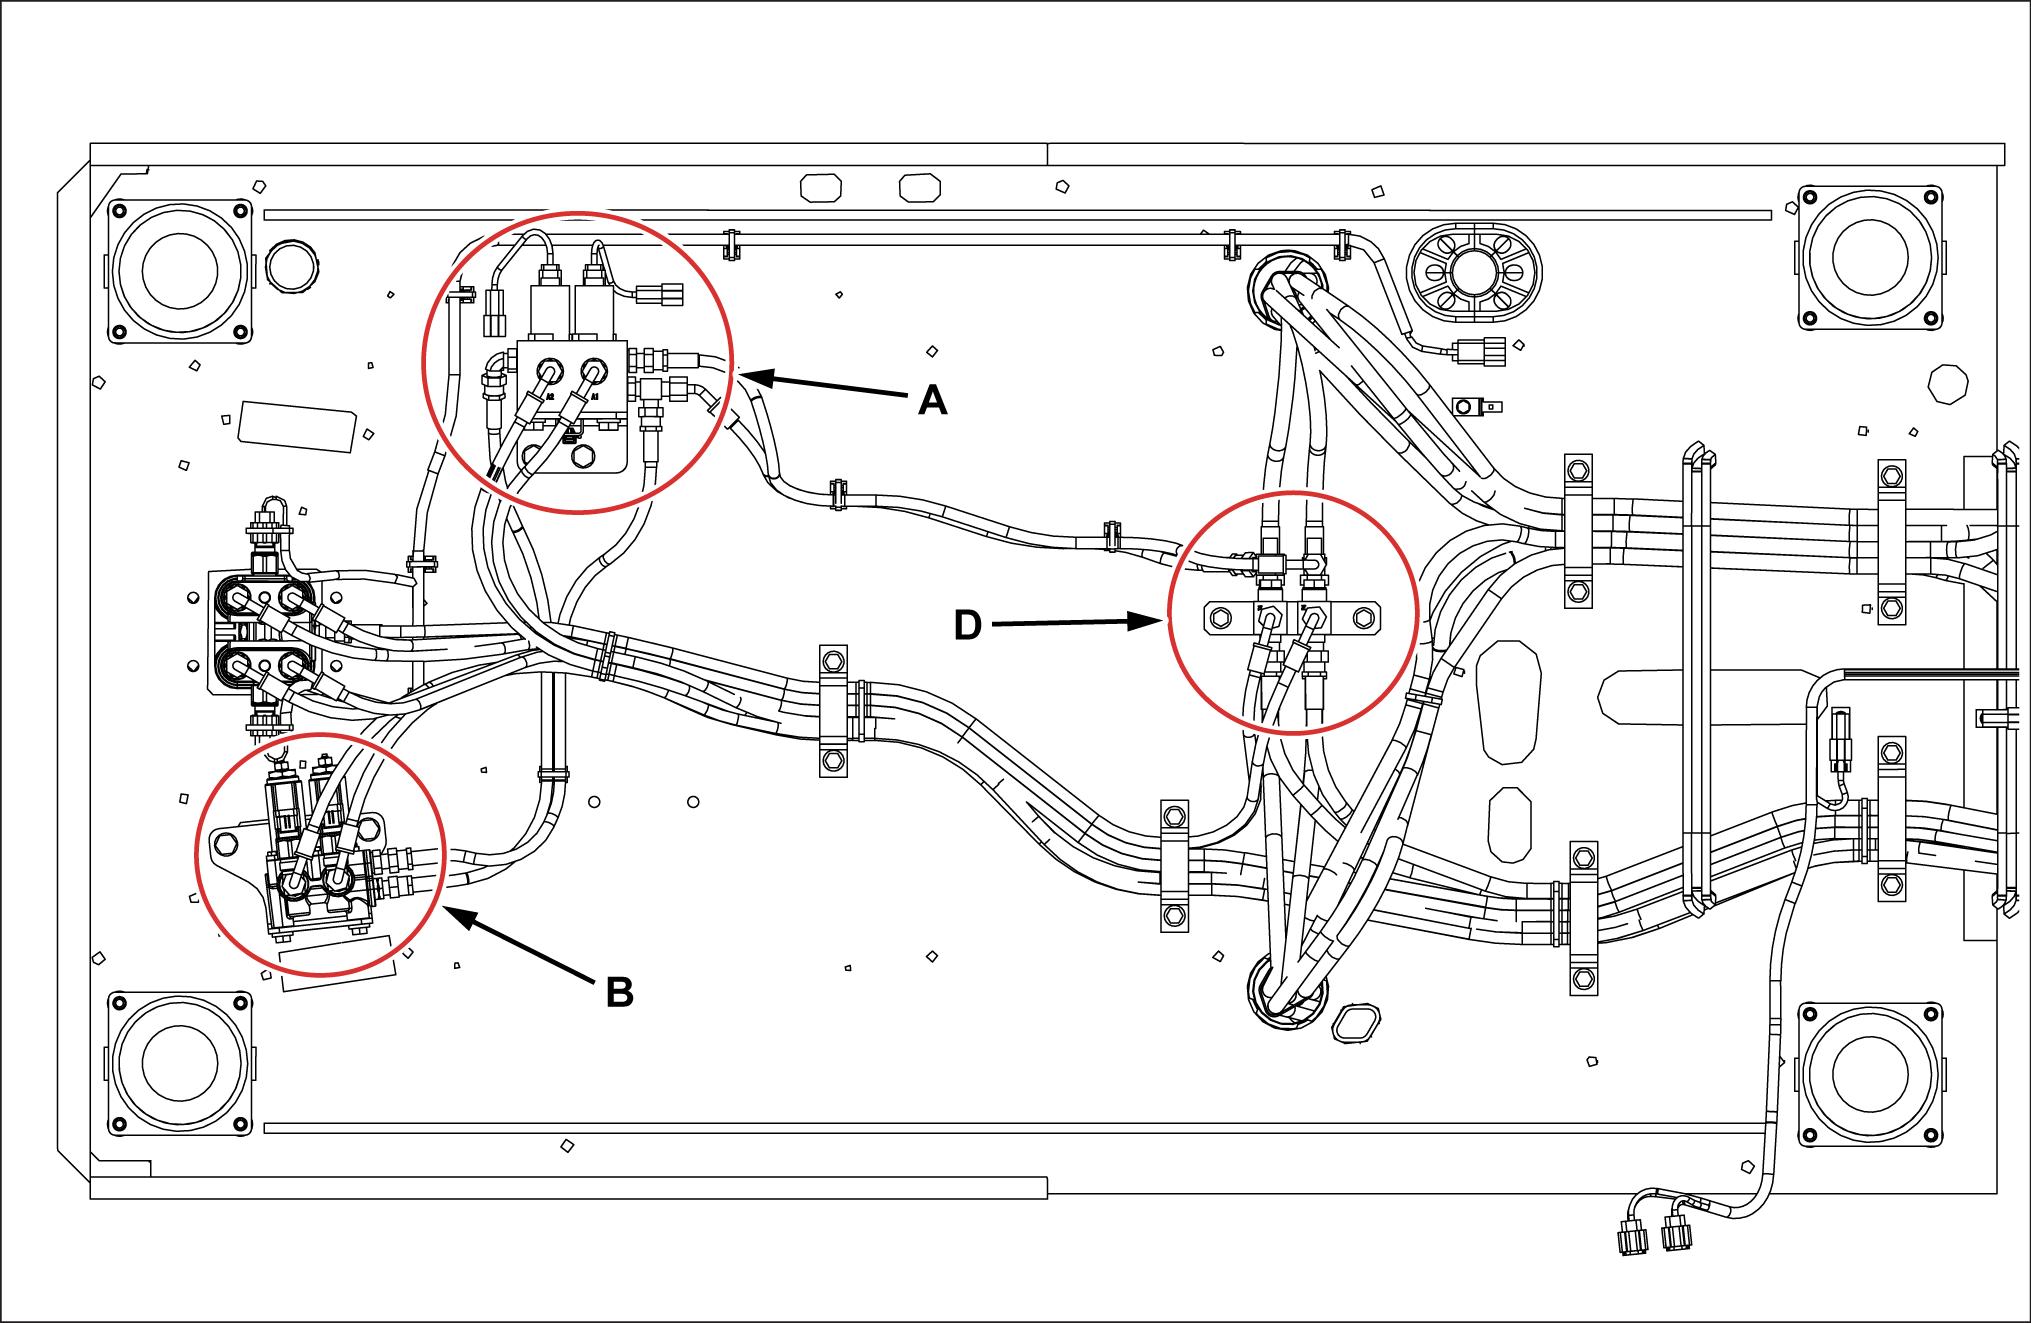
Connect the electromagnetic relief wire harness (33) the relief
Route the electromagnetic relief wire harness (33) shown the diagram and fasten the connector tion with the clip (32) and special bolt (30) , and ness section with the mount clamp (31)
Connect the electromagnetic relief wire harness (33) the frame main
Harness installation - Proportional control
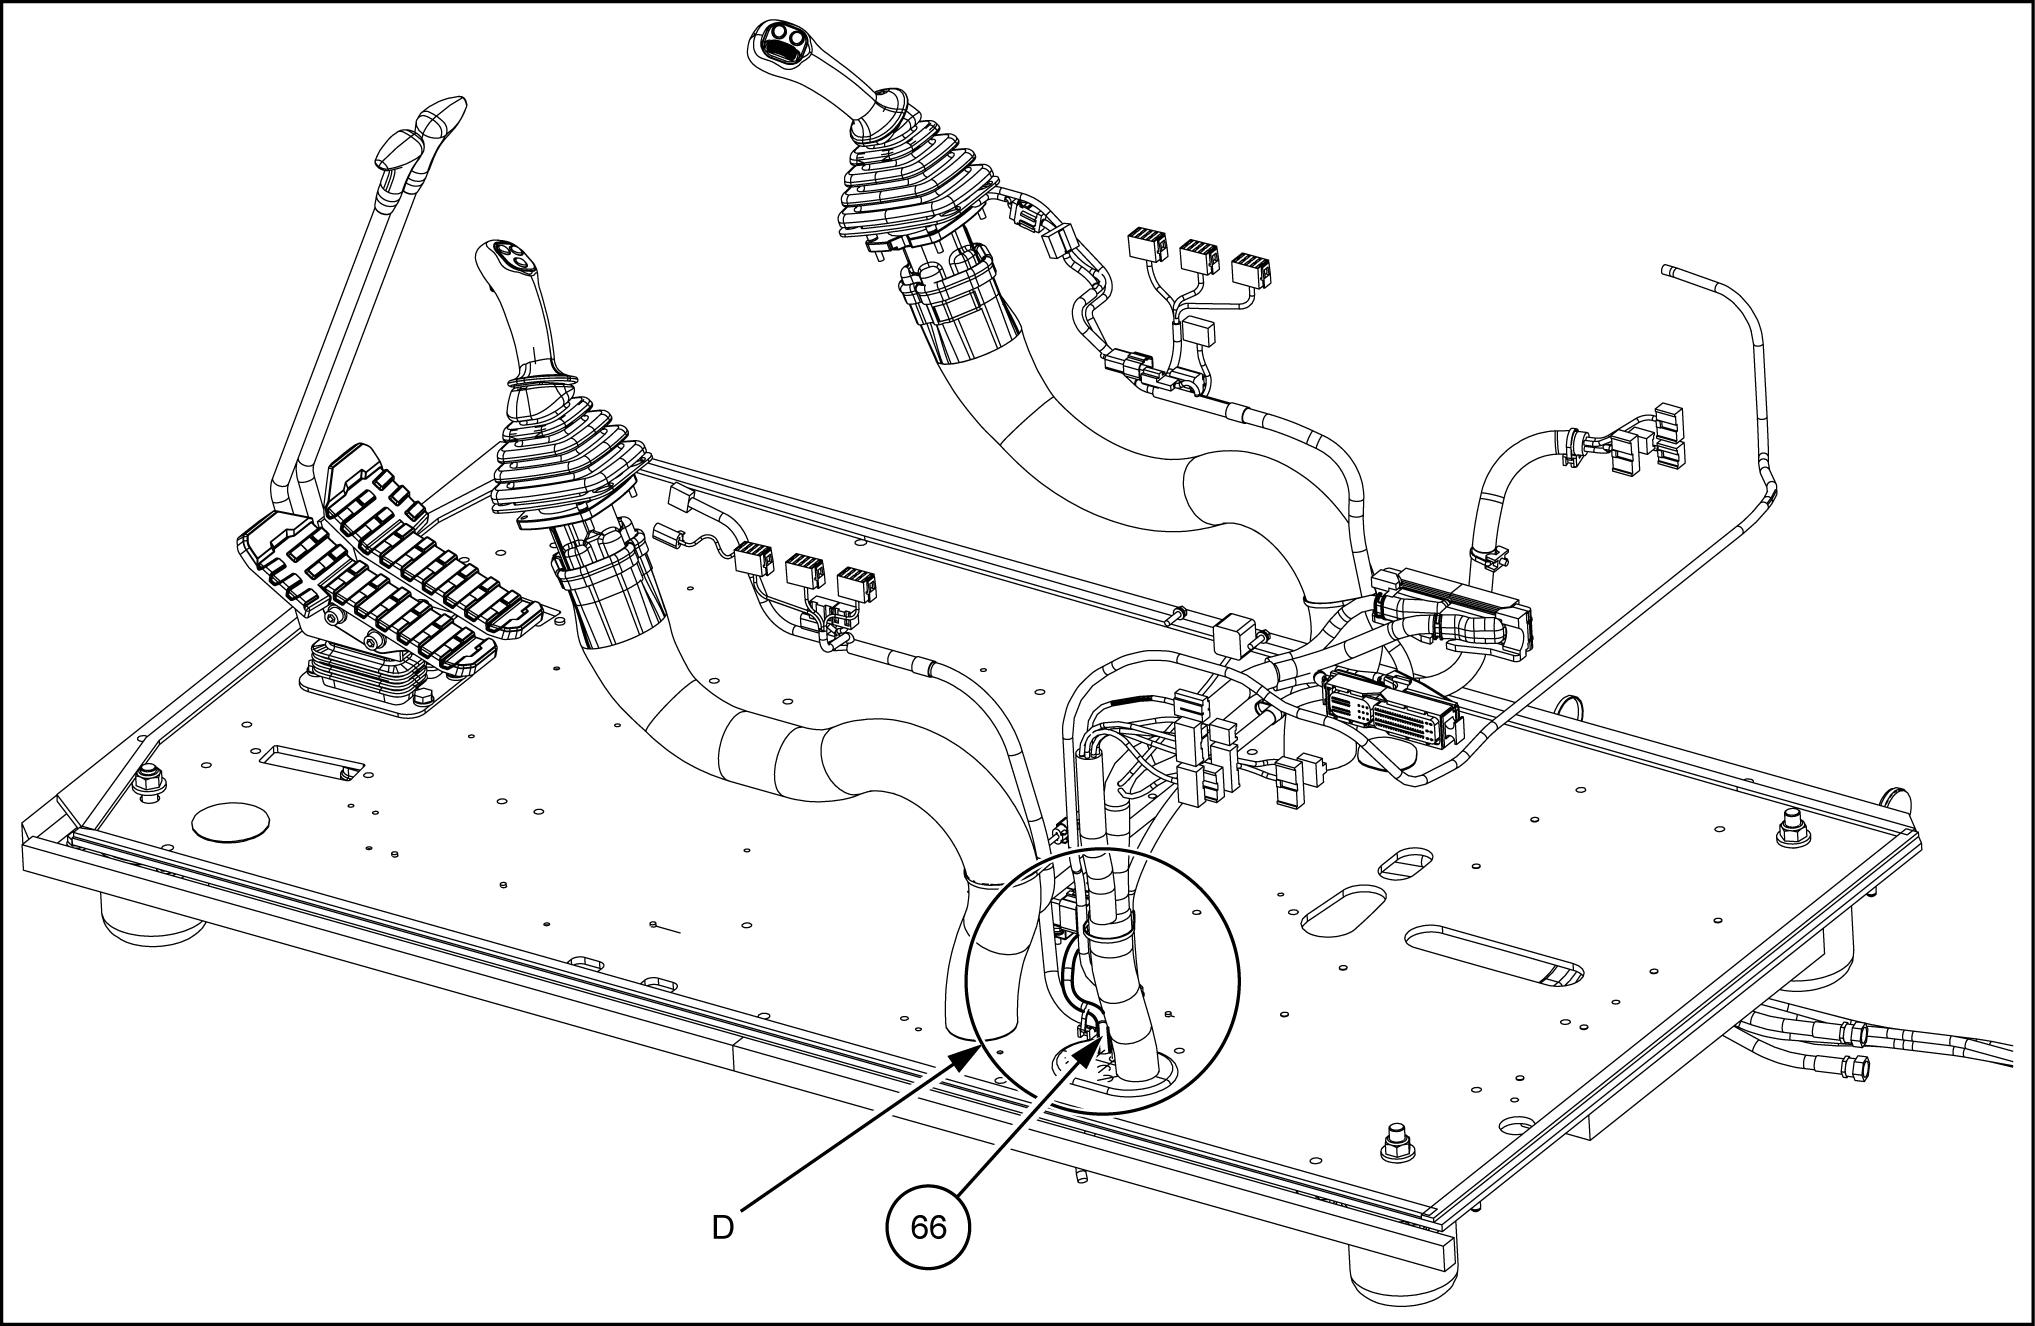
Connect the wire harness (66) and reducing valve (*1) .
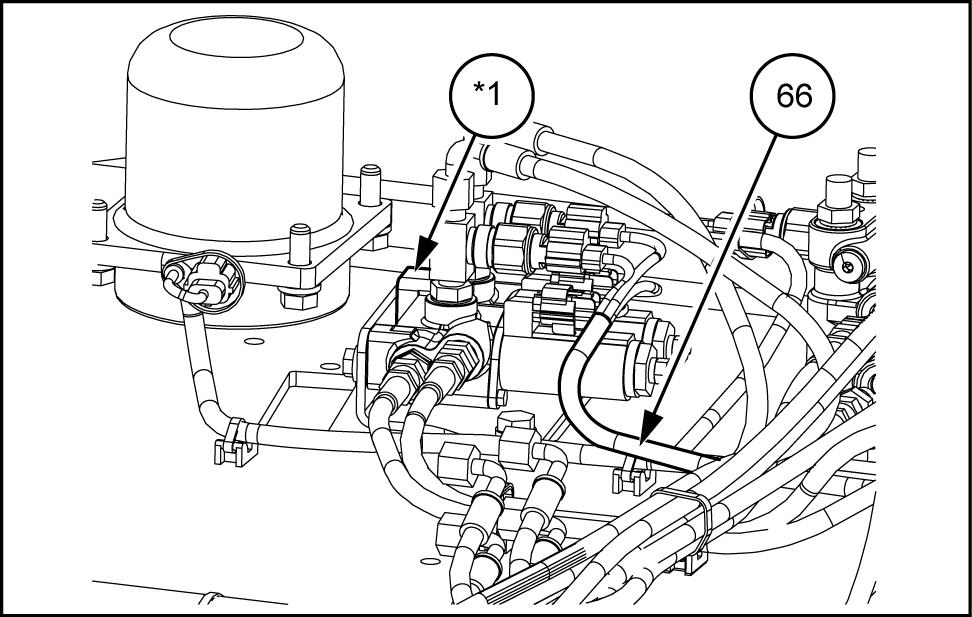
SMIL15CEX7716AB 3
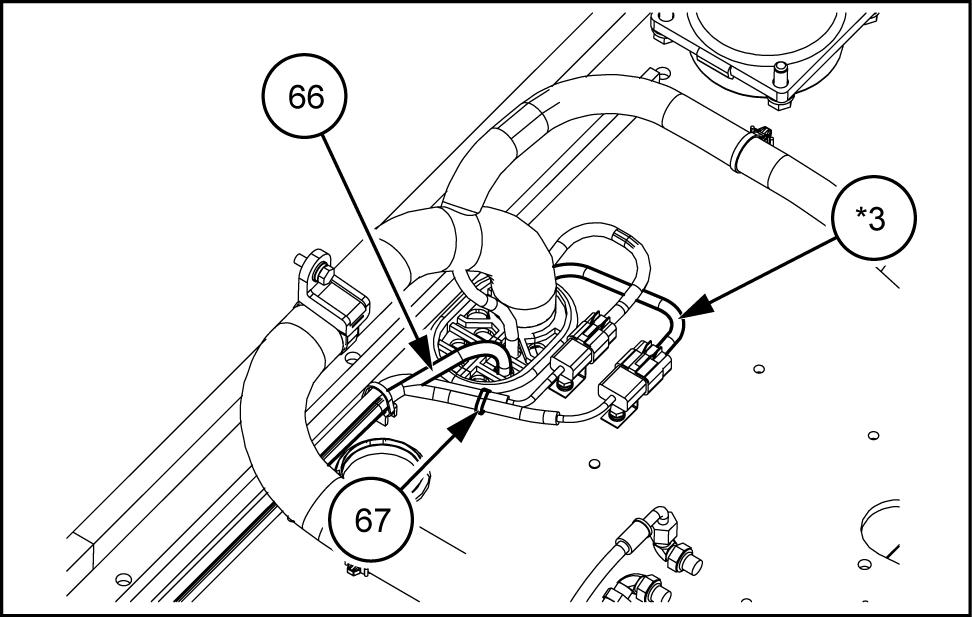
Route the wire harness (66) shown the diagram.
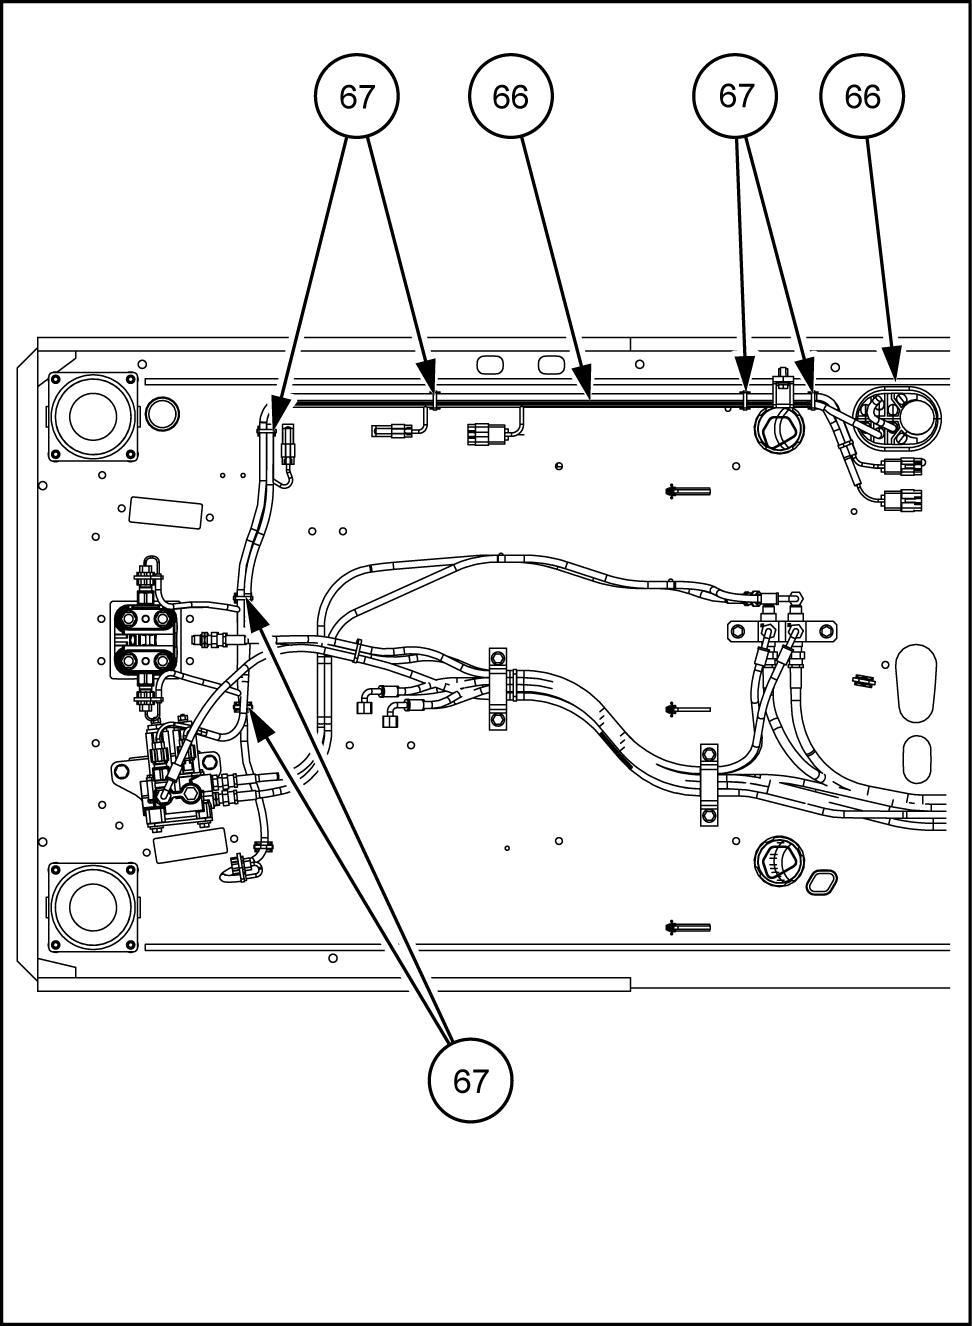
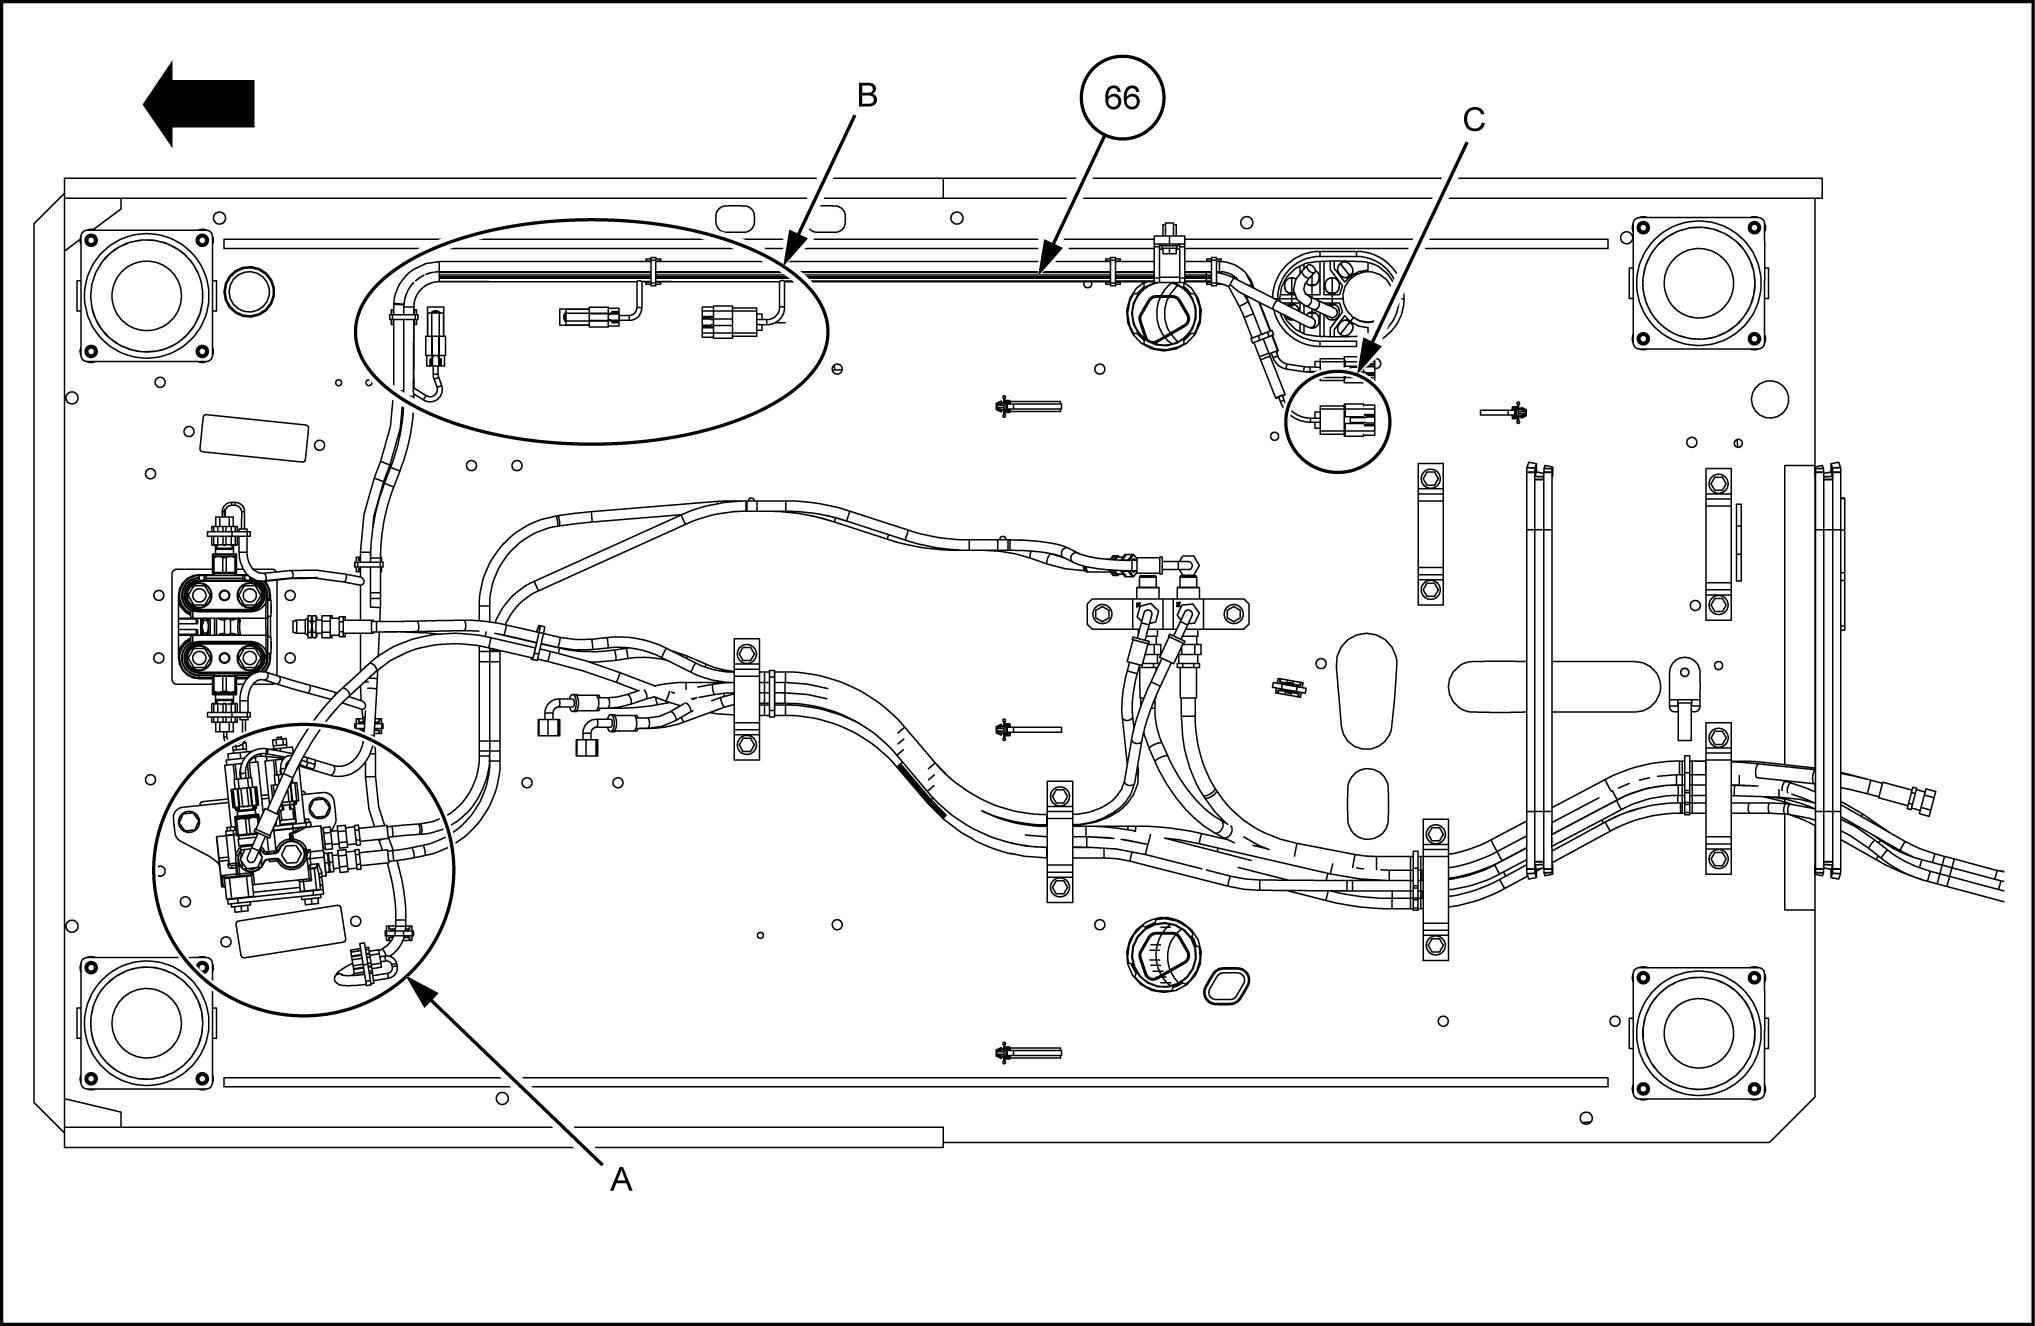
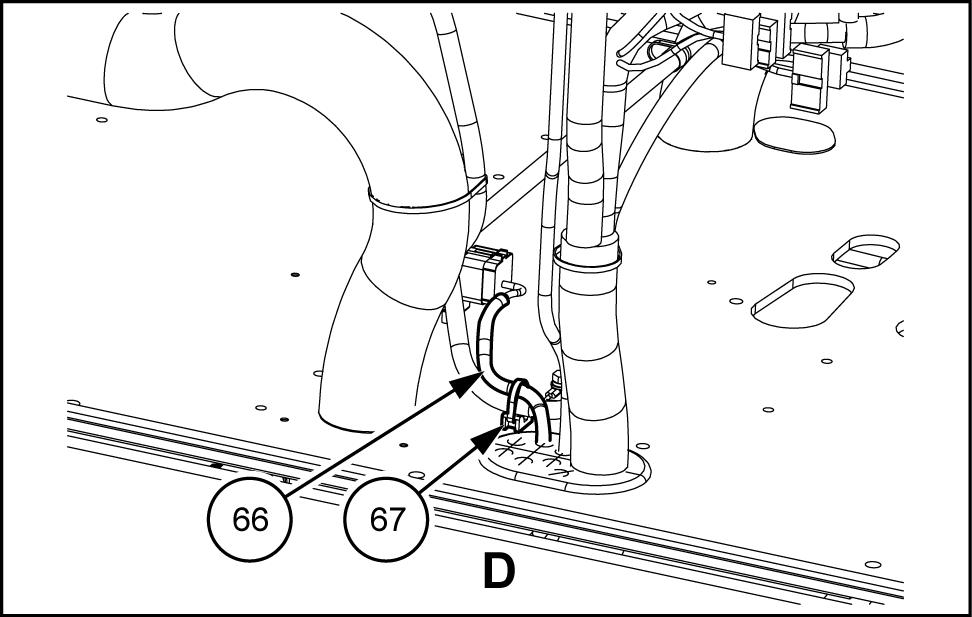
Fasten the wire harness (66) six locations with six wire bands (67)
SMIL15CEX7717BB 4
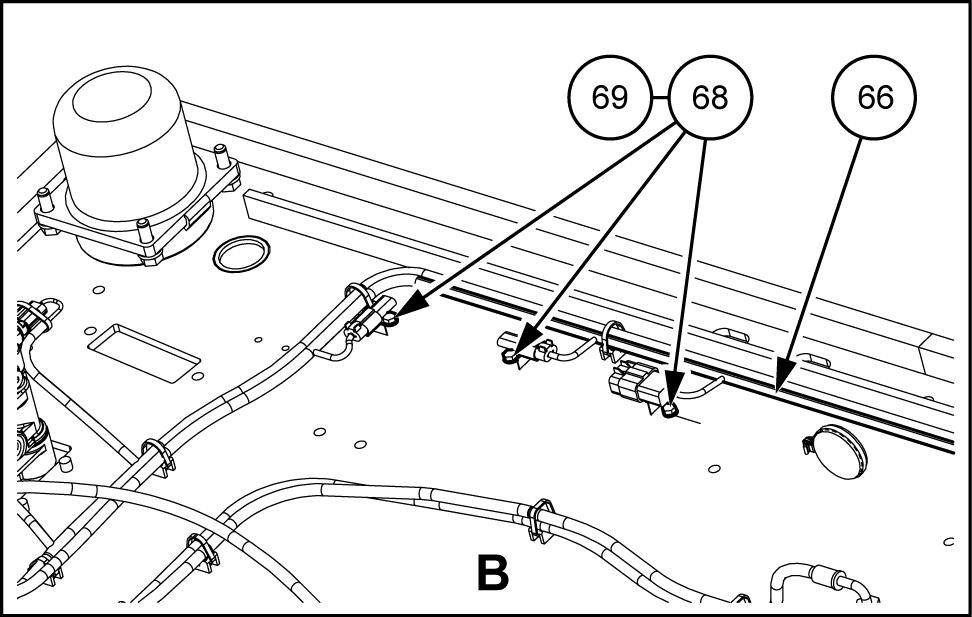
Fasten the three couplers the wire harness (66) with one clip (68) each and one bolt (69)
SMIL15CEX7718AB
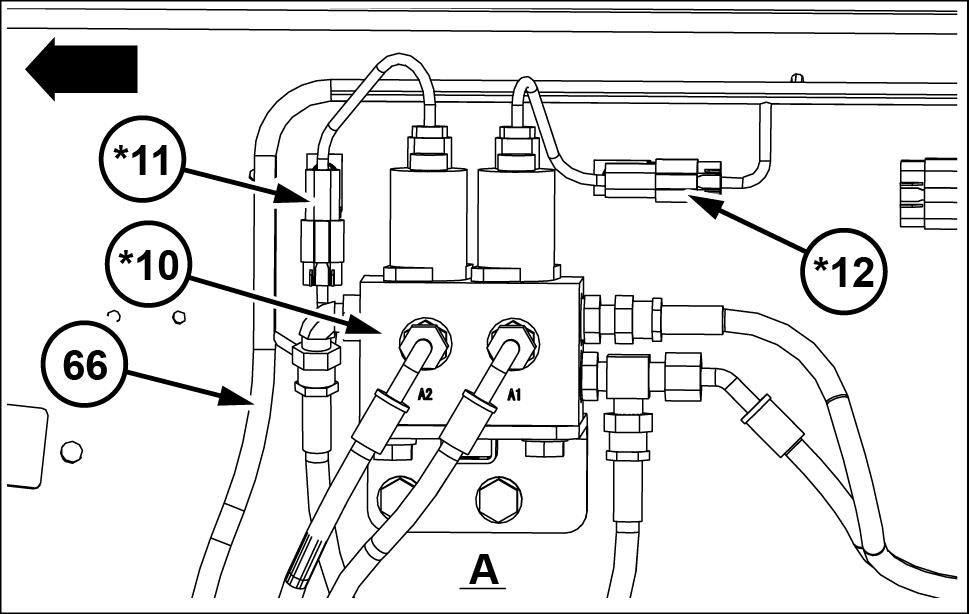
Connect the wire harness (66) and the solenoid valve (*10) connectors (*1 (*12)
SMIL15CEX8742AB 6
Connect the wire harness (66) connector - pin) the frame main harness (*3) and fasten with the wire band (67)
Extend the wire harness (66) the floor side from der the cab.
Connect the wire harness (66) connector (16 - pin) the cab main harness and fasten with the wire band (67)
SMIL15CEX7720AB 7
SMIL15CEX7721AB 8