1 minute read
3.3.3 Recording

1
2
7076
10
3
18016
11 3.3.3 Recording
Recording depends on the distance covered. Before starting recording: –Set the road travel switch to fieldwork. –Enable functions to be recorded, e.g.: -Enable automatic PTO shaft operation. -Connect implement to the hydraulic system. -Unlock the rear power lift. -Activate special steering program if required. Recording: Call up the Implement menu (1).
Call up the CLAAS SEQUENCE MANAGEMENT menu. Select and confirm the Record sub-menu.
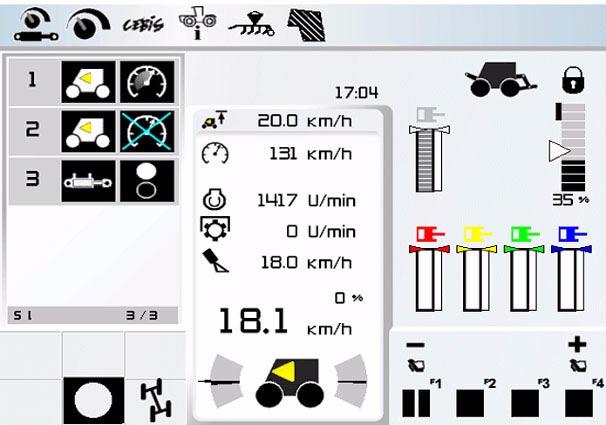
The windows on the CEBIS monitor display the standby recording symbol.
Allocating the recording to a function key: Up to 4 operating sequences can be saved. –Select free or available function button F1 to F4.
Function buttons that are assigned other functions are not available for such recording. -See CEBIS / Assignment of function buttons on the ground speed control lever menu. - Changing the function button assignment, see page44. –Press the selected function key on the multifunction handle.
The standby recording symbol(1) appears inverted.
–Carry out the operating sequence. The recorded functions(2) are displayed on the CEBIS monitor as symbols.
Finishing recording: –Push one of the function buttons for which the stop symbol(3) is shown on the monitor.


