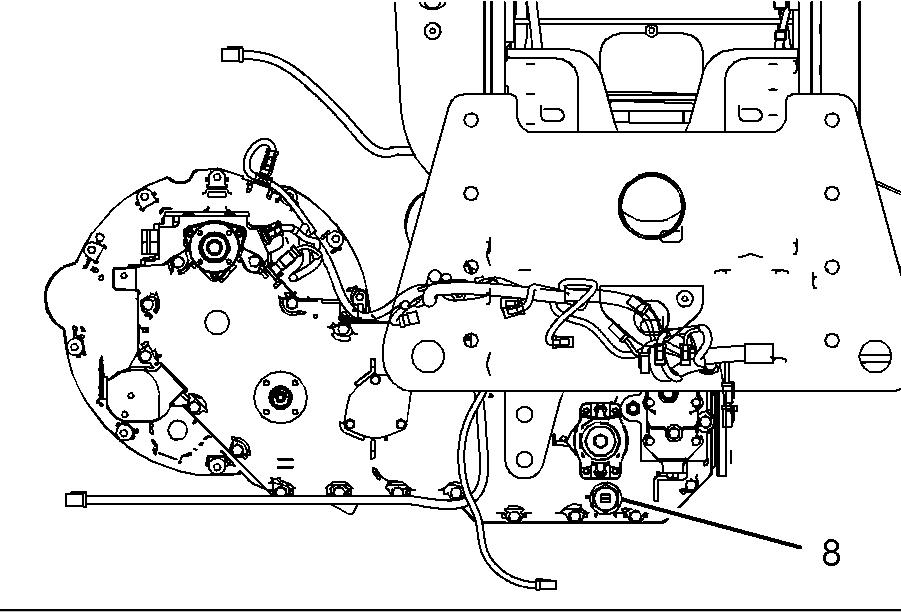
86 Operation Section by hand in order to contact the ball. Attach a wrench to adjustment screw (17) and turn the screw clockwise until the screw becomes tight. Note: Do not use excessive force when a wrench is used in order to turn adjustment screw (17). 3. Perform Step 2 for the other boom cylinder. 4. Locate control valve (11). Refer to Illustration 136. 5. Measure the distance from the head of adjustment screw (13) to the top of locknut (12). Completely remove locknut (12). Turn the screw clockwise by hand until the screw is tight. Use an allen wrench to turn the adjustment screw clockwise in order to lower the boom. Allow the boom to fully lower. Note: If necessary, turn adjustment screw (13) counterclockwise in order to stop the boom from lowering. 6. When the boom has fully lowered, turn adjustment screw (13) in a counterclockwise direction until the adjustment screw is returned to the original position. 7. Tighten locknut (12). Note: Do not start the engine until you have reset adjustment screw (17) and adjustment screw (13). 8. Start the engine. Raise and lower the boom. Extend and retract the boom approximately 300 mm (12 inch). 9. Position the boom to the fully retracted position. Position the boom to the fully lowered position. 10. Remove the hydraulic tank filler cap. Add the 12 L (3.17 US gal) of oil that was removed from the hydraulic tank in Step 3 of "Procedure for Draining Hydraulic Tank". 11. Check the oil level in the hydraulic tank. If necessary, top up the hydraulic oil to the required level. Install the hydraulic tank filler cap. Clean up any oil that may have been spilled. Refer to Operation and Maintenance Manual, "Lubricant Viscosities" and Operation and Maintenance Manual, "Capacities (Refill)" forfurther information. 12. Install the access cover on the chassis.
31200245
Resetting the Load Control System Resetting the Load Control Valves 1. If you used the procedure for retracting the boom with the hand pump or lowering the boom with the hand pump, proceed to "Purging Air from the System". 2. If you used the procedure for retracting the boom without the hand pump, reset adjustment screw (8) to the measurement that was recorded in Step 1 of "Procedure for Retracting the Boom without Hand Pump". Refer to Illustration 134. 3. If you used the procedure for lowering the boom without the hand pump, reset adjustment screw (17) to the measurement that was recorded in Step 2 of "Procedure for Lowering the Boom without Hand Pump". Refer to Illustration 138. 4. Secure adjustment screw (8) with locknut (9). Also, secure adjustment screw (17) with locknut (18). 5. Repair the machine before you return the machine to service.
Purging Air from the System Air may have entered the hydraulic system. Ensure that the air is purged from the hydraulic system before the machine is returned to service. Note: Purging air from the system should be performed on an unloaded boom. 1. Fully raise the boom and fully lower the boom. 2. Repeat this procedure three times in order to purge the air from the hydraulic system. 3. Fully extend the boom and fully retract the boom. The boom operation should be smooth. 4. If necessary, repeat this procedure in order to purge the air from the hydraulic system.
Verifying the Correct Setting of the Load Control Valves Procedure for Single Hand Pump 1. Install a work tool onto the quick coupler. Raise the boom until the work tool is clear of the ground. Extend the boom by approximately 300 mm (12 inch). 2. Look at the boom extension reference scale and the boom angle reference scale and note the readings. Refer to the load chart and use these two values in order to determine the maximum weight that can be lifted with the boom in this position.


