6 minute read
Every 1000 hours work
25.BATTERIES - Check electrolyte level
Tilt the cab of the machine, as described in the point "TILTING THE CAB".
With engine inoperative and the machine on a flat surface. Check that the electrolyte level reaches the reference mark, on the side of the battery. To top-off the electrolyte level, add distilled water through the filling holes.
WARNING Batteries contain SULPHURIC ACID. Protect eyes when working on batteries. In the event acid contacts skin, eyes or clothing, WASH IMMEDIATLEY WITH WATER FOR AT LEAST TEN MINUTES.Seek medical help. Should booster batteries be used, remember to connect both ends of the booster cables in the proper manner (+) with (+) and (-) with (-). Avoid short-circuits of the terminals. FUMES ARE FLAMMABLE. Estinguish all smoking materials and free flames, before checking, topping-off or charging batteries. Do not check batteries by shorting.
Caution – To maintain batteries in efficient conditions, follow these instructions: -do not leave lights on for extended periods when engine is off or idling; -for short stoppages, it is preferable idling the engine rarther than shutting it off, since each starting can run down the batteries; -make sure the cable terminals are properly secured to battery posts and are covered with a thin layer of petroleum jelly; -keep batteries clean, especially the top;
Caution – To avoid possible damages to the electrical system: -do not mismatch the terminal connection on batteries; - do not let the engine run when batteries are disconnected; - if batteries are partially discharged and auxiliary batteries are used to start the engine, or in the event of battery charging through external systems, connect terminals of the same sign, (+ to + and - to -).
1650-2M027
26.AIR CONDITIONER COMPRESSOR -
Check condition of belt and adjust sag
Open the access panel on the left side of the machine. 1.Check the conditions of the compressor belt. If the belt is worn or damaged, replace it with a new one.
The belt must deflect 15 to 20 mm (19/32 to 25/32 in)under as force of 110N. 2.Loosen the compressor mounting bolt and the bracket adjusting screw. 3.To obtain a correct belt adjustment, move the compressor outward. Tighten the compressor mounting bolt and the bracket adjusting screw. 4.If necessary, repeat phases 2 and 3.
1850-2M0138
27.DRIVE BELT
Inspection/Replacement
Open the right and left panels of the engine compartment and inspect visually the belts. Check for the presence of crossing cracks: the cross-way ones (in the width direction of the belt) are allowed, whereas longitudinal ones ( in the longitudinal direction of the belt) crossing cross-way cracks, are not allowed. Replace the belt if worn. Allowable condition
Belt to be replaced
D150-2M114
WARNING Do not inspect nor adjust belts with engine in operation. Be particularly aware of the presence of fans. Keep head, body, limbs, feet and hands away from belts and moving blades. Be particularly aware of blowing fans.
Replacement
3/8 in square drive
To remove and install the belt, lift arm 4 of belt tensioner 2 and the pulley with square drive 1.
Service suggestion: In case of difficulty during the installation of the drive belt (belt apparently too short) place the belt on the fan hub pulley, then slide the belt over the water pump pulley, keeping the belt tensioner lifted. The application of an excessive force in a direction opposite to the rotating direction or after the belt tensioner has been tightened to a mechanical stop, could cause the fracture of the belt tensioner arm.
1
D150-2M115
Also, check that bolt (3) securing the tensioner is tightened to a torque of 4.3 daNm (ft lbs).
3 29.UNDERCARRIAGE SUSPENSION - Lubricate oscillating cross-bar
Introduce grease into the two grease fittings for lubrication of the oscillating cross-bar (one each side).
2 4
D150-2M116
28. DRIVE BELT
Inspection - Tension of drive belt
Measure the belt sagging on the longest side. Maximum sag: 9.5 - 12.7 mm (3/8 - 1/2 in)
Note – Use a belt tension measuring dynamometer Cummins ST-1293).
Tension limit: 267 - 578 N (60 - 130 lbs/ft).
D150-2M119
30.CRANKSHAFT PULLEY - Check
Check the tightening torque 13.7 daNm (101 lbft) of the crankshaft pulley retaining screws.
31.BELT TIGHTENER - Check
Make sure the belt tightener pulley can turn freely. Check the belt tightener bearing.
D150-2M117
D150-2M118
Every 2000 hours work
32.RADIATOR - Change coolant
DANGER FLUID UNDER PRESSURE; prior to removing the cap, turn it slowly to relieve the pressure. To avoid burns, do not loosen the radiator cap with an hot engine.
T
Open the panel from the upper side of the engine compartment and remove the filler cap located on the radiator.
A
D150-2M171
Change the coolant proceeding as follows: -with cold engine, drain the coolant from the engine by loosening draining plug T at the bottom of the radiator; -Dilute "Radiator flushing de-scaling product" or an equivalent product in water, following the dosage indicated on the container. Pour the solution into the radiator when the engine is cold. -Operate the machine with engine at high speed, until it warms-up completely. -Drain the solution. Wait for the engine to cool-off a little, then run water through the radiator filler neck letting it flush through the lower side of the radiator.
Use antifreeze mixed with water at 50% for operation down to - 35 °C (- 31 °F).

33.CLOGGED ENGINE AIR CLEANER -
Replace cartridges
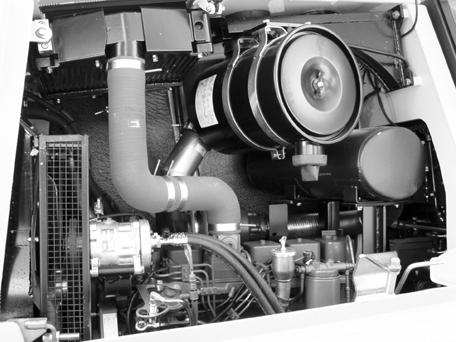
Open the engine left side panel. Remove the cover from canister B loosening the screw. Remove the two filtering elements: one inner D, the other outer E and replace them.
Before installing the elements, clean inside canister B and check that dust discharge valve C, located on the lower side of the cleaner, is clean.
B
C
E D
D150-2M172
D150-2M120
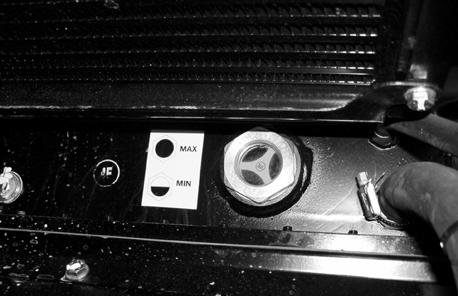
-re-install plug T and pour the coolant slowly through the filler neck of the radiator until it fills completely (up to MAX level) sight gauge A; -retighten the radiator filler cap; -start the engine and let it run for a few minutes, -let he engine cool-off, the top-off the coolant level, through the radiator filler neck.
Note – If the engine cooling system is filled with water instead of coolant (having anti-oxidant, anti-scaling, anti-corrosion properties) flush the system as described here after.
D150-2M180
WARNING When using compressed air for cleaning parts, use safety glasses with side shields or goggles, so as to reduce the danger for personal injuries cause by flying particles. Limit pressure to 2 bar, in accordance with local and national regulations.
34.EQUIPMENT HYDRAULIC CIRCUIT - Change oil, clean magnetic rod and suction filter
Important – Keep spare elements of the prescribed type, available from the Sales Organisation, on hand to reduce machine down-time.
Oil draining
-Place the machine on a flat surface, with the equipment resting on the ground. -open the right side panel of the hydraulic oil reservoir; -remove the hydraulic oil filler cap from the reservoir and loosen, plug Tto drain the oil from the reservoir. -Clean with solvent the plug T and the magnet Z.
D150-2M124
Z
T
D150-2M123
WARNING Avoid environment pollution. The used fluids, such as hydraulic oil, lubricants, coolants and the filter elements soaked with these fluids, must be eliminated according to local or national current regulations qualifying these materials as polluting, harmful and dangerous waste. Fa V
WARNING Never use gasoline, solvent or other flammable fluid to clean parts. Use, non-flammable, non-toxic commercial solvents.
WARNING Avoid environment pollution. The used fluids, such as hydraulic oil, lubricants, coolants and the filter elements soaked with these fluids, must be eliminated according to local or national current regulations qualifying these materials as polluting, harmful and dangerous waste.
Loosen screws V retaining the filter support. Unscrew filter Fa and wash it. The filter must be washed and inspected at every oil change. If during the inspection the filter appears to be damaged, replace it with a new one.
Oil refilling
Reinstall the magnetic rod and plug, fill the reservoir with oil through the filler neck up to maximum level and tighten cap. Start the engine, move the blade slowly and the ripper a few times, to fill the cylinders and tubes with oil; topoff with oil at various intervals. Check the oil level as described at point (9) of the MAINTENANCE TABLE.


