4 minute read
FUEL SYSTEM


Template Date: 1994_04_29Template Name: OM_1_col
TRIM THIS EDGE
Coolant level
The level of coolant solution should be checked when the engine is cold. !
WARNING: Do not remove the reservoir cap while the engine is hot. The cooling system will still be under pressure and you could be scalded.
STEP 2
CD98E013 Check the level on flat, level ground, before using the machine (while the engine is still cold). The level in the coolant reservoir should be in the middle of the sight glass. If not, see “Filling” .
Draining
Tools required
-One 17 mm wrench for hexagonal head screws -One flat-headed screwdriver
STEP 1
CD99N001 Move the heating control to the left (open).
STEP 3
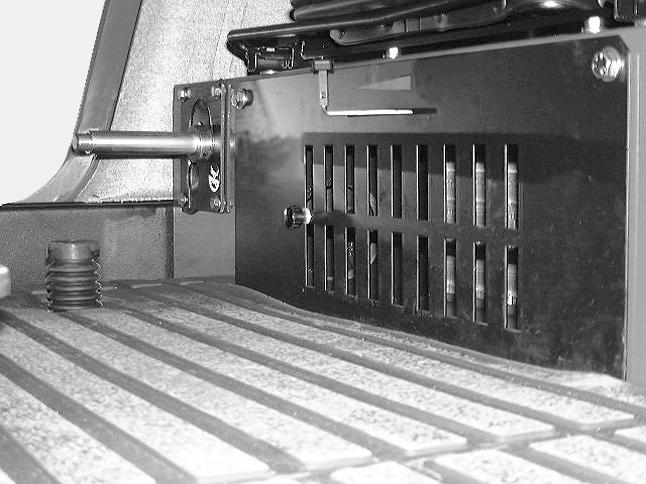
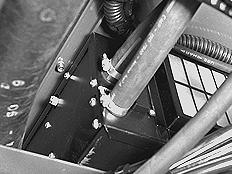
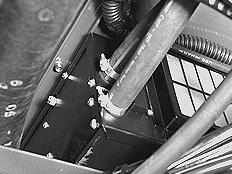
PG03004 Remove the screws and the lower tray under the operator’s compartment.
CD98E013 Remove the coolant reservoir cap.
226
TRIM THIS EDGE LEFT PAGE
STEP 4
Filling
Tools required
-One 17 mm wrench for hexagonal head screws -One flat-headed screwdriver
STEP 1
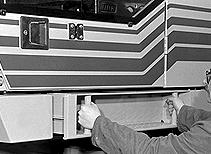
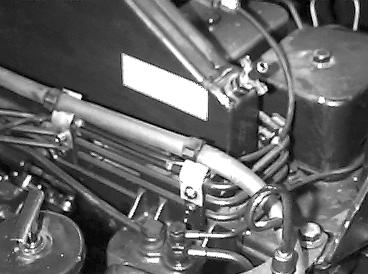
PE07509 Disconnect the hose from the heater unit and let the liquid flow out. NOTE: Use a container of an adequate capacity.
STEP 5
CD98E013 Fill with coolant solution via the coolant reservoir until it overflows. IMPORTANT: Use a suitable coolant solution.
STEP 2
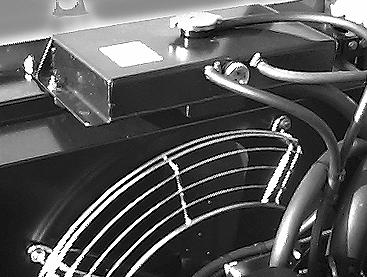
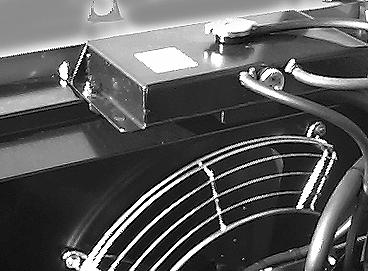
CD98E014
Open the radiator drain valve.
STEP 6
After the system is completely drained, reconnect the hose to the heater unit and tighten the clamp.
STEP 7
Rinse out the system with fresh water. Drain again, reconnect the hose to the heater unit and tighten the clamp. Refill the system.
PE07509 Loosen the heater unit bleed screw, let the air escape until coolant solution starts to flow out. Then retighten the screw.
227
TRIM THIS EDGE RIGHT PAGE TRIM THIS EDGE
Template Name: OM_1_colTemplate Date: 1994_04_29
Template Date: 1994_04_29Template Name: OM_1_col
STEP 3
TRIM THIS EDGE
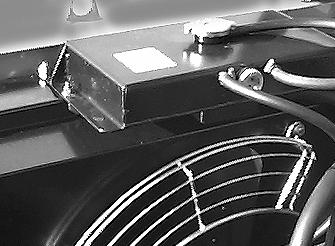
CD98E014 Close the radiator drain valve as soon as coolant solution flows out.
STEP 4
Run the engine for a few minutes, then check the level in the coolant reservoir again. Add coolant solution, if necessary.
STEP 5
Install the coolant reservoir cap.
STEP 6
Install the lower tray under the operator’s compartment.
228
TRIM THIS EDGE LEFT PAGE
FUEL SYSTEM Service specifications
Fuel tank sediment removal.......................................Every 10 hours or every day Fuel filter sediment removal.......................................Every 10 hours or every day Fuel pre-filter sediment removal.................................Every 10 hours or every day Fuel filter replacement...................................................................Every 500 hours or when there is a loss of power Fuel pre-filter element replacement..............................................Every 500 hours or when there is a loss of power Fuel tank capacity.....................................................................................330 liters Type of fuel....................................................................See “Fluids and lubricants”
Fuel pre-filter element replacement
STEP 2
Tools required
-One filter strap wrench -One flat-headed screwdriver -One grease or oil can
STEP 1
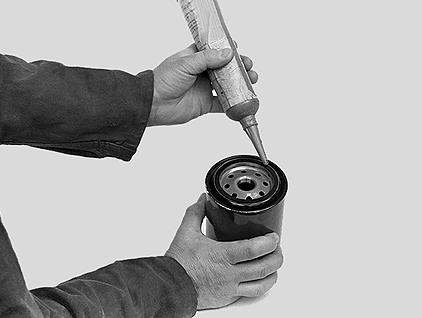
PH08325 Apply a thin coat of oil or grease on the new filter seal. NOTE: Do not fill the new filter with fuel before installing it.
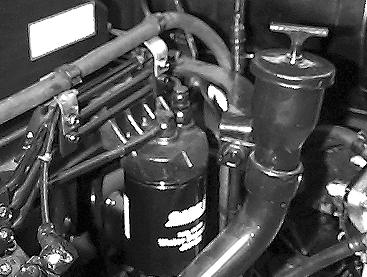
CD98E015 Clean the area around the filter head. Place a container of a suitable capacity under the filter and remove the filter using the filter wrench. TRIM THIS EDGE
229
TRIM THIS EDGE RIGHT PAGE
Template Name: OM_1_colTemplate Date: 1994_04_29
Template Date: 1994_04_29Template Name: OM_1_col

TRIM THIS EDGE
STEP 3
CD98E015 Install the new filter. Turn the filter until the seal comes into contact with the filter head and turn an extra half turn by hand to tighten. IMPORTANT: Do not use a filter wrench. Overtightening can damage the seal and the filter. NOTE: If the engine does not regain full power after replacing the filter, bleed the system.
Bleeding the fuel system
Tools required
-One 17 mm wrench for hexagonal head screws It is necessary to bleed the fuel system when: -The fuel tank has been completely emptied. -Parts of the fuel system have been removed for service or repair work. -The machine has been in storage for a long time.
STEP 1
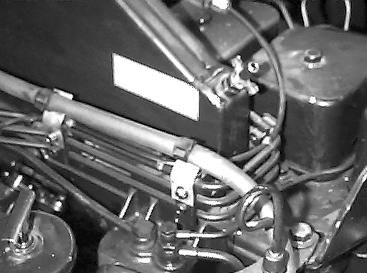
CD98E014 Loosen the bleed fitting two or three turns.
STEP 2
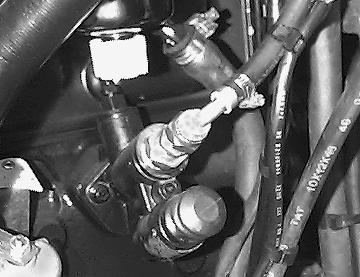
CD98E016 Operate the priming pump until fuel flows out with no air bubbles in it. Then retighten the bleed fitting.
230
TRIM THIS EDGE LEFT PAGE