Suspension
3. Remove the two cap screws and nuts securing each rear shock absorber to the frame and the lower trailing arm. DISASSEMBLING
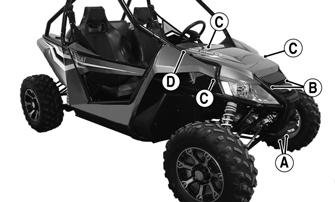
The following suspension system components should be inspected periodically to ensure proper operation: A. Shock absorber rods bent, pitted, or damaged.
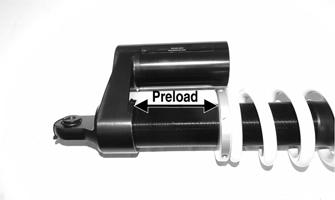
NOTE: It is very important to measure the preload with a tape measure before disassembling in order to return the spring to the proper preload setting.
B. Reservoirs damp or leaking. C. Shock absorber body damaged, punctured, or leaking. D. Shock absorber eyelets broken, bent, or cracked. E. Shock absorber eyelet bushings worn, deteriorated, cracked, or missing. F. Shock absorber spring broken or sagging. G. Sway bar mountings tight and bushings secure. H. Proper preload and damping for conditions.
Shock Absorbers
WC901A
NOTE: Only the external parts are serviceable. If the shock absorber is damaged, it must be replaced.
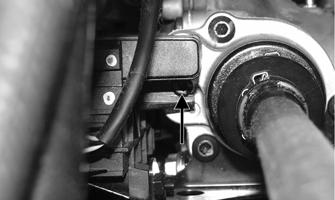
1. Loosen, but do not remove the lock ring screw. ADJUSTING SHOCK COMPRESSION NOTE: The JRi shock absorber comes with a 70-position Compression Adjuster for a stiffer or a softer ride. The adjuster dial is located at the bottom of the shock. NOTE: On two-seat models equipped with JRi shocks, the front limiter straps must be removed before removing the front shock absorbers (see Limiter Straps sub-section).
Turn the dial toward the (+) position for more compression (stiffer) or the (-) position for less compression (softer).
WC905B
2. Loosen the lock ring toward the top of the shock until there is no pressure on the spring.
WC910
REMOVING
1. Secure the vehicle on a support stand to elevate the wheels and release the load on the suspension. 2. Remove the two cap screws and nuts securing each front shock absorber to the frame and the lower A-arm.
WC905A
3. Push the spring and spring retainer upward toward the lock ring.
147