DENTAL SOLUTIONS

APR - JUN 2023
EXCLUSIVE ONLINE BENEFITS
EXCLUSIVE ONLINE BENEFITS
TAKE ADVANTAGE OF THESE EXCLUSIVE BENEFITS
TAKE ADVANTAGE OF THESE EXCLUSIVE BENEFITS
• Speed up your consumable o
• Speed up your consumable o
• Speed up your consumable o
• Speed up your consumable o
• Select from over 18,000 p
• Select from over 18,000 p
• Select from over 30,000 p
• Select from over 30,000 p
• Track & Trace deliveries
• Track & Trace deliveries
• Track & Trace deliveries
• Track & Trace deliveries
• Ordering templates to save time & money
• Ordering templates to save time & money
• Ordering templates to save time & money
• Ordering templates to save time & money

• View your backorder status
• View your backorder status
• View your backorder status
• View your backorder status
• Pay your account quickly Online
• Pay your account quickly Online
• Pay your account quickly Online
• Pay your account quickly Online
• Online Live Chat - to resolve any questions
• Inventory Management Solutions
• Inventory Management Solutions
• Online Live Chat - to resolve any questions
• Online Live Chat - to r
• Online Live Chat - to resolve any questions
henry schein.co.nz
henry schein.co.nz
H E N R Y SCHEI N COM
H E N R Y SCHEI N COM
SCHEINING PRICES M
SCHEINING PRICES M
YOUR GO - TO SITE FOR EDUC
YOUR GO - TO SITE FOR EDUC
• Webinars
• Webinars
Exclusive online only promotions every month
Exclusive online only promotions every month
• Podcast
• Podcast
• Clinical Videos
• Clinical Videos
• Henry Schein TV
• Henry Schein TV
• Clinical Articles & News
• Clinical Articles & News
• Latest In-Person Events & Courses
• Latest In-Person Events & Courses
DENTAL EDUCATION HUB.CO.NZ
DENTAL EDUCATION HUB.CO.NZ


Clinical content from leading global dental manufacturers updated weekly
Clinical content from leading global dental manufacturers updated weekly

02 0800 808 855
NEW ZEALAND’S LARGEST
A’S LARGEST ONLINE STORE FOR
NEW ZEALAND’S LARGEST
AUSTRALIA’S LARGEST ONLINE STORE FOR
ONLINE
NEW ZEALAND’S LARGEST DENTAL ONLINE STORE

03 henryschein.co.nz 13 42-43 34-35 Strategies to reduce stress & stay productive Antiviral Masks CAD / CAM Blocks LiSi, lithium disilicate ANAESTHESIA COSMETIC & RESTORATIVE 06 08 HENRY SCHEIN ONLINE NEW PRODUCT SPOTLIGHT 02 04 ENDODONTICS INFECTION CONTROL 23 26 SURGICAL DIGITAL 42 44 INSTRUMENTS PREVENTATIVE 48 40
NEW PRODUCT
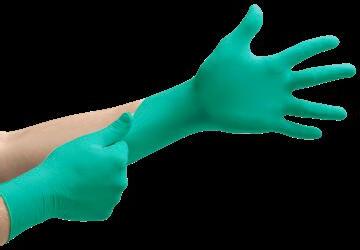
Ansell Microflex Neogard™ TOUCH
Ultralight, comfortable neoprene exam gloves, certified for exceptional wet grip. ERGOFORM™ Technology provides extra comfort and reduced muscle effort - US Ergonomics certification for wet grip. Thin, ultra-lightweight design provides heightened tactile sensitivity.

Pella transparent crown forms Assorted Tray
Pella transparent crown forms are transparent strip crowns designed for contouring restorative material and matching natural dentition using “peeloff” technique. Available in 39 different shapes/sizes, for both pediatric and adult dentistry, the crown forms are numbered according to a specific chart in order to precisely identify each available shape/size. Already exisiting in refills of 6-pack individual pairs (right and left), we have now brought for you an assorted pack with 18 individual pairs (right and left).

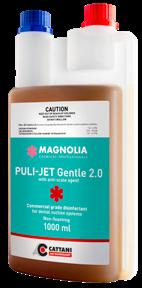
Pulijet 2.0 – Now Phenol and Aldehyde free
One Disinfectant, One Dilution, Once a Day. PULI-JET Gentle 2.0 is an antimicrobial solution, specifically made to disinfect dental suction devices, known for its easy-to-remember single dilution disinfecting procedure, it’s now even safer to use, with no Phenol or Aldehyde.
04 0800 808 855
Henry Schein White Nitrile Gloves
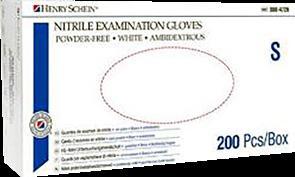

White, powder-free non-sterile nitrile gloves new from Henry Schein brand. Created from soft nitrile that ensures comfort and reduces hand fatigue while remaining flexible and tear resistant. Ambidextrous and strong with tactile fingertips. A very good quality glove for day to day use and represents excellent value for money. Meets glove standards EN455, EN374 and EN21420.
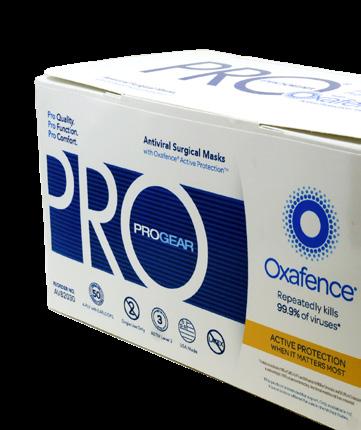
Singletto Mask with Oxafence
Masks are considered a first line of defence, but most masks were designed for filtration and fluid resistance – they weren’t designed to inactivate pathogens. We believe masks should kill viruses, not just shield or trap them. That’s where Oxafence comes in. It’s an extra level of protection – Active Protection – that kills viruses* while masks are being worn.
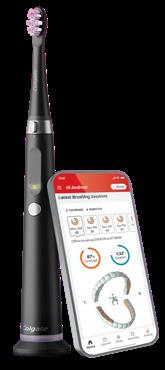
Colgate Pulse Series 2 Electric Toothbrush
Coaches you to miss fewer spots for a more complete clean. Bluetooth Connected Brus - Sync up to the app to track how long, often & well you brush, coaching you to a healthy smile. Pressure Sensor indicates when to lighten your brushing style. 2 Minute Timer with Quad Pacer: Guides you to a better brushing routine.
05 henryschein.co.nz
PRODUCT
SPOTLIGHT
THE STA SINGLE TOOTH ANAESTHESIA Q&A - PART 2

WITH DR. EUGENE CASAGRANDE
1. What is the feedback from patients when using the STA vs conventional syringes?
The patient response is universally very positive. In the United States alone, 40 million people are dental phobic; Most patients judge dentists by their ability to deliver a “painless” injection; Patients perceive the syringe as a leading cause of their pain anxiety. In a survey of patients who experienced the STA, 100% prefer it over the syringe; 79% are more likely to refer friends and family to the practice; 72% would be willing to pay extra for an STA injection rather than a syringe injection. Many testimonials from STA users and patients to validate how the STA has had a positive and beneficial effect on them is available on the Milestone Scientific website: milestonescientific.com
2. Can we use the STA techniques/ injection sites with our normal conventional syringe?
Yes, the STA injection techniques (AMSA, P-ASA, Intraligamentary, and crestal) are possible with the traditional dental syringe. If the same anaesthetic is deposited at the same injection site, the anaesthetic effect will be the same or similar regardless of the delivery device or instrument. However, there is a major difference between delivery devices.
The STA’s computer-controlled technology produces a consistent and precise flow rate of anaesthetic (one drop every two seconds) that is below the patient’s pain threshold. This flow rate is used for all STA injections and is almost impossible to reproduce with the 160-year-old technology of the traditional syringe which uses manual pressure on the plunger to force the anaesthetic out of the cartridge. There is a great difference between a computer-controlled flow rate versus a manual-controlled flow rate. Using the STA handpiece allows the operator to have excellent control of the needle and to be able to use a finger rest during the injections. Using the STA for these injections makes their delivery easier and less stressful for the operator and virtually painless for the patient in comparison to a dental syringe. There are many more benefits and reasons to use the STA.

3. How can the STA system be advertised to patients?
Primarily by social media platforms, such as Facebook, Linked In, etc. If you only use the STA for all injections on all patients, consider a campaign that lets the public know that you are a syringe-free practice.
06 0800 808 855
ANAESTHESIA
4. What is the difference between the Wand & STA Single Tooth Anaesthesia System®?

The first computer-controlled local anaesthetic delivery system was The Wand; the second version of The Wand was called the Wand Plus. The STA Single Tooth Anaesthesia® is the third and last generation of The Wand.
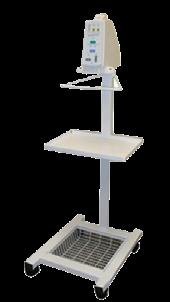
5. Can we use the Wand Handpieces with STA?
The Wand handpieces are used for The Wand and the Wand Plus instruments and are still available. The STA handpieces were modified to allow an automatic purge cycle and cannot be used on the two previous versions of the Wand.
The Wand Handpieces are not interchangeable and cannot be used in place of the STA Handpieces.
6. How long is the warranty for the STA?
The STA (Single Tooth Anaesthesia) is warranted for two years from date of purchase against manufacturing defects in materials.
Please refer to the STA user manual for more information.
More useful information, including important injection videos, is available on the manufacturer’s website: milestonescientific.com
Henry Schein Dental Education Hub
Author: Dr. Eugene R. Casagrande has practiced Cosmetic and Restorative Dentistry for over 30 years in Los Angeles. As the Director of International & Professional Relations for Milestone Scientific for over 23 years, he has published multiple articles and has lectured both nationally and internationally at over 100 dental schools and in over 50 countries on Computer-Controlled Local Anaesthesia.

07 henryschein.co.nz
DR EUGENE R. CASAGRANDE DDS, FACD, FICD
CLICK HERE CLICK HERE ANAESTHESIA
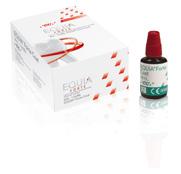
Glass Hybrid, EQUIA Forte® HT
UPGRADE TO EQUIA FORTE HT
Restorations that cross generations
GLASS HYBRID
Glass Hybrid, EQUIA Forte® HT
Restorations that cross generations
Glass Hybrid, EQUIA Forte® HT
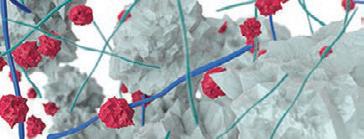
Glass hybrid technology
EQUIA® was first launched in 2007, and numerous clinical studies have demonstrated its clinical success. In 2014, GC’s new glass hybrid technology caused further considerable improvements, leading to the development of EQUIA Forte®. This restorative system combined a self-cure, bulk fill restorative, EQUIA Forte® Fil, laminated with a nano-filled, selfadhesive resin coat, EQUIA Forte® Coat.
Glass hybrid technology
EQUIA ® was first launched in 2007, and numerous clinical studies have demonstrated its clinical success. In 2014, GC’s new glass hybrid technology caused further considerable improvements, leading to the development of EQUIA Forte ®. This restorative system combined a self-cure, bulk fill restorative, EQUIA Forte ® Fil, laminated with a nano-filled, self-adhesive resin coat, EQUIA Forte ® Coat. The new glass hybrid innovation was achieved through introduction of ultra-fine highly reactive glass and highmolecular weight polyacrylic acid powders within conventional glass which ensures advanced mechanical properties with improved flow and non-sticky handling. The nano-filled, self-adhesive resin, EQUIA Forte ® Coat, ensures optimised marginal seal and wear resistance.
Glass hybrid technology
The new glass hybrid innovation was achieved through introduction of ultra-fine highly reactive glass and highmolecular weight polyacrylic acid powders within conventional glass which ensures advanced mechanical properties with improved flow and non-sticky handling. The nano-filled, self-adhesive resin, EQUIA Forte® Coat, ensures optimised marginal seal and wear resistance.
Surface-treated FAS
EQUIA ® was first launched in 2007, and numerous clinical studies have demonstrated its clinical success. In 2014, GC’s new glass hybrid technology caused further considerable improvements, leading to the development of EQUIA Forte ®. This restorative system combined a self-cure, bulk fill restorative, EQUIA Forte ® Fil, laminated with a nano-filled, self-adhesive resin coat, EQUIA Forte ® Coat. The new glass hybrid innovation was achieved through introduction of ultra-fine highly reactive glass and highmolecular weight polyacrylic acid powders within conventional glass which ensures advanced mechanical properties with improved flow and non-sticky handling. The nano-filled, self-adhesive resin, EQUIA Forte ® Coat, ensures optimised marginal seal and wear resistance.
(Fluoro Alumino Silicate) glass
Glass hybrid technology
Highly reactive surfacetreated fine FAS glass
High-molecular-weight polyacrylic acid Polyacrylic acid
EQUIA ® was first launched in 2007, and numerous clinical studies have demonstrated its clinical success. In 2014, GC’s new glass hybrid technology caused further considerable improvements, leading to the development of EQUIA Forte ®. This restorative system combined a self-cure, bulk fill restorative, EQUIA Forte ® Fil, laminated with a nano-filled, self-adhesive resin coat, EQUIA Forte ® Coat. The new glass hybrid innovation was achieved through introduction of ultra-fine highly reactive glass and highmolecular weight polyacrylic acid powders within conventional glass which ensures advanced mechanical properties with improved flow and non-sticky handling. The nano-filled, self-adhesive resin, EQUIA Forte ® Coat, ensures optimised marginal seal and wear resistance.
and EQUIA Forte advanced glass hybrid technology
Strong & du
Strong and durable
Strong & du
Glass hybrid systems offer the strength of the latest innovative glasses combined with the wear resistance of a filled coating. The unique synergy between the coating and the restorative material improves the durability and wear resistance of the restorations.
Strong & durable*
Glass hybrid systems offer the strength of the latest innovative glasses combined with the wear resistance of a filled coating. The unique synergy between the coating and the restorative material improves the durability and wear resistance of the restorations.
Glass hybrid systems offer the strength of the latest innovative glasses combined with the wear resistance of a filled coating. The unique synergy between the coating and the restorative material improves the durability and wear resistance of the restorations.
Glass hybrid systems offer the strength of the latest innovative glasses combined with the wear resistance of a filled coating. The unique synergy between the coating and the restorative material improves the durability and wear resistance of the restorations. * Basso et al. 7 Years, Multicentre, Clinical Evaluation on 154 Permanent Restorations Made With a Glassionomer-based Restorative System.
True bulk-fill Moisturetolerant
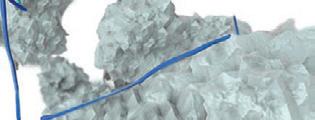
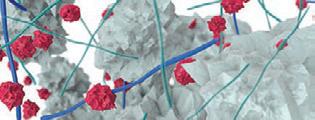
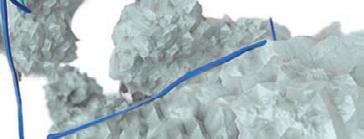
Moisturetolerant MICROLAMINATION with EQUIA Forte® Coat
ISO9917-1: 2007.
* Source: GC R&D, Japan, 2018. Data on file.
MICROLAMINATION with EQUIA Forte® Coat
• Self adhesive
EQUIA Forte® HT Fil Refill
MICROLAMINATION with EQUIA Forte ® Coat
• Self adhesive
• Tough, highly cross-linked
EQUIA Forte ® HT Fil Refill


• Single dispersion nanofiller
• Self adhesive
• Tough, highly cross-linked
• Tough, highly cross-linked
• Single dispersion nanofiller
• Single dispersion nanofiller


Contains: 50 EQUIA Forte® HT Capsules (Powder 0.4g, Liquid: 0.13g (0.10mL) per capsule). Shades: Assorted, A1, A2, A3, A3.5, B1, B2, B3, C4
Contains: 50 EQUIA Forte® H (Powder 0.4g, Liquid: 0.13g (0.10mL) per capsule).
Shades: Assorted, A1, A2, A3
08 0800 808 855 COSMETIC & RESTORATIVE
For te® HT Bulk fill glass hybrid restorative system
EQUIA
EQUIA Forte® HT Fil competitor A competitor B competitor C Compressive strength (MPa) ISO9917-1: 2007. Source: GC R&D, Japan, 2018. Data on file. * 233 198 176
EQUIA Forte advanced glass hybrid technology
Basso et al. 7
Multicentre, Clinical Evaluation on 154 Permanent Restorations Made With a Glassionomer-based Restorative System. J Dent Res. 2016;95 Spec Issue B: #0446.
*
Years,
EQUIA Forte® Fil and EQUIA Forte® HT Fil
EQUIA For te® HT Bulk fill glass hybrid restorative system EQUIA Forte ® HT Fil Refill Contains: 50 EQUIA Forte® HT Capsules (Powder 0.4g, Liquid: 0.13g (0.10mL) per capsule). Shades: Assorted, A1, A2, EQUIA Forte® HT F l competitor A competitor B competitor C Compressive strength (MPa) ISO9917-1: 2007. Source: GC R&D, Japan, 2018. Data on file. * 233 198 176
Surface-treated FAS (Fluoro Alumino Silicate) glass Highly reactive surfacetreated fine FAS glass High-molecular-weight polyacrylic acid Polyacrylic acid Fil
EQUIA® Fil
* Basso et al. 7 Years, Multicentre, Clinical Evaluation on 154 Permanent Restorations Made With a Glassionomer-based Restorative System. J Dent Res. 2016;95 Spec Issue B: #0446. True bulk-fill Moisturetolerant MICROLAMINATION with EQUIA Forte ® Coat • Self adhesive • Tough, highly cross-linked • Single dispersion nanofiller Restorations that cross generations EQUIA For te® HT Bulk fil glass hybr d restorative system EQUIA Forte® HT Fil Refill Contains: 50 EQUIA Forte® HT Capsules (Powder 0.4g, Liquid: 0.13g (0.10mL) per capsule). Shades: Assorted A1 A2 A3 A3.5 B1 B2 B3 C4 EQUIA Fort ® HT F mp tit A p it B comp tit C Compressive strength (MPa) ISO9917-1: 2007. Sou ce: GC R&D, Japan, 2018. Data on file. * 233 198 176
Surface-treated FAS (Fluoro Alumino Silicate) glass Highly reactive surfacetreated fine FAS glass High-molecular-weight polyacrylic acid Polyacrylic acid EQUIA Forte®
hybrid technology EQUIA® Fil
Fil and EQUIA Forte® HT Fil advanced glass
B: #0446.
J Dent Res. 2016;95 Spec Issue
True bulk-fill
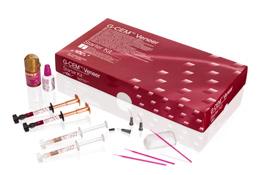
G -CEM VENEER


LIGHT-CURING RESIN CEMENT FOR HIGH AESTHETIC DEMANDS WITH EASE OF PLACEMENT


Initial presentation, patient presented with a fractured 21 veneer and leaking, stained margins on cervical of the
Upon removal of veneers you can see failure of the adhesive cementation and associated leakage




Old cement removed and preparations refined, retraction cord in place
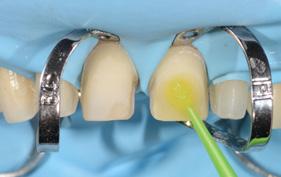
Hydrofluoric Acid etch applied to veneer
09 henryschein.co.nz 9 COSMETIC & RESTORATIVE Scan or click here for further information
veneers
Clinical Images courtesy of Dr Chee Chang
After Isolation and etching of veneer preparations, G-Premio BOND applied to preparation
G-Multi PRIMER applied
G-CEM Veneer (shade A2) applied
Final result showing six veneers adhesively bonded
Veneers seated
CLICK HERE
DR CHEE CHANG Sydney
G-ÆNIAL A’CHORD
THE ADVANCED UNIVERSAL COMPOSITE WITH UNISHADE SIMPLICITY


Initial Presentation
Caries removal

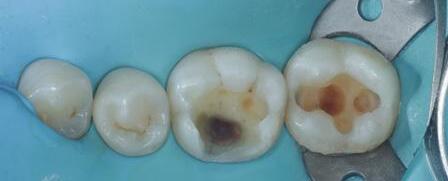
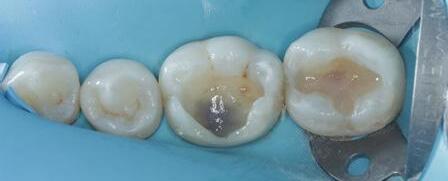
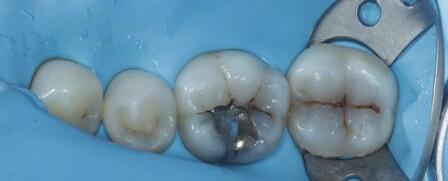
Lining placed using G-aenial Universal Injectable, shade A2

Placement of EverX Flow, dentine shade

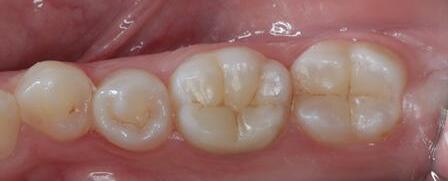
Post-operative review, showing beautiful shade integration Clinical Images courtesy of Dr Yo-Han Choi, Sydney
Placement of G-aenial A’CHORD, shade A2
10 0800 808 855
COSMETIC
Scan here for further information
DR YO-HAN CHOI Sydney
& RESTORATIVE
COMPOSITE GUIDE

RECOMMENDED POLISHING GUIDE FOR GÆNIAL COMPOSITES


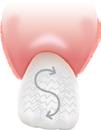
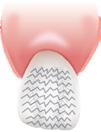
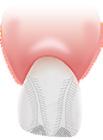


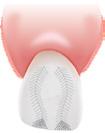


Polishing guidelines

11 henryschein.co.nz
Shaping – disc/bur PS: Maximum 6,000 rpm (no water spray)
Polishing – step 1 PS: Maximum 10,000 rpm (no water spray) 1. 2. or or or or + +
Secondary anatomy – bur PS: Maximum 6,000 rpm (no water spray)
Perikymata PS: Maximum 6,000 rpm (no water spray)
Polishing – step 2 PS: Maximum 10,000 rpm (no water spray) 6. High gloss PS: Maximum 13,000 rpm (no water spray) Contouring and Polishing Disc – Medium Eve DIACOMP Plus Twist – Pink 6856-314-016 Komet 6856-314-016 Komet 6856-314-016 Komet 831-204-012 Komet 858EF-010 Komet 858EF-010 Komet 9628-220 Komet Calico Mop RA GC DIAPOLISHER PASTE Jiffy Goat Hair Brush 1. 4. 2. 5. 3. 6. Eve DIACOMP Plus Twist – Grey T: +61 2 9301 8200 E: info.australasia@gc.dental www.gcaustralasia.com GC Australasia Dental Pty Ltd 1753 Botany Road Banksmeadow NSW 2019 Australia COSMETIC & RESTORATIVE
1.
2.
3.
4.
5.
CAD CAM BLOCKS
CERASMART 270, HYBRID CERAMIC
CERASMART™ 270
Force absorbing hybrid ceramic block, for strong, durable and beautiful restorations
Force absorbing hybrid ceramic block, for strong, durable and beautiful restorations
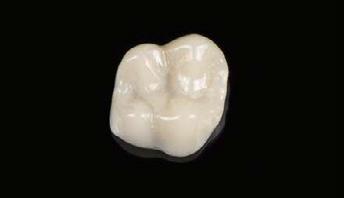
CERASMART™ 270 is an aesthetic hybrid block which builds on the remarkable performance of the original CERASMART™ and it is made to provide fast and long lasting clinical success.* Thanks to the newly developed “ Full Coverage Silane Coating” (FSC) with improved nanofiller technology, CERASMART™ 270 offers high physical and aesthetic properties.^# The milling is fast and effective, making it possible to create a qualitative restoration with fine margins and optimal fit in a single visit.* Additionally, it can be polished or characterised for more vibrant aesthetics. CERASMART™ 270 is indicated for a range of cases, be it a quick onlay or a challenging wear case.
CERASMART™ 270 is an aesthetic hybrid block which builds on the remarkable performance of the original CERASMART™ and it is made to provide fast and long lasting clinical success.*
Thanks to the newly developed “Full Coverage Silane Coating” (FSC) with improved nanofiller technology, CERASMART™ 270 offers high physical and aesthetic properties.
Strength & Flexibility
Impressive wear resistance
The milling is fast and effective, making it possible to create a qualitative restoration with fine margins and optimal fit in a single visit.*
Additionally, it can be polished or characterised for more vibrant aesthetics. CERASMART™ 270 is indicated for a range of cases, be it a quick onlay or a challenging wear case.
Upgrade today
Natural Aesthetics
CERASMART™ 270 after hand polishing
GC
Source:
CERASMART™ 270
CERASMART™ 270 or CEREC, refill of 5 blocks

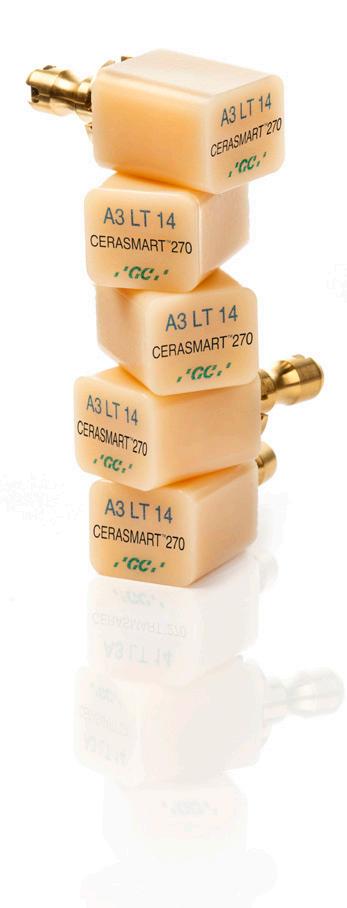
Sizes 12, 14, 14L
HT shades (A1, A2, A3, A3.5, B1)
LT shades (A1, A2, A3, A3.5, B1)
Bleach shade (BL)
* Awada A, Nathanson D. Mechanical properties of resin-ceramic CAD/CAM restorative materials. J Prosthet Dent. 2015 Oct;114(4):587-93.
^ Carrabba M. High Strength Hybrid-Ceramic for CAD/CAM Milling:a 3-Point Bending Test. J Dent Res 2018 Vol 97 (Spec Iss C ): 2488 (IADR/PER 96th General Session https://iadr2018.zerista.com/event/member/492082) # GC R&D data on file
^ Carrabba M. High Strength Hybrid-Ceramic for CAD/CAM Milling: a 3-Point Bending Test. J Dent Res 2018 Vol 97(Spec Iss C ):2488 (IADR/PER 96th General Session https://iadr2018.zerista.com/event/member/492082)
# GC R&D data on file
12 0800 808 855 COSMETIC & RESTORATIVE
A1 HT A2 HT A3 HT A3.5 HT B1 HT A1 LT A2 LT A3 LT A3.5 LT B1 LT Bleach (BL)
0.0 0.5 1.0 1.5 2.0 2.5 3.0 3-point Fexural Strength (MPa) 3-point Fexural Strength (MPa) Breaking Energy (N-cm) Breaking Energy (N-cm) CERASMART 270 CERASMART Competitor A Competitor B Competitor C 0 50 100 150 200 250 300 246 2.7 140 0.26 240 1.58 229 2.4 231 2.2 0 3 6 9 12 15 Abrasion –3-Body Wear (µm) CERASMART 270 3 77 10 15 14 Competitor A Competitor B Competitor C Competitor D Competitor E
CERASMART 270 after hand polishing R&D Data on file Source: GC R&D Data on file
* Awada A, Nathanson D. Mechanical properties of resin-ceramic CAD/CAM restorative materials. J Prosthet Dent. 2015 Oct;114(4):587-93.
CAD CAM BLOCKS
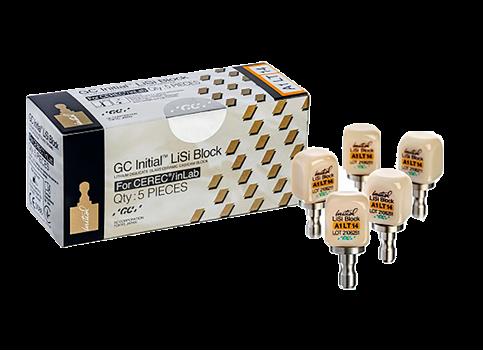
LISI, LITHIUM DISILICATE
Lithium disilicate block for one appointment dentistry


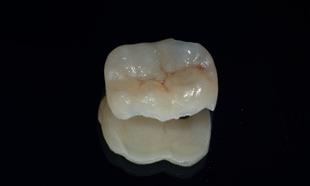

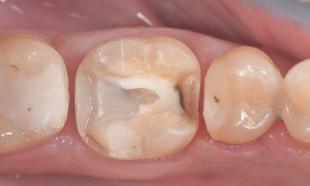
Initial LiSi Block is a fully crystallized lithium disilicate block that delivers optimal physical properties without firing. This unique block features GC’s proprietary HDM (High Density Micronization) technology for CAD / CAM dentistry to deliver high wear resistance, smooth margins and aesthetic final results. This makes it an ideal, time saving solution for single visit chairside treatments
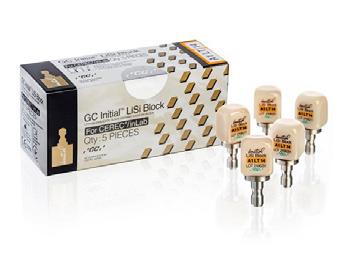
Initial LiSi Block can dramatically reduce process time: no need to fire, glaze, characterize and cool. This saves up to 40% in the time required to create your restorations, also reducing the chair time for you and your patient. You just need to mill, polish and place.


Workflow
Design
Condition
13 henryschein.co.nz COSMETIC & RESTORATIVE
Prepare Mill Cement Scan Polish or characterise Final result
Images courtesy of Prof. Matteo Basso, Italy
ADVANCED MATERIAL SCIENCE
DESIGNED TO SIMPLIFY
Despite getting its start in the early 1900s manufacturing synthetic fibres, today, Kuraray Noritake Dental is known to clinicians as a restorative powerhouse - especially to those who have relied on its advanced material science for years to achieve consistently successful restorations. One reason for Kuraray’s success is the company’s introduction of adhesive monomers to dentistry nearly 4 decades ago. Years of careful research ultimately led to the development of the MDP monomer, whose molecular structure yields greater adhesion and a stronger chemical bond to enamel, dentine, metal, and zirconia. It is the foundation of all products in Kuraray’s CLEARFIL and PANAVIA product lines, and likely what has led teams of clinicians to crown several of these materials as DPS Best Products.

CLEARFIL: A Strong Bond and Aesthetic Fill
For restorative dentists, building a strong restoration calls for an artful combination of technique and materials. To satisfy the latter, Donald Jetter, DMD, relies on CLEARFIL adhesives and composites.
“We have been using Kuraray’s CLEARFIL
After using CLEARFIL MAJESTY ES-2 in the A2 shade for several years with success, Dr. Jetter was excited to try out CLEARFIL
MAJESTY ES-2 Universal, a singleshade composite for posterior restorations. It uses Light Diffusion Technology to mirror the way tooth structure distorts light,resulting in a virtually seamless blend between the restoration and surrounding dentition. Additionally, enamel-like translucency allows for easy polishing to a high gloss.
“The new universal shade seems just a bit lighter than the A2 shade but works well to match adjacent tooth structure,” said Dr. Jetter. “I tried another universal shade product that came out prior to CLEARFIL Universal, but I experienced material failure with it, and it did not handle as well as Kuraray’s material.”
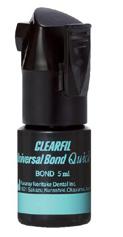
CLEARFIL MAJESTY ES-2 Universal pairs well with CLEARFIL Universal Bond Quick, a singlebottle adhesive that houses both the original MDP monomer and AMIDE-based chemistry, which rapidly permeates dentine and enamel to eliminate waiting time and dramatically reduce water absorption. Together, the two monomers provide a unique Rapid Bond Technology.
Dr. Jetter and his team have been using CLEARFIL Universal Bond Quick since it first came to market, after successfully using its predecessor, CLEARFIL Universal Bond, for many years. “I like these products because they are single-bottle, fluoridereleasing, universal adhesives with low odour that help achieve less postop sensitivity,” he shared.
“I would highly recommend CLEARFIL MAJESTY ES-2 and CLEARFIL Universal Bond Quick to other


COSMETIC & RESTORATIVE
We shine a light on 4 of Kuraray’s most-loved DPS Best Products and members of its successful CLEARFIL and PANAVIA product lines.
dentists, as they’ve helped me create long-lasting and aesthetic composite restorations with little to no sensitivity for my patients.”
PANAVIA SA Cement Universal: Cementation
Simplified
Designed to remove both primer and silane from the cementation procedure, PANAVIA SA Cement Universal contains not one, but two monomers: the original MDP monomer and the LCSi monomer, which allows for a strong bond to porcelain, lithium disilicate, and composite resin.

“In my 12 years of clinical practice, I have tried using a variety of different cements and what I find myself gravitating toward is the versatile powerhouse of Kuraray’s PANAVIA, which makes sense since Kuraray revolutionised bonding by introducing the MDP monomer to the world,” said Bilyana Tesic, DDS, who practices in Monterey, CA.
After using earlier generations of PANAVIA cements, which required mixing several bottles together before application, Dr. Tesic was excited when PANAVIA SA Cement Universal changed all that.
“PANAVIA SA Cement Universal simplified this process into a single step delivered via automix dispenser. Voilà! One cement to rule them all.”
Dr. Tesic has been using PANAVIA SA Cement Universal for the past two years, and what she appreciates most about the material is its versatility.
“It is a self adhesive, radiopaque, dual-cure resin cement that bonds to enamel, dentine, composite, semi-precious and precious metal, porcelain, fibre posts, and zirconia. It’s easy to dispense and even easier to clean up. Fast setting time, no need to refrigerate, and no postop sensitivity. That all adds up to no headache. I recommend it to anyone looking to simplify their cementation protocols without losing any bond strength.”
PANAVIA V5: ‘V’ is for Versatility
The strongest dentine bonding cement that Kuraray has ever developed, PANAVIA V5 simplifies cementation of crowns, bridges, inlays, onlays, veneers, and posts and cores. PANAVIA V5’s MDPbased Tooth Primer offers high bond strength in the self-cure mode thanks to unique catalyst technology, while a 1-bottle surface treatment applies to all indirect restorations.
“I loved being able to cement a metal post-and-core and ceramic crown all at the same time with the same product,” said Dr. J. Jerald Boseman, who took part in the DPS product review of PANAVIA V5. He added that the cement was easier to use, had a longer set time, and was less technique-sensitive than similar products.
Available in 5 shades - White, Brown, Universal, Clear and Opaque - with corresponding try-in pastes, PANAVIA V5 offers easy removal of excess cement after light-curing. Just one drop creates a durable bond to hydroxyapatite, metals, composites, and zirconia.


“So far, the retention has been good with excellent handling properties,” shared J. Michael Heider, DDS, who has also used previous generations of PANAVIA products. “I’m glad to see the best characteristics of PANAVIA are being improved further.”

The Crown and Bridge Duo Kuraray offers this pair of products for a simplified, reliable process designed for a range of restorative procedures.
PANAVIA SA Cement Universal
All-in-one bonding solution that can be used without a separate primer because it adheres to virtually all restorative materials. Using a silane coupling agent built into the paste, it delivers a strong, durable chemical reactiveness with zirconia, dentine and enamel.

KATANA Zirconia

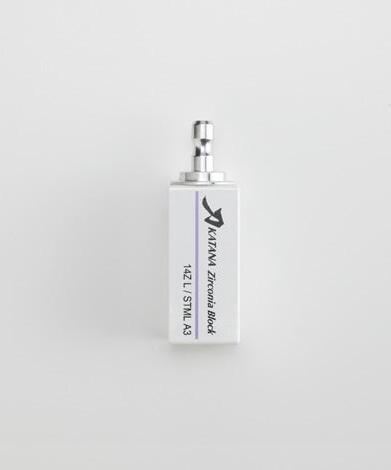
Innovative multilayered block specialised for the fabrication of full-contour zirconia prosthetics at chairside; it reflects natural opacity and comes with natural colour gradients as a dentine-like base for restorations, eliminating timeconsuming challenges in staining a restoration.
JETTER DMD
15 1300 65 88 22 COSMETIC & RESTORATIVE
DR. DONALD
Article from Dental Product Shopper March 2022
SMILE MAKEOVER
USING A MINIMALLY INVASIVE MULTI-DISCIPLINARY APPROACH
In this case, a female patient in her late 30s presented to the practice with moderate upper anterior crowding, a discoloured upper left central incisor and defective composite restorations in the upper central incisors (Fig. 1). Unhappy with the overall aesthetics of her smile, the patient was keen to undergo a smile makeover using a minimally invasive treatment pathway.
To help ensure the patient made an informed decision, several treatment options were discussed including orthodontics, tooth whitening, composite resin restorations and ceramic veneers. After consultation, the patient chose the more conservative option of composite restorations, following comprehensive orthodontics and tooth whitening. By opting for the less intrusive – and also more cost effective – process of alignment, bleaching and bonding, all of the patient’s concerns were addressed safely and effectively.
Alignment and bleaching
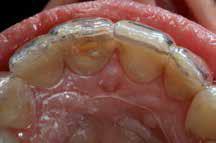
The upper anterior crowding was resolved by using a removable appliance to expand the arch followed by a conventional fixed appliance to align the anterior labial segment. The orthodontic treatment took approximately 12 months (Fig. 2 and 3). Once the anterior crowding had been remedied using conventional fixed appliances, tooth whitening was carried out on the upper left incisor using the inside/outside technique to correct the internal discolouration. For this, an Essix retainer was used with 16% carbide peroxide gel, with instructions given to wear the tray at all times for three to five days changing the whitening gel twice a day during this time (Fig. 4 and 5).
After five days of whitening, the access cavity of the upper left central incisor was sealed and the patient was instructed to wear the tray at night-time only using the whitening gel to whiten the rest of the
upper arch (Fig. 6 and 7). Once a satisfactory shade was obtained, there was a pause in treatment for three weeks prior to restoring the central incisors with direct composite resin restorations, to allow the oxygen to dissipate from the teeth, which would otherwise have interfered with the bonding process.
Restoration
For the third phase of the treatment process, the aim was to improve the shape of the central incisors as well as replace the defective Class III composite restorations. This was achieved with a single shade composite, which is both effective and convenient for restorations of this nature. In this instance, BRILLIANT EverGlow shade A1/B1 from COLTENE was chosen, as the universal composite works well as a single shade composite and it doesn’t run or stick to instruments, thus allowing for easy modelling of the composite resin. BRILLIANT EverGlow also features a Duo Shade system, which allows the composite to blend in well with the adjacent tooth structure making the restoration look virtually invisible (Fig. 8, 9 and 10).
A white opaque tint from the MIRIS 2 range, also by COLTENE, was used to mask discolouration on the cervical area of the upper left central incisor. Free hand incremental build up technique was utilised to restore the central incisors with direct composite resins. To finish, the restorations were polished using a fine diamond followed by alumina impregnated silicone points and fine Sof Lex discs.
16
COSMETIC & RESTORATIVE
Review
As the BRILLIANT EverGlow polishes to a very high lustre and is incredibly durable thanks to its submicron particle filler particle size (Fig. 11), I am pleased with the result of the restoration. As for the orthodontic aspect of the treatment, both central incisors are now proportionate resulting in a more aesthetically pleasing smile. As such, the patient is extremely delighted with the treatment



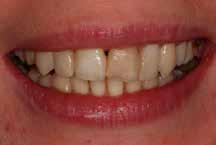

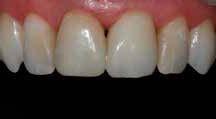
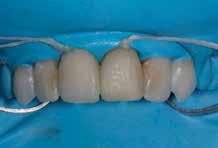
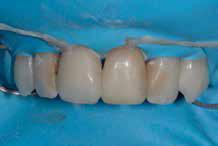
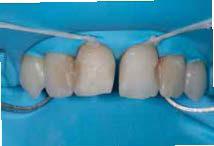

outcome, which she says has “exceeded her expectations” (Fig. 12).
Nadeem Younis is a Principal Dentist at Bridge Dental Practice in Burnley and a full member of the British Academy of Aesthetic Dentistry (BAAD). Here, he presents a smile makeover case using a minimally invasive multidisciplinary approach.


17 henryschein.co.nz Scan QR Code or visit website CLICK HERE
Fig. 1: Patient’s preop occlusion
Fig. 2: Pre-op smile
Fig. 3: Pre-op intraoral view
Fig. 4: Prep for inside/ outside whitening
Fig. 6: Inside/outside whitening post-op
Fig. 7: Upper arch whitening post-op
Fig. 9: Composite build up
Fig. 10: Polished composites upper centrals
Fig. 11: Post treatment
Fig. 12: Final smile
DR. NADEEM YOUNIS, BURNLEY/LANCASHIRE APRIL 2018
Fig. 5: Essix retainer used for whitening
COSMETIC & RESTORATIVE
Fig. 8: Preparation of upper central incisors for
CLINICAL CASE
COMBINED APPROACH TO SOLVING A MULTIFACTORIAL ESTHETIC CHALLENGE
About the case
A 33-year-old woman sought treatment due to an unsatisfactory smile. Her chief complaints were a factured crown, misalignment between her central incisors (one being an implant) and diastemas between her incisors. She mentioned that she felt that the spaces had progressively become bigger over the years.
Her central incisors had suffered trauma about 20 years ago, which eventually resulted in the loss of her right central incisor. That was replaced with an implant when she was 20 years old. The implant and left central incisor were then restored with all-ceramic crowns.
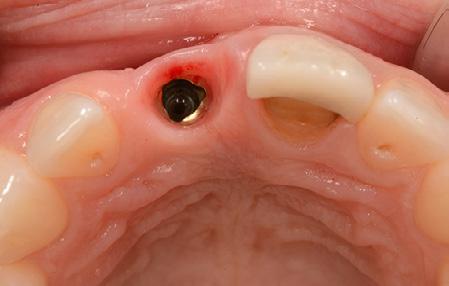
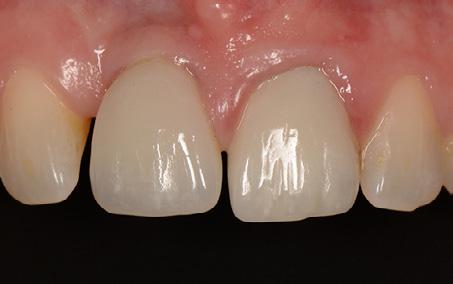
Eleven years later the crowned implant is in infraposition and slightly more labial compared to the surrounding teeth. This tends to happen with anterior implants as they do not follow the surrounding teeth in passive eruption creating esthetic challenges for the restorative dentist. The following case shows an example where alignment, gingival levels, proportions, material choice and diastema all create unique challenges for a functional and esthetic outcome. Refer to Instructions for Use (IFU) for complete product information. Results may vary.

18 0800 808 855
Pre-operative situation: Infraposition of implant-supported crown in relation to surrounding teeth is evident.
COSMETIC & RESTORATIVE
Labial soft tissue and bone recession around implant and semi-lunar fracture lingually of crown on left central incisor.
The diastema were closed with the aid of sectional matrices used in a vertical manner. A small amount of 3M™ Filtek™ Supreme Flowable Restorative was placed cervically and light-cured, to allow placement of a wedge, to support the matrix and allow a tighter proximal contact. Restoration was made with 3M™ Filtek ™ Supreme XTE shade A2B.

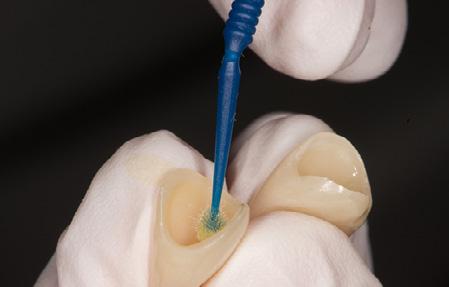
After try-in, the zirconia crowns were cleaned and 3M™ Scotchbond™ Universal Plus Adhesive was then applied, air-thinned but not light cured to give maximal retention. This step is optional.


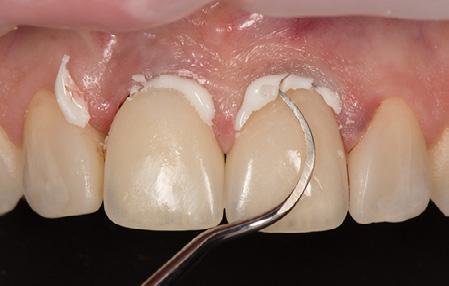
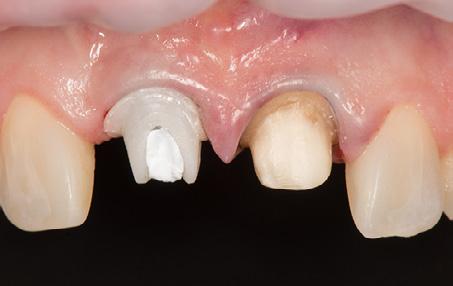

After seating and tack-curing 2-3 seconds, the excess cement is easily removed with a sharp instrument, such as an interproximal scaler.

19 henryschein.co.nz
Diagnostic wax-up: widening of both lateral incisors, as well as corrected crown contours for the central incisors.
A customized zirconia abutment is placed. Retraction cord has been placed around the abutments to provide a dry field for cementation. The abutment tooth is cleaned with pumice and water.
3M™ RelyX™ Universal Cement shade white opaque is applied to the intaglio surface of the crowns.
Post-operative view after three months.
COSMETIC & RESTORATIVE
DR. VILHELM GRÉTAR ÓLAFSSON DDS, MSc. Reykjavik, Iceland
HALO™ SECTIONAL MATRIX SYSTEM

Introduction
The restoration of the proximal surface of Class II cavities has always been an important objective for the dental practitioner. There are several reasons why the reestablishment of optimum form and function is important: support, alignment, and stabilization of the dentition are the fundamental ones. Also, the protection and preservation of both tooth and interdental gingival papilla, and consequently, the rest of the periodontal complex. A good contact between teeth helps to prevent food impaction and deter the formation of proximal carious lesions.
Several features like the correct interproximal form or contour (embrasure shape), optimum proximal contact surfaces, consistent marginal ridge elevations, and central groove continuity within a dental arch are paramount. Absent or open contacts and/or proximal contact surfaces may give room to poorly aligned dentition, which in turn may cause food impaction, halitosis, caries formation, and periodontal disease— just some of the reasons why the knowledge of accurate tooth anatomy is essential for a functional dental rehabilitation.
With the requirement of so many anatomic details, the optimum form and function associated with the proximal surface tooth anatomy has included numerous obstacles over the years, especially after the improvement of esthetic materials to be used in the posterior region. If by one side the development of new toothlike composite resins and bonding technique allowed for conservation of tooth structure, by the other it brought new challenges and problems.
Tight, well-contoured proximal contact areas in the posterior region were more easily achieved with dental amalgam, especially due to its mechanical properties and handling characteristics. Today, composite resin has replaced the metallic direct material as the posterior restorative material of choice, with reports of it being used in at least 58% of posterior restorations according to some studies. The way in which posterior composite restorations are now placed went through a rapid change in the last few years, greatly because of the change and improvements in composites’ composition and formulas, and the new materials and technologies available. Nevertheless, persistent challenges are still encountered by the practitioner, and new improvements in this field will be discussed further ahead.
Matrix Systems
In order to facilitate the reconstruction of proximal contact surfaces, several different matrix systems have been proposed. The re-creation of proximal anatomy is based on three pillars: the matrix or band, the wedges (generally made of wood or plastic), and the device responsible for holding the matrix in place (the matrix retainer). It is important to note that a rapid separation is also desired, which is usually accomplished by the wedge, the ring (in systems where it is available as the matrix retainer), or both. In the last decades, all three: matrices, wedges, and ring (matrix retainers) went through rapid changes and development.
Historically, the Tofflemire system is probably the most popular matrix system. When used with amalgam, it produced good and predictable anatomy and contact points. Today, it is still employed for insertion of composite resin, bein g widely used around the world. However, more developed matrix systems have been introduced, bearing great characteristics more suitable for the demands posed by composites. One of the main reasons is because of the peculiarities of the contact point that is obtained with the use of the Tofflemire matrix systems—usually too close to the occlusal surface. It is common that after even the initial occlusal adjustments, the contact point is lost due to this proximity. Another common mishap is when there is a fracture of this anatomical portion of the restoration. Ring matrix systems that include a separation ring, sectional matrices, and custom-fitted plastic wedges have become popular, with one of the first matrix systems being introduced in the 1990s. It was the first generation to utilize this concept exclusively as the restoration of posterior teeth using composite resin increased.
20 0800 808 855
COSMETIC & RESTORATIVE
Mechanical Separators
Tooth displacement is achieved with a maximum interdental separation of about 0.55 kg/mm, and it is important to compensate for the thickness of the matrix when this one is removed. According to Owens et al. (2016), “The practice of flossing has traditionally been the method for the evaluation of proximal contact achievement, with designations of tight, weak, or open.” Even though it is an empirical form of classification, the distinctive “click” felt when the dental floss goes through the proximal restored area is usually a good sign, and something that many dentists seek, as it usually implies a good contact point.
It is good to remember that in the days of the dental amalgam, both the expansion suffered by the material and the packing required by the insertion technique greatly helped the dentist to achieve a good contact point/surface between the posterior teeth. With the passivity of insertion when using composite materials, the pressure delivered by the separation ring (or spring clamp) systems and the wedges became responsible for the separation force. This combination (ring and wedges) should guarantee the movement of the tooth and compression of the periodontal ligament space, allowing for an improved separation. The idea behind rings (or clamps) is to provide the separation necessary to achieve proper interproximal anatomy. From the myriad of designs available, some do not adapt well to the interproximal-occlusal anatomy, failing to provide a good contact between matrix and tooth.
This in turn results in flash on the margins of the restoration that must be dealt with in the finishing step. Others allow for a tighter contact, but sometimes they misshape the matrix band, collapsing it in cases where a wider Class II cavity is present or a cusp is missing. There is also the problem of some rings being too bulky to be used in challenging areas, such as what happens to the second upper molar region. A novel concept on this field, the Halo™ Sectional Matrix System Ring proposes a solution with a unique beak design with built-in anatomical contours that mimic the natural anatomy and helps to decrease the finishing time. (Figure 1). The Ni-Ti metallic ring is fabricated with glass-filled nylon tines that are strong and rigid, which presents a 3D anatomy.
This unique design provides a better separation, and at the same time, adapts the sectional matrix more tightly around the tooth without collapsing it on the margins where wider Class II restorations are present. (Figure 2)As for the other component responsible for separation, the wedges, these can be fabricated in many materials. The most popular design is still the wooden wedges.
Available in many sizes they are a popular material, but can be harmful for the gingival papilla. On one side they provide a good separation

force, on the other this happens with the expense of compressing, sometimes harming, this portion of the periodontal apparatus. Another fundamental role of the interdental wedge is to help adapt the matrix band, providing a good contour and a perfect fit to the tooth structure.


Since the interproximal region is blocked from direct view after the completion of the restoration, this is important to avoid any hidden overhangs, and the subsequent risk of recurrent decay due to bacterial colonization. For this purpose, a new shape has been proposed in the last decade which is gentler to the soft tissues. It has a V-shape, and it helps to achieve a better adaptation to the interproximal region.
The problem is that some of the wedges may be too soft, therefore helping to adapt the matrix to the tooth, but failing to provide a good separation. The new Halo Sectional Matrix System comes with an innovation: the wedges have a hollow design but are also firm (Figure 3). This new material provides an active wedging for enhanced separation, but makes the wedge gentle to the gingival papilla and easy to place.
It also allows the wedges to be stacked when multiple wedges are needed, providing a perfect adaptation between the matrix band and the tooth, making sure no overhangs will be present on the final restoration.
21 henryschein.co.nz
Figure 1. Figure 3.
COSMETIC & RESTORATIVE
Figure 2.
Matrices

One of the main purposes of the matrix (band) is to contain the restorative material so it can be shaped into the proper lost proximal anatomy. Matrices can be either circumferential or sectional. They are the fundamental part for achieving the proper anatomy of the tooth, as it is the type of matrix system and not the composite resin material that is primarily responsible for the tooth anatomy.
That is exactly one of the main problems of the Tofflemire-type matrices when used with composites: it delivers an anatomy too parallel or too trapezoidal in relation to the tooth. As mentioned above, the contact point obtained is too close to the occlusal surface, and with occlusal adjustments, it might be removed.
In addition to the lack of a well-contoured profile from occlusal to cervical, they are likely to create problems for the gingival papilla region in terms of food impaction. Also situations like these are more prone to fracture over time because of the masticatory loading.
A class of matrices worth mentioning is the automatrices, sometimes used because of their ease of placement. However, these matrices usually present the same anatomical setbacks similar to those of the circumferential, discussed above. Novel designs in matrix shapes and thickness (together with new rings and wedges) allowed for a better and predictable anatomy, both in occlusal and proximal, the so-called sectional matrices.
One of the reasons why the sectional matrix provides an improved interproximal anatomy with proper marginal adaptation is because such systems can be customized according to the variety of the shapes and surfaces of the proximal surfaces of different teeth. However, it is necessary that a ring (and/or the wedge) acts as a displacement force, otherwise, there’s always the risk of getting a suboptimal contact surface contour. In case of excessive separation force, the matrix might get wrinkled.
There are two types of curvatures in the metallic bands for the Halo Sectional Matrix System: one is the “wrap-around” curvature, going from lingual to buccal, and the other curvature goes from gingival to occlusal (Figure 3). The buccal-lingual curvature is unique to each size of band and it is not incrementally sized, giving the right anatomy for the right tooth. When used with its uniquely designed ring, the matrix is adapted rather than “smashed” against the tooth. In that way, it is possible to achieve both a good separation and the proper anatomy at the same time.
The Halo band’s curvature also has a natural anatomical shape based on measurements from actual teeth, and the curve at the marginal ridge
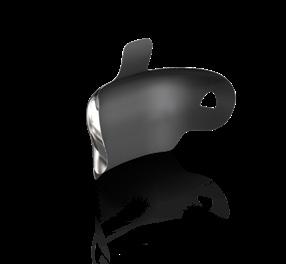
creates ideal occlusal embrasure, reducing finishing time and occlusal adjustments.
(Figure 4)
There are no doubts that composite resins have achieved prominence as a posterior Class II restorative material. Improvements in both mechanical and optical properties led to greater survival rates, sometimes similar to those typically and historically found with amalgam restorations.
One of the primary challenges for dentists when restoring posterior teeth using composite resin is the establishment of anatomically correct proximal contacts. It is well-known that sectional matrices and separation rings for insertion of Class II composite resin restorations resulted in stronger contact surfaces compared to the utilization of traditional circumferential (Tofflemire) bands and wood wedges. The usage of the latter in conjunction with current materials (such as composite resin) may lead to clinical failure and decreased longevity of these restorations. Today, a new matrix system has moved further ahead, refining the anatomy provided by the matrix, the adaptability of the ring, and the separation force of the wedges.
The innovations brought by the Halo Sectional Matrix System allow clinicians to achieve a more precise proximal contact surface with anatomically correct contours faster and more easily, a fundamental step for optimum form and function of the dentition

Reference
Owens BM, Phebus JG. An evidence-based review of dental matrix systems. Gen Dent. 2016 SepOct;64(5):64-70. PMID: 27599285.
22 0800 808 855
Figure 4.
CLICK HERE Halo Sectional Matrix System White Paper objectiveforthedentalpractitioner.Thereare especiallyaftertheimprovement esthetic posteriorregionweremoreeasilyachievedwith choice,withreports beingused least Read more COSMETIC & RESTORATIVE
DR. RAFAEL BEOLCHI São Paulo, Brazil
PREP OF COMPLEX CANAL SYSTEMS
IN PRIMARY WITH THE AID OF A MARTENSITIC FILE SYSTEM

In our previous Dental Solutions Magazine, we reviewed a preparation of complex canal systems in a primary treatment of first lower molar with radix entomolaris. For this issue we would like to review a primary treatment of an upper second molar.
Medical history
The 61-year-old patient presented for primary root canal treatment at 27 after referral by his general dentist. The tooth had been crowned about 2 years ago and the patient was symptom-free. In the course of the radiological check-up after apicoectomy of tooth 26, a periapical osteolysis had been detected on tooth 27.

Clinical findings
Tooth 27 showed a sufficient restoration. No increased probing depths were palpable and both cold and percussion tests were negative.
Radiographic findings
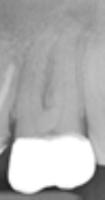
Tooth 27 shows periapical osteolysis in the sense of chronic apical periodontitis (Figure 1).

Therapy
The primary endodontic treatment of tooth 27 was also performed in one session. After trephination, the initial intracoronal diagnosis and visualisation of the four canal orifices was performed using a long-neck carbide round bur. An EdgeFile X7 size 17.06 was used for coronal expansion of the canals. The creation of the glide path could be done purely mechanically. For this purpose, EdgeFile X7 sizes 17.04, 17.06 were used in an alternating manner until the approximately radiographically determined preliminary working length was reached. After electrometric determination of the working length with C-Pilot files size 8 and 10, further preparation was carried out with EdgeFile X7 size 20.06, 25.06 and 30.06.
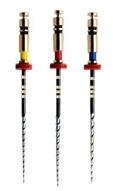
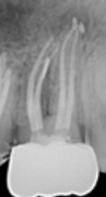
After final preparation, the canals were rinsed with 17% EDTA for 60 seconds. As a final rinse 6% NaOCl was sonically activated. A masterpoint image was taken to verify the preparation and the fit of the adapted gutta-percha tips (figure 2). After drying with micro aspiration and paper tips, all canals were obturated with bioceramic sealer using a warm vertical filling technique (figure 3). Adhesive closure was carried out with Bulk Fill Flow composite (figure 4).

23 henryschein.co.nz
DR. PHILIPP EBLE
ENDODONTICS
Fig 1: Preoperative diagnostic image
Fig 2: Masterpoint image
Fig 3: Control image after root canal filling
Scan QR Code to view Edge X7 Range or visit website CLICK HERE
Fig 4: Control image after adhesive closure
THE IMPORTANCE OF IRRIGATION IN A CHALLENGING CASE
Irrigation of root canals is key to improve the removal of bacteria, pulp tissue, smear layer and debris from the root canal system, reducing the risk of post-treatment disease. In fact, it is well known that mechanical instrumentation leaves untreated canal areas for individual canals ranging from 10% to 50%: in these areas there is the possibility for bacteria to replicate and lead to the failure of the treatment.
An article showed that the bacterial persistence at the time of filling has a significant influence of the outcome of the treatment, regardless of the irrigating solution and the medication used, thus stressing the importance of eradicating as many microorganisms as possible from the root canal system.
The synergy between mechanical preparation and irrigation is influenced by several factors, such as the fluid properties and the volume of the irrigant, the irrigant delivery system and its depth of placement, the anatomy of the root canal system. Conventional needle irrigation is not enough to provide a good disinfection because of the risk of vapor lock effect and because needles can have difficulties in penetrating into narrow spaces; as a consequence, the difficulty in reaching the most apical region of the canal with large volumes of fresh irrigant may result in insufficient replacement and fluid exchange beyond the tip of the needle. In order to increase the efficiency of the irrigation, the Literature suggested to use pre-heated solutions or to activate irrigants by means of ultrasonic/sonic devices or negative pressure devices.
The more the needle is close to the working length, the more performing the irrigation is: for this reason, using products that follow the anatomy of the prepared root canal can help in this clinical step. On the other hand, the flux has not to be violent in order to decrease the risk of extruding debris into the periapical tissues.
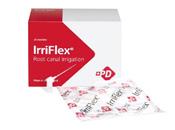
Several articles described the use of a novel polypropylene needle (IrriFlex, Produits Dentaires SA, Switzerland) characterized by a back-to-back side vent design that help the clinician irrigating efficiently and safely the root canal space. This product, with his 30G tip, has the plus of reaching effortlessly the working length and to bring a high volume of irrigant close to the apex.
The product has been shown effective in curved canals, but what about challenging cases?

The following case shows the use of IrriFlex.
Case
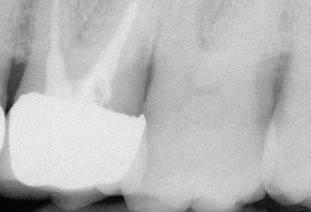
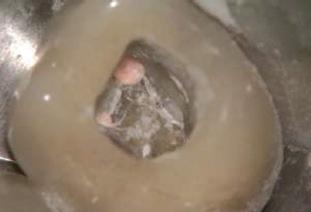
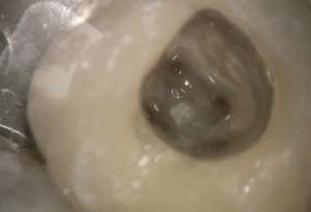
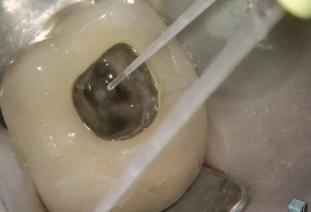
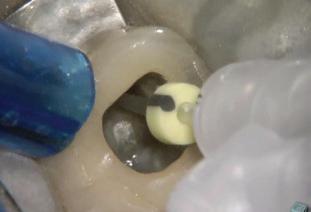
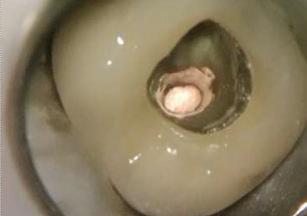
A 62 years old patient was referred to our clinic for endodontic retreatment: the patient reported swelling to the upper left part of the gum. The radiographic examination showed the presence of an existing endodontic therapy and of periapical radiolucencies (Fig. 1). Since the existing therapy could be improved, we decided to retreat the tooth passing through the existing crown. After positioning the rubber dam (Fig. 2), the existing composite filling in the centre of the crown was removed by using a diamond coated bur driven by a high-speed handpiece. In this way, the access cavity was executed and refined in order to see the pulp cham-ber (Fig. 3). The existing root canal filling was removed thanks to the use of rotary instruments specifically designed for retreatment, then ultrasonic tips were used to remove the remnants of the pull chamber floor. The chamber was filled with 5% sodium hypochlorite (Fig. 4) and the MB2 canal, that had not been shaped-cleaned-filled during the initial treatment, was found and it underwent the standard protocol for shaping. Considering the presence of an endodontic lesion and swelling, a lot of time was dedicated to decontamination of the root canal system (Fig. 5). The device chosen to deliver the irrigating solution right to the working length was IrriFlex (Produits Dentaires SA, Switzerland) (Fig. 6) because, thanks to its flexibility, it was able to deliver the irrigant to the apical third of each root, without any effort, without stopping in case of curvatures. The irrigant was then activated by means of ultrasonic inserts according to the indications given by Tonini et al. After ensuring that the root canals were dry, they were filled according to the warm gutta percha compaction technique (Fig. 8-10). After that, the access cavity was filled by means of a direct composite restoration (Fig. 11) and a post operative x-ray was taken in order to check the final result (Fig. 12).
24 0800 808 855
ENDODONTICS







25 henryschein.co.nz
MARCO MARTIGNONI
DR
Fig. 1
Fig. 2
Fig. 3
Fig. 4
Fig. 5
Fig. 6
Fig. 7
Fig. 8
Fig. 9
Fig. 10
Fig. 11
Fig. 12
Code
Irriflex
website CLICK HERE ENDODONTICS
Scan QR
to view
Range or visit
AUTOMATED INSTRUMENT CLEANING
ULTRASONICS VS. MEDICAL GRADE WASHERS
In 1916 The Medical Summary journal reported, “The possibility of the transmission of disease through the medium of dental instruments has probably been considered by every occupant of the dentist’s chair.”
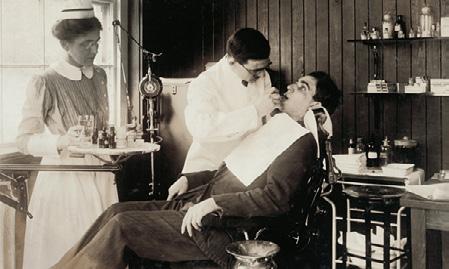
One can only assume that healthcare workers were considering that same risk throughout their day at work. Within a dental clinic, one of the most potentially hazardous steps in the reprocessing cycle is the cleaning of contaminated instruments; and yet, in 1976 instruments were still only cleaned manually with a short handled brush, sometimes only disinfected and not sterilised, and then stored unwrapped.
It wasn’t until the late 1980’s that Occupational Safety and Health Administration (OSHA) recognised the hazards that healthcare workers were being exposed to and released the first mandatory standard infection control procedures for dentists. This was then followed by the issuing of the final Mandatory Bloodborne Pathogens Standard in 1991. While these were critical steps in protecting healthcare workers from hazards faced in their occupation, OSHA’s sole focus are the employees and their standard does not address patient safety. Thus, to protect both the patient and the healthcare workers, the Centers for Disease Control and Prevention (CDC) issued their first Infection Control Recommendations for dentistry in 1993, and subsequently the first Dental Infection Control Guidelines in 2003.

Thankfully infection control guidelines have come a long way since then and, as patients, we trust that everything is being done to protect us from infections and diseases caused by improper reprocessing and cross contamination. We trust that guidelines are being followed and standards of practice are being adhered to. The patient’s safety and that of every healthcare worker in the dental office, needs to be the number one priority.
There are two methods to clean dental instruments manual and automated cleaning. Manual cleaning of instruments is not recommended because of the risk it presents to the healthcare worker. In both the 2003 guidelines and the 2016 Summary of Infection Prevention Practices in Dental Settings, the CDC recommends using an automated cleaner such as ultrasonic cleaners, or medical grade washers “to improve cleaning effectiveness and decrease worker exposure to blood.” However, of the two automated options, which is safer and more efficient?
A 2016 study done by the Dental Advisor showed that ultrasonic solutions can become up to 70 times more contaminated over the course of the day when the prepared solution is used several times to clean instruments. Furthermore, the average microbial contamination at the beginning of the day was 2190 cfu/mL (Table 1), which is 83% higher than the EPA regulated microbial levels for potable water.
26 0800 808 855 INFECTION CONTROL
Photograph of a patient in a dentist’s chair having dental work (by Lewis Wickes Hine, American, 1874-1940), 1917. Silver print. (Photo by GraphicaArtis/Getty Images)
This finding suggests that even when changing the ultrasonic solutions regularly there is still residual contamination from previous runs, requiring the ultrasonic chamber to be cleaned thoroughly at the end of each work day.
A medical grade washer, on the other hand, uses fresh water and cleaning solution for each cycle. In addition some medical grade washers, such as SciCan’s HYDRIM units even have a self-cleaning cycle that can be run periodically.
When using an ultrasonic there are still many steps involved in the preparation of instruments, such as pre-soaking and scrubbing instruments to remove any gross debris, loading, unloading, rinsing, inspecting, sorting, and drying the instruments before preparing them to be sterilised. All these steps involve handling the contaminated instruments thereby increasing the risk of being exposed to blood and body fluids, as well as the risk of sharps injuries. This risk increases dramatically when using the ‘pat dry’ method to dry the instruments.
Alternatively, when using a medical grade washer, the process only involves loading, unloading, inspecting and preparing the instruments for sterilisation. Ultimately a medical grade washer is the safer and more effective option, greatly decreasing microbial contamination and the risk of exposure and injuries.

A medical grade washer is also more time efficient. Medical grade automated washers are designed to improve the workflow while protecting healthcare workers and patients. According to DentistryIQ, “the time saved by automated washing compared to ultrasonic cleaning is approximately one hour of labor for every nine procedural set-ups.”

Another benefit of a medical grade washer is that most can record cycle data. For example, SciCan’s G4 technology’s automatically store all the cycle data via USB and online. This feature saves the office time by removing the need to manually log cleaning cycles. Moreover, it provides the office the peace of mind of always being prepared for any audit.

27 henryschein.co.nz
INFECTION CONTROL
10,000 0 20,000 Sample, Day 1Sample, Day 2Sample, Day 3Average 2,920 30,000 40,000 50,000 60,000 70,000 80,000 90,000 Beginning of Day Micr obial Co ntamination (cfu/ml) End of Day 61,000 81,000 38,000 56,000 3,600 500 4,150
LOUISA VON HEYNITZ Product Manager Scican Ltd
Hydrim C 61 table top
STEPS INTO STERI
STEP 2 - PREPERATION & PACKAGING
The procedures required to prepare a contaminated reusable device ready for its intended use involve several steps. Known as instrument reprocessing, these steps follow an orderly flow from cleaning through to sterilisation and storage. In the previous issue of Dental Solutions, we discussed Step 1 - receiving, cleaning, and decontamination. Now that the instruments are clean and dry, we can proceed through to Step 2 – Preparation and Packaging.
This is the clean zone of the reprocessing area, where reusable devices are prepared and packaged. An understanding of the Spaulding Classification System is helpful for this step, as it guides the dental team in addressing the amount of preparation and/ or packaging a reusable instrument may require. The Spaulding system classifies reusable items according to their intended use and the risk of transmission of infectious agents.
Critical devices enter normally sterile tissue or the vascular system, therefore must be sterile at the point of use. These items are packaged in bags or wrapped before sterilisation and require batch control identification (BCI).
Semi-Critical devices contact intact mucous membranes or non-intact skin but do not enter the tissues. Instruments used in semi-critical procedures require sterilisation, however are not required to be sterile at the point of use, therefore placing them in bags or wraps is optional.
Non-Critical devices contact intact skin but not mucous membranes and have the least risk of infection transmission.
The classification of an item may change depending on its use, for example, tweezers and periodontal instruments may be classified as critical or semicritical. To avoid confusion and ensure consistency when packaging instruments, it is recommended that semi-critical instruments be bagged or wrapped to keep the items clean and make for easy storage.
Preparation
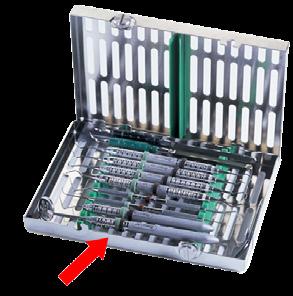
To save time and for convenience, instruments can be organised by procedure and placed in cassettes, rather than individually packaging every instrument. When considering cassettes make sure their size is compatible with your sterilisation equipment.

Hu-Friedy’s small 5-instrument cassettes (HF-IM6056) will fit most ultrasonic baths and steam sterilisers. Coding cassettes with coloured tabs (HF-IMS12911) will help keep them organized, and with matching tubs (ZC-20Z463R) and trays (ZC-20Z101R) finding the instruments required for certain procedures is easy.
To quickly identify instruments, specifically designed silicone rings can be used that will not impede cleaning or sterilisation. These colour-coded ID bands (HF-IMS12811) help make sure the right instruments get placed back into the right cassettes and are laid out in the correct order.
28 0800 808 855 INFECTION CONTROL 28
0800 855
1 2 3 4
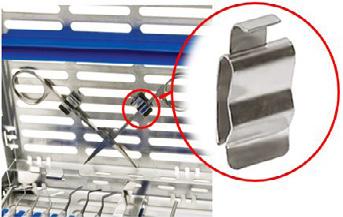
Instruments with hinges or ratchets must remain open and unlocked to ensure steam contacts all parts. This can be achieved by using clips (HF-IM1002) to secure them to the lid of a cassette.
The purpose of such indicators is to ensure that instrument packs that have not been processed are not released for patient use. When using pouches to pack cassettes, the Hu-Friedy Bagette Pouches (HF-IMS1239) are specifically designed to optimise the cassette fit, reducing bulky storage and simplifying packaging time.
Internal chemical indicators are placed inside sterile packages during assembly. The Attest Type 5 integrating indicator (MD-1243A) with its moving front ink window provides an easy-to-read ‘Accept or Reject’ result and can be used in all 121 –135oC steam sterilisation cycles.They are designed to indicate that steam has penetrated through the packaging materials and that appropriate conditions have been met inside the pack.
Packaging
The intention of packaging is to allow penetration of the sterilising agent and maintain sterility of the processed item after sterilisation. The packaging material must permit the removal of air, the penetration of steam into the pack, and the removal of steam and water vapour after sterilisation. There are several packaging options including self-sealing laminate/paper bags or pouches, synthetic wraps, linen and aluminium trays and boxes.
The Maxima Sterilisation Pouches (HS-9006154) conform to high regulatory standards. They not only have an external chemical indicator (CI), but also an isolated internal chemical indicator that indicates the instruments have undergone sterilisation inside the pouch. External chemical indicators are placed on the outside of the packages to show whether the pack has been exposed to a sterilisation process or not.

References
ADA,
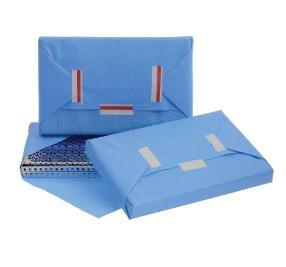
Synthetic wraps are strong nonwoven fabrics with good flexibility and tensile strength. Intended for single use, the fabric is known as SMS (Spunbond Meltblown Spunbond). The spunbond layer (S) provides good filtration properties, and is fluid repellent, while the meltblown layer (M) with its very small porous size ensures a strong bacterial barrier. Small 5-instrument cassettes can be wrapped with IMS Sterilisation wrap (IMS-1217), and for the larger 8 to 10-instrument cassettes use Kimguard Sterile wrap (KC-10824). Autoclave tape (MD-1322-18) is a recommended closure for wrapped sets. When labelling wrapped kits, writing should always be done on autoclave tape, not on the packaging material.
https://www.ada.org.au/Dental-Professionals/Publications/Infection-Control/Guidelines-for-InfectionControl/Guidelines-for-Infection-Control-V4.aspx
Dental Council, https://www.dcnz.org.nz/assets/Uploads/Consultations/2015/Infectionprevention-and-control-practicestandard-effective1May16.pd
CDC, https://www.cdc.gov/oralhealth/infectioncontrol/faqs/packaging-storing.html
The products listed are provided as suggestions only.
29 henryschein.co.nz INFECTION CONTROL 29
STERILISATION WRAP UPDATE PACKAGING
Why wrap?
Hu-Friedy sterilisation wrap is a wet formed, nonwoven fabric compromised of natural wood pulp bonded with resin binder.

During manufacturing, the wrap components are bonded together by entangling their fibres of filaments mechanically, thermally, or chemically. This bonded web of materials creates what is called a tortuous path.

During steam sterilisation, steam is able to enter the wrap due to the extreme pressure present.
Post sterilisation, the tortuous path created by the fibres prevents bacteria from entering.
Sterilisation packaging requirements
• Must be an FDA cleared medical device

• Suitable for steam sterilisation (temperature resistance up to at least 141 °C with sufficient steam permeability)
• Sufficient protection of the instruments and the sterilisation packaging against mechanical damage
• Sterilisation wrap should be used in accordance with the recommendations of the following standards:
i ANSI/AAMI ST79: Comprehensive Guide to Steam Sterilisation and Sterility Assurance in Health Care Facilities
i i CDC Guidelines for Infection Prevention in Dental Healthcare Settings
Tips for packaging
• Ensure all instruments and cassettes are dry before packaging for sterilisation.
• After cleaning, critical & semicritical instruments should be inspected for remaining debris.
Hu-Friedy wrap material is mostly composed of wood pulp, but there is an added polymer that aids in bonding the wood fibres. There is a sustainability advantage in that the main component, wood pulp, is a fully renewable resource. Many other wraps are composed of petrol/oil derived plastics, which have no sustainability.
• An internal chemical indicator should be placed inside each instrument package prior to sterilisation. If the internal indicator is not visible from outside the package, an external indicator should be affixed to the pack.
• Packages should be labeled with the date and, if multiple sterilisers are used within the facility, the steriliser used should also be labeled. (This simplifies retrieval of processed items in case of a sterilisation failure.)
• When packaging instruments and cassettes, ensure packaging does not have open gaps
30 0800 808 855 INFECTION CONTROL
Visual representation of the path that a potential bacteria would have to take.
After sterilisation, wrapped items must be stored in a dedicated space free from dust and contamination. It is also important to note they must ideally be stored in ‘enclosures’ due to risks of environmental contamination. Often there are open shelves for storage in the sterilisation area or treatment room. To ensure your sterile packs are not compromised, you may want to consider doors or draws as a more suitable storage option.


HOW TO WRAP

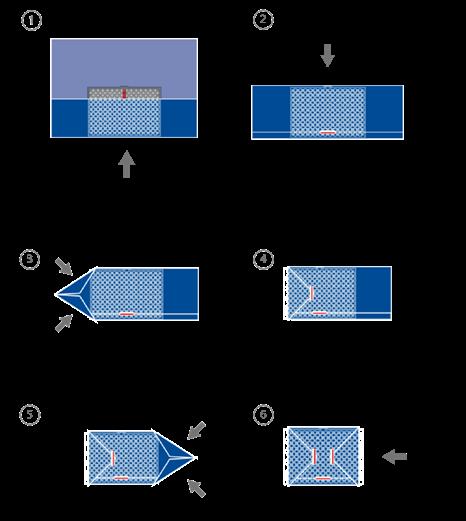
31 henryschein.co.nz INFECTION CONTROL
gift technique
technique
Standard
Hospital
Scan the QR Codes below to watch the ”How to wrap” demonstration videos
CHEMICAL INDICATORS FOR
MONITORING STERILISATION PROCESSES
Whichever sterilisation process is used, it must be validated and routinely monitored to ensure ongoing efficacy.1 The characteristics that must be monitored within the process are those that kill any microbial contaminants present on the medical device; these are called the process variables.2 In steam sterilisation, the characteristics of the process which cause microbial kill are the temperature and time of exposure in the presence of moisture.3
There are three basic methods for monitoring sterilisation processes. One measures the physical characteristics of the process such as temperature or time of exposure (physical indicators). Another consists of a preparation of bacterial spores, presenting a known resistance to the process, but inactivated by an efficacious process (biological indicators). The third method consists of a mixture of reactive chemicals (printed on a substrate) that respond to defined characteristics of the processes so that visible change is observed after suitable exposure (chemical indicators; CIs). It is the purpose of this article to expand further on this latter approach for monitoring sterilisation processes.
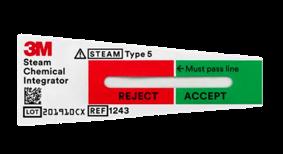
Chemical indicators are, in essence, products that give some visual evidence of exposure to a specific combination of process variables. Thus, in moist heat sterilisation, they respond to time and temperature in the presence of moisture when sterilised.
The simplest form of chemical indicator is an ink printed on a substrate. The substrate may be paper or plastic based with an adhesive label that can be fixed onto the outside of surgical instrument sets and sterile packs. The ink might be printed directly onto sterile packaging materials such as paper bags or pouches. The ink might also be applied to adhesive tapes which can be used to secure instrument sets wrapped in flexible wrapping materials.4
There are also chemical indicators called moving front CIs.5 These CIs have a more complex construction. They consist of a pellet of dye which is placed within an
indentation on a foil base. A paper wick is then placed in contact with the dye pellet and the whole assembly is then sandwiched between a semi-permeable membrane and the foil base. An adhesive label is then usually placed over the semi-permeable membrane with informational material printed on it. Figure 1, below, shows the construction of a typical moving front chemical indicator.
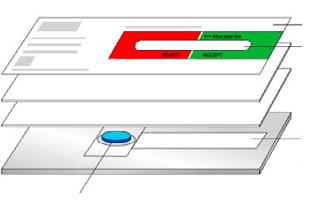
Paper/film top cover steam penetration rate controlling Clear plastic display window
Chemical Indicators have also been supplied in other formats in which they are incorporated into some form of test device which is then used in a special test to ensure the steriliser is functioning correctly, for example, the Bowie and Dick test.6
Chemical indicator inks
The inks used for making printed CIs are usually made from chemical substances which react together when exposed to the variables of a sterilisation process. The chemical reactions which take place usually give rise to a colour change which can then be interpreted by the observer. As an example, two reagents may be included in the ink which gives a cream starting colour but during the reaction, they combine to give a black-colored by-product.6 Alternatively, the colour change may be due to the two reacting chemicals giving rise to a change that causes an additional reagent included in the ink to change colour. For example, the ink may contain a pH indicator that changes colour due to the release of an acidic by-product from the reaction between the two principal reagents.
32 0800 808 855
INFECTION CONTROL
Paper wick strip bottom cover
Steam and temperature sensitive checmical pellet
A third category of ink is one in which the moisture present in the sterilisation process causes the ink to change colour. In this instance, the chemical reagent is reacting with the moisture in the steam to change from one hydrated state to a second,7 this gives rise to the colour change.
The overarching purpose of such indicators is to ensure that instrument packs that have not been processed are not released. They are also used by the clinician to ensure that they are using a sterile set that has been processed. Such indicators should have a very clear colour change that cannot be misinterpreted.
Prep your packs
Internal chemical indicators are placed inside sterile packs during assembly. They are designed to indicate that sterilising agent has penetrated through the packaging materials and appropriate conditions have been met at the point of placement. It is important to understand that such indicators cannot alone be used to judge if the pack is sterile; other factors must also be considered.1 Internal pack indicators are primarily interpreted by the clinicians, and it is vital that they are appropriately trained in the interpretation of the CIs and have available appropriate reference material such as wall charts and clear instructions
Chemical Indicators are therefore an extremely useful and practical tool for ensuring sterilisation processes are functioning correctly.
It is important to recognise that CIs are designed for use in specific sterilisation processes because the chemical reagents included react to the process variables associated with the sterilisation process. Thus, a steam CI should not be used in an ethylene oxide (EO) sterilisation process and vice versa because the EO indicator will have reagents that are designed to react with the EO present in the process.
For moving front chemical indicators, the colour change is due to a physical change, rather than a chemical reaction. When exposed to the process variables the dye pellet melts and begins to migrate along the attached wick due to capillary action. The speed of migration is governed by the temperature of exposure and by the presence of moisture passing through the semipermeable membrane.5, 8
The use of chemical indicators
Chemical indicators monitor various aspects of a sterilisation process and can be divided into three categories based on how they are employed:
• External chemical indicators.

• Internal chemical indicators.
• Special test indicators.
External chemical indicators are placed on the outside of every sterile pack to give a clear indication of whether the pack has been exposed to a sterilisation process or not. It is important to understand that these types of indicators do not provide any evidence that the pack is sterile, but simply that the pack has been put through a process.
References:
1. ANSI/AAMI ST79:2017, Comprehensive Guide to steam sterilization and sterility assurance in health care facilities, 2021, AAMI, N Glebe Rod, Arlington VA
2. ISO 11139 : 2018, Sterilization of health care products, Vocabulary – Terms used in sterilization and related equipment and process standards, International Standards Organisation, Geneva, Switzerland
3. ISO 17665-1:2006, Sterilization of health care products – Moist Heat – Part 1: Requirements for the development, validation and routine control of a sterilization process for medical devices (ISO 17665-1:2006), International Standards Organisation, Geneva, Switzerland.
4. 3M autoclave tape patent
5. Bunn, J.L and Sykes, I,K. A chemical indicator for the rapid measurement of Fo values, J Appl Bacteriol, 51, 143-147, 1981
6. Bowie, J. et al, The Bowie and Dick autoclave tape test, Lancet (16), 586-587 (1963)
7. Ignacio, R.T, Simplified sterilizer vacuum test pack, Canadian patent 2125543, 1994
8. Foley, T.A, Steam sterilization indicator, US patent 4448548, 1984
33 henryschein.co.nz
Figure 2 shows examples of the reactions which are used.
INFECTION CONTROL
WORKING SHORT-STAFFED
STRATEGIES TO REDUCE STRESS AND STAY PRODUCTIVE

Imagine getting to work at the dental practice to discover your co-worker called in sick. You might feel bad that they are sick, but then it hits you: you are working short-staffed today. You immediately look at the schedule and see it is heavily booked. Now imagine coming into this kind of environment every day, maybe for weeks or even months! Many of you are dealing with just that.
One of the biggest concerns for dental practices is the difficulties they experience while having to work short-staffed. This was an issue well before COVID-19, but the pandemic certainly exasperated the problem. There are some strategies to maintain production while working short-staffed. Zirc Dental manufactures products to help dental practices become safer, happier, and more efficient.
Zirc’s colour-coded B-Lok instrument trays and procedure tubs help to organize clinical chairside setups, improve time management and increase efficiency. Colour coding allows clinicians to have all of the necessary instruments and adjuncts at their fingertips, and the array of colours looks professional in front of the patients!
Emotional and Financial Stress
The following stressors from working short-staffed can cause burnout, lost revenue, and frustrated teams and patients.
• Running behind schedule
• Decreased production
• Continuous training (temps, subs, family members, cross training team members)
• Inefficient inventory management

• Increased cost of supplies
• Missing items at chairside
• Poor patient perception
• Stressed, unhappy team
• Non-compliancy (OSHA and maintenance schedules)
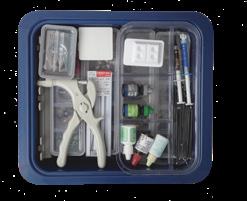
• Increased employee turnover
• Salaries increased and employees working overtime
INFECTION CONTROL 34
0800 808 855
BEFORE AFTER
Tips and tricks to get through the day
1. Morning huddle Be sure that the entire team is present for a morning huddle. Spend fifteen minutes at the beginning of the day to check in with each other and see how everybody is doing. During this time, you will review the schedule from the day before and see if there were any hiccups. A quick discussion will prevent those same pain-points from happening repeatedly. Review the day’s schedule and look for potential bottlenecks. Discuss the best place to add in emergency patients.
2. Re-evaluate procedure times Track how long it takes from setup to tear-down of a procedure when you are working short-staffed to estimate accurate appointment times. Track the times for at least one week and figure out the average time spent. You may need to consider temporarily adding in a little extra time into each procedure. I understand we don’t like to do this, but it may be necessary to prevent patients and/or employees from leaving.
3. Cross-train For example, assistants should be able to schedule appointments and answer phones, just like administrators should know how to get a treatment room set up and reprocess instruments. When we are missing team members, we must have each other’s backs!
4. Evaluate your clinical systems
Do you find that you must go to multiple areas to find what is needed for a procedure? Can’t quickly locate what is needed? Are finding an abundance of expired materials? Perhaps you are running behind schedule or working late to catch up. If so, it is time to consider making some changes. Zirc’s Colour Method is a simple colour code system that identifies each procedure with a different colour for quick and accessible material and instrument management. The Colour Method has been proven to save time and money, increase efficiency, and create a stress-free, cohesive environment.
It can be implemented in five easy steps: Get colourful - Assign each procedure a different colour.
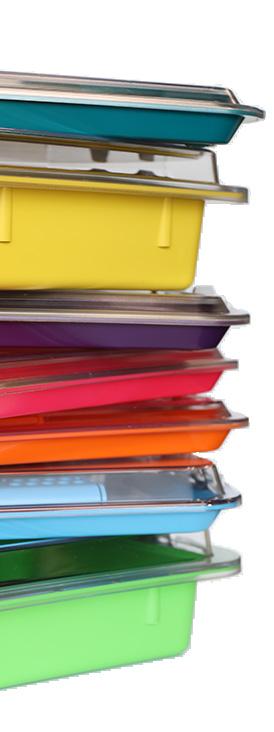
Instrument management - Utilize cassettes, bur organizers, and procedure trays with locking covers to keep everything together and organized from setup to sterilisation.
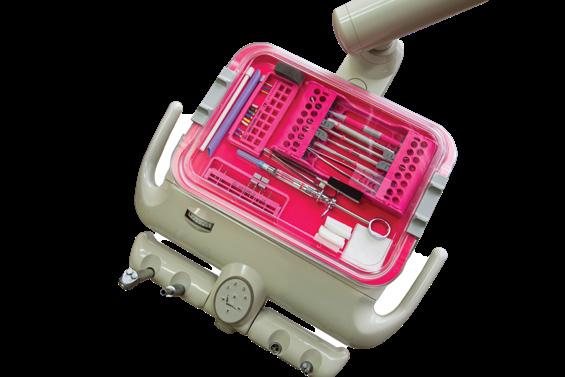
Material management - Procedure tubs become portable drawers for procedurespecific materials. Tubs will reduce the amount of inventory on hand, missing materials at chairside, and lost or expired materials.
Sterilisation Centre - Make it the hub of the practice. Store tubs with materials, trays with the instrument setups, and extra inventory for tub restocking. Simply grab a blue tray and a blue tub, and you will have everything needed for the procedure.
Treatment rooms - Countertops should be free of clutter. Utilize the drawers or cabinets to store disposables such as cotton products, gloves, saliva ejectors, etc.
Working short-staffed doesn’t mean that our days must be chaotic or unproductive! Implement some strategies that will provide a sense of calm as we weather out the storm.
Sometimes challenging times is what is needed to force us to make improvements in our work practices. The team can be happier and more productive whether working short-handed, or not.
INFECTION CONTROL 35
henryschein.co.nz
ANTIVIRAL * MASKS ARE HERE
ProGear Level 3 Antiviral Surgical Masks contain Oxafence Active Protection technology. Oxafence begins inactivating viruses* immediately and inactivates 99% by 5 minutes. 99.9% inactivation is achieved by 15 minutes. It’s the additional layer of protection health, dental, and medical workers deserve. The ProGear Antiviral Masks with Oxafence are made in the USA with premium materials for enhanced comfort, fit, and breathability.
How Oxafence Works
ProGear® L3 Surgical Masks include Oxafence® Active Protection. The Oxafence technology was developed on principles of Photodynamic Therapy (PDT), which deploys light, oxygen, and colourants/ dyes to fend against viruses*.

The protective dyes in Oxafence absorb and transfer the energy from ambient light to the oxygen in the air thereby generating singlet oxygen. Singlet oxygen creates a forcefield of protection on the mask’s surface and can destroy viruses* if they become present via Antimicrobial Photodynamic Inactivation (aPDI).
The ProGear® Difference. Pro Quality. Pro Function. Pro Comfort.

• Level 3 Fluid Resistance
• BFE & PFE Filtrations Ratings Above 99%
• 4-layer Surgical Mask with Ear Loops
• Patented Wave-Fit Pre-bent Fog-reducing Nosepiece
• Snug, Secure Fit at the Sides
Oxafence Active Protection®.
Quick-acting & Long-lasting Viral Inactivation.
• Starts Working Immediately
• Provides Ongoing Inactivation of Viruses*
• Protects Masks While Being Worn
• Simple Ingredients. No Earth Metals.
• Technology Supported by Global Health Leaders & Peer-reviewed Data.**
About the Manufacturers
Prestige Ameritech is a designer and manufacturer of premium disposable medical devices, including ProGear surgical masks, and the automated machinery that produces them. The company is the United States’ largest domestic surgical mask manufacturer.
Singletto, Inc. manufactures Oxafence Mask Spray and licenses its proprietary Oxafence Active Protection technology to healthcare and consumer brands and manufacturers to provide solutions for existing and future products, technology, and systems.

*Tested against SARS-CoV-2 and Influenza A/H1N1 in vitro. Oxafence starts working immediately in visible light but is specifically optimised for normal, indoor lighting environments where mask use/wear is common (typically ~500-700 lux). Oxafence inactivates 99% of SARS-CoV-2 and H1N1 in 5 minutes and 99.9% in 15 minutes in ambient light (~500 lux). Any clinical event has not been evaluated.
**For Peer-Reviewed Research, please visit: Infection Control and Hospital Epidemiology (2021) and American Journal of Infection Control (2022).
Surgical masks, when worn properly, may reduce potential exposure to blood and bodily fluids. No surgical mask eliminates the risk of contracting any disease or infection. If pregnant, nursing, or hypersensitive to Methylene Blue, consult your physician prior to use. This product is not made with natural rubber latex. Do not use in MRI. Information may not be applicable to countries outside of New Zealand, nor may products marketed in New Zealand necessarily be available in other countries. This does not constitute promotion of products outside New Zealand.
36 0800 808 855 INFECTION CONTROL
IT’S TIME FOR MASKS TO KILL VIRUSES* RATHER THAN JUST TRAPPING OR SHIELDING THEM
INSTRUMENT PRE-CLEANING
CLEAN AT POINT OF USE
Instrument cleaning cannot always occur immediately after use. If bioburden is left on the instrument surface, it hinders the sterilisation process and will block steam from making contact with the instrument surface. The pre-cleaning of instruments lessens the chances of bioburden drying and helps remove adherent materials. Spraying instruments with special chemicals or placing them into holding solutions to keep them moist is good practice to prepare the instruments for disinfection and sterilisation. Empower Foam is an ideal point-of-use precleaner used to hold contaminated instruments in suspension. It is a ready-to-use dual enzymatic foaming spray perfect for the pre-cleaning of instruments. The thick foam effectively removes blood, tissue, mucous and other protein-rich body fluids. EmPower Foam saves time by starting the pre-cleaning process for you. Perfect for use in busy dental practices where instrument cleaning is not immediately available.
Easy to use: Wear appropriate PPE when handling chemicals and contaminated items.
1. At chairside, remove disposable items from
2. Saturate instruments with EmPower Foam. (This may also be done in the sterilisation
3. Allow instruments to remain covered with enzymatic foam to dissolve bioburden. Reapply as needed to keep instruments.

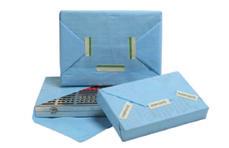
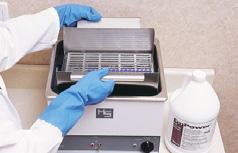


INSPECT instruments carefully for damage and debris.
1. If instruments are not clean, repeat
2. Air dry or carefully dry with a clean towel.
3. Manual cleaning with brush or irrigation of lumens should occur only if soil remains after automated cleaning processes, and should be performed under water to help reduce splashing.
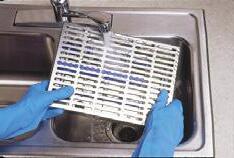
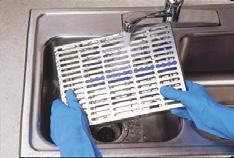


CLEAN in ultrasonic/automated cleaning device. Place instruments in ultrasonic cleaner filled with detergent, or cycle instruments in automated washer according to the manufacturers instructions. Activate the ultrasonic bath for the appropriate time to remove soil.
Package the instruments according to your practice guidelines and proceed to sterilisation in an approved steam steriliser following recommended practices and manufacturer directions.
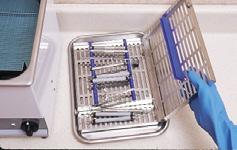


37 henryschein.co.nz INFECTION CONTROL
Scan QR Code or visit website CLICK HERE
RINSE instruments thoroughly.
RELIEVING AND PREVENTING THE ACHES AND PAINS
of Working as a Dental Hygienist
Dental hygiene has always been a profession that taxes the mind and the body.
But you may be noticing a few more physical aches and pains lately, especially if you are hand scaling— instead of using ultrasonics—to reduce aerosol production.
If you’re like most hygienists, it’s not just your hands, wrists, and arms that hurt. Your daily work can also take a toll on your back, neck, shoulders, and legs.
Dental hygienists are at risk for conditions such as carpal tunnel syndrome, repetitive motion injuries, and even chronic headaches.
This pain can strike at any point during your career: Between 64% and 93% of dental professionals experience general musculoskeletal pain.
In fact, musculoskeletal disorders are the leading reason for early retirement among dentists.
There is now a solution to your woes, the NEW Harmony™ Ergonomic Scalers and Curettes. This scientifically proven hand scaling solution is designed with TrueFit™ Technology, which collected 2.8 million data points via research, studies, and tests.

With Harmony™ Ergonomic Scalers and Curettes, you will discover relief for your hands down to a science.
Reduces pinch force up to 65%1
This reduces the amount of pressure a clinician needs to
apply when using the instrument, which may alleviate hand fatigue and the injury risk due to repetitive motions. 5,6,7,8
37% less pressure applied to tooth2
The Harmony™ Scaler can increase patient comfort and reduce clinician fatigue because it requires less pressure to the tooth when scaling.
Designed with TrueFit™ Technology
HuFriedyGroup pioneered TrueFit Technology to provide true ergonomic benefits driven by scientific evidence.
This advanced, sensorbased testing system measured over 2.8 million data points for pinch force in the finger and pressure applied to the tooth when scaling.4
Secure and Nimble Grasp
The silicone grip has been extended by 30%, which can provide a secure and nimble grasp while using the instrument.
The geometric pattern is specifically designed to maximize grip in all directions.
Confidence in Your Hand
The durable metal handle, which features a recessed double-helix texture, is designed for optimal tactile sensitivity and to reduce tactile fatigue.
Fit for you, with over 2.8 Million reasons to believe Comfortably maneuver and roll the scaler due to the round shape of the handle and the smooth transition to the functional shank.
38 0800 808 855 38 0800 808 855 INSTRUMENTS
With over 2.8 million data points measured, this handle was designed to easily adapt to your individual grasp.
EverEdge™ 2.0 Working Ends
EverEdge 2.0 working ends are 72% sharper than the next leading competitor,3 allowing clinicians to efficiently remove calculus while applying less pressure to the handle.
Less pressure to do the same amount of work creates a more comfortable experience for you and your patient.
Learn how to scale in perfect Harmony at hu-friedy.com/harmony
Testimonials
By using the new Harmony™ Scaler, a reduction of biomechanical stress on fingers and hands will occur compared to other available scalers on the market.
Klaudia Kulpa-Lindgren MOT, OTR/L
Sabrina (Chia-Chun) Chang MOT, OTR/L, CHT, CKTP, CEAS
I could feel the difference in my grasp the first time I scaled with a Harmony Scaler.
Tami Wanless RDH, MED
1) When comparing leading scaler designs, cylindrical handles had a reduction in pinch force up to 52% and shaped handles had a reduction in pinch force up to 65%. Data on file. Available upon request.
2) Data on file, compared to other leading scaler designs. Available upon request.
3) Data on file. Available upon request
4) Compared to the Hu-Friedy #9 metal handle, these are the nominal values. Data on file. Available on request.
5) A systematic review of musculoskeletal disorders among dental professionals.
6) Rempel, David, et al. “The Effects of Periodontal Curette Handle Weight and Diameter on Arm Pain.” The Journal of the American Dental Association, vol. 143, no. 10, 2012, pp. 1105–1113., doi:10.14219/ jada.archive.2012.0041.
7) Lalumandier, James A, and Scott D McPhee. “Prevalence and Risk Factors of Hand Problems and Carpal Tunnel Syndrome among Dental Hygienists.” Journal of Dental Hygiene, vol. 75, no. II, 2001, pp. 130–134.
8) Mulimani P, Hoe VCW, Hayes MJ, Idiculla JJ, Abas ABL, Karanth L., Ergonomic interventions for preventing musculoskeletal disorders in dental care practitioners. Cochrane Database of Systematic Reviews 2018, Issue 10. Art. No.: CD011261. DOI: 10.1002/14651858 CD011261.pub2.
All company and product names are trademarks of Hu-Friedy Mfg. Co., LLC, its affiliates or related companies, unless otherwise noted.
©2020 Hu-Friedy Mfg. Co., LLC. All rights reserved. HFL-483AUS/1220

039 henryschein.co.nz 39 1300 65 88 22
Scan here for further information INSTRUMENTS
DENTINAL HYPERSENSITIVITY
TOP TIPS TO MANAGE
Learning how to help our patients manage this condition ultimately helps us improve their dental health, well-being and quality of life. From my own clinical experience, I share my top tips to help you manage dentinal hypersensitivity in your patients.
Dentinal hypersensitivity occurs when the dentine is exposed either through the loss of enamel or exposure of root surfaces by gingival recession. The hydrodynamic theory of dentinal hypersensitivity posits that, any stimulus of the fluid within the dentinal tubules leads to activation of nociceptive (pain) fibres which are interpreted by the brain as sensitivity or pain.1
These stimuli are sourced from temperature changes (hot or cold), certain foods (sweet, sour or spicy), or tactile changes during toothbrushing or touching the exposed area with a finger.

The first risk factor for dentinal hypersensitivity is exposure of the root surface of the tooth caused by gingival recession or periodontal disease. Given the root surfaces of teeth are not covered by protective enamel, these exposed dentinal tubules can become vulnerable to stimuli and therefore sensitivity.
The second way dentinal hypersensitivity can be caused is from the loss of the enamel surface that protects the dentine. This can be a consequence of acid erosion, toothbrush abrasion or abfraction of the cervical surface of the tooth.2
Understanding the aetiology and causes of dentinal hypersensitivity is only part of the challenge as the main challenge is managing our patients who all have individual thresholds of pain/sensitivity.
Here are some top tips to navigate these clinical challenges:
• Switch the patient to a soft manual toothbrush or electric toothbrush - brushing with too much pressure during toothbrushing combined with the micro-abrasive particles in toothpastes which facilitate mechanical removal of plaque can lead to loss of cervical enamel over time leading to exposed dentinal tubules and sensitivity.


Some models of electric toothbrushes come with pressure sensors that flash a red light when brushing with too much force and can be a great tool to prevent further abrasion. If patients are already experiencing some sensitivity, instruct them this will not stop the sensitivity but will prevent further damage from exacerbating the dentine hypersensitivity.3
• Apply a fluoride varnish layer to the sensitive areas in chair - when patients present for a routine hygiene appointment or other dental procedure it can be helpful to apply a fluoride varnish layer to sensitive areas of teeth to provide some short term relief but also aim to strengthen the existing enamel and dentine surfaces.3
40 0800 808 855
PREVENTATIVE
As dental professionals one of the greatest dental concerns our patients report when they sit in our chair is experiencing sensitive teeth.
• Apply a desensitising bonding agent layer to sensitive areas in chair - for patients who get persistent or frequent sensitivity to exposed dentinal tubules where there is no obvious defect of tooth surface, a desensitising bonding layer can be applied to the dried surface and cured to provide a barrier which prevents further stimulation of dentinal tubules thus reducing sensitivity.3
• Switch the patient to using a sensitive toothpaste twice daily - some patients benefit from switching to a sensitive toothpaste (e.g. Colgate Sensitive Pro-Relief*) which has been specially formulated to provide a barrier between the dentinal tubules and oral environment, relieving dentinal hypersensitivity.3
• Switch the patient to higher strength fluoridated toothpaste twice daily - patients who experience dentinal hypersensitivity and have a higher risk of dental caries can use a 5000ppm fluoridated toothpaste which aims to strengthen the existing tooth structure by increasing the likelihood of fluorapatite crystals on the enamel surfaces and dentinal tubules making them more acid resistant.3
• Restore the defective tooth surfaces - Some patients have Non-Carious Cervical Lesions (NCCLs) on the cervical surface of teeth or eroded occlusal surfaces of teeth which can lead to frequent dentinal hypersensitivity and can be relieved permanently by restoring the defective surfaces with composite resin, providing a permanent barrier between the dentinal tubules and oral environment.3
• Suggest gingival grafting to cover exposed root surfaces - for patients who have root surfaces of teeth exposed from gingival recession subsequent to periodontal disease or significant NCCLs may qualify in some cases for a gingival graft which covers the exposed surfaces with grafted gum tissue and thus provides soft tissue coverage of dentinal tubules relieving dentinal hypersensitivity. This procedure can be complex and may require treatment by a specialist periodontist.3
• Educate the patient on the long term management of this condition - this is the most important factor as patients need to be aware that once enamel has been lost it cannot be replaced and so the condition must be managed in the long term.
Any of the management tips suggested above do not guarantee complete cessation of dentinal hypersensitivity permanently but will relieve it and thus improve the quality of life for the patient.3
References
1. Davari A, Ataei E, Assarzadeh H. Dentin hypersensitivity: etiology, diagnosis and treatment; a literature review. J Dent (Shiraz). 2013;14(3):136-145.
2. Colgate. Treatment options for tooth sensitivity. Published January 18, 2023. Accessed January 26, 2023. https://www.colgate.com.au/oralhealth/tooth-sensitivity/treatment-options-fortooth-sensitivity
3. Colgate. Sensitive teeth too cold? What you should know. Published January 18, 2023. Accessed January 26, 2023. https://www. colgate.com.au/oral-health/tooth-sensitivity/ sensitive-teeth-to-cold-what-you-should-know
*Colgate Sensitive Pro-Relief Toothpastes
For the relief of sensitive teeth. For instant relief, apply directly to each sensitive tooth with finger tip and gently massage for 1 minute, up to twice daily. For lasting relief, apply to gentle toothbrush, making sure to brush all sensitive areas of teeth. Brush twice daily. Do not use in children 6 years of age or less. Do not swallow.
Colgate-Palmolive Pty Ltd. 420 George St, Sydney NSW 2000, AU. Phone: 1800 802 307
Colgate-Palmolive Ltd. 45 Knights Rd, Lower Hutt, NZ. Phone: 0800 441 740
Biography
Dr Kaejenn Tchia is a recent graduate working in a corporate private practice in Darwin, Northern Territory. He is the current Treasurer of the Australian Dental Association NT Branch Inc. In 2020, he was an inaugural member of the Bupa Dental Corporation Clinical Advisory Panel, helping guide strategic direction and providing input towards clinician development within the network of practices. He is passionate about helping and collaborating with fellow dental colleagues, recently embarking on a new journey to help recent graduates eliminate burnout through a 6-step B.E.L.I.E.F System through his motivational coaching platform, The Limitless Dentist.
Kaejenn is a member of the Colgate Advocates for Oral Health Editorial Community and hopes to use this platform to raise awareness of the importance of mental health in dentistry and provide mindset tools, which can help his colleagues unlock their next level of growth and success.
 DR KAEJENN TCHIA Darwin Australia
41
PREVENTATIVE
henryschein.co.nz
TAPERED PRO IMPLANT
Predictable, immediate results
Immediate implant treatment requires predictability Tapered Pro implants have been developed based on over 10 years of tapered implant success. The unique design elements provide a predictable solution for immediate treatment.
Design features include
• tapered body and aggressive threads provide primary stability
• end cutting, self-tapping thread design for controlled implant placement in challenging sites

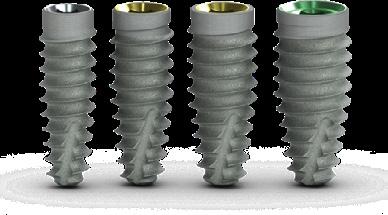
• unique Laser-Lok microchannels create connective tissue attachment and retain crestal bone, allowing better control of aesthetic outcomes
• reduced collar diameter preserves vital bone

• available in 3.8mm, 4.2mm, 4.6mm and 5.2mm diameter
Tapered Pro implants & instruments
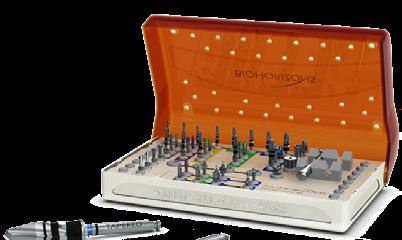
BioHorizons Tapered Pro implants can be placed with the existing freehand and guided surgery kits. The surgical kits include the instrumentation required for Tapered Pro, Tapered Plus, Tapered Internal and Tapered Tissue Level implants.


42 0800 808 855
NEW SURGICAL
CGS4000 – Guided Surgery Kit
TSK4000 – Tapered HD Surgical Kit
For more information please contact Kim Austin 021 712 758 or kim.austin@henryschein.co.nz


43 henryschein.co.nz
SURGICAL START UP OFFERS SURGICAL X10 Tapered Internal Implant X20 Tapered Internal Implant X10 Healing Abutment X20 Healing Abutment X1 Tapered Internal HD Surgical Kit X1 Tapered Internal HD Surgical Kit $6,500 SAVE $3,628
STARTER SPECIAL
$9,490 SAVE $6,440


 DR KAEJENN TCHIA Darwin Australia


