

Care Guide
SETTING UP, OPERATING AND CARING FOR YOUR FURNITURE

Contents
Caring for your furniture
Setting up your furniture
Operating your furniture
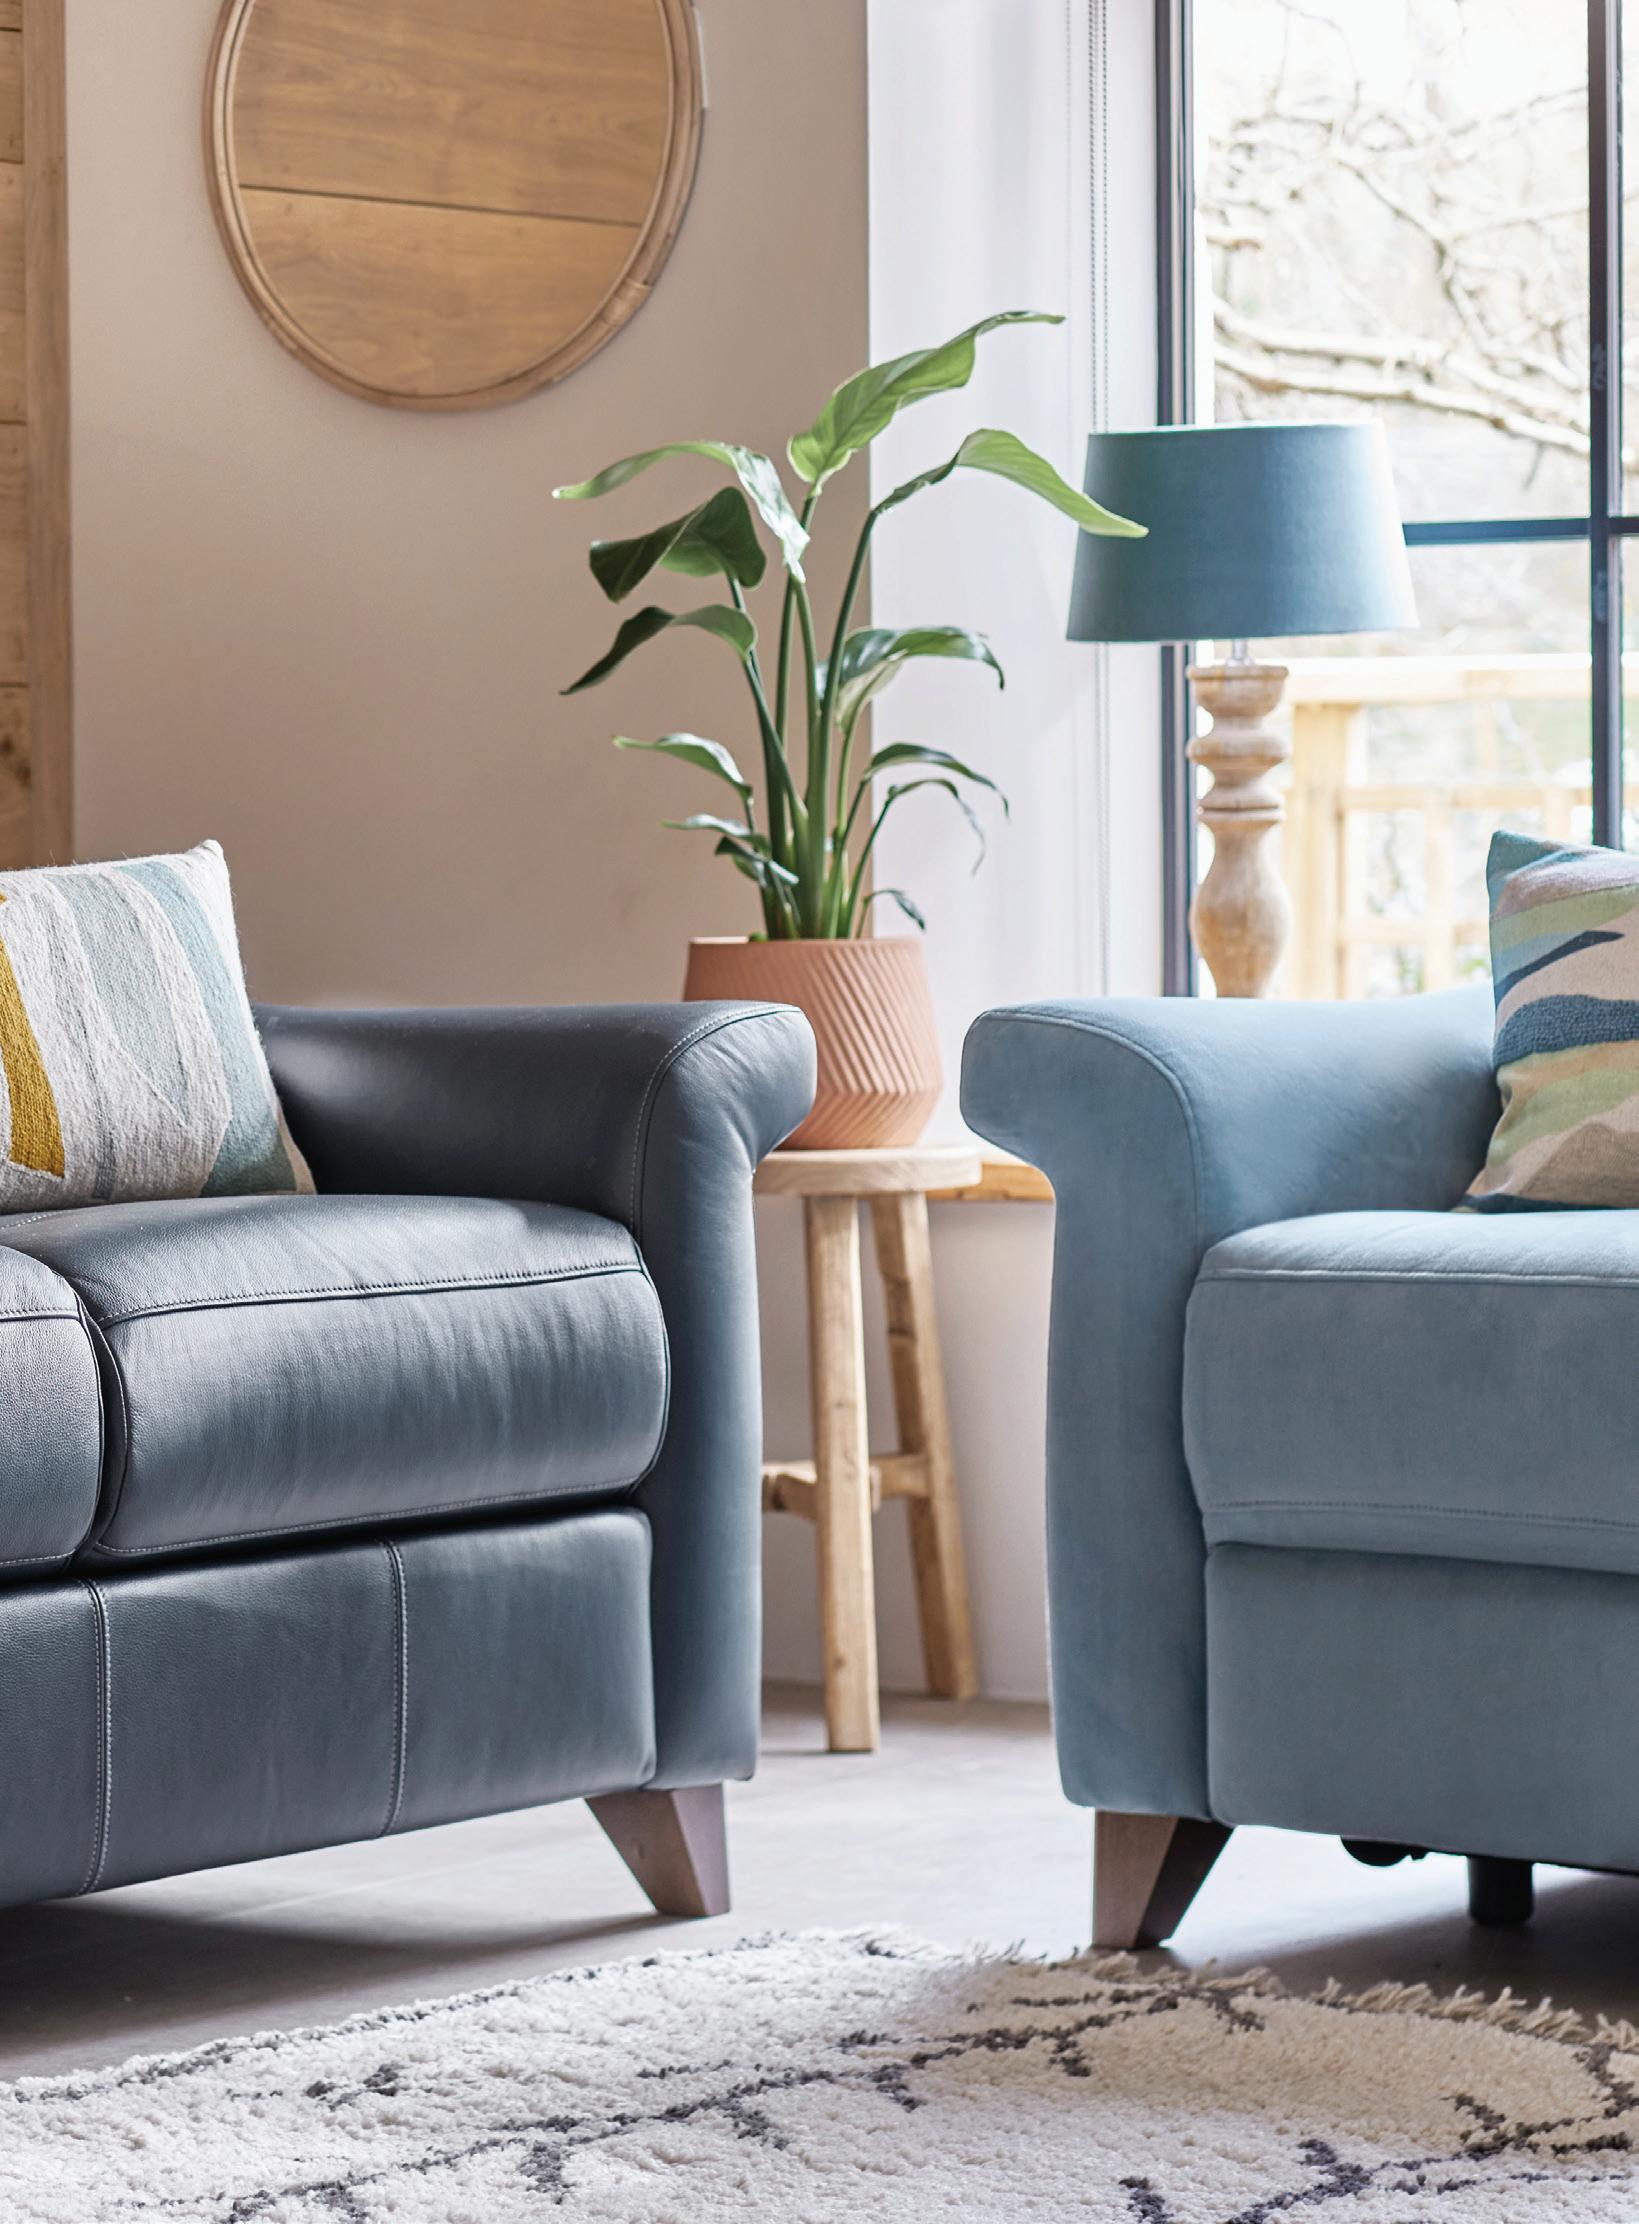
Thank you for choosing us
We hope that you’re delighted with your new purchase – we loved making it for you.
Over the years, we’ve perfected our craft so you can enjoy life’s little moments. Here at G Plan, we are continually looking at ways to evolve our much-loved products. Innovative design, premium materials and exceptional comfort are at the heart of our ethos. And with every sofa made by hand in the UK, you can rely on the comfort and quality of G Plan.
This guide has been created to provide care and safety advice, to help you get the very best from your furniture. Please take a few minutes to read this information – it’s important, we promise.
If you have any queries or concerns about your furniture, please contact the store you purchased it from in the first instance. They will be happy to assist you and will contact G Plan where necessary to help facilitate your query.
Don’t forget to visit www.gplan.co.uk to register your furniture by clicking on the ‘Register Sofa’ button on the home page, or by scanning the below QR code.


Caring for your furniture
Avoid sitting on upholstery with heavily soiled or non-colourfast clothes. Also, do not leave newspapers on your sofa or chair as the ink can stain.
Direct sunlight can cause fading and cover deterioration, so protect furniture where possible by drawing curtains and blinds.
Keep furniture away from direct heat or air conditioning, as this can damage your upholstery.
Avoid sitting or standing on the arms of chairs and sofas to prevent damage to the fillings, padding and fabric.
Please note: While we know children love jumping on sofas, this should be prevented as it can damage the cushion covers and seat platforms.

What to avoid Premium interiors
All G Plan upholstery features premium quality interiors for lasting comfort and quality. When cared for correctly, these cushions should give many years of comfort.
Foam seat cushions
Our premium foam cushions are specially selected to offer the optimum levels of comfort and support.
Each cushion specification is chosen to complement the individual sit
characteristics of its particular model. All our foam seat cushions offer excellent Seat recovery characteristics to help retain their appearance and comfort. interiors will soften over time.
Care should be taken with sharp-edged toys, buckles and jewellery. Take extra care when operating recliners with concealed buttons to avoid scratches and marks.
Trim off any loose threads with sharp scissors, as pulling a thread could leave a hole
Keep pets off furniture to avoid scratches and marks.
Don’t over-wet leather when cleaning (See page 14).
Both fixed feet and castors are designed for use in the home only. Avoid dragging the furniture across exterior surfaces (paths, driveways etc.) as this can damage the feet and subsequently your flooring.
Fibre in back cushions is held in compartments separated by baffles to prevent thinning of heavily used areas.
Cushion Fillings
Some of our G Plan Vintage collection feature 100% recyclable polyester fibre back cushions.
These back cushions are made using 100% recyclable polyester fibre from recycled plastic waste, produced by our supplier Fibreline.
The average sofa cushion uses the equivalent of 100 plastic bottles.


How to dress your furniture
Regular dressing of your furniture should be carried out to ensure it remains in good condition.
All loose cushions should be plumped regularly, with a minimum of six plumps (3 back and front) to minimise creasing and flattening. This is particularly relevant for the pillow back version of the Hatton.
Reversible cushions should be turned at regular intervals and their positions swapped around to enhance their appearance and comfort and minimise wear and tear.
Fixed seat and arm cushions require plumping and re-dressing after every use to keep them in excellent condition. Ensure that the cushions and fabric are straightened and ‘smoothed out’ to their original position.
The fabric pads on chaise style furniture that connect the seat cushion with the kickboard also require dressing after every use.
The pads have to be flexible to accommodate the movement of the kickboard and consequently require realignment and repositioning, especially in the case of three seater sofas.
For more information about how to dress your furniture, please visit our ‘How to adjust and dress your furniture’ Owner’s Video on our YouTube channel.

How to care for fabric upholstery
There are several things you can do to keep your sofa looking in good condition.
If you have purchased a fabric care treatment for your upholstery, please consult your care treatment provider for cleaning advice. Chenille and velvet style fabrics may change appearance after use. This is due to the pile in the fabric moving in different directions as you sit on the upholstery, it is not a fault with the fabric. By brushing the fabric gently with a soft brush, you may be able to restore the pile to its original position.
A light steaming or gentle brushing in the direction of the pile will be beneficial and reduce pressure marking. Avoid heavy or hard brushing or this may damage the fabric.
Lightly vacuum your upholstery once a week to prevent dust from building up. If you allow dust and dirt to accumulate, it can dull colours and speed up wear.


Caring for chenille fabrics
Chenille yarns consist of several strands of thread twisted together with short fibres running crossways trapped between them. It’s these short fibres that create the pile effect.
Chenille yarns are often used to create an uneven, random effect with a soft surface texture. The fabric may then be tumbled to further add to the soft texture. Shading can occur across the piece due to the pile running in different directions. For example one arm may appear darker than the other.
Chenille fabrics have more yarn joins which appear on the surface and are a natural characteristic, rather than a fault.
The thickness of chenille yarns tends to vary slightly giving a random unevenness to the surface. This may appear as slightly raised lines across the fabric and should not be confused with rogue yarns which sometimes occur as faults in other fabrics.
Chenilles can be subject to ‘pile movement’, particularly in areas of heavy use. This can create a shading look which is a natural characteristic and not a fault in the fabric (please see our care section to minimise this). This is a feature of these types of fabrics which means the character of the furniture builds as it is used. It can be compared with the signs of use that appear over time on good quality leather.
What to do if you spill something
In the event of a spillage, prompt action can reduce the likelihood of permanent staining.
Remove as much of the spillage as possible with a spoon or blunt palette knife.
Work towards the middle of the spillage to prevent spreading the stain.
Soak up liquids with a clean cloth, towel or kitchen paper without rubbing the stain.
Blot up as much of the spillage as possible using a damp cloth (not wet) with warm clean water, again without rubbing. We strongly advise against using any liquids or damp cloths to clean velvet-style fabrics.
Seek specialist upholstery cleaning advice if required.
Cleaning your upholstery
Due to the variety of fibre and fabric constructions used, G Plan recommends that you use a specialist upholstery cleaning company for your sofa. If you have purchased a fabric care treatment for your upholstery, please consult your care treatment provider for cleaning advice.
Covers should never be machine washed or dry cleaned by a launderette as this can damage the fire retardant treatment, fade colours and affect the finish of the fabric. Where zips are fitted, this is often to assist ease of manufacture and does not necessarily mean that the cover is removable for cleaning.


G Plan ‘Worry Free Fabric’ cleaning and maintenance
G Plan Worry Free fabrics with Aquaclean® Technology have an advanced protector, which covers every fibre of the fabric with an invisible molecular layer, enabling the majority of household stains to be removed with just water.
Cleaning
It is best to clean stains as soon as possible and the following steps should be taken.
Remove any excess residue from the upholstery. Apply water on the stain, either directly or using a damp cloth and wait a few seconds.
Press down over the stain with the damp cloth and rub gently over the fabric using circular movements.
If the stain does not come off completely, repeat the process as required. For larger or tough stains seek professional upholstery cleaning advice.
Maintenance
For normal sofa maintenance we recommend that you vacuum the entire surface area regularly with a brush fitting.
Caring for leather upholstery
Lightly vacuum your upholstery and dust with a soft brush weekly to prevent dirt from building up. If you allow dust and dirt to accumulate, it can dull colours and speed up wear.
All leathers can also be wiped weekly with a damp cloth to remove any dirt. Please also do not allow hair products, bodily oils, hand creams/lotions, hand sanitiser or perspiration to settle as this could break down the finish over time. If you don’t carry out simple, yet gentle cleaning of your leather sofas on a weekly basis, it can reduce the life of your upholstery.

We do not recommend or endorse any leather cleaning products as polishes, detergents, solvents, white spirit and stain remover may damage the leather. Do not use baby wipes for cleaning your leather upholstery.
Cleaning of any wooden trim is best done with a soft clean cloth, dampened with water only. Furniture polish will not harm the wood but should be avoided to prevent soiling the fabric or leather cover. Any wood on show is manufactured from natural timber and so the grain and colour can vary.
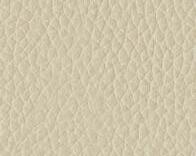
The natural characteristics of leather
Leather is a natural material and some of the animal’s natural characteristics may feature on your furniture. Marks such as veining, creases, healed scars, tone and grain difference should be appreciated as a mark of authenticity. No two hides are alike, just as no two animals are alike.
If your furniture includes any of these features, please do not worry. These are natural characteristics of leather that help to make your piece of furniture completely unique.
When cutting leather hides to make upholstery, the following general guidelines are applied to all leathers.
Front facing parts of the upholstery can include light natural markings and minor surface blemishes including a variation in grain.
Side and rear facing parts of the upholstery may show more visible natural marks including variation in grain.
Non-visible parts (for example under seat cushions or behind back cushions) may contain marking, blemishes and occasional light brand marks as long as they do not impact on the structural integrity of the leather.
After a few weeks use, leather will begin to ‘stretch’ and ‘give’ (much like a pair of leather shoes) forming a natural ‘sat in’ look with creases and folds developing as you use the furniture. These are quite normal and should not cause concern. They add to the soft inviting look that is inherent with leather upholstered furniture.


Leather finishes
All G Plan leathers are made from cattle hides. A hide becomes leather when it is tanned. We supply various grades and finishes in order to suit your individual circumstances.
All G Plan leather is 100% top grain.

Durham
A semi-transparent pigment base coat provides good light-fastness, durability and stain resistance. Most of the natural markings and leather variations are visible in the finished product.
Husk
This finish provides good light fastness, durability and stain resistance. This leather is easily cleaned and features a uniform colour.

Genesis

Capri
A semi-transparent pigment base coat provides good light-fastness, durability and stain resistance. Most of the natural markings and leather variations are visible in the finished product.

Cambridge
A lightly pigmented finish provides good light fastness, durability and stain resistance. Most of the natural markings and leather variations are visible in the finished product.

Oxford
This finish provides good light fastness, durability and stain resistance. This leather is easily cleaned and features a uniform colour.

Texas
A semi-transparent pigment base coat provides good light-fastness, durability and stain resistance. Most of the natural markings and leather variations are visible in the finished product.
A top quality Semi Aniline leather which will gain character over time. Most scuffs and scratches will appear and fade during use. Some colour variations may occur due to the tendency of the leather to accept dyes differently in specific areas. Every hide is unique and will exhibit colour fluctuations.
Stretch marks Tone difference
Veining Scars
Grain difference

Setting up your furniture
Removal of transit feet
To prevent damage during transit and delivery, some furniture is fitted with temporary transit feet. Follow the instructions below for easy removal.
Some models will come with a sticker advising that the feet should not be


1 2 3

removed. In these instances, please leave these feet in place.
Castors are available as a free option on selected models only. This must be specified when ordering your furniture.
Turn the furniture on its back. We would recommend that this is done by two people on a mat or carpet, rather than hard floor. This is for health and safety reasons, but also to avoid damage to the upholstery. Be careful not to drag the furniture whilst in this position as this may cause scuffing to the fabric or leather cover.
With a Posidrive screwdriver, remove each of the feet fitted to the bottom of the furniture by undoing the screws in the centre.
Selected ranges have screw in transit feet. These can be unscrewed by hand and the castor screwed in the same hole.
Furniture ordered with optional castors
Permanent castors are enclosed with the furniture and should be fitted once the transit feet are removed. Please note that castors are left or right-handed (they are fitted left or right from a seated position). They are marked with an ‘L’ or ‘R’ accordingly at the base of the stem There are two types of castor which are either screwed in or pushed in.


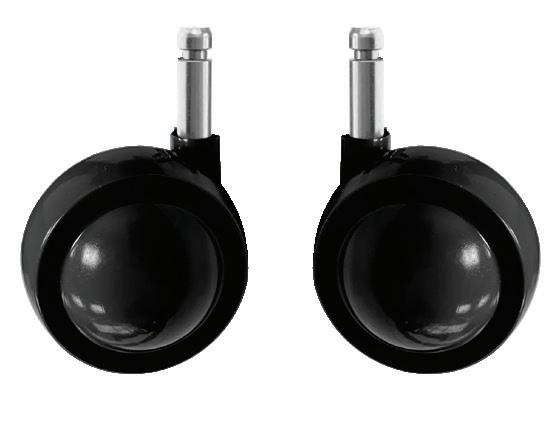

Push-in castors
Screw-in castors
Fitting screw-in castors

Locate the castor fixing which has been fitted into the base of the sofa. Place the stem of each castor into its fixing and screw into place.
Further tighten with a 13mm open ended spanner.
Fitting push-in castors

Please ensure that the left and right castors are fitted on the correct sides. Left and right refer to the sides as you look at the furniture. 1 1 2 2 3
Locate the castor socket which has been fitted into the sofa base.
Place the stem of each castor into its socket and tap it in with a mallet. Please ensure that the left and right castors are fitted on the correct sides. Left and right refer to the sides as you sit in the furniture.
NB. Do not use a metal hammer as this may damage the castors.
Setting up recliner furniture
Recliner furniture will need to be assembled via one or two sets of joining brackets on the inner side of the recliner sofa. We recommend that two people carry out this assembly.


For more information about how to set up your recliner furniture, please visit our Owner’s Videos on our YouTube channel.

1
2
Locate the set of J bars on the inner side of the recliner furniture and place the two pieces side-by-side.
3
Carefully lift the sofa section to align the J bars. Line the stem of the joining bracket above the slot and slowly lower it into place.
This process should be carried out again if there are multiple sets of brackets on the furniture. Multiple sets of brackets will be on a three seater three cushion recliner sofa.
If your furniture has black J bars that hook together, select ‘How to unpack and assemble your recliner furniture carefully and correctly’. Or, if your furniture has silver plates that slide into each other, select ‘How to unpack and assemble your incliner furniture carefully and correctly’.
The J bars are located at the bottom edge of the furniture.
Attach stems together.
How to dismantle your Fifty Four/Eleanor sofa bed


Remove back cushions.
Place the back of the sofa on top of the seat cushion. 1 2 3 4
Locate the two metal connectors behind the seat cushion.
With the help of another person, carefully lift each end of the sofa to remove the hinged bars from the slots.

Operating your furniture
General safety tips for recliner sofas, chairs and storage chaise
There are some sensible precautions that we would advise for all of our recliner sofas and chairs.
Ensure there is adequate room behind and in front of the chair or sofa to allow the back to recline and the footrest to open. Our recliners require 1” – 5.5” dependant on model. Elevate dual motor chairs require 445mm/17.5”.
Ensure the space underneath the footrest is kept clear of objects when in the open position, to ensure it can then close without obstruction.
Keep hands and fingers clear of all moving mechanism parts when operating the controls.
Always ensure your recliner furniture is fully closed before attempting to get up/ reach out of the furniture.
Ensure children or pets are not playing near to or lying in the way when the mechanism is operated.
Recliner mechanisms are not suitable for use by children.
Do not allow anyone to sit or stand on the footrest when it is open as it could tip or damage your recliner.
Close the footrest when not using the sofa or chair to prevent people tripping over it.
In the case of power recliners, ensure the cable between the transformer and the plug is kept clear of the mechanism under the chair.
The chaise storage system is not suitable for use by children. Any child using the storage system must be supervised at all times.
Please note: G Plan do not endorse the use of footstools as seating.
How to operate your power recliner
G Plan power recliners can be operated by two buttons on the chair/sofa. One button reclines the furniture and the other button reverses this operation. You can release the button at any stage of the opening or closing operation to find the most comfortable position for you.
Buttons are located on the outside of the arm. On ‘footrest only’ furniture such as Hatton and The Sixty Eight, one button will release the footrest whilst the other brings the footrest in.
Some ranges also have the option of an innovative power headrest and lumbar support. Customise your individual comfort at the touch of a button, located on the control panel on the outside arm.
Within this panel, you will see three buttons. The back button on the left hand side of the panel controls the headrest, the middle allows you to adjust the lumbar support and the front button gives you the chance to recline and reset the footrest.
Touch-sensitive buttons are featured on selected models and only require light contact with part of the button to operate. Making contact with just the button is sufficient to operate. Contact should only be made with one button at a time. If contact is made with both buttons, the recliner mechanism will not operate.
Plug in the lead from the transformer unit to an appropriate domestic mains electricity supply, ensuring the cable is not routed under the item, where it can become trapped in the mechanism.

Double recliner sofas on selected models have a splitter cable to allow both actions to be connected to a single transformer and plug.
IMPORTANT. Do not push the excess cable under the furniture as it will trap in the mechanism and shear the cable.
On selected models, the power lead under the chair is secured by black cable ties. These should not be removed.
Press and hold the open button to move the footrest. By continuing to hold the button, the back will move to the recline position.
The Hatton and Sixty Eight ranges have an optional footrest mechanism and will not recline.
To return the furniture to the upright position and close the footrest, simply press and hold the close button.
Recliner furniture must always be returned to the fully upright position before attempting to get up or reach out of the seat.
For more information about how to operate a power recliner, please visit our ‘How to operate your furniture’ Owner’s Video on our YouTube channel.


How to operate your manual recliner
A manual recliner uses a combination of a balanced mechanism and your body weight to operate.
Sit well back in the seat to ensure your body weight is in the correct position to operate the manual mechanism.
To open the footrest, pull the release catch on the arm of the chair/sofa. Ensure the release catch returns to its rest position to enable the recliner to return fully to the closed position. Sitting forward will cause the cushion to trap the footrest, preventing it from opening and closing.
To recline the back, place hands on top of the arms and push back against the backrest.
To return the seat to an upright position sit up so that all your weight is on the seat cushion. Then ensure the release catch is in the closed position and pull back on the footrest with your heels until it locks in place.
For more information about how to operate a manual recliner, please visit our ‘How to operate your furniture’ Owner’s Video on our YouTube channel.

Advice on rechargeable power packs and transformers
Before using the power pack, please carefully read the following instructions.
• Do not use extension cables or use the unit with a damaged cable or plug. Damaged parts have to be replaced immediately. Contact your upholstery stockist if any parts become damaged.
• All rechargeable batteries dissipate energy over a period of time even if they are not used. It is recommended that they are fully recharged at least every four weeks, or when a noticeable drop in power or operation of the recliner unit is noticed.
• For models which have a swivel AND recliner function powered by a rechargeable battery pack you must not use the swivel/recliner functions when charging the battery pack. Battery life will depend on use of these functions.

• Should you need to charge a cold battery (approx 5ºC or less) in a warm room, leave the battery for at least one hour inside the room and charge only after the battery has been warmed to room temperature (otherwise the battery may not fully recharge). Do not charge the power pack in temperatures below 0ºC.
• The transformer and power pack are specially coordinated. The transformer must not be used for any other equipment or tools. Never charge the power pack with another transformer/ charging unit other than the one supplied.
• The transformer and power pack are not designed for external use and must not be used in damp places.
• On separating the transformer from the wall socket please always grasp the plug to avoid damage to the cables or cable connections.

• Before cleaning the transformer/power pack, disconnect from the power supply and do not immerse in water. Cleaning should be done with a dry cloth or duster only.
• Do not store the transformer and power pack in rooms with a temperature of more than 35ºC or less than 0ºC.
• Never burn exhausted power packs; they may explode.
• Avoid mishandling and damage to the cable. Keep it away from extreme heat, naked flames and sharp implements.
• Always recharge the power pack in a well ventilated room. Never cover the transformer or power pack with textiles or other material during the charging process.
• Ensure that the transformer cable is routed to avoid causing a trip hazard.
• We recommend that it is put away when not in use. It should never be left under the recliner unit as it can be damaged by the mechanism.
• When used according to these instructions and guidelines the rechargeable power pack is supported with a two-year guarantee.
• Battery life will also depend on the use of the USB functionality.
• Wires and batteries should be kept away from your recliner mechanism(s) to avoid damage and malfunction of electrical components.
• Please note - the transformer or rechargeable power pack should only be used with G Plan products.


Options for rechargeable power packs (selected models only)
There are two different ways you can use the rechargeable power pack.
1. Using the Rechargeable Power Packs with mains power
A permanently connected rechargeable power pack to the mains supply (the power pack connects between the recliner unit and the transformer). This will provide you with an emergency battery backup power supply in the event of mains power supply failure. Used in this way, your power pack will be kept continually charged.
A fully charged power pack enables you to use the power pack
(for approximately 100-150 cycles before it needs recharging) without being connected to the mains power supply.
Please note: recliner furniture with headrest/lumbar functionality will require a purchase of two rechargeable power packs. Please follow the instructions to ensure these are connected correctly.
Waste disposal
Do not dispose of chargers or power packs in domestic rubbish. Please return to your retailer or to G Plan.
Charging your power pack
2. Using the Rechargeable Power Packs without mains power
The following instructions apply if you are using the rechargeable power pack remotely from the mains.
For the initial charge or if recharging after a long period of non-use please charge for 5-8 hours to achieve full capacity. Subsequent recharging is necessary as soon as the power pack has insufficient strength to power the unit. When the charge is low on your pack, an audible warning will be heard.
Charging your power pack
1. When the battery is depleted/running low, disconnect the lead to the sofa
2. Keep the transformer and power pack connected to the plug
3. Plug into the mains.
When charging is complete there is an internal installation which avoids overloading the power pack. If you are experiencing any difficulty charging the battery, please contact G Plan Customer Services.
To help preserve the life of your power pack, it should be recharged on a weekly basis if the power pack is used frequently on a daily basis. Where the pack is used occasionally, say, a few times a week, the power pack should be recharged on a monthly basis, even if the audible warning of ‘low charge’ is not heard.
Malmo power recliner with battery back-up option: We recommend you switch off USB charging when not in use, to prolong battery life.
For more information about cable management and power packs, please visit our ‘Cable management’ Owner’s Video on our YouTube channel
When everything is connected, the power pack will charge automatically.


USB operation and trouble-shooting
For your convenience, certain models are fitted with built in USB power outlet ports, to be able to charge your devices whilst sitting in comfort. The USB power outlet is low voltage; 5.1 V/2.1 Amps/10 Watts and must only be used to charge IT or mobile equipment. Do not place any other objects or cables into the USB outlet.
When fitting a USB cable, if you are unable to plug in the connection head; rotate the head by 180° and try again. Should your device not charge, please check all connections including the condition of your personal charging cable.
If your USB power outlet port is part of an electric recliner toggle switch, ensure the seat reclines. If the seat reclines, power will be present at the outlet. Please test your cable on another USB power outlet.
Do not leave USB cables plugged in to the USB ports for long periods of time, to avoid over heating.
If there are any concerns over the functionality of the USB power outlet, please contact your retailer.
It is possible that USB ports can warm up when they are in use, this is due to the charging device taking energy via the port, which is transferred into heat. This is a normal characteristic.
All USB ports in our furniture contain thermal protection devices which are designed to switch off when they reach a certain temperature, this is designed for thermal protection and is normal. If the USB does power down, leave it to cool and then you can reconnect, the USB will automatically reset and will be ready for use.
Ensure that all charging devices are kept on a hard surface and not on the upholstered product.
Never leave charging devices unattended, including overnight charging.

G Plan Heated Seats
For your convenience, certain models are fitted with built in Heated Seats.
At the touch of a button, our Heat Pads will run for a 60-minute cycle. The Heat Pad control button will turn red when active. With the temperature of the Heating Pad being monitored, the Heating Pad thermostat will stop the temperature from rising to an unsafe range and will keep the Heating Pad in a safe temperature range. To turn off the Heated Seat, press the control button once and the red light will turn off.
There are some sensible precautions that we would advise for all users of Heated products.
Care should be taken with sharp edged toys, buckles and jewellery as these could potentially pierce the Heat Pad.
DO NOT machine wash the Heat Pad (including immersion in water), if the Heat Pad becomes wet from a spillage, please ensure that the Heat Pad is disconnected immediately from the power supply. Please ensure Heat Pad is completely dry before reconnecting.
This appliance is not intended for use by children.
Children must not be left unsupervised or play with this product.
If the Heating functionality of this product ceases working, turn off the power supply and please contact your Retailer immediately.
Rechargeable power packs are not available on Sofas and Chairs with Heat.
All Heat Pads come with a 2-Year Manufacturing Guarantee.
Warning - Heating appliances should never be left unattended or overnight.
Warning - Should the Heating become uncomfortably hot, switch off at the mains and contact your Retailer immediately.
Warning - Ensure the product is disconnected before cleaning up spillages.


G Plan Elevate Rise & Recline with Power Assist Technology
G Plan Elevate technology is designed to help people who need assistance with sitting down and standing back up. The mechanism effortlessly lowers you from a near standing position to seated, with the option to recline to a full horizontal position. When you’re ready to get back up, the chair will rise back up to a near standing position.
All Elevate chairs come with a 25-year frame and frame construction guarantee. They are covered by a 10-year seat spring guarantee, as well as an additional 5-year mechanism, motor and handset guarantee.
Our Elevate chairs are fitted with castors, making them easy to move whenever you like. Once the chair starts to rise, the castors are automatically immobilised.
For more information about how to operate an Elevate chair, please visit our ‘How to operate your furniture’ Owner’s Video on our YouTube channel.
Please note: Castors will move on all flooring when chair is not elevated. Please take care and consider the use of castor cups.
Elevate quick release handset
Elevate® Rise & Recline with Power Assist technology. The dual motor allows the footrest and back of the chair to be operated independently.
We have fitted our Elevate chairs with a quick release connection to enable you to quickly release the handset and store it away from little hands or inquisitive pets.
To unlock the quick release mechanism on the handset cable, simply raise the locking bar and separate the two sections.
We currently have two handset designs in circulation - referenced below. Both of these handsets have exactly the same functionality.
Backrest
The back is moved to the upright position.
Recline
The back is moved to reclined position.
Memory
This allows you to store your favourite position. With your chair in the desired position, press the ‘Standby’ button for five seconds and the ‘Memory’ button will flash green. Then simply press the ‘Memory’ button to store the current position. Once stored, holding down the ‘Memory’ button will return the chair to the position stored. To store a new position, simply repeat this process.

Reset
Returns chair to the seated position, with the footrest closed and the back upright.
Elevate
Elevate is activated, gently raising the chair and allowing you to stand up more easily.
Footrest
Footrest is raised to a position of your choice.
Standby
Activates and lights up the handset for 20 seconds. The handset is set to ‘sleep’ mode if it hasn’t been used for 15 seconds – to reactivate it, simply press and hold for one second.

Backrest
The back is moved to the upright position.
Recline
The back is moved to reclined position.
Memory
This allows you to store your favourite position. With your chair in the desired position, press the ‘Standby’ button for five seconds and the ‘Memory’ button will flash green. Then simply press the ‘Memory’ button to store the current position. Once stored, holding down the ‘Memory’ button will return the chair to the position stored. To store a new position, simply repeat this process.

Elevate
Elevate is activated, gently raising the chair and allowing you to stand up more easily.
Footrest
Footrest is raised to a position of your choice.
Reset
Returns chair to the seated position, with the footrest closed and the back upright.
Standby
Activates and lights up the handset for 20 seconds. The handset is set to ‘sleep’ mode if it hasn’t been used for 15 seconds – to reactivate it, simply press and hold for one second.
Product warnings
These are the warning labels, which will appear on various products. Please read carefully.
IMPORTANT, READ CAREFULLY, RETAIN FOR FUTURE REFERENCE:
G Plan SAFETY information for Manual and Electric recliners. (complies with BS8474:2013)
WARNING: This is an electrical item and should be treated with caution.
WARNING: The motion lockout control must be engaged when the chair is not in use.
WARNING: Always ensure that there is nothing to obstruct the free movement of the chair, for example children or pets, or solid objects, e.g. a wall.
WARNING: This chair is not suitable for use by children. Any children in the vicinity must be supervised at all times.
WARNING: Take care when adjusting positions to avoid trapping or pinching of body parts.
WARNING: Do not sit on footrest.
WARNING: Only the occupant or a responsible person should operate the chair.
WARNING: Exercise care when lowering into the chair as shock loads can severely damage the chair and the mechanism.
Weight Limits
• The maximum weight limit for all static units, recliner units and elevate chairs is 110kg/17.3 stone per seat.
• The maximum weight limit for the Fifty Four sofa bed is 200kg/31.5 stone.
• Only operate movement of the recliner with the controls provided.
• Recliners are only to be used once fully and correctly installed.
• When recliners are not in use, always return them to the seated position.

Don’t forget to visit www.gplan.co.uk to register your furniture by clicking on the ‘Register Sofa’ button on the home page.
Our website is also home to a range of information on our product collection, materials and also an electronic copy of this guide.
Sign up to our newsletter to receive the latest updates on the G Plan brand, care information and details on our latest offers. If you do not have access to our website, please call 01225 700880 to register your sofa.
Our guarantees Register your furniture
We’re so confident and proud of the quality of our craftsmanship, we offer a range of different guarantees with your sofa.
25-Year Frame and Frame Construction Guarantee. This covers the timber frame and frame construction on models despatched from 1st November 2019 onwards. Springs, mechanisms and fabrics are not included.
10-Year Steel Frame & Moulded Foam Guarantee on all our Ergoform chairs.
All models will be covered by a 10-Year Spring Guarantee. Springs within recliner mechanisms are not covered.
2-Year Manufacturing Guarantee on materials, mechanisms, electrics and workmanship.
Our Elevate chairs also feature a 5-Year Mechanism, Handset and Motor Guarantee.
All G Plan guarantees cover claims by the first owner of products with normal use, purchased from our approved stockists only. They do not cover damage caused by abnormal use or storage conditions, accidents, negligence by you or a third party or any commercial or institutional use. Failure to follow the written instructions in the Care Guide or provided with the product will invalidate the claim. Any alterations or repairs carried out without our written permission will also invalidate the claim. We do not recommend or endorse any form of stain protection on our fabrics. Our guarantees do not affect your Statutory Rights.

If you require any more information please don’t hesitate to contact us.
www.gplan.co.uk
Telephone: 01225 700880
Email: customer.service@gplan.co.uk
Address: G Plan Upholstery Ltd, Hampton Park West, Melksham, Wiltshire SN12 6GU
If you are looking for inspiration on how to style your sofa, visit our social media channels and blogs. For other information on how to assemble your furniture, operate your furniture, dress your sofa and more, scan the QR code below.
@designbygplan
@gplandesign
@gplandesign
gplan.co.uk/be-inspired

G Plan Upholstery Limited is registered by BM TRADA under the management systems of ISO 45001; Occupational Health and Safety and ISO 9001:2015; the International Standard for Quality.
Your furniture was designed and manufactured under the control of an Integrated Management System which has been independently assessed by BM TRADA for conformity to these standards.
March 2025


