3 minute read
Designing the Personalized Storefront

from M2 Operating Guide
Next Article
We cover these actions on the succeeding pages, but after earning each virtual reward, she will receive a “congratulations” message.
Designing the Personalized Storefront
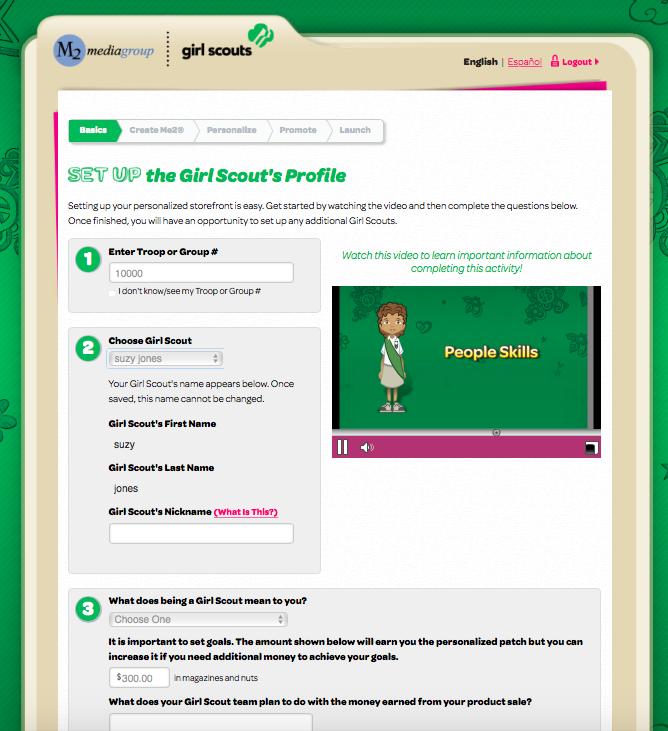
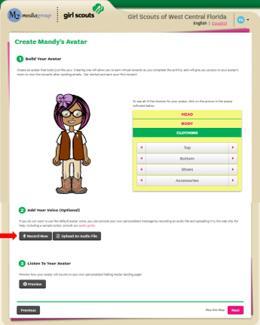
The storefront is what the customer will see when they click on the email she sends out. Here she can personalize that storefront - she can Upload A Selfie and decorate it a bit (add stars, for example), or leave the avatar image and decorate that a bit. Or not, and just leave the picture or avatar otherwise unadorned.
The girl can Upload A Video. This video would override any video your troop has uploaded, so be sure your caregivers/girls know if you intend all girls in the troop to use the troop video or if each girl is to use her own. Completion of these tasks will earn the girl a “virtual reward.”
Promote the Campaign
Next, the girl needs to Promote Her Campaign. Here she will import or manually add the email addresses of those family and friends she wishes to “ask.” Addresses can also be imported. Once her contacts are entered, she is ready to launch her campaign. She will be able to Preview the email that her customers will receive. When she is ready, she should click Launch Your Campaign. She will also be able to share her storefront with her friends and family via Facebook and Twitter.


Once she has everything set up, she’ll see a screen like that shown at left. From here a caregiver can visit their daughter’s storefront (Your Store is Live!), open and download girl business cards and a magazine flier (Helpful Sales Tools, also available from her dashboard) and manage her campaign, which includes adding another daughter if the caregiver needs to (Manage Your Campaign).
Managing the Campaign
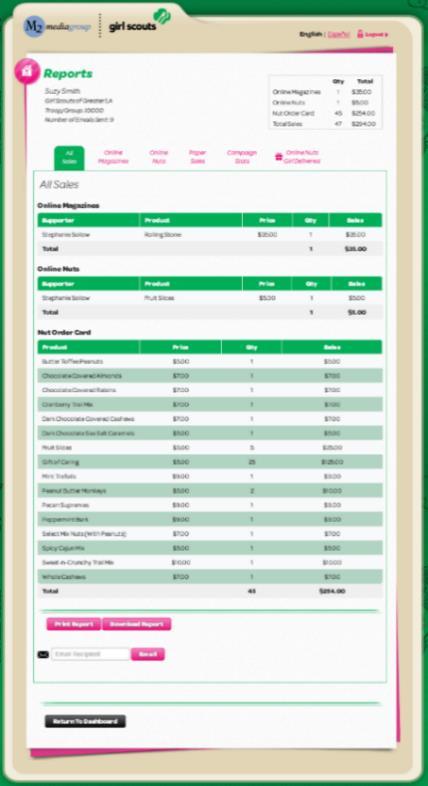
This is the girl’s dashboard (see image at right). On each subsequent login, this is the page she will see and it is from here that she can track her sales, send/resend emails, view her Me2 room, and more.


You can view the top tier of icons as the business part of her Campaign, the second tier (Fun Stuff) as … well, the fun stuff, and then the third tier (not shown) is where the caregiver will make changes. If she has a second daughter, she can go through the second set up process here by selecting Add Another Participant; this will allow her to manage both accounts with one log in!
The girl can also track her distance to her goal), see her progress towards the avatar patch (emails sent and sales; right side). Below that, she can see the top sellers in her Council and the top sellers in her troop (first names only, not amount sold).
Update Girl Scout Details


If the girl/caregiver clicks the link labeled Update Girl Scout Details under her avatar image or selfie picture, she can update information she entered when she set up her account –maybe she wants to change her goal, for example, or what the troop plans to do with their proceeds. She can also click the Change Photo link to update her picture or add a picture if she hadn’t earlier.
The most important element, however, is for the caregiver to enter a mailing address (if it wasn’t entered upon registration) so the avatar patch, if the girl earns it, can be directly sent to her. Yes, that’s right, it’s not coming to you, but to the caregiver directly (only to you if you ARE the caregiver).