


AUSTRALIA EDITION · ISSUE 33 · 2023 · FREE COPY GCMAG.CO
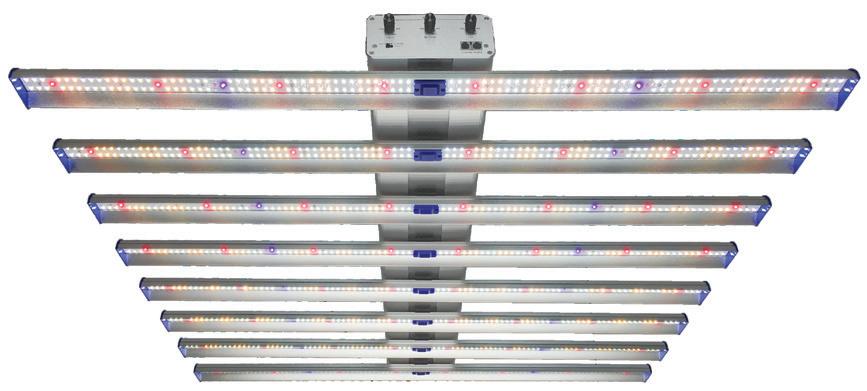
ENHANCED FULL SPECTRUM MULTI-DRIVER CONTROL


10-BAR 8-BAR


6-BAR 4-BAR

600/750W DE-HPS: COVER 1.2 x 1.5m @ 45cm
1000/1100W DE-HPS: COVER 1.5 x 2.1m @ 60cm


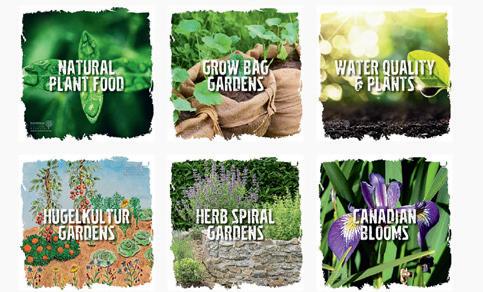
7 CONTENTS IN THIS ISSUE OF GARDEN CULTURE : 9 Foreword 11 Author Spotlight 13 Marketplace 18 RIP HPS 22 Growing a Pharmacy Garden for Home Remedies 28 Why I Still Grow Cannabis Outside 30 Mushroom Grow Cycles Using Fruiting Bags 34 How to Make the Perfect Edibles 40 TRENDING NOW: Got Old Seeds? Help Them Sprout With These Tips and Tricks 42 Calling the Cultivation Dance - The Cycles Take the Square 48 What is Triacontanol? 50 Notes From a Dirty Old Gardener: Planting and Picking Peppers to Pickle in my Pepper Patch 54 Living Soil Beds as the Glatt Kosher Option for Cannabis Cultivation 58 Know Your Soil pH 62 The Importance of Proper Airflow in a Drying Room 65 The High Seas Treaty 66 Red Light, Green Light - Cannabis Lighting for the Stages 70 The Art of Growing 71 Plants and Mycorrhizal Fungi - The Ultimate Symbiotic Relationship 72 Hearing the Music of the Forest Giants (PART 1) 76 Propagating and Preserving the World’s Old-Growth Forests 80 5 Cool Ways 28 42 WHY I STILL GROW CANNABIS OUTSIDE 30 MARKETpLACE GROWING A PHARMACY GARDEN FOR HOME REMEDIES 22 HEARING THE MUSIC OF THE FOREST GIANTS 72 MUSHROOM GROW CYCLES USING FRUITING BAGS CALLING THE CULTIVATION DANCE THE CYCLES TAKE THE SQUARE


Welcome to another edition of Garden Culture Magazine, your analogue gateway to becoming a better grower. This edition contains great tips from some of the industry’s finest minds.
Philip McIntosh’s “Know your soil pH” will help you avoid common mistakes if you grow in soil. We have two interesting articles on lighting. The first, by Rich Hamilton, looks at the downfall of HPS lighting. And in “Red Light, Green Light - Cannabis Lighting For The Stages”, Av Singh explores changing (or not changing) lighting in every growth stage.
If you are new to growing mushrooms, Chris Johnson’s “Mushroom Grow Cycles Using Fruiting Bags” will help you strive for fungal growing perfection. One mushroom that indoor gardeners are familiar with is mycorrhizal fungi. In “Plants and Mycorrhizal Fungi - The Ultimate Symbiotic Relationship”, Ari Singer gives us a short but sweet look at the benefits of using this product. It is one of the few supplements I could not imagine growing without.
This month’s featured author, Xavi Kief, has crafted quite a creative piece comparing you and your growing space to square dancing. “Calling The Cultivation Dance - The Cycles Take The Square” takes a unique view of organising and controlling what happens in your grow space; it’s an excellent read.
In the first part of “Hearing The Music Of The Forest Giants”, Cosmic Knot continues listening to the trees. He coined the term Florganoleptics, a genre of music created between plants and people with the help of an electronic device. Read the article and then google the word; it’s some trippy shit.
After listening to plants playing music, check us out at GCMag.co, where all our past editions live forever. It’s fun looking back over 10 years of growing. Old ads, old products; you can see the industry’s evolution on our pages.
SPECIAL THANKS TO:

Adam Clarke, Anne Gibson, Ari Singer, Av Singh, Catherine Sherriffs, Chris Johnson, Cody J. Garrett-Tait, Cosmic Knot, Lissa Skitolsky, Philip McIntosh, Regan Moran, Regi Oneton, Rich Hamilton, and Xavi Kief.
PRESIDENT Eric Coulombe eric@gardenculturemagazine.com
+1-514-233-1539
EXECUTIVE EDITOR
Celia Sayers celia@gardenculturemagazine.com
+1-514-754-1539
EDITOR Catherine Sherriffs cat@gardenculturemagazine.com
DESIGN Job Hugenholtz job@gardenculturemagazine.com
GCMAG.CO

DIGITAL & SOCIAL MARKETING social@gardenculturemagazine.com


ADVERTISING ads@gardenculturemagazine.com
PUBLISHER
325 Media INC
44 Hyde Rd., Mille-Isles QC, Canada J0R 1A0 GardenCultureMagazine.com
ISSN 2562-3540 (Print)


ISSN 2562-3559 (Online)
Garden Culture is published six times a year, both in print and online.

@GardenCulture @GardenCulture
DISTRIBUTION PARTNERS
• WHG
• Stealth Garden Supplies
@GardenCultureMagazine @Garden_Culture © 325 Media
All
any form or by any means, electronic, electrostatic, magnetic tape, mechanical, photocopying or otherwise, without prior permission in writing from 325 Media Inc.
9 GARDENCULTUREMAGAZINE.COM FOREWORD & CREDITS
FOREWORD CREDITS
rights reserved. No part of this publication may be reproduced, stored in a retrieval system or transmitted in

Author Spotlight
Xavi Kief is a writer and researcher who loves growing food and medicine for their family and community on their beautiful homestead on the Canadian Northeast coast. Xavi’s written more than a few pieces for Garden Culture over the last little while, and their articles are always a great mix of creative fun backed up by a lot of science. In this edition, Xavi compares plant growth cycles to the art of square dancing, and who doesn’t love square dancing? Let’s get to know Xavi a little better!
Is there a motto you grow by?
There’s never a bad time to sprout a seed.
What is your favourite plant to grow and why?
Favourites are hard to choose, but I consider cannabis a life companion and cultivating cannabis plants a joy-filled calling. I connect most with cultivars I have bred in my medical garden. One of my top picks was a pheno I called ‘Koala’ because it was so potently eucalyptus-scented. Its genetics were a combination of Northern Lights and GSC. Unfortunately, I could not establish a true breeding line from that one, so I’ll be hunting for the best of its progeny in future grow-outs! While they’re not plants, I’d be remiss if I didn’t mention how much I love to grow many kinds of wood-decaying mushrooms!
XAVI KIEF
Do you prefer to grow indoors or outdoors?
I prefer growing outdoors, where I can learn and benefit from collaborating with the incredibly diverse and abundant wild species in my local ecology. Ideally, a regenerative garden in a protected environment (greenhouse/high tunnel) for season extension and storm protection!
What is your favourite food?
You can make me happy any day of the year by folding up seasonal produce, plant protein, something sprouted, and something fermented in a toasty corn tortilla.
What is your favourite animal/insect?
Cats are living therapy. 3
Are you interested in writing for Garden Culture Magazine?
We’d love to hear from you! Send us an email introducing yourself with a sample of your work. editor@gardenculturemagazine.com
Xavi’s written more than a few pieces for Garden Culture over the last little while, and their articles are always a great mix of creative fun backed up by a lot of science
AUTHOR SPOTLIGHT 11


AthenaAg.com SIMPLICITY IN A BOTTLE Complete & Ready-To-Use Concentrates CLEAN FORMULA WITH NO PARTICULATES OR RESIDUE FOR USE IN CLONE THROUGH FLOWER ARCADIA Sales Services For distribution in Australia and New Zealand, contact Arcadia Sales Services at ArcadiaSalesServices@gmail.com @Athena.Ag
Optic Foliar SWITCH
Prevent and combat key stress factors with Optic Foliar SWITCH and stimulate plant flower initiation. Use during the first two weeks of flowering triggers early blooms with tighter nodes. Ensure that your plants will form flower sites and maximise flower growth. Using SWITCH assures no loss in growth, quality or yield. Maximise yields by using OVERGROW during the early growth stage and through the flowering stage.
Find a retailer near you: Stealth-Garden.com

PRO GROW Tents
A collaborative effort between Wholesale Horticultural Group and many of Australia’s leading retail grow stores, PRO GROW Tents offer the best quality and value that meet customer needs without compromise.
PRO GROW Tents provide industry-leading performance, superior weight holding and long service life. Features over-engineered white powder-coated poles, highstrength ABS plastic corners, and heavy-duty industrial zippers professionally sewn into double-stitched, light-proof 600D Mylar fabric. Removable waterproof flooring with a raised drain bar. The high-pressure CFM support bars, multiple dual drawstring socks for electrical equipment, and ducting ports offer flexibility in your set-up.They also have insect-proof ventilation ports, external gear hangers and an internal tool bag.
Available in six popular sizes from propagation to flowering, the larger tents feature an extendable roof panel allowing them to grow at 2.0 m or 2.3 m high.
Grow like the professionals with PRO GROW Tent. Check out WHG.net.au to learn more.

Introducing the Plant Mechanics TRICHOSCOPE
The new gold standard in flower inspection!
Observe
• Magnified viewing of flowers in a hermetic (sealed) glass jar.
• 5x Magnification and LED lighting for ultra trichome inspection.

• Long-lasting battery, with USB-C charger
Available in 6 unique colours (Green,Yellow, Blue, Purple, Red & Black). Enjoy a new insight into flower quality with Plant Mechanics.
Distributed by Stealth-Garden.com
13
your best flower with this new technology, perfect for all customers and connoisseurs.
• BPF (ePar) - 1950 µmol/s
• PPF - 1870 µmol/s

• Efficacy - 2.6 µmol/J
• Sosen ‘low inrush’ Driver
• CRI 90 - Full Spectrum Array

• Adjust to 40%, 60% or 80%
• Timer, Sunrise/Sunset, Auto dimm

• Operates up to 80 Fixtures

I n c r e a s e d B l u e
Deep blue targets peak chlorophyll & photosynthesis production for boosted vegetative growth & plant vigour.

I n c r e a s e d R e d & Fa r - r e d
Higher Red and Far-red output for increased production in flowering plants. The right amount of Far-red light engages Emerson Effect, encourages early node staging and more flower sites.

I n c r e a s e d R e d , Fa r - r e d + U V
UV & Red & Far-red offers maximum BPF (ePar). This encourages lateral branching, less stretching, enhanced flower size and improves essential oils, taste and aroma.
14 Z W
Channel 3 - Late Bloom Stage
Channel 1- Grow Stage
Wholesale Horticultural Group
Channel 2 - Early Bloom Stage
Growth Early
Late
S m a r t C o n t r o l l e r C o m p a t i b l e S p e c i fi c a t i o n s + +
LM301H H y p e r r e d 2 3 C h a n n e l A d j u s t a b l e S p e c t r u m
Bloom
Bloom
With
added Far-red, UVA and UVB Diodes
Digi-Lumen LED Array

600 W / 6 Bar
Purpl PRO

The new Digi-Lumen LED Array is the first LED to operate directly from a 600 W, 240 V electronic ballast. Featuring 720 Watts of Optimum diodes to ensure plenty of LED power when used on the boost setting of your Electronic Ballast. Compared to an HPS lamp, the Digi-Lumen increases light output by 60% with up to 1820 µmol/s of output at 690 Watts. Switching out your HPS with a sixbar LED immediately decreases radiant heat and delivers light more evenly over a 1.5 m² area.


Keep your Electronic Ballast, save money and lift your grow game by easily swapping your HPS light to a Digi-Lumen LED Array. Designed and tested to operate with a Digi-Lumen Ballast.
Visit WHG.net.au for more information.


Purpl PRO is a pocket-sized potency application that is accurate, affordable, and easy to use. Turn your mobile phone into a stateof-the-art Potency Measurement System. Using Purpl PRO is simple, providing results with a few clicks. Designed to be fast and user-friendly with the accuracy of a lab, you can take Purpl anywhereideal for field testing!

Check out Stealth-Garden.com for more great products for your garden.

®
Mother Nature’s Best Fer tiliser


5X more Organic Phosphorus than our nearest competitor. Better solubility in nutrient solution - pre-milled to 5 micron. Added Kelp and Fulvic for superior biological assimilation. Assists in the establishment of Mycorrhiza. Microbe friendly.


I n p u t f o r O r g a n i c G a r d e n s ACO CERT. NO. 13250 L i f t y i e l d , f l a v o u r, t a s t e a n d a r o m a t o n e w h e i g h t s w i t h c e r t i f i e d o r g a n i c B i o G u a n o ™ . Give your Flowering Plants the organic love they deser ve. Biologically
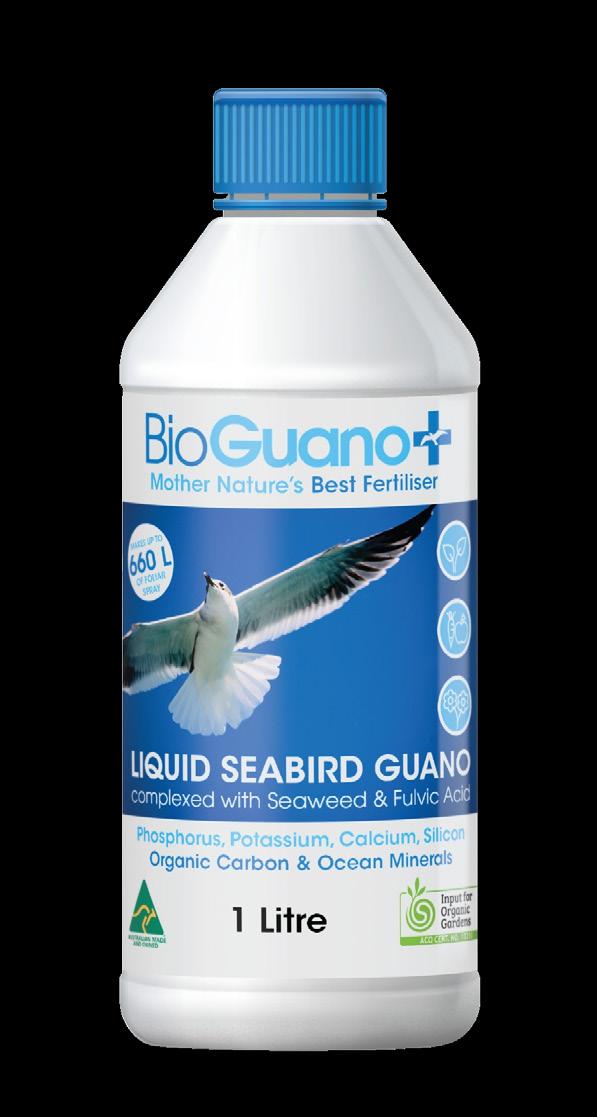


w w w . b i o g u a n o . c o m . a u Living Soil Coco Hydro Microbe Friendly Organic P Organic Ca Rhizo Booster
When they first appeared on the scene, LED grow light technology couldn’t match what HPS technology offered in terms of overall performance or yield. Despite significant leaps throughout the early years, LEDs still hadn’t surpassed the achievements and reliability of the HPS. However, the tables have now turned.

BY RICH HAMILTON 18
New-generation LED Technology is constantly evolving, and every model is better than the last. LED grow lights now account for 80% of all sales, and here’s why:
Energy Efficiency
Data from independent sources say LED lights cost 30-40% less in energy compared to HPS. Additionally, growers will use less energy on ventilation and temperature-regulating equipment because LEDs produce less heat. By switching to LED, AC usage alone can be reduced by as much as 75%.
Heat
LED grow lights are safer, reduce ventilation costs, and make your grow room easier to monitor and manage. LED lights generally produce minimal radiant heat of around 11%. In contrast, HPS lights have radiant heat levels of close to 55% and require ventilation kits. Ballasts are also necessary so that lights don’t explode. All this extra electrical equipment increases the heat produced and the fire risk.
Light Penetration
PAR describes the specific region of the light spectrum that plants use for photosynthesis. LEDs deliver more PAR to your plants per watt of electricity, and less light is lost between the bulb/diode and the plants.
LEDs also typically have better PPF & PPFD levels. PPF measures the amount of PAR released from your light source in photons, and PPFD measures the amount of these photons that reach your plants.
Customisation
LEDs make it incredibly easy to customise light for specific plant needs. Do you want more blue or red light? You got it. The diodes can be tuned to a particular wavelength along the photosynthetic spectrum, which you cannot do with an HPS system.
Great For Small Spaces
LEDs can be positioned very close to your plants due to their cooler running temperatures. They also rely on fewer accessories and are generally “plug-and-play”, making them perfect for tight spaces, quick to install, and easy to use.
Cost
Per watt based on a traditional fixture, HPS is the cheaper option. However, once you factor in the price of electricity for the fixture, the initial layout, and the energy cost for any additional equipment, it’s clear that LEDs will save you the most money long-term.
Life Span
LEDs will last longer than HPS and better maintain their brilliance. The longer life span helps offset the panel’s higher initial price. The industry standard warranty for an LED is 100,000 hours. A standard HPS bulb offers roughly 2,400-3,600 hours.
Convenience
LEDs can be turned on and off or dimmed instantly as needed. In contrast, once you turn HPS bulbs off, you must wait several minutes before you can turn them on again. If you don’t, you risk damaging the lamp’s output for the rest of its life.
HPS grow lights make it difficult to see the actual colour of your plants, meaning yellowing or sick leaves are easy to miss. Full-spectrum LEDs have a whiter spectrum that allows you to see the natural colour of your plants and easily monitor their health.
Security
The yellow light from an HPS is immediately recognisable. LEDs, however, generally look like regular lighting and aren’t as suspicious if light leaks out of a window.
Many HPS ballasts also produce RFI (Radio Frequency Interference). RFI scrambles the sound of an AM radio, so in theory, anyone using an AM radio within miles of your garden will know when your lights turn on.
The Future of LEDs
So, with LEDs now in the top position in the world of horticultural lighting, what exciting developments can we expect to see as the technology continues to evolve?
LED Chip
Prices will likely continue to come down as choice widens and the efficiency of LED chips continues to improve. The chip is essentially the brain of the light fixture. Most people focus on the shape of the grow light first when they should focus on the chip — the better the brain, the better the build quality, efficiency, light output, and reliability.
Cooler Running
Heat can reduce the lifespan of LED chips. The internally generated heat can cause the chip to lose efficiency, meaning the quality of the spectrum deteriorates. Therefore, making systems run even cooler than they already do is an essential focus for manufacturers. Low current-powered LEDs run much cooler and will perform optimally for much longer thanks to the lower internal heat production.
1919 HPS & LED
New-generation LED Technology is constantly evolving, and every model is better than the last
It's about improving what nature gives us and making LED lights more efficient than natural sunlight
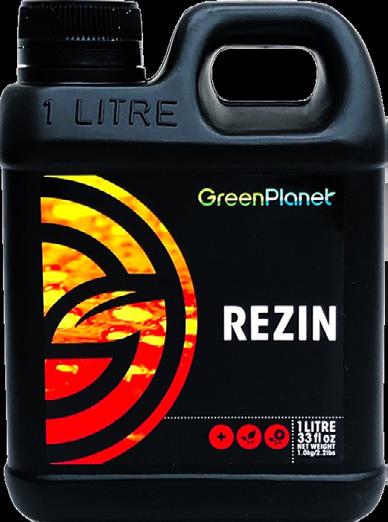
R E Z I N G R O W M O R E T R I C H O M E S


Light Spread
Suppose your light does not spread evenly across your grow room and has a higher PPFD in the centre than at the edges. In that case, most light will be directed towards the plants below your light fixture, creating hot spots. The plants on the periph erals of the canopy will also lose out on light, and overall, you will get below-par results. Achieving an even spread of PPFD across the canopy is essential for top-performing grow lights.
Custom Spectrums
Spectrum refers to the electromagnetic wavelengths of light that promote plant growth. Many new-generation LED grow lights are full-spectrum, producing a light range similar to the sun.


The peak of photosynthetic efficiency falls in the red and blue light spectrums. Red light is considered the most efficient at driving photosynthesis – especially during the flowering stage. Blue light is essential for the vegetative and flowering stages of plant growth. Other types of light, like green and far-red, are used by the plant in much smaller quantities but are still essential parts that make up the entire light spectrum that plants receive from the sun.
There is still much to unravel regarding how plants interact with different ratios of light. Therefore, future LED grow lighting systems will be designed and developed to give growers even more intricate control of using the ideal light spectrums for optimising the yield and quality of their plants in different stages of the lifecycle.
The Takeaway
High-pressure sodium (HPS) lights were undoubtedly the undisputed heavyweight champion of the lighting world for decades. However, LED technology has now taken the crown.
The future of LED grow lights comes down to fine-tuning and ironing out what is already a super-efficient technology. It’s about designing grow lights indistinguishable from the sun, so the plants don’t know the difference. Dare I say it? It’s about improving what nature gives us and making LED lights more efficient than natural sunlight. As the LED prices decrease, more people will move to LED, slowly closing the well-respected casket of HPS lighting forever. 3
Full-spectrum LEDs have a whiter spectrum that allows you to see the natural colour of your plants and easily monitor their health
HPS & LED
21
Prices will likely continue to come down as choice widens and the efficiency of LED chips continues to improve
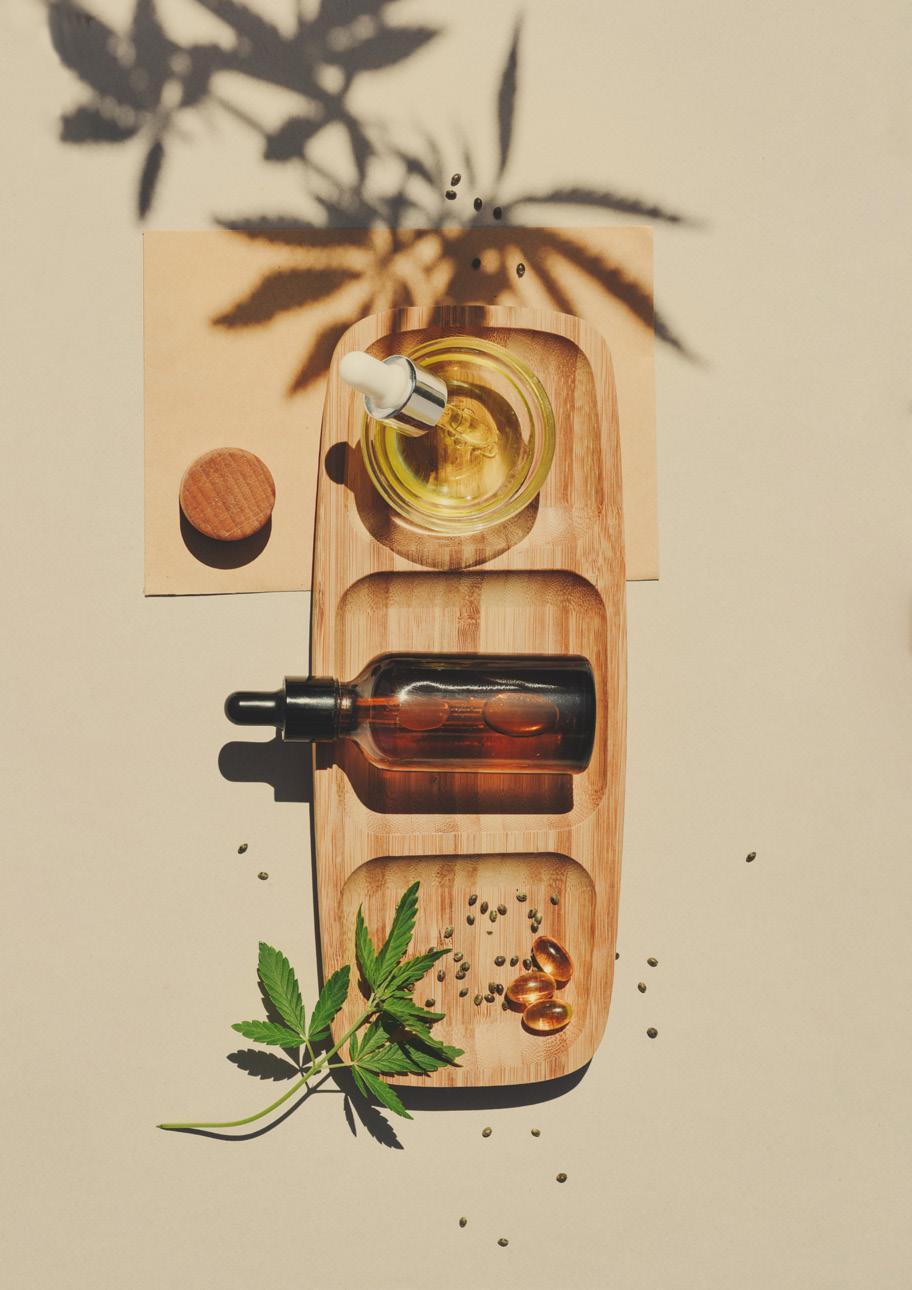
Pharmacy Growing a for Home Remedies Garden

BY ANNE GIBSON 22
With a strong focus on health over the past few years, many people are looking for ways to be more selfreliant. Many have struggled to access health services in a timely fashion. So, it’s not surprising there is a resurgence of interest in using plants for medicinal purposes. Creating a themed Pharmacy Garden is one way to be more self-sufficient in treating everyday ailments.
For example, pain and healing from cuts, stings and bruises can be managed by growing and using the right plants. Just the other day, I was stung on the face and arm by an angry hornet while watering the garden. The swelling and pain were immediate. As I returned to the house, I cut an aloe vera leaf from the mother plant. I applied the cooling, soothing gel inside the leaf to the swollen stings and dabbed some plantain salve on the area. The pain diminished within minutes, and the healing began. No need for pain medication, a first aid kit, or a trip to the chemist or doctor! My garden is a ‘medicine cabinet’ waiting to be used when needed. It’s incredibly empowering to know which plants to use and when.
So how do you create a medicinal garden?
Step 1: Make a list of the most common ailments in your household. If you have children or are out in the garden frequently, stings, bites, sunburn, scratches, wounds and bruises are likely! If you suffer from regular headaches, stress or anxiety, insomnia, sore throats, coughs and colds, there are plants you can grow and use to relieve many symptoms and jumpstart healing. A list will help you focus on choosing plants that best meet your unique needs. Most medicinal herb books are an excellent place to start.

Step 2: Match the ailments on your list to plants that can be useful for prevention, treatment or healing. Many herbs and food plants perform double duty with culinary and medicinal uses. You can benefit your health from the nutrients they contain and use many for their therapeutic effects for specific conditions. Look for plants that perform multiple roles and are suited to your climate; this allows you to grow fewer plants of higher value.
Step 3: Start with the most common, easy-to-grow plants that will give you confidence in using them for healing. Learn how to make herbal teas, salves and poultices. These are some of the easiest ways to use plant material without much time, money or effort. We generally want a quick solution when we feel sick or have a minor ailment. However, not all plants give up their healing benefits in the same way. We can eat some herbs, but others are best made into herbal tea or pulverised and applied to the skin as a poultice. Some plants perform best when added to other ingredients to make a salve, oil or tincture.
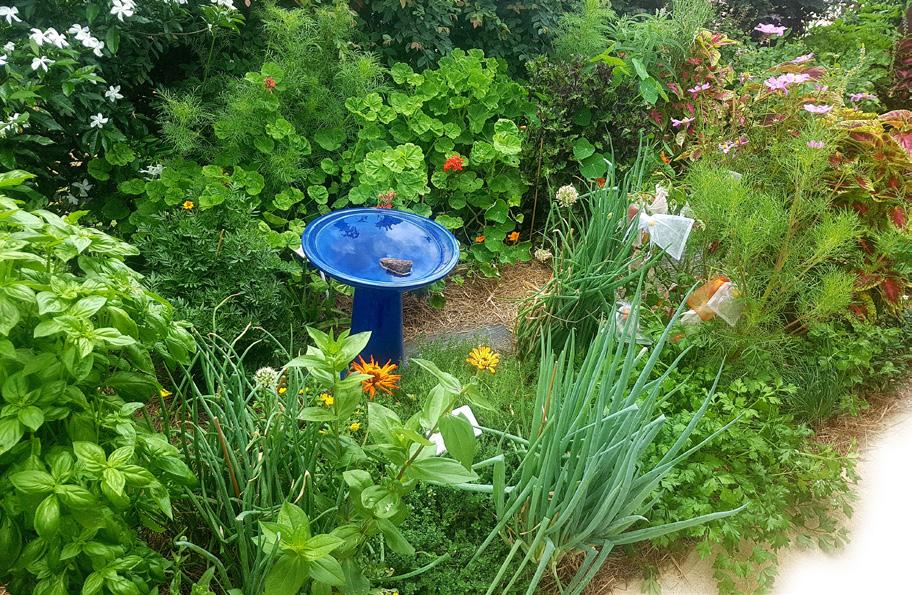
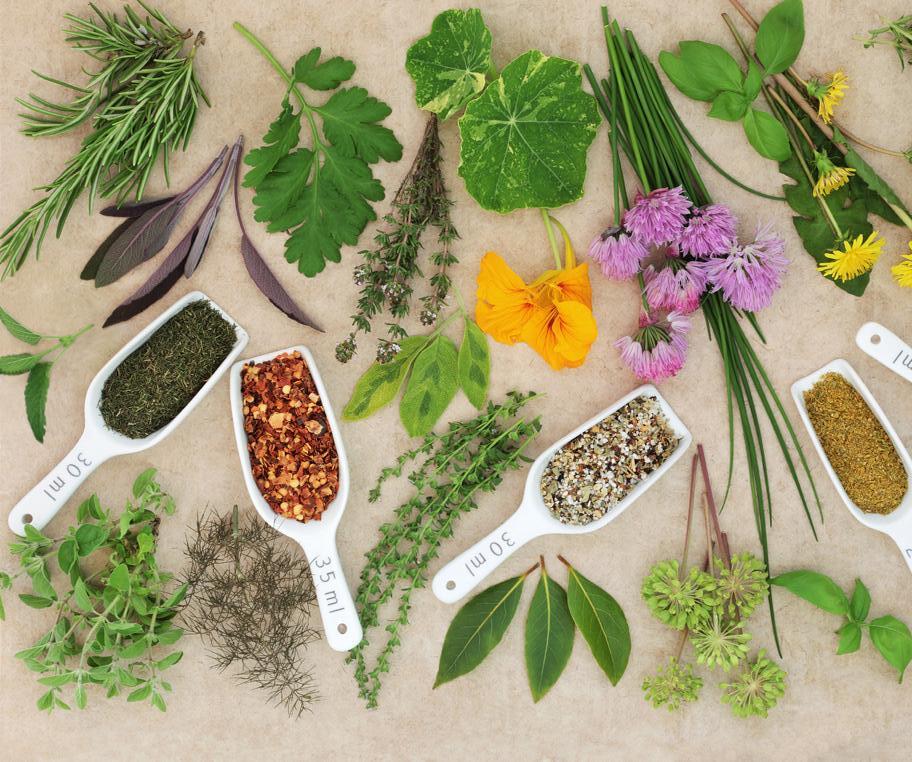
You can either grow medicinal plants in containers or set aside an area of your garden specifically for this purpose. Start small and add more plants as you need. I have a home pharmacy garden close to the kitchen, so I can dash out and pick fresh ingredients for meals and herb teas or other remedies. I interplant them with edible flowers like calendula, dianthus and violets. Aim to group plants according to their sun and water needs.
6 Best Medicinal Plants And Their Benefits
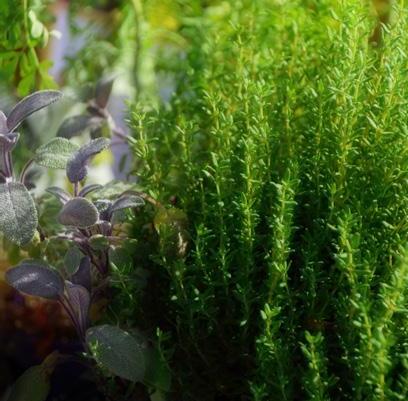
Sage, rosemary and thyme are perennial herbs well-known for their flavour and hardy nature, even in the harshest conditions. This trio of herbs are a great starting point for a mini medicinal garden that can be expanded plant by plant. I highly recommend three others in a basic pharmacy garden: aloe vera, nasturtiums, and comfrey. Their properties cover a wide range of uses for common ailments.
1. Sage (Salvia officinalis). A perennial clumping herb that does best in full sun. It prefers well-drained soil with low to moderate water needs. Make sage tea with fresh or dried leaves by steeping for 3-5 minutes in boiling water. This remedy is widely used as a tea or mouthwash for sore throats, laryngitis, indigestion, depression, anxiety and grief. The leaves contain antibacterial properties and can be smeared over wounds after cooking them in vinegar.
23
it’s not surprising there is a resurgence of interest in using plants for medicinal purposes
23
PHARMACY GARDEN
Thyme and purple sage are culinary and medicinal herbs that grow well together

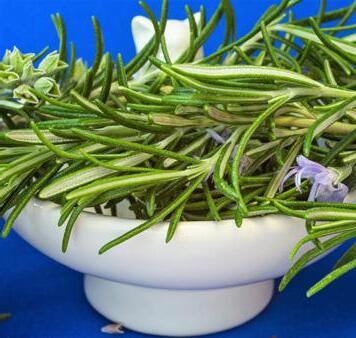
2. Rosemary (Rosmarinus officinalis). A perennial clumping and bushy herb that thrives in full sun, well-drained soil and minimal water. It is known as the ‘herb of remembrance’ for aiding memory and mental clarity. Rubbing and crushing the leaves releases essential oil compounds. Inhaling this aroma has an almost immediate effect on stimulating the brain and improving concentration. The leaves can also be rubbed over the temples to relieve a headache. The essential oils in the leaves and flowers have antiseptic, anti-fungal, anti-inflammatory and antibacterial properties. In addition, regularly eating rosemary provides a rich source of phytonutrients that can help build the immune system.
3. Thyme (Thymus species). This perennial low-growing and spreading herb prefers full sun to partial shade in well-drained soil with low to moderate water needs. It partners well with rosemary and sage in a garden as they all share the same requirements. Thyme contains antiseptic, antimicrobial, anaesthetic and antibacterial compounds that help keep infections at bay and are beneficial for healing. Combine the three herbs in tea!
Add fresh or dried leaves to boiling water to make thyme tea. The essential oil in the leaves contains thymol, a pain-relieving compound helpful as a simple remedy for many common ailments. Hot thyme tea may be sipped to ease a sore throat or poured into a bowl and inhaled to relieve a blocked nose, cough or cold. The warm tea can be used as a throat or mouthwash gargle for inflamed gums and laryngitis (combined with sage) and to destroy germs. Cooled thyme tea may be applied topically to the skin to alleviate and soothe rashes and sores.
Rosemary has powerful phytonutrients with medicinal health benefits
4. Aloe vera (Aloe barbadensis). Often referred to as the Medicinal Plant or Living First Aid Plant, it lives up to its name! Aloe vera is a perennial drought-hardy succulent that thrives in full sun or in a well-lit bathroom where it will get used regularly. It has to be one of the planet’s lowest maintenance, highest value medicinal plants. Aloe vera has anti-ageing, moisturising, healing and soothing properties, making it an incredibly useful healer for all skin complaints. The gel inside the leaves is used to heal burns, as a daily moisturiser or aftershave balm, and to heal cuts, bites, stings, blisters, infections, sunburn and many other ailments. We have many plants that we use daily. Aloe vera has anti-inflammatory, antiseptic and antimicrobial properties that make it a ‘go-to’ remedy that is quickly absorbed into the skin.

2525
No need for pain medication, a first aid kit, or a trip to the chemist or doctor! My garden is a ‘medicine cabinet’ waiting to be used when needed
PHARMACY GARDEN
Medicinal and culinary herbs interplanted with edible flowers in my home pharmacy garden
Aloe vera leaves cut into fillets with healing gel
HELLION VARIABLE SPECTRUM III


8-BAR 10-BAR

6-BAR 4-BAR
FOUR CUTTING-EDGE, HIGH INTENSITY LED FIXTURES BY ADJUST-A-WINGS


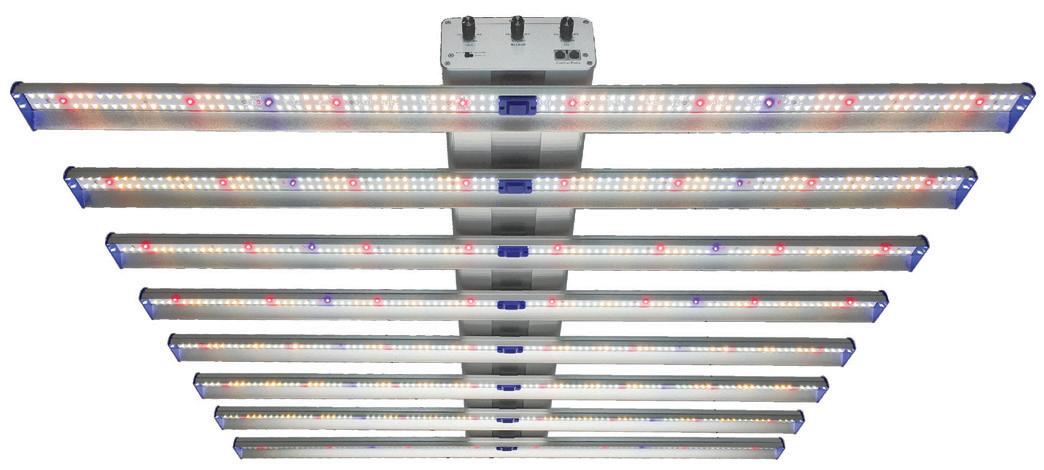
MULTI-DRIVER CONTROL & EFFICIENCY
Adjustable spectrum and intensity across three channels (VEG, BLOOM, UV)
PREMIUM BRAND DIODES
Samsung LM301h 3k + 5k, Osram 660nm Red

Osram 730nm Far-Red, Seoul 395 UV (all 50,000hr rated)
EXTENDED FULL SPECTRUM 360 — 780nm

PAR with UV-A / Near-Blue & Far-Red / IR
EVEN FOOTPRINT
Micro-reflector controlled light distribution for more intensity, deeper penetration and even coverage
VEG BLOOM UV
5. Nasturtium (Tropaeolum majus). This attractive annual herb flowers abundantly in full sun and grows more leaves in the shade. It’s tolerant of many soils and has moderate water needs. All parts of the plant are edible – flowers, leaves, buds and seeds. Research studies(1, 2) show the leaves have antimicrobial, antibiotic and general tonic properties. Tromalyt is the fast-acting antibiotic compound present in nasturtiums. One of the key reasons to have this natural remedy on hand is that nasturtiums don’t negatively impact the gut microbiome as pharmaceutical antibiotics do.
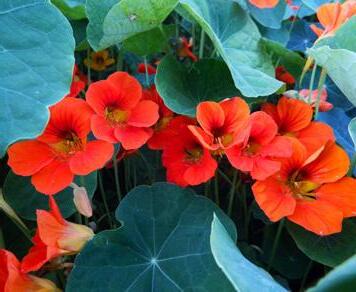
Nasturtiums also have anti-fungal and antiseptic properties. Whenever I feel a cold or flu coming on, I eat three leaves or seeds several times during the day. They are rich in Vitamin C and consistently ward off illness.
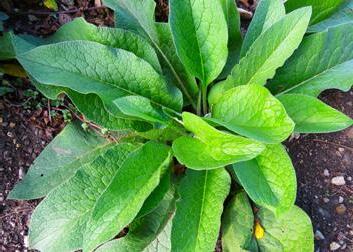
6. Comfrey (Symphytum officinale). Also known as Knitbone and All Heal. This clumping perennial and flowering herb tolerates full sun to partial shade and has moderate water needs. When I was a young girl, I spent a lot of time playing outdoors and falling out of trees, ending up with regular bruises (internal bleeding). So my mum grew comfrey and applied a fresh leaf poultice (a paste from the crushed leaves spread over a warm, moist cloth). This helped relieve inflammation, draw out bruising, reduce swelling and encourage faster healing. Over the years, I’ve used it to help heal sprains, bruising, broken bones and joint injuries. Of course, it has many other uses, but these alone earn it a place in a pharmacy garden.
General Precautions
Paracelsus wisely said, “All things are poison, and nothing is without poison. The dosage makes it either a poison or a remedy.” Consult your healthcare provider to determine if any medications you are taking could interact with the herbs you intend to use and research their contraindications.
Following these simple steps, you can grow a healing home pharmacy garden that will support your health and well-being for many years. 3
Paracelsus wisely said, “All things are poison, and nothing is without poison. The dosage makes it either a poison or a remedy
References:
1. ‘Antimicrobial and anti-inflammatory activities of the volatile oil compounds from Tropaeolum majus L. (Nasturtium)’, African Journal of Biotechnology Vol. 10(31), pp. 5900-5909, 29 June, 2011
2. ‘Traditional uses, botany, phytochemistry, pharmacology, separation and analysis technologies of Euonymus alatus (Thunb.) Siebold: A comprehensive review.’ J Ethnopharmacol. Fan L, Zhang C, Ai L, Wang L, Li L, Fan W, Li R, He L, Wu C, Huang Y. 15 Sep 2020; 259:112942.
BIO Anne Gibson, The Micro Gardener, is an author, speaker and urban garden community educator on the Sunshine Coast, in Queensland, Australia. Anne is passionate about inspiring people to improve health and wellbeing, by growing nutrient-dense food gardens in creative containers and small spaces. Anne regularly presents workshops, speaks at sustainable living events, coaches private clients and teaches community education classes about organic gardening and ways to live sustainably. She has authored several eBooks and gardening guides. Anne shares organic gardening tips and tutorials to save time, money and energy on her popular website - TheMicroGardener.com

27
Nasturtium tropaeolum majus flowers and leaves have medicinal benefits
Comfrey plant with healing leaves
PHARMACY GARDEN
A Grower’s Journal
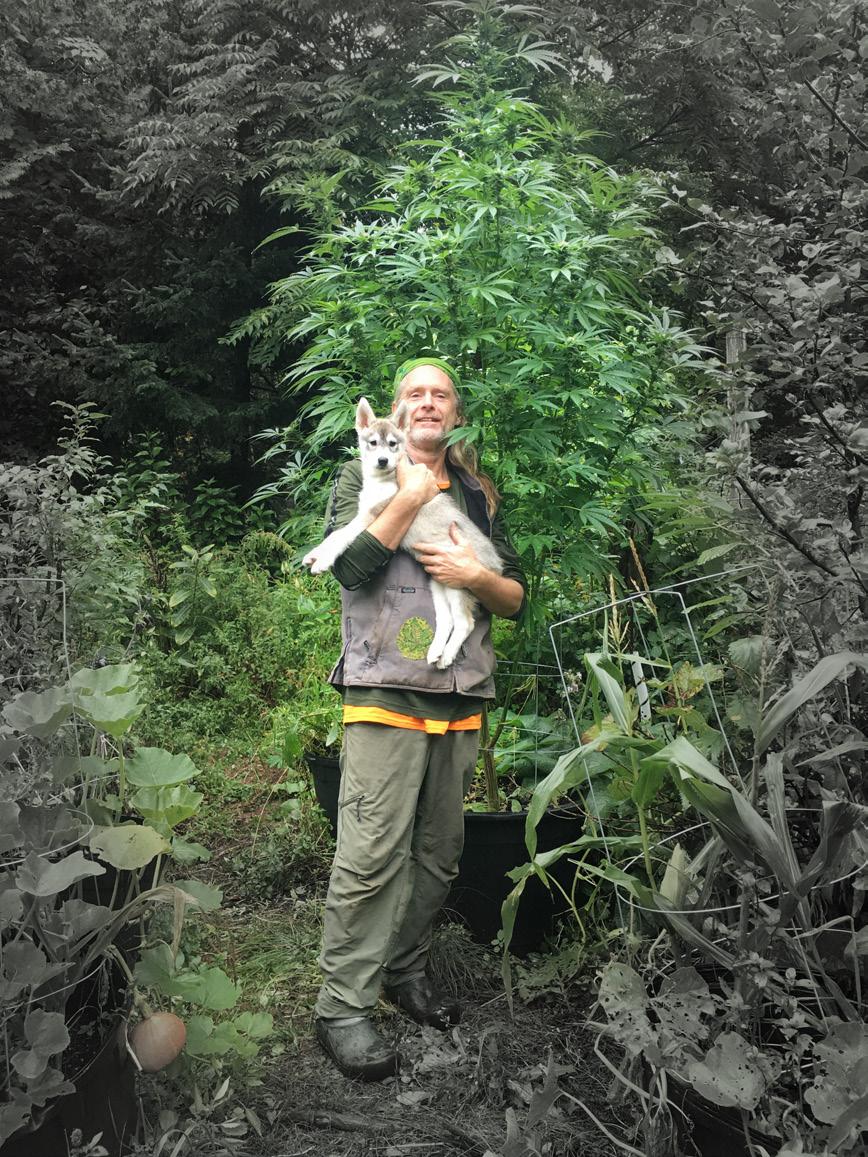
Why I Still Grow Cannabis Outside
I will keep growing, if just for the pleasure of those early morning barefoot walks
BY REGAN MORAN 28
Why do I still grow cannabis outside? For the smell of fresh flowers, of course! But that is just one of many good reasons. After cutting the last of the plants in mid-October, I feel a sense of relief to have a winter of medicine successfully grown in my backyard (under the ACMPR programme for personal use only). Growing outdoors involves so much work and dedication; there is constant weather watching and listening to the plants because they tell you when they’re thirsty! By the time harvest happens, it has been six months since I started the seeds, waiting for that first magical popping of germination. After narrowingly missing a little tornado that ripped through our community last May, destroying thousands of trees and a few houses, I feel fortunate that my crop wasn’t affected. Then, of course, there was the usual late spring hail, snow, and erratic rainfall throughout the summer (they now call them ‘rain events’).
Changing Ecosystems
There are also yearly surprises as things change in the biome, like almost no dragonfly hatchings until late summer, which meant swarms of deer flies, mosquitos, and black flies all at once. But, on the other hand, this year, I had virtually no slug pressure, even though I no longer have ducks on patrol; maybe it’s all the frogs in the outskirts of the garden and the new little pond I dug, which leap through the wet grass in the morning on their way to work.
How The Garden Grows
Hauling water to some of the plants further out in the garden made me rethink my haphazard planting guide. Each spot in the garden has specific attributes, and the sun, the most important one, is not as bright or strong in every area in my garden, which presents some challenges. Back to the drawing board, I guess!
But It Is All Worth It!
I love watching this resilient and fascinating plant grow in such an extreme climate and ripen its flowers beside an apple fruiting for the first time. It’s a long trip and requires dedication. I don’t go on summer vacations, and the plants in the garden are one of the reasons.
Growing indoors looks great to me on a small scale. I would probably have less work and worry and grow more consistent plants. But walking around the garden on summer mornings with the dew and the sparkling trichomes is incredible. The heavenly scent of all the flowers mingles with the bee balm, calendula, hops, clover, buckwheat, and the local spruce, birch, and pine add their terpenes to the
mix. The bees blissfully buzz around with loads of pollen, and the Eastern Pewee nested in the garden flits around with laser accuracy picking off bugs in mid-air. The hummingbirds play and fight, sometimes almost tumbling into the swarms of flowers!
Natural Cannabis
I think all this makes a difference; the wind, the rain, and the many feet of old-growth forest soil layered with the massive boulders of the Laurentian shield. The hedgerows, where I bury all the root mass and leaf litter and add whatever mulch I can, grow deeper and welcome a larger cast of plants as the soil matures yearly. I feel this translates into the complexity, depth, and purity of the plant’s offerings.
Home, Sweet Home
It would be easier to drive and buy some flower in a store, and maybe even cheaper with today’s abundance of products available, but homegrown cannabis is just that; it’s home. Now, if only the powers that be would be open to small artisan growers distributing plant medicine hyperlocally, providing for themselves and their community. In the meantime, I will keep growing, if just for the pleasure of those early morning barefoot walks. 3
BIO Regan is a gardener, homesteader and ski bum living in the Laurentian mountains of Quebec, Canada and spends his time tending to Porcupine Experimental Forest Farm.
I love watching this resilient and fascinating plant grow in such an extreme climate and ripen its flowers beside an apple fruiting for
OUTDOOR CANNABIS
2929
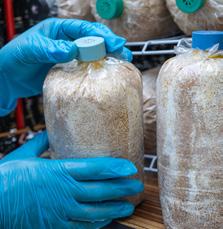
Mushroom Growth Cycles Using Fruiting Bags
Mushroom cultivation has become increasingly popular over the past few years due to its many ecological benefits, including growing nutrient-rich and delicious mushrooms in a small space with minimal inputs. However, growing mushrooms can be complex, requiring careful attention to detail and a good understanding of the various stages involved in the growth cycle. In this article, we’ll focus on the growth cycle of mushrooms using fruiting bags, one of the most common ways people cultivate gourmet and medicinal mushrooms. Fruiting bags are most commonly made of polypropylene, allowing the cultivator to sterilise various nutrient-rich substrates on which mushrooms grow. We’ll take a closer look at each growth cycle stage and explore some everyday situations cultivators encounter and how to identify them to ensure a successful flush.
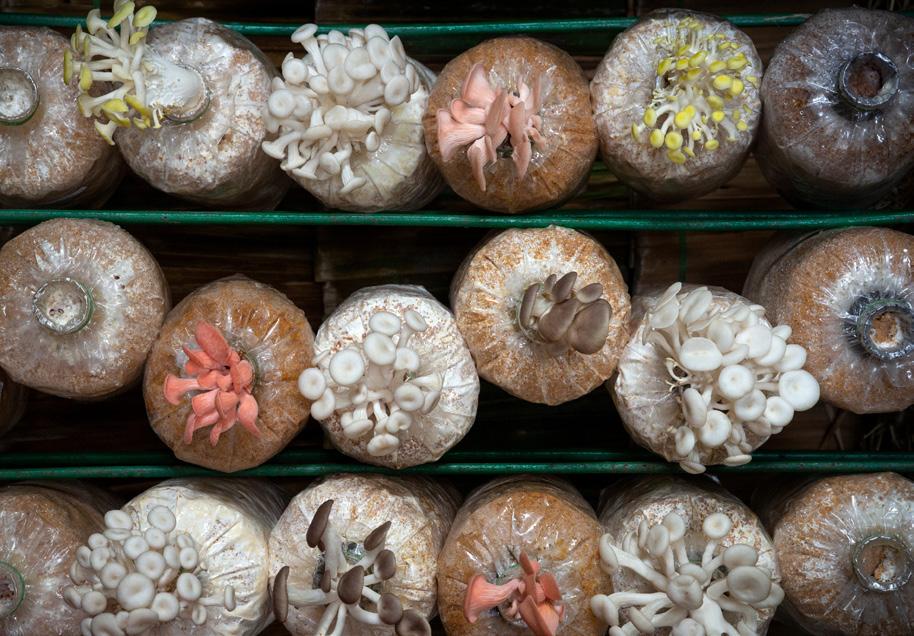
BY CHRIS JOHNSON 30
growing mushrooms can be complex, requiring careful attention to detail and a good understanding of the various stages involved in the growth cycle
Stage 1: Inoculation
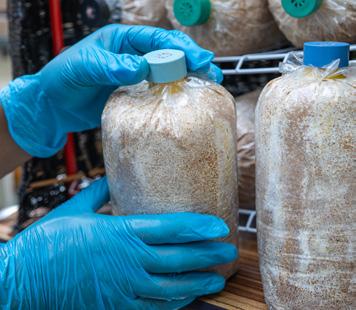
Inoculation is the first and perhaps most crucial stage when using fruiting bags to grow mushrooms. During inoculation, spawn, spores or liquid culture of the desired mushroom species are introduced to a sterilised fruiting bag filled with a nutrientrich substrate. However, several obstacles may present during this stage that can prevent a successful flush of mushrooms. One common scenario is failing to properly sterilise the substrate before inoculation, which can lead to microorganisms multiplying and overcoming the substrate before the mushrooms. Therefore, it’s essential to use a pressure cooker or autoclave to ensure that the substrate is entirely sterile before inoculation. Autoclave tape ensures your method reaches sterile temperature by changing colour at 121°C.
Mushroom Life Cycle
Another way to avoid contamination issues caused by understerilisation is to purchase sterilised media from a reputable source. When using spawn as an inoculant, follow the recommended ratio of spawn-to-substrate for the specific mushroom species being grown. If too little spawn is used, the mycelium may not colonise the substrate properly. On the other hand, too much spawn can lead to rapid but weak mycelial growth. Using clean liquid cultures or spores from a reputable supplier can help minimise the risk of contamination and ensure that the desired mushroom species is introduced to the substrate. Working in a clean and sterile environment during inoculation is also essential to further reduce the risk of contamination. By taking these precautions, growers can increase their chances of a successful harvest and produce highquality mushrooms.

and overcoming the substrate before the mushrooms
Stage 2: Colonisation
After the inoculation stage, the colonisation process begins. This stage involves mycelium growth throughout the substrate, which is the foundation for the eventual development of fruiting bodies. During colonisation, it’s essential to maintain the proper temperature and humidity levels to support healthy mycelial growth. However, several issues can arise during this stage that will impact yields. One common problem is slow or uneven mycelial growth, which can be caused by inadequate moisture, insufficient oxygen, or incorrect temperature. To address this, growers will monitor the bags while colonising and adjust the environmental conditions accordingly. Identifying contamination during colonisation is crucial to prevent further spread down the line and maintain a continuous growth cycle. Contamination
3131
MUSHROOM GROWTH CYCLES
One common scenario is failing to properly sterilise the substrate before inoculation, which can lead to microorganisms multiplying
Working sterile when inoculating
Mycelium development


can occur for various reasons, including exposure to air due to an improperly sealed bag, inadequate sterilisation, or the introduction of foreign bacteria or spores. Signs of contamination during colonisation include unusual colours or odours in the substrate and abnormal or slow mycelial growth. Common contaminants include moulds, bacteria, and yeast, often identified through visual inspection or an offputting smell. If contamination is detected, take immediate action to prevent further spread. Remove the contaminated bags from your healthy bags, seal them in a large garbage bag, and discard them as soon as possible. If you open one of the contaminated bags in your lab or grow area, you are opening yourself up to a mass contamination event, which leads to total crop failure. Growers should take precautions like wearing the appropriate PPE when working with their crops and ensuring all surfaces are clean and sanitised regularly.

Stage 3: Primordia Formation
After the mycelium has fully colonised the substrate, primordia formation is the next stage in the growth cycle. Primordia are small, pin-like protrusions that eventually develop into mature fruiting bodies. Ensuring your temperature and humidity controls are dialled in for this part of the growth cycle is crucial, as it will dictate how many pins develop, dramatically affecting your yield. For example, some mushroom species require a drop in temperature or increased humidity to trigger primordia formation. Others require increased fresh air exchange to promote pinning, often done by slicing an “x” in the side of the fruiting bag. Adding an opening to the fruiting bag helps orient the mushrooms where they should grow. Once primordia have formed, they will continue to develop into mature fruiting bodies over several days or weeks, depending on the species. Proper care during primordia formation is crucial to ensure a healthy and abundant harvest. Any environmental fluctuations or contamination at this stage can cause the primordia to abort or fail to develop into mature fruiting bodies.

Stage 4: Fruiting
The fruiting process is the final stage in the mushroom growth cycle. During this stage, primordia erupt into giant mushrooms that dwarf the small pins they once were. This often happens in a short window, so watching your mushrooms as they start to take off is essential. Environmental conditions during the fruiting stage are crucial for ensuring a healthy and abundant mushroom harvest. Mushrooms, similarly to humans, are mostly made of water, so ensuring the air has enough moisture in it is very important, as the mushrooms will dry out very quickly. But, like people, some mushrooms may require different parameters to thrive, so do your homework first. For example, some mushroom species require high humidity and low temperatures, while others require the opposite conditions. One issue that can occur during the fruiting stage is irregular fruiting, where some areas of the substrate produce more fruiting bodies than others, or the mushrooms grow at a variable rate. This is frequently caused by an improper pin-set being formed due to fluctuating temperatures or humidity conditions. Removing the entire fruiting body when harvesting is essential if you plan to do a second flush. Any piece of the fruiting body left behind will be prone to contamination, especially Trichoderma.
Level Of Difficulty: You Decide!
Mushroom cultivation using fruiting bags can be as complex or as simple as you need! If you are a hobbyist looking to try new things, starting with a pre-inoculated kit is the way to go, as you only need to worry about the fruiting stage of the mushrooms. If you want to get more involved, there are kits you can purchase that include a pre-sterilised substrate, PPE and liquid culture so you can experience more of the process yourself! Successful mushroom cultivation involves careful attention to detail, including proper substrate sterilisation before inoculation, maintaining the right temperature and humidity levels during colonisation, and ensuring appropriate environmental conditions for primordia formation and fruiting. While challenges may arise during each stage, identifying and addressing them early will increase the chances of a successful harvest. 3
33
BIO Chris Johnson is a business professional and amateur mycologist working in the Canadian psychedelic industry. Chris is passionate about making mushrooms and mushroom cultivation more approachable for the everyday myco-curious person.
MUSHROOM GROWTH CYCLES
If you are a hobbyist looking to try new things, starting with a preinoculated kit is the way to go, as you only need to worry about the fruiting stage of the mushrooms
Primordia formation
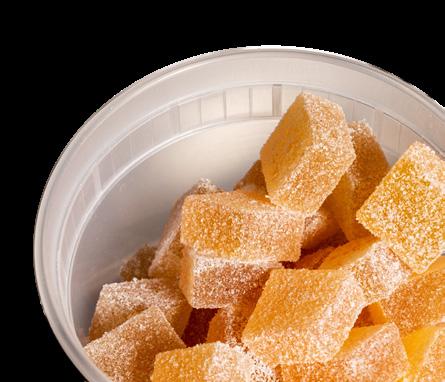
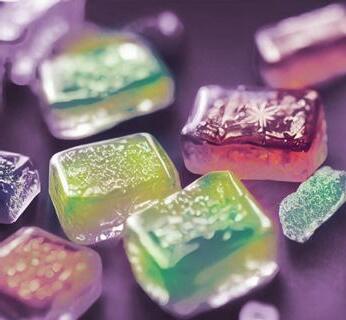
How To Make The

Perfect Edibles
Adam Clarke writes about how cannabis edibles don’t have to be like that one time in college.
BY ADAM CLARKE
34
Most people who have tried cannabis have also tried edibles at least once. They’ll tell stories of how they didn’t even notice it or were high for two days without a comedown. Both are the reality of edibles when they are prepared without knowing the concentration of cannabinoids in the final product. Like all cannabis products, not all edibles are created equal or have the same effects. All information for this article should be classified as anecdotal, and I have not sighted references. The information is from discussions with people after consuming edibles.
When they think of edibles, most people remember the brownie or cookie they were given years ago and told, “just one bite!” as they proceeded to mow the entire cookie. These oldschool edibles are why so many people fear taking cannabis orally. There is currently no reason why anyone making edibles doesn’t have at least a general idea of how much THC is the final product.
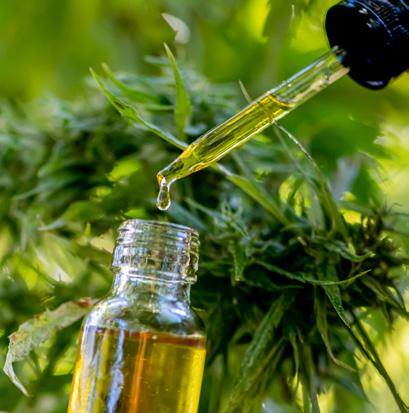
The two main ways to start your edibles at home are with cannabis flower or cannabis oil (concentrated cannabinoids, usually at least 70% THC, or high CBD, depending on the desired edible result). Cannabis oil will simplify the entire edible process and produce a more consistent result. Starting from cannabis flower will require some math and knowing the concentration of your starting inputs. For the new cannabis consumer trying to understand and learn about proper edible consumption, I recommend starting with cannabis oil.
Using Cannabis Oil For Edibles
We must start by looking at the oil you use for your edibles and determine the desired effect. Knowing your favourite strain or terpenes will help you choose your oil base. You will typically have an option of buying distillate or a full-spectrum oil. I never use distillate in edibles, as it gives a horrible high compared to full-spectrum and doesn’t give a proper balance. I can’t explain the science; however, why would we remove all the micro cannabinoids from the oil when they seem to be what balances your high? Generally, I have found the paranoid high from edibles comes from using distillate. The downside of using a full-spectrum oil is the cannabis taste. However, if used correctly, you can pair the cannabis flavour with the edible you make or hide it. For my purposes, as I never use distillate anymore, we will only consider full-spectrum oil. I like the taste of cannabis, so the flavour is no concern.
When buying oil, consider the edible you will make to determine the next steps. You need to look at the THC vs. THCa
of the oil depending on if you plan to cook, bake or heat your edible. If you plan to heat it, you can buy predominantly THCa, as the heating process will decarboxylate and convert the THCa into THC. THCa does affect the body, but it isn’t going to give the typical “high” one would associate with cannabis. If you do not heat your edible, consider buying a THC-only product, or you will need to decarboxylate your oil.
Luckily, the decarboxylation process is easy, and if you do a ‘no-heat edible,’ you will need to do the decarboxylation step for only your oil before making the edible. The simplest method to decarboxylate at home is to use your oven, put your oil in a Pyrex dish, and heat at 400°F for 15-30 minutes. I already know some people will be cringing at that comment and say there will be a significant terpene release, and they are right. If you want high terpene content, read up on the decarboxylation process online and consider a lower temperature for longer. When I make edibles, I almost always start with a THC-only (very slight THCa) oil. The next step for starting with cannabis oil is to add alcohol or fat to carry the THC into your body. In Canada, we cannot mix cannabis and alcohol in the legal market, so fat tends to be the way to go. Everything we discuss will be fat-based. However, ethanol is an excellent solvent for THC, and “green dragon,” as it is often referred to, is a great way to solubilise cannabis. The main issue with green dragon-based
For the new cannabis consumer trying to understand and learn about proper edible consumption, I recommend starting with cannabis oil
Like all cannabis products, not all edibles are created equal or have the same effects
CANNABIS EDIBLES 3535
Recipes For My Favourite Cannabis Edible Products Starting From Oil Cannabis Candy!
• 1 cup white sugar
• ½ cup water
• ¼ cup light corn syrup
• Cannabis oil (dose as desired)
• Flavour as desired
I use silicone candy moulds for the above recipe and get about 80-100 candies per batch. Your mould size will change the end dose, so I suggest making a batch of candy without cannabis first to see how many you get to determine your dose. Once you have calculated your dose based on THC concentration and quantity, you can make your candy.

Place all the ingredients in a pot and heat on the stove, but do not add the cannabis oil yet. The goal is to get the candy to the hard crack stage. This will require a candy thermometer; aim for about 310°F.

Stir the mixture until all the ingredients incorporate. At about 200-250°F, drop the cannabis oil into the mix. The absence of fats means using the heat to thin the cannabis oil and then allowing it to bind to the sugar. I don’t usually put the cannabis oil in at the beginning due to the potential of turning the THC into CBN, which makes you sleepy after consumption. I have never tested the difference in end products at the lab. However, I get very tired if I put the oil in first. If sleep is your desired output, heating your oil longer could be beneficial!
Once the candy in the pot hits 300°F, remove it from the stove and put it on a heat-proof surface. The pot will stay hot and take the candy to the 310°F hard crack stage. Next, add 1 ml of a concentrated flavour. I usually use the LorAnn brand, and they always turn out great. After adding the flavour, stir vigourously for about a minute, then pour the candy into your moulds. Place them in the fridge after to cool down. Later, dusting icing sugar on the candy will stop any sticking during transit.
You will find that cannabis candy has a sublingual effect and hits and leaves you faster than a typical edible. A lower dose of candy hits fast and tastes great!
WARNING: If you snack on the candy scraps while making these, expect to get quite high!
36
You will find that cannabis candy has a sublingual effect and hits and leaves you faster than a typical edible
Portable Cannabis Pills

Cannabis pills are an underrated edible format. They are easy to make, extremely portable, and discrete. While I cannot make any medical claims, I have helped people supplement their sleep with cannabis pills. These people cannot stand the smell or taste of cannabis but are in their seventies and desperately want to sleep more and not have the side effects of their prescribed sleeping pills. Again, not a doctor, but from anecdotal experience, these pills have done wonders for some of my friends and family.
I have gone through many iterations of pills and carrier oils and have found the best fat to use is Coco Butter. Coco butter is solid at room temperature, allowing two-part capsules to be used without the risk of leakage. It also melts at a reasonably low temperature, which helps the fat process with the cannabis oil in a liquid state. Generally speaking, these pills will stay solid in most environments after filling. I have tried coconut and olive oil, but they are too thin in a liquid state and slowly seep from the pill case.
When I buy empty pills, I use the ‘00’ size, readily available online. Be warned that these pills will melt if they come in contact with water.
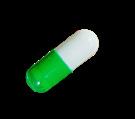

My typical batch will make approximately 100 pills based on an 80% THC content input oil. As this is a hand process and everyone is liable to change the numbers and fill levels slightly, this is only a measure of the end potency, and how you handle the product will change the outcome.
I recommend having some isopropanol, a 15 gauge 10 ml syringe (blunt tip), a pill holding tray, and a 500 ml mason jar available (I buy them all on Amazon).
 CAPSULE SIZE COMPARISON
3737 CANNABIS EDIBLES
Cannabis pills are an underrated edible format. They are easy to make, extremely portable, and discrete
with our Garden Culture Blog


Our blog is where we bring you more than we can cover in our print issues; timely news, growing tips, and great ideas. Hundreds of growing articles are waiting for you.
38
Stay up-to-date
@gardenculturemagazine Stay
GCMAG.co
up-to-date with our Garden Culture Blog
100 pills @ approximately 10mg using 80% THC oil (no or little THCa) and ‘00’ capsules.
• Take 75g of coco butter and place in a mason jar.
• Place the jar on a scale and zero.
• Add 1.25 grams of 80% oil to the mason jar.
• Close the mason jar lid and place it in a bowl of boiling water. Do not keep adding heat to the oil. I usually boil water in a kettle and pour it into a bowl. Make sure not to place a super cold mason jar into boiling water, or it may break.
• Wait for the coco butter to melt completely. After it is liquid, shake the jar vigourously until a uniform colour, and no cannabis oil is visibly present. Now you have a cannabis extraction that is in edible form.
• Take your two-part capsules and place them large side in your pill holder.
• Use your 15 gauge syringe and suck up the cannabis coco butter oil.

• Dispense the oil into the caps.
• Place the other half of the cap back on after all are filled.
*Test each cap by hand to ensure you got them to ‘click.’ They should not move when squished on the ends.
Place in a container and store below 35-40°C (melting point of coco butter).
Most people find the effects start about 30 minutes to one hour after ingestion.
Preparing Cannabis Edibles From Flower
When starting with cannabis flower, it is crucial to understand the concentration of your starting flower material and the weight you will use. Using flower from the regulated market, you will know these concentrations as stated on the bottle.
For the extraction technique, we can assume that you will extract at about 90% efficiency and lose about 5-10% in material handling. For your edible end concentration, take the starting THC and assume you finish with about 80-90% of the total THC you began with.
When I extract flower in my kitchen, I always lean toward fats that can be used in many things. My favourite fats are olive oil, coco butter, and coconut oil. For this extraction technique, we will be using olive oil. Start by filling a large pot halfway with
half water and half olive oil (the amount of water/oil depends on the amount of cannabis flower used). After adding the oil and water, place the flower in the mix. Put the pot on the stove, heat it to about 70-80°C, and hold it there for 30 minutes. Then, strain the flower from the mix with a cheesecloth. The goal is to remove as much plant matter as possible. After you have filtered out the plant material, place the water, olive oil, and cannabis mixture in the freezer so the water and oil separate. Leave the pot in the freezer overnight to ensure the water completely freezes. Remove the pot in the morning when all the oil is semi-solid and has floated to the top. The water/remainder of any plant material has stayed in the bottom and turned into a block of ice. Take a spoon and quickly scrape your oil before the water melts.
This olive oil is now super green and ready to consume. It is likely mainly converted from THCa to THC during the heating process on the stove. However, without a lab result, it isn’t possible to see how well it was decarboxylated. I use this oil for oral consumption, cooking on the stovetop, or baking. This oil will have the cannabis flavour from the strain you used, so find ways to pair the flavours and create a well-mastered dish.
I use a flower-based extraction for simple products, not for more complicated or smaller-dose edibles. Cannabis concentrate oil is a better starting material if you want an exact metered dose in your end edible cannabis oil.
There are many other ways to cook with cannabis. For example, try using citric acid in or on your candy for a sour taste. Marinate your steak in your cannabis olive oil. Have fun and enjoy cannabis cooking! 3
This oil will have the cannabis flavour from the strain you used, so find ways to pair the flavours and create a well-mastered dish.
3939 CANNABIS EDIBLES
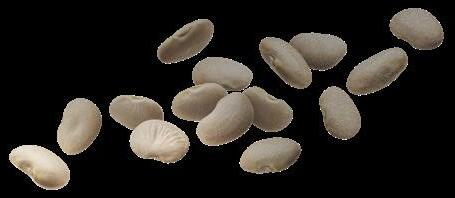
Got Old Seeds? Got Old Seeds?
There’s something exciting about finding some longforgotten, rare seeds. Once you have them, the challenge is to revive those genetics, especially considering they’ve been sitting in someone’s tobacco tin, basement, or garage for decades. While they look like they could germinate, you don’t have many, and you want to make sure they sprout.
Soaking seeds in a diluted solution of blackstrap molasses or even sugar water will bolster carbohydrate levels

We pulled this article from the archives! It originally published in UK37/US35/AUS19, but it’s been trending on our website lately, so we thought we’d share it with you again!
Don’t give up on old seeds you have lying around the house. It’s possible to revive them! Cody J. GarrettTait has some tips on helping forgotten seeds sprout. Find other seed starting tips at GCMag.co.
BY CODY J. GARRETT-TAIT 40
Trending now GardenCultureMagazine.com
Help Them Sprout With These Tips And Tricks

Is It Possible?
Yes! Even seeds that are thousands of years old can germinate. But proper pre-treatment is essential, and the older the seed, the less energy it has left in storage.
Seeds from annual plants aren’t often designed to last many years, part of what makes the germination process so tricky. With each trip around the sun, energy declines. Eventually, the embryo doesn’t have any juice left to break the seed coat and push through the soil to the surface.
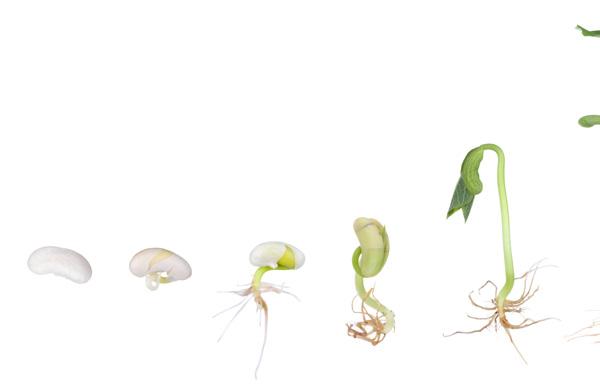
To an extent, we can minimise this through proper storage in cool and dry environments. But even still, the passage of time inevitably wins.
Clean Beans
Aggressive tactics are often needed to give the seed a fighting chance. First, the seeds will need to be cleaned, minimising any potential mold spores and pathogens that may be on the seed surface. Soaking the seeds in a 1 or 2% hydrogen peroxide solution for a few minutes cleans effectively while also providing slight chemical scarification to the seed coat, which has likely hardened over time.
Chemical Scarification?
For germination to occur, the embryo needs to be able to exchange oxygen with the outside world. The issue? Seed coats tend to harden over time, which prevents them from properly absorbing water and oxygen. While H202 can provide a chemical roughing, it’s often necessary to get a bit more surgical.
Mechanically scarifying seeds can be as simple as lightly sanding the micropyle (edge) with a piece of sandpaper (being careful not to go too far), or knicking a notch out of the seed coat with a utility knife. Cracking the seed coat carefully between a pair of forceps is another method. Many old-timers used to crack the seeds between their teeth!
Scrubbing In
Sometimes, you have to perform surgery to get a seed to germinate. Do this by entirely removing the seed coat and directly germinating the embryo by placing it on top of a quality propagating media kept evenly moist in a controlled environment. Steady hands and magnification are a must for this; small seeds mean delicate work! Often, this step alone is enough for seeds and should improve success rates.
Rejuvenation
To further ensure the best chance of germination, we can attempt to replenish some of the energy and hormones that have been lost over time. Soaking seeds in a diluted solution of blackstrap molasses or even sugar water will bolster carbohydrate levels. When added to the mix, kelp, fulvic acid, B vitamins, alfalfa meal, coconut water, and malted grain (especially barley) provide a considerable array of biocatalysts, including natural enzymes to wake the tired embryos and get them moving. Coconut water is notably used in plant tissue culture as food stock, which proves very useful for these purposes. Germination is an enzyme-driven process, which can be naturally supplemented by the above ingredients.
Once the seeds are ready, place them directly into a quality, organic soil for germination, rather than on a paper towel. The latter makes the seeds more prone to pathogens. Good soil should be brimming with healthy microbes. Direct planting also avoids injury to the initial taproot’s very fine feeder hairs during transplanting, further enhancing survival rates.
Don’t give up on older seeds; try to germinate them to see if they are as good as you remember. 3
4141
SPROUTING OLD SEEDS
BIO Cody is the owner of High Powered Organics and a second-generation Australian grower with more than a decade of experience in the horticulture industry. Cody works closely with growers locally and abroad, creating organic solutions for high output cropping. He achieves maximum results by combining aspects from permaculture, biodynamic farming, and Korean natural farming techniques. Cody’s main focus is finding natural, and sustainable ways to produce high-quality plants with a minimum of input.
Seeds from annual plants aren’t often designed to last many years, part of what makes the germination process so tricky
Cultivation Calling the Cultivation
The Cycles Take the Square

If you’re a millennial in the United States, modern western square dance was likely the country’s official dance in the year you were born. For all those who’ve shared an evening (or a school physical education class period) kicking up their heels in time to a hoedown, let’s explore how we might incorporate the noncompetitive and fun spirit of the Square Dance into our cultivation strategies.

42 BY XAVI KIEF
As a cultivator, you might imagine yourself as a square dance caller
Dance Dance
So often, we growers put a lot of pressure on ourselves to control environments, create timelines, and follow perfectly laid plans for efficiency and output. As a result, we can be demanding, ambitious, and highly emotionally invested.
To an observer, square dance is variously predictable and creative, repetitive yet changeable. The floor area is divided into one or more squares, where groups of partners may meet, exchange places, travel together, join with other pairs or singles in seemingly limitless combinations, and, depending on skill level, play games or experiment with the form.
In a given space, let’s say a garden marked out in dimensional feet, each square might host its own fraction of your vision as a whole. While you are involved and can influence the inhabitants of the space through your choices, it’s ultimately not up to you to grow from a seed into a plant or transform from a mass of mycelia into fruiting mushrooms.
As a cultivator, you might imagine yourself as a square dance caller. The best you can do is see potential, provide opportunity, cheer, coax, and call instructions – you can change the music, and even the players, in attempts to provide tunes and tempos that harmonise well with those others present. It can be a humbling and delightful place to be, acting from a vantage point both participatory and supervisory; you’re at the dance, but it’s not really about you.
Providing Prompts: You make the Call, but will they Listen?
Your instructions can be as creative, inventive, or traditional as befits the occasion and the group. You will use your improvisational skills to adjust for the dancers’ abilities, skill levels, and styles.
Elocution, Pitch, Rhythm, and Timing are the foundation of a caller’s skillset. Each can be related to overseeing and guiding a garden to its full potential.
Elocution
Developing a clear voice in communicating with your cultivars is key: chaotic, complicated, or uncertain instructions are difficult to follow. This can be accomplished with tidy workspaces and clean lines, using assertive actions like aligning your planting with a grid. It allows you to communicate where you want specific things to take hold at the beginning of life and where, if planting below ground or out of sight deep inside an inoculated log or grow bag, you expect to find them at harvest time.
“Square ‘em Up!”
Inviting the dancers into the arena, you clasp the mic and signal the band. “Greet your partners,” you encourage, preparing the substrates and starting materials to meet.
You don’t know where the season will take you at this stage. It might be a triumph or fall apart; you develop confidence with your style, honed through practise and a willingness to try new things. When attention is on you to lead, you have to negotiate dynamically with those who have agreed to follow; they’ll only move how you want them to if the instructions are clear and result in fun for everyone.

Whether practising controlled environment agriculture on a rotation of your choosing or working outside within a given set of climatic conditions, you have groups of basic elements to consider and coordinate. Time and Space are divided into manageable parts, with periods for dancers to recover from their activity.
Individual growing days, weeks, or months make up a setlist of songs. Each subset of time, even if it repeats (e.g. the lunar cycle leading up to the Summer solstice), has its own character. The same song played twice by live musicians, even those most professional and practised, with every string tightened and tuned, imparts a unique experience.
Think of the combination of the hands, tools, machines, and other instruments employed in the space (e.g. trowels, seeders, fans, de/ humidifiers, carts, misters, etc.) as the band. These are your support, and you rely on them to be predictable.
The music kicks in and all move in time with the beat, sharing a pace and a pulse, gathering momentum and becoming increasingly lively, buoyant, and celebratory.
Pitch
How high or low your voice sounds is its pitch. For example, consider how the pitch of your voice changes when you are stressed and rushed – does it go up? Do your instructions come out squeaky or broken? The opposite is true when you are calm and relaxed – your pitch is lower and easier on the ears.
4343
While you are involved and can influence the inhabitants of the space through your choices, it’s ultimately not up to you to grow from a seed into a plant or transform from a mass of mycelia into fruiting mushrooms
THE CULTIVATION DANCE
As a cultivator, you might imagine yourself as a square dance caller
Not to overly anthropomorphise nonhuman garden occupants, but this pitch can be ‘heard’ in the sense of pace – pushing for ever faster growth, or trying to make things happen before the conditions are ready, drives this pitch higher. At some point, the message receivers may be unable to keep up, become confused, and stop responding as they wish.
Friendship Set to Music
In this kind of dance, the ultimate effect is lovingly coordinated chaos. Given a familiar structure, community agreement on terms and definitions, and limited to the specifics of locale and spacetime, rogues still have to throw things out of synch to challenge the flow with missteps or distractions.
Egos, ruthless competition, showing off, and rushing has no place here. As your garden’s caller, you can identify peaks and valleys of resources used, the phases of growth each of your targeted cultivars are in, and how these relate to any other observable ecosystem inhabitants.

For example, suppose you notice a symptom of nutritional deficiency, signs of aggressive overpopulation by generally unhelpful insects (Mites! Aphids!) or other pests. In that case, you can seek to correct this imbalance holistically by giving attention to it. Using an amplified voice (in this case, the power of selected amendments or techniques), you can intervene with admonishment or encouragement.
44
Send me an “Angel”
Throughout the growing season, seemingly infinite cycles may occur and intersect. For as many single plants you may harvest, the ways and means by which they matured and developed had a great deal to do with the activities of unseen microbes, organic chemicals, minerals, and other organisms sharing the space.
There will never be a perfect group, but experienced dancers (your “Angels”) can demonstrate to beginners, leading by example. Imagine these as your perennials, perhaps your favourite perpetually-harvested propagants, or the permuting presence of various micro and macro-fungi and ‘phytes.
In each square, aim to have at least some Angels who will help keep things on track. Even in a highly-sanitised, nearly inert growing space, including a familiar cultivar or two in the rotation can be beneficial. Since you know what to expect from these plants or variants of fungi (e.g. a specific strain of oyster mushroom you’ve grown before in the space), it will be easier to tell if your calls are coming through clearly depending on how they respond.
In wilder, regenerative growing ecosystems, the friendships forged are intergenerational; life cycles of different lengths turn and the peak of one supports the emergence of another.
Market gardeners and perpetual harvesters actively stagger these cycles in their squares. Those who brew their microbial teas and craft KNF inputs will also notice that their source materials are often existing in the part of their life cycles just in advance of the one being experienced by the target of those amendments.
Practising “chop and drop”, re-introducing indigenous microorganisms after multiplying them, and cultivating beds of staggered blooming plants to maintain food sources and homes for beneficial insects, are other ways that your calls can reach their intended audiences.
The ecosystemic and biochemical processes involved are stunningly beautiful and not always necessary to understand to be enjoyed. The environment is enriched by diversity because the players can see and learn the “steps” from one another. Seeing these cycles in each square, dancers are supported by having those ‘in front’ of them travel a path clear of obstacles and can be mimicked.
Rhythm and Timing: Finding the Groove
Especially when working in a regenerative environment, each observable cycle builds on a previous one and intersects with untold others. Your skill level as a caller will improve each time you witness the successful completion of a circuit. This is primarily a measure of the pleasure and enjoyment experienced by everyone present.
In the garden, a good metric of this pleasure is abundance! Your choreography develops a rich and vital environment, promotes hearty and vigourous growth, crescendos to jubilant peaks, and makes it inviting to return and dance again.
Take any chance you get to release a shared, hearty, exclamatory cheer at the sheer thrill of coming together in performance with your cultivation collaborators!
Writer’s note: Square Dancing has a fraught history and is generally associated with English language-dominated countries worldwide (mainly where post-WWII American military installations have been located). Henry Ford, motivated by racism and anti-Semitism and fearful of jazz’s influence in America, invested heavily in promoting the “wholesomeness” of the form. This amounts to a historical erasure of (or worse, pride in) the appropriation of dance calling by white performers from their black counterparts, as the caller’s contribution is what makes square dancing distinct from other dance traditions imported from Europe. Ford’s argument was similar to cheering for hemp but maligning “marijuana”. I encourage anyone who has enjoyed this article to check out “Square Dance Calling: The African-American Connection” by Philip A. Jamison. Whether in the dance hall or the grow space, where you can lead, it’s up to you to stay critical of those relationships; between entertainers and the entertained, those doing the work and the ones enjoying its rewards.
Bio THE CULTIVATION DANCE
While I have enjoyed dabbling in dance from time to time, I claim neither to be a trained caller nor a historian of the form – if you are, and my vocabulary or metaphors aren’t quite right, I ask your forgiveness and mean no insult!
Your choreography develops a rich and vital environment, promotes hearty and vigourous growth, crescendos to jubilant peaks, and makes it inviting to return and dance again
Xavi Kief is a writer, researcher, and lifelong learner with their hands in the dirt and their imagination traversing the universe. Seeking always to deepen and integrate their connection with the living planet and its diverse inhabitants, Xavi finds joy by infusing their practical and playful approach to cultivation with a healthy dose of science. They grow food and medicine for their family and community on their NorthEast Coast homestead. 4545
PUSH PAST PAR WITH ePAR
ePAR:

ePAR redenes the PAR spectrum to recognise the benets of light waves outside of the 400 to 700 nm range. PRO GROW UFO LEDs include a blend of far-red 730 nm diodes. The addition of far-red diodes extends the spectral gap previously provided by HPS lights but until now was missing from LEDs


100 W UFO
Total Diodes: 304
PPF: 210 µmol/s

Efcacy: 2.1 µmol/J
200 W UFO
Total Diodes: 608
PPF: 420 µmol/s
Efcacy: 2.1 µmol/J
300 W UFO 0 -10 V Control
Total Diodes: 912
PPF: 620 µmol/s

Efcacy: 2.1 µmol/J
500 W UFO 0 -10 V Control
Total Diodes: 1520
PPF: 1050 µmol/s
Efcacy: 2.1 µmol/J
3 LM301H 400 800 500 600 700 300 380 770 ePAR P PAR E E
EXTENDED PAR SPECTRUM GRAPH (ePAR)
OPTIMUM DIODES
DIM & CONTROL
• Dimmable and Controllable


• Compatible with Eco Controller
SMART CONTROLLER
Controls up to 30 fixtures in a single room.
• Replaces timers while offering advanced features.

• Programmable auto temperature dimming to 50%.


• 1 hour programmable sunrise/sunset feature.
• Temperature & humidity sensor included.
Wholesale Horticultural Group
ECO
What Is
Triacontanol?
Triacontanol (TRIA) is a naturally occurring alcohol found in the waxy parts of plants, including the leaves and beeswax. This non-toxic substance can be highly beneficial in boosting and supporting plant health.
Triacontanol raises the efficiency of the plant cells responsible for the growth and maturity of a plant.
Triacontanol’s Roots
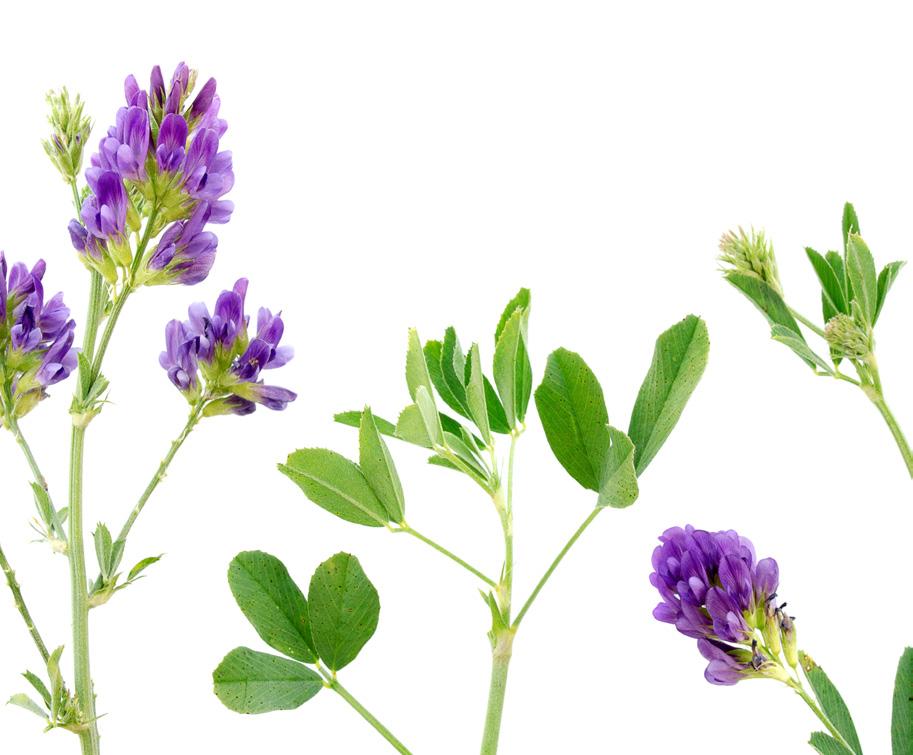
Triacontanol was first isolated from wax from the alfalfa plant in 1933. For many years, researchers thought that the alfalfa plant might benefit plants, humans, and animals. Finally, in the 1970s, American plant physiologist, Stanley K. Ries, confirmed these suspicions. Ries was the first to observe significant increases in the yield and growth of plants such as cucumber, tomatoes, wheat, lettuce, maise, and rice when growing near alfalfa hay.
BY RICH HAMILTON
Alfalfa plant (Medicago sativa)
48
Triacontanol was first isolated from wax from the alfalfa plant in 1933.
Further research into alfalfa led to the isolation of 1-triacontanol. Studies found that small quantities of alfalfa and triacontanol could stimulate growth and productivity, even in the dark (without the help of photosynthesis)!
From the evidence, triacontanol may be effective when airborne. It could influence plants merely by being present in the immediate environment, making alfalfa an excellent companion plant for other crops.

What Does Triacontanol Do For Plants?
Triacontanol has consistently shown many valuable benefits for the root zone and leaves of vegetables and agronomic, horticultural, medicinal, and aromatic crops. Triacontanol is a multi-tasker, stimulating growth and supporting plants in optimising their genetic possibilities.
Triacontanol can drastically increase chlorophyll levels in leaves, raising the rate of photosynthesis, cell multiplication, and cell growth. Triacontanol can also reduce plant stress factors and boost photorespiration and the assimilation of CO2
Triacontanol is reported to work very fast if the dosage is correct, helping to fight and prevent disease, unlock amino acids, and increase enzyme action. As a nutrient and water uptake enhancer, it can also boost nitrogen fixation, aiding plants suffering from poor nutrient intake or other growth deficiencies. In addition, leaves and flowers can see significant size increases when triacontanol is used, as can root systems.
Is Triacontanol Organic?
Triacontanol is included in some commercial bloom boosters, although not without issues. Triacontanol does not readily dissolve in water and must be mixed with an emulsifying agent first; this is one reason it is less commonly used than other amendments and supplements. While triacontanol is an organic product, the solvents and surfactants needed to make it a stable product are not.
These synthetic chemicals can stop commercial triacontanol products from gaining official organic certification. There are some commercial products available, however, that are created using only materials allowed under organic certification processes. If you are an organic grower, always research the product before buying and ensure it is suitable for your needs.
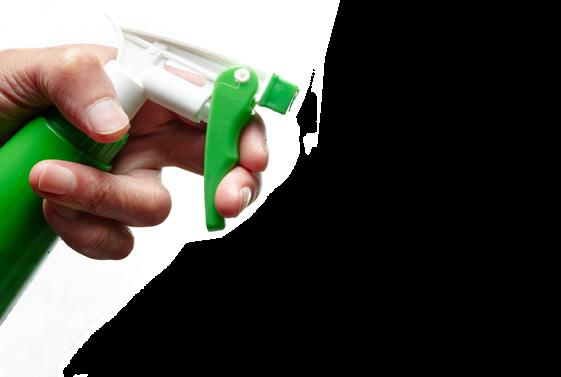
It is also possible to buy water-soluble triacontanol powders that you mix yourself to make a foliar spray. These are very convenient, but you should check whether the solvents and surfactants included are organic.
How to Use Triacontanol
Triacontanol can be applied as a foliar spray or directly to the medium. However, much depends on the plant’s lifecycle stage. For instance, TRIA is an excellent tool for helping cuttings root, so add it directly to the medium.
Triacontanol is effective in tiny doses. Application concentrations range between 0.01 parts per million (ppm) to 1 ppm, which is very little compared to other common amendments, so be vigilant when preparing doses.
It’s difficult to argue with the abundance of scientific evidence that shows a definitive correlation between the use of triacontanol and healthier plants. Many keen growers also share success stories after using triacontanol in the garden. So if you have never used TRIA, it’s worth a shot, and if applied correctly, it will give your plants an extra growth boost and potentially increase yields. 3
An industry veteran with over 20 years of experience in a variety of roles, Rich is currently a business development manager for a large UK hydroponics distributor. The author of the Growers Guide book series, Rich also writes on all aspects of indoor gardening. He is also an independent industry consultant, working closely with hydroponic businesses worldwide.
BIO
Triacontanol is a multitasker, stimulating growth and supporting plants in optimising their genetic possibilities
TRIACONTANOL 49
Triacontanol has consistently shown many valuable benefits for the root zone and leaves of vegetables and agronomic, horticultural, medicinal, and aromatic crops.
Notes From A Dirty Old Gardener
lanting and icking eppers to ickle in
epper atch Pepper PepperS
my
I recently learned pepper plants are perennial, so I expect these suckers to be giants by summer
BY REGI ONETON 50
If you have been reading this lovely publication, you know that the grocers and powers that be angered me to the point of starting an indoor garden for sustenance rather than just for my favourite medicinal plant. I was sick of paying through the nose for subpar produce, so I politely asked my plants to share their space with some companions that would help keep daddy strong. The winter season isn’t even close to over, and I have experienced such a success story I wanted to call the local news. But I doubt they share our passion for anything containing Chlorophyll. So let me share my experiences with you, my dear reader; welcome to the pepper patch. Call me Peter Piper.
Peter Piper?
I was about 60 days deep into the winter depression when the dozen or so chilli pepper plants of different varieties I had started late fall needed to be harvested. When all was said and done, I had collected enough spicy fruit to satisfy a Mexican Cartel’s taco celebration or Quinceanera. The juxtaposition of the winter wonderland outside and the seemingly out-of-place cultivar being harvested was not lost on me. I recently learned pepper plants are perennial, so I expect these suckers to be giants by summer. The Fauna will spread fiery diarrhoea across the landscape. I am setting spicy traps all over the garden this summer. The squirrels will learn to fear my garden and its fire fruit; there will be no sympathy for garden vultures. I am stacking jars of hot sauce and haven’t had to buy some hipster three-ounce bottle of swill for $9 in months. Damn, does that feel good!
Herbs Galore
Any self-respecting amateur chef has a couple of herbs growing. Well, let me tell you, my basil is up to my goddamn shoulders, and I am making pesto almost weekly. My basil could sustain the sauces of ten Italian families—big ones with lots of fat uncles who sweat and don’t use napkins. My bay leaf plant is older than I am. All that time spent in a controlled environment has it shooting so much new growth that I am filling bags faster than I can give them away. This summer’s harvest was so abysmal I couldn’t share a cherry tomato with my neighbours. Now, mid-winter, they have some weirdo offering them “fresh” pesto, hot sauce and produce. It’s hard
to explain that you have enough Asian Eggplants in your basement to feed the Ming Dynasty, but given the food prices, nobody seems to be complaining about their winter windfalls. Applying my indoor practises and the controlled environment is turning summer mistakes inter winter successes. I will carry knowledge from my winter session into the summer and vice versa.
Plans For Expansion

It makes me wonder; if I am accomplishing this with a couple of tents and spare lights, what would a whole room do? If a few of my neighbours adopted the same philosophy and had anything resembling a “green thumb,” we could put the local big-box grocery on its knees. No kids and no lady mean I can convert this whole country house into a fucking greenhouse if I want to, and it’s looking like things are leaning aggressively in that direction. I can’t wait until the grocery store gangsters send someone to have a “talk” with me about besmirching their good name and messing with their margins. I will remind them I have been skirting the law since I was a young lad, and they are safest at the edge of my property line. Don’t let the barn door hit you on the ass on your way out, and take some hot sauce when you leave.
So Many Pros
What is there not to like? It’s like having a second secret pantry. New recipes are inspired weekly, and these plants form a symbiotic relationship in which I participate. The air quality in my house during winter months is cleaner, with the three dozen plants scrubbing the air. My belly is fuller for less money, and my mind is more occupied and clearer. This winter garden also presents the opportunity to cherry-pick my genetics for summer by isolating the stronger, tastier fruits for reproduction. Even if grocery prices return to the realm of the affordable, I don’t think I will be returning to the grocery store with the same intensity and reliance. The sour taste the grocers have left in my mouth has led me to do what I usually do: “do it your damn self”. Or, in this case, grow it.
5151
DIRTY OLD GARDENER
The winter season isn’t even close to over, and I have experienced such a success story I wanted to call the local news


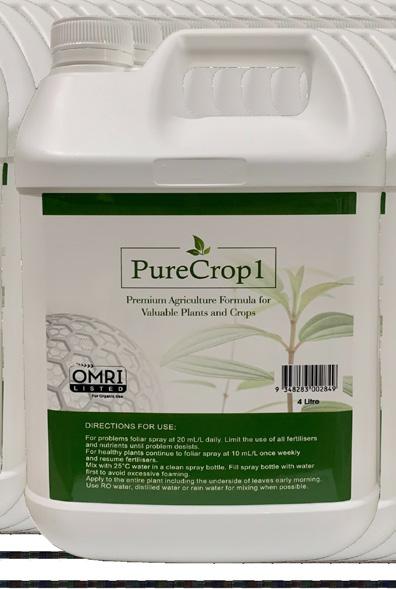


The Cons?
I am stretching to find drawbacks to my experiences this winter with an indoor veggie garden but here goes nothing. The pest population I usually experience in winter months producing only medicinal plants seems to increase with all those companion plants. We are four months deep into the Canadian winter bitch slap, and I still have an active ladybug population. Those damn spider mites are consistently trying to set up shop, but I have enough Green Cleaner to wash a Mack truck, so things will be fine. All that to say, it was completely manageable, and I am really reaching for a negative. Wait... here’s one: watering. Not only is mixing several different nutrient blends for plants in different stages of growth a challenge but so is administering the correct amount to each pot. I encourage you to use a short pipe to help reach the far corners and pots in your tent and avoid blindly watering. Touch the soil and see who is drinking; these plants will drink at different rates due to size, genetics and location. Aside from those two little potential drawbacks, maybe some indigestion from all the spicy food is on the horizon.
Ongoing Rewards
I fully expect the benefits of this new practise to keep presenting themselves, so I will keep cataloguing my experiences for you, the dear reader. Remember that there is power in fruitbearing perennials, especially when grown indoors and having your favourite out-of-season consumables on hand year-round will surely impress the neighbours. I feel vindicated after such
Good Company
a cruel summer in my impotent garden. Winter successes have overshadowed all the major failures, and I am once again the harvester of fruits. My eggplants are a respectable size and should no longer get the depressed chuckle they once did amongst the wildlife. And remember, If the wildlife chooses to prey on my garden this upcoming outdoor season, they will be met with a protective layer of diarrhoea-inducing spice bombs intermingled with the usual plants.
In all fairness, only some have the room or the equipment to achieve a large winter harvest. However, we all need to try and not only supplement our diets but also assist Mother Nature. Grab those lettuce and green onion ends that usually end up in the trash and toss them in a glass of water so you can enjoy them a second time. A tray of bean sprouts under a single LED bulb or any fast-growing super green is a win for you and your family. The more you grow, the more you get to tell the grocery store to screw themselves. I hope to see my local grocer pawning his Mercedes one day because he ran out of people to charge top dollar for wilted lettuce. I hope the population one day realise how low-effort and highreward plants can be. I hope summer comes sooner than later, but at least I have my winter garden to keep me and the dog company.
Happy growing my little bean sprouts. I’m off to get some more mason jars for all these peppers! 3

5353
If a few of my neighbours adopted the same philosophy and had anything resembling a “green thumb,” we could put the local big-box grocery on its knees
DIRTY OLD GARDENER
BIO Regi Oneton is a multi-disciplinary artist and daytime executive. He’s been a member of Socan since his first album release at the age of 20, and is a self-taught audio engineer and self-proclaimed studio rat. Regi is a late-blooming street artist and painter whose works can be found hanging in the offices of Burton and Vans Canada. Long-time contributor to the Under Pressure Graffiti Festival and lover of the Arts. As the years plow forward, he has added botanical enthusiast/plant father to his litany of passions. His interests include writing and spending too much time looking at his phone.
Living Soil Beds
as the Glatt Kosher Option for Cannabis Cultivation
a glatt kosher approach to cannabis cultivation must respect the importance of soil as the ecosystem of the plant that provides the environment and community necessary for cannabis—as a living thing—to exercise its agency and achieve optimal health before harvesting and consuming its flower

BY DR LISSA SKITOLSKY
54
Although most of the cannabis produced by Israel for medicinal use is cultivated through hydroponics, there are now several kibbutzim cultivating cannabis in living soil. If we intend to cultivate kosher, medicinal cannabis, the process will conform to Jewish dietary laws (kashrut) or, in addition, to Biblical standards for the cultivation of cannabis—kaneh bosem (Exod. 30: 22-23)—a sacred herb.
This distinction is expressed in Jewish culture as the difference between a product being “kosher”—processed according to the laws of kashrut—and “glatt kosher”—processed following a stricter standard and/or with adherence to additional Biblical standards. Although the hydroponic cultivation of the cannabis plant has received rabbinical certification as kosher (“fit”) for its medicinal use, there are many reasons to reserve the label of glatt kosher for medicinal cannabis that has been cultivated in living soil beds.
A Glatt Kosher Approach

Cannabis is an ancient plant that has evolved with humans to provide health benefits in conjunction with our endocannabinoid system that maintains homeostasis among the body’s biochemical and physiological systems. It facilitates our ability to relax, eat, sleep, and protect ourselves (Di Marzo et al. 1998, Trends Neuroscience 12: 521-8). Although the medical community has just started to appreciate the significance of this co-evolution, cannabis is discussed in the Bible as an herbaceous plant that produced sacred or “holy” oil used in ritual offerings to God, and it is mentioned in the Talmud as an effective medicine for pain (even during childbirth). So, what would it mean to grow cannabis in a glatt kosher way that does not just respect Jewish dietary laws but also honours the role that kaneh bosem has played in Jewish history as an ancient, sacred herb provided by God for our health and spiritual practise? I would argue that a glatt kosher approach to cannabis cultivation must respect the importance of soil as the ecosystem of the plant that provides the environment and community necessary for cannabis—as a living thing—to exercise its agency and achieve optimal health before harvesting and consuming its flower.
This distinction is expressed in Jewish culture as the difference between a product being “kosher”—processed according to the laws of kashrut—and “glatt kosher”—processed following a stricter standard and/or with adherence to additional Biblical standards
practise that minimises animals’ suffering and why it’s not kosher to slaughter an animal and its offspring on the same day.
The Jewish concern with respecting the agency and integrity of animal life also explains why it is not kosher to harm or disable an animal before slaughter since it compromises the health and vitality of the animal. Although we do not usually think about respecting the lifeworld of plants in the same way, this is the additional standard that is relevant to a glatt kosher approach to the modern cultivation of medicinal cannabis, one that does not merely conform to Jewish dietary laws but to the Biblical practise of treating cannabis like a sacred herb that brings us closer to God. Thus, the standard for the glatt kosher cultivation of the cannabis plant must include respecting the agency and integrity of its vegetative life so that plants are not harmed, disabled, or weakened before their flowers are removed and then consumed to relieve our pain and help us heal.
Hydroponics and Kosher Cannabis
In his Rabbinical opinion for STAR-K about why the hydroponic cultivation of plants in a nutrient solution without soil is a kosher process, Rabbi Zvi Goldberg claims:
The science of hydroponics proved that soil is merely the holder of the nutrients, as well as the place where the plant roots traditionally live and a base of support for the plant structure. Soil isn’t required for plant growth; the elements, minerals and nutrients that soil contains such as carbon, nitrogen, phosphorus, potassium and magnesium can be supplied in liquid solutions.
Respecting The Plant
The importance of showing moral respect for the plant and animal species we consume is also the general principle behind the laws of kashrut. This is evident in the agricultural laws in the Talmud that aim to limit farmers’ ownership of their land and crop, such as the obligation to release the land from cultivation every seventh year (Shemitah); during Shemitah, farmers must relinquish personal ownership of their fields to allow all people and animals to reap the benefit of the land. Similarly, the dietary laws regarding meat limit how we treat animals before and after killing them for food to ensure that we respect the value of their lives and species. This explains the kosher slaughter
Although it is possible to grow plants without soil, plants can’t take an active role in their growth or develop their immune, digestive, and respiratory systems outside of soil and its rich microbial environment that produces—rather than merely “holds”—all of the nutrients that plants need. Further, the hydroponic cultivation of the cannabis plant is more difficult than other plants because cannabis is a “heavy feeder” with higher nutrient needs. More importantly, the hydroponic cultivation of cannabis makes it impossible for the plant to regulate its uptake of nutrients or develop within the ecosystem of microorganisms that provide immunity against disease and act as a system of mutually dependent organisms that work together to ensure that the cannabis plant thrives.
5555 LIVING SOIL BEDS


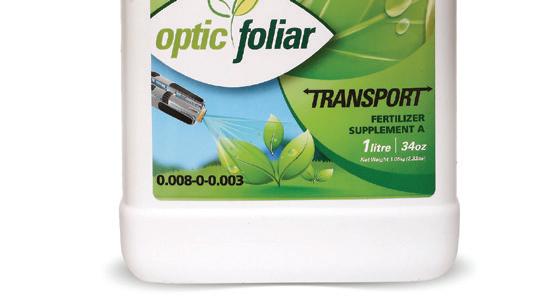
www.opticfoliar.com Distributed by: Stealth garden THE LIGHT Check out our complete product line: Overgrow RTU All-in-One REV Nutrition Watts Efficiency Evios Health Atak Late flower Switch Health TRANSPORT provides superior spreading and wetting capabilities that allow you to spray in full sunlight with no damage or burning. Combine Optic Foliar TRANSPORT with any foliar solution to allow you to spray in full sunlight with no damage or burning, residuals to wash off or the need to spray the undersides of the leaves. Transport is the only spreader to maximize absorption to the plants Mesophyll Layer. LIGHTS ON NO DAMAGE OR BURNING! FOLIAR SPRAY
the standard for the glatt kosher cultivation of the cannabis plant must include respecting the agency and integrity of its vegetative life so that plants are not harmed, disabled, or weakened before their flowers are removed and then consumed to relieve our pain and help us heal

While the ingredients used in hydroponic solutions may conform to Jewish dietary laws, the process does not respect the cannabis plant as a living thing with the right to exercise agency and develop its capacities before it is harvested. For this reason, it is not a process that cultivates cannabis according to the Biblical standard of treating kaneh bosem as a sacred herbaceous plant worthy of respect. Instead, hydroponic cultivation removes the cannabis plant from its lifeworld and places it on life support outside its natural environment and the microbial community that provides for its needs. For this reason, using living soil raised beds in greenhouses, indoor grow facilities, and grow tents provide an option for the glatt kosher cultivation of medicinal cannabis following Biblical standards, which is also more sustainable than the process of hydroponics that depends on non-biodegradable media and chemical solutions. Each living soil bed can support multiple plants and includes a liner to help lock in moisture for an optimal microbial environment; if the beds are placed on drain trays, then the cannabis plants can regulate their uptake of nutrients through sub-irrigation watering.
Limits to ‘Control’
Although the benefit of hydroponic cultivation is usually explained in terms of having total control over the conditions of growth, the agricultural laws in the Talmud serve to restrict the amount of control we can assume over the land and the plants that we grow so that we remain pious, and value every living thing as a part of God’s creation rather than as our personal possession or as something that we creat-
ed. Concerning the cultivation of medicinal cannabis, we should not treat this ancient plant as if it lacks a natural microbial environment designed to facilitate its growth and healthy development.
There is also strong evidence to suggest that cultivating cannabis in living soil produces a more robust plant, which leads to a significant decrease in the microbial matter found on the flowers themselves, and decreases the possibility of insects—the primary concern for kosher certification, as insects are traife, not fit for consumption. Finally, evidence shows that the microbial environment in living soil produces a more complex bouquet of metabolites in the cannabis plant that enhance the medicinal value of its flowers and their uniformity and genetic stability. This makes sense, as the cannabis plant has evolved with humans to thrive on the earth and produce cannabinoids that work with our endocannabinoid system to help us recover, heal, and feel awe at God’s creation. 3
Dr Lissa Skitolsky is an author, advocate and grower who is currently studying Cannabis Cultivation at Nova Scotia Community College. Before moving to Halifax in 2019 to serve as the Simon and Riva Spatz Visiting Chair of Jewish Studies at Dalhousie University, Skitolsky worked as an Associate Professor of Philosophy at Susquehanna University, in Selinsgrove, PA. She is the author of Hip-Hop as Philosophical Text and Testimony (Rowman & Littlefield, 2020) and a forthcoming book on Ashkenazi Jews, the logic of race, and antisemitic paranoia (Indiana University Press, 2024).
Bio LIVING SOIL BEDS 5757
Know Your
Soil pH
If the pH is too high or low, the availability of essential nutrient elements is impacted

BY PHILIP MCINTOSH
58
Plants do best in soil with optimum physical and chemical properties to support growth and development. One crucial parameter is pH, which measures the acidity or basicity of the soil. If the pH is too high or low, the availability of essential nutrient elements is impacted. For example, unchelated iron is essentially unavailable to plants above pH 5. So
what is pH exactly?
Acids & Bases
We need to know something about acids and bases to understand pH. There are several ways to define an acid, but we will go with the simplest one, the BrønstedLowry definition: an acid is any substance that donates a proton to another substance. We can understand that a little better by thinking of an acid as a compound that releases free protons when dissolved in water. Great. What’s a proton? A proton (symbol H+) is a positively charged particle found in the nucleus of all atoms. We used to think protons were fundamental particles like electrons. However, unlike electrons, which cannot break into smaller fundamental particles, protons are made of quarks (two up quarks and one down quarks). It’s a fun thing to tell people at parties, but that is all we’ll say about quarks. The simplest atom is hydrogen consisting of a single proton and a single electron in orbit around it. Protons are hydrogen nuclei; as it turns out, they often don’t mind cutting loose and roaming around on their own to link up with other molecules under certain conditions. The higher the concentration of free protons in a solution, the more acidic it is.
The simplest definition of a base is any substance that has some electrons that can accept a free proton that happens to pass by. A more practical way of looking at it is by considering a base as any substance that releases hydroxyl ions (OH-) when dissolved in water. An ion is any atom or molecule that has a net electric charge. A hydroxyl ion possesses a negative charge and includes a hydrogen atom and an oxygen atom bonded together. The negative charge results from an extra electron that remains associated with the ion when formed. Notice that if you combine a proton and a hydroxyl ion, it forms water—H2O.
Acids and bases can be “strong” or “weak.” Strong acids ionize completely when dissolved in water to release most or all of their protons. Hydrochloric acid (HCl) and nitric acid (HNO3) are strong acids. When dissolved in water, hydrogen chloride (HCl) becomes a solution of H+ and Cl- ions with few HCl molecules intact (Bonus scientific fact: negatively charged ions are called anions, and positively charged ones are cations [pronounced ANions and CATions]). Weak acids such as acetic acid (C2H4O2) found in vinegar and citric acid (C6H8O7 ) in some fruits only release some of their protons but not all of them. So you can put your finger in vinegar for a bit without harm but don’t try that with concentrated hydrochloric acid!
One last technical thing—the pH scale. No need to go into the details, but pH means “take the negative logarithm of the hydrogen ion concentration.” When you do that, it puts the
range of acid concentrations on a scale from 0-14, with anything below 7 being acidic, anything above 7 being basic, and pH 7 being neutral.
What Do Plants Like?
Most plants tolerate a pH range from about 5-8, but 6-7, slightly on the acidic side, is usually fine, depending on the species. Some acid-loving plants, such as blueberries and azaleas, don’t mind around 5, while ferns and asparagus prefer a bit above 7 in the basic range. More on the acid side (pH 5.5) is generally favoured for growth in vitro or in liquid media because many bacteria are inhibited at low pH. It’s a different story in the soil since you don’t want to inhibit beneficial bacteria in a healthy root biosphere, and common soil bacteria are used to those conditions anyway. So, how does one go about testing soil pH? There are five ways to do it.
Litmus Paper
The simplest way is with litmus paper. For each test, you use a fixed amount of soil (say 1 gram), add a fixed amount of distilled water (a couple of millilitres or so), let it soak and then dip the litmus paper in it. Litmus is pretty crude, usually only able to tell if a solution is acidic (red), neutral (purple), or basic (blue). A slightly better way is by using special pH test paper that changes colour depending on the pH, and you compare it to a colour scale that comes with it. Some paper kits can provide a resolution within 0.25 pH points. If you are only interested in testing a limited range like 3-6 or 7-10, test papers with the better resolution are available.
Soil pH Test Kit
The next least expensive way is with a soil pH test kit. You put a soil sample in a provided test chamber, add some distilled water and test solution, shake it up, wait a few minutes and compare the colour of the solution to a colour chart to estimate the pH. Estimate is the keyword here; it is hard to tell the difference between similarly tinted solutions. It isn’t easy to interpolate the results between the integer values on the colour scale. In other words, you will not be able to tell the difference between pH 6.3 and 6.5 reliably. But, in most cases, close enough is good enough, and it is more repeatable than the paper methods since the test chamber provides standard volumes of soil and test solution.
59 SOIL PH
We need to know something about acids and bases to understand pH


pH Probes
The next convenient way is with a specially designed soil pH probe. You can get test paper for about $5-$10 and a test kit for $10$25, depending on what it offers. A soil pH probe runs about $15 for a cheap one of questionable accuracy and durability, or you can spend $130 or so on a professional model. You press the probe into moist soil and read the indicator.
Dilution Paste Method
Two more professional methods require a good pH meter that will set you back several hundred dollars, but they are more accurate and repeatable than the other methods. The dilution paste method requires one gram of soil wetted with a minimal amount of distilled water. Allow about an hour for the solution to reach equilibrium. Then, press the meter probe into the paste and read the pH. One disadvantage is that the results are affected somewhat by the dilution factor. Some highly hydrophilic soils will take up quite a bit of water before they get pasty enough to get a reading, and this affects the results but only by about 0.20.4 pH points. The more water you add, the less accurate the results. This can be improved by using a 0.01 molar solution of calcium chloride (CaCl2) instead of distilled water.
Pour-Through Method
The other professional technique is the pour-through method. First, a fixed volume of dry soil is put in a pot, and a volume of water is added to it to saturate the soil. Then, after an equilibrium period, another equal volume of water (or CaCl2 solution) is poured into the soil so that the previous solution is pushed out into a container below the pot. Then the pH of the solution is easily measured with a pH meter. The dilution paste and pour-through methods usually produce results within about 0.2 pH points of each other.
So now you have some methods at your disposal for determining the pH of your soil. How to adjust it in your soil is a topic for another time. Stay tuned! 3
Philip McIntosh holds a B.Sc. in Botany and Chemistry from Texas State University and an MA in Biological Science from the University of Texas at Austin. He has been publishing professionally for over 30 years in magazines, journals, and on the web on topics relating to botany, mycology, general biology, and technology. As a STEM (Science,Technology, Engineering, and Math) educator, Phil enjoys working with students to help them advance their knowledge and skills in relevant fields of learning.
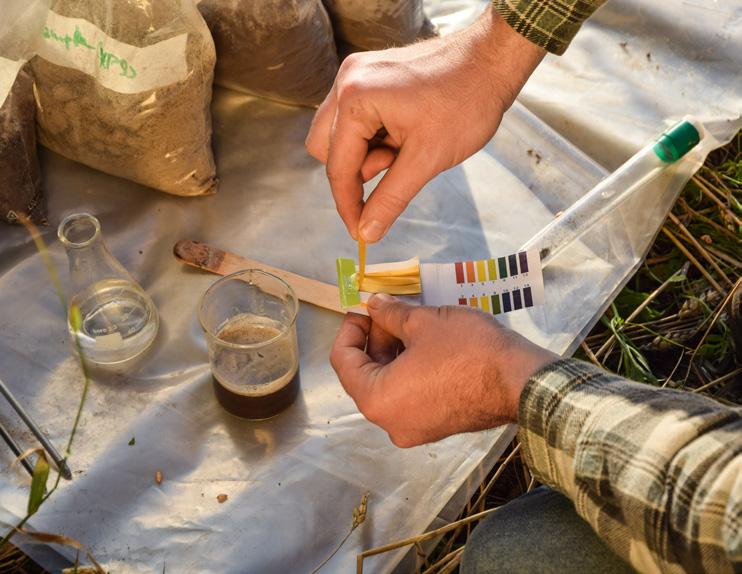
6161
Most plants tolerate a pH range from about 5-8, but 6-7, slightly on the acidic side, is usually fine, depending on the species
SOIL PH Soil pH Test Kit with Litmus paper
Bio
Airflow
The Importance Of Proper In A Drying Room
This topic holds a special spot in my cannabis carrier as it is, in my opinion, the most important aspect of cannabis growing. I don’t care how well you can grow cannabis; if you don’t dry it properly, you’ll have a poor final product. A mediocre product can improve with proper drying, and an incredible product can become garbage with improper technique. While so many people have tried to convince me of the magic of their cannabis drying methods, the old-school “low and slow” is still the winner in my books.
The Learning Curve
Before entering the cannabis world, I was fortunate to be working with an unnamed company that was one of the leading desiccant air-handling manufacturers in the world. While representing them (through a third party) in Western Canada, I experimented with the technology and learned a lot about psychometrics, dehumidification, and vapour pressure. With this, I designed and screwed up one of the first large legal cannabis grows in Canada. I learned fast what to do and what not to do. My first lesson in cannabis drying was never to use a desiccant unless it’s 100% outside air. However, I won’t do that anymore either due to terpene loss. Over time, I have realised that drying cannabis is an art and the most crucial part of growing.
Low And Slow
Let’s look at the old-school methodologies of cannabis drying and understand the roots. Cannabis has been dried at 60°F at 60% for as long as cannabis has been dried well. Funny enough, this wasn’t a function of what was best but rather of what the black market could do with the available equipment. The typical AC unit produced and sold off the shelf supplies air at a design of 55°F. The magic of 55°F is that we rarely can freeze up the evapourator (cold part of the air stream), as freezing is 32°F. For the unit to deliver 55°F
air, the coil is sized 10°F colder; this means the coil reaches 45°F, unlikely to cause any freezing issues. In turn, a 55°F supply allowed a grower to hold about 60°F in the room, assuming there wasn’t much heat gain from the rest of the building. This is why 60°F at 60% became the mythical “low and slow.”
Too Hot And Too Cold
So, what happens if we go hotter?
The answer is simple: your product will dry, the terpenes will evapourate quickly, and your weed will suck! I don’t recommend this unless you have some crazy vacuum technology, and there aren’t too many around in the average grow. I am still waiting for someone to prove with lab results they can dry faster at hotter temperatures without product issues.
Let’s take a look at what happens when you go slower. How slow of moisture removal is too slow? How cold is too cold? I have had lots of time to try to perfect this process. However, it’s hard to convince people to spend money on experiments. I suspect the world of drying at 50°F, 40°F, or even 33°F will be fascinating; however, getting the vapour pressure differential to remove water at those levels becomes more expensive, and perhaps the quality change may not justify the cost. So, for now, we will look at the ideal drying room for 60°F at 60% and see the best way to dry.

BY ADAM CLARKE
62
I don’t care how well you can grow cannabis; if you don’t dry it properly, you’ll have a poor final product
60°F @ 60%
For this discussion, I’m not going to get into the hang dry vs. rack dry, as the goal is to communicate how to get your crop to dry well without causing an excessive loss of terpenes. Regardless of how you dry, the ideas below will work.
We have developed a straightforward design that delivers consistent and remarkable results. From experience, the sketch below will do a great job of accomplishing my biggest issue with cannabis drying. No dry air should ever be distributed onto any cannabis directly.
If you look at the sketch below, all air is distributed down the centre hall of the dry room. The air is shot almost to the floor, then it is drawn back through the cannabis to dry it. No air hits the cannabis directly. The idea of this design is to increase quality at a low cost. I think we can make improvements on this; however, they would come at a cost for low returns and airflow modelling of the room.

If you don’t have the money to spend on a quality dry room, you only need to remember never to let hot or dry air blow directly onto your plants. Instead, expose the cannabis to the room’s air without the source of the dehumidification or heating or cooling hitting the plants.

Everyone can dry good quality weed. However, those with patience will consistently achieve the best crop. 3
Bio
Adam has provided planning and design services for cannabis and hemp cultivation and processing facilities over the last seven years with Stratus. His projects involve outdoor cultivation, indoor cultivation, drying, processing, extraction, storage, bottling and packaging, and more. Living on a hobby farm, Adam loves all plants, including flowers, vegetables, and microgreens, but is most passionate about hemp and is in awe of the fast-growing plant and all of the benefits it offers to humans and the environment alike.
If you don’t have the money to spend on a quality dry room, you only need to remember never to let hot or dry air blow directly onto your plants
AIRFLOW 63


 BY CATHERINE SHERRIFFS
The High Seas Treaty
Historic And Hopeful
It took 20 years of talking, but the United Nations has finally reached a historic deal to protect international waters. Referred to as the ‘high seas treaty,’ UN member states finally agreed in New York early last month. The legal framework places 30% of the world’s oceans into protected areas and puts more money into marine conservation. Essentially, a new body will manage conservation efforts and help prevent further loss of marine life, sharing out the high seas’ genetic resources. In addition, the framework will assess all activities on the high seas to ensure they’re not negatively impacting ocean biodiversity.
The treaty is crucial as the world addresses climate change, biodiversity loss, and pollution. According to the National Ocean Service, half of the oxygen production on earth comes from ocean ecosystems, which include drifting plants known as plankton. Despite this and the fact that the high seas are massive carbon sinks, they have long been vulnerable to exploitation. The new deal strives to change that and is necessary if we hope to enforce the 30x30 pledge, an agreement to protect a third of the world’s biodiversity on land and sea, made at the Kunming-Montreal Global Biodiversity Framework last December. 3
Sources:
• United Nations, UN News: UN delegates reach historic agreement on protecting marine biodiversity in international waters (bit.ly/3YqrjET)

• The Guardian: High seas treaty: historic deal to protect international waters finally reached at UN (bit.ly/3ZQGCYN)
• National Ocean Service: How much oxygen comes from the ocean? (oceanservice.noaa.gov/facts/ocean-oxygen)
HIGH SEAS TREATY
The treaty is crucial as the world addresses climate change, biodiversity loss, and pollution.
6565
Cannabis Lighting for the Stages
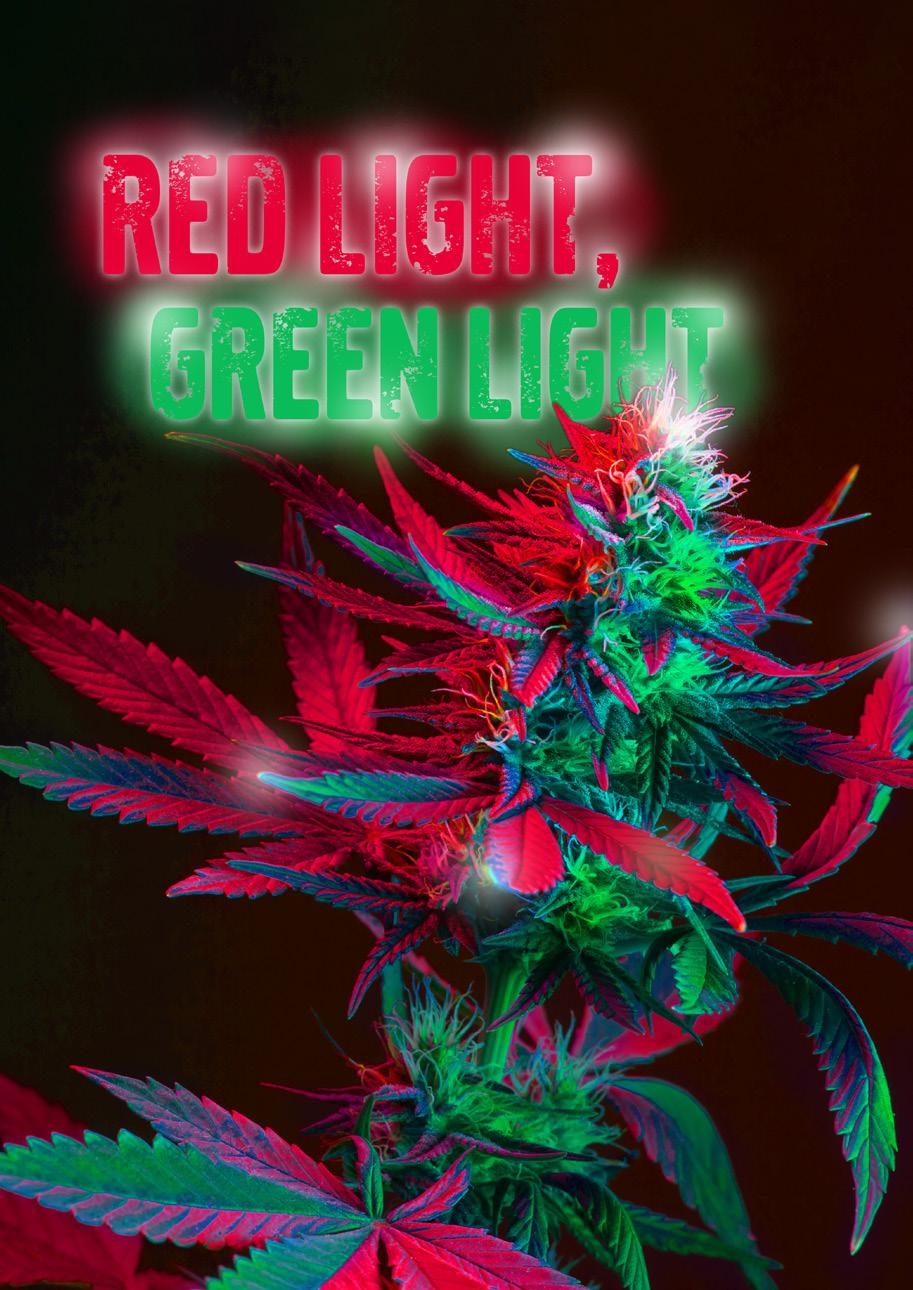
BY AV SINGH 66
We can’t replicate sunlight. However, during cannabis prohibition, growers sought various forms of industrial lighting to grow their crops, advancing controlled environment agriculture to where we are now with greenhouse production and indoor facilities. Rapid evolution in cannabis lighting has growers adopting a wide array of technologies, from spectrum altering to the introduction of UV-A and UV-B photons in the quest for higher yields and better medicine. Despite our continued efforts to figure out the intricacies of this primary ingredient in the recipe for photosynthesis -- the ideal light remains elusive.
Despite our continued efforts to figure out the intricacies of this primary ingredient in the recipe for photosynthesis -- the ideal light remains elusive
The term photobiology has piqued the interest of growers and has them seeking to better understand all that light does for the developing cannabis plant. Photobiology is the influence of light on living things. Most recognise that light is critical to fixing CO2 and making sugars (photosynthesis, simply defined). But light also influences plant structure (photomorphogenesis), plant development (photoperiodism), and secondary metabolite production (photometabolism). The multi-faceted impact of light makes the decision to have the right light (i.e., in terms of intensity and quality - the spectral properties of light) at the right time (the photoperiod or duration of exposure to light), so critical in producing the desired impact.
In the early adoption of LED technology, the light spectrum was limited to predominantly red and blue diodes, leading to the term “blurple lights” in reference to the pinkish hue.
We can roughly break the cannabis lifecycle into five influence stages: Seedling or Clone, Vegetative, Transition, Flowering, and Pre-Harvest.
Seedling/Clone Stage
Traditionally, compact fluorescent bulbs served the purpose of clone lights, delivering about 100 to 250 µmols/m2/s of light that, despite having low photosynthetic efficiency, did offer a full spectrum of photons. Providing blue photons in the early stages helps initiate chlorophyll biosynthesis and helps with the plant’s circadian rhythm. The importance of cannabis adjusting to a circadian cycle is to help support internal signaling such as that required to initiate flowering.
Cannabis does not require a “dark period” for photosynthesis and respiration. However, the 18h versus a 24h “lights on” photoperiod has been shown to provide increased plant vigour and health, increased root development, and reduced electrical costs. The importance of red photons in a seedling/clone light is to ensure the plant grows upright (straightening the hypocotyl hook from seedling emergence) and promoting stem growth.
Vegetative Stage
Once seedlings and rooted clones have been up-potted, light intensity during the next two to four weeks will gradually increase from 300 to 650 µmols/m2/s. We cannot underestimate the importance of the vegetative period as a developmental phase in preparation for flowering. Once again, lights with increased blue photons (above 10%) can support the synthesis and location of chlorophyll and chloroplasts. Blue light is instrumental in defining stomatal conductance, which plays an integral role in the uptake of CO2 . Legacy cannabis growers often choose metal halide lights (over 20% blue photons) for their vegetative phase because blue light increases lateral branching and tighter internodes.
In contrast, red photons facilitate the expression of the plant hormone auxin, which aids stem elongation, becoming more critical in plant morphology in the flowering phase. Arguably, the most important role of red photons (and those in the far red wavelength) is in triggering flowering. Some studies have shown that the red:far-red ratio elicits physiological responses toward flowering. More specifically, red light early in the photoperiod and far red light towards the end of the photoperiod seem to steer the cannabis plant towards flowering sooner.
In the early adoption of LED technology, the light spectrum was limited to predominantly red and blue diodes, leading to the term “blurple lights” in reference to the pinkish hue. The technology capitalised on the photosynthetic efficiency of the blue and red wavelengths but failed to recognise the importance of other wavelengths in photosynthesis and metabolite synthesis. Green light was considered unavailable for plant growth because photosynthetic pigments like chlorophyll have limited absorbance for these wavelengths; its support for other pigments like anthocyanins and carotenoids as phytoprotectants is essential in high-light intensity conditions. Another benefit of green light is that it has deeper leaf tissue penetration than either red or blue, allowing at least some photosynthesis in the lower canopy.
6767 LIGHTING
Transitional Phase

Although not technically a phase, the transition period employs one of the main crop steering techniques of moving cannabis from vegetative to generative growthphotoperiod. “Flipping” is the shift from a long day (18h) to a short day (12h) and happens instantaneously in indoor facilities. This abrupt change allows the cannabis plant to initiate flowering but may cause potential yield losses because of decreased photons received daily. In horticulture, the phrase Daily Light Integral (DLI) is an index that calculates the total amount of light a plant gets in 24h. For example, a cannabis plant in late vegetative may receive 18h of 650 µmols/m2/s (a total of 11,700 µmols), while that same plant will receive only 12h of 700 µmols/m2/s (a total of 8,400 µmols) a day later. This 30% decrease in light will impact net photosynthesis. Alternatively, growers can use the last three days before flipping to increase their light intensity by 75 to 100 µmols/m2/s daily, reducing the overall dip in DLI. It is important to note that this is cultivar specific and that any change in light intensity may require a corresponding change in watering and nutrient availability.
As mentioned earlier, red photons play a critical role in creating the final structure of the cannabis plant. Internode elongation is favoured by red photons, helping generate a plant structure that allows for greater airflow and light penetration to the emerging inflorescence.


Flowering
Many would argue that this is where the magic happens. Cannabis can achieve some of the highest photosynthetic rates of any plant, and no definitive study has determined a light saturation limit for cannabis. Light saturation is the light intensity at which the photosynthetic rate hits the maximum and where more light has no positive or negative effect on photosynthesis. Studies have shown cannabis continues to show photosynthetic gain above 2500 µmols/m2 /s, although this required significant supplemental CO2 , high temperatures, and ample water and nutrients. These data should not be interpreted as a recommendation for light intensity. Despite an increase in biomass yield, the return on investment is counteracted by a concomitant increase in energy costs. More commonly,
Growers need to consider the impact of individual wavelengths, not only on growth traits and yield but also on secondary metabolites
68
growers will seek 900 to 1200 µmols/ m2 /s of light by week three of flower and maintain that level for the next three to four weeks (assuming an eight to nine-week flowering period) with a corresponding increase in CO2 levels (1000 to 1200 ppm).
Growers need to consider the impact of individual wavelengths, not only on growth traits and yield but also on secondary metabolites. Blue light has consistently shown higher cannabinoid concentration in most studies, largely CBGA (cannabigerolic acid) and THCA (tetrahydrocannabinolic acid) and, to a lesser extent, CBDA (cannabidiolic acid). However, recent studies have quantified that larger amounts of blue light during flowering significantly reduce flower yield, and thereby total cannabinoid per plant is reduced.
Blue light (and more recently UV-A and UV-B, have been associated with promoting pest resistance, increasing flavonoid accumulation, and increasing photosynthetic efficiency. Having appropriate amounts of blue light (as well as green light) in the flowering period allows for the accumulation of light-screening compounds (carotenoids, flavonoids, and anthocyanins) to limit potential damage from red photons (photobleaching).
Red photons drive photosynthesis and, consequently, biomass and inflorescence yield. High-Pressure Sodium (HPS) lights are still common in many grow rooms because growers feel any other light will compromise yield. Many of the new generation LEDs mimic the light spectrum of the HPS in hopes of converting growers to their technology. Red photons should dominate the light spectrum during the flowering phase because of the plant’s efficient ability to convert red photons to energy. However, some new lights are also beginning to include the far red spectrum.
Far-red light has been shown to trigger more efficient photosynthesis in green light, thereby increasing overall photosynthetic efficiency. Far-red light treatment has also been shown to affect flavonoid synthesis profoundly. As noted above, flavonoids play a significant role in plant health (and human health) and may contribute significantly to the therapeutic and medicinal effects of cannabis.
Pre-harvest
As the cannabis plant enters the “autumn” phase of its life, the goal for most growers shifts from yield to quality. Light intensity may be slightly reduced, and lights with spectrum change may shift towards more blue, far red, and even UV spectrum to bring out leaf colour, terpene biosynthesis, and cannabinoid transformation. Many growers will gradually bring their flower rooms to approximate the conditions of their dry room (55% Relative Humidity and 15oC). They may even use solely blue light for the last days before harvest (approximately 250 µmols/m2/s).

Is there an ideal light on the market? Unfortunately, we’re not there yet. More information on the light intensity, quality, and secondary metabolite production is required to determine which spectrum is best at what time and how much is enough. For now, we continue to look to our creative growers who constantly innovate to make better medicine. 3
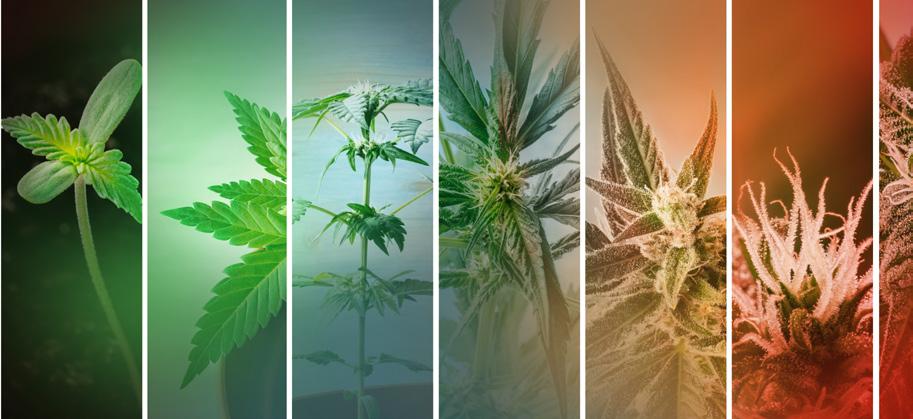
Bio
Av Singh, PhD, PAg is an advocate of regenerative organic agriculture serving various organisations including Regeneration Canada, Navdanya, and the Canadian Organic Growers.
6969 LIGHTING
Far-red light has been shown to trigger more efficient photosynthesis in green light, thereby increasing overall photosynthetic efficiency
The ArtOf Growing Art
They say art is subjective, but let’s face it; when it comes to creating masterpieces, some of us have it, and some don’t. All grown up and still drawing stick people? We feel you! But what if we told you that you don’t necessarily have to be an artiste to produce gallery-worthy watercolours? All you need is a brush, some paper, and Sushma Hegde’s new book, Wildflower Watercolour: A Beginner’s Guide To Painting Beautiful Florals.
Hegde’s comprehensive guide will help you create 30 jaw-dropping watercolour projects, regardless of your artistic ability! From chamomile and lavender to buttercups, forget-me-nots, and roses, this book features a stunning array of botanicals with easy-tofollow instructions and step-by-step illustrations to translate the beauty of a garden onto paper. You’ll also learn the basics of mixing colours and making various types of brushstrokes so you can feel confident in your new role as a creative genius. With art and gardening known to boost mental and physical health, this guide is worth a try!
Hegde is a self-taught illustrator and instructor who teaches watercolour floral and landscape classes on Skillshare with an audience of over 10,000 students! You can see more of her work at: sushmahegde.com or on her Instagram @sushhegde

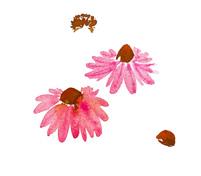
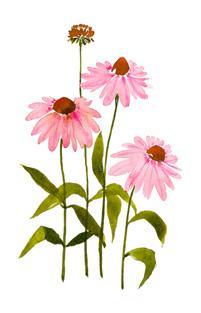
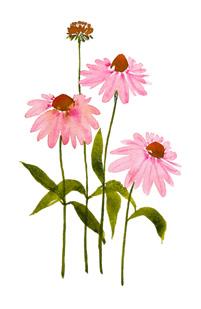

ART
Hegde’s comprehensive guide will help you create 30 jaw-dropping watercolour projects, regardless of your artistic ability!
70
Plants & Mycorrhizal Fungi

The Ultimate Symbiotic Relationship
Plants have been on this planet for approximately 400 million years; the perfect conditions allowed them to begin life outside their original water habitat and grow on dry land. But how did these plants survive? They weren’t necessarily the plants we know today. These plants had photosynthesis capabilities. However, they relied on other organisms to fetch water and nutrients because they didn’t have root systems! For this task, they relied on mycorrhizal fungi. Mycorrhizal fungi, which means fungus root, live in symbiosis with plants. Some fungi can associate with many plants, while others associate only with specific types.
Certain plant families can associate with several types of fungi simultaneously, while other plants, like monotropid plants, must have a fungal partner to live because they are incapable of photosynthesis. Finally, some plants do not associate with fungi, such as those found in the brassica family, like mustard, cauliflower, or broccoli. Given that plants evolved with fungi, the question is, why don’t modern farmers and gardeners use these microscopic miracle workers more often? Let’s go on an imaginary stroll through the giant Redwood Forest. Hundreds of feet above your head, towering trees reach for the sky. Birds chirp in the canopies overhead. Around eye level, you can find ferns and other vegetation, and mushrooms pop up from the ground.
Over the last century, the agricultural world experienced a vast shift in production and inputs, moving from a biological/ organic-based input system (humus, compost, etc.) to a chemical/inorganic-based input system. Since the introduction of chemical-based fertilisers, most farmers in western societies have gone this route while also changing to a mono-crop system. Regarding the Redwood Forest example above, when have you ever seen a person fertilising these plants? How did these trees get so big? The soil food web and mycorrhizal fungi, of course. Let’s return to our roots and show our plants some love with our fungi friends! 3
Given that plants evolved with fungi, the question is, why don’t modern farmers and gardeners use these microscopic miracle workers more often?

71
BY ARI SINGER
71
BIO Ari Singer is a man with a mission: spreading endomycorrhizal fungi spores to benefit plants worldwide. He leads the DYNOMYCO sales team in the USA, Canada, UK, Australia, and Israel and is passionate about mycology, gardening, and making the world more sustainable. Ari has a B.A. in Sustainability & Economics from the Interdisciplinary Centre in Herzliya. When he is not roaming the globe spreading DYNOMYCO spores, you can find him on his urban garden rooftop growing vegetables and mushrooms or on a slackline somewhere between cliffs and trees.
Hearing The Music Of The Forest Giants
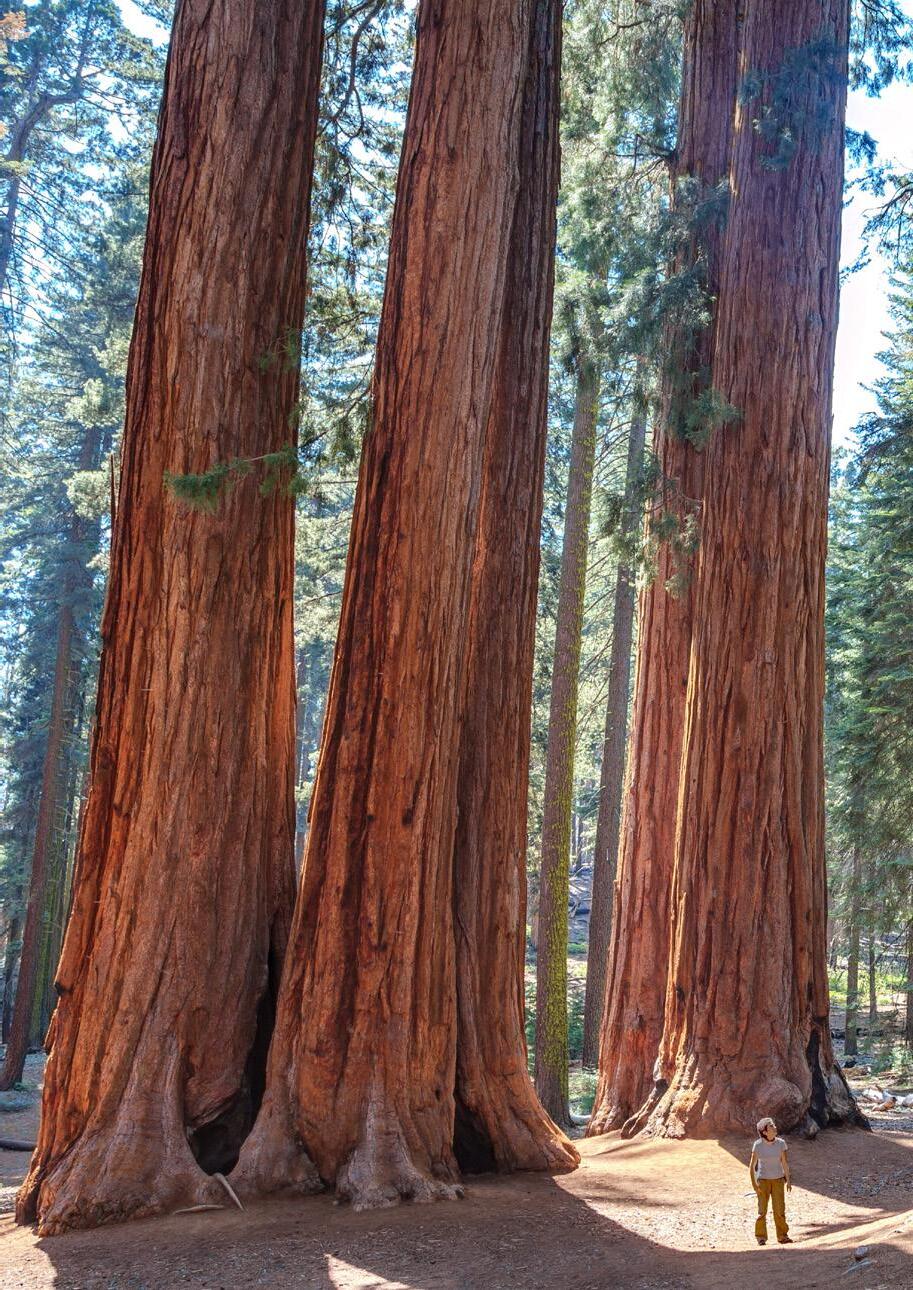
Part One
They say everything happens for a reason. In this three-part series, Cosmic Knot shares how a devastating life experience sparked him to play music with some formidable forest giants. His findings are nothing short of incredible and are wildly entertaining, to say the least. We hope you enjoy the first part of this inspirational series; be sure to tune in for part two in the next edition of Garden Culture Magazine.
72
BY COSMIC KNOT
Climbing to the top of a 240-foot giant sequoia may not be on everyone’s to-do list, but when it comes to hearing what a forest giant sounds like musically, there’s only one way, and that’s up. For those of you counting, 240 feet is 70 metres or the equivalent of a 22-story building. You may have heard of plant, tree, or mushroom music, but the giant sequoia is an extreme case of pushing boundaries.
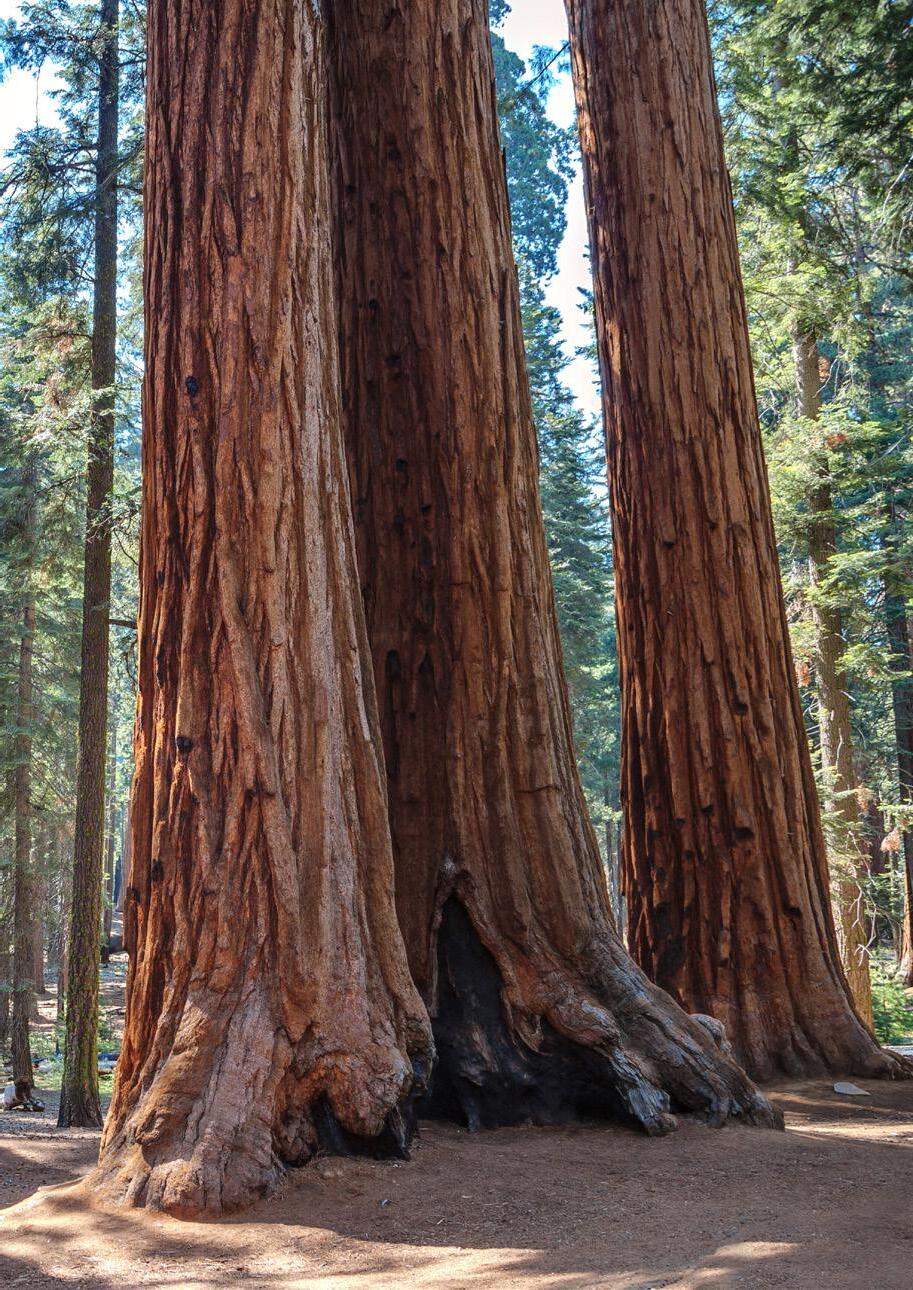
Where The Journey Began
It all started after my house was robbed, and somebody took almost all my musical gear. I was suffering from PTSD when some dear souls like my adopted family members tracked down the stolen guitar that I hand-built in high school. How they found it was nothing short of a miracle and deserved its own story. But after getting my guitar back, I needed something to help keep my mind focused on positive prospects.
I started working musically with a professor friend, and our conversations always ran deep. One of our talks during that stressful time made me remember a strange chat I had with a friend about the potential of plant music. Plant music is made by connecting the plants and trees to electrodes to convert their inner electromagnetic pulses into sounds.
Nature’s Tunes
After investigating the concept further, I decided to purchase a Music Of The Plants device and see how the plants and trees performed. I plugged in the machine and explored the different settings, finding some more musical than others. Finally, I discovered one that sounded like a person playing the piano.
The first plant played better than I anticipated, so I decided to play along with my guitar. We weren’t jiving, so I launched into one of my songs. To my amazement, it started to play along. I stopped, not fully believing what I had experienced. A week later, my band and I noticed more of the same results, and when the drums started playing, the plants really responded.
We took an aloe plant and the plant music device the next week into the recording studio (Third Coast Recording Company). The plant was knocked over three times before it attempted performance. Banged up as it was, it played so well that we recorded a seven-minute track with the aloe plant and didn’t need to edit anything it played.
Florganoleptic Music
Laughing like a mad scientist during the initial recording, I knew there was something to this and set about naming the genre florganoleptic music. This name stems from combining the words flora and organoleptic, meaning plants evaluate with their senses. I made videos every step of the way, and the genre exploded.
The concept of plants playing in a rock band gained international attention. My friend that informed me about plant music mentioned I should go to the grounds of the Electric Forest Festival during the off-season and play with its “Sherwood Forest.” So my girlfriend and I went there on the winter solstice to play music in the forest and filmed the event. I published the video on New Year’s Day, and it went viral; this was the start of a different life path for me.
Hearing news of the new genre of music attracted the attention of the television show Mystic Michigan, and I agreed to do an episode with them. During filming, the show’s host, Mark Jagger, mentioned that I should meet a man named David Milarch in Copemish, MI. He was cloning and propagating the real oldgrowth trees of the world to help save their genetics for future generations.
7373 MUSIC OF THE FOREST GIANTS
Plant music is made by connecting the plants and trees to electrodes to convert their inner electromagnetic pulses into sounds

WWW.STEALTH-GARDEN.COM Serious Supplies for your Hydroponic Store
The Archangel Ancient Tree Archive

As the day progressed, I shared some bizarre experiences I have encountered in nature. Mark stressed that I should see David. He told me they had just done an episode on him at his Archangel Ancient Tree Archive. They didn’t include in the episode that David had a neardeath experience when his heart briefly stopped during an alcohol detox. While he was out, he was told to work with the ancient trees.
Mark explained that when David was in the other realm, a ‘light being’ came to him and said it wasn’t his time to die. He was shown the devastated earth if we didn’t take care of it and was told that we needed to clone the oldest and largest trees to preserve their genetics for our and the planet’s future.
Nearly a year later, I received a message from a man in France. He was putting on a plant music festival and asked if I could submit some work to be featured during the festival to showcase how the plants and trees play music with me. My first reaction was to venture into the forest and get some good footage of the natural surroundings. Suddenly, I remembered David and his ancient tree archive, so I ventured north for a visit.
True Miracles
Upon entering the Ancient Tree Archive, you are immediately overwhelmed with a feeling of awe, inspiration, gratitude and remorse that you can only experience around those trees. The first tree nominated to play music was a clone of the giant Barrett Redwood tree; this was one of the largest indoor Redwood clones in the world, coming from the stump of a tree that was once nearly 30 feet wide and hundreds of feet tall.
When a giant Redwood tree is cut down, the stumps continue to grow shoots from the base, allowing the possibility of cloning these giants and preserving their genetics for future generations. We can repeatedly replant the tree, keeping its ancient DNA and spreading it beyond its typical reach.
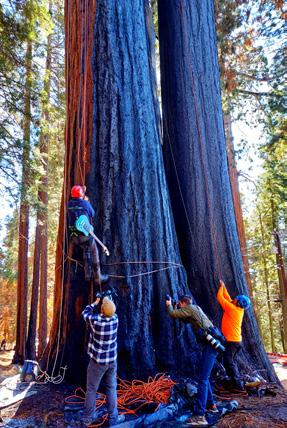
We hooked up the Barrett tree to try a solo musical recording and then a jam. Without hesitation, it played beautifully, allowing for a great recording. I then performed with two Redwoods, two sequoias, and a sycamore clone from a tree that Hippocrates taught under, giving testament to how old these trees are.
After I jammed with the various trees, we decided to test their musical reactions when their different caretakers interacted with them. The results were noticeable, showing they had different moods depending on who they were around. The trees were most excited when they came into contact with Dave, the founder at Archangel. Then, they grew quiet as he thanked them for their work.
Mind blown? Wait until you read part two of Hearing The Music Of The Forest Giants in our next edition! In the meantime, learn more about the important work at the Archangel Ancient Tree Archive at ancienttreearchive.org. 3
7575 75
BIO Tom Wall: Professional Musician, Writer and Gardening Consultant. Cosmic Knot/Therapeutic Horticulture Consultations. Growing up on a deer farm located on 79 acres of land along the banks of one of Lake Michigan’s tributaries, Tom grew a love for nature and all the beauties it could hold. Through that passion, Tom has channeled his influences into educating the community on sustainable agriculture, becoming an activist, writing for magazines and creating music tuned to nature in his band, Cosmic Knot.
For those of you counting, 240 feet is 70 metres or the equivalent of a 22-story building you are immediately overwhelmed with a feeling of awe, inspiration, gratitude and remorse that you can only experience around those trees
Propagating And Preserving The World’s Old-Growth Forests
Propagating And Preserving The World’s Old-Growth Forests
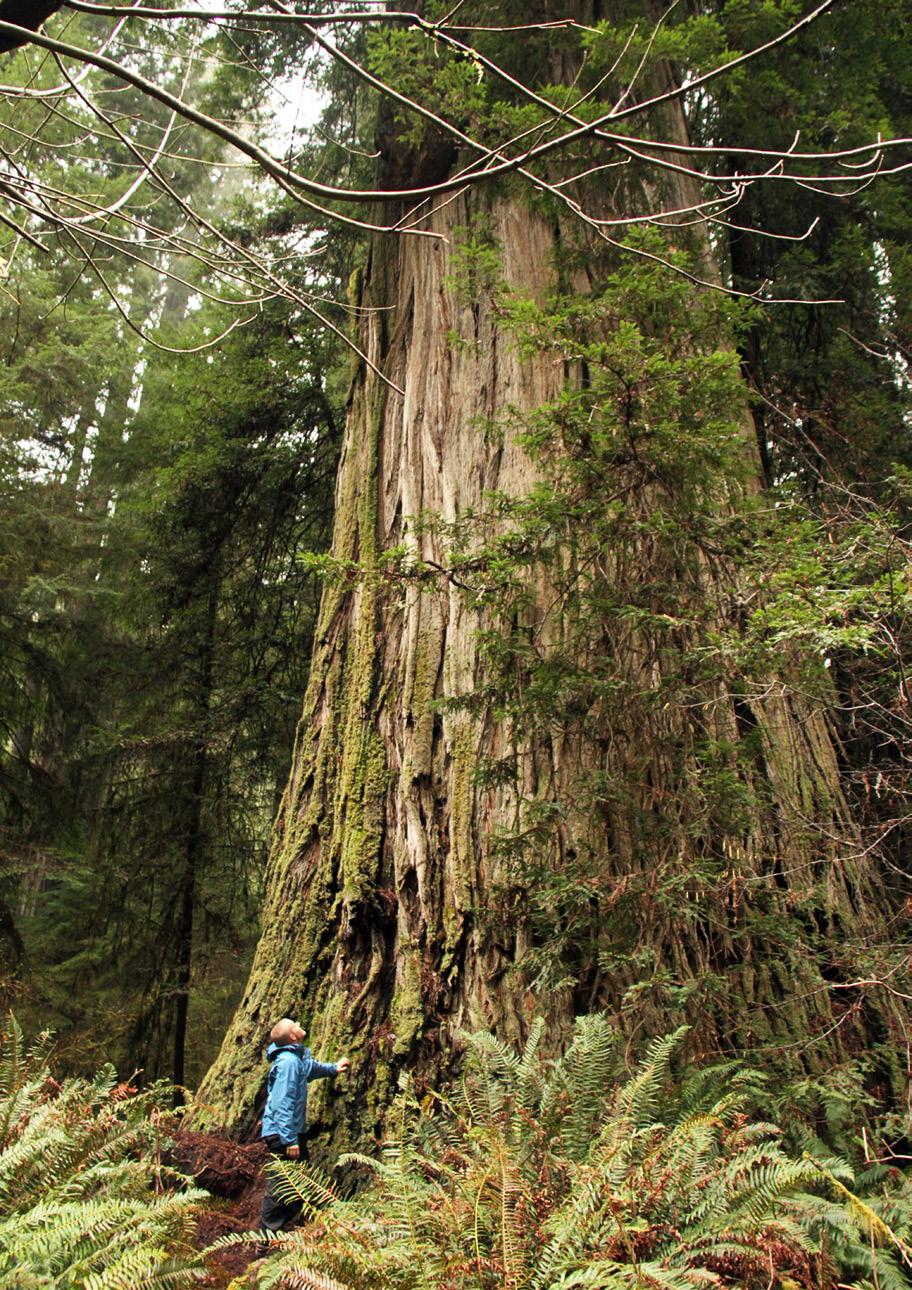
76 BY CATHERINE SHERRIFFS
The world’s old-growth forests are some of the natural wonders of this planet. The trees in these forests are called ‘giants’ for a reason, and something you almost have to see in real life to believe. Thousands of years old, trees like giant redwoods and sequoias reach up to 300 feet into the sky, and their trunk diameters at the base are wider than most city streets! According to National Park Service, giant sequoias produce 40 cubic feet of wood yearly, the equivalent of a 50-foot-tall tree one foot in diameter.
Climate-Friendly Giants
If the sheer size of these giants doesn’t blow your mind, consider their environmental impact. First, the forests are home to countless animals, insects, and birds. But, of course, the most natural answer to carbon sequestration is trees; lots and lots of trees. It is estimated that the world’s oldest living sequoia (located in Sequoia National Park in California and named General Sherman) has sequestered 1,400 tons of carbon dioxide in its lifetime. And that’s just one tree! Unfortunately, old-growth forests are not immune to industrialisation and the increasing threats of climate change, including drought and wildfires. As a result, their numbers are dwindling, and the Archangel Ancient Tree Archive (AATA) is working tirelessly to protect them and the future of our planet.
Thousands of years old, trees like giant redwoods and sequoias reach up to 300 feet into the sky, and their trunk diameters at the base are wider than most city streets!
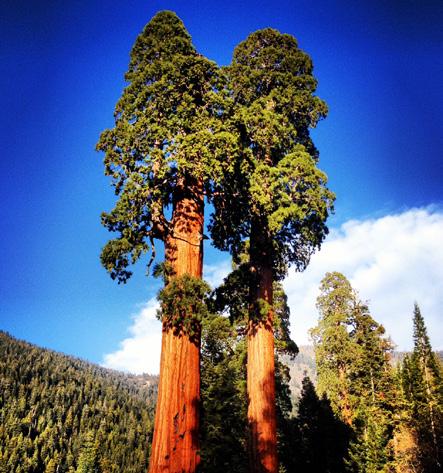
Bedgebury National Pinetum
Bedgebury National Pinetum ( pinetum is Latin for pine grove) is home to the largest pinetum in the world and focuses on species conservation, scientific advancement and education. More than 12,000 conifer species grow on 350 acres of Wealden countryside, a property with six lakes and ponds. The park is open to the public year-round; people are invited to walk along the paths that wind through the valley and the impressive rows of giant redwoods.
Cloning The Giants
The AATA strives to propagate the world’s oldest-growth trees before it’s too late. With a grant from the National Tree Trust and through private donations, the AATA proved it was possible to clone these incredible forest giants. The trees are propagated from rooted cuttings in a state-of-the-art lab in Copemish, Michigan. Then, the clones are nurtured into saplings, each with the exact DNA of the parent tree. Successful saplings are fastgrowing and are ready to plant when they are about six feet tall. Archiving the genetics of these ancient trees in living libraries for future generations is another crucial part of the AATA’s mission.
Living Libraries

These living libraries are safe spaces for the Champion trees to grow. They are continuously cared for to give them the best chance of survival so that they can help in the battle against climate change and be available for further study and preservation. In southern Oregon, for example, the AATA has established a ‘super grove’ that contains hundreds of vital clones of the largest and oldest coast redwoods. In a partnership with The Eden Project in Cornwall, England, these clones are now also growing in Europe’s first redwood forest.
Reforesting the earth with the babies of these giant trees is essentially a solution to global warming. So as the AATA works to draw attention to this critical environmental issue in the United States, across the pond in England, the National Pinetum is doing the same.
Bedgebury is a world leader in conifer conservation efforts that help protect biodiversity. The initiative offers scientists forestry research opportunities and helps mitigate climate change by allowing ancient trees to thrive in their natural environment. Furthermore, opening the sanctuary to the public means people can learn about the conifers growing there, creating an appreciation for nature and the vital work happening at Bedgebury.
Giant sequoias
7777
OLD-GROWTH FORESTS
Micropropagation
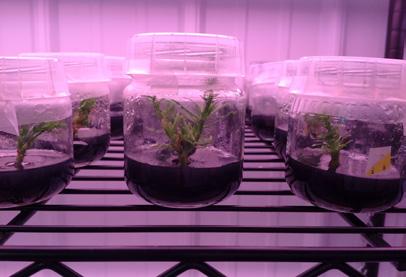
Archiving the genetics of these ancient trees in living libraries for future generations is another crucial part of the AATA’s mission
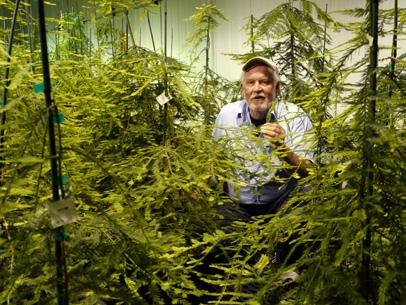
Seedlings
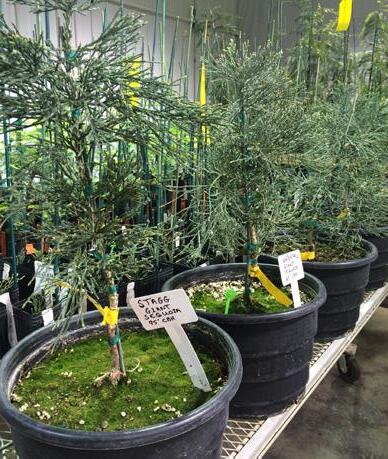
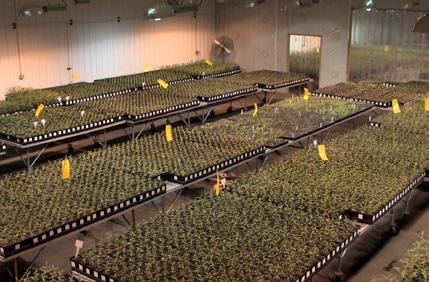
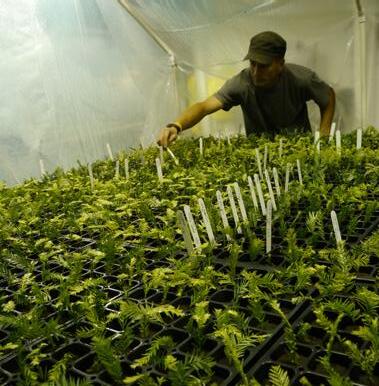
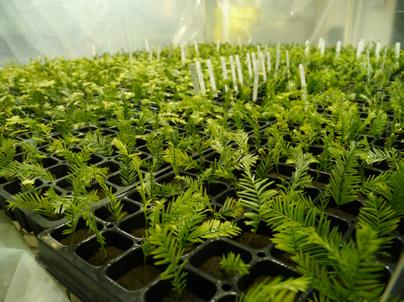

78
AATA facility
Giant sequoia babies
The Great Reserve
Also in the UK, The Great Reserve recognises the giant sequoia as the world’s most powerful carbon-capture tree and an endangered species. Henry Emson launched the initiative for his two young children after realising that planting and protecting this ancient tree would offset their lifetime carbon emissions. Friends and family quickly wanted in on this venture, and today, the organisation is working to establish a forest network of 100,000 sequoias and a legacy for future generations. The Great Reserve plants responsibly and has grown thousands of sequoia saplings from seed at its Abergavenny nursery site, with many more growing locations in the works.
No matter what corner of the world you live in, initiatives like these exist. You just have to do some digging and find them. Once you do, you can learn how to help the cause and become a player in tackling the climate crisis and protecting biodiversity. The giants need our help. 3
It is estimated that the world’s oldest living sequoia (located in Sequoia National Park in California and named General Sherman) has sequestered 1,400 tons of carbon dioxide in its lifetime

The giants need our help
Sources:
• Archangel Ancient Tree Archive (ancienttreearchive.org)
• National Park Service: Sequoia and Kings Canyon (bit.ly/3KYQbkb)

• Terraformation: How We Measure the Carbon Capture Potential of Forests, by Dr Victoria Meyer. (bit.ly/3kHlYvi)
• Forestry England: About Bedgebury, The National Pinetum (bit.ly/3ZuKSgQ)
• The Great Reserve (thegreatreserve.org)

Bio
Catherine is a Canadian award-winning journalist who worked as a reporter and news anchor in Montreal’s radio and television scene for 10 years. A graduate of Concordia University, she left the hustle and bustle of the business after starting a family. Now, she’s the editor and a writer for Garden Culture Magazine while also enjoying being a mom to her three young kids. Her interests include great food, gardening, fitness, animals, and anything outdoors.
7979 OLD-GROWTH FORESTS
WAYS To Support Plants Through The Growth Cycles

We all need a support system, and plants are no different! To get the best harvest yields, nurturing plants through all stages of growth is critical. There are countless ways you can offer your garden the best life possible; let’s get you started with our list of 5 Cool Ways To Support Plants
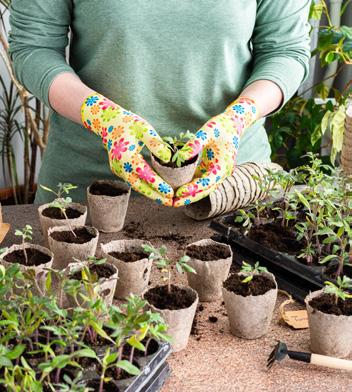
Through The Growth Cycles
To Soak, Stratify, or Scarify?
Not all seeds are created equal; some need extra attention before planting. For example, some wild seeds germinate best after stratification, exposing them to cold to imitate the dormant winter period they’d naturally experience if left outdoors. Others, such as peas, legumes and nasturtiums require scarification, which involves scratching the hard seed coat with sandpaper or something rough so moisture can enter and help the seed sprout. Finally, seed soaking is another tried and true method to jumpstart beans, squash, beets, and more.You can use either a moist paper towel or a water bowl.To determine the best plan for your seeds, carefully read the packets before starting.
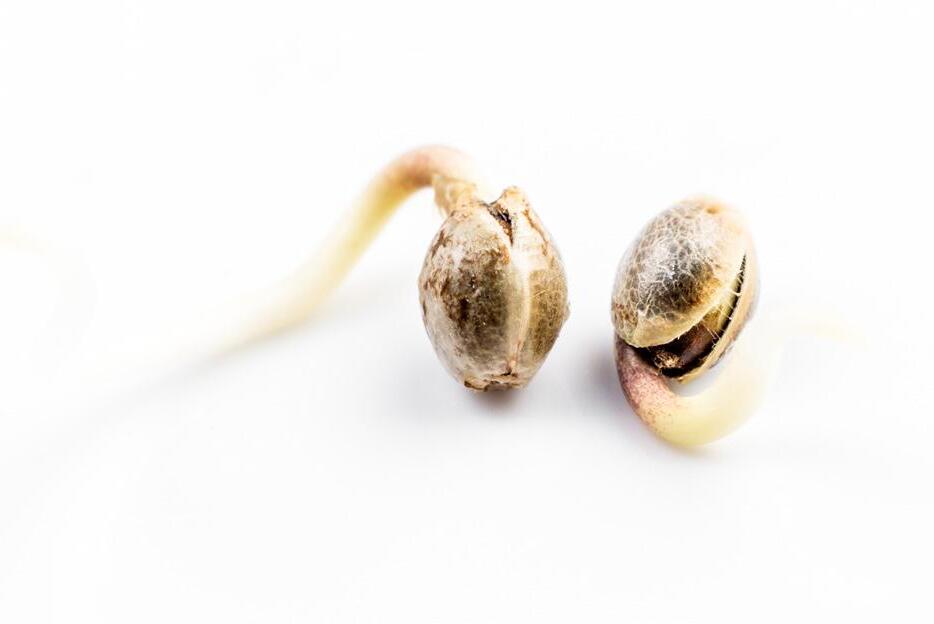
Transplant Boost 2
After successful germination and a lot of TLC, your plant babies are ready for transplant. You can do many things to help your seedling through this next stage, including selecting the right container. Determine your plant’s size at maturity and select pots or spaces in the garden that can accommodate them and their expanding root zone. Rootbound plants will suffer and never reach their full potential. The secret ingredient to helping your plants grow strong and healthy? Mycorrhizae! Essential to the soil food web, plant roots adore this beneficial fungus. Applying a mycorrhizae product directly to the rootball or the planting hole will help reduce transplant shock. Other benefits include increased nutrient uptake, better pest and disease resistance, and higher yields.You can use granular mycorrhizae or a water-soluble product. Whatever option you choose, your precious transplants will thank you for the boost! Finally, foliar feeding is excellent in both the vegetative and flowering stages and allows nutrients to enter through the plant leaves and directly into the vascular system. You’ll notice the results within a few days; spray in the morning or early evening when the sun isn’t so intense.
80 80
1
Mycorrhizae
IPM Before The Critters Arrive 3
You’ve nurtured your babies from seed, and now that they’re happily growing, you’re looking forward to making it to harvest. Unfortunately, a pest invasion can happen in the blink of an eye, dashing any dreams of a successful crop. Support your growing plants with Integrated Pest Management (IPM) before any destructive insects move into the garden. The first step is to monitor your garden daily. Take the time to walk through the rows and observe your plants, checking leaves, flowers, and fruit to be sure nothing is chomping away or getting ready to lay tons of eggs and take over. Place yellow sticky traps beside your plants to see what you’re dealing with before things snowball out of control. Floating row covers are another excellent option for pest management, as the lightweight mesh fabric will prevent unwanted bugs from landing on your crops. Consider pest-resistant plant varieties, and interplanting with trap crops will help deter predator bugs from what you are growing for yourself. Plant diversity will attract many insects, including beneficial ones that eat the bad guys. If growing indoors, consider releasing beneficial insects into your environment early.
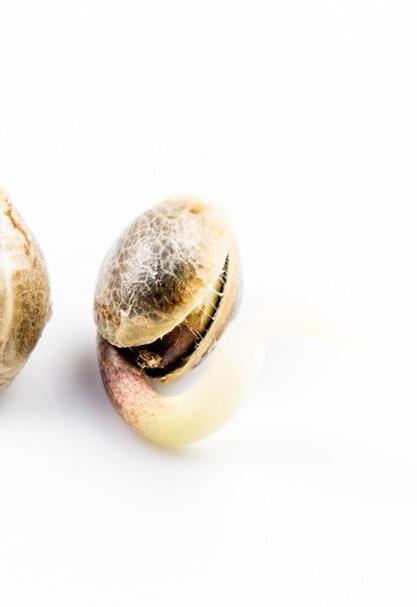
Let There Be Fog 4
A fogger is a must-have for all indoor growers looking to support their plants through the vegetative cycle. This incredible tool helps plants thrive in dry locations by boosting humidity, something tomatoes and eggplants love. It also decreases VPD, which helps open the plant’s stomata. A well-balanced VPD means the crop can better respond to light and temperature in a controlled environment. Are you gardening outdoors? A foggy morning will work wonders for you, but you can keep the dreamy vibe alive by installing an outdoor fog system into your landscape design. The fog shoots look pretty and give a zen-like feel to your space, but more importantly, installing the systems close to tropical plants offers the perks associated with increased humidity.

Pruning To The Finish Line 5
Do not underestimate the power of pruning and cutting back plants! This process can be done throughout the vegetative and flowering cycles, although pruning during flowering should be limited. Always remove dead, diseased, or damaged material so your plant can focus on producing yields above anything else. Many gardens become unruly as plant growth kicks into high gear, and removing excessive foliage will help prevent disease and allow light to hit fruiting areas better. As a result, you’ll have robust plants and an even canopy with better yields. Speaking of yields, be sure to harvest on time so your plant can put its energy into producing new fruits. As for edible and ornamental perennial plants, cut them back after they’ve finished blooming so they can put their energy into growing stronger for the next growing season. 3
If you’re looking for a fun-to-read resource on growing plants from seed to harvest, check out The Vegetable Gardening Book: Your Complete Guide To Growing An Edible Organic Garden From Seed To Harvest, by Joe Lamp’l.
8181
GREEN ADVICE


Visit GardenCultureMagazine.com and subscribe now! Don’t want to miss out? Grow your own – no matter where you live. Sustainable, efficient gardening. New hints and tips Follow Us GardenCulture GardenCulture Garden_Culture GardenCultureMagazine 10 years, and grow ingstro n g ! Don’t want to miss out?


BRING YOUR CULTIVATION AREA INTO THE FUTURE www.hi-par-horticulture.com MORE LIGHT, LESS POWER
R E T R O LED ™
UNPLUG YOUR HPS - PLUG IN AN LED

600 W DIGITAL BALLAST COMPATIBLE


250 W/400 W/600 W/ 690 W (Super Lumen) dimmable power options
BETTER LIGHT COVERAGE
Six passively cooled LED bars provide optimal light coverage up to 1.5 m²


RUN A HPS LAMP & SHADE OR A 6 BAR LED ARRAY
Use the LED in summer with an option to swap back to a HPS in winter
Wholesale Horticultural Group
