


86 87 Schwazzing is a technique that involves removing a substantial amount of fan leaves deliberately during specific points of the plant’s flowering cycle and can be considered a form of high-stress training (HST)


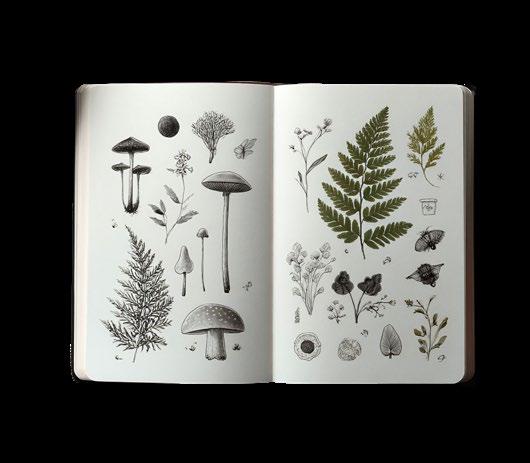
This time of year, I am usually spending as much time as possible walking through the forest foraging for hedgehog mushrooms. Unfortunately, it has barely rained since the first week of July, and there are no mushrooms at all in the forest. Luckily for you, we have an edition chock full of mushroom growing and foraging tips and tricks. Our editor, Catherine Sherriffs, talks to foraging expert Whitney Johnson in ‘Go Forth and Forage - Helping Baby Foragers Blossom into Mushroom Warriors.’ We get more excellent advice in ‘Enter the Mushroom Chamber: Dialing in the Perfect Conditions for Your Grows’ from our mushroom expert Alex Fields, and in ‘Professional POV - Q&A with Steve Gallo: Growing the Future with Mushrooms.’ Steve is an old friend who has, quite by accident, become a successful mushroom farmer.
SPECIAL THANKS TO:
Adam Clarke, Alex Field, Anne Gibson, Av Singh, Catherine Sherriffs, Dustan Mclean, Everest Fernandez, Haley Nagasaki, Martyna Krol, Shane Hutto, & Xavi Kief. Special thanks to Jacob Rolfe for the exceptional cover art.
PRESIDENT
Eric Coulombe eric@gardenculturemagazine.com +1-514-233-1539
VICE PRESIDENT
Celia Sayers celia@gardenculturemagazine.com +1-514-754-1539
EXECUTIVE EDITOR
Catherine Sherriffs cat@gardenculturemagazine.com
DESIGN

If you don’t really care about mushrooms, we have a couple of gardening gems. In ‘It’s Zyme Time... Whatever that Means!’ Av Singh dives into enzymes, explaining what they are and how they can help gardeners maximize their plants’ potential. Another hot topic these days is under canopy lighting. It’s not a new concept, but one that is definitely gaining momentum. Everest Fernandez tries to set the record straight between fact and hype in ‘The Curious Case of Upside-Down Lights.’
On another topic, keeping your room free of pathogens such as powdery mildew can be an absolute nightmare. Enter chlorine dioxide, a chemical that is new to me and has been a savior, and will forever be part of my gardening SOPs.
Whether you are growing mushrooms, vegetables, flowers, or medicine, this edition will be both educational and inspirational.
A big thank you to Jacob Rolfe, an artist from Canada’s east coast, whom I was lucky enough to meet at a trade show last spring in Toronto. He designed and hand-drew the cover. Check out his work at and read all about him in our
Happy Gardening,

Job Hugenholtz job@gardenculturemagazine.com
INTEGRATED SALES & BUSINESS DEVELOPMENT
Haley Nagasaki Haley@gardenculturemagazine.com +1 (604) 401-7209
DIGITAL & SOCIAL MARKETING social@gardenculturemagazine.com
ADVERTISING ads@gardenculturemagazine.com
PUBLISHER
325 Media INC 44 Hyde Rd, Mille-Isles QC, Canada J0R 1A0 GardenCultureMagazine.com
ISSN 2562-3567 (Print) · ISSN 2562-3575 (Online)
Garden Culture is published six times a year, both in print and online.


@GardenCulture @GardenCulture

@GardenCultureMagazine @Garden_Culture
DISTRIBUTION PARTNERS
Hydrofarm
5.8 Distribution Central Coast Garden Products
325 Media INC
• Biofloral
• Autopot USA
• Hydrofarm Canada
• Quality Wholesale
All rights reserved. No part of this publication may be reproduced, stored in a retrieval system or transmitted in any form or by any means, electronic, electrostatic, magnetic tape, mechanical, photocopying or otherwise, without prior permission in writing from 325 Media Inc.
BY CATHERINE SHERRIFFS
It doesn’t happen all that often, but for this edition of Garden Culture Magazine, we looked outside our small team for our cover design. The artwork you see on the front jacket of this issue is courtesy of Jacob Rolfe! Jacob is a Canadian artist, actor, and lover of the great outdoors. When he’s not creating art or appearing as a series regular on the Canadian sitcom Trailer Park Boys, Jacob can be found dodging housework on hiking trails or traveling the globe. Our executive editor, Catherine Sherriffs, caught up with Jacob to chat creative processes, mycophobia, and…cats.
What was your inspiration for the cover of this edition of Garden Culture Magazine?
Mushrooms are the source of inspiration. I’m actually a bit of a mycophobe in my real life. I don’t eat mushrooms at home. I mean, I don’t know about phobia. That might be overstating my level of fear, but I don’t eat mushrooms at all. But I do indulge in magic mushrooms from time to time. I’ve been drawing mushrooms for this video game I’m working on with a guy. There’s a mushroom planet with mushroom characters, and they come up in my doodles and drawings. I’m drawing inspiration from different parts of my life, as well as what I’ve gleaned from other people who cultivate culinary mushrooms.
We know you’re an artist; however, another claim to fame is that you’re an actor and a series regular on the Trailer Park Boys. You star as Jacob Collins. Tell me a little bit about that experience.
It’s super fun. They actually just filmed a 13th season of the show last month, so the dynasty continues. Back in grade seven or so, I went to an acting camp. We were doing some acting, and it culminated with a stage play at the end of the week. And I was so mortified to be on stage, having severe stage fright. And so I was like, Oh my God, I never want to do this ever again. So acting wasn’t something I aspired to, but I was living in Halifax back when the show started in 1999. And I just happened to be working at a bar there and ended up being asked to do a small part on the show because I guess I looked ‘trailer park’ enough. Being on set was really nerve-racking. And I thought, after the first scene in the first season, oh man, I was so stiff, they’re never gonna ask me back. But then season two, it was a similar thing. I was a clerk in a store for the first bunch of seasons. My character was established as a nervous, awkward guy, which is my style in front of the camera, so to speak. And yeah, the rest is history. My part expanded in season seven, and I’ve been a regular part of the cast since then.

work as screen prints. I draw with pen and paper to start, and then I’ll scan that into the computer and work on the image, assemble it, and add color. The last couple of years, I’ve been moving into more reproductions to supplement the screen prints. I try to keep my art affordable for regular folks, and by selling reproductions, I can sell them cheaper than screen prints. I guess I sometimes think of myself as a psychedelic doodler.
What is your typical creative process?
I’ll usually get out my sketchbook, smoke a joint, and just start drawing lines and see how it develops. Sometimes, the first drawing might be what ends up being the final project. Sometimes it takes a few passes to get something to gel.

A lot of your artwork involves plants. Do you have a garden?
I don’t. I have like a brown thumb, if any, or a black thumb. I don’t know what the opposite of green is. Red thumb? Brown thumb sounds a bit...off. I blame the coastal environment here. Like I tried to grow basil a couple of years ago, but it never got any bigger than the little plant that I bought from the garden shop. Similarly, my brother gave me some peppers this year. They’ve grown a little bit. I’ve gotten only one pepper off them so far. He’s got giant bushes back in Toronto, where he lives. I’m not a natural farmer by any means. So, maybe drawing plants is my compensation for that. If I can’t grow the plants, I can at least draw a picture of them and, you know, put that on the wall or on a shelf.
What about cats? Do you have cats? Because I noticed you enjoy drawing cats.
No. Maybe a similar thing, compensation for not having any of my own. We grew up with a lot of cats when I was a kid. Like we probably had five cats at one point, all at once, and different cats coming and going over the years. My mom would always feed stray cats if they were outside. She couldn’t bear to let them go hungry, and we’d end up adopting them sometimes if they just ended up moving into the house.


I like making lots of bean or lentil dishes. That’s sort of my base thing, like soups or stews. I also really like spreads and sauces that are very flavorful, like making a black olive or black and green olive tapenade. I just made a spread called Zoug. It’s a coriander- or cilantro-based sauce with cumin, cardamom, garlic, and lemon juice. I’ll make a pizza from scratch if I’m feeling a little bit junk foodie. I live alone, so there’s a risk that if I make a pizza, I’ll eat the whole thing, and then I’ll end up regretting it. I can’t pack away the courses like I used to.
I find it really funny that you’re doing our mushroom edition and don’t eat mushrooms.
Yeah, it is. I do find mushrooms super fascinating. If you look up weird mushrooms online, there are so many weird mushrooms, things you could never even imagine. So I do find them fascinating, but also, you know, kind of repulsive on a certain level.
I like traveling a lot. The last couple of years, I spent time in Thailand during the winter. I spent a lot of time in India over the years, which I find to be a really exhilarating place to travel. Although it can be kind of overwhelming as well. I’m going to Nepal in a couple of months to hike in the Annapurna mountains with a buddy this year. I have to start training for hiking in the Himalayas. I realized that I turned 50 last year, and I can’t just take it for granted that my body’s going to cooperate. So yeah, I’ve been doing a bit of jogging for the first time in years, like just starting off real slow, you know, doing some planks. 3

On the set of Trailer Park Boys

Watch for the full, unedited interview with Jacob Rolfe on our YouTube Channel @gardenculturemagazine
Are you interested in writing for Garden Culture Magazine?
We’d love to hear from you! Send us an email introducing yourself with a sample of your work
editor@gardenculturemagazine.com


Athena is partnered with Canada’s top distribution partner, Biofloral. They bring several key factors that aid in our success; reliability, large local inventory, fast delivery, and knowledgeable supportive staff across Canada. Our philosophy is to partner with the best so you can run your best. Athena × Biofloral is a winning pair. With Biofloral and Athena, growers’ success is always the priority.
Many Canadian cultivators rely on GMP manufacturing and GACP-grown biomass. That’s where your inputs matter.
Athena Ag’s ISO 9001:2015 certified quality management system delivers documented, repeatable nutrient production, traceable lots, risk-based controls, and tight specifications that align with GPP and make GMP and GACP audits smoother.
Choose Athena and Biofloral to reduce compliance friction, protect your license, and scale with confidence.
Interested in a free facility audit or want to learn more? Contact Mike Pflug, an Athena facility advisor with over a decade of cultivation experience which included being the Head Cultivator at one of Canada's largest licensed producers, where he oversaw over a million sqft of canopy. • m.pflug@athenaag.com or call 844-333-1818 x 1079


Athena Nutrients has quickly become a staple in our grows at Eastcann. The formulas are clean, consistent, and easy to work with, making mixing and feeding a breeze.
Working with multiple Micros and Licensed Producers I really appreciate how dialed-in the nutrient ratios are. Plants respond fast with healthy, vigorous growth, strong roots, and vibrant foliage. This provides us consistency across our many buildings. Unlike some other lines, there’s very little salt buildup, which keeps the medium cleaner and reduces maintenance. The Pro line especially shines for larger grows, offering cost efficiency without sacrificing quality. I’ve noticed improved yields, better terpene expression, and overall healthier crops since switching. Having one of the best suppliers in Canada Biofloral stocking Athena, supply is never an issue.

Whether you’re running a small home setup or a commercial facility, Athena delivers reliability and performance in every batch. It’s straightforward, no-nonsense nutrition that just works.

The Quest 746 is Quest’s largest capacity dehumidifier, renowned for delivering serious moisture removal with industry-leading energy efficiency, powered by Quest’s patented M-CoRR Technology.The second-generation 746 is now more efficient than its predecessor and features an onboard digital control for easier operation, self-diagnostics, and an optional connection for external controls. Designed for growers utilizing 480-Volt (3-phase) power, the new and improved 746 only consumes 4.9 amps, making space on your electrical panel for other equipment. Plus, its shorter, more compact build allows it to fit better in tighter grow spaces.
Learn more at QUESTCLIMATE.COM

Grow Light Science (GLS) designs LEDs with one goal: to maximize plant performance. Built around plant biology, GLS fixtures use a proprietary HI-RED full-cycle spectrum that enhances photosynthesis, optimizes plant structure, and supports higher cannabinoid and terpene production from seedling through harvest.
Engineered for commercial cultivation, GLS lights deliver exceptional photosynthetic photon flux (PPF) with industry-leading efficiency, uniform coverage, and lower long-term operating costs.Their lightweight, all-aluminum construction ensures superior heat management and simple plug-and-play installation, while protective lens covers make maintenance easy. Certified to the highest standards, GLS fixtures integrate seamlessly with room control systems for precise, scalable operation.
Grow Light Science delivers unmatched flux per buck. Available exclusively in Canada through BioFloral. Visit BioFloral.com to find out more.


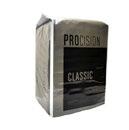
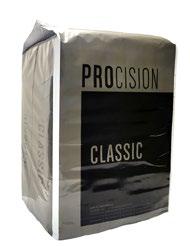
The traditional professional mix perfected for today’s growers
A reliably consistent media that offers excellent drainage and minimal added nutrients, Procision Classic gives gardeners complete control of their feeding program. Use it for heavy feeding, a quasi-hydroponic setup, or as a base mix to customize with your own amendments. Crafted from coarse sphagnum peat, perlite, dolomitic and calcitic lime, plus a wetting agent, it’s enriched with mycorrhizae and beneficial bacteria for healthy root development. Ideal as a primary growing media or in custom blends, Procision Classic delivers versatility and professional results.
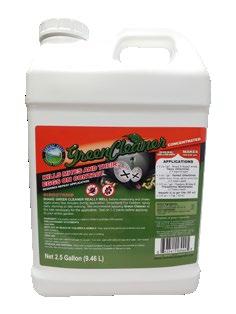
Discover the ultimate solution for sustainable pest management in commercial cultivation.
This eco-friendly formula harnesses plant-based botanicals and essential oils to deliver powerful, targeted pest control without harsh chemicals. Ideal for large-scale operations, it ensures zero residue on harvest-ready crops, meeting stringent organic certifications and regulatory standards effortlessly.
Boost yields and protect your investment by preventing pest outbreaks proactively - safe for beneficial insects, soil health, and farm workers. Easy application minimizes downtime, reducing labor costs while maximizing profitability. Embrace green innovation that aligns with consumer demand for clean, traceable produce. Transform your cultivation today with IPM Green Cleaner - nature’s defense for tomorrow’s harvest.
Visit AuroraPeat.com for more information.
CCMS’s Central Controller Mobile System delivers streamlined control for every stage of your grow. Designed to integrate seamlessly with existing devices and hardware, it lets each room operate independently while linking all controllers to a secure local server.
Manage fertigation, veg, mom, flower, and dry rooms from office desktops, mobile devices, or any controller - all while keeping data private and locally stored. Its intuitive interface simplifies monitoring and adjustments for efficient, precise cultivation management.
Hydrofarm proudly offers this advanced solution to help growers upgrade operations with smart, centralized oversight.
Learn more at Hydrofarm.com.
Available from: CentralCoastGarden.com


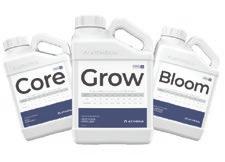
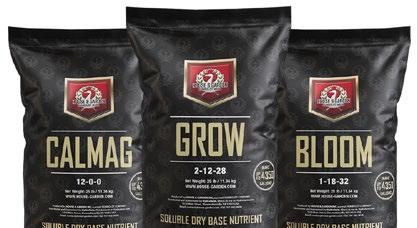
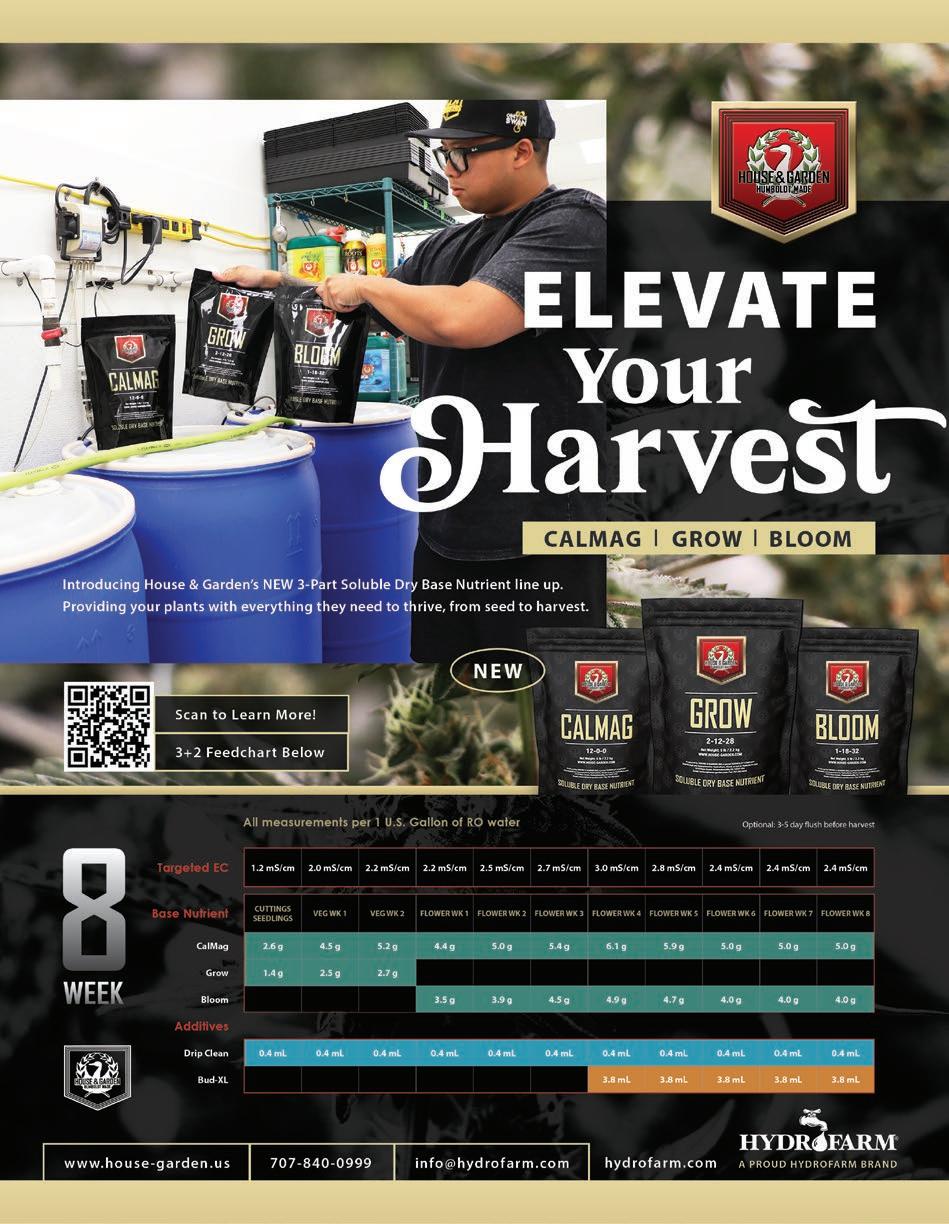
Elevate your harvest with House & Garden’s new 3-Part Soluble Dry Base Nutrient line - CalMag, Grow, and Bloom - crafted for precision nutrition and professional results.
CalMag 12-0-0 delivers readily available calcium and magnesium to encourage rapid growth and prevent deficiencies at every stage. Grow 2-12-28 and Bloom 1-18-32 blend premium macronutrients with chelated micronutrients for vigorous plants and abundant yields.
Ideal for commercial or home cultivation, these nutrient solutions uphold House & Garden’s legacy of quality. Available now in convenient 5 lb and 25 lb sizes, they represent the next evolution in plant nutrition.
Learn more at house-garden.us
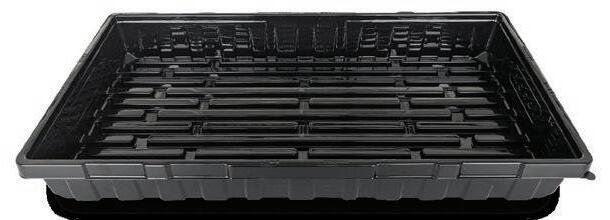
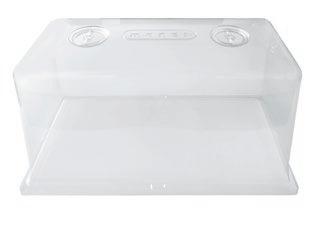
Mondi™, the original inventors behind the design, style, and performance of the patented propagation tray, introduces their latest innovations! Manufactured with Avara Technology, a proprietary, food-grade material, these products set a new benchmark in durability, safety, and environmental sustainability.
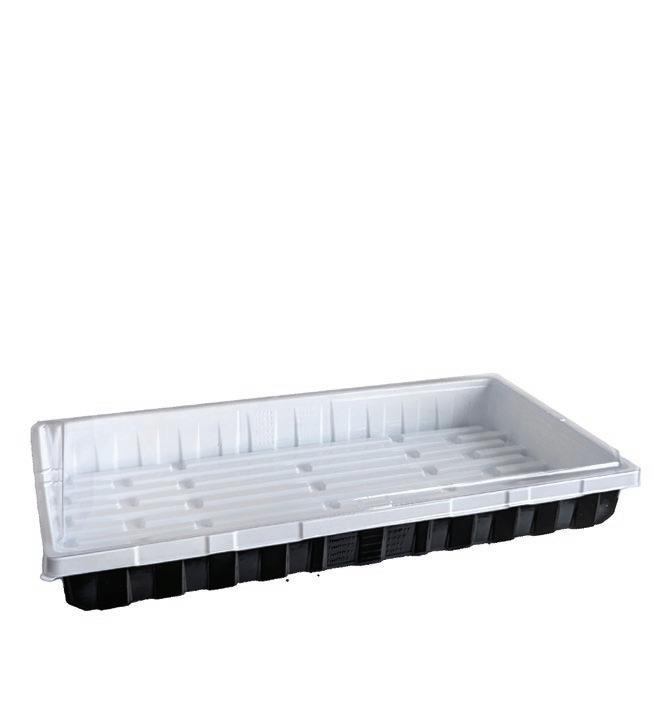
Mondi™ Black & White Premium Propagation Tray - designed for growers who require exceptional strength and durability for extended use. The white surface increases light reflectivity while the black base prevents light penetration to the root zone and reduces the chance of root disease. It’s a perfect fit for the Mondi™ Mini Greenhouse and standard 1020 inserts.
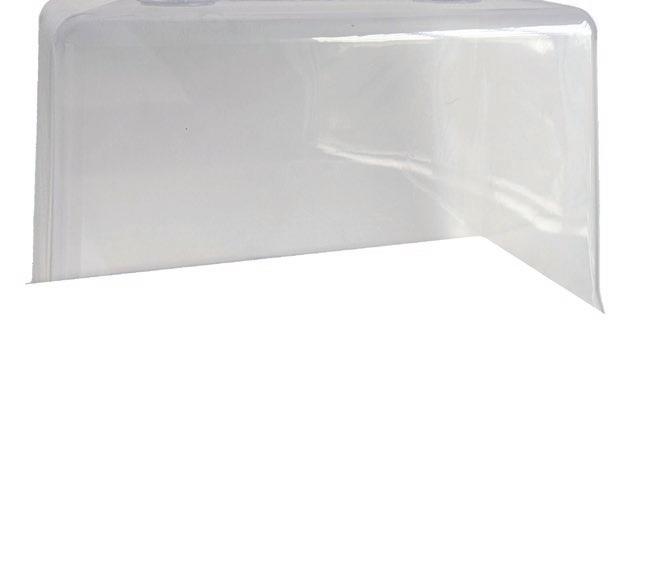
Mondi™ 12” Crystal Clear Mega-Mini Greenhouse - the ultimate humidity dome engineered to deliver the highest propagation success rates. The 12” design offers expanded capacity to accommodate larger clones, and features the innovative Perfect Fit system for a secure fit with standard 1020 trays. Equipped with the Perfect 2-Finger Easy Vent, it allows for precise humidity regulation throughout the propagation process.
Mondi™ 7” Frosted Mini Greenhouse - the ultimate humidity dome for light regulation in highly illuminated environments. The innovative Perfect Fit system securely fits standard 1020 trays. Equipped with the Perfect 2-Finger Easy Vent, it allows for precise humidity control throughout the propagation process.
Mondi™ 7” Jet Black Mini Greenhouse - the ultimate humidity dome for mushroom cultivation and for light control in highly illuminated environments. The innovative Perfect Fit system securely fits standard 1020 trays. Equipped with the Perfect 2-Finger Easy Vent, it allows for precise humidity regulation throughout the propagation process.
Ask for Mondi™ at your local grow shop. Distributed by Quality Horticulture.
Visit qualityhort.com for more Mondi™ products.
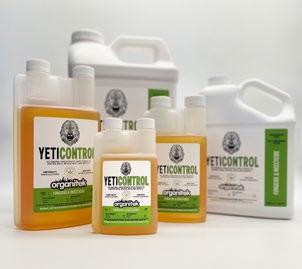
The advanced pest control solution formerly known as Mammoth® CannControl is now YetiControl. This safe EPA: 25(b) product works as a contact insecticide, miticide, and fungicide, effectively eliminating pests like spider mites, aphids, thrips, and powdery mildew. Its unique vapor action technology also penetrates dense foliage to reach and control hidden threats, ensuring comprehensive protection. An ideal component of any Integrated Pest Management (IPM) program, YetiControl is safe for use on all plants, including food crops.
The name has changed. The power has not - it’s the same premium recipe you’ve counted on for years, brought to you exclusively by Organitek.
Visit Organitek.com for more information.
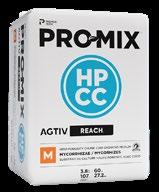

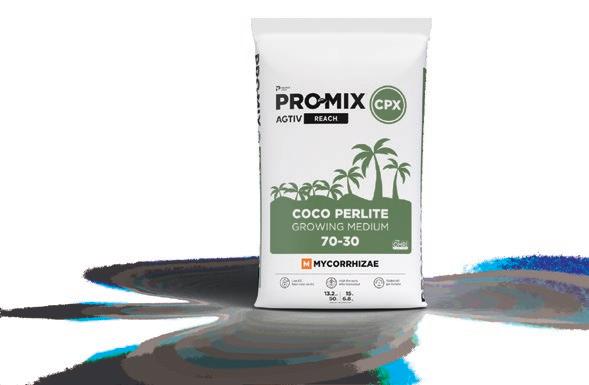
Discover the peat/coir growing medium that offers water retention and superior porosity similar to bark-based mixes. This medium excels at absorbing water, reducing the frequency of watering.
The chunk coir is thoroughly washed to remove waste ions, such as salt and chloride, as well as excess potassium, resulting in a decrease in EC and salt content.
The AGTIV® REACH™ technology develops the root system, increasing nutrient and water uptake, promoting plant growth, robustness, and vigor, thanks to mycorrhizae.
Say goodbye to nutrient imbalances or excessive salts concerns. PROMIX® HPCC AGTIV® REACH™ is the ideal choice for promoting vigorous plant growth.
Check out PTHorticulture for complete details.
SILICBASTIC contains a high concentration of a stable and plantavailable form of silicon. Silicon is not an essential element, but it plays some interesting roles for plants!
Plants incorporate silicon into their cell walls, creating a stronger physical barrier that helps plants resist mechanical and physical damage, such as wind or fruit weight, but also improves their overall strength, increasing their resistance to biotic stress and environmental challenges. Silicon will even improve nutrient uptake, increasing crop yield and quality.
Add SILICBASTIC and increase the resistance of your plants! Visit

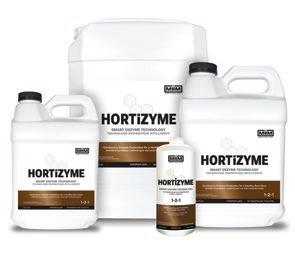
New from MiiM Horticulture, HORTiZYME is a smart enzyme product featuring horticultural enzymes, beneficial bacteria, and macronutrients. It has been developed specifically for use in high-performance growing environments to maintain and revitalize a healthy soil or substrate matrix, enhance the rhizosphere, and promote optimal nutrient cycling. Additionally, running HORTiZYME weekly through irrigation lines and fertigation systems helps to prevent the buildup of unwanted biofilms. Ask for HORTiZYME at your local grow shop. Distributed by Quality Horticulture.
Go to qualityhort.com for more information.
The scientifically engineered and thermally refined hydroponic cannabis growth matrix is made with 100% compostable, 100% recycled Southern Yellow Pine.
CLEAN & GREEN: With HydroMatrix, your water runs clear, your drains stay open, and your growth medium is inhospitable to pests and disease.
COMPLETELY HYDROPHILIC: Unlike most substrates that become more hydrophobic with each watering, HydroMatrix is 100% hydrophilic – providing consistent peak moisture for the entire life of each crop.
CONSISTENT & RELIABLE: HydroMatrix is engineered from HydraFiber – a consistently available USsourced raw material.
Choose between 100% HydraFi ber or a Premium Blend of HydraFiber and Coconut Coir.
Visit GrowHydroMatrix.com for more information.

BY ADAM CLARKE


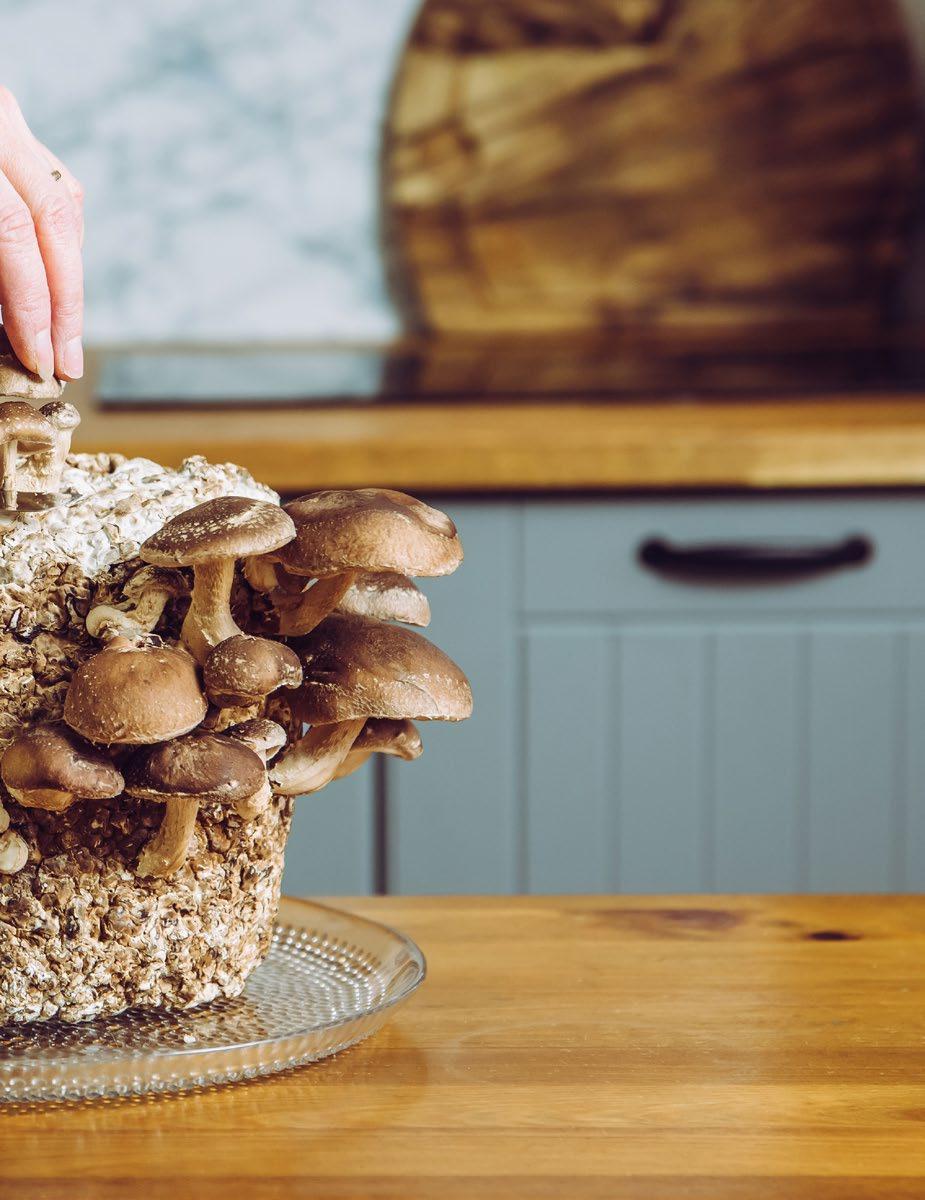
Mushroom cultivation has not always been something that interests me. I have never found mushrooms appealing, especially when the big three, cremini, shiitake, and button, are grown indoors in shit for mass production. There has been a lot of discussion about the health impacts of these mushrooms, but is it more about the mushrooms or how we grow them?
Mass-scale mushroom cultivation has typically taken place indoors in manure and high-humidity environments. Over the past few years, the types of mushrooms available for growing have expanded along with the methods, and now we have some neat options for mush-
room production. These typically involve a pre-inoculated sterile block that you hide in a dark place in your house. Misting the block is required to get some very funky indoor mushrooms growing. These often look like something from a sci-fi novel and can also resemble a brain.
Mushrooms are not plants, nor are they from the plant kingdom. Mushrooms are fungi and lack chlorophyll, which means they cannot produce food through photosynthesis and instead absorb nutrients from their environment, including decomposing material. With this in mind, we can start thinking about how to grow mushrooms indoors and the necessary conditions for production. If you are used to growing plants indoors, you might as well forget most of that knowledge and think about your new fungi farm.
Mushrooms start from a culture, typically in an agar. From there, a sterile substrate is inoculated and then taken to medium temperature rooms with high humidity to start the fruiting process. Mushrooms do not require much light; however, studies are showing that some light levels at various times in very specific spectrums can help different elements of the mushroom grow better. Typically, I see people using hay or oats as the sterile substrate for mushroom growth, but many options certainly exist. Mushrooms remain in their fruiting chamber until they are ready to harvest. Before harvesting, it is crucial to run a kill step in large-scale cultivation, and typically this is done through direct steam to a room at 150-160°F for 12- 24 hours. After this, the mushrooms can be harvested and dried for use in their desired application.
BIO Adam has provided planning and design services for cannabis and hemp cultivation and processing facilities over the last seven years with Stratus. His projects involve outdoor cultivation, indoor cultivation, drying, processing, extraction, storage, bottling and packaging, and more. Living on a hobby farm, Adam loves all plants, including flowers, vegetables, and microgreens, but is most passionate about hemp and is in awe of the fast-growing plant and all of the benefits it offers to humans and the environment alike.
Large-scale mushroom cultivation is very dependent on sterile conditions and constant vigilance for competing bacteria that are trying to stop or harm the mushroom growth. In a home-based environment, you do not need to be quite so stringent to get your desired results because you are not putting your products through as much risk while growing. If you are looking to start growing mushrooms at home, I recommend starting with one of the premade, pre-inoculated blocks that are available in many retail locations. Find a dark spot and build a small polytent with a little humidifier, and you are ready to grow.
Functional mushrooms are taking off in society now, and learning and exploring keep things interesting and fun. These are an easy and cost-effective way to explore growing something in your own home. 3
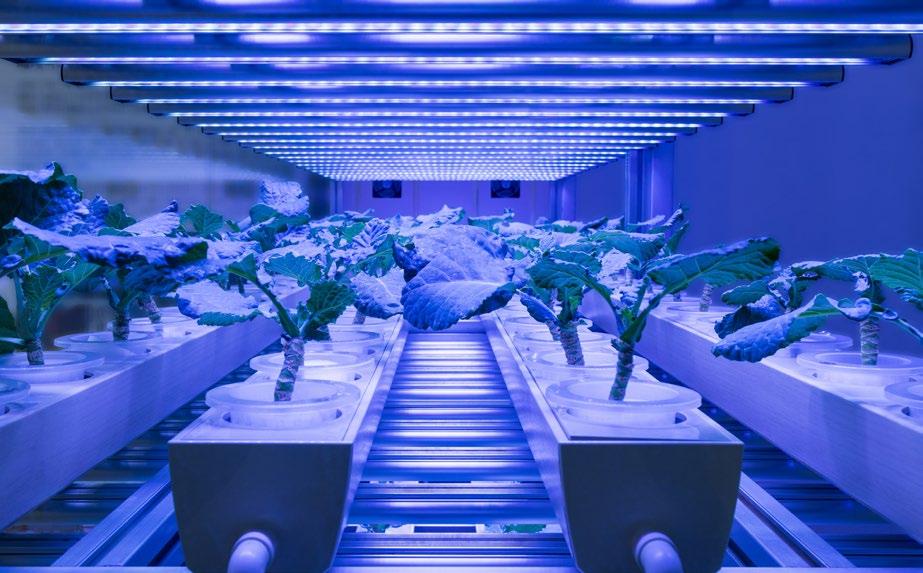
why are so many growers suddenly pointing lights up at their plants?
Everest Fernandez talks to Alexandre Gauthier, a leading commercial grower, about sub-canopy lighting.
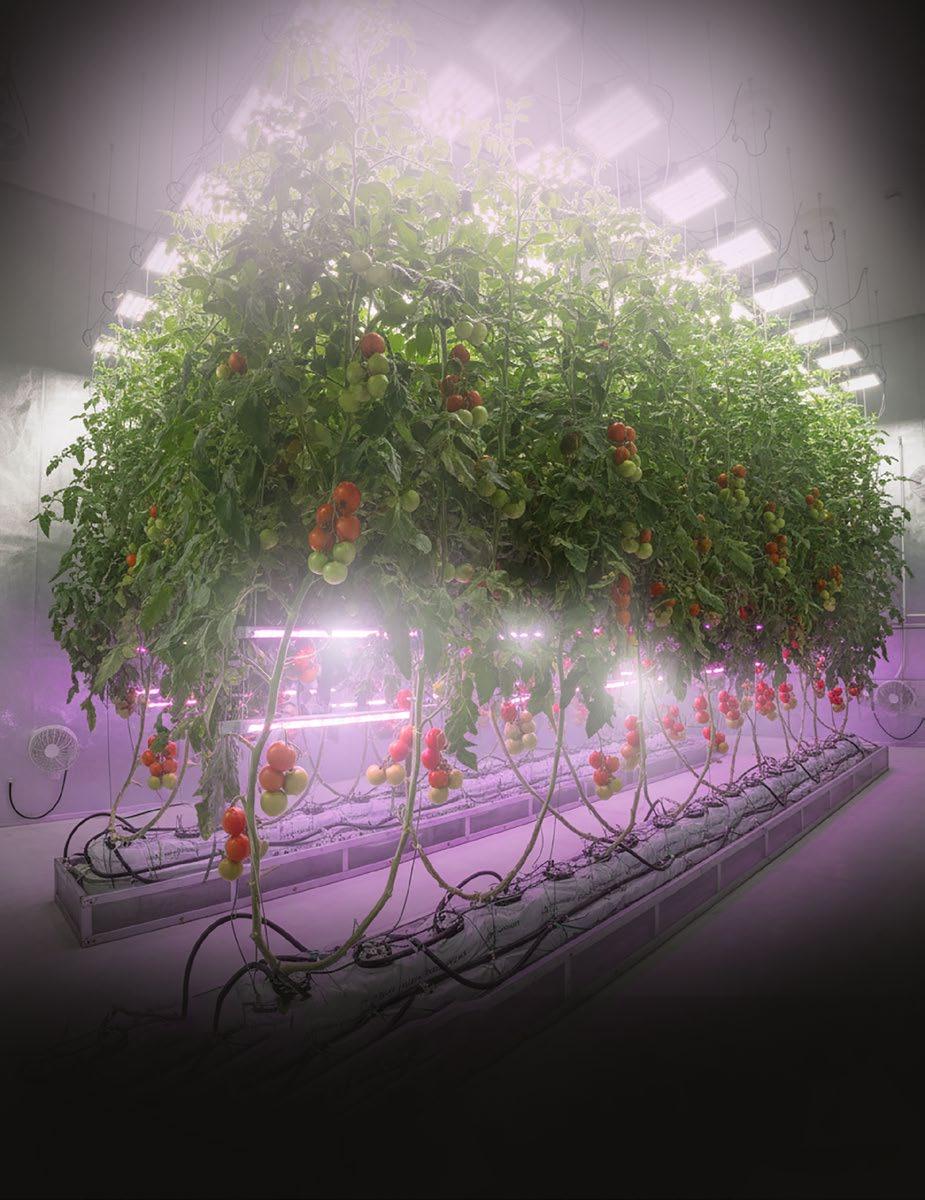
Sub-canopy lighting. Under-canopy lighting. Whatever you call it, why are so many growers suddenly pointing lights up at their plants? Scroll through a cultivation forum in 2025 and you’ll see the same thing: people who’ve run rooms for years are mounting LED bars under the canopy and swearing the results are transformative.
Remember: this is about balance, not brute force
Even the manufacturers who laughed it off as a fad three years ago are now rushing sub-canopy products to market. So what’s changed? Did LEDs diminish canopy penetration, so we’re trying to fix what we broke? Not exactly. According to Alexandre Gauthier, VP R&D at Origine Nature Inc. in Quebec, it’s about finally understanding how to manage a canopy and move light through it more intelligently.
Back in the HID days, a 1,000-watt double-ended HPS wasn’t shy. It was a blunt tool that hurled photons straight through the canopy. With the right reflector, it could punch deep between stems, lighting up leaves and buds you couldn’t even see from above.
Alex G adds, “Whatever the light source, the key issue remains: canopy management. When plants are properly managed, they open up to allow light penetration throughout.”
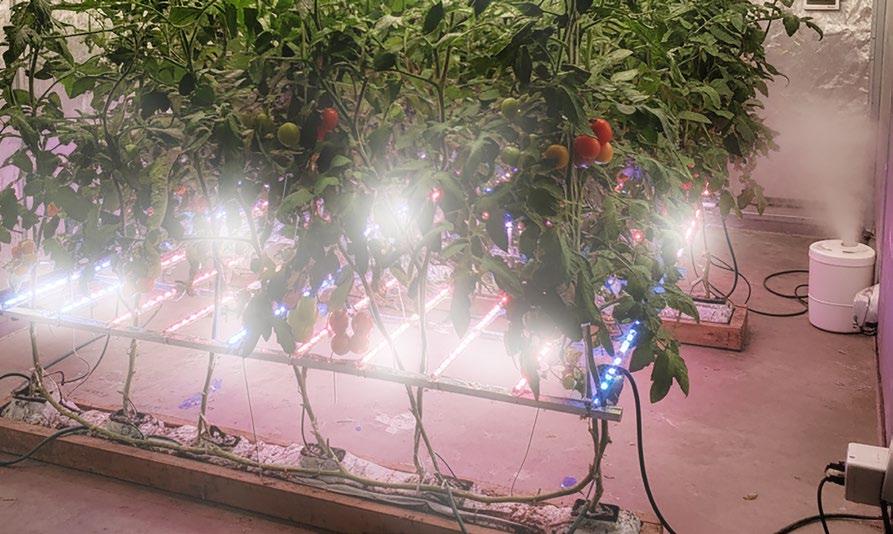
LEDs arguably make canopy management more important than ever. Sure—they spread their output evenly across the top and turn electricity into plant-usable light far more efficiently. But with wide beam angles and hundreds of tiny diodes, the light falls differently than an HPS. Sub-canopy lighting isn’t just there to compensate for this qualitative difference in light, however. It’s about taking the photons you have and distributing them more evenly through the whole plant.
Leaves can work from both sides. In some crops, when the underside (the abaxial surface) gets good light, it can pull in almost half the leaf’s total carbon gain. Cannabis seems to do something similar, though we’re still building the dataset for different genetics.
Conventional wisdom says cannabis yield starts leveling off somewhere around 1,000–1,500 µmol/m²/s if you’re on ambient CO2. But that assumes all the light’s coming from above. “You don’t need to run at 1200–1500 PPFD with undercanopy lighting,” says Gauthier. “The goal is to provide usable light more evenly to the entire plant, often reducing the need for as much overhead light.”
In his projections, running top lights at 800–900 PPFD with SCL can cut electricity use by roughly 25% compared to HPS – without hurting yield, and sometimes improving it. He’s also seen growers sail past the 100 g/ft² of dried, trimmed flower threshold with SCL in the mix, though he’s quick to stress that’s with meticulous canopy management, not just inserting a few light bars here and there.
Still, it’s not for everyone. If your top lights are underpowered, HVAC is already stretched, canopy is sparse, or disease pressure is high – fix those problems first
Far-red light – those wavelengths just beyond deep red – can help when blended with red and white, balancing the two photosystems in the leaf. But it’s not a magic trick; results depend on spectrum balance, total PPFD, and cultivar. Fluence’s own multi-site trials, carefully designed to avoid the “more photons = more yield” trap, saw an average 7% boost from SCL (vendor-reported).
The Overlooked Factor –Convection and Microclimate
One part of SCL that rarely makes the headlines is the gentle convection it creates in the canopy. As Gauthier explains, “In some greenhouses, this is replicated by running hot water pipes, which promotes much-needed airflow in the canopy.”
Every watt you add produces about 3.4 BTUs of sensible heat, plus extra moisture from higher transpiration. That warmth can set up a slow, beneficial air current that helps reduce humidity pockets and improve gas exchange around the lower leaves. Aim for at least half an air change per minute, and work with the heat gradient – but don’t rely on it as your only air-moving strategy.
StateHouse Holdings reported a 20% yield lift and 27% bigger buds after rebalancing their lighting to include SCL – without increasing total wattage (vendor-reported, Cannabis Business Times, 2023).
LightSky Farms, in a Fluence-documented trial, saw their “A” grade shift from 46% to 55% (vendor-reported).
Those results are worth noting – but they rarely happen in isolation. Most trials also tweak plant density, defoliation timing, CO2 levels, and harvest practices. That’s why Gauthier isn’t keen on marketing-style percentage promises. The real value is in understanding the principles so you can adapt them to your own facility.

But it’s not a magic trick; results depend on spectrum balance, total PPFD, and cultivar
Old advice was to switch on sub-canopy lights 14–21 days into flower, once the stretch was over. These days, many commercial rooms are running them from day one. Some even use SCL as a gentle “sunrise” – flicking them 15–30 minutes before the top lights to wake plants gradually.
For setup, aim for 100–200 µmol/m²/s in the lower third of the canopy, but treat it as part of your total light budget. Ramp intensity over two or three days so the plants adjust without stress. And remember: this isn’t about cranking everything up – it’s about balance.
Go for fixtures with at least an IP65 rating – IP66 if you want them to shrug off pretty much anything your irrigation system or power sprayer can throw at them. Plug them into GFCI-protected circuits and keep all wiring tidy and well clear of wet areas. If you can, use adjustable stands or mounts so you can tuck the bars neatly above the pots and irrigation lines, right where the lower sites need them most. Go the extra mile to establish true proximity between SCL and the lower regions of the plants.
SCL changes your humidity profile. Warm air rising off the fixtures can help, but you’ll still need active mixing – under-bench ducts, vertical fans, or well-placed HVAC – to avoid damp pockets that pathogens love. And if you start SCL earlier in flower, be ready for the extra cleaning workload that comes with it.
Shaded leaves that can’t make enough sugar become carbon freeloaders – they cost more than they contribute. Give them enough light from below to break even, and they’ll start pulling their weight again. Often, that’s a better return than adding even more PPFD to the already-lit tops. This is where light redistribution, not just addition, makes the difference.
The Hardware Scene
Today’s SCL kit comes in many flavors:
• FloraFlex – up to 3.3 µmol/J (model-dependent, vendor-reported)
• Faven – R6 (~60% red) for HID rooms; R8 (~80% red) for LED rooms
• Thrive Agritech – yield-increase guarantee (vendor-reported)
• California Lightworks MegaDrive – keeps drivers outside the grow to reduce heat
Specs, spectrum, and warranty can vary even within a single brand –always check the datasheet.
Innovation or Optimization?
SCL isn’t a sticking plaster for LEDs – it’s part of a more three-dimensional way of thinking about light. In dense single-tier rooms or vertical stacks, no top-down setup can hit everything evenly. Well-run SCL can turn larf into saleable buds – if you’ve already nailed your canopy structure and environment.
But it’s not for everyone. If your top-lights are weak, your HVAC is maxed out, your canopy is shallow, or disease pressure is high, fix those first.
The return on SCL depends as much on quality improvements as on weight. Factor in kit cost, power price, installation labor, ongoing sanitation, and whether you can sell the extra flower at a premium. In the right conditions, it can pay back quickly. In the wrong ones, it’s just more gear to clean.
Sub-canopy lighting works – but only if you treat it as part of a bigger strategy. Master canopy management, get your environment dialed, and think of light as a resource you place in three dimensions, not just from above. As Gauthier says, it’s about “providing usable light more evenly to the entire plant” – not chasing big headline numbers. 3
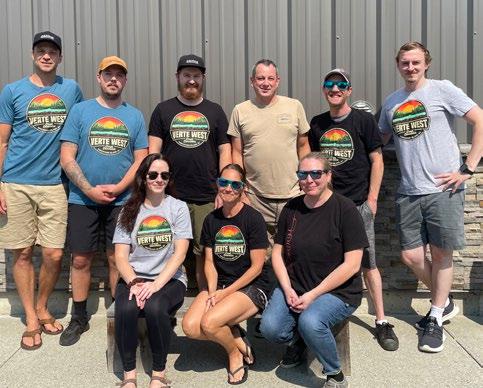
Vancouver Island cannabis producer Tyler Hass turned business studies into a family venture when he co-founded Verte West in 2019. Together with his friend Erik, his father, uncle, and brother – who turned to cannabis after a life-changing car accident – Hass developed a brand born out of tribulation and perseverance, which today is in demand both in Canada and abroad.
Hass has grown with CANNA for “15 years straight,” utilizing the nutrient line and cultivating in CANNA loose coco. He swears by its consistency, effectiveness, international recognition, and ability to simplify production.


“It takes away the worry of mixing nutrients. It’s ease of mind for me,” he says.
The Hass family’s West Coast connection runs deep, with his brother once owning Victoria hydroponic store Mr. Fertilizer, where they trialed products long before scaling up.
The Canadian cannabis business “was a whole new thing,” he says. “So, we overshot, and over-predicted, and learned. We learned, but we stuck with it. I think we’ve done a great job putting the pieces together now.”
The producer stands at 6,000 square feet of canopy, with another floor currently under construction for a total of 12,000 square feet.
“We’re going to do that very slowly. We have a lot of demand,” says Hass, “but I just don’t want to make any mistakes expanding.” Including a bigger office to account for QA and global expansion! Additionally, Cowichan Valley’s Verte West has partnered with Quebec’s Lot420. The collaboration has positioned them as a dependable international supplier, with 80% of their harvest exported in the last year.
As the owner and COO of Verte West, Hass mitigates potential problems while prioritizing daily tasks.
“I have so many things I have to worry about,” he says, “so worrying about mixing nutrients or making mistakes on the mixture when we do it – I just don’t want that to be on my list.
“I’ve tried everybody else, I’ve tried powdered lines, and ultimately, I’ve come back every time. Not that I left, but I’ve just never successfully switched to something else.”
Working with Lot420 was an easy transition as well because “they knew the quality they were going to get, and they knew our growing methods were identical. So, we grew some of their genetics, and it was a great fit.”
Both producers conduct genetic hunts, and due to the high cost of phenohunting, “strategically,” he says, “I think that’s been incredible for both of us.”
Verte West and Lot420 grow using CANNA nutrients under very similar conditions. “So, if we fill a SKU together, or if we work together domestically, we can rely on each other to help with production.”
With a foundation of legacy genetics alongside their own breeding programs, both producers have distinguished the distinctive “dank” profiles that Canadians favor. “The danky armpit, cheese, baby diaper; all the nasty stays here,” he says. In contrast, the fruitier and floral profiles feed German and UK markets. Verte West has also worked with the Orchard brand, as well as Pistol and Paris, representing them domestically.
“I think Hawaiian Fanta has been a pretty big cultivar for us,” says Hass. “Jungle Berries was big for us. We’ve done a lot of Gelato for Lot420, Orange Cake, and right now, personally, I’m super excited for Lot420’s Glock. It’s the Gelato-Orange Cake cross they did. To me, it’s off the charts!”
Still, Hass emphasizes the importance of balance and staying diversified because loyalty to the Canadian market matters, and export markets aren’t bulletproof.
“We’re kind of stepping back, and we’ve got to have a domestic presence regardless of if it costs us a bit.”
However, with domestic prices stabilizing over the past 18 months, and now that Verte West has established itself as a trusted producer, Hass says he’s excited by the prospect of choice moving forward – in the pursuit of quality over the THC hype.
“I think overseas sucked up a lot of product; a lot of good product, too, which maybe impacted the quality of the local market a little bit,” says Hass. “Now that there’s been this year and a half of constant pricing, I feel like, as a producer, I know where we’re at, and I know I can produce at this price.”
Hass couldn’t do it without the dedication of his team, including head grower Ryan Murley.

The Canadian cannabis business “was a whole new thing,” he says. “So, we overshot, and over-predicted, and learned.
“His hard work and dedication have allowed this company to achieve what it has.”
When producing a consistent, high-quality product for international markets, inputs are key. For Verte West, CANNA is still the only one.
“You get dialed in, and if things are going well, it’s really hard to dial in somebody else’s stuff too – it takes years and years,” he says. “So, I think we just got it sorted. I think because I’ve built enough trust and have enough people willing to buy our product, I can grow some way better weed, way higher quality. And maybe it’s 24 or 25%, but it’s just better.”
Having built that trust over the last 5+ years, Hass says that’s what he’s most excited about.
“Now I can launch it at 26%, that’s better quality than 31%,” he says, “And I’m not compromising anything.” 3


Rule One of growing mushrooms: Give them the consistent conditions they need to flourish at every stage. This task is not difficult, but I have met many cultivators who are wasting significant time and money because they fail at this crucial step. The results are below-par harvests or worse – fruiting fails and contaminated blocks.
Consistent temperature, humidity and airflow (as well as light and a clean environment) are the key components of a happy mushroom block, whether you’re a home grower or running an industrial enterprise. Dialing in these variables is easier than you might think – and can be done in small areas with basic kit.
This article will show you how to maximize the quality, quantity and consistency of your mushroom crops. We’ll use nature as our guide to explore what mushrooms need at incubation (‘underground’) and fruiting (‘overground’) stages – and how to emulate these conditions at home, from budget grows right up to large-scale automations.
This article is focused primarily on indoor mushroom cultivation, but it will also give you an idea of what fungi need if growing outside.
How Fungi Grow Underground
The colonization stage is the part of the mushroom life cycle that is less visible.
In the natural world, a fungus (or mycelial ‘body’) generally thrives in warm, dark and humid conditions. It will digest and colonize its substrate (be it soil, dung, wood, or other organic matter) and turn it into mycelium.
While each strain has its particularities, we can make some generalizations for what the fungus needs at this stage:
• Temperature: 21–27°C, depending on species
• Humidity: Moderate (70–80%)
• Light: Minimal or none
• Air: Still but not stagnant. Some gas exchange is important
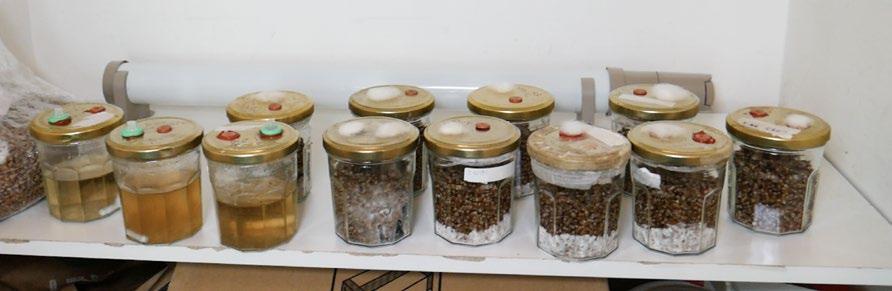
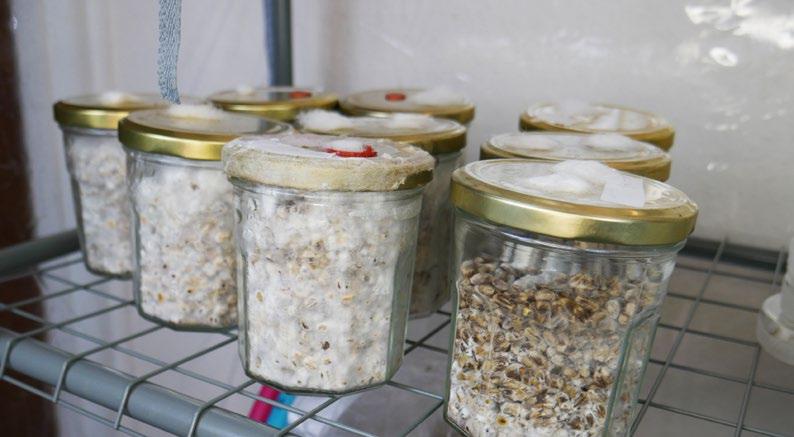
Consistency is key here – many stalled, slow or contaminated grows fail because of varying conditions at the incubation stage. Temperature is critical, and growers generally use an incubation ‘chamber’ to
keep conditions consistent within an enclosed area. This saves you from turning your home into a sweatbox and allows for a low-cost controlled environment.
Airing cupboard (or another consistently warm and relatively dark space)
When I started, I had a surprising amount of success using my airing cupboard for incubating grain bags and substrate blocks. Not everyone does.
My cupboard had a boiler which kept the ambient temperature fairly consistent and within the desired range. This is well worth a try for hobby growers – but make sure you get a thermometer to monitor the temperature of the space and note any physical areas that seem to bring better results. As always with mushroom growing, keep the area inside your cupboard clean.
Avoid having bags, jars or tubs touching a heat source, as this can dry out or ‘burn’ the mycelium, leading to stalled grows or contamination. Consistent ambient temperatures are the goal. Other warm places like shelves above heaters can also do the job – the more consistent the temperatures, the better.
Insulated container with automated temperature
Think polystyrene box or plastic storage tub lined with towels. A cupboard, grow tent or greenhouse tent covered in towels or blankets can do a good job too. I use a homemade box made of insulation boards with wooden shelving units inside.
Don’t seal your container, as the mycelium needs some passive airflow at this stage. For an extra layer of security, I have a hole in the front of my incubation chamber covered in a layer of carbon filter sheet.
Rule One of growing mushrooms: Give them the consistent conditions they need to flourish at every stage

My incubation chamber- insulation boards built around a shelving unit with a greenhourse heater plugged into an Inkbird temperature regulator


To automate temperatures, I recommend using a greenhouse heater. Get one with a temperature dial and play with it until your thermostat consistently reads the temperature you need – or even better, get hold of a temperature controller. I use an Inkbird, and it has never let me down.
Many growers use heat mats – if you choose this, make sure to put spacers between the mat and your colonizing containers to avoid cooking your grain or substrate. As always with mushroom growing, heat the space and not the container you are colonizing.
Incubation Rooms
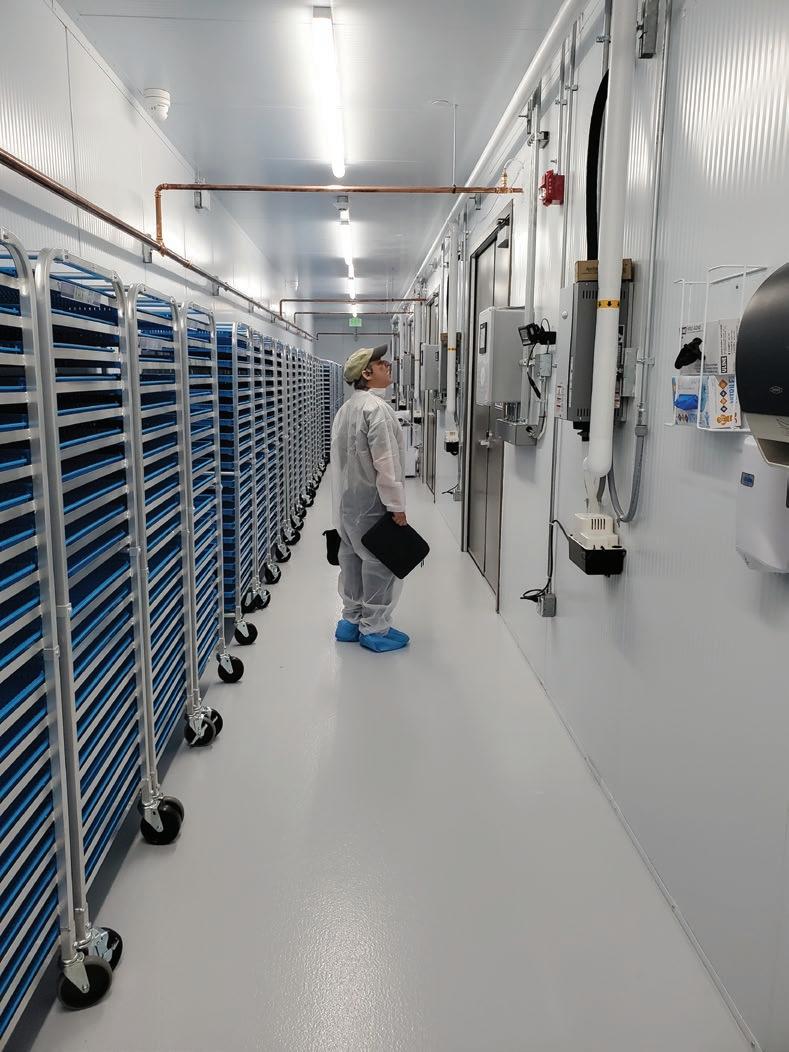
On a commercial scale, whole rooms are insulated, sealed, and climate-controlled. Grain and substrate containers are loaded onto rolling racks, stacked high to maximize space. I have seen this effectively done inside a shipping container.
Passive humidity is often enough – the moisture from the substrate keeps things within range. Air is filtered and exchanged gently to prevent CO2 buildup, but without any turbulence that could disrupt colonization. Logging systems track temperature and humidity 24/7, and different zones are often designated for different incubation
How and when Mushrooms Fruit
Fungi in nature often grow mushrooms in autumn or fall. Climatic triggers are when the temperature drops, humidity rises, and the fungus reaches the top (or edge) of whatever it is colonizing.
As with incubation, fruiting preferences vary for different species of mushrooms, but the range of conditions below is favorable for most.
• Humidity: 85–95% RH
• Temperature: 16–24°C
• Light: Indirect daylight or 6500K LED, around 12 hours per day
• Fresh Air Exchange (FAE): Essential to prevent legginess and poor pinning
Some species are much fussier than others – but generally, it is essential to simulate a clear change in season by dropping temperatures and introducing humidity, light and airflow to stimulate pinning (the formation of baby mushrooms) and then to aid the healthy maturation of fruiting bodies.
The setup you need depends on how many mushrooms you’re growing and how much control you want over your environment. All containers will need ambient daylight (avoid direct sunlight) or


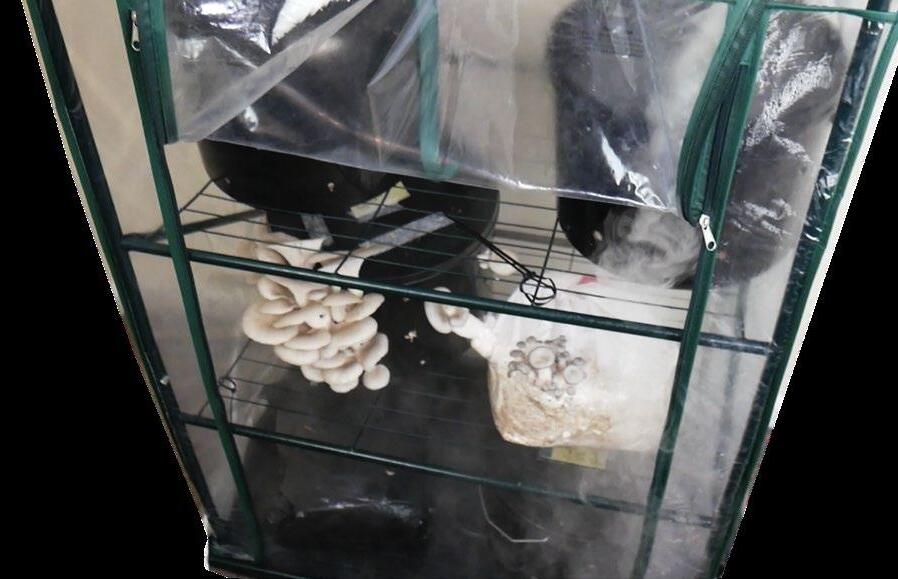
1. Clear dome or upturned box (or even plastic bag)This could be as simple as an upturned plastic storage bin (or bag) over a tray. It creates a mini-greenhouse effect. This is good for beginners and small grows, but you will need to spray for humidity and waft your substrate with fresh air every day.
2. Monotub A plastic storage tub with holes stuffed with polyfill or covered in micropore tape. It creates a semi-controlled environment for small bulk grows like coco coir and grain spawn, and is simple, cheap, and surprisingly effective. Increase humidity inside the tubs with a water mister and waft the substrate with the lid of the tub for air exchange.
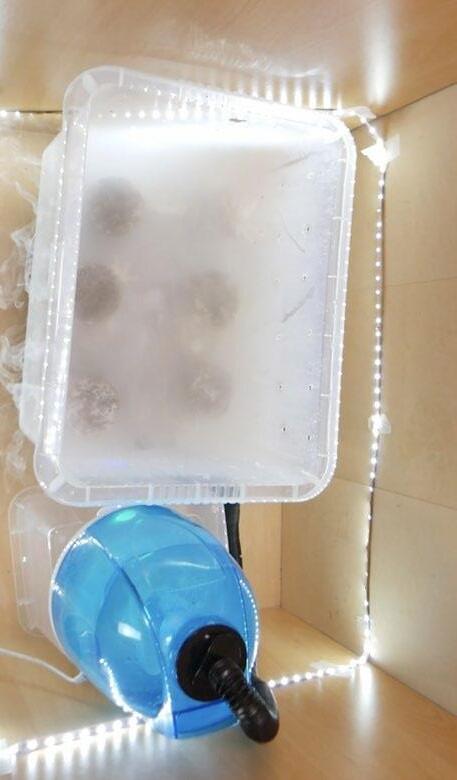
3. Shotgun Fruiting Chamber (SGFC) A box with holes drilled on all sides and a layer of damp perlite at the base. Great for PF Tek cakes or small trays. You’ll need to mist and fan it regularly – it’s low-tech, but hands-on.
Don’t seal your container, as the mycelium needs some passive airflow at this stage
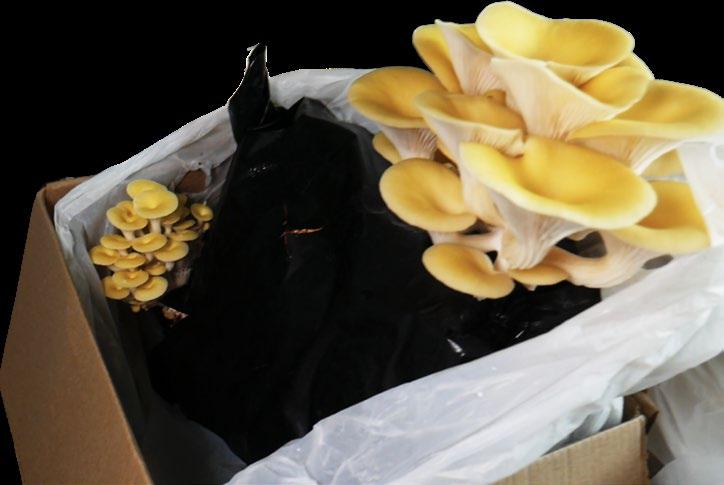
Oysters fruiting in a shotgun fruiting chamber, with a lizard fogger on a timer for humidity
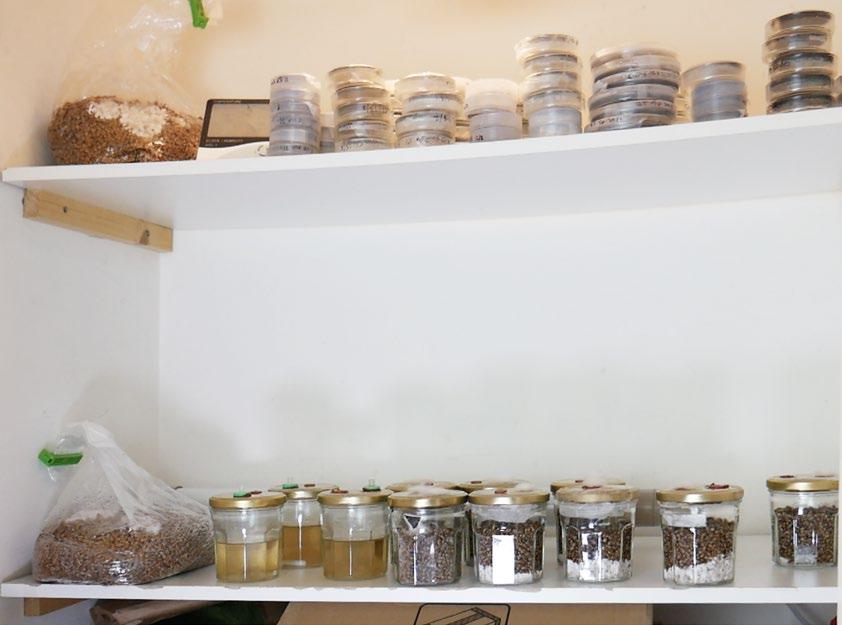
Grain, Petri dishes and liquid cultures incubating in a cupboard, with a greenhouse heater
Some species are much fussier than others – but generally, it is essential to simulate a clear change in season by dropping temperatures and introducing humidity, light and airflow to stimulate pinning (the formation of baby mushrooms) and then to aid the healthy maturation of fruiting bodies
GMP Readiness: Cannatrol systems stabilize environmental factors, ensuring repeatable post-harvest processes that maintain product integrity and compliance while enhancing credibility in medical, pharmaceutical, and export markets.
Greater Yield: Cannatrol systems prevent over-drying and unnecessary weight loss through controlled drying and curing control, allowing cultivators to retain more sellable product per harvest and directly increase profitability.
Labor Efficiency: Automated environmental control reduces the need for endless monitoring of cure rooms and product minimizes product touch points.

1. Greenhouse tent with fogger A tall mini-greenhouse with shelves, fitted with a lizard tank humidifier. Add a clip-on fan for air exchange and a timer to automate cycles. Handles multiple growing containers well and lets you cultivate several species side-by-side.
2. Grow tent with controller A proper grow tent with a shelving unit inside, fitted with a humidifier connected to an Inkbird-style humidity controller. Add intake and exhaust fans for airflow and basic LED lighting. You still need to check it daily, but it offers consistent results without constant management.
1. Grow rooms and warehouses If you’ve got the space and budget, you can turn almost any enclosed area into a serious fruiting room. I’ve seen people make it work in spare rooms, sheds, and garages – with insulation on the walls and waterproof surfaces like fiberglass panels or pond liner.
Plumbed-in humidifiers keep the air consistently moist, and fans with HEPA filters circulate clean air. You can add a CO2 monitor, timers for lights, and an environmental controller. Once you reach this point, yields and quality tend to jump.
On a bigger scale, there are shipping containers and warehouse rooms that feel more like labs. Every surface is sealed, and temperatures are locked in. Humidity comes from ultrasonic systems, and fresh air moves in through filters. CO2 is tracked constantly—the whole setup ticks along on its own.
Don’t throw too much money around before you understand the conditions you are in. Hi-tech setups are expensive and will need different features depending on the species you grow and the variables in your environment. There is no substitute for learning over time and adjusting as you go.
Just starting? Go low-tech and notice what works well - then build your empire from there. 3
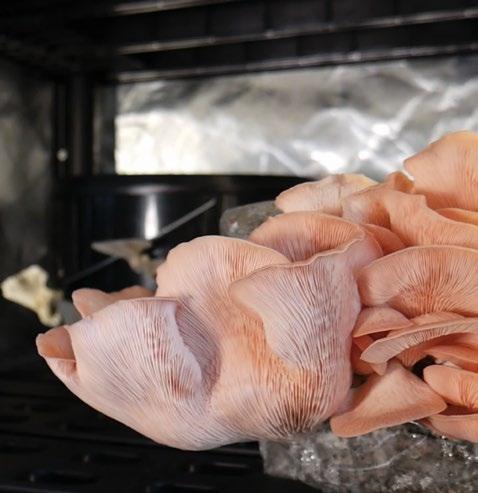
Golden oysters fruiting inside a plastic bag FRUITING
If you’ve got the space and budget, you can turn almost any enclosed area into a serious fruiting room
Alex loves empowering people to grow their own food and medicine. He has taught over 6,000 students worldwide to cultivate mushrooms at home. Stay tuned for more specific guides from Alex in future issues of Garden Culture Magazine. Follow on Instagram: @fungi_tribe

Dan Pomerantz, founder of Rebel Grown, paints a picture of medicinal sungrown cannabis using the easel of his life. He grew up on the East Coast, in the Boston area, and launched his brand on the West Coast, inspired by the culture of his early years and by the value and versatility of the plant. He and his transcontinental team have expanded to other markets (indoor grows in Arizona and Ohio) where producers who match his standards and skill level carry on the iconic Rebel Grown brand, where the pursuit of growth persists with international possibilities on the horizon (Canada and Europe).
Due to the restrictive classification of the plant, in his early years, Dan says he fantasized about what legalization could look like, and wondered why it hadn’t already happened.
“I moved to Vermont when I was 17 to pursue a more rural lifestyle where I could get away with growing and gain skills,” he says. At the time, the medical scene in California, Colorado, and Maine was already underway, “so the goal was to eventually go someplace where I could participate in a legal or at least a medical market.”
Dan made the move to California in 2010, and recreational cannabis was legalized in 2016. He also bought his 200-acre Vermont homestead in 2012, which he rented as an off-grid recording studio for years before moving back full-time.
“When my partner and I started having kids, we wanted to raise them in the New England area, where we were from,” he says.
The timing coincided with the development of legal markets in the area. Dan essentially accomplished the goal of homesteading in the hills of Humboldt, where there’s so much legacy in the neighborhood and community. Then he transitioned to doing the same on the East Coast.
The bi-coastal producer spent years moving back and forth, sometimes three weeks at a time, forging the dream and burning himself out in the process.
If you’re a weed grower in North America, you know that operating in today’s cannabis market means balancing craft quality with commercial scalability, while keeping up with variable regulations between states and countries.
How do you scale in new markets without sacrificing product integrity?
The focus of Rebel Grown has always been long-term breeding projects, rather than the pump-and-dump method. Dan logged his progress and built a stable library of cultivars with unique flavors and effects, serving as a competitive edge by owning and controlling his genetics, rather than depending on open-market stock.
In 2011, Kevin Jodrey was the director of cultivation and held a permit by the city at the Humboldt Patient Resource Center.
“[Kevin] gave me my first shot getting seeds into a medical dispensary,” Dan says, who was operating on the online forums as Ganja D. He then sold seeds under the name Ganja Rebel Seeds, and eventually renamed at the time of legalization to Rebel Grown.
While in Toronto for Grow Up, Dan sat on a panel moderated by Garden Culture’s Av Singh (a Rebel advocate) about the benefits of sungrown cannabis. He touched on the medicine and spiritual aspects of an organic, sun-grown plant in its full natural embodiment. Where so many worldwide, and especially in Humboldt, have healed by way of the sun’s rays transformed through the cannabis plant.
If you’re a weed grower in North America, you know that operating in today’s cannabis market means balancing craft quality with commercial scalability, while keeping up with variable regulations between states and countries.

Dan showed up in Humboldt “right before things got out of control in what you might call the Green Rush era.” He recalls a sense of greed and opportunism permeating, rather than a sense of community and culture. “It was an exciting time, and I got to experience a few years of that magic before things really ramped up.
“I’ve always believed that organic herb as medicine is just more natural; more pure,” he says. Still, he recognizes that it comes back to the skill of the operator, though his preference is the natural style – keeping things simple and organic. “As I have learned more and gained experience, and scaled and built out farms over the years, I just think that a diversity of organic inputs grows the best weed; the most balanced soil.”
“The two main bases are the highest quality compost and worm castings you can find.” Dan uses brown oat flour, gypsum, different trace minerals, and micronutrients.
Understanding soil science, particularly in relation to minerals and breakdown times, can be challenging for novice or home growers.
“So, a little bit of kelp meal, some fish hydrolsate, or something from the ocean we add in the first 24 hours.” The intent is to proliferate the microbiology already present in the castings and compost, with the addition of other beneficial microbes and fungal species, including Bacillus subtilis, Thuringiensis, and Trichoderma.
In Vermont, Rebel’s head grower sources certified organic microbes from a pool supply company that brews on the side. “What makes them so beneficial is great diversity and high colonization rates,” he says.
After bouts of homesickness for the East Coast, Dan is now back in Vermont full-time, living with his family and members of the small Craftsbury community that he employs.
“Before Vermont went legal adult use, I planted hemp here to develop the soil, test the climate, and figure out farming systems. It was R&D without risking premium genetics.”
I’ve always believed that organic herb as medicine is just more natural; more pure
The focus of Rebel Grown has always been long-term breeding projects, rather than the pump-and-dump method
He has since used the federally compliant hemp landscape to market seeds directly to consumers.
“A lot of resources go into our breeding program in the state of Vermont,” he says. A new propagator’s license, backed by state legislators, “allows me to have up to 3,500 square feet for R&D or seed production.” He continues to foster partnerships with US hemp companies and the seed lines he produces, as he believes it adds value to his brand and future.
Currently, Dan maintains feedback loops by selling seeds to growers. At the commercial level, input from cultivation teams, retail staff, and consumers helps producers like him identify which cultivars to scale, tweak, or retire.
Alongside cannabis, the team is working toward a permaculture-inspired farm. In the long term, Dan envisions an ecotourism destination featuring off-grid cabins and on-farm events where guests can tour or participate.
“Picture checking into a lodge with a little shop in back – our weed, some local food, a place to hang out.”
In the meantime, Dan’s top priority is showing the cannabis world the depth of Rebel Grown’s genetics.
“We’re sorting through over 3,000 seed plants this year. Some go back 14 years,” he says. “And that’s the story I want to share.” 3
BIO Haley Nagasaki is a legacy journalist and former B2B magazine editor in the Canadian cannabis sector. Now a strategist for Garden Culture Magazine, she drives content and business development, advocating for small-scale organic farming and global community-building initiatives. Connect with her on Instagram @haleynagasaki

Whether they’re talking about yield, potency, water conservation, or reduced fertilizer usage – growers are loving their experience with HydroMatrix.
And they’re quickly moving from running trials to growing full crops — using the industry’s only scientifically engineered and thermally refined hydroponic cannabis growth matrix, made with 100% compostable, 100% recycled Southern Yellow Pine.
If you haven’t started a trial yet, what are you waiting on?

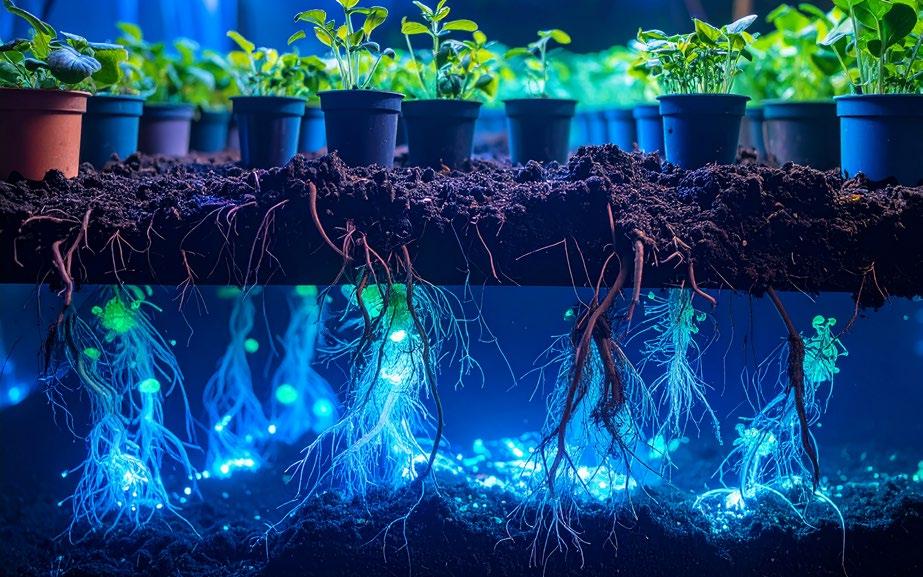
growers are scratching their heads on how and where to implement enzymes in their gardens
We’ve all seen them. Often a stand-alone product or tucked in along a suite of nutrients, we’ve come across an input that either ends with ZYM or ZYME, and most of us have no clue what it does and why we need it. With the recent surge in the use of biostimulants to complement plant nutrition and plant health, the world of commercial enzyme formulations is ready for a renaissance amongst gardeners and growers. Like other biostimulants, such as beneficial microbes, humic acid, and seaweed, enzymes are multifunctional, and their range of benefits may be primarily responsible for the limited understanding by cultivators of why and how to use them best. Marketed to accelerate the breakdown of root debris, enhance nutrient availability, or help maintain clean fertigation lines, growers are scratching their heads on how and where to implement enzymes in their gardens.
The shift from maximizing yield by using fertilizers at any cost to a focus on optimising plant health by enhancing root function is gaining traction amongst growers. Using targeted language like improving soil health, promoting nutrient availability, and supporting efficient organic matter breakdown, enzyme-based products such as Hygrozyme, MultiZyme, ZenZym, Cannazym, Sensizym, EndZyme, HORTiZYME and dozens more, are garnering attention from growers seeking opportunities to get more out of their fertilizers.
Enzymes are biological molecules (mostly proteins) that catalyze chemical reactions, speeding up processes that would otherwise occur too slowly to sustain life. In plants, enzymes are involved in nearly every physiological process, from photosynthesis to nutrient absorption and organic matter decomposition. By breaking down complex organic compounds into simpler, more accessible forms, enzymes facilitate essential metabolic pathways, helping plants absorb nutrients more effectively. This becomes critically important in plants with a relatively short life cycle and in cropping systems where you have successive crops within one growing season. Best of all, enzymes can be catalysts for thousands of reactions before they get degraded by temperatures, UV light, or oxidation.
Enzyme products designed for horticultural crops typically contain a blend of specific enzymes—each targeting a distinct process in soil or root zone health. The most common include:
• Cellulases/β-glucanases/hemicellulases/xylanases break down polysaccharides in dead roots, releasing soluble sugars that feed beneficial microbes.
• Pectinases break down pectins found in the cell wall of plants, primarily stems and mature roots.
• Proteases hydrolyse proteins into peptides and amino acids that microbes can then assimilate.
• Phosphatases free up inorganic phosphorus that has been tied up by organic matter.
• Amylases convert starches into simple sugars, which is critical in priming microbial respiration.
• Chitinases, which degrade chitin in fungal cell walls and insect exoskeletons, can also induce an immune response within the plant to help increase plant health.
These enzyme products are typically derived from natural sources, including bacteria (Aspergillus), fungi (Trichoderma), and other microorganisms that live in symbiosis with plants in the rhizosphere.
In hydroponic and soilless systems, the “native” enzyme pool around the rhizosphere is primarily a function of plant exudates and, to a lesser extent, microbial communities. These enzymes are highly influenced by pH, temperature, and oxygen. Supplementing with exogenous enzymes aims to “boost” catalytic activity, especially in times when “native” capacity is low (e.g., cool root zones, overly sanitized conditions, or rapid crop turnover) or in situations where specific substrates have accumulated, like dead roots, and harder to decompose coco or peat fiber.
Some purists are not interested in any input that comes in a jug -- an apparent aversion to including something in their fertility program that a hydroponic grower might also use. The irony when it comes to commercial enzyme products is that they may be even more beneficial to organic growers than those using soluble nutrients. A buildup in your LSO beds of high organic matter products like compost, worm castings, coco, peat, can lead to reduced oxygenation and nutrient immobilization. Substances like humic acid, fish/squid hydrolysate, seaweed extracts, and molasses can be a nightmare for drip lines and emitters. The above inputs are cornerstones of most organic fertility programs. The inclusion of exogenous enzymes can be a game-changer for organic systems that might need a kick start or refresh. Case in point, some producers include commercial enzyme products at the beginning of their thermophilic composting process to help accelerate the initial breakdown of organic matter.
Some of the products mentioned in this article are OMRI-approved, and organic certifying bodies have approved some. At the same time, it is important to note that for those who are fans of Natural Farming that many of the elixirs, teas, and extracts, such as sprouted seed teas and fermented teas, are DIY enzyme preparations.
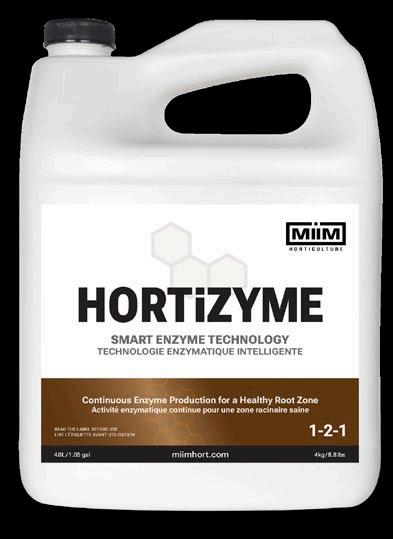
HORTiZYME is a first of its kind, Smart Enzyme Technology featuring the most concentrated enzyme formula and our exclusive biorefinery microbes. HORTiZYME’s biorefinery produces enzymes right in the root zone, delivering superior performance at a lower cost.

“enzyme products can also play a role in disease management.”
Whether we are producing food or medicine, the incorporation of any input must show a return on investment. Incorporating commercial enzyme formulations into your system will usually be dependent on a yield increase as the sole justification. However, many growers have provided testimonials of witnessing less disease, fewer clogged drippers, shorter turnaround times, and the need for fewer harsh oxidants for sanitation, as alternative motivations beyond yield to continue using enzymes in their fertility program.
The root zone of plants is home to an extensive microbiome, including bacteria and fungi that assist in nutrient uptake. However, plants often grow in nutrient-dense media where many of the available nutrients are locked in complex organic forms, making them difficult for plants to absorb. Enzyme products break down these organic compounds, releasing essential nutrients like nitrogen, phosphorus, and potassium into a form that is more accessible to the plant. The effect is relatively modest in high-fertigation systems but can be dramatic in phosphorus-limited systems and those using high-organic matter systems like coco or living soils.
Consider enzymes as root-zone housekeeping. Dead root material and other organic matter in the substrate can build up over time, tying up valuable nutrients. Breaking down this matter frees up nutrients, ensuring that the plant has access to a constant supply of readily available resources. Regardless of your media (living soil, stonewool, coco, peat), the accelerated breakdown of sloughed-off root tissues increases gas exchange within the rhizosphere, improving hydraulic activity and resulting in fewer anaerobic pockets where disease could initiate.
Healthy roots are essential for nutrient uptake, disease resistance, and overall plant vigor. Certain enzyme formulations are specifically formulated to promote root development and maintain root health by the inclusion of other biostimulants, including vitamins, seaweed extracts, and beneficial microbes. This improved root structure enables the plant to access water and nutrients more efficiently, ultimately leading to more vigorous and productive plants.
Root development is especially critical during the early vegetative stages, when plants are establishing their root systems. By incorporating enzyme products into the growth cycle early, growers can ensure that the roots develop rapidly and remain healthy throughout the entire growth cycle.
One of the most common problems faced by growers, particularly those cultivating in hydroponic or soilless mediums, is root rot. This condition is often caused by a buildup of dead organic matter in the root zone, which can lead to oxygen deprivation and the proliferation of harmful pathogens. Enzyme products help prevent this issue by breaking down dead roots and other organic material, reducing the risk of root rot and creating a cleaner, healthier environment for the roots to thrive.
While enzyme products shouldn’t be viewed as sterilants or sanitizers, they can be integrated into a sanitation program. Certain enzymes can cleave extracellular substances that contribute to biofilm buildup and thereby soften the biofilm to improve the efficacy of mechanical flushing of drip lines and emitters.
This principle can be extended to include the benefit of shorter transition times between crop turnarounds. Whether you plan to reuse your media (stone wool or coco) or you are growing in living soil beds, the reduction in residual organic load within the media or fertigation lines will reduce the inoculum of opportunistic microbes when the next crop is establishing.
In addition to their nutrient and soil health benefits, enzyme products can also play a role in disease management. By promoting healthy root systems and improving soil structure, enzyme products help plants become more resistant to pathogens. Enzyme-based products can help mitigate the effects of root diseases such as Pythium and Fusarium by maintaining clean root zones and reducing the buildup of dead organic material, which can harbor harmful microorganisms as it is their primary food source. Important to note that enzymes are not fungicides; instead, the disease suppression tends to be indirect, for example, rapid residue decomposition or improved oxygenation at the roots.

Commercial enzyme formulations must be viewed as “additional horsepower” to an already existing function in the rhizosphere
The use of enzyme products in horticulture offers several environmental benefits. By enhancing the breakdown of organic matter, enzyme products help reduce the need for synthetic fertilizers and chemical pesticides. Moreover, enzyme products often work synergistically with soil microbiota to promote natural nutrient cycling, further reducing the reliance on chemical inputs. This aligns with the growing trend of organic and sustainable farming, where the goal is to minimize the use of chemicals and optimize the natural processes that drive plant growth.
From a sustainability standpoint, enzymes can support gentler sanitation regimes between cycles, reduce reliance on chlorine or peroxide, and accelerate biodegradation of plant residues before composting or substrate reuse.
Peer-reviewed trials on commercial enzyme products are few and far between. However, the broader soil science literature consistently supports the relationship between extracellular enzyme activity and nutrient cycling, residue turnover, and microbial dynamics. Arguably, in most horticultural systems, there will be tangible benefits to the implementation of exogenous enzymes, with the greatest impact happening in systems that lend themselves to substantial buildup of decaying root/organic matter residues like multi-cycle coco, living soil beds, ebb-and-flood tables, and drain to waste when employing incomplete line purges.
As mentioned above, in high-input hydroponic systems, yield gains may be negligible, and the focus must be placed on other metrics like plant health, plant vigor, fewer irrigation issues, easier sanitation practices, and faster turnaround between crop cycles.
Enzyme products like Hygrozyme, MultiZyme, ZenZym, Cannazym, Sensizym, HORTiZYME and EndZyme have proven to be valuable tools for managing organic load, not silver bullets. By improving nutrient availability, supporting root health, and facilitating the decomposition of organic matter, these enzyme-based solutions enable growers to optimize plant health, improve biofilms, and reduce disease pressure.
Commercial enzyme formulations must be viewed as “additional horsepower” to an already existing function in the rhizosphere. As high-value horticulture continues on its path of high-planting densities, rapid crop cycles, precision fertigation, in combination with a sustainable mandate of reducing fertilizer and pesticide use, the role of exogenous enzymes to maintain order in the rhizosphere seems like an inevitable additive for growers.
Enzyme Plus (or really minus)
Not all enzyme products are created equal. Some commercial products have additional ingredients like vitamins and microbes. In particular, MultiZyme Probiotics (RJ Chemicals) and EndZyme do not contain enzymes; instead, they use a proprietary blend of primarily Bacillus species that are geared to producing enzymes to break down fats, proteins, and carbohydrates. MultiZyme Probiotics is registered as a cleaning agent and works through microbial secretion of enzymes that degrade organic matter, but also outcompete pathogens, and suppress biofilm-forming organisms on surfaces like floors, drains, and irrigation lines. One benefit of enzymatic cleaners over oxidizing reagents is that products like hydrogen peroxide and peracetic acid lose efficacy in the presence of organic matter. In contrast, a product like MultiZyme Probiotics becomes more effective.
A new product by MiiM Horticulture, HORTiZYME, combines a high concentration of beneficial enzymes with a Bacillus species that continues to produce enzymes around the root for the lifecycle of the plant. 3
BIO Av Singh, PhD, PAg is an advocate of regenerative organic agriculture serving various organizations, including Regeneration Canada, Navdanya, and the Canadian Organic Growers.
This is the moment when we see our mistake — the release of an invasive species.

In the strange story of Rumpelstiltskin, a peasant man aims to find favor with a greedy king by offering his daughter up for marriage. He tells the king a lie, claiming the young woman can spin straw into gold.
By analogy, let’s imagine this king represents the commodity food sector, and the peasant and the girl represent the most recent two generations of farmers. The king tells the girl to produce gold (excessive, accumulating wealth, and by extension, sovereignty/ power) or face death.
Along comes the “impish” man – Rumpelstiltskin – the golden oyster mushroom personified. A pattern is established: each night, the girl gives up a small piece of her personal wealth (a necklace, a ring), in exchange for the conversion of straw to currency, until she has nothing left to give.
It is then that Rumpelstiltskin makes a power move. Since we know already this strange person can make gold from straw, why would he have accepted small tokens in exchange for spinning on the girl’s behalf?
“Something living,” says Rumpelstiltskin, is dearer to me than all the treasures of the world.” And so the girl agrees to the unimaginable — she will surrender her firstborn child.
Now, at this point in the story, for some unexplained reason, the king is also at least temporarily satisfied and no longer requires the woman to keep enriching him with gold. Perhaps enlightened by her exchange with Rumpelstiltskin, in desperation, she chose to leverage her bodily fertility (her life and labor) by promising to produce an heir to the kingdom.
To continue this analogy, we now have a farmer (or a generation of well-intentioned food producers) uneasily surviving, living a more stable existence because of the gains gotten with the mushrooms’ help. The intense pressure to make gold or die has been put on hold. Except when the time comes to pay the debt, the baby (the literal future of the land) is not something the woman can afford to give up. So she begs for an ‘out’. If she can tell the impish man (whose identity until this point is a secret) his name, he promises to free her from their arrangement.
Along comes the “impish” man –Rumpelstiltskin – the golden oyster mushroom personified.
This is the moment when we see our mistake — the release of an invasive species. In the Grimms’ tale, it comes down to luck that a scout sent by the woman happens to catch Rumpelstiltskin in a moment of self-congratulation, and discovers the key to stopping the transaction.
This scout represents citizen observers and scientists who document and speak out to protect the fertile future. These are the ones who can give evidence that one individual (in this case, the golden oyster mushroom) is asking too much. Furthermore, their work underlines the need to defend food producers’ contributions from being forcibly valued according to the trade desires of powerful people, and not in keeping with the duty of care ascribed to them by the greater population.
The golden oyster mushroom, like all other species or technologies creating imbalances, will have its day. Rumpelstiltskin self-destructs (literally — he stamps his foot and breaks into two pieces) when confronted. We can hold out hope that the naturalized Pleurotus citrinopileatus will not cause enough destruction to collapse its surrounding ecologies. In the meantime, we may as well gather it in large quantities to feed our communities, attempting to break its pattern of dominance by harvesting it hard and limiting the number of wild-released spores.
By naming it, we call attention to the problem and empower others not to perpetuate the cycle. Keeping clear heads, we can continue farming mushrooms of many types while spinning our own agricultural “straw” not into gold, but something much more valuable – healthy land that will live on when we are gone.
The golden oyster mushroom, like all other species or technologies creating imbalances, will have its day.


Using low-tech methods that can feel a bit like magic, folks have been improving food security by turning common straw and other bulk sources of agricultural waste into gold — in this case, by teaming up with golden oyster mushrooms
For decades now, mushroom growers in the United States and Canada have been pulling off a bit of a ‘Rumpelstiltskin’ act (see ‘Grimm Warning’ inset piece). Using low-tech methods that can feel a bit like magic, folks have been improving food security by turning common straw and other bulk sources of agricultural waste into gold — in this case, by teaming up with golden oyster mushrooms, or Pleurotus citrinopileatus
Due to their tendency to produce dense clusters of eye-catching fungal fruiting bodies, this subspecies of the ubiquitous oyster mushroom is a market-farmer’s delight. It’s just about as easy to grow as mushrooms come. For the cultivator, it takes fewer resources to manage and produce than some other species because it’s well-suited to grow in areas already established as food production regions on the continent. Now this native of eastern Russia, China, and Japan has become naturalized and self-perpetuating in at least 25 American states and at least one Canadian province. It’s also been documented growing wild in Sweden, Yemen, Tanzania, and several other countries.
By examining sample DNA, researchers say it’s clear these oysters ‘escaped’ from domesticated environments numerous times, with closely related specimens appearing in far-flung locations.
Like many vigorous and handy cultivated plants that have migrated with colonial spread and imperial trade before them, these pretty yellow mushrooms are practical and relatively easy to identify. However, similar to non-indigenous insects, which, having no appropriate local predators, can devastate important crops, or as some imported plants quickly dominate and displace regional species, the golden oyster threatens to outcompete wild fungi for resources. New research reveals this is already happening — the citrinopileatus was “changing fungal community composition and lowering species richness” in the dead elm wood where it was found to be thriving.
It’s not surprising that a commercialized strain of Pleurotus would be especially successful in gaining ground in hardwood forests. Human intervention in mushroom breeding, by selecting for rapid regeneration and resilience against competitors (like trichoderma mold), could easily have promoted traits which would give the golden oyster genetics extra advantages over its wild, slowly- and locally-evolved, counterparts.
So while it is true that human mycophages may now more readily gather this valuable food from their local forests, decay timelines and species successions within natural forest renewal and regeneration cycles are also changing.
Wild fungi are integral to many traditional healing practices. They produce numerous metabolites already found to work for human concerns. Similarly, forest microbes, collected from leaf mold, are central to soil-replenishment and preservation programs like those promoted by the Soil Food Web School, Korean Natural Farming, and other similar approaches to regenerative land stewardship.
The concern is that populations of as-of-yet undocumented beneficial fungi, or those whose ecologies rely on partnership with communities of microbes we don’t realize are creating unique conditions, may suffer from rapid habitat loss. They could become extinct before we even know they need protecting.
Disappearing microbes might be important ecological, agricultural, or medicinal partners in humanity’s survival. How can we harmonize our desire to grow and consume nutrient-packed, health-promoting, delicious mushrooms with a genuine strategy to mitigate potential consequences?
First, reduce the spore load leaving your grow. Like eliminating odors or restricting the escape of pollen to prevent crossing with neighboring plant crops, spore management is part of responsible mushroom cultivation at any scale. Harvesting often and early, before spore release, is a logical primary strategy of containment.
Indoors, if you haven’t already, build spore capture into your system by filtering the air leaving fruiting rooms. Golden oyster spores are oval-shaped and can be as small as 2.5 microns at their narrowest. A household HVAC system with a MERV 13-rated filter will capture a minimum of 85% of particles this size.
Some facilities bring mushrooms to fruit outdoors in long tunnels, using shade cloth, fans, and misting systems to create ideal lighting, humidity, and fresh air exchange. Cultivated mushrooms rely almost entirely on wind and water (rather than other lifeforms, like insects, snails and small mammals, for example) to carry their

spores to sites suitable for establishment. Consider using windbreaks to disrupt air currents migrating spores in the direction of intact forests. Since oyster mushrooms prefer hardwoods (as do Lion’s Mane and many other marketable fungi), incorporate a fast-growing stand of softwood trees in your site use plan. Be mindful of your sanitation and post-harvest procedures, and consider how the use of powerful hoses and dryers could aid spore dispersal.
Another option would be to only grow two types of mushrooms: those that cannot survive the local conditions, and those which naturally occur already in nearby ecozystems. The plan assumes climate predictability and a relatively narrow range of microclimates within which the spores will land. Urban cultivators may be better suited to achieve good results with this tactic.
One benefit of finding, cloning, and growing locally sourced species is the built-in educational opportunity. By highlighting the seasonality, rarity, and local significance of your crop, you can create powerful allies in negotiating public land protections and conservation efforts.
At the market, and especially in dealings with gourmet chefs and speciality buyers, be sure to communicate and defend the high value of these ultra-niche, unique mushrooms. If that vibe feels exploitative, raise the stakes by affording access to certain mushrooms only to those who come to connect with the land and appreciate its gifts. Of course, you’re free to navigate pay-whatyou-will, barter, and other forms of exchange, for your part in facilitating that experience.
Since mushrooms, particularly oysters, are often touted as an accessible, low-input, high-value crop, some of these options may add layers of unexpected cost and increase frustration for the well-intentioned food producer.
Remember that it is emotional labor to take on the ethical stewardship of rare or vulnerable spaces, and to act on the part of species that rely on those environments for survival. Seek to find the balance where you feel you are honoring your commitments to all, recognizing when something truly is priceless, by being clear about your boundaries and holding firm to them.
Ambitious mushroom cultivators who want to reduce their existential burden and achieve high yields without risking spore-related environmental (or farm workers’) health have a third option: sporeless varieties.
A genetic mutation discovered in 1997 led European researchers to work on developing commercially viable versions of sporeless Pleurotus. Although the lack of spores means cultivators are not able to breed the varieties themselves (in the same way that seedless varieties prevent growers from saving and working lines of plant genetics), realistically, fewer mushroom producers concern themselves with this work.
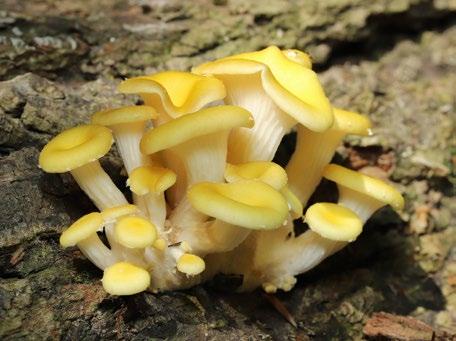
How can we harmonize our desire to grow and consume nutrient-packed, health-promoting, delicious mushrooms with a genuine strategy to mitigate potential consequences?
Regularly buying fresh, lab-made liquid culture and multiplying it to the needed volumes makes using these strains a logical and low-stress decision. The main downside is that sporeless oyster types currently available are a somewhat less “exciting” product by comparison with the diverse flavors and colors of the globe’s natural rainbow of oyster varieties.
Though it may feel paradoxical to champion widespread use of reproductively “sterile” subtypes, there’s little sense in advocating against intentional selection, breeding, and development of fungal strains with traits like sporelessness, which humans find beneficial. Scientists will surely keep doing this in pursuit of dependable, ethically defensible food production. After all, it will take a diversity of strategies to provide sustenance and medicine for future generations. Preventing global monoculturing (e.g. learning from the banana industry) and conserving what wildness remains, buffers us against missteps we’ll predictably continue to make. 3
References:
• Bruce, A.L. Population genomic insights into the establishment of non-native golden oyster mushrooms (Pleurotus citrinopileatus) in the United States. MS in Biology, December 2019, 47pp (T. Osmundson).
• Veerabahu et al. Invasive golden oyster mushrooms are disrupting native fungal communities as they spread throughout North America. DOI: 10.1016/j.cub.2025.06.049
• minnesotamycologicalsociety.org/sporeless-oyster-mushrooms
• epa.gov/indoor-air-quality-iaq/what-merv-rating
• wur.nl/en/article/new-sporeless-oyster-mushrooms.htm
BIO Xavi Kief is a writer, (re)searcher, and lifelong learner with their hands in the dirt and imagination traversing the universe. Seeking always to deepen and integrate their connection with the living planet and its diverse inhabitants, Xavi finds joy by infusing their practical and playful approach to cultivation with a healthy dose of science. They grow food and medicine for their family and community on the northeast coast of Turtle Island.
Instagram: @xavi_kief


• Spores represent a significant biological air quality hazard to unprotected workers. Suitable personal protective equipment (masks with fitted respirators) may be inaccessible due to cost or local availability. Reducing or eliminating the need to wear this type of gear for long shifts can improve morale and increase compliance with other safety protocols by showing compassion and consideration for workers’ well-being.
• Spore build-up in exhaust ducting and fans can be a food source for contaminant microbes, threatening the volume and viability of future harvests.
• Spore filtration increases maintenance and tear on HVAC equipment
• The ability to clean rooms faster can improve turnover rates and increase production yield when measured over time.
• “Grow your own” kit sporeless varieties promise customers less clean-up and easier, responsible disposal after use.
• Environmental remediation filtration or soil clean-up using “bunker spawn” of myceliated straw, for example) can be done without concern for unlimited release of nonlocal species.
• Growers remain reliant on labs to provide clean source material. Any changes/improvements to the strains will likely be made based on non-specific conditions, which could be more or less favorable to the buyer’s circumstances. Becoming involved in participatory breeding studies may be a way to mitigate this downside.
• Sporeless varieties may be less tolerant of seasonal fluctuation than locally-adapted fungi, increasing demand for climate control to maintain harvest predictability.
• Currently, sporeless oyster mushrooms are all fairly
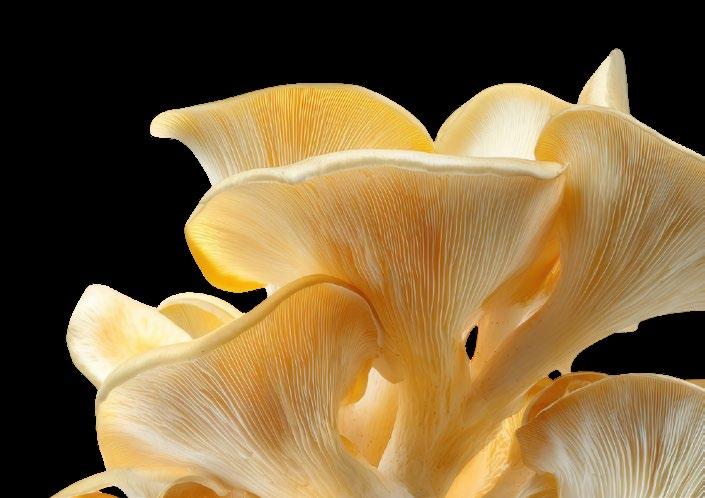
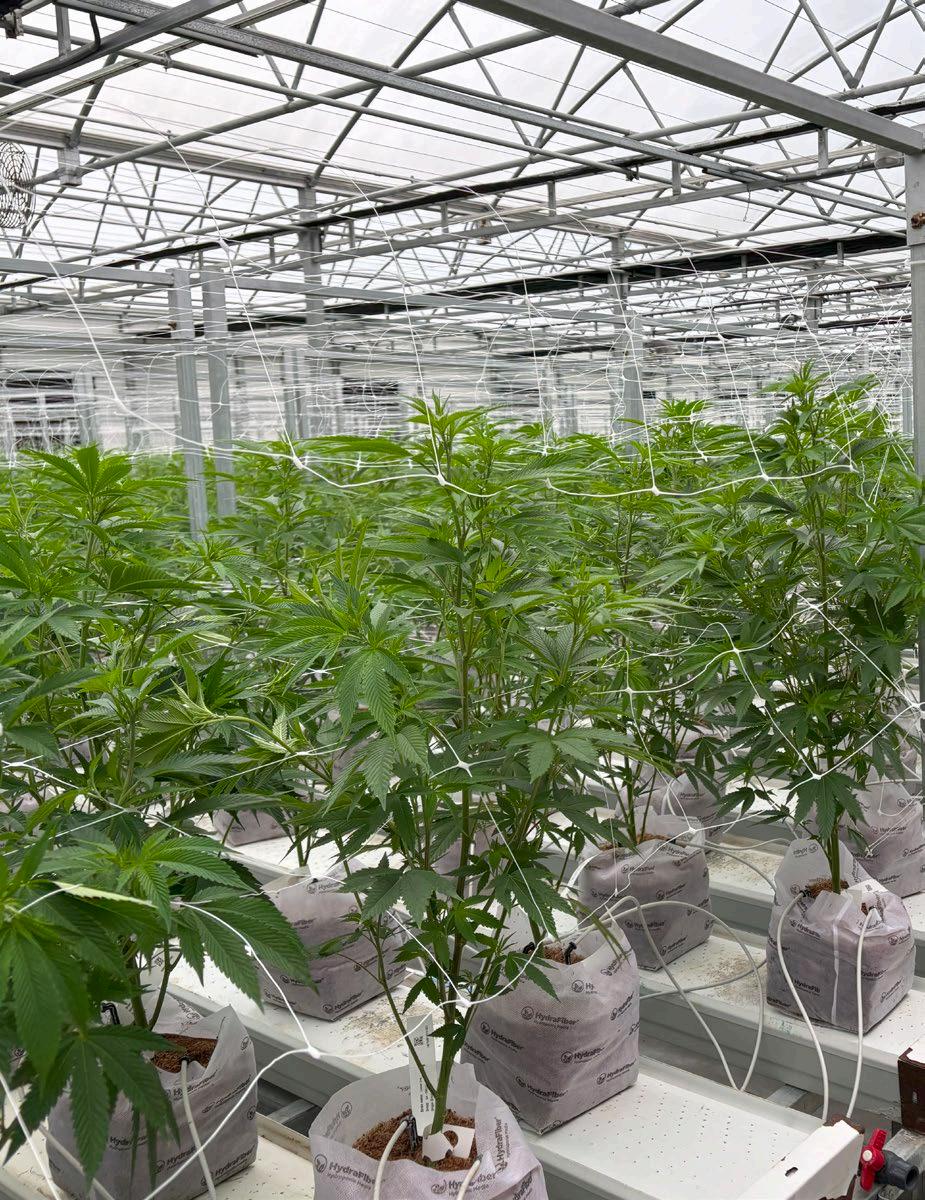
The real definition of hydrophobic doesn’t matter; it’s just a symptom of problems created by low moisture conditions. Many problems arise when you let a plant and its substrate get too dry. Still, growers strive to achieve good drybacks to keep roots healthy and breathing, while promoting strong fertilizer uptake and extracting as much of the greasy gas from the plant as possible.
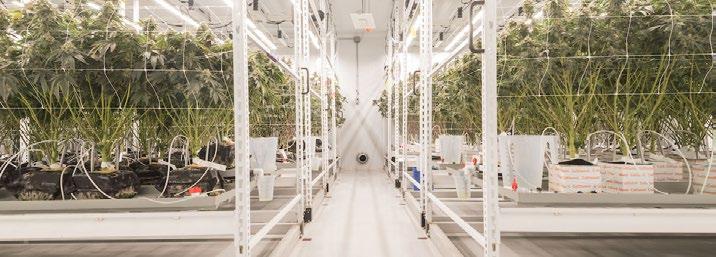
As a cultivator, I want to be a “dry guy” because it means I’m pushing my plants to the max. The situation becomes a problem when attempting to rewet the plant, and it channels all the feed/ water through the medium directly to the drain; that’s hydrophobic! What we all want is something that rehydrates consistently every time.
There are a few solutions possible, but the one I teach growers is how to build the root mass early and then maintain it until late flower. The first thing I ask is about their hydration method. When using irrigation or hand watering to initially saturate the media before planting, it’s essential to check the bottom and sides to ensure there are no dry pockets. If ignored, the dry pockets will never hydrate, and the root zone will be deprived of moisture. In a fully hydroponic medium like stonewool or Hydromatrix, the initial hydration method must always be submersion.
Growers often have good roots in veg, but the progression of the root mass slows in week two of flower, before the plant really takes off. The early root loss doesn’t manifest as a problem until you start drying the plant down in late flower. That’s when necrosis appears in the upper canopy, and there’s not enough support in the feet to keep the head cool. The cause of the initial root loss allows the substrate to get too dry in the early cycle.
We often hear growers discuss drybacks, but they frequently overlook their daily saturation limit. Drybacks need to be 10-15% in veg, 15-20% in early flower, and 20+% in late flower, but the ceiling matters a lot more. If a grower starts flower at a 55% daily peak saturation and drops by 20% overnight, they’re still at 35%, which is a nice place to be in early flower. However, if they lose the ceiling in week two of flower and the daily peak is only at 40%,
Many problems arise when you let a plant and its substrate get too dry
still hitting the 20% overnight dryback, then they’re on the verge of a problem and might be losing roots. Stonewool performs exceptionally well between 55% and 25%, but below the 20% mark, the block becomes hard and crusty, with the drippers flowing straight through it instead of spreading across. It is crucial to keep it above that 25% mark so you can climb back up to the 55% daily. If you can’t get back to 55%, you’ve lost some of the ceiling.

It is possible to get that ceiling back to some extent, but it’s extra labor. The method is called a hand reset. After the first few shots in the morning, go in and hand water over the top with a wand using a nice breaker. Give it a solid saturation all over the top with some runoff; this will help rehydrate the entire block. Ensure this is completed before the last irrigation so that the plants’ timing and dryback aren’t thrown off schedule. Use a nutrient solution, but 0EC will work if you need to lower the block salt concentration significantly.

The timing of resets matters: the time of day and the time in the lifecycle. Reset as often as needed in veg and early flower so that the roots remain healthy, continue to build mass, and the block performs at peak saturation. Once in mid-flower, reset sparingly, never on consecutive days. The goal with mid-flower is really to maintain the root mass established in veg and early flower. In late flower, resetting with a hand water should not be necessary. If you absolutely need to increase the daily water volume, then an occasional reset is acceptable to carry plants through to harvest.


The focus should be on root development early! Once root mass is established, the water distribution from irrigation becomes more stable through spread. However, the plant drinks it faster. The “art” of growing is a balance!

Substrate Choice is Crucial
Never overlook substrate choice. While stonewool performs well, it’s not the only substrate that becomes hydrophobic. These strategies also work with Coco, but the percentages will be slightly different. Recently, I have been using HydraFiber, now branded as Hydromatrix. This all-pine substrate is interesting due to its resistance to becoming hydrophobic. The pine fiber in Hydromatrix can drop relatively low in volumetric moisture content before it channels irrigation without absorption. The selling point for the technology is its ability to rewet. The HM100 (100% Hydrafiber) features a 97% rewet rate, certified by RHP Labs in Europe. Growers can’t lose the ceiling in early veg or late flower when trying to run the blocks dry. It alleviates the need to reset because, even if too dry, extra irrigations do the trick.
Hydromatrix also offers a coco blend for those who prefer something with a higher water buffer. It dries a tad slower than the 100% so there is more time to react and make decisions. It’s quite different from running a standard coco, as the water-holding capacity is higher, without impacting oxygen availability.
As with any substrate choice, there are some subtleties to learn. The nitrogen availability may be lower due to the high carbon content of the Hydromatrix, but most fertilizer lines are high in nitrogen, so growers typically don’t need supplementation. This is really only the case in the Hydromatrix 100, because the coir blend (HM40) is only 40% Hydrafiber; there is not a noticeable impact on nitrogen availability as compared to a 100% coir.
BIO Shane started as a grower in the legacy market and has two horticulture degrees. After college, he went to Grodan before starting his own consulting firm. He was later hired by Gavita, where he handled North America consults. Next, he took over as the owner of two farms in Colorado. After leaving Colorado, Shane was hired as Sr. Director of Cultivation at Cresco Labs in Illinois. Three years later, he decided to go back to consulting as part of the Cultivation Coaches. He currently provides consulting services and also sells substrates for Profile Products, the parent company of Hydromatrix.
The focus should be on root development early!
The critical part of production growing is to push the plants to their maximum potential. Whether you want increased yield, quality, or both, the answer is in the roots! We have come a long way in hydroponics over the decades, but many growers don’t know how to build a root mass, let alone maintain it until late flower. Keep that ceiling and make good choices in your substrate supplier! 3


There’s convincing evidence that herbs, spices, and other plant-based foods prepared to retain their bioactive compounds can immediately impact brain signals and reduce long-term cognitive decline in those who consume them
Similar to the grow-your-own and wild food movements, more people are searching for alternatives to modern-day medicines by drawing on traditional practices and looking to plants to cure what ails them. From the common cold and seasonal flu to pain relief and sleep promoters, plants certainly have a place in the home apothecary as long as they’re properly researched before being used or consumed
The power of plants reaches far beyond using thyme and raw honey to cure a sore throat or drinking lavender tea to catch some Z’s. Science is discovering that plants can also help improve overall brain function. In a 2024 paper published in the National Library of Medicine, researchers pointed to several studies indicating that plant-derived compounds have neuroprotective effects, “demonstrating antioxidant, anti-inflammatory, and cognitive-enhancing properties” [1]. Clinical trials on whether the things growing in our gardens can potentially treat neurodegenerative diseases must be done; however, there’s convincing evidence that herbs, spices, and other plant-based foods prepared to retain their bioactive compounds can immediately impact brain signals and reduce long-term cognitive decline in those who consume them.
Exploring how plants can boost overall brain health and cognitive function is made easy and fun with Your Brain on Plants: Improve the Way You Think and Feel with Safe - and Proven - Medicinal Plants and Herbs by Nicolette Perry, PhD, and Elaine Perry, PhD. This book is an excellent ally for believers of plant-based medicine, featuring more than 50 complete plant profiles that include history and folklore, what the science says, the key ingredients, how
Plants for improved memory and concentration:
• Chinese Clubmoss
• Bacopa
• Sage
• Nigella
• Rosemary
• Peppermint
• Walnut

Plants for busting the blues and relieving mild depression:
• St. John’s Wort
• Turmeric
• Blueberry Cayenne Pepper
• Saffron
• Black Cohosh
• Skullcap
• Clary Sage
• Chai Hu
• Rose
Plants for extra energy and fighting mental fatigue:
• Astragalus
• Comfrey
• White Willow
• Feverfew
• Aloe Vera

Plants’ Impact on the Human Brain-Exploring the Neuroprotective and Neurotoxic Potential of Plants. Pharmaceuticals (Basel). 2024 Oct 7;17(10):1339. doi: 10.3390/ph17101339. PMID: 39458980; PMCID: PMC11510325.
BY HALEY NAGASAKI
With over four decades of experience in plant cultivation before pivoting to fungi, Steven Gallo, inventor of Cube Cap, has built a unique perspective on how controlled environments and innovative thinking can reshape food production. From plug-and-play container farm systems to Lion’s Mane Steak Company, Gallo is championing mushrooms as a delightful solution for everyone, chefs and consumers alike.
What is Farm Anywhere, and how did you get involved?
Farm Anywhere is a company that takes shipping containers and converts them into incredible, environmentally controlled grow spaces. It intrigued me; I was very interested in mushrooms at the time. And I saw these things grow so quickly without a lot of labor. I got involved and saw the market evolving with the mushrooms, specifically lion’s mane, and I just love it!
Farm Anywhere has five or six different containers, from strawberries to hemp, leafy greens, microgreens, and mushrooms. They were interested in my flood caps –that’s how I got introduced to them – and we became great friends. This was seven years ago.
I became a sales manager for the company because of everything that’s going on with the supply chain, and food being imported from outside the country. I thought everyone should get involved with hyperlocal food production; the freshest it could be. So, I bought one.
I thought everyone should get involved with hyperlocal food production; the freshest it could be
Why is lion’s mane such a great meat replacement?
We had the idea of starting to produce gourmet mushrooms and sell them to the grocery stores, restaurants, and the public. We started growing lion’s mane, chestnut, blue, gray, pink, and yellow oyster mushrooms, as well as king mushrooms. The more research I did with the lion’s mane, I discovered doctors prescribe powdered lion’s mane for dementia and Alzheimer’s. I was amazed at what they can produce. I found people were making steaks out of them, so we started making steaks.
It grows to be like a big cauliflower. And it’s like a sponge, so you cut it up into sections, one-inch pieces, and you marinade it. It absorbs the marinade and tastes exactly like whatever marinade you choose to use. We make “no chicken” and “no beef” steaks. Greek, Thai, BBQ, all sorts of things.
One of the reasons we started is that they’re very perishable mushrooms. How do we [avoid] throwing out the extra pounds not sold? We turn everything into steaks and opened Lion’s Mane Steak Company. Now we have great interest from the vegan restaurants, even non-vegan restaurants; they just love it. Coming up in January, it’ll be two years since we had the container. Everybody we introduce it to is just elated about it. It’s not a hard sell.
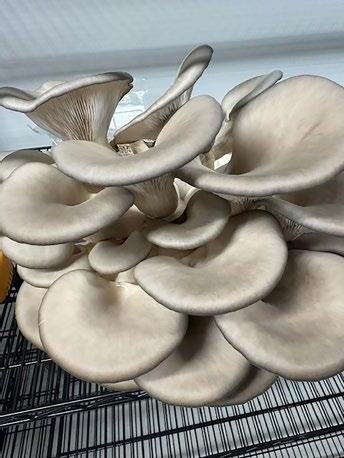
What kind of growing medium and environment do you use?
We are Global G.A.P.-approved – GGAP, Good Agricultural Practices through ECOCERT. We grow them organically, although we’re not certified organically. But there’s no fertilizer; nothing dangerous. We are going to be organically certified for the grocery stores.
Right now, we purchase our medium from an outside source. We will be making our own, but since we’re so new, it’s a mixture of sawdust and soy hull pellets, and 60% moisture. Then, grain spawn is added, it gets inoculated, and within three weeks, those bags go inside the container. If you’re growing blue oysters, it’s seven to nine days before they’re ready. Lion’s mane is 11 to 14 days, start to finish. It’s amazing. And we just keep reusing them.
The pinks, yellows and blues like a warmer environment. There’s a range involved there, but you set up the container and forget it; it’s plug-and-play. Others like around 17°C. But you have to keep that temperature with a high humidity, like 85-87%. Lion’s mane works between 18-22, so we’re around 19 degrees on average. There are five shelves in the container, so you could move the substrate bags higher up for a little more temperature, or lower down for cooler temps.

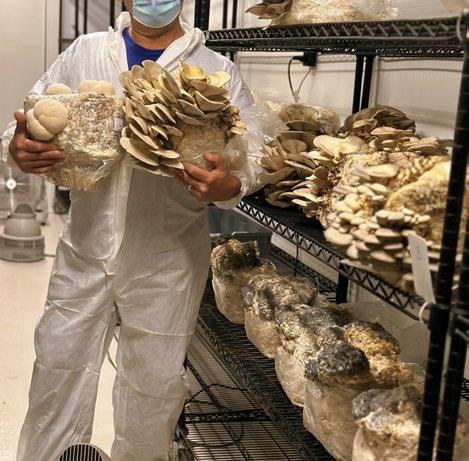
If you’re growing blue oysters, it’s seven to nine days before they’re ready. Lion’s mane is 11 to 14 days, start to finish.


When I’m finished with my bags, I’ll give them to my friend who’s got a nice garden. He mulches the bags and mixes them in there, and the mushrooms start growing again. Not even in a controlled environment! There’s excellent regenerative potential there.

How do you see the demand for mushrooms evolving?
Lion’s mane is the most popular. Next after that would be the blue and gray oysters. Blue oysters, torn into strips and battered, make chicken strips at the restaurants. Lion’s mane, they mulch up and make crab cakes. They’re very high in protein.
The barbecue restaurants, you know, if you have a guy coming in eating steak and he brings his girlfriend and she’s a vegetarian, a salad isn’t very accommodating, is it? So, it gives them another feature on their menu.
A lot of people are getting into mushroom production – the demand is growing. In a small way, they’re growing their own. I’ve seen people putting straw in buckets and drilling holes. Of course, they sell little substrate bag kits. You create your own humidity with a spray bottle, and it grows right on your counter. One of our friends, it’s a pretty big company in Ontario, they do farmer’s markets all the time, and the success is amazing!
When I’m finished with my bags, I’ll give them to my friend who’s got a nice garden. He mulches the bags and mixes them in there, and the mushrooms start growing again. Not even in a controlled environment! There’s excellent regenerative potential there.

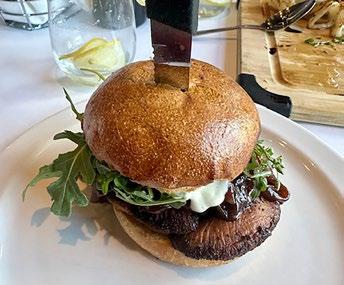
Looking Ahead: Mushrooms as food security
“You know, Haley, that’s one of the things I tell my wife –‘we will never starve.’ If the food shuts off, we will always be having our mushroom soup, our mushroom steaks, 100% in the dark.”
Steve’s work highlights more than just a business opportunity – it signals mushrooms as a cornerstone of sustainable food systems. That’s because container farming offers reliability. Local production reduces dependence on supply chains, and mushrooms themselves provide satiating nutrition and versatility.
Mushrooms are not only the future of sustainable agriculture, but they are also a versatile food source that can thrive almost anywhere, requiring only humidity, fresh air, and minimal care.
For more information on Steve Gallo’s ventures, check out farmsmart.ca, lionsmanesteak.ca , and his IG: @cubecap 3


How confident are you in the cleanliness of your grow tent or grow room right now? I’d guess most of you would say moderate at best. It’s also possible I could be projecting my own lack of fondness for cleaning…
In any case, if I told you there was an easy way to deep-clean your indoor garden – taking it way beyond just “surface clean” – and it didn’t mean giving up two days of your life, I’m pretty sure I’d have your attention. Similarly, if there were a reliable way to stop mold outbreaks before they start, your interest would no doubt be piqued.
Funny, then, that more growers haven’t heard of chlorine dioxide (ClO2). It’s a water-soluble gas that can be used both in its gas phase and as an aqueous solution. It’s really good at getting into all those nooks and crannies – inside your ventilation ducting, the internal mechanisms of your inline fans, your carbon filter, even behind the environmental controller on the wall. As such, it’s an incredible ally when it comes to combating mold and mildew spores that might be hiding between grows. It can also be used as a nutrient solution additive to help keep feed lines and drippers sanitized.
Household bleach? This stuff needs a low pH so hypochlorous acid can do the heavy lifting. ClO2 doesn’t play by those rules. It’s basically a free agent, a gas that couldn’t care less about pH levels. It’s too unstable to bottle safely, so you generate it on demand. That “just-mixed” quality might seem inconvenient at first, but it becomes a real asset: you use exactly what you need, then it breaks down into mostly harmless by-products – primarily salt, water, and oxygen.
As such, it’s an incredible ally when it comes to combating mold and mildew spores that might be hiding between grows
This stuff seeps into every crack and crevice you didn’t even know existed, tears apart problems at the root, and just... vanishes. No residue, no drama, no BS.
Chemists describe ClO2 as a moderate, selective oxidizer. Ozone attacks nearly anything organic, and hydrogen peroxide is still fairly aggressive. ClO2 is more refined: it targets microbes effectively without the collateral damage. It won’t typically harm plastics or burn plant leaves – unless you overdo it.
Water-activated sachets: Great for room resets. Open the foil, tip water into the inner pouch, place it in a container on the floor, and get out. Within minutes, chlorine dioxide gas fills the space – not suitable for plants or people. By morning, it’s done.
Humidity-activated generators: These paper pillows release low doses – typically 0.05 to 0.1 ppmv – into the air. At these levels, most plants (and humans) tolerate the exposure, though some sensitive cultivars may exhibit oxidative stress. I hang one per 20 m² of canopy when plants first go in, swap it monthly, and have seen noticeable reductions in powdery mildew.
Stabilized liquids: Two-part liquids can be dangerous and messy, so I prefer a sachet-based liquid for ease of use and cleaner ClO2. Depending on dilution, crop type, and use case, the working strength can vary – from a mild dip to a high-powered flush for neglected irrigation lines.
Most of us have battled biofilm – that clingy, grimy stuff coating trays and clogging pipes. Bleach struggles to penetrate it properly. Chlorine dioxide, because it’s a true gas, gets right into the slimy layers and breaks them apart more effectively.
One lab trial showed a 99.999% reduction in mixed bacterial biofilm at just 5 ppm ClO2. Peroxide can do it too, but usually needs much higher concentrations and is less gentle, often damaging the lines you’re trying to clean. ClO2 also performs well across a wide pH spectrum, so whether you’re dealing with acidic nutrient residue or stubborn alkaline water, it keeps working.
if I told you there was an easy way to deep-clean your indoor garden – taking it way beyond just “surface clean” – and it didn’t mean giving up two days of your life, I’m pretty sure I’d have your attention
Room resets: Drop in the amount of quick-release sachets your room needs. Leave overnight with doors sealed. Come morning, give the room several air exchanges using extraction fans. I check with a handheld detector at floor level to confirm the space is clear – looking for readings under 0.05 ppm. There’s usually a tart, hyper-clean tang in the air – not unpleasant, but it lingers just enough to let you know something serious went down.
Continuous air treatment: Emitters maintaining 0.07 ppm have reduced musty odor outbreaks. Most cultivars tolerate this, but always observe plants closely. Don’t assume all genetics react the same.
Irrigation hygiene: Dosing fertigation water at 1 ppm keeps tubing clearer longer. I run a 50 ppm flush between cycles and follow with clean water. Biofilm build-up drops dramatically.
Cutting & clone care: A 5 ppm spray or dip on new cuttings reduces spoilage microorganisms.
OSHA sets a time-weighted average exposure limit of 0.1 ppm over eight hours. Anything above 5 ppm is dangerous.
ClO
traction fans, then (wearing a full respirator) take floor-level readings using a ClO2-specific detector. If readings are elevated, nobody goes back in.

Growers often ask: Does ClO2 damage terpenes? Keep it at 0.1 ppm or below, and you’re golden – I’ve yet to see any strain lose its nose at those levels. Push it higher, though, especially when nearing peak trichome density? That’s when things get dicey.
Some lab techs and plenty of growers swear they’ve noticed subtle changes to smell profiles. Others report higher terpene percentages. Dialing it in is key. Proceed cautiously. Reduce exposure or use recommended levels during peak terpene production. Where aroma matters, always test a small batch before wider use.
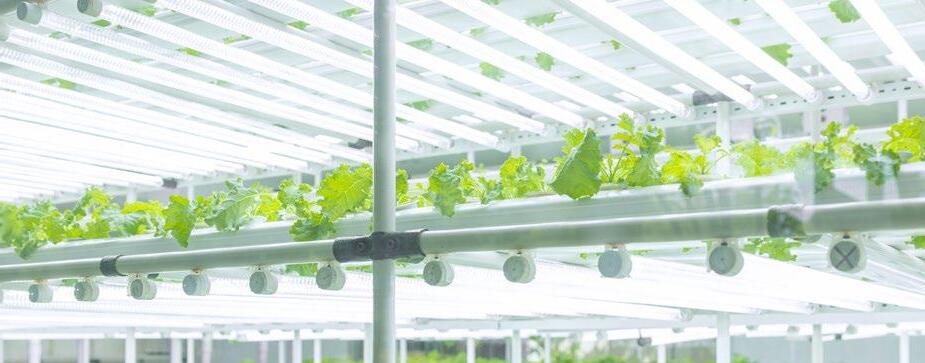

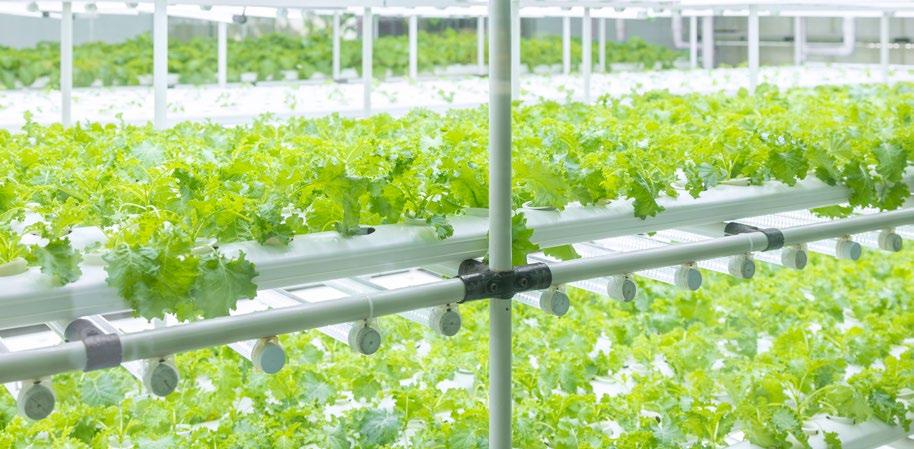

The trick isn’t drowning everything in ClO₂ 24/7. It’s knowing when to pull it out of your toolkit

Chlorine dioxide isn’t a silver bullet – but it’s about as close as you can get to having an invisible crew of highly motivated “cleaning elves” on standby. You know those growers who blast everything with bleach until their eyes water? Or the ones who spend entire weekends scrubbing on their hands and knees? Yeah, ClO2 makes them look like they’re working way too hard. This stuff seeps into every crack and crevice you didn’t even know existed, tears apart problems at the root, and just... vanishes. No residue, no drama, no BS.
What really sells me on it is how many jobs it can handle. Got a contaminated room that needs the nuclear option? Drop in a quick-release sachet before you leave for the night – problem solved by morning. Powdery mildew keeps coming back, no matter what you try? ClO2 might just become your new best friend. Irrigation lines getting gunked up with that slimy biofilm? Regular 1 ppm doses keep everything flowing like new.
No. Bleach generates hypochlorous acid and needs fairly acidic conditions to work effectively. It also leaves behind unwelcome chemical guests like trihalomethanes. ClO2 works across a wider pH range and breaks down without the same messy footprint.
“Plants absorb it through roots.”
If dosing under 5 ppm in fertigation, you’re unlikely to see meaningful uptake of active ClO2 – it breaks down too fast. It comes down to the quality of ClO2 you’re using and whether it leaves by-products – especially chlorite and chlorate – that can stick around. With regular use, these residues could accumulate slowly.
“Microbes will adapt.”
So far, no microbial resistance to ClO2 has been documented in over 15 years of water treatment data. The oxidative burst disrupts multiple cellular targets simultaneously, making adaptation unlikely – but not impossible.
The trick isn’t drowning everything in ClO2 24/7. It’s knowing when to pull it out of your toolkit.
Cast your mind back to my original question – how confident are you really about your grow room’s cleanliness? Once you’ve got ClO2 in your back pocket, “pretty damn confident” becomes an honest answer instead of wishful thinking.
Just remember: respect what this gas can do. It’s not playing around. Take it slow at first, run small trials, tweak based on results – not forum hearsay – and if you really want to dial it in, consult a professional. 3
Everest Fernandez is a well-respected industry educator, veteran hydroponic grower and grow light enthusiast, based in France. He works primarily as a marketing and cultivation consultant and was the founding editor of Urban Garden Magazine in the UK, US and Canada. He also writes and researches for the popular hobby horticulturalist YouTube channel, Just4Growers.

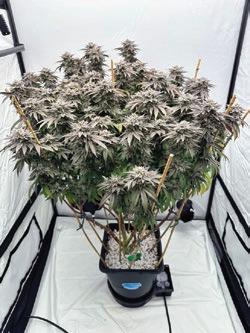
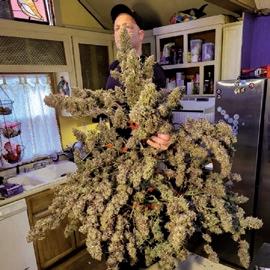
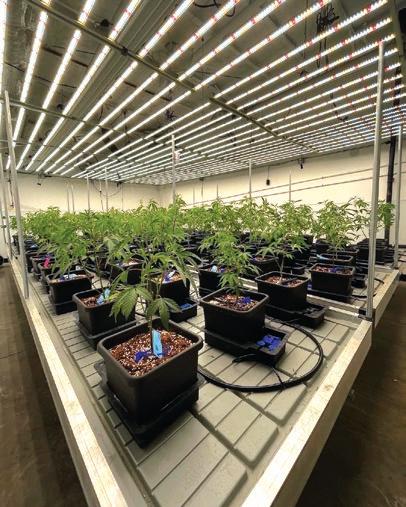
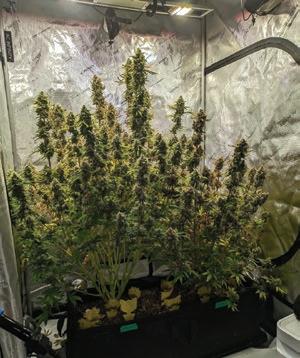
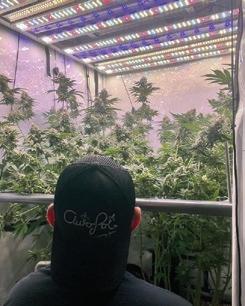
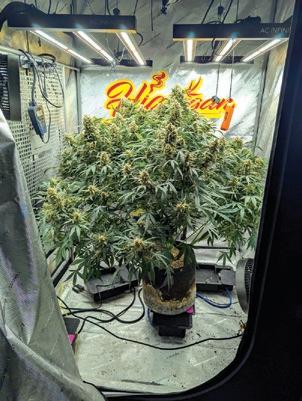
In my medicinal garden, thyme stands out as a multifunctional powerhouse
In my medicinal garden, thyme stands out as a multifunctional powerhouse. It’s one of those easy-to-cultivate herbs that has a lot to offer - flavor, healing properties and versatility. I wouldn’t be without it for both culinary and medicinal use.
It has been extensively used to treat upper respiratory tract infections, bronchitis, coughs, laryngitis and asthma
‘Thyme’ originates from the Greek word thymos, meaning ‘to fumigate or disinfect with the fumes of a particular plant’ - a hint to thyme’s medicinal properties and uses. Historically, the Greeks and Romans burned thyme as incense to purify the air and protect against illness.
It was also a symbol of courage for Roman soldiers who took strongly scented thyme baths before battle. In Europe during the 15th to 17th centuries, it was a medicinal remedy against the plague. Interestingly, in World War I, thyme oil was used as a life-saving antiseptic for many soldiers.
While there are over 300 known varieties, this member of the mint family (Lamiaceae) includes ornamental and wild types with a considerably smaller number of cultivars used in kitchens and gardens. Each has its unique growth habit, distinct flavor and aroma.
Common thyme, also known as Garden thyme (Thymus vulgaris), is one of the most popular varieties. I also grow Lemon thyme (Thymus citriodorus), which has a citrusy flavor and scent. Pizza or Italian thyme (Thymus nummularius) is another favorite in my kitchen. The latest variety I’m trying is Jekka’s Thyme, because it doesn’t become woody like garden thyme.
I use this herb every week – sprinkled over potatoes, zucchini, tomatoes, mushrooms, onions and eggplant or a tray of roasted vegetables. I add it to homemade salad dressing, casseroles, savoury breads and fritters, soups, sauces, stuffing, rissoles and baked dishes.
What makes thyme stand out in terms of taste is that it doesn’t lose its flavor even with long, slow cooking. Dried thyme has even more flavor than fresh. Whenever I have a surplus of thyme in the garden, it gets a good haircut to stimulate new growth. I dry it in a low oven or dehydrator and store it in an airtight jar. I also add it to oil or vinegar to preserve the flavor. Crumbled and used on its own or with other dried herbs like chives, oregano, parsley, and sage, it’s a delicious, rich in digestive enzymes, and healthy salt substitute.
Though small in stature, aromatic thyme is mighty in medicine. Thyme has an impressive nutritional profile. It’s packed with phytonutrients, vitamins and minerals that are known for preventing disease and boosting health. To name just a few, it is high in Vitamin C, which protects the body from free radical damage and helps resist disease. Thyme is also high in Vitamin A, an antioxidant that supports healthy skin and vision. It’s also a good source of Vitamin B6, which helps regulate stress.
Numerous research studies confirm thyme has exceptional therapeutic actions, including its ability to inhibit the growth and spread of malignant cells, as well as antioxidant, anti-inflammatory, antiviral, antibacterial, antifungal, and antiseptic activities.
It is rich in essential oils – the active ingredients primarily responsible for the health benefits. Thymol and carvacrol are the two major compounds in thyme oil, and studies confirm that they act as anticancer agents. Thymol displays antimicrobial, antioxidant, anticarcinogenic, anti-inflammatory, and antispasmodic properties. Carvacrol has been found to suppress inflammation. Together, they are powerful.
Thyme also contains a large amount of the green pigment, chlorophyll, a natural detoxifier and an anticancer agent.
As a traditional medicine, thyme was used as a decongestant and for its anti-inflammatory properties. It has been extensively used to treat upper respiratory tract infections, bronchitis, coughs, laryngitis and asthma. In our family, we use it as a tea, an inhalant and as a spray.
Thyme Tea: Studies show that thymol acts as an expectorant to help relieve coughing and spasms. We drink thyme tea warm or use it as a mouthwash gargle to relieve sore throats and inflamed gums. The healing antiseptic, anaesthetic, and pain-relieving compounds have been effective in my experience.
Here’s the recipe I use:
Add 1 teaspoon dried thyme or 2-3 teaspoons fresh crushed or chopped leaves to one cup of boiling water. Cover and steep for 3-5 minutes to infuse. For a strong brew, double this quantity and infuse for as long as possible, stirring often.
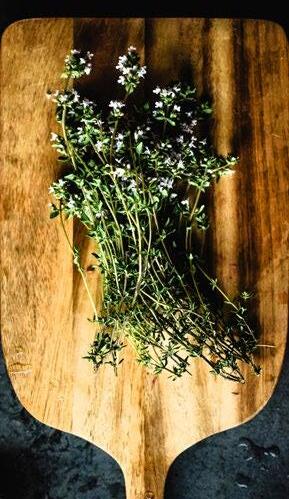


Room Fumigant: Thymol acts as a powerful disinfectant agent that is very effective against bacteria and fungi. I add a few drops of thyme essential oil to water and use it as a room spray during illness. Alternatively, I make a high-strength tea (with an intense color) and pour it into a spray bottle when cool to use around the home. A few drops of thyme oil can enhance the strength and help preserve the spray.
Inhalant: For stuffy noses, coughs and colds, we pour the hot tea into a bowl and use it as an inhalant. I put a towel over my head and breathe in the vapors deeply for about 10 minutes. I also add a few drops of essential oil - thyme, lavender, tea tree or eucalyptus to enhance the effects and unblock sinuses. I’ve found inhaling the steam and essential oils in the vapor quickly relieves and heals, especially if used at the onset of a cold or flu.
Thyme isn’t just good for us - it’s helpful for our gardens too.
Due to the antifungal compounds in thyme oil, it can be used as a natural fungicide against some fungal plant diseases. One study found “Another application of thyme oil rich in carvacrol acting as an antifungal agent has been reported in controlling Botrytis cinerea, a primary pathogen causing stem and fruit rot during pre- and postharvest of ornamental crops, fruits, and vegetables.”
Another way we can use thyme oil in our gardens is as a biopesticide. Thymol, carvacrol and flavonoids in thyme oil have insecticidal and acaricidal properties that target ticks and mites (Ozcan and Chalchat, 2004). Studies have found it effective against pests like aphids, mealybugs, mosquitoes, armyworms and whiteflies.
Using ingredients and proportions that align with scientific literature, I make a DIY fungicide and biopesticide spray with thyme oil (and sometimes other essential oils like oregano, tea tree or lemongrass).
I reinvigorate my thyme by covering the center of the plant where it’s woody with compost and a light layer of mulch. Push the stems down into the soil so new roots form
I use this simple recipe to target powdery mildew, early blight and black spot, common fungal diseases in my climate.
1. Mix 5ml of thyme essential oil and 5ml of eco-friendly castile liquid soap in a small jar or bowl.
2. Then add the mixture to 250ml of water in a spray bottle and shake vigorously.
3. Spray the affected plants early morning or late afternoon to avoid leaf burn. Repeat weekly or as needed.
This low-growing, evergreen perennial herb is characterized by its strongly scented leaves and flowers. It thrives in a dry, sunny, temperate to hot climate. Thyme tolerates drought, frost, salty and poor or rocky soil, but it will rot or succumb to fungal disease if the soil is too wet. It does best in a neutral pH soil. If it needs a boost, I water it with liquid seaweed or diluted worm leachate.
I predominantly propagate thyme from cuttings or divide established plants with a good root system, although you can also grow from seed. Thyme gets straggly as it ages. The internal stems can become woody and not as attractive. I reinvigorate my thyme by covering the center of the plant where it’s woody with compost and a light layer of mulch. Push the stems down into the soil so new roots form. This encourages new growth and is a form of propagation called layering.
Thyme isn’t just a kitchen staple - it’s a healing ally for human and plant health. Whether steeped in honey to soothe a sore throat, infused into oils or as a garden remedy, it’s one of the most versatile and trusted herbs to grow for wellness. I hope it earns a place in your garden too. 3
* Always seek advice from a professional before using a plant medicinally.
References:
• Anti-Inflammatory and Antimicrobial Properties of Thyme Oil and Its Main Constituents Thyme History, Applications, and Overview of Potential Health Benefits by Keith Singletary Phytochemical Profiling and Therapeutic Potential of Thyme (Thymus spp.): A Medicinal Herb
• Zhang, J.; Ma, S.; Du, S.; Chen, S.; Sun, H. Antifungal activity of thymol and carvacrol against postharvest pathogens Botrytis cinerea. J. Food Sci. Technol. 2019, 56, 2611–2620.
• A Focused Insight into Thyme: Biological, Chemical, and Therapeutic Properties of an Indigenous Mediterranean Herb
• How Can I Use Herbs in my Daily Life? by Isabell Shipard
Anne Gibson, The Micro Gardener, is an author, speaker and urban garden community educator on the Sunshine Coast, in Queensland, Australia. Anne is passionate about inspiring people to improve health and wellbeing, by growing nutrient-dense food gardens in creative containers and small spaces. Anne regularly presents workshops, speaks at sustainable living events, coaches private clients and teaches community education classes about organic gardening and ways to live sustainably. She has authored several eBooks and gardening guides. Anne shares organic gardening tips and tutorials to save time, money and energy on her popular website - TheMicroGardener.com
My attitude to sauerkraut may be a little different from most Western readers, as I’ve been enjoying this dish since early childhood. In fact, when thinking about sauerkraut one day, a faint memory from the early nineties popped into my head, when my cousins and I were subjected to child labor for the sake of sauerkraut.
Growing up in post-communist Poland was a wild ride, but we weren’t often in a labor camp—and when we were, it was always at Babcia’s*, our Grandma Jasia’s house. Our little fingers were perfect for picking currants from the many bushes in her hundredmeter-long garden, our long limbs ideal for reaching apples while balancing on Uncle’s shoulders, and most importantly, we were still pure enough to be useful at making massive sauerkraut batches in one go. With our feet.
Yup! We probably all have the same feelings about feet in food, but this method was used for centuries. The key is using feet that haven’t been tortured by bad shoes and working life, but have merely run freely on grass or pebbly beaches. On sauerkrautmaking day, our feet were inspected for cuts, thoroughly washed, and then we were put to work. Those who’ve tried making sauerkraut at home know the rather monotonous process of massaging salt into cabbage. When you have kilos to make in one go, it would take days and sabotage the sustainability of the Polish appetite for sauerkraut. So, into the big wooden barrel we went— shredded cabbage, carrot, caraway seeds, and rock salt, plus three kids with energy to burn, jumping and squeezing, pressing and stomping, doing little sprints in place and repeating it all until the mixture released its natural juices. Totally normal behavior!
There isn’t only one reason why most of Central and Eastern Europe is obsessed with sauerkraut. Sauerkraut was the saving grace of many sailors, helping to cure vitamin C deficiencies when they were at sea for months at a time with no fresh food. The beneficial properties of fermented cabbage have been studied since the 18th century. With recently spiked interest in gut health and the microbiome, this humble salted vegetable is enjoying a revival.
One sauerkraut is not equal to another, so bear this in mind if you try something that doesn’t rock your boat. Find one with live cultures, maybe from a small producer, or best yet, make it at home—all the instructions are below. When I buy sauerkraut in the Polish shop nearby, I look for ‘Kapusta Kiszona’ and not ‘Kapusta Kwaszona’— the former is a live, fermented, and beneficial product; the latter is acidified with vinegar, so while tasty, it has fewer gut benefits than the live version. Another clue: watch for whether the packet states’ pasteurized’ (it’s dead) or ‘unpasteurized’/’ with live cultures’—no explanation needed.
The idea of a ‘live product’ may be novel to some readers. An easy way to remember what’s what is linking it to the famous ‘prebiotic’ and ‘probiotic’ terms. ‘Pre’ is the precursor to a well-functioning

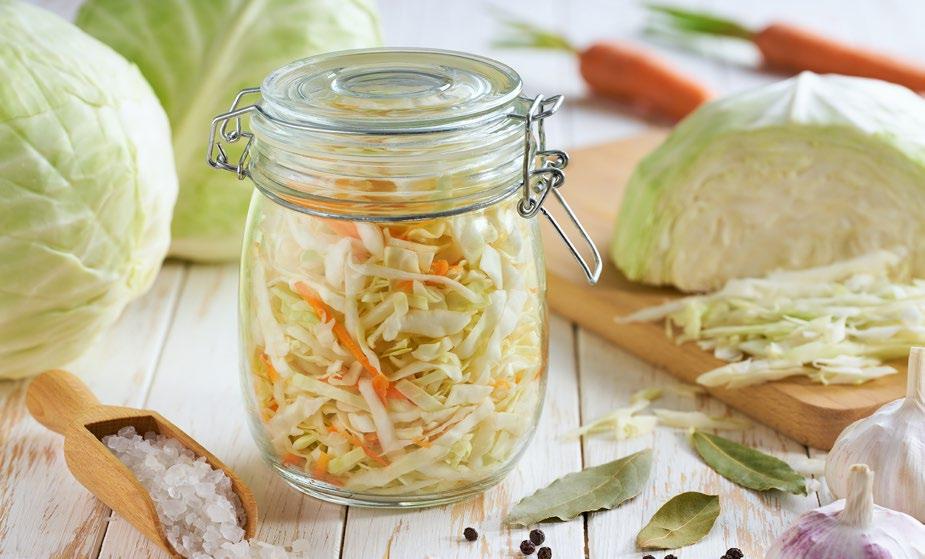
gut biome, so prebiotics are essentially food for our microbes—the ones already present in our large intestine. Imagine your gut as a farm, and prebiotics are the food supply for your livestock of bacteria and fungi living there. Prebiotics are rich in fiber, found in vegetables, fruit, many seeds, and grains.
Probiotics, on the other hand, are foods that have been pre-digested by bacteria (for example, during fermentation, such as our Kraut) and have grown a variety of beneficial microbes on their surface. When consumed, these increase the array and load of bacteria and fungi in your gut. Our farm (the gut) is so expansive that we can add more livestock (microbes), which in turn enriches our land with even more benefits—provided we give them prebiotics regularly.
a faint memory from the early nineties popped into my head, when my cousins and I were subjected to child labor for the sake of sauerkraut
Bacteria) are broad and present in many fermented foods, including the sauerkraut I started making about five years ago.
So a ‘live product’ is essentially a combination of prebiotic (because sauerkraut contains fiber) and probiotic food, already in a more bioavailable form for the gut to absorb. This sounds like faff, but when you have ‘leaky gut,’ IBS, or just unexplained bloating and pain, indigestion or food intolerances, suddenly pre-digesting your food with bacteria becomes a life mission. Seven years working in hospitality damaged my gut, and I started avoiding gluten, dairy, and eggs; essentially, changing plasters on a bleeding wound. I finally arrived at the real solution: repairing the gut via food. For me, it was kombucha at first, but the benefits of LAB (Lactic Acid
Lactic Acid Bacteria is a term often used in fermentation, interchangeably with lacto-fermentation, which I prefer for ease of use. The science of lactofermentation is pretty simple: bacteria from the Lactobacillus family thrive in low-pH environments. In Kraut, this is created by salt applied to shredded cabbage. As the cabbage is massaged and cell walls are crushed, natural juices with enzymes start oozing out, further drawn by the salt. While Lactobacillus thrives in this environment and feasts on all the enzymes from the cabbage, many other bacteria and fungi, like molds, can’t handle it if the environment stays fairly anaerobic. When these unwanted guests receive oxygen and the salt doesn’t sufficiently inhibit their growth, they’ll capitalize on available food and create islands of fluffy mold patches, which render our ferment inedible—no debate here, folks. Mycotoxins are not to be taken lightly, especially when combined with our delicate gut microbiomes, so any ferment showing signs of spoilage goes straight down the toilet.
Explaining lacto-fermentation may bring unwanted chemistry class memories, but knowing the basics for safety is wise. The actual process is lots of fun, including listening to bacteria farting and having a delicious product at the end.
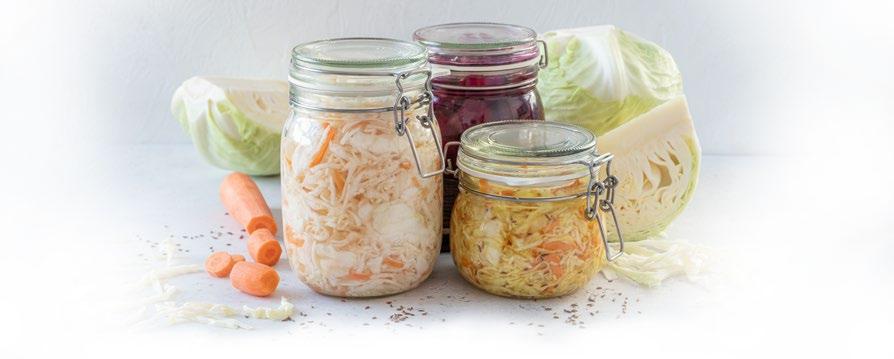
It’s a classic; tangy, sour, addictive. Your gut bacteria will scream for more
During workshops, I often get asked about special equipment. What equipment do you think my great-grandmother had? She certainly didn’t have glass weights, self-burping Kilner jars, or those fancy American airlock fermentation jars. She had a clay barrel, a plate, and a stone. While modern equipment is cool and airlock lids can be helpful with trickier ferments, you don’t need them.
The science of lacto-fermentation is pretty simple: bacteria from the Lactobacillus family thrive in low-pH environments. In Kraut, this is created by salt applied to shredded cabbage
Jars: I like fermenting in simple glass jars with lids. Anything between 530ml and 750ml is sufficient for a portion that will feed you for several dinners without getting boring, unlike a 5-liter jar. These are great for long-term storage in cellars or cupboards.
Kilner jars with rubber bands and clip-tops are self-burping and best for short-term ferments. If stored long-term, air may get inside and spoil the ferment. I use these for my rotation of ferments we eat on the go, simply storing them in the fridge until empty. Clay pots shaped like small to medium barrels, as well as wooden barrels, were used in the past for larger batches. My mum had a brown clay barrel, about a foot in diameter, filled with gherkins and brine, with a plate weighing the veg down.
Cabbage: White cabbage is widely used across Eastern Europe for its size and tenderness. Older leaves are picked and discarded; a few bigger ones are kept as ‘the lid’ to place on top of the jar, preventing shredded pieces from floating and teasing mold. Generally, young spring cabbage is best for salads and fresh use, while mid-season and autumnal varieties are ideal for long-term storage. Fewer sugars mean less stormy fermentation and better storage qualities. However, a cabbage is a cabbage, so you can make Kraut with Brussels sprouts, cavolo nero, or other types. The famous Napa cabbage is used for kimchi—an Asian version of sauerkraut with added spices and fish sauce, resulting in a more pungent flavor than our humble European Kraut.
While cabbage is the main ingredient due to its texture, shredded carrot or apple cubes are often added to boost sugars in the fermentation process and soften the flavor with sweetness. When I spoke to my Babcia the other day and mentioned some people add apple (my mum added carrot), she told me her grandma
used to put whole apples in her barrel of cabbage. Tastes can change and resurface with different generations.
Caraway seeds add a unique smoky flavor and are natural antimicrobials. Compounds like carvone and limonene help suppress harmful bacteria while allowing LAB to thrive. This was particularly crucial in pre-refrigeration times when controlling spoilage was essential for winter food security. The seeds support fermentation themselves while adding digestive properties—helping break down cabbage and reduce gas-producing compounds that can make Sauerkraut difficult to digest.
Salt: The key component without which no food would be preserved by humanity. Sandor Katz, world-renowned fermentation expert, writes in “The Art of Fermentation” that “salt slows the fermentation process, inhibits other bacteria and molds, and slows the enzymes that digest pectins and make vegetables go soft.”
In Poland, we have many salt mines and take pride in their excellent mineral quality. We ferment with rock salt, although sea salt is also widely used. Avoid iodized salt, which prevents lumping and is full of impurities. It will ferment, but if you’re going through the hassle, do it right and get good-quality salt. I use ‘Sól Kłodawska’ or ‘Sól z Wieliczki’ from one of the world’s oldest continuously operating salt mines, which has been in operation since the 13th century. It was among the first UNESCO World Heritage Sites, where you can find salt chambers, including a ballroom with salt chandeliers 327 meters below ground, salt sculptures, and underground boat trips along old excavation shafts. We take our salt seriously.
Lastly, you’ll need a little tray or a plastic zip-lock bag. As your cabbage ferments, juices may leak through the lid and puddle at the base. Once fermentation slows, you can press the contents below the remaining brine, tighten the lid, and store it in the fridge for months. Well-made ferments won’t spoil even at room temperature. I’ve tested this over the years and still have jars from at least four years ago that show no signs of spoilage and taste perfectly fine. For novices, make small batches and store them in the fridge.


Want a STRONGER & thicker stem?

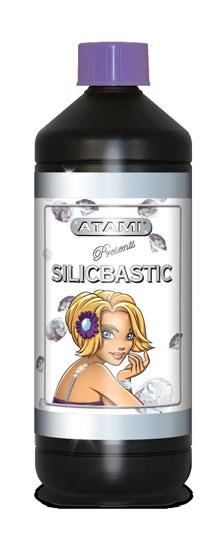

Sauerkraut can be enjoyed as a side dish, mixed with roasted or boiled potatoes, served as a topping on a sandwich, mixed with chicken salad or turned into a fantastic Polish soup with roasted sausage, AKA Kwaśnica
It’s a classic; tangy, sour, addictive. Your gut bacteria will scream for more.
Makes a 1.5 or 2 liter jar.
• 1 white cabbage, about 1 kg when shredded
• 1 tbsp caraway seeds
• 1 medium-sized carrot
• 20g fine rock salt
1. Peel and discard the outer layers of the cabbage, remove the core and finely shred the head. Peel and grate the carrot.
2. Add salt to the cabbage and carrot mix. Massage the salt for 5 minutes, then leave it to rest for 30 minutes.
3. Once the cabbage has released the brine, add caraway seeds and mix again. Fill the jar, pressing any air out and making sure all cabbage is covered with brine.
4. Leave the jar for 5-14 days. If your kitchen is warm, the fermentation process will be faster. Once you taste the cabbage and the flavor is not too salty and tangy, clean the jar if any brine comes up over the lid, and store it in the fridge.
An absolute banger and must-have for those wintery stews, as a side dish or on a sandwich—YUM!
Makes a 1 or 1.5 liter jar
• 1 red cabbage, about 750g when shredded
• 1 apple, quartered, peeled and coarsely chopped
• 2 tsp caraway seeds
• 1 tbsp juniper berries, crushed
• 20g fine rock salt
1. Remove the outer two to three leaves, quarter and remove the core and shred the cabbage finely by hand or in a food processor.
2. Layer the cabbage with the salt and massage for 5 minutes. Leave it to rest for 5 minutes and massage again for 3 minutes. You should have a reduced volume with briny juices.
3. Add the apple, caraway seeds and juniper berries. Mix thoroughly and pack the mixture into the jar, ensuring the top is covered with brine.
4. Leave at room temperature and taste after 7 days. The taste should be aromatic and tangy, but not too salty. If it’s too salty, leave it for a few more days, then store it in the fridge. As it ferments, it will rise, so press the contents daily with a clean fork, so that all the pieces are submerged under brine.
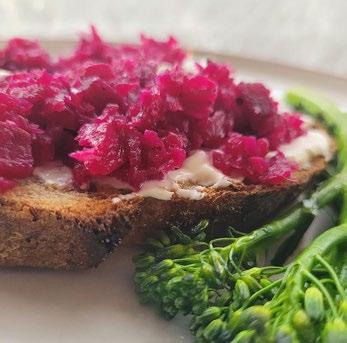
Sauerkraut can be enjoyed as a side dish, mixed with roasted or boiled potatoes, served as a topping on a sandwich, mixed with chicken salad or turned into a fantastic Polish soup with roasted sausage, AKA Kwaśnica.
*Babcia - Polish for Grandmother, sweetly 3
BIO Martyna Krol is a vegetable grower, natural beekeeper, and edible spaces designer. She is a lover of all soil and urban farming techniques and is the former head of growing at Incredible Aquagarden.
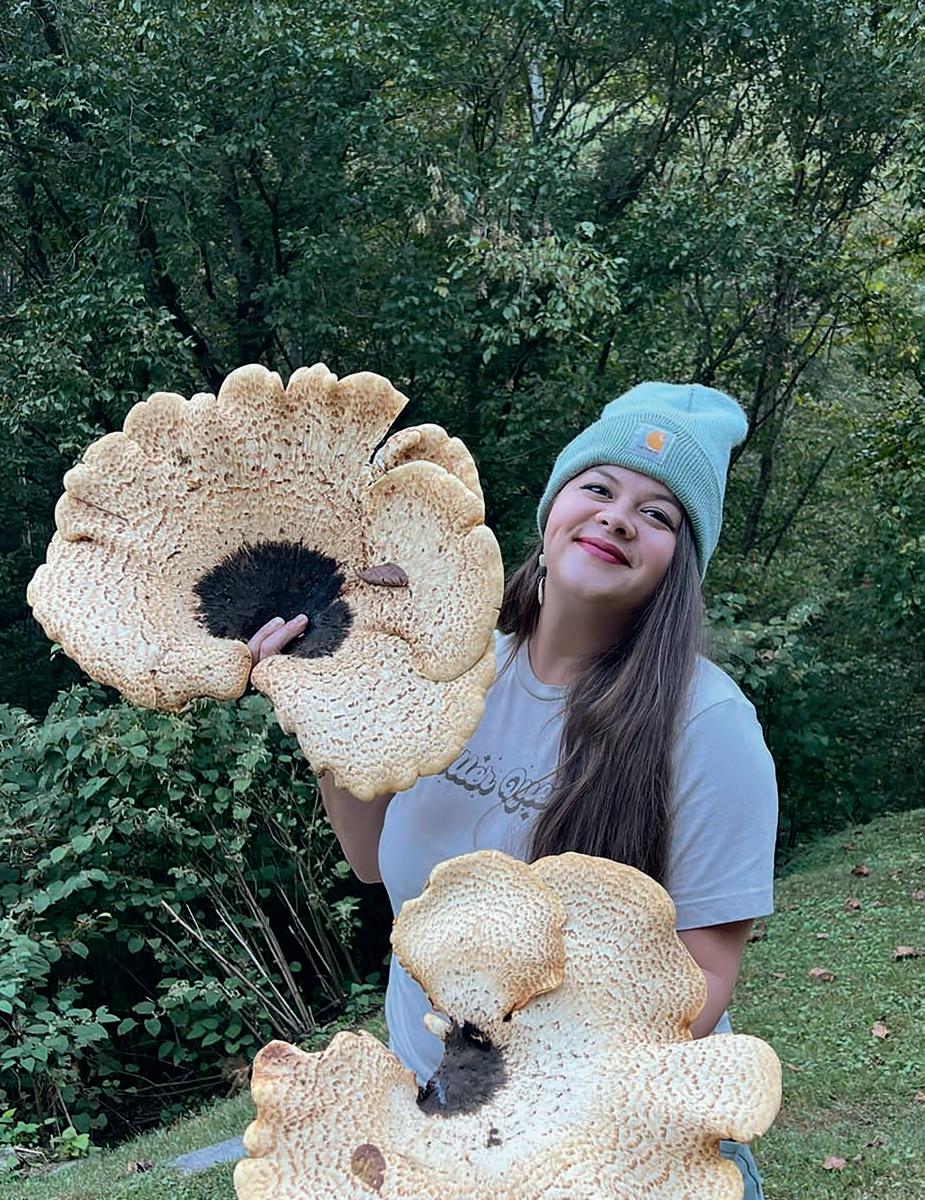
Research is your best friend when foraging for wild food
Ihave a confession to make: my first mushroom foraging experiences haven’t been fruitful. I had visions of heading out into the forest and stumbling upon a honey hole of wild food, my family hoisting me up on their shoulders after eating the most nutritious and damn delicious meal of their lives (or, at least volunteering to do the dishes). But after a couple of hours out in the woods, I’d come across many inedible wood-decaying varieties, some turkey tails, and a single Rooted Agaric, which apparently isn’t all that tasty, and given that there was only one, certainly couldn’t feed my family of five. I don’t necessarily think this is a ‘me’ problem, because after an extremely hot July and August with hardly any rain, the shrooms just weren’t there.
Although my first mushroom foraging experiences may not have been entirely fruitful, they were filled with optimism and were successful nonetheless. Time spent in nature walking with my family and two dogs is always time well spent. Besides, the thrill of never knowing when you’ll come across a honey hole of wild mushrooms keeps me going, and everyone knows that the fall is one of the best times for foraging, anyway.
In the era of uncertain supply chains and global warming, the wild food movement has many seeking to reconnect with nature, eat more sustainably, and harvest healthy, seasonal foods in their most natural state. Growing up in the country, I’ve come across plenty of wild mushrooms in my day and wrongly assumed they were all poisonous. Now armed with the knowledge of the many health benefits associated with eating mushrooms, from brain and heart health to immune function and weight management, I’m dying to harvest mushrooms in the forest. After receiving a copy of Go Forth and Forage by Whitney Johnson, my interest became a fullblown obsession.
“I really wanted to help beginner-level people who might see this hobby as intimidating or scary, and take the fear out of it and make it fun and attainable,” she tells me. “There are things, of course, you need to know not to do as well, which is covered, but I’m just trying to help the baby mushroom forager flourish into a confident, strong mushroom warrior.”
Whitney refers to herself as a ‘self-taught mountain mycologist’ and describes the act of foraging as ‘chaotic fun.’ Born and raised in eastern Kentucky, she has always been passionate about the outdoors but only developed an interest in mushroom foraging in college. She studied field guides, spent time in nature, and joined online mushroom ID groups. Whitney’s knowledge, warmth, and sense of humor shine in her videos on social media (@appalachian_forager), and she quickly developed an online following. Soon after, she started offering workshops and was approached by a publisher.
Fast forward a couple of years, and she’s now the author of a friendly and relatable regional field guide to foraging over 50 North American species of edible and medicinal fungi. Go Forth and Forage offers detailed information on identifying, harvesting, and preparing wild mushrooms, is beautifully photographed, and features interactive QR codes directing readers to fun, informative videos of Whitney doing what she does best. Her outstanding personality oozes from the pages with laugh-out-loud lines; she writes how she speaks, and you can hear her southern drawl as you learn the craft of foraging for mushrooms.
“Mushroom field guides can be highfalutin, a little over your head, really big, crazy words being thrown at you without much explanation to make it make sense,” she says. “There ain’t no bells, whistles, frills. I ain’t fancy [...] I want to be your hillbilly mushroom mama guide in the hills.”
Whitney’s right; there ain’t nothing fancy about foraging mushrooms. The first step involves getting outside; that’s where you’ll get field experience by finding mushrooms and learning to identify them.
“I say that mushroom hunting is a lolly gagging sport,” Whitney explains. “It is slow. You just kind of ‘fiddle fart’ is what my papa would have said.”
A regional field guide (like Go Forth and Forage) is a must, along with a journal for taking notes, pants and long sleeves to prevent tick bites, and a sack for the mushrooms.
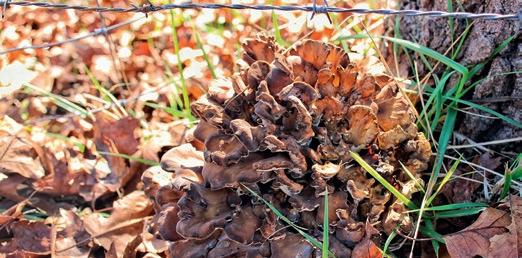
For more of Whitney’s top mushroom foraging tips, check out our 5 Cool Ways feature on page 95.

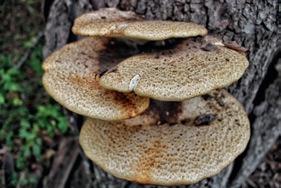

Learning your trees is half the battle
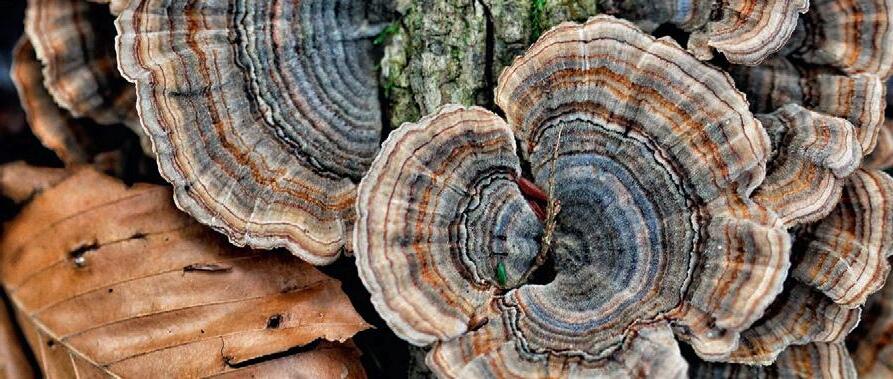
Like, it’s nutso. I never put anything in my mouth that I didn’t know what it was, but there were several times when I saw top-choice edibles and blew right past them just because I didn’t know any better. It takes time. I always say the fungi kingdom wasn’t built in a day. So, your mushroom knowledge is not going to happen overnight.”
That’s a relief to hear; it looks like there’s still hope for me.
Whitney explains that mushrooms are really good at blending into their surroundings, so it’s essential to slow down and observe. While her reference guide is mostly about getting to know mushrooms and how to identify them through physical characteristics (caps, pores, teeth, and gills), spore prints, or growth patterns, Whitney also says knowing trees will give you a head start. Mushrooms and forests have a symbiotic relationship; some fungi species grow exclusively alongside specific kinds of trees.
“Let’s say our target mushroom is the morel mushroom,” she says. “I would want to put myself somewhere with sycamore trees, and I have a lot of luck around poplars, but the number one tree I think for morels is the elm. So, we’re looking for hardwood.”
If you spot a hemlock tree, Whitney suggests looking for hedgehog or yellowfoot mushrooms in the fall and reishi in the spring and summer. If you’re hunting for chanterelles in the summer, find a forest with lots of beech, oak, birch, and poplar. Learning your trees is half the battle.
“Mushrooms get a bad rap; a real bad rap, and people are terrified of them,” Whitney explains. “I feel like a lot of people are scared to even touch them. So, I talk about how you can touch them.”
An irrational fear of fungi, mushrooms, and mold is called mycophobia, and Whitney’s book aims to debunk many common myths so that people can shed their worries. Research is your best friend when foraging for wild food.
“I’ve brought home several toxic mushrooms because I’m a nerd and I want to do spore prints, and I want to cut them apart, look at all the anatomy, smell and feel them because it’s really important to engage all of your senses when you’re in the mushroom identification process [...] If you have a questionable mushroom and you’re not sure if it’s toxic, we’re not throwing it in our sack with our edible mushrooms.”
Whitney suggests working with Mother Nature and taking only a third of what you discover, leaving the rest for the critters, and allowing the mushrooms to spread their spores so the life cycle can continue. She also advises foragers to know the rules and regulations of the area they’re harvesting.
“I do not want you to be sent to prison for picking mushrooms, which is nuts,” she says. “Make sure that you’re [foraging] respectfully, ethically, and legally; that’s always going to be on the top of your priority list.”
So, what does a typical foraging experience with Whitney look like? If she’s got a target mushroom in mind, she’ll hike certain trails that check the boxes for that species. But she also loves the thrill of the unknown, because as she says, going ‘willy-nilly with it’ is just plain fun.
“New terrain gets me all like juiced up,” she says. “It’s happened before where we’ll find a trail and a boatload of oyster mushrooms, and I’m like, ‘heck yeah.’ We’ll mark the calendar [and say] on this day, on this trail, we found this. So, that clues us in to go back there that time, next year. But I mean, a regular forging experience with me is just utter freaking chaos. I’m hooting, hollering, and running through the hills and getting my top knot stuck in briars.”
When I tell her that sounds just perfect, and I think that I’d like to forage with her one day, Whitney doesn’t skip a beat.
“You’re welcome to come anytime, honey.”
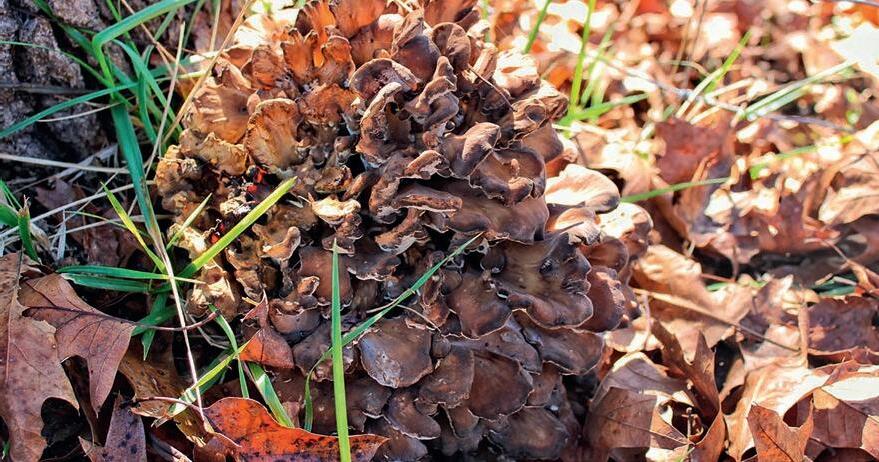
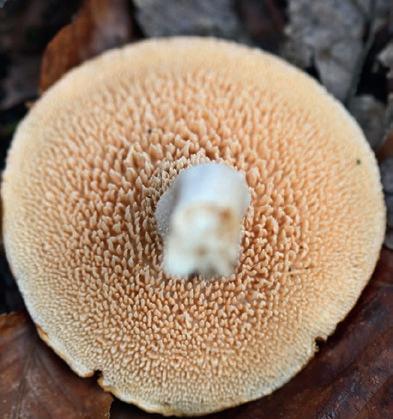
Anyone who has foraged for wild food has a memorable discovery, and for Whitney, it was when she found her first morel.
“I had hiked my rear end off for years, and I felt like a poser because I’m the ‘mushroom girl’ and I hadn’t found a morel,” she says. “I lost my freaking marbles. I was shaking because I’d never seen one. It was like it was some mythical mushroom, and I’d almost accepted defeat, like Gosh, you’re never going to find one. After that, of course, I found a ton; once you get the eye for them, you know.”
When it comes to favorite varieties, Whitney doesn’t discriminate, but there’s one in particular that she pegs as the tastiest, which can be eaten fresh but also preserves well when dried or frozen.
“Hen of the woods is the most delicious wild mushroom there is. The flavor is unmatched. There are tons of delicious wild mushrooms, but I think hen of the woods is the best.”
As for the easiest mushroom to find, she gives the award to the hedgehog, because it doesn’t have any toxic look-alikes. It features a cream-to-orange cap, and when you turn it over, it has teeth! The hedgehog also holds a special place in her heart because it grows in the colder months.
“The main reason I like them is because they provide a serotonin boost for me in the midst of the wintertime blues,” she explains. “It’s cold outside. I’m kind of sad. Everybody who has Seasonal Affective Disorder can sympathize with that.”
A regular forging experience with me is just utter freaking chaos. I’m hooting, hollering, and running through the hills and getting my top knot stuck in briars
weeks out of the year,” she says. “They’re super elusive. So, if you can get one and eat it, it’s like victory.”
At the end of my chat with Whitney, I tell her I get the sense she’s constantly foraging, no matter where she is, and she confirms this is true. Whether she’s in a city park, hiking in the forest, or driving down a street, she’s always looking. She loves the entire process, from research and being outside to finding the mushrooms, cleaning and cooking them, and sharing them with her friends and family. For beginners, she warns against overcomplicating something meant to be fun and therapeutic.
“You don’t have to have target mushrooms when you go out. You don’t have to be that guy. You can go out for the fun of it and be like, “Let’s see what we can find today,” because I do that all the time.”
So, I won’t be that guy. Or girl. It’s finally fall, we just got buckets of rain, and fiddle-farting is in the air. It’s time to get willy-nilly with it. 3
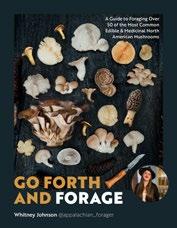
BIO Catherine is a Canadian award-winning journalist who worked as a reporter and news anchor in Montreal’s radio and television scene for 10 years. A graduate of Concordia University, she left the hustle and bustle of the business after starting a family. Now, she’s the editor and a writer for Garden Culture Magazine while also enjoying being a mom to her three young kids. Her interests include great food, gardening, fitness, animals, and anything outdoors.

Schwazzing is a technique that involves removing a substantial amount of fan leaves deliberately during specific points of the plant’s flowering cycle and can be considered a form of high-stress training (HST)

Many people use grow tents, closets, or even construct small rooms in their home to help grow their crops year-round
Growing indoors is becoming increasingly popular by the year, especially in locations where growing outdoors isn’t feasible year-round due to climate restrictions, such as cold winter months, lack of outdoor space, or apartment living. Many people use grow tents, closets, or even construct small rooms in their home to help grow their crops year-round. A lot can be grown in these small spaces, so let’s explore the ‘Schwazzing’ technique as a way to enhance your harvest quality and boost yields.
Growers must pay close attention to many variables to help maximize yield and quality, such as monitoring the watering, feeding, airflow, light intensity, and more. It is a science and an art. In addition to those, many growers use an advanced defoliation technique called ‘Schwazzing’ to maximize their crop yield. The technique was first used in avocado crops and then adopted by farmers growing other crops, such as cannabis. When performed correctly, this trimming method can significantly enhance plant development, thereby increasing potency and yield.
The term ‘Schwazzing’ was made popular in the book Three a Light by Joshua Haupt, where he wrote about how the removal of leaves helped light distribution, redistribution of carbon, and airflow within the canopy, which led to increased plant development, yield, and most importantly, potency. Fan leaves are vital for plant development, as they perform the much-needed process of photosynthesis. However, over time, they can become less beneficial to the plant’s growth as they age. Because light penetration and airflow are essential to the plant canopy, these leaves tend to block light from reaching lower flower sites, thereby reducing much-needed airflow. To help these sites receive adequate light and airflow, growers will use this technique to optimize their indoor grow operations.
Schwazzing is a technique that involves deliberately removing a substantial amount of fan leaves at specific points during the plant’s flowering cycle and can be considered a form of highstress training (HST). There are a few variations of the Schwazzing - and it’s best to know your cultivar before adopting the practice fully. Some growers will remove leaves on Days 1 and 21 of flower, while others will do their leaf strips on Days 21 and 42. The science behind this method involves leveraging the plant’s response to stress. When removing fan leaves, the plant enters a state of shock. This survival mechanism is known as
stress-induced morphogenesis, which stimulates photosynthesis and transfers resources at a higher rate, thereby ensuring reproduction in remaining leaves and flower sites. Fan leaf removal also enhances a plant’s response to light cues, a process known as photomorphogenesis. As more flower sites are exposed to light, the plant will adopt optimized growth patterns, leading to improved bud and trichome development and higher yields. The increased light exposure helps the development of lower (secondary) bud sites and encourages a more abundant and uniform yield. The improved airflow through the canopy reduces the risk of mildew and mold, which thrive in stagnant environments. Proper airflow also helps maintain optimal temperatures and humidity levels around the plant(s). Disease and pest pressure are also easier to spot and treat with fewer leaves, ensuring healthier plants.
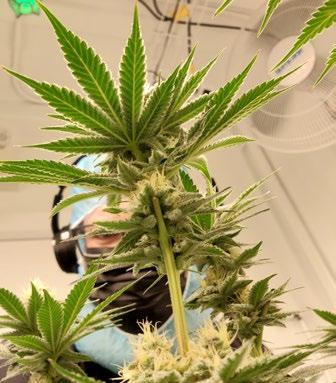
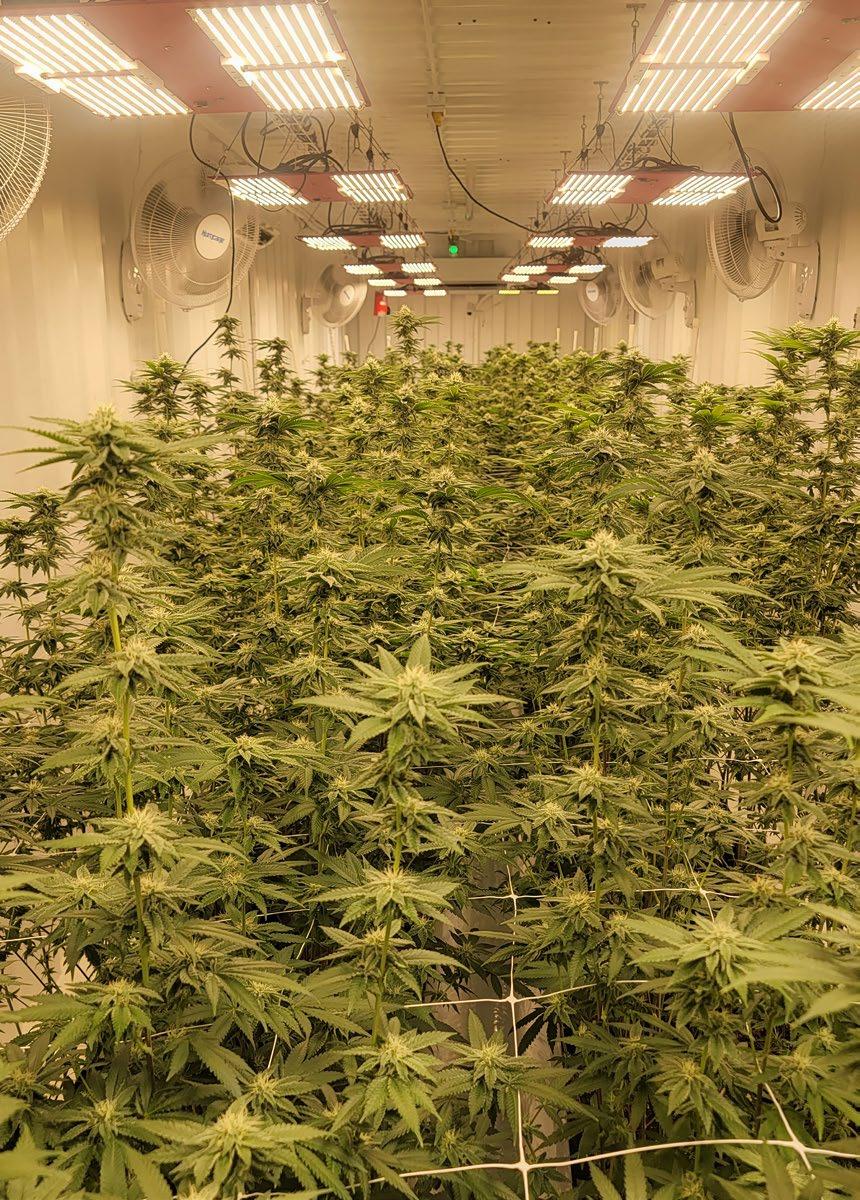
So, how does one perform the Schwazzing method on their plants? First, some advice I give to novice growers: different growers = different experiences. GO LOW. GO SLOW. Start by removing a small (low) number of leaves to see how your plant reacts and adapts. If you see positive results, gradually increase leaf removal and incorporate the trimming technique into the rest of your crop.
Now onto the four steps of successful Schwazzing:
Step 1 is to ensure your plant has a healthy and robust rhizosphere (root zone) before trimming. Your plants should be free of any stress or pest pressure. If your plants are suffering from a pre-existing stress or pest infestation, performing this may make your problems worse.
Step 2 involves the timing of trimming. If you decide to test this method on a couple of your plants, understand that there isn’t a single method that works for every grow. It’s best to start simple, slow, and then figure out what works best for you and your plants. Here are the two basic schedules to follow (find the one that best works with your cultivar):
1. First Schwazzing Event: Day 1 of the flowering cycle. Start at the bottom of the plant and remove the large fan leaves at the base of the petiole, below the top three nodes. The leaves left at the top are vital for continuing photosynthesis.
2. Second Schwazzing Event: in the early start of the flowering stage, around Day 20. Some cultivars prefer a strip at Day 14, but for many, the transition from vegetative growth to flower production begins around the 21st day of the flowering cycle.
1. First Schwazzing Event: in the early start of the flowering stage, around Day 21. Some cultivars prefer a strip at Day 14, but for many, the transition from vegetative growth to flower production begins around the 21st day of the flowering cycle.
2. Second Schwazzing Event: approximately three weeks later, around Day 42 of the flowering stage. The timing of this trim ensures the plant has recovered from the previous defoliation and is ready to handle the stress again. It also prepares the plant for harvest. Remember, removing too many fan leaves can and will deprive the plant of the sunlight it needs, negatively affecting the plant. Low and slow.
Step 3 is the basics of the technique. Use sterilized scissors or pruning shears. These help prevent infection and the spread of any possible pathogens to other plants. Remove the larger fan leaves that block the light from reaching the lower part of the plant. Focus on the leaves that are shading lower flower sites. Be sure to take your time and plan your cuts. Ensure the plant still has sufficient leaves to support photosynthesis and respiration. If you’re not sure about a leaf, leave it.
Step 4 is all about post-Schwazzing care; the removal of fan leaves deliberately stresses your plant. After you’ve completed the trimming, careful and close monitoring of the plant is essential to detect any signs of excessive stress. Ensure the plant receives adequate water and nutrients. After the first Schwazzing, it is crucial to temporarily increase the amount of nutrients the plant receives. Because the large fan leaves store nutrients, removing those leaves also removes the nutrient storage pool the plant uses and relies on. A 20% increase in nutrients will be needed in the following days of the trim (four to six days) with a focus on increased potassium and phosphorus. Pay very close attention to the environment, too. Monitor and adjust temperature, humidity, and airflow; the removal of biomass can significantly impact the plant’s environment. Being methodical and strategic before and during the procedure is incredibly important. Be mindful of the plant’s health after every trim.

Some growers will remove leaves on Days 1 and 21 of flower, while others will do their leaf strips on Days 21 and 42
Different cultivars react differently, and some don’t need to have it done at all. It’s always best practice to know your cultivar intimately. Learn what your plant requires from the environment and irrigation before trimming back its leaves. When executed and performed correctly, Schwazzing can significantly improve quality and yield. With enhanced light penetration, improved airflow, and the redirecting of plant energy, this technique has helped growers produce bigger and higher-quality yields. As with any advanced technique, thoughtful implementation and monitoring are critical for success. With some time, practice, and attention to detail, any grower can achieve the results they are looking for and become a master at Schwazzing. 3
When executed and performed correctly, Schwazzing can significantly improve quality and yield


BIO With 30 years of cannabis cultivation experience, Dustan has dedicated a good portion of his life to medicinal plants. He was a founding partner and Head of Cultivation/Master Grower for Parkland Flower Inc. He is now the Head of Cultivation and Master Grower for Big League Cultivation in Alberta, Canada. He provides incredible genetics to Canadian producers and selected flower and concentrates for the international market. In 2024, Dustan was named one of Canada’s Top 50 Cannabis Leaders. He is also a cultivation consultant with Chief Grow Officer Consulting. He is currently working on several projects, including developing a cultivar to help with opioid addiction and a drought-resistant variety.


There’s something interesting spawning in Knoxville, TN, where Andrew and Samantha Reed are doing more than just cultivating gourmet mushrooms; they’re unlocking the future of fungal farming. The couple started Mossy Creek Mushrooms in 2011 to empower growers worldwide with the knowledge and tools they need to grow mushrooms at home sustainably. They produce unique hybrid strains developed through years of practice and bioprospecting, such as the King Blue, Copperhead, and Rocky Top oysters.The couple believes that every strain has a story, so they closely examine everything harvested from a forest floor or tree stump in their fruiting chamber. They diligently crossbreed strains to create something exceptional. They don’t sell anything from a catalog; they hunt, breed, and build their products themselves.
Andrew and Samantha decided to set themselves apart when they noticed a significant discrepancy between them and the local tomato grower. While tomatoes had endless varieties, the couple had only five mushroom varieties to sell at markets. So they started breeding with spores to create new strains that they could track, test, and fine-tune for performance.They’ve made a living archive of fungal diversity called the Mycologeum, where they store weird and wild mushrooms, rogue genetics, forgotten flushes, and even unassuming forest varieties. The archive prevents the strains from being lost to climate change, invasive species, habitat destruction, and human neglect. Andrew and Samantha are all about community science and appeal to other mushroom enthusiasts to send them their discoveries in exchange for an elite strain they can grow at home.The submissions don’t have to be rare; Mossy Creek Mushrooms wants them because they’re real. Those who send something in can have their names tagged in the lineage and know that one day, someone might grow their special find on another continent.
Customers can order everything from spawn and medicinal extracts to a wide variety of cultures and lab supplies from Mossy Creek Mushrooms. All of the mushrooms and products sold are grown in the United States without harmful chemicals.The Mossy Creek Culture
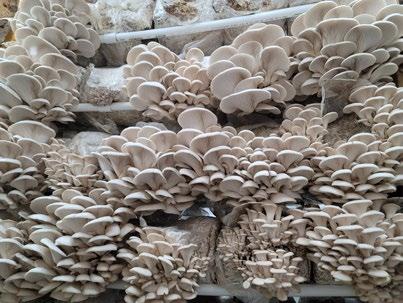
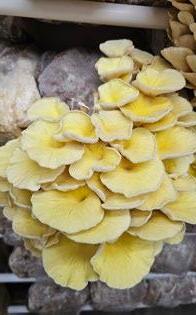

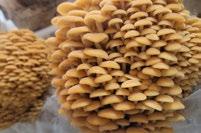

Club is ideal for those who want to take the guesswork out of ordering; every month, they receive a high-performing mushroom culture at their door without having to hem and haw over selection. The farm shares its expertise on its YouTube channel, offering tips, farm tours, and a behindthe-scenes look at the operations. Andrew and Samantha are doing everything they can to make mushroom cultivation accessible, sustainable, and as rewarding as possible for all growers, regardless of experience level.
mossycreekmushrooms.com
facebook.com/mossycreekmushrooms
Instagram: Mossy Creek Mushrooms
YouTube: @Mossycreekmushroomsofficial


Would you like to be featured as one of our local growers? If you’ve got a garden, grow room, or farm and have a story to share, contact us at growers@gardenculturemagazine.com.
Everyone loves a locally grown, gourmet mushroom, which is why I was drawn to Marie-Josée Gagné’s table at my local farmer’s market one Friday. Unlike anything found at the grocery store, the blue oyster mushrooms grown by La Ferme à Champis were as fresh as they’d be if they were still growing on some decaying wood in the forest. They were sold in generous portions and compostable packaging. After enjoying them at dinner later that night, I was grateful to have found a local farmer with not only great-tasting mushrooms but excellent values, too.
Marie-Josée and her partner Patrice are behind La Ferme à Champis, a venture they started together in 2023. Originally from Montreal, the couple is passionate about local food and building community and saw an opportunity to truly engage with people and the environment in Gore, a beautiful township in the Laurentian mountains. MarieJosée has always loved foraging for wild mushrooms, but living in a cold Quebec climate, she wanted access to this nutritious food source year-round. The couple began learning how to grow them indoors, and after a few attempts and a successful flush, they officially launched La Ferme à Champis.
By 2024, the mushrooms were selling as fast as they were being harvested. From blue oysters to lion’s mane and coral hydnum, the micro farm grows mushrooms year-round without chemicals or pesticides. The mushrooms grow at their own pace and are never rushed; they are picked only when ready to eliminate waste. For that reason, varieties and quantities fluctuate from week to week, bringing the artisanal vibe over the top. But La Ferme à Champis is much more than a small-scale source of nutritious food; it’s a believer in local food resilience. It grows its gourmet mushrooms with care and offers customers direct access to eliminate the middleman and uncertain supply chains. Customers call to see what harvests are available or order online. Delivery is available in some regions, and La
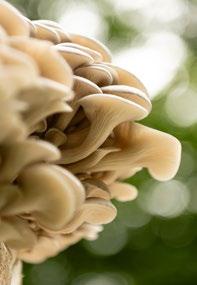
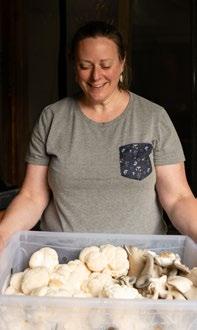
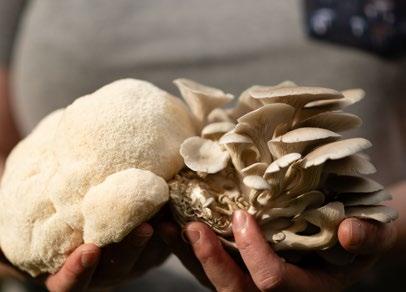
Ferme à Champis attends several weekly markets. Restaurants lcan also order directly from the farm.
Beyond the mushrooms themselves, mycelium blocks are available for a couple of dollars each. The blocks can be composted, used for a second flush of mushrooms, or as a starting point for mycological projects. Ultimately, Marie-Josée and Patrice want to share their passion for mushrooms and help people regain control of their dinner plates. As they continue to evolve, they hope to one day open the farm for tours and workshops so more people can learn about the magic of local food.
lafermeachampis.com 3

central coast grown 2.0 (40% and easy): this is why I use this product man

and

craftcannabisohio Love the product hands down the best, Si doesn't hold a matchstick to the double G as we call it round here

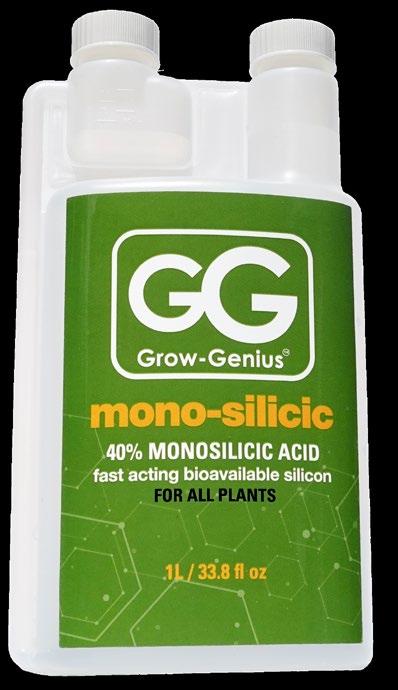


michigannja Multiply everything by 40....

talesofchronica I bought a bottle of GG Mono months ago and I still have about 10% left Great stuff I even went heavy with it at times!

4twentygrow ! Want your babies to super grow? BUY THIS PRODUCT!!! I use it in all my projects!

ROGUE_VALLEY_FARMS_OMMP Absolutely love this stuff!

canberracrops Definitely one of the best products I've ever used


Becoming a mushroom forager doesn’t take years of school and a fancy degree.
Plenty of practice and proper identification are crucial. On page 80 of this edition, Whitney Johnson, author of Go Forth and Forage , talks to Garden Culture Magazine about her love of mushrooms and the current ‘shroom boom’. In our list of
5 Cool Ways to Expertly Forage for Wild Mushrooms , Whitney shares her top tips for success. In her words, “first things first, just get your hind-end outside.” Yes, ma’am.

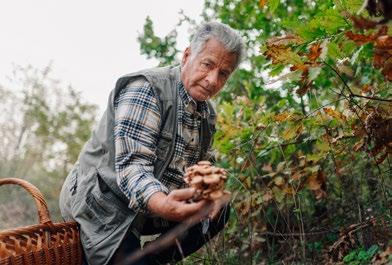
We’re not kidding when we tell you that foraging for wild food is a no-frills hobby, because mushrooms are everywhere. Check the local regulations concerning foraging before getting started; some areas allow it, others don’t. Many places have a maximum amount of mushrooms one can pick in a day, and anyone found to be in excess will face stiff penalties. If you’re foraging on private property, make sure you have the proper permissions to be there. Otherwise, Whitney recommends having your head on a swivel. “I have found tons of roadside mushrooms. The first hen of the woods I ever found, we were just rolling down a country road, and there she was sitting at the base of an oak tree,” Whitney recalls. “If I’m out walking around anywhere, even in the city, there’s trees, grass, and dirt in places, and there can be mushrooms there.” In other words, always be foraging, but make sure you’re allowed to do it wherever you are.
So you’ve moved your butt outside and you’re ready to look for mushrooms. Now what? Whitney says numero uno is to get a regional field guide to help identify mushrooms specific to your area. “I live in eastern Kentucky. There ain’t no need for me to get a book that covers the Pacific Northwest,” she says. Whitney’s guide covers Appalachia, but plenty of books have been written on the subject and are easy to find. Join an online mushroom identification group; find a reputable one on Facebook or Reddit. “If you can’t identify your mushroom from your field guide, you can submit pictures to different groups to help you verify your ID [...] If you do not know with 100% certainty that you have an edible, safe mushroom, do not eat it.” For some hands-on experience, check local activity listings for mushroom walking tours led by experienced foragers.
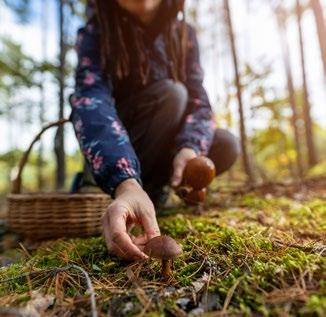
There are no bells or whistles when it comes to proper foraging attire, but the more coverage, the better. Showing skin isn’t recommended on forest treks due to the risk of tick bites. Whitney’s guide recommends comfortable, light-colored, full-length clothing that isn’t too tight or baggy. Tucking the bottoms of pants into socks may not be the most fashionforward approach, but it’s precisely what we’re looking for while foraging for that extra layer of bug protection. In the colder months, Whitney recommends dressing in layers, and she always brings an extra pair of socks in case her feet get wet. As for footwear, consider a waterproof pair of hiking boots with good traction. Remember, keep it simple. Foraging for wild food is fun, but it can get dirty; don’t stress about ruining a designer sweater or pair of pants.
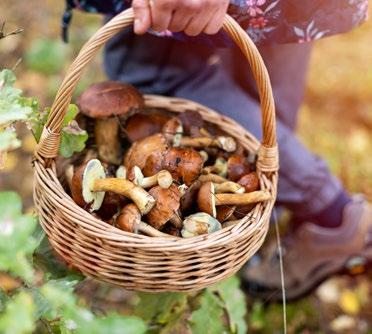
Keeping track of your foraged discoveries is crucial, because trust us, you will forget about them or where you found them. Bring a journal on your treks so you can record the type of species you saw, their location, and the time of year. Include details like whether the area has recently received rain, and snap a quick pic for future reference. “If you have your own photo that you took of a mushroom versus a stock photo in a field guide, you relate to it more and remember it better,” Whitney explains. She says journaling is also fantastic for keeping track of your personal progress; looking back at older entries and seeing how far you’ve come is a confidence booster! If you want to quickly jot down where and when you found your treasures, you can do so on a calendar and refer back to it the following year. .

Let’s face it, some hobbies are expensive. Pickleball calls for pricey paddles and good shoes, and skiing requires… well, skis. However, mushroom foraging isn’t fancy, and neither is the gear you’ll need to bring with you. Whitney’s supply list includes a $20 backpack, a mesh, breathable sack for the harvest, and a knife for cutting some varieties off tree stumps. “It doesn’t have to be expensive. Take a butter knife; I don’t care! I don’t even use a knife all the time. Some people say, ‘Cut it. Don’t pluck it.’ It doesn’t matter. Studies show squat. No matter how you pick your mushroom, it’s going to be the same,” she says. “I like to use [a knife] to get big shelf mushrooms. It comes with a little brush on the end so you can brush off your mushrooms in the field [...] When you get in the kitchen later, you don’t have all those