OPERATOR’S MANUAL


MODELDH4105 AND DH4106
5KLDH41051 (ENGLISH)
Introduction:
READ THIS MANUAL carefully to learn how to operate and service your machine correctly. Failure to do so could result in personal injury or equipment damage.
THIS MANUAL SHOULD BE CONSIDERED a permanent part of your machine and should remain with the machine when you sell it.
MEASUREMENTS in this manual are given in both metric and customary U.S. unit equivalents. Use only correct replacement parts and fasteners. Metric and inch fasteners may require a specific metric or inch wrench.
RIGHT-HAND AND LEFT-HAND sides are determined by facing in the direction of forward travel.
WRITE PRODUCT IDENTIFICATION NUMBERS (P.I.N.) in the Specification or Identification Numbers Section.
Accurately record all the numbers to help in tracing the machine should it be stolen. File the identification
numbers in a secure place; do not keep them on the machine.
WARRANTYis provided as part of John Deere's support program for customers who operate and maintain their equipment as described in this manual. The warranty is explained on the warranty certificate which you should have received from your dealer.
This warranty provides you the assurance that John Deere will back its products where defects appear within the warranty period. In some circumstances, John Deere also provides field improvements, often without charge to the customer, even if the product is out of warranty. Should the equipment be abused, or modified to change its performance beyond the original factory specifications, the warranty will become void and field improvements may be denied.


We appreciate the confidence placed in us by your purchase of this machine. Before this machine was brought to the market, countless hours were spent designing and testing to ensure that its performance would be at the highest level. To achieve maximum performance,it is imperative this machine be operated in accordance with the procedures outlined in this manual. Information in this manual is divided into sections. These sections are identified at the top of each page. Specific information within each section is organized into modules. These modules are encased in boxes
with principle modules identified with a heading at the top left side of the box. Two-part page numbers identify both the section and page of that section.
By reviewing this manual often, one will quickly learn which section to go to for specific information. For instance, machine adjustments would be found in the Operating Machine section, lubrication intervals in the Lubrication section, opener maintenance in the Service section, etc. A detailed Table of Contents is found immediately behind this page.
Thank you very much for purchasing this machine.
It is the Customeror Operator’s responsibility to read the Operator’s Manual, to operate, lubricate, maintain and store the product in accordance with all instructions and safety procedures. Failure of the operator to read the Operator’s Manual is a misuse of this equipment.
It is the Customer’s or Operator’s responsibility to inspect the product and to have any parts repaired or replaced when continued operation would cause damageor excessive wear to other parts or cause safety hazards.
It is the Customer’s responsibility to deliver the product to Authorized Dealer, from whom they purchased it, for service or replacement of defective parts which are covered by warranty. Repairs to be submitted for warranty consideration must be made within thirty days (30) of failure.
It is the Customer’s responsibility for any cost incurred by the Dealer for travelling to or hauling of the product for the purpose of performing a warranty obligation or inspection.
Pre-Delivery Inspection:
Assemble the Poly Plough. Make sure all the hardware tightened properly. See “Assembly Instruction” in this section.
After the Poly Plough has been completely adjusted and lubricated, check it and make sure it is ready for operation after delivery to the customer. The following list is a reminder of items that need to be inspected. Check whether each item has been found to be correct or after the appropriate adjustments have been made.
The tightness of bolts and nuts.
Greasing and Lubricating.
Safety precautions.
Any damage to product. If yes, repair it before delivering to customer.
Assembly
Operate the Poly Plough and make sure all parts move freely, all hardware is correctly tightened. Clean the Poly Plough and retouch any areas where the paint has been removed or scratched. Make sure all decals are properly positioned and free of damage. Replace them as required.
To the best of my knowledge, the Poly Plough has been checked and is ready for delivery to the customer. Make sure that all accessories ordered by the customer have been installed. Technician's
Delivery Inspection:
The following list is a reminder of important information to be conveyed directly to the Customer when delivering the Poly Plough. Mark each item after explaining it to the Customer correctly.
Assemble the Poly Plough. Make sure all the hardware tighten properly.
Give the customer the Operator's Manual and fully explain all operating adjustments as well as lubrication and maintenance operations.
Explain the importance of operating the machine correctly and safely. Point out the decals that help the operator to avoid risks due to unsafe procedures and conditions.
Remind the customer to record the Poly Plough serial number in the space provided at the back of this Operator's Manual.
Inform the Customer that when transporting the Poly Plough on public roads by day or night, lights and safety devices should be used to warn the operators of other vehicles. Advise that the customer check local traffic regulations.
Complete the delivery and warranty forms by filling in the machine serial number.
Explain the warranty. Have a form signed by the customer and dealer.
Show the Customer how to attach the implement and how to make the main adjustments.
To the best of my knowledge, the machine has been delivered, is ready for use and the Customer has been fully informed about its operation and care.
Signature
RP90046,00007A2 -19-20SEP11-1
After-Sales Inspection:
The following items should be check continuously during the first few hours of operation.
Inspect the entire machine and make sure there are no damaged parts. Repair or replace parts as needed. Review Poly Plough operation with the customer.
Inspection Date
Make sure proper operating adjustments have been understood.
Make sure there is no loose or missing hardware. Review the entire Operator's Manual with the customer and emphasize the importance of adequate, regular lubrication and the safety precautions. Inform the customer of any accessories and options that are available.
Signature
RP90046,00007A3 -19-11AUG11-1/1
Inspection before Each Day of Operation: Lubricate daily lube points and those due for lubrication at the recommended interval.
Make sure there is no loose hardware and that no parts are damaged or missing.
Verify the Poly plough is correctly attached to the tractor that the tractor hitch links are long enough and the control levers operate correctly.
Installation Instruction:
Installation process Poly Plough is as follow: Clear the area of bystanders, especially small children.
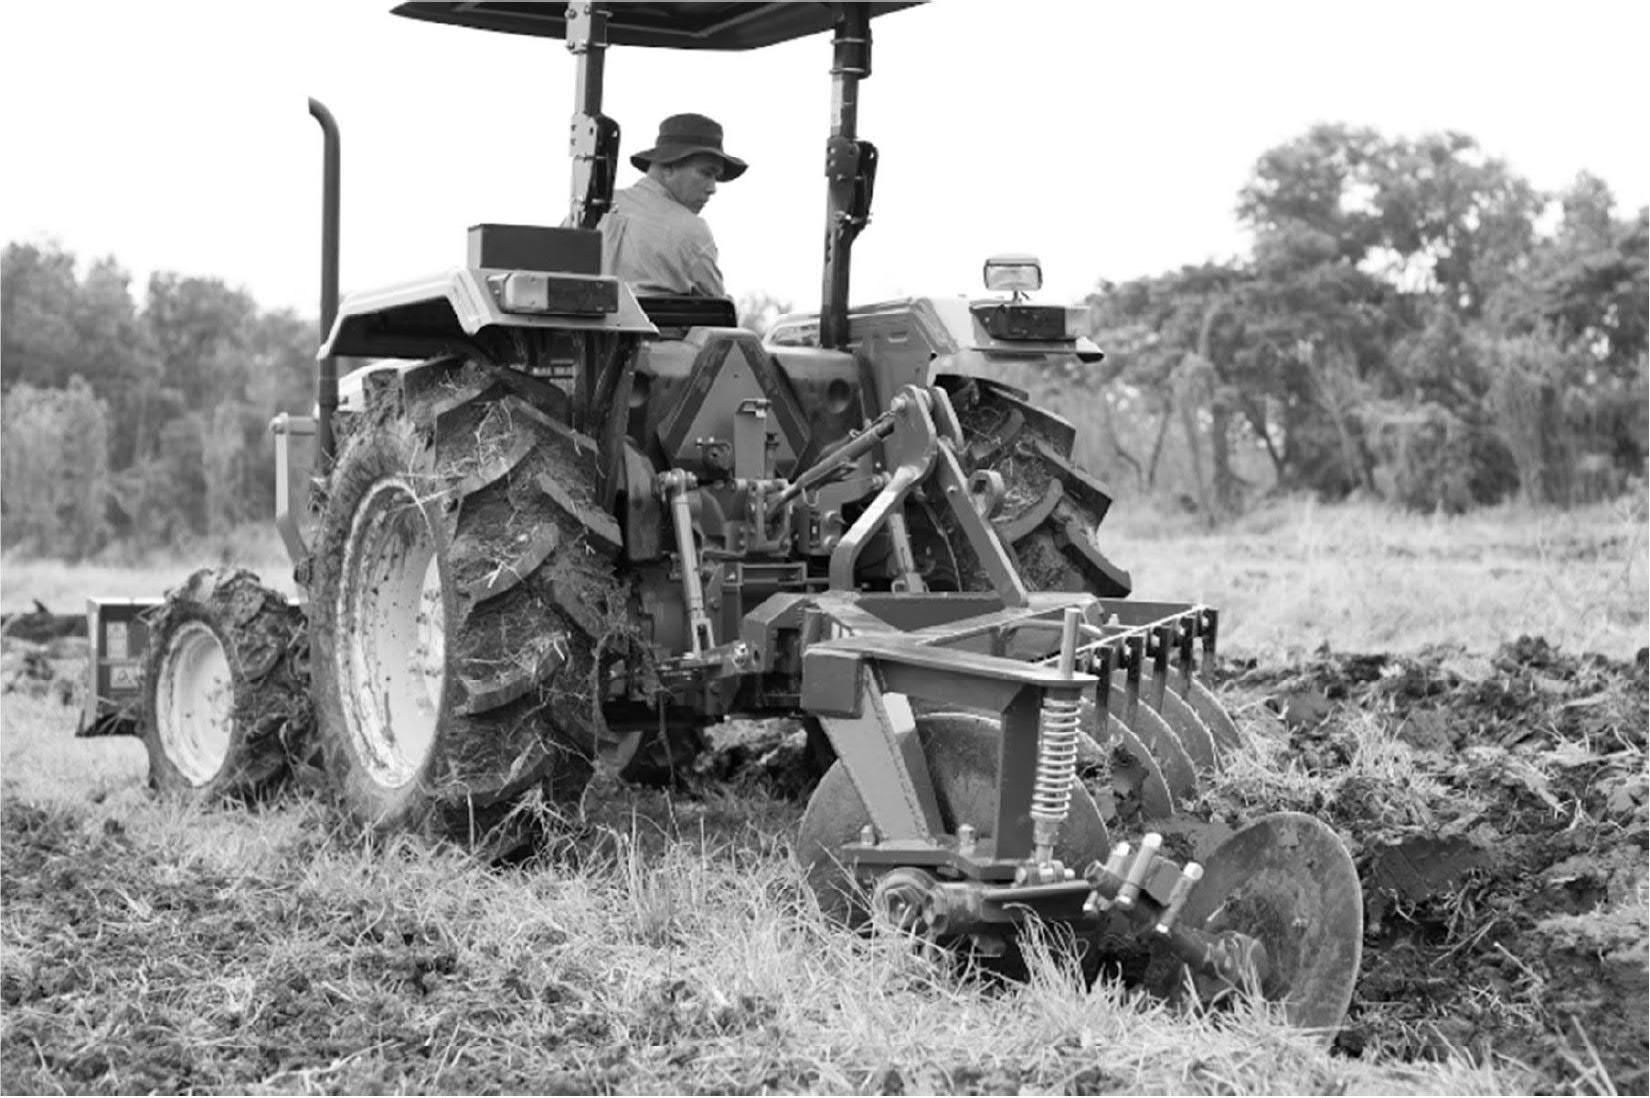
Back the tractor into the position where you can align the top link, the right and left lower links to the links position of Poly plough. The length of the lift links of tractor is adjustable by rotating the turn-buckle. Attach each three point links together and secure the connection with pin and lock with circle pin.
Adjust the lift links by rotating the turn-buckle. The right lift link should be shorter than the left lift link which makes the right side of Poly plough lifted higher than the left side. This will keep the right side and left side of Poly plough parallel with the land and each disc are in the appropriate position to perform the best tillage as during the plough operation the right wheels of tractor are running into the groove
Inspection before Each Season:
Make sure the recommended lubrication has been performed.
Make sure proper operating adjustments have been performedto obtain the best performance from the Poly plough.
RP90046,00007A5 -19-11AUG11-1/1
The right and left lower links shall have the same clearance with rear wheels by adjusting the sway chains both sides. The sway chains should be tight in order to keep the Poly plough follow straight behind the tractor where each disc performs the wide working width in equivalent load.
Adjust the top link arm to appropriate height in order to control the consistency of working depth by observe that the main frame of Poly plough is parallel with the land.
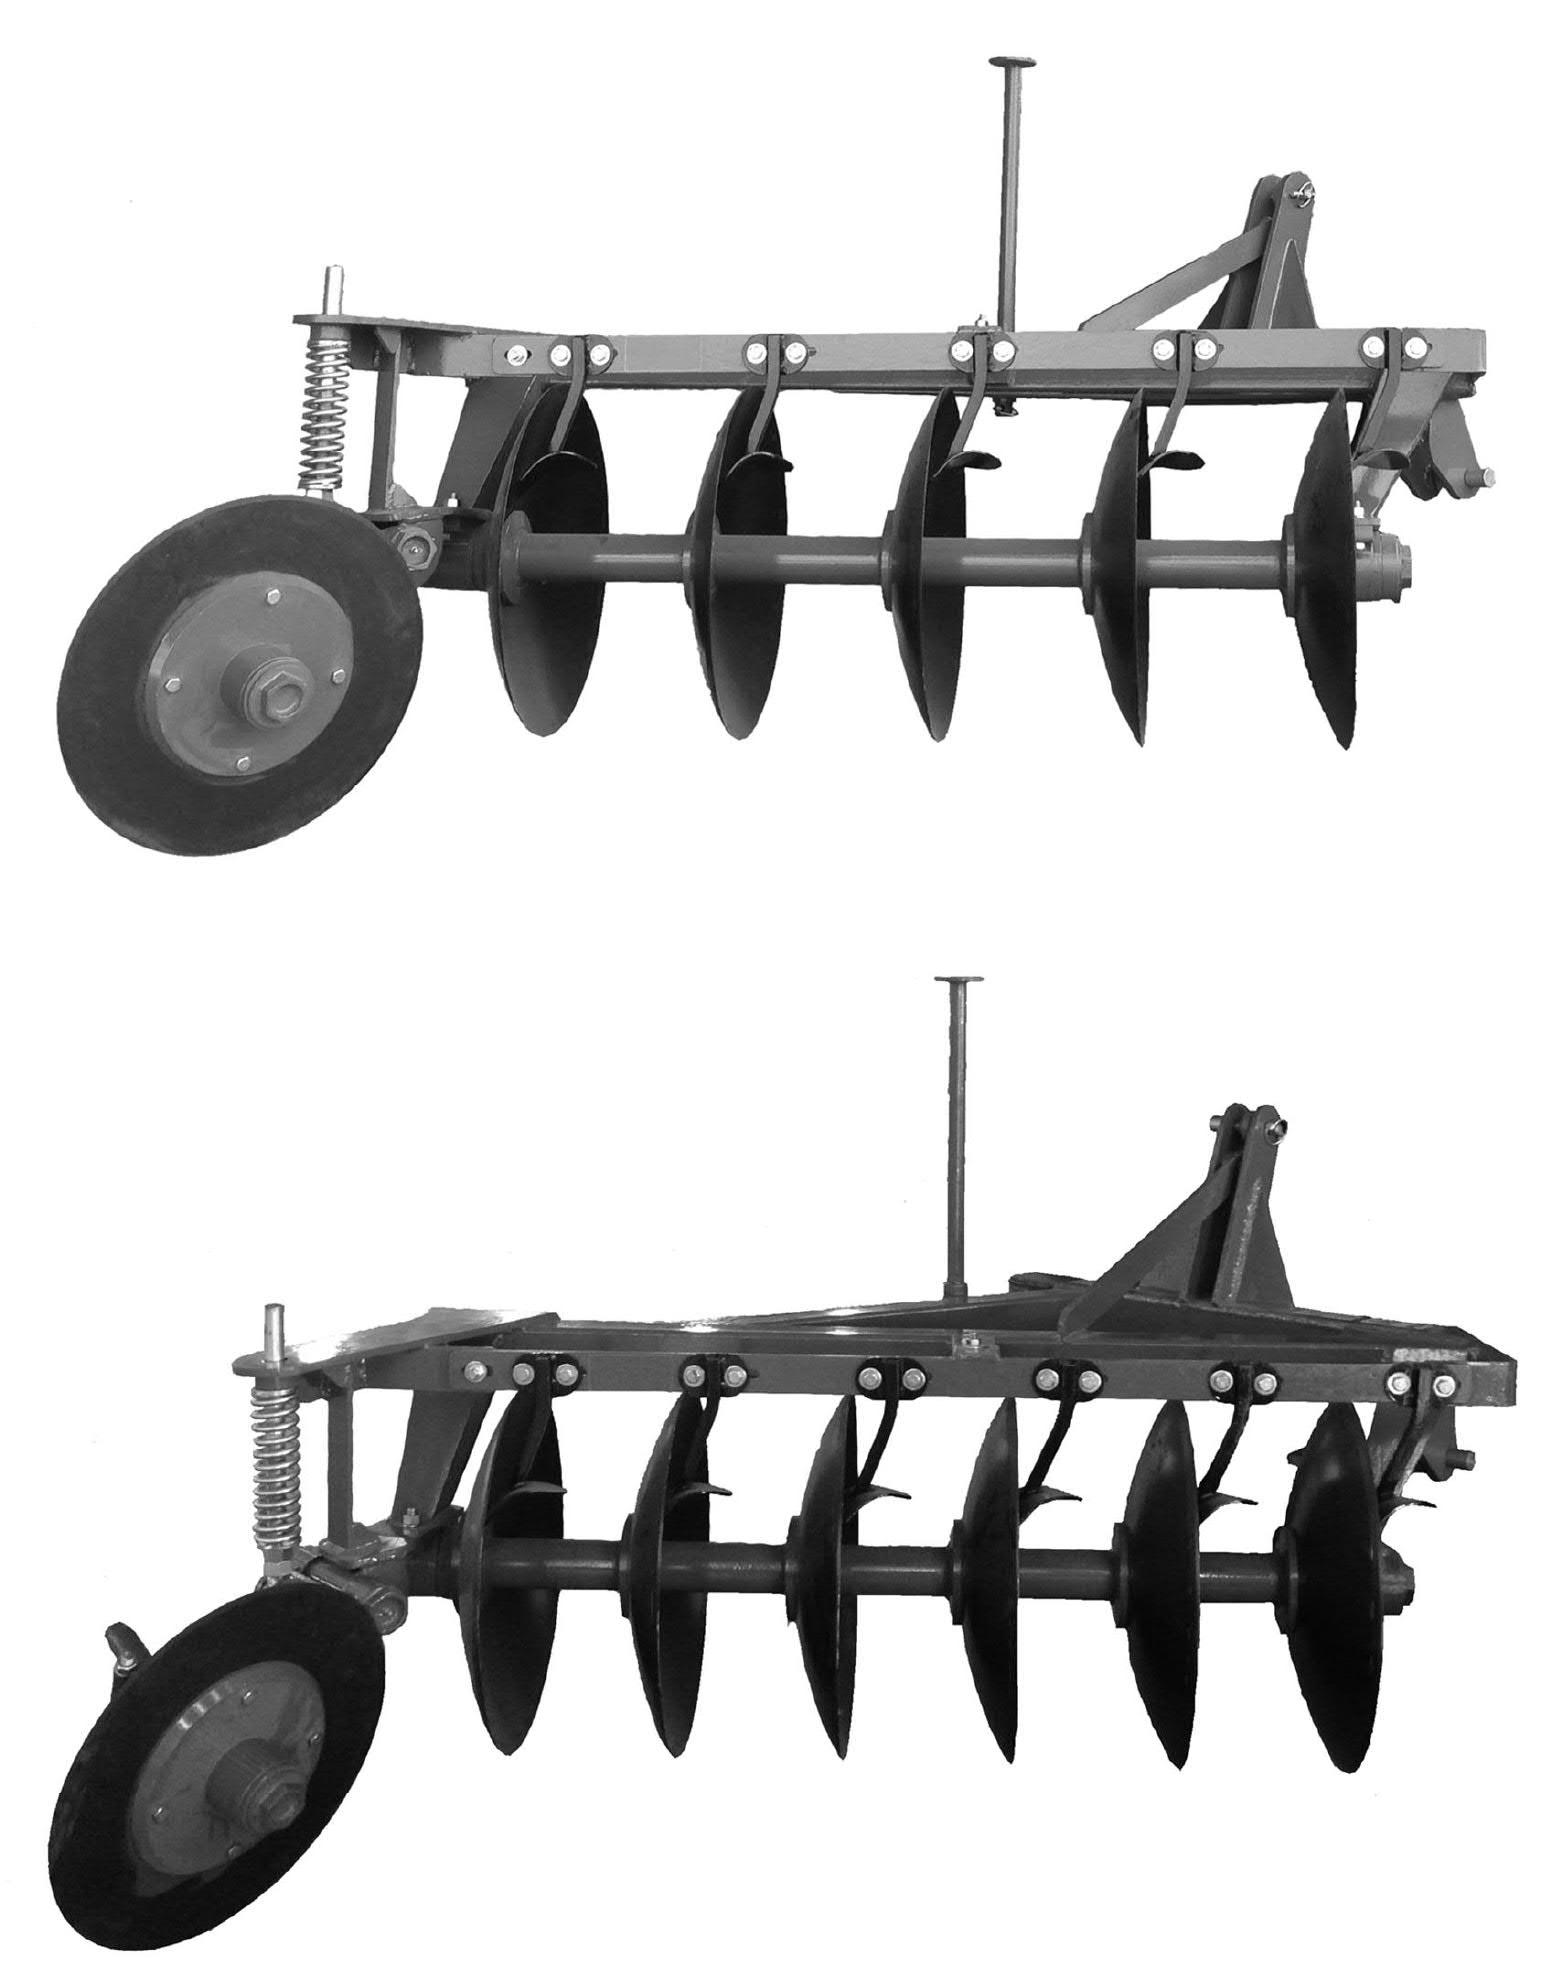
The furrow disc should be adjusted after performed short distance of plough operation. The edge of furrow disc should run on the center line of the groove with 45 degree inclination to the center line of the groove by adjust the length of disc furrow shaft and rotate the furrow disc.
Adjust the spring compression to increase appropriate pressure to the ground in order to control movement of Poly Plough.
To insure the safe and reliable operation of the Poly Plough, it is necessary to use a tractor with the correct specifications and appropriate engine horsepower Use the following list as a guide in selecting a tractor to use on the machine.
3- Point Hitch: The Poly Plough is equipped with a Category 1, 3-point hitch. Be sure the tractor 3-point hitch is in the Category 1 configuration. Install the lift arm blocks or shorten the stop chains to place the arms into the non-sway configuration. Refer to the tractor manual for details.
Engine power: The operator is advised to use the Poly Plough with the tractor which has appropriate engine horsepower in order to gain the optimum performance, safety, and prevent tractor and Poly Plough from damage. The appropriate engine horsepower is 30-36 HP.
Load Sensing Hydraulics: Many newer tractors are equipped with “Load Sensing” hydraulics. It is the responsibility of the operator to set the tractor hydraulic system to provide “float” on the 3-point hitch. Refer to Tractor Manual for details. The float feature will allow the machine to follow the ground contours during operation.
Number of disc: Poly Plough has variety number of disc starting from 2 discs. The disc space is designed to be adjustable in order to control the desired working width and depth of operation which can vary on the type soils and engine power of the tractor required to haul Poly Plough. The more working width and depth of operation required the more horsepower to be provided. This Poly Plough is designed to be suitable for the 30-36 HP tractors.
Disc size: size of disc has impact on the depth of operation. The bigger disc size the deeper depth of operation can perform, however, it is also required the high engine horsepower to haul the Poly Plough. It is required the design the suitable size of disc to gain the optimum performance, for 3036E tractor the 22 inch. Disc diameter is selected.
Weight of Poly Plough: weight of Poly Plough has impact on the depth of operation. Heavy Poly Plough can gain high depth of operation, however, it is also required the high engine horsepower to haul the Poly Plough. This Poly Plough weight is 300 Kg.(5 Disc) and 320 kg.(6Disc) suitable for the 30-36 HP tractors.
Durability: The high engine horsepower tractor requires the durable and strong structure of Poly Plough to attach with. This Poly Plough is suitable for the 30-36 HP tractors.
Recognize Safety Information:
This is a safety-alert symbol. When you see this symbol on your machine or in this manual, be alert to the potential for personal injury. Follow recommended precautions and safe operating practices.

Understand Signal Words:
A signal word—DANGER, WARNING, or CAUTION—is used with the safety-alert symbol. DANGER identifies the most serious hazards.
DANGER or WARNING safety signs are located near specific hazards. General precautions are listed on CAUTION safety signs. CAUTION also calls attention to safety messages in this manual.

Prevent Machine Runaway:

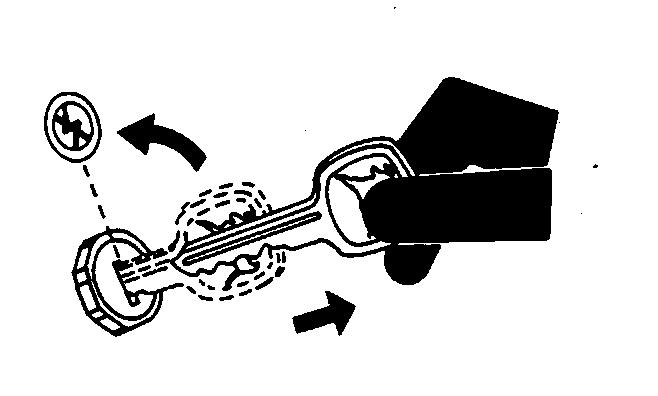
Avoid possible injury or death from machinery runaway. Do not start engine by shorting across starter terminals. Machine will start in gear if normal circuitry is bypassed. NEVER start engine while standing on ground. Start engine only from operator’s seat, with transmission in neutral or park.
Follow Safety Instructions:
Carefully read all safety messages in this manual and on your machine safety signs. Keep safety signs in good condition. Replace missing or damaged safety signs. Be sure new equipment components and repair parts include the current safety signs. Replacement safety signs are available from your John Deere dealer. There can be additional safety information contained on parts and components sourced from suppliers that is not reproduced in this operator's manual. Learn how to operate the machine and how to use controls properly. Do not let anyone operate without instruction. Keep your machine in proper working condition. Unauthorized modifications to the machine may impair the function and/or safety and affect machine life.
If you do not understand any part of this manual and need assistance, contact your John Deere dealer.
Operate the machine carefully to avoid injury.
If the machine must be raised for work on or near the machine, make sure the service locks are installed or that the machine is safely supported.

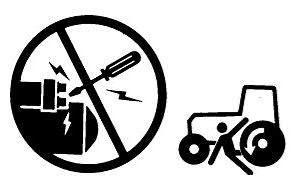
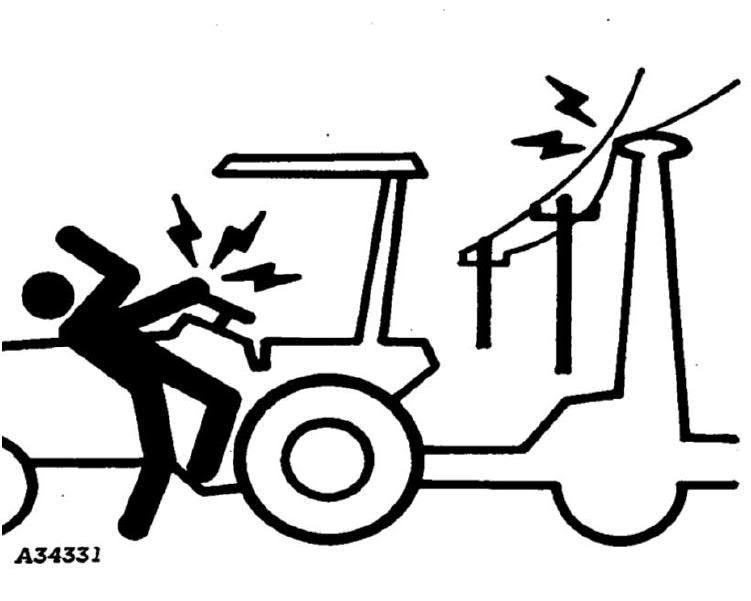
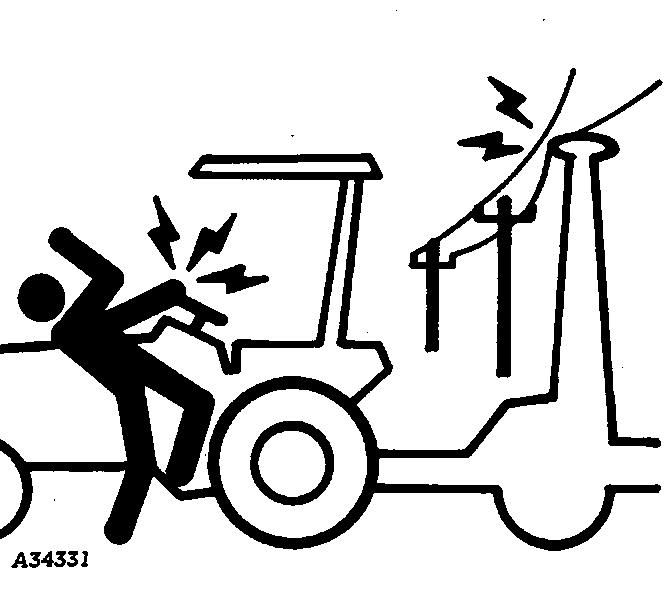
Contact with electrical cables can cause severe injury or death. When transporting or operating the machine, make sure to avoid contact with electrical lines.
Keep away from the machine when hydraulic components are in operation. Machine components can move suddenly in case of a mechanical or hydraulic failure.
Make sure the cylinder and hoses are full of oil before operating the system.
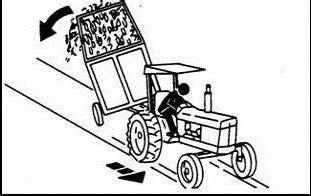
Be careful when operating the system on slopes; the tractor can overturn if it hits a hole or ditch or if it encounters rough terrain.
Only one person, the operator, should be in the tractor operator's station when the tractor and machine are in use.
Only allow the operator on the machine. Keep riders off.
Riders on machine are subject to injury such as being struck by foreign objects and being thrown off of the machine. Riders also obstruct the operator’s view resulting in the machine being operated in an unsafe manner
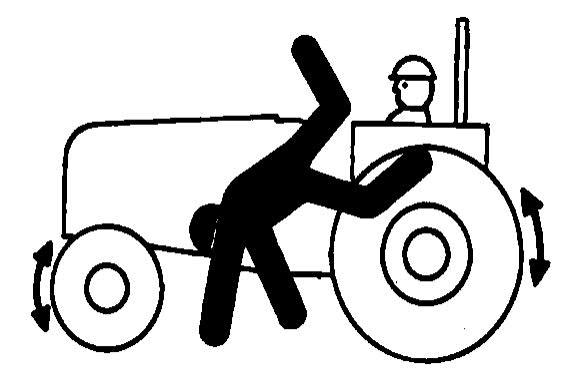
Use seat belt if installed. Avoid holes, ditches, and obstructions which can cause tractor roll-over, especially on hillsides. Never drive near the edge of a ditch, gully or steep embankment.
Slow down during turns, when driving on rough ground executes turns and when turning on hillsides.
Wear
Wear
Prolonged
Wear a suitable hearing protective device such as earmuffs or earplugs to protect against objectionable or uncomfortable loud noises.

Operating equipment safely requires the full attention of the operator. Do not wear radio or music headphones while operating machine.

Prevent collisions between other road users, slow Moving tractors with attachments or towed equipment, and self-propelled machines on public roads. Frequently check for traffic from the rear, especially in turns, and use turn signal lights.
Use headlights, flashing warning lights, and turn Signals day and night. Follow local regulations for Equipment lighting and marking. Keep lighting and marking visible, clean, and in good working order. Replace or repair lighting and marking that has been damaged or lost. An implement safety lighting kit is available from your John Deere dealer.
Transport Safety:
Always raise the parking stand before transporting. Tractor brakes should be coupled.
Engage a lower gear when going down steep hills or grades.

Always operate at reasonable and safe speeds. Never exceed 22 km/h when the machine is half full. Prevent collisions between other road users and slow-moving equipment operating on public roads. Frequently check for traffic from the rear, especially in turns, and use turn signal lights.
Keep others away from the machine.
For better stability and operator safety, make sure the tractor is correctly ballasted. If the tractor has a safety ROLL-GARD™ canopy, keep your seatbelt fastened during transport operations.
Be aware the machine's transport height and width.
Suggest:
If the above button click is invalid.
Please download this document first, and then click the above link to download the complete manual.
Thank you so much for reading

Stopping distance increases with speed and weight of towed loads, and on slopes. Towed loads with or without brakes that are too heavy for the tractor or are towed too fast can cause loss of control. Consider the total weight of the equipment and its load.
Observe these recommendedmaximum road speeds, or local speed limits which may be lower:
• If towed equipment does not have brakes, do not travel more than 22 km/h and do not tow loads more than 1.5 times the tractor weight.
• If towed equipment has brakes, do not travel more than 40 km/h and do not tow loads more than 4.5 times the tractor weight.
Ensure the load does not exceed the recommended weight ratio.
The maximum permissible travel speed for this implement is 22 km/h
Some tractors can operate at speeds higher than the maximum speed limit for this implement. Regardless of the maximum speed the tractor used to tow this implement can achieve, do not exceed the implement's transport speed limit.
Exceeding the implement's maximum transport speed can result in:
• Loss of control of the tractor/implement combination
To help prevent personal injury caused by unexpected movement, be sure to service machine on level surface. If the machine must be in a raised position while working on or near it, be certain service locks are installed or machine is adequately supported. If machine is connected to tractor, engage parking brake and/or place transmission in “PARK”, shut off engine and remove key.
Add ballast to recommended maximum for tractor, lighten the load, or get a heavier towing unit. The tractor must be heavy and powerful enough with adequate braking power for the towed load. Use additional caution when towing loads under adverse surface conditions, when turning, and on inclines.
• Reduced stopping power or no ability to stop during braking
• Implement tire failure
• Damage to the implement's structure or components
Be careful and slow down when towing the machine in adverse conditions, when turning and when operating on slopes.
Do not attempt to transport if the fully loaded implement weighs more than 1.5 times the weight of the tractor. Never tow this implement with an automobile.
If machine is detached from tractor, block wheels and use safety stands to prevent movement.
Practice Safe Maintenance:
Understand service procedure before doing work. Keep area clean and dry. Never lubricate, service, or adjust machine while it is moving. Keep hands, feet, and clothing from power-driven parts. Disengage all power and operate controls to relieve pressure. Lower equipment to the ground. Stop the engine. Remove the key. Allow machine to cool.
Securely support any machine elements that must be raised for service work. Keep all parts in good condition and properly installed. Fix damage immediately. Replace worn or broken parts. Remove any buildup of grease, oil, or debris. On self-propelled equipment, disconnect battery ground cable (-) before making adjustments on electrical systems or welding on machine.
Avoid potentially toxic fumes and dust.
Hazardous fumes can be generated when paint is heated by welding, soldering, or using a torch. Remove paint before heating:
• Remove paint a minimum of 100 mm (4 in.) from area to be affected by heating. If paint cannot be removed, wear an approved respirator before heating or welding.
• If you sand or grind paint, avoid breathing the dust. Wear an approved respirator.


• If you use solvent or paint stripper, remove stripper with soap and water before welding. Remove solvent or paint stripper containers and other flammable material from area. Allow fumes to disperse at least 15 minutes before welding or heating.
On towed implements, disconnect wiring harnesses from tractor before servicing electrical system components or welding on machine.
Do not use a chlorinated solvent in areas where welding will take place.
Do all work in an area that is well ventilated to carry toxic fumes and dust away.
Dispose of paint and solvent properly.
