Are you about to set up your new HP ENVY 6455e printer? That’s great! Even if this is your first-ever experience in the printer setup, just chill out. And we will help you walk throughout the process in the right way. Before we get started, it would be helpful if you understand the two stages in the first-time printer setup: Hardware Setup and Software Setup. Well, in this article, you will read more about it. So, why wait? Let’s get into the HP Envy 6455e Setup.
Start With The Hardware Setup
Preparing The Printer
● Unpack the box and remove the setup documents, power cord, and ink cartridges from the package.
● Now, slowly pull the printer out of the pack.
● Check whether the printer and the other supplies are delivered without damage.
● Discard the packing materials and remove the printer from the plastic bag.
● Start discarding the blue protective tapes around the printer
● Then, remove the protective tape and packing materials inside the printer.

Connecting The Power Cord
● First, connect the power cord to the rear of your printer and the other end to an electrical outlet.
● The printer will turn on automatically.

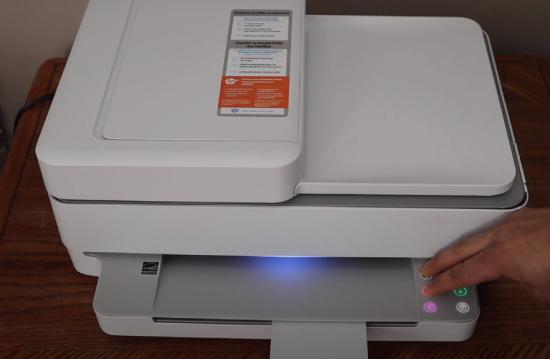
● Wait until you see a purple light at the printer’s center
So far, going on well? That’s great! Let’s finish the remaining process as fast as we can.
Loading The Paper
● Now, pull out the input tray from the printer
● Slide the paper width guide to the outermost position.
● Insert the plain white sheets into the paper tray and adjust the paper width guide until it rests at the edge of the stack.
● Ensure that you have loaded the sheets within the maximum limit.
● Close the input tray
Installing The Ink Cartridges
● Usually, when you set up the HP ENVY printer for the first time, a light will blink at the corner of the ink cartridge access door. It is the indication to install the ink cartridges.
● Now, lift the ink cartridge access door of your printer
● Unpack one of the ink cartridges from the package and discard the protective tapes.
● Now, lift the lid and insert the ink cartridge into the respective slot.

● Close the cartridge lid.
● Repeat these instructions to insert the remaining ink cartridges.
● Ensure that the ink cartridges are installed correctly in their slots.
● Close the ink cartridge access door.
● Now, the printer will automatically print the alignment page.
● Lift the scanner lid and load the printed alignment page with the scan side down on the scanner glass to complete the alignment process.
Have you done the printer hardware setup? Good! Looks like you are familiar now. Well, let’s move on to the software setup.
Easy Ways To Connect Your Devices
When you have made the connection between your printer and computer, it is pretty easy to perform the printing task. Well, let’s get started with the procedures to connect your devices.
HP ENVY 6455e USB Setup In Windows 10
● Make sure to turn on your printer.
● Connect your printer and computer using a USB cable.

● Select the Start menu from the main screen on your computer
● Open the Settings window and choose the Printers & Scanners option in the left menu panel of the window.
● Pick the Add a printer or scanner option.
● Select your printer from the available list.
● The printer installation window will appear on the screen.
● Now, follow the on-screen instructions and finish the printer installation on your computer.
Connecting The Devices Using Over Wi-Fi
Before starting the Wi-Fi setup, check whether the wireless router or access point supports the WPS push button. After that, you can proceed with the below steps.
Using The WPS Method
● Now, press and hold the Wireless and Power button together for at least three seconds on your printer to begin the WPS push button method.
● You can now see that your printer will glow in purple repeatedly at the outside edges of the light bar

● Next, hit the WPS button on your router.
● The printer will now start to establish the network connection. Wait for a few minutes.
● Once the printer is successfully connected to the Wi-Fi network, the outside edges of the light bar will start to glow purple.
● If your router does not support a WPS push button, use the PIN method by following the below steps.
Using The PIN Method
● First, hit and hold the Information button on your printer until the light blinks on all the control panel buttons.
● Then, press and hold the Information and Down Arrow buttons together for five seconds on your printer to start the WPS PIN method to print a page with a WPS PIN code.
● Now, you will see the outside edges of the light bar will glow purple on your printer.

● Launch the configuration utility or the software of your wireless router or wireless access point on your device and enter the WPS PIN.
● Wait for a few minutes to connect your printer to the wireless network.
● When the printer is connected successfully, the light bar will glow white in the center of your printer
Did your printer print the WPS PIN code? Great! Let’s finish the remaining process as fast as we can.
Using The Printer Software

In case you are going to connect your printer to the network using the HP software, restore the printer’s network settings to the factory default to enable the Wi-Fi setup mode. So, just follow the below instructions to connect your devices.
● Ensure to connect your computer to a wireless network.
● Make sure to connect the printer and computer to the same network.
● Before starting the Wi-Fi setup, you must know your network name (SSID) and WEP key or WPA Passphrase if necessary.
● Now, launch the printer software on your computer.
● Select the Tools tab from the top of the window
● Next, click on the Device Setup & Software option from the list.
● Select the Connect a new device option and follow the on-screen prompts to complete the wireless setup.
If you are having any issues while connecting your devices, contact our technical experts. They will help you out of this!
Procedure To Connect The Devices Using Wi-Fi Direct
If you don’t have a router or access point, still, you can use the Wi-Fi Direct feature, which lets you connect your devices quickly To do so, go ahead with the below steps.

● Confirm that your printer is turned on.
● On the printer’s control panel, hit and hold the Information button until you see the lights on all the buttons.
● At the same time, hit and hold the Cancel and Down Arrow button.
● When Wi-Fi Direct is turned on, you can see a blue light, which travels from the edges to the center of the printer
● If Wi-Fi Direct is turned off, you will see a blue light, which travels from the edges to the printer center.
Finished Setting Up The Printer?
We believe “Yes.” We have provided you the entire setup procedure for your HP ENVY 6455e printer. In addition to the printer setup, we also included the procedures for driver downloading, installation, and more. Hope you could have now completed your printer setup with the above instructions. To get an instant solution for your printer issues, use the call option on this page to contact our technical experts.