13 minute read
How to Use the Exness Trading App: A Comprehensive Guide

The world of online trading has evolved dramatically, offering individuals the opportunity to engage with global financial markets from the comfort of their smartphones. Among the many platforms available, the Exness trading app stands out for its intuitive design, robust features, and accessibility for traders of all experience levels. Whether you're a beginner taking your first steps into forex and CFD trading or an advanced trader seeking a reliable mobile platform, this guide will walk you through everything you need to know about using the Exness trading app effectively. From downloading and setting up the app to executing trades and managing your portfolio, we’ll cover it all in detail to help you maximize your trading potential.

💥 Trade with Exness now: Open An Account or Visit Brokers
Why Choose the Exness Trading App?
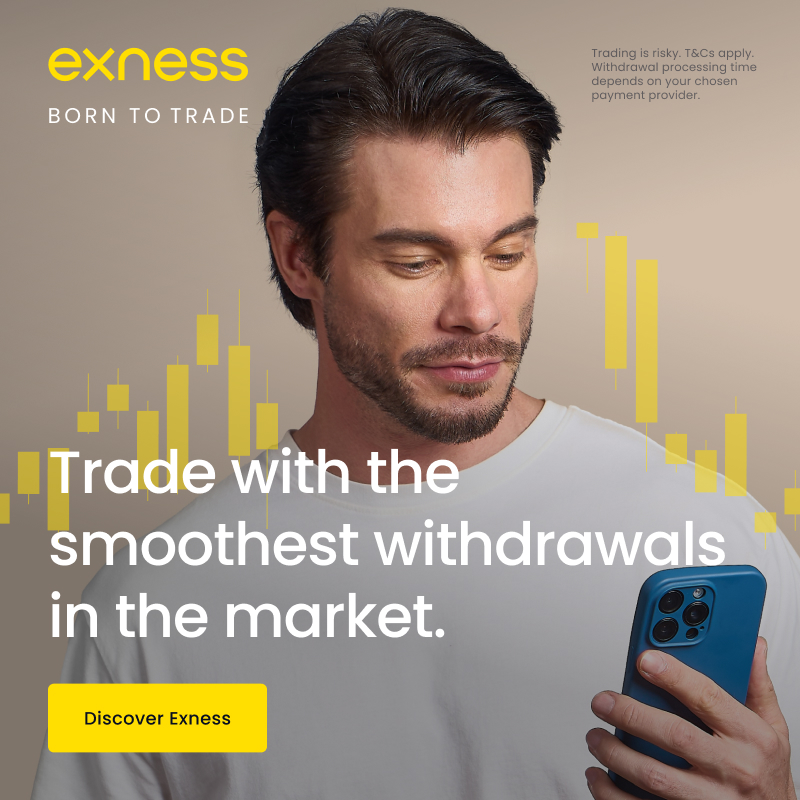
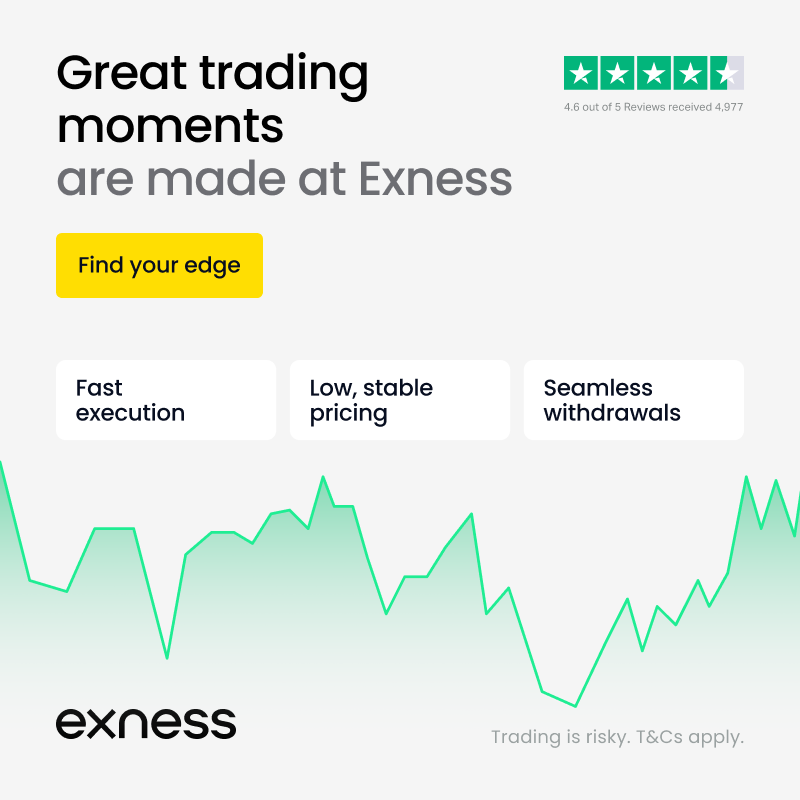
Exness, established in 2008, has built a reputation as a trusted broker in the financial industry, known for its transparency, competitive trading conditions, and innovative technology. The Exness trading app is a cornerstone of its offerings, designed to provide traders with seamless access to forex, stocks, commodities, indices, and cryptocurrencies. Here are some reasons why the app is a preferred choice for traders worldwide:
User-Friendly Interface: The app’s clean and intuitive design makes it easy for beginners to navigate while offering advanced tools for experienced traders.
Real-Time Market Data: Stay updated with live price quotes, charts, and economic news to make informed trading decisions.
Wide Range of Instruments: Trade over 100 currency pairs, major stocks, commodities like gold and oil, and popular cryptocurrencies like Bitcoin and Ethereum.
Fast Execution: Orders are executed in milliseconds, ensuring you can capitalize on market opportunities without delays.
Secure Transactions: Encrypted payment systems and two-factor authentication (2FA) protect your funds and personal information.
24/7 Support: Access multilingual customer support anytime, directly through the app.
With these features, the Exness trading app empowers traders to stay in control of their portfolios, no matter where they are. Now, let’s dive into the step-by-step process of using the app to start your trading journey.
Step 1: Downloading and Installing the Exness Trading App
Before you can begin trading, you’ll need to download and install the Exness trading app on your mobile device. The app is available for both Android and iOS, ensuring compatibility with most smartphones and tablets. Here’s how to get started:
For Android Users:
Open the Google Play Store: Launch the Play Store app on your Android device.
Search for “Exness Trade”: Type “Exness Trade” into the search bar and look for the official app developed by Exness.
Install the App: Tap the “Install” button and wait for the download to complete. Ensure you have a stable internet connection and sufficient storage space.
Launch the App: Once installed, tap “Open” to launch the app or find it on your home screen.
For iOS Users:
Open the App Store: Access the App Store on your iPhone or iPad.
Search for “Exness Trade”: Enter “Exness Trade” in the search field and locate the official Exness app.
Download the App: Tap “Get” to download and install the app. You may need to authenticate using your Apple ID or Face ID.
Open the App: After installation, tap “Open” or find the app icon on your device.
Pro Tip: Always download the app from official stores (Google Play Store or Apple App Store) to avoid fake or malicious versions. Check that the developer is listed as “Exness” to ensure authenticity.
Step 2: Setting Up Your Exness Account
Once the app is installed, the next step is to create or log into your Exness account. The app supports both new registrations and existing accounts, making it easy to get started.
For New Users:
Open the App and Register: Launch the Exness trading app and tap “Register” or “Sign Up” on the home screen.
Enter Your Details: Provide your email address, phone number, and create a strong password. A strong password should include a mix of letters, numbers, and symbols for enhanced security.
Select Your Country: Choose your country of residence from the dropdown menu. This helps Exness tailor the app experience to your region.
Agree to Terms: Read and accept Exness’s terms and conditions and privacy policy.
Verify Your Identity: To comply with financial regulations, Exness requires identity verification. Follow the prompts to upload a government-issued ID (e.g., passport, driver’s license) and proof of residence (e.g., utility bill or bank statement). Verification typically takes a few minutes but may require up to 24 hours in some cases.
Set Up Security Features: Enable two-factor authentication (2FA) for added account protection. You can link 2FA to your phone number or an authenticator app like Google Authenticator.
For Existing Users:
Log In: Open the app and tap “Log In.”
Enter Credentials: Input your registered email address and password.
Authenticate: If 2FA is enabled, verify your identity using the code sent to your phone or authenticator app.
Pro Tip: If you’re new to trading, consider starting with a demo account. Exness offers demo accounts with virtual funds, allowing you to practice trading strategies without risking real money. You can switch to a live account once you’re confident.
Step 3: Exploring the Exness Trading App Interface
The Exness trading app is designed with a user-centric interface, making it easy to navigate even for beginners. Here’s a breakdown of the key sections you’ll encounter:
Dashboard: Displays your account balance, equity, margin, and recent trades. It’s your central hub for monitoring your portfolio.
Market Watch: Lists available trading instruments with real-time price quotes. You can filter by asset class (e.g., forex, stocks, cryptocurrencies) or search for specific pairs like EUR/USD or Bitcoin.
Trading Tab: Access charts, execute trades, and set stop-loss or take-profit levels. This is where most of your trading activity will take place.
Accounts: Manage multiple trading accounts, switch between demo and live accounts, and adjust leverage settings.
Deposits and Withdrawals: Handle funding and cashing out directly from the app with various payment methods.
Settings: Customize app preferences, including language, notifications, and themes (light or dark mode).
Take some time to explore each section to familiarize yourself with the app’s layout. The intuitive design ensures that essential functions are just a tap away.
Step 4: Funding Your Exness Account
To start live trading, you’ll need to deposit funds into your Exness account. The app supports a variety of payment methods, including bank cards, e-wallets, and cryptocurrencies, making it convenient for traders worldwide. Here’s how to deposit funds:
Navigate to Deposits: From the dashboard or accounts section, tap “Deposit.”
Choose a Payment Method: Select from options like Visa/Mastercard, Skrill, Neteller, bank transfer, or crypto wallets (e.g., Bitcoin, USDT).
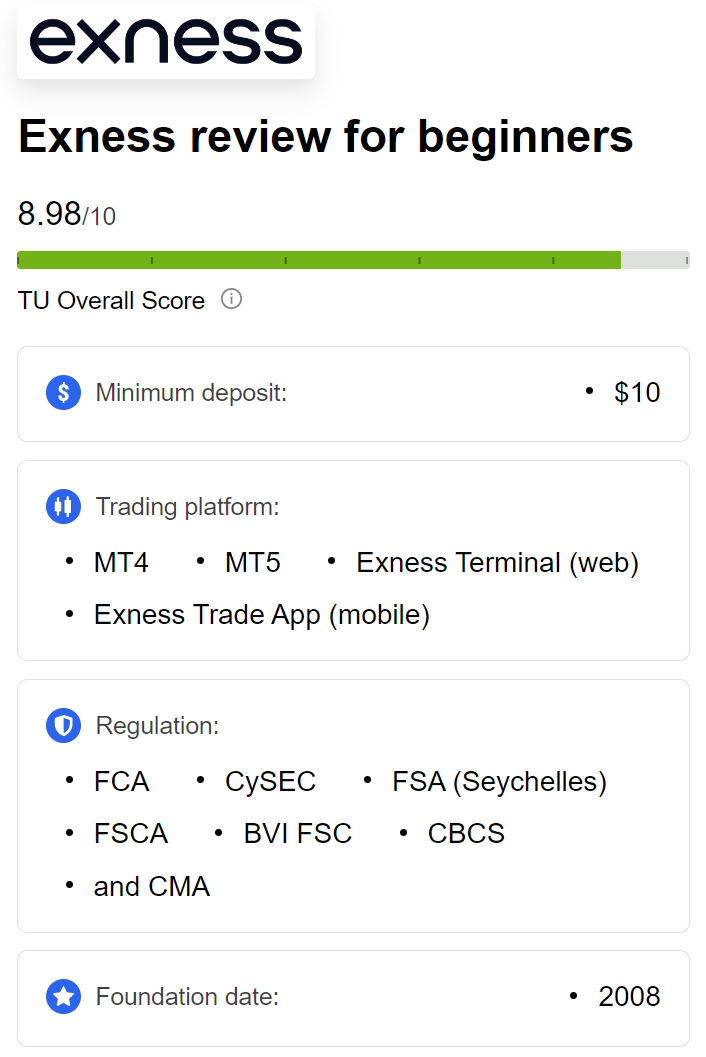
Enter Deposit Amount: Specify the amount you wish to deposit. Exness has low minimum deposit requirements, often as little as $10, depending on the account type.
Confirm Transaction: Follow the prompts to complete the payment. Most deposits are processed instantly, though bank transfers may take 1-3 business days.
Check Your Balance: Return to the dashboard to confirm that the funds have been credited to your account.
Pro Tip: Always verify the payment method’s processing times and fees (if any) before depositing. Exness typically covers transaction fees, but third-party providers may charge a small percentage.
Step 5: Choosing the Right Account Type
Exness offers several account types tailored to different trading styles and experience levels. When setting up your account, you’ll need to choose one that aligns with your goals. Here’s a quick overview:
Standard Account: Ideal for beginners, with no commission fees and low spreads. Suitable for casual traders exploring forex and CFDs.
Standard Cent Account: Perfect for new traders, allowing you to trade smaller lot sizes with minimal risk. Great for practicing strategies.
Raw Spread Account: Designed for advanced traders, offering near-zero spreads but with a commission per trade. Best for scalping and high-frequency trading.
Zero Account: Features zero spreads on major instruments for a commission. Ideal for experienced traders seeking the tightest spreads.
Pro Account: Balances low spreads and no commissions, catering to professional traders with larger portfolios.
To select or change your account type:
Go to the “Accounts” section in the app.
Tap “Open New Account” or “Manage Accounts.”
Choose your preferred account type and confirm.
Pro Tip: Start with a Standard or Standard Cent account if you’re a beginner. As you gain experience, you can explore Raw Spread or Zero accounts for more advanced strategies.
💥 Trade with Exness now: Open An Account or Visit Brokers
Step 6: Executing Your First Trade
Now that your account is funded, it’s time to place your first trade. The Exness trading app makes this process straightforward. Follow these steps:
Select an Instrument: Go to the “Market Watch” section and choose a trading instrument (e.g., EUR/USD, Apple stock, or Bitcoin).
Analyze the Market: Tap the instrument to view its chart. Use built-in tools like Moving Averages, RSI, or Bollinger Bands to analyze price trends. You can customize the timeframe (e.g., 1-minute, 1-hour, daily) to suit your strategy.
Open the Trade Window: Tap “Trade” to open the order window.
Set Trade Parameters:
Lot Size: Specify the trade volume (e.g., 0.01 lots for micro-trading).
Stop Loss (SL): Set a price level to limit potential losses.
Take Profit (TP): Set a target price to secure profits.
Buy or Sell: Choose “Buy” if you expect the price to rise or “Sell” if you expect it to fall.
Confirm the Trade: Review your settings and tap “Confirm.” The trade will appear in the “Trades” section.
Monitor Your Position: Go to the “Trades” tab to track your open positions, including real-time profit/loss updates.
Pro Tip: Always use stop-loss and take-profit levels to manage risk. A common beginner mistake is trading without a clear exit strategy, which can lead to significant losses.
Step 7: Managing Your Trades
Effective trade management is crucial for long-term success. The Exness trading app provides tools to help you monitor and adjust your positions:
View Open Trades: In the “Trades” section, see all active positions, including entry price, current price, and profit/loss.
Modify Orders: Tap an open trade to adjust stop-loss or take-profit levels. This is useful if market conditions change.
Close Trades: When ready to exit, tap the trade and select “Close.” You can lock in profits or cut losses manually.
Set Alerts: Enable price alerts to get notified when an instrument reaches a specific level. Go to the chart settings and tap “Add Alert.”
Track Performance: Use the app’s account history to review past trades, helping you identify patterns and improve your strategy.
Pro Tip: Avoid emotional trading. Stick to your strategy and use the app’s risk management tools to stay disciplined.
Step 8: Withdrawing Your Profits
When you’re ready to cash out your profits, the Exness trading app makes withdrawals simple and secure. Here’s how:
Go to Withdrawals: From the dashboard or accounts section, tap “Withdraw.”
Select Payment Method: Choose the same method used for deposits (if possible) to comply with anti-money laundering regulations.
Enter Amount: Specify how much you want to withdraw. Ensure you have sufficient free margin (not tied up in open trades).
Confirm Request: Follow the prompts to submit your withdrawal. Most withdrawals are processed instantly or within a few hours, though bank transfers may take longer.
Check Status: Monitor the withdrawal status in the app’s transaction history.
Pro Tip: Regularly withdraw a portion of your profits to secure your gains. Leaving all funds in your trading account increases risk exposure.
Step 9: Leveraging Advanced Features
The Exness trading app offers advanced features to enhance your trading experience. Here are some tools and functionalities to explore:
Economic Calendar: Found in the app’s tools section, the economic calendar highlights upcoming events like interest rate decisions or employment reports that could impact markets.
Technical Indicators: Access over 30 indicators, including MACD, Stochastic, and Fibonacci retracement, to refine your analysis.
Social Trading: Copy the trades of successful traders through Exness’s social trading feature. Browse trader profiles, review their performance, and allocate funds to follow their strategies.
One-Click Trading: Enable one-click trading in the settings for faster order execution, ideal for scalpers or day traders.
Customizable Charts: Adjust chart types (candlestick, line, bar), timeframes, and colors to match your preferences.
Educational Resources: Access webinars, tutorials, and articles within the app to deepen your trading knowledge.
Pro Tip: Experiment with social trading if you’re a beginner. Copying experienced traders can help you learn while potentially earning profits.
Step 10: Tips for Success with the Exness Trading App
To make the most of the Exness trading app, follow these best practices:
Start with a Demo Account: Practice trading strategies risk-free to build confidence before risking real money.
Use Risk Management Tools: Always set stop-loss and take-profit levels. Aim for a risk-reward ratio of at least 1:2 (e.g., risk $10 to gain $20).
Stay Informed: Monitor economic news and market trends using the app’s calendar and alerts. Events like central bank announcements can cause volatility.
Manage Leverage Carefully: Exness offers flexible leverage (up to 1:2000 in some regions), but high leverage increases both potential profits and losses. Start with lower leverage (e.g., 1:10 or 1:50) as a beginner.
Keep Learning: Trading is a skill that improves with practice. Use Exness’s educational resources to study technical analysis, risk management, and market psychology.
Update the App Regularly: Ensure you’re using the latest version of the app for access to new features and security patches.
Avoid Overtrading: Stick to a trading plan and avoid placing too many trades in a short period, which can lead to impulsive decisions.
Common Mistakes to Avoid
While the Exness trading app is designed to be user-friendly, beginners often make mistakes that can hinder their success. Here’s what to watch out for:
Trading Without a Plan: Always have a clear strategy, including entry/exit points and risk limits.
Ignoring Risk Management: Failing to set stop-loss orders can lead to significant losses, especially in volatile markets.
Overusing Leverage: High leverage can amplify losses as much as it boosts profits. Use it cautiously.
Emotional Decisions: Avoid chasing losses or trading based on fear or greed. Stick to your analysis.
Neglecting Verification: Complete identity verification early to avoid delays with withdrawals or account restrictions.
Exness Trading App vs. Other Platforms
How does the Exness trading app compare to other popular trading platforms like MetaTrader 4 (MT4), MetaTrader 5 (MT5), or apps from brokers like eToro or Binance? Here’s a quick comparison:
Exness Trading App:
Pros: Intuitive interface, fast execution, wide range of instruments, social trading, and instant withdrawals.
Cons: Advanced traders may prefer MT4/MT5 for deeper customization.
MetaTrader 4/5:
Pros: Industry-standard platforms with extensive charting tools and automated trading (Expert Advisors).
Cons: Steeper learning curve for beginners; mobile versions are less streamlined than Exness’s app.
eToro:
Pros: Strong focus on social trading and copy trading; beginner-friendly.
Cons: Higher fees and spreads compared to Exness; fewer forex pairs.
Binance:
Pros: Ideal for cryptocurrency trading with low fees.
Cons: Limited forex and CFD offerings; not tailored for traditional trading.
The Exness trading app strikes a balance between simplicity and functionality, making it a versatile choice for most traders.
Conclusion
The Exness trading app is a powerful tool that brings the world of financial markets to your fingertips. Whether you’re trading forex, stocks, or cryptocurrencies, the app’s user-friendly interface, real-time data, and advanced features make it suitable for both beginners and seasoned traders. By following the steps outlined in this guide—downloading the app, setting up an account, funding it, and executing trades—you can start your trading journey with confidence.
To succeed, prioritize risk management, continuous learning, and disciplined trading. Use the app’s demo account to practice, leverage its analytical tools to make informed decisions, and take advantage of Exness’s educational resources to grow your skills. With dedication and the right approach, the Exness trading app can help you achieve your financial goals in the dynamic world of online trading.
Read more: