Chapter
Sleeping and waking the iPad
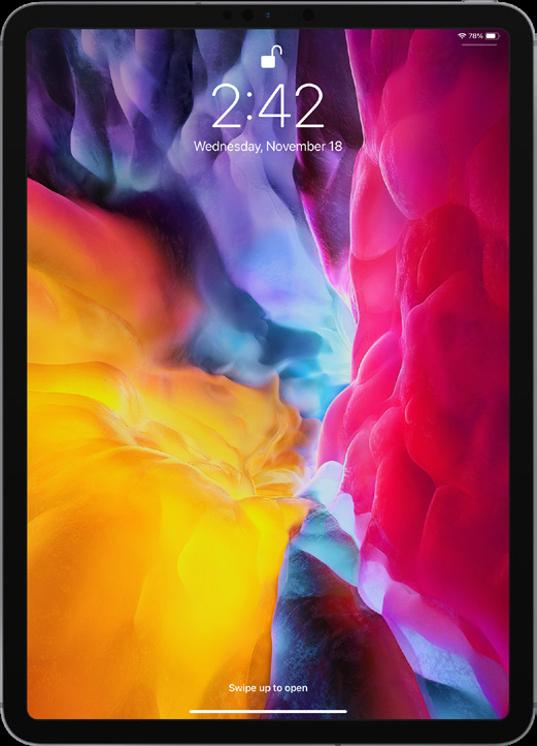
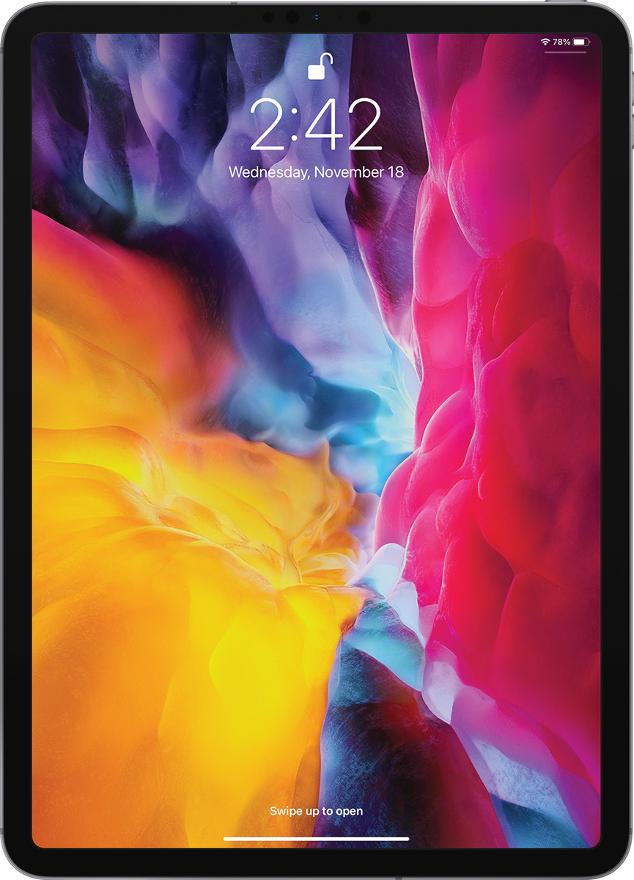
You put your iPad into sleep mode (sometimes called standby mode) by pressing the Top button. Sleep mode turns off the screen (which conserves battery power and prevents accidental screen taps), but some background activities still occur (such as receiving messages and playing music). Press the Top button once again to wake up your iPad and see the Lock screen. You now have two ways to proceed:
Slide a finger up from the bottom of the screen.
Press the Home button (if your iPad has one).
This either unlocks the tablet right away or prompts you to enter your passcode, if you use one (if you don’t, you should; see Chapter 11).
Turning the iPad off and back on again
You won’t turn off your iPad often, but here are a couple of scenarios where shutting down your tablet can be useful:
If your iPad’s battery level is critically low and you can’t charge it, turning off your iPad is a good idea because then the device consumes no power. You can then turn the iPad back on whenever you need to use it.
If a glitch has caused your iPad to freeze or behave erratically, turning the device off and then back on can often solve the problem (I talk more about this in Chapter 11).
To turn off your iPad, use one of the following techniques, depending on your iPad model:
Your iPad has Face ID� Press and hold the Top button and one of the Volume buttons for a couple of seconds.
Your iPad has a Home button� Press and hold the Top button for a couple of seconds.
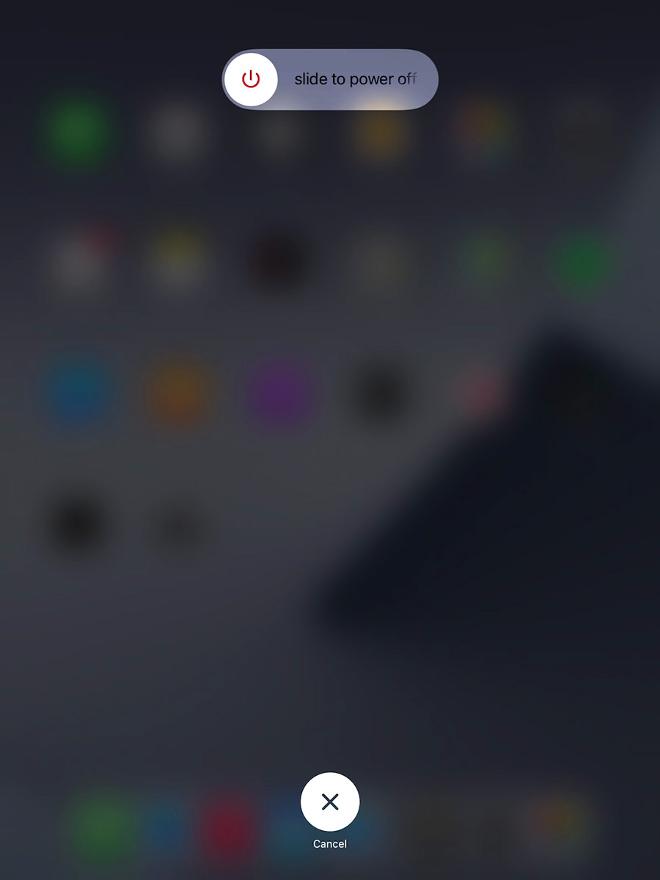
The Slide to Power Off slider appears on the screen, as shown in Figure 1.2. (Note that you can tap Cancel if you change your mind and decide to leave your iPad on, or just do nothing and iPadOS will cancel the screen for you automatically after about 30 seconds). To shut down the iPad, use a finger to drag Slide to Power Off all the way to the right.
Note
iPadOS is the software that controls just about everything that happens behind the scenes of your iPad. The “OS” part stands for operating system, so in that sense iPadOS performs essentially the same functions as Windows does on a PC and macOS does on a Macintosh computer.
1�2 Use the Slide to Power Off screen to shut down your iPad.
To turn your iPad back on, press and hold the Top button until the Apple logo appears on the screen.
Making a purchase
If your iPad supports Face ID (see Chapter 11 to learn more), you can also use the Top button to authorize purchases on the device:
Using Apple Pay in a store� Double-press the Top button to use your default Apple Pay credit card. To learn how to set up Apple Pay, see Chapter 3.
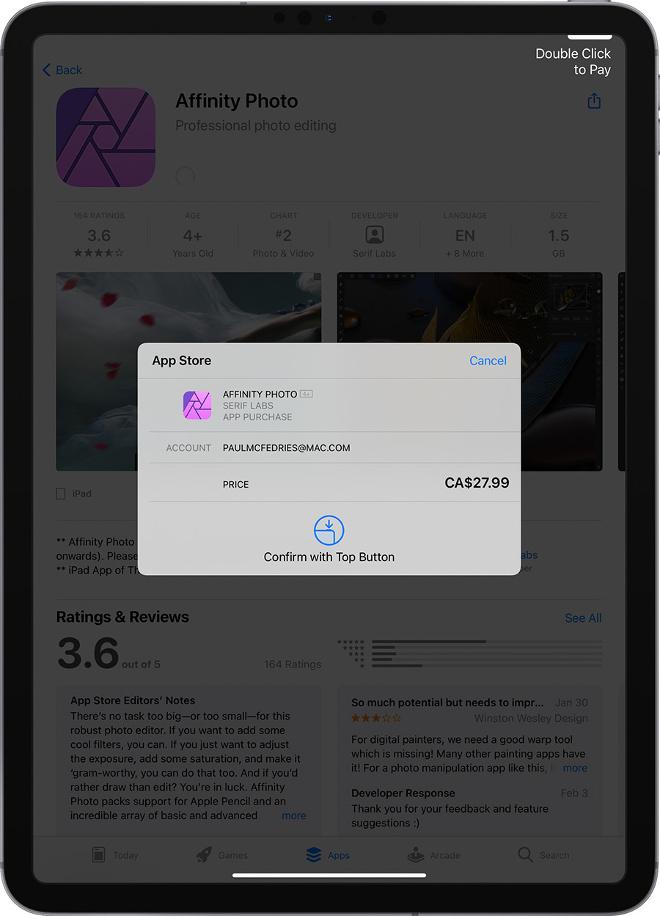
Confirming an app or in-app purchase� When you see the Double Click to Pay message on your iPad (see Figure 1.3), double-press the Top button to approve the purchase.
1�3 Double-press the Top button to authorize an app or in-app purchase.
Using the Home Button
If you have an iPad that comes with a Home button — that is, the circular button on the face of the tablet at the bottom — then you’ll use that button a lot because the Home button has quite a few functions. Here are the main ones:
When the iPad is in sleep mode, pressing the Home button wakes the device and displays the lock screen.
When the iPad is running, pressing the Home button returns the device to the Home screen.
Pressing and holding the Home button invokes Siri, which enables you to control many iPad features using voice commands. (If Siri is turned off, pressing and holding the Home button opens a window that asks if you want to turn on Siri.)
Double-pressing the Home button displays the multitasking screen, which enables you to quickly switch between your running apps.
If your tablet is in sleep mode, press the Home button to display the Lock screen. (This screen appears for up to about six seconds; if you don’t do anything, the tablet drops back into sleep mode.)
Working with the Touchscreen
If you’ve only ever controlled devices by using a keyboard and mouse, you’re in for a treat when you start using the iPad’s touchscreen. The “touch” part of the name means that you do everything on the iPad — zooming in and out, scrolling through screens and lists, dragging items here and there, and even typing messages — by using a finger (or, in some cases, two or more fingers) to perform particular movements, known as gestures, directly on the screen.
There’s a learning curve, but it’s not a steep one, and it won’t be long before you’re wishing that every digital device came with a touchscreen.
Note
The touchscreen is a marvel, but if you intend to do serious work on your iPad, then you might consider augmenting your tablet with some extra technology that can make your life easier. If you write a lot, then easily the most important accessory you can invest in is an external keyboard (such as Apple’s Magic Keyboard or Smart Keyboard). For drawing or writing notes, consider a digital pen (such as the Apple Pencil).
Understanding touchscreen gestures
Learning to use the iPad’s touchscreen means learning how to use gestures to make the iPad do your bidding. You might think there must be dozens of gestures to master, but happily there are a mere half dozen:
Tap� Use a finger (it doesn’t matter which one; even a thumb will work) to lightly and quickly press and release a specific part of the iPad screen. Tapping initiates just about any action on the iPad. For example, you tap to launch an app, select a check box, turn a switch on or off, enter text using the on-screen keyboard, run a command button, and much more.
Long press� Place a finger on a screen object (such as a Home screen icon) for a few seconds. In most cases, long pressing an object displays a list of commands that you can perform with the object.
Double-tap� Use a finger to tap a specific part of the screen twice, one right after the other. Most of the time, double-tapping something zooms in on it, and a second double-tap zooms back out.
Swipe� Place a finger on the screen and then move it along the screen (which, depending on what you’re doing, could be up, down, left, right, or diagonally). You use this gesture — which is also called a flick — to scroll through screens or lists, drag objects to different parts of the screen, and much more.
Spread� Place two fingers on the screen relatively close together and then move them apart. You use this gesture to zoom in on items such as photos and web pages.
Pinch� Place two fingers on the screen relatively far apart and then move them closer together. You use this gesture to zoom out of something (so it’s the opposite of the spread gesture).
Searching for stuff on your iPad
Each new generation of the iPad bumps up the space available for storage: from 4GB in the original tablet to 1TB (terabyte, or 1,024GB) in a top-of-the-line iPad Pro. That’s a lot of data, but the more photos, videos, music, email, messages, apps, and documents you stuff into your iPad, the harder it gets to find what you’re looking for. Fortunately, your iPad comes with a powerful search feature that makes it easy to find what you want. Here’s how it works:
1� Return to any Home screen�
2� Swipe down anywhere on the screen� Actually, don’t swipe down from the top of the screen because that gesture displays the Notification Center instead of the Search box.
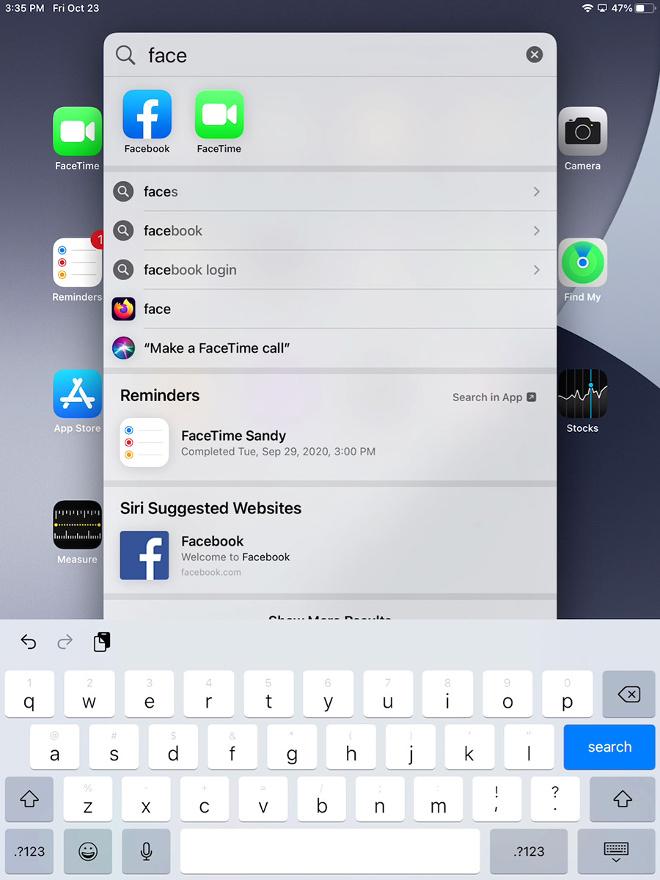
3� Tap inside the Search box and then enter your search text� Your iPad immediately begins displaying items that match your text as you type, as shown in Figure 1.4.
4� Tap Search to display a list of all the results� If you see what you’re looking for, tap it.
1�4 Flick down on the Home screen and then type your search text.
If you’re getting way too many search results, you can customize iPad searching to not include results from certain apps or their content. Open the Settings app and then tap Siri & Search. In the Siri & Search settings that appear, for each app you want to remove from your search results, tap the app, tap the Show App in Search switch to Off, and then tap the Show Content in Search switch to Off.
Switching from one app to another
You’re free to run multiple apps at the same time on your iPad. However, it’s a rare iPad user who runs apps one after the other without having to return to a previous app. For example, you might open Mail to check your messages, run a few other apps, then sometime later want to return to Mail to see if there’s anything new.
That’s no problem, but the technique you use to switch from one app to another depends on what kind of iPad you have:
For all iPad models, slide a finger up from the bottom edge of the screen; stop when you get to about the middle of the screen.
If your iPad has a Home button, double-press the Home button.
Either way, iPadOS displays the multitasking screen, which offers thumbnail versions of the apps you’ve used recently. Swipe sideways to bring the thumbnail of the app you want into view and then tap the app to switch to it.
Shutting down an app
The apps on your iPad don’t come with a “Close” command or button. That’s because when you switch to a different app, iPadOS automatically suspends the app you were working on, so you almost never have to worry about closing an app. However, there are two exceptions to this:
Shutting down one or more apps can make it easier to navigate the app thumbnails in the multitasking screen.
If an app is frozen and is preventing you from working in other apps, shutting down the stuck app usually fixes things.
To shut down an app that you’ve used recently, follow these steps:
1� Display the multitasking screen:
• Slide a finger up from the bottom edge of the screen; then pause about halfway up.
• Double-press the Home button (if your iPad has one).
2� Locate the thumbnail for the app you want to shut down�
3� Drag the app thumbnail up to the top of the screen� iPadOS shuts down the app.
Typing on the touchscreen keyboard
Your iPad comes with a touch keyboard — the portrait mode version of the keyboard is shown in Figure 1.5. To get the keyboard on-screen, tap inside any control that requires text input, such as a text box, a search box, or an address bar. You “type” on the keyboard by tapping each key, just like you would on a physical keyboard.
1�5 iPadOS displays the touchscreen keyboard automatically when you tap inside a text control.
Accessing special keys
Besides the usual letters, numbers, and symbols, the touchscreen keyboard offers some special techniques and keys that allow you to do some tricks:
Shift� These keys — there’s one to the left of the Z key and one to the right of the period (.) key — work similarly to Shift on a regular keyboard. You have two ways to use Shift on your iPad:
• Enter a single uppercase letter� Tap Shift to change the letter keys to their uppercase versions and then tap the letter. The keyboard automatically returns the letters to their lowercase versions.
• Enter multiple uppercase letters� Double-tap the Shift key. Again, the letters change to uppercase, but now you can tap as many letters as you need. When you’re ready to return to the lowercase letters, tap the Shift key once again.
Undo Redo
Chapter 1: How Do Get Started with My iPad?
Key flicks� If you take a close look at the keyboard in Figure 1.5, you see faint symbols above the regular letters: a 1 above Q, an @ above A, a % above Z, and so on. You enter one of these extra symbols using a gesture called a key flick: that is, flick down on a key and instead of the key’s regular letter, you get the symbol above it. For example, flick down on the A key to enter an @ symbol.
Note
.?
If you don’t see the extra symbols, it means the key flicks feature is turned off. Open the Settings app, tap General, tap Keyboard, and then tap the Key Flicks switch to On.
123� Switches to the numeric keyboard, which includes not only the numbers, but also many punctuation marks. The key changes to ABC, and you tap ABC to return to the original keyboard.
#+=� This key appears when you switch to the numeric keyboard, and tapping it switches to yet another keyboard that offers even more punctuation marks and symbols.
Backspace� This key appears to the right of the P key, and tapping it deletes a single character to the left of the insertion point. However, you can also tap and hold this key to delete multiple characters.
Caution
If you hold the Backspace key long enough, it starts deleting entire words instead of single characters. This really speeds up the deletion, but if you’re not careful, you can end up deleting much more than you intended to.
Return� Much like the Return (or Enter) key on a physical keyboard, your iPad’s Return key starts a new line when you’re entering multiline text, and it initiates an action in a dialog or form. However, unlike a physical keyboard, your iPad’s Return key often changes its name or its function, depending on what task you’re currently doing. For example, I showed earlier (see Figure 1.4) that the Return key changes to the Search key when you invoke your iPad’s Search screen.
Working with predictive typing
While you’re typing, iPadOS constantly makes predictions either about the word you’re currently typing or about the next word you might want to enter. iPadOS displays these suggestions in a bar just above the keyboard. This is known as predictive typing, and iPadOS uses it in a couple of different ways.
First, predictive typing kicks in when iPadOS detects what it believes to be a misspelled word. iPadOS selects the allegedly misspelled text and then offers predicted suggestions. You have three ways to deal with these suggestions:
To accept the default suggested word (the highlighted one in the middle), tap it, or tap the spacebar or any punctuation key.
To use a different suggested word, tap it.
To use your word as is (if, for example, you know it’s not a misspelling), tap the suggestion that appears in quotation marks.
Second, predictive typing kicks in as you’re typing when iPadOS tries to guess what your next word might be. For example, if you type text, followed by a space, iPadOS suggests (among others) “me” for your next word. If one of the suggestions is the word you want, tap the suggestion to enter it.
Editing with Your iPad
Can your iPad take the place of your desktop or notebook computer? It depends on what you use your computer for. If you’re just surfing the web, working with emails and texts, and posting to social media, then, sure, your iPad can do all that and more. If you use your computer for more serious pursuits, then it’s unlikely your iPad is up to the challenge of being your full-time computing device. However, your iPad is getting closer all the time, and as you see in the next few sections, the iPad’s ever-improving editing skills sure makes your iPad a useful tool, especially when you’re away from your computer.
Editing text
If you notice a typo or missing text, you might be tempted to hold down Backspace until you delete text back to the spot where you want to make your edits and then retype what you just deleted. Well, sure, you could do it that way, but a better and more efficient method is to move the insertion point back to the error and then delete the mistake or insert the text, leaving your correct typing intact.
Whether you want to fix a typo or insert new text, follow these steps to perform the edit:
1� Press and hold on the text you want to edit� iPadOS adds an insertion point cursor within the text.
2� Slide your finger along the text toward the point where the typo appears� As you slide your finger, the cursor moves along with it.
Chapter 1: How Do Get Started with My
3� When the cursor is immediately to the right of where you want to begin your edits, remove your finger�
4� Make your changes to the text�
5� (Optional) Tap at the end of the existing text to resume your text entry�
Selecting, copying, and pasting text
Your iPad has options for selecting, cutting, copying, and pasting text. However, which of these features is available depends on whether the text you’re working with is editable: Noneditable text� This type of text (for example, the text you see on a web page) can’t be edited, and therefore it can’t be cut. However, it can still be selected, copied, and pasted:
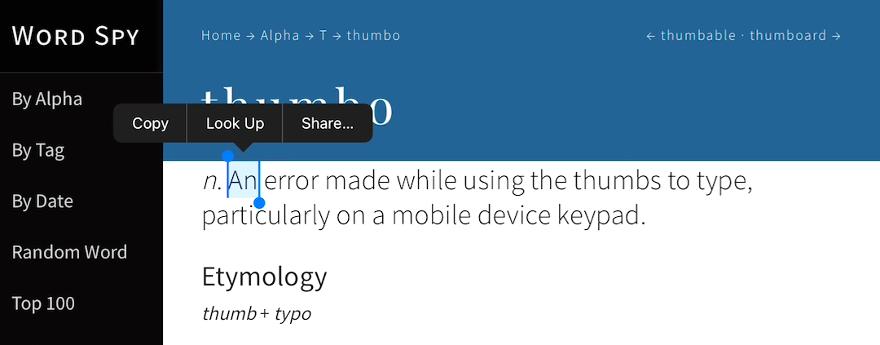
1� Tap and hold anywhere inside the text. After a second or two, your iPad selects the text and displays blue selection handles around it, as shown in Figure 1.6.
1�6 For noneditable text, select it and then tap Copy to copy it.
2� If necessary, tap and drag the selection handles to select more or less of the text�
3� Tap Copy�
4� If you want to paste the text into a different app, open that app�
5� Position the cursor where you want the text to appear�
6� Tap the cursor and then tap Paste� iPadOS inserts the copied text.
Editable text� This type of text (for example, the text in a note, an email message you’re writing, or a text box) can be edited; therefore, it can be cut or copied and then pasted:
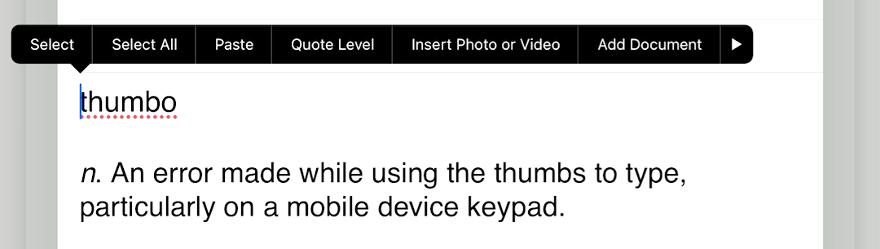
1� Tap and hold anywhere inside the text� After a short pause, your iPad displays a several buttons above the text, as shown in Figure 1.7.
1�7 Tap and hold editable text to see these options.
2� Tap one of the following options:
• Select� Tap to select some of the text. Selection handles appear around the word you tapped.
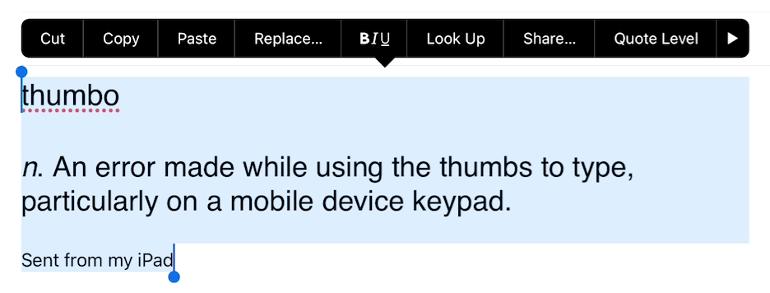
• Select All� Tap to select all the text. iPadOS displays the buttons shown in Figure 1.8; if you don’t need to modify the selection, skip to Step 4.
1�8 Select your text and then choose what you want to do with it.
1� Drag the selection handles to select the text you want to cut or copy� iPadOS displays a new set of buttons above the text, as well as above the keyboard (see Figure 1.8).
Chapter 1: How Do Get Started with My iPad?
2� Tap what you want to do with the text:
• Cut� Removes the text and stores it in memory.
• Copy� Stores a copy of the text in memory.
1� If you want to paste the cut or copied text into a different app, open that app�
2� Position the cursor where you want the text to appear�
3� Tap the cursor and then tap Paste (see Figure 1�8)� iPadOS inserts the cut or copied text.
Copying and pasting an image
To make a copy of an image, such as a photo or illustration in a web page, follow these steps:
1� Long press the image� iPadOS displays a menu of options.
2� Tap Copy� iPadOS copies the image to memory.
3� Open the app to which you want to paste the copy of the image�
4� Position the cursor where you want the image inserted�
5� Tap the cursor�
6� Tap Paste� iPadOS pastes the image.
Undoing an edit
The iPad’s many editing features give it an almost computer-like feel, but there’s another feature that takes it a step closer to computer-hood: Undo. That’s right, just like on your regular computer, iPadOS offers an Undo command that can reverse your most recent action, whether it’s typing something, deleting some text, or pasting an object you cut or copied. If that typing, deletion, or paste was a mistake, Undo is happy to reverse it for you.
To use Undo, you have two choices:
Above the keyboard, tap the Undo icon (the left-pointing arrow pointed out earlier in Figure 1.5). Note that the keyboard also offers a Redo icon that undoes the Undo.
Give your iPad a vigorous shake and you see a dialog similar to the one shown in Figure 1.9. Tap Undo Action (where Action is whatever type of edit you’re reversing, such as Paste or Typing) to reverse your most recent edit.
Note
1�9 Shake your iPad to display the Undo dialog.
If you shake your iPad and nothing happens, it means the Shake to Undo feature is turned off. Open the Settings app, tap Accessibility, tap Touch, and then tap the Shake to Undo switch to On.