Buy ebook Photoshop elements 2024 for dummies® 1st edition barbara obermeier cheap price
Visit to download the full and correct content document: https://ebookmass.com/product/photoshop-elements-2024-for-dummies-1st-edition-b arbara-obermeier/
More products digital (pdf, epub, mobi) instant download maybe you interests ...
Photoshop Elements 2023 For Dummies Barbara Obermeier
No part of this publication may be reproduced, stored in a retrieval system or transmitted in any form or by any means, electronic, mechanical, photocopying, recording, scanning or otherwise, except as permitted under Sections 107 or 108 of the 1976 United States Copyright Act, without the prior written permission of the Publisher. Requests to the Publisher for permission should be addressed to the Permissions Department, John Wiley & Sons, Inc., 111 River Street, Hoboken, NJ 07030, (201) 748-6011, fax (201) 748-6008, or online at http://www.wiley.com/go/permissions.
Trademarks: Wiley, For Dummies, the Dummies Man logo, Dummies.com, Making Everything Easier, and related trade dress are trademarks or registered trademarks of John Wiley & Sons, Inc. and may not be used without written permission. Photoshop is a registered trademark of Adobe, Inc. All other trademarks are the property of their respective owners. John Wiley & Sons, Inc. is not associated with any product or vendor mentioned in this book.
LIMIT OF LIABILITY/DISCLAIMER OF WARRANTY: WHILE THE PUBLISHER AND AUTHORS HAVE USED THEIR BEST EFFORTS IN PREPARING THIS WORK, THEY MAKE NO REPRESENTATIONS OR WARRANTIES WITH RESPECT TO THE ACCURACY OR COMPLETENESS OF THE CONTENTS OF THIS WORK AND SPECIFICALLY DISCLAIM ALL WARRANTIES, INCLUDING WITHOUT LIMITATION ANY IMPLIED WARRANTIES OF MERCHANTABILITY OR FITNESS FOR A PARTICULAR PURPOSE. NO WARRANTY MAY BE CREATED OR EXTENDED BY SALES REPRESENTATIVES, WRITTEN SALES MATERIALS OR PROMOTIONAL STATEMENTS FOR THIS WORK. THE FACT THAT AN ORGANIZATION, WEBSITE, OR PRODUCT IS REFERRED TO IN THIS WORK AS A CITATION AND/ OR POTENTIAL SOURCE OF FURTHER INFORMATION DOES NOT MEAN THAT THE PUBLISHER AND AUTHORS ENDORSE THE INFORMATION OR SERVICES THE ORGANIZATION, WEBSITE, OR PRODUCT MAY PROVIDE OR RECOMMENDATIONS IT MAY MAKE. THIS WORK IS SOLD WITH THE UNDERSTANDING THAT THE PUBLISHER IS NOT ENGAGED IN RENDERING PROFESSIONAL SERVICES. THE ADVICE AND STRATEGIES CONTAINED HEREIN MAY NOT BE SUITABLE FOR YOUR SITUATION. YOU SHOULD CONSULT WITH A SPECIALIST WHERE APPROPRIATE. FURTHER, READERS SHOULD BE AWARE THAT WEBSITES LISTED IN THIS WORK MAY HAVE CHANGED OR DISAPPEARED BETWEEN WHEN THIS WORK WAS WRITTEN AND WHEN IT IS READ. NEITHER THE PUBLISHER NOR AUTHORS SHALL BE LIABLE FOR ANY LOSS OF PROFIT OR ANY OTHER COMMERCIAL DAMAGES, INCLUDING BUT NOT LIMITED TO SPECIAL, INCIDENTAL, CONSEQUENTIAL, OR OTHER DAMAGES.
For general information on our other products and services, please contact our Customer Care Department within the U.S. at 877-762-2974, outside the U.S. at 317-572-3993, or fax 317-572-4002. For technical support, please visit https://hub.wiley.com/community/support/dummies
Wiley publishes in a variety of print and electronic formats and by print-on-demand. Some material included with standard print versions of this book may not be included in e-books or in print-on-demand. If this book refers to media such as a CD or DVD that is not included in the version you purchased, you may download this material at http://booksupport.wiley.com. For more information about Wiley products, visit www.wiley.com.
Library of Congress Control Number: 2023946548
ISBN 978-1-394-21959-9 (pbk); ISBN 978-1-394-21960-5 (ebk); ISBN 978-1-394-21961-2 (ebk)
PART 2: MANAGING MEDIA
Getting
Selecting Your Subject, Background, or Sky with One-Click Selecting
Fine-Tuning with the Refine Selection Brush
Working with the Cookie Cutter Tool
Eliminating with the Eraser
Using Layer via Copy and Layer via Cut
Pinpointing proper contrast with Levels
Removing color casts automatically
Adjusting with Hue/Saturation
Eliminating color with Remove Color
Switching
Removing
Blurring
Using the Text On Selection tool
Using the Text On Shape tool
Using the Text On Custom Path tool
Specifying Type Options
Introduction
This book is about Photoshop Elements 2024. This version of Photoshop Elements has some exciting new features, with perhaps the biggest change being in the user interface (UI). As usual, this version also offers a new Guided Edit, a few new tools and menu changes, and some fun and interesting ways to work with free Adobe Stock images.
About This Book
This book is an effort to provide the most comprehensive view of a wildly featurerich program as we can. Additionally, this book is written for a cross-platform audience. If you’re a Mac user, you’ll find all you need to work in Elements 2024 for the Mac, exactly the same as when we refer to using Elements on Windows.
Photoshop Elements 2024 gives you a new Guided Edit, Add Text, which you can find in the Basics category. To discover how to use Guided Edits, take a look at Chapters 3 and 19.
The big change in Elements 2024 is a completely new look in the user interface. You can change your interface to a light or dark theme. You make this change in the Photo Editor Preferences General panel by choosing the options from a dropdown menu. After choosing Light or Dark, you must quit and relaunch the Photo Editor. Take a look at Chapter 1 to see how you can switch back and forth between the themes.
Another new feature in Elements 2024 is the ability to set one-click operation for changing appearances in items such as Subject, Background, or Sky. For more information, see Chapter 19.
Adobe Stock photos are heavily integrated into Photoshop Elements 2024. You now have access to royalty-free photos from the massive Adobe Stock library. You can easily search for the right photo you want to add to your composition and open it up in the Photo Editor. For more information on using Adobe Stock Photos, see Chapter 3.
Throughout this book, especially in step lists, we point you to menus for keyboard commands. For accessing a menu command, you may see something like this:
Choose File ➪ Get Photos ➪ From Files and Folders
In this case, this command means to click the File menu to open its drop-down menu, click the menu command labeled Get Photos, and then choose the command From Files and Folders from the submenu that appears. It’s that simple.
We also refer to context menus, which jump up at your cursor position and show you a menu of options related to whatever you’re doing at the time. To open a context menu, just right-click the mouse, or Control-click on a Mac if you don’t have a two-button mouse.
When we mention that keys need to be pressed on your keyboard, the text looks like this:
Press Alt+Shift+Ctrl+S (Option+Shift+⌘ +S on the Mac)
In this case, you hold down the Alt key on Windows or the Option key on the Mac, and then the Shift key, and then the Control key on Windows or the ⌘ key on the Mac, and then press the S key. Then, release all the keys at the same time.
Icons Used in This Book
In the margins throughout this book, you see icons indicating that something is important.
This icon informs you that this item is a new feature in Photoshop Elements 2024.
Pay particular attention when you see the Warning icon. This icon indicates possible side effects or damage to your image that you might encounter when performing certain operations in Elements.
This icon is a heads-up for something you may want to commit to memory. Usually, it tells you about a shortcut for a repetitive task that can save you time.
A Tip tells you about an alternative method for a procedure, giving you a shortcut, a work-around, or some other type of helpful information.
Elements is a computer program, after all. No matter how hard we try to simplify our explanation of features, we can’t entirely avoid some technical information. If a topic is a little on the technical side, we use this icon to alert you that we’re moving into a complex subject. You won’t see many of these icons in the book because we try our best to give you the details in nontechnical terms.
Beyond the Book
In addition to what you’re reading right now, this product also comes with a free, online Cheat Sheet that includes a detailed look at the Elements photo-editing workspace, Tool Panel shortcuts, tricks for selecting objects, and more. To get this Cheat Sheet, simply go to www.dummies.com and type Photoshop Elements 2024 For Dummies Cheat Sheet in the Search box.
Where to Go from Here
Try to spend a little time reading through the chapters in Part 1. After you know how to edit and save photos, feel free to jump around and pay special attention to the cross-referenced chapters, in case you get stuck on a concept. After exploring the Elements Photo Editor, look over Part 2, where we talk about organizing and searching photos. When it comes to editing photos, look over Chapter 7 carefully. Everything begins with adjusting photos for brightness, contrast, and color. In Chapter 7, you learn that using the Camera Raw Editor is your first stop when editing a photo for any kind of output. If you’re ready to jump into more advanced tasks, check out Parts 3 and 4, where you find out how to make selections; layer images and effects together; add filters and type; and much, much more.
We hope you have much success and enjoyment in using Adobe Photoshop Elements 2024, and it’s our sincere wish that the pages ahead provide you with an informative and helpful view of the program.
1 Getting Started with Photoshop Elements 2024
Open the Photo Editor and make quick and easy edits to one of your photos in Quick mode.
Select the best file format when you save your image.
Tour the Photo Editor interface so that you know how to switch among images and navigate the many panels and options.
IN THIS CHAPTER
» Opening the Home screen
» Starting the Photo Editor
» Opening, editing, sharing, and saving a photo
» Using Undo History
» Finding help
» Saving your files
Chapter 1
Getting Started with Image Editing
Image editing is incredibly fun, especially with a tool like Photoshop Elements, which enables you to modify, combine, and even draw your own images to your imagination’s content. To get the most out of Elements, you need to understand some basic technical concepts, but like most people, you probably want to jump in, play around, and basically just get started right away.
You’re in luck: In Quick mode, Elements helps you make basic edits to your photos, like revealing your child’s face darkened by a baseball cap’s shadow or cropping out the gigantic trash can on the left edge of your otherwise perfect landscape shot. In this chapter, we help you jump-start your image-editing skills by guiding you through Quick mode and how to share photos online, retrace your steps, save your edits, and more.
Getting Familiar with the Home Screen
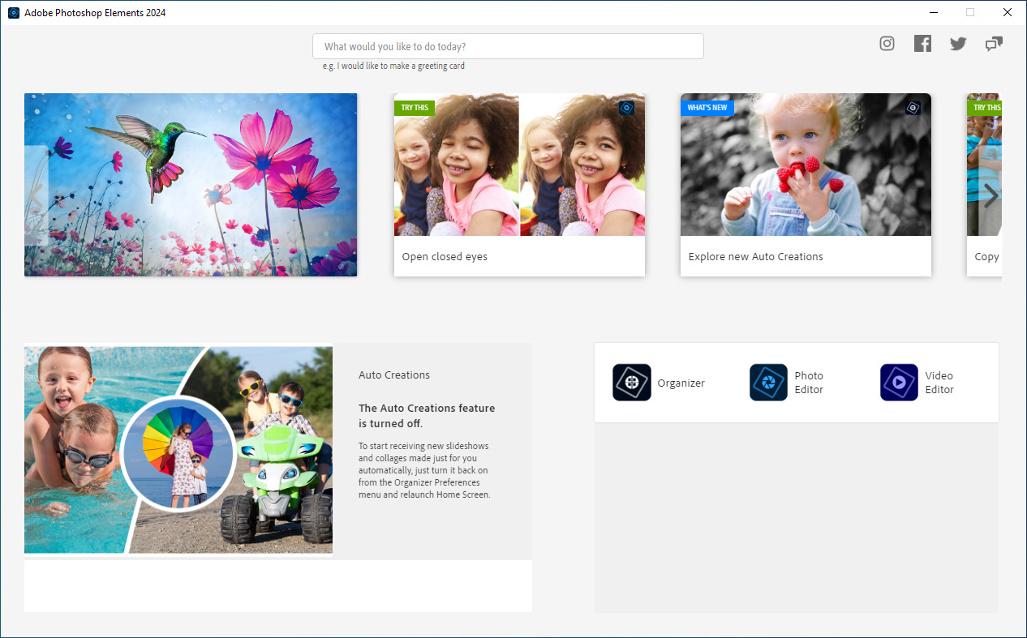
After installing Elements, launch the Elements application, and you arrive at the Home screen (or Hub, as Adobe calls it), shown in Figure 1-1.
From the Home screen, you have the following options:
» Search (What would you like to do today?): At the top of the window, you can search for a task and have help returned to you (see the text at the top of the window where it reads: “What would you like to do today?”).
» Instagram, Facebook, Twitter, and Help: At the top right, click one of the three respective buttons to open the Photoshop Elements pages on the social media sites of Instagram, Facebook, and Twitter. There are Photoshop Elements pages on these social media sites that enable you to see various posts made by Adobe related to using Photoshop Elements. Click the fourth icon to arrive at the Adobe Customer Care website where you can install Elements, use a trial version, manage your account, and log on to Adobe’s Help Center where you can get some help using Elements. Clicking Help takes you to a web link.
» Explore New Auto Creations: When you click the card, a URL link opens with instructions on accessing new Auto Creations.
» Application Launcher: Click one of the three icons to launch the Elements Photo Editor, the Organizer, or Video Editor (Adobe Premier Elements must be installed to launch this item).
» Recent Files: Click an image in the Recent Files list, and the file opens in the Photo Editor.
FIGURE 1-1: The Photoshop Elements Home screen.
Launching the Photo Editor
Photoshop Elements has two separate components. There is the Organizer, which is where you manage photos. It’s full of tools for tagging, rating, sorting, and finding your images. (Part 2 of this book helps you start using the Organizer.) The second component is the Photo Editor, which is where you correct photos for brightness and color, add effects, repair images, and so on. The Photo Editor is where you correct photos for brightness and color, add effects, repair images, and so on.
USER INTERFACE CHOICES
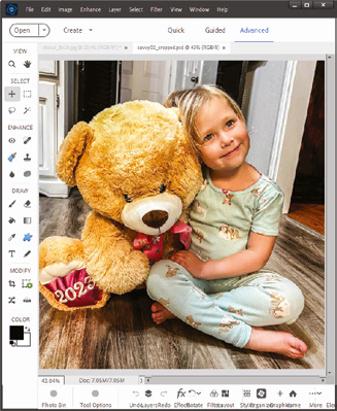
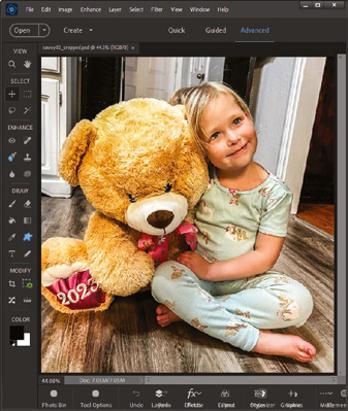
If you’re familiar with previous versions of Photoshop Elements, you will immediately notice the change in the user interface (UI). In Elements 2024, you can choose one of two different UI displays: Light Theme and the Dark Theme. The following figure shows the Light Theme display on the left and the Dark Theme display on the right.
Photo: Ted Padova (continued)
(continued)
To change between the two choices, you need to make a selection in the Photo Editor Preferences. Press Ctrl/⌘ +K to open the Preferences dialog box. Be certain that General is selected in the left pane. Open the drop-down menu under Choose Theme, as shown in the second figure in this sidebar, and choose Light Theme or Dark. After you change from one theme to another, you need to quit the Photo Editor and relaunch it for the change to take place.
In this chapter, you work in the Photo Editor to make basic edits to a photo. Here’s how to start Elements and open the Photo Editor:
1. Double-click the Photoshop Elements shortcut on your desktop or in your Applications folder (Mac) to launch the Home screen.
2. Click the Photo Editor button shown in the Home screen (refer to Figure 1-1).
The Photo Editor workspace loads and appears, as shown in Figure 1-2. By default, you see the Quick tab selected at the top of the Photo Editor workspace, which means you’re in Quick mode (or right where you want to be for the purposes of this chapter). Quick mode offers a limited number of tools for adjusting brightness, contrast, color, and sharpness.
FIGURE 1-2: The default Photo Editor workspace with the Quick tab selected.
On the right side of the workspace, you see the Adjustments panel docked in an area dubbed the Panel Bin. When you’re in any one of the three editing modes (Quick, Guided, Expert), you find different panels, always on the right side of the window. On the left side of the workspace, you see a Tools panel. Interacting with the items in the Panel Bin and using tools in the Tools panel provide you with an enormous number of options for editing, improving, and stylizing your pictures.
Making Basic Edits in Quick Mode
For beginning users, the Quick mode in the Photo Editor is both powerful and easy to use. Follow these steps to make some simple changes to an image:
1. Open the Photo Editor and make sure the Quick tab is selected at the top.
2. Choose File ➪ Open or click the Open button at the top left of the Photo Editor.
If Elements is your default editing application, you can also double-click your photo file in Windows Explorer or the Mac Finder, and the file opens in Elements.
3. In the Open dialog box that appears, navigate your hard drive to locate the file you want to open, select the file, and click Open.
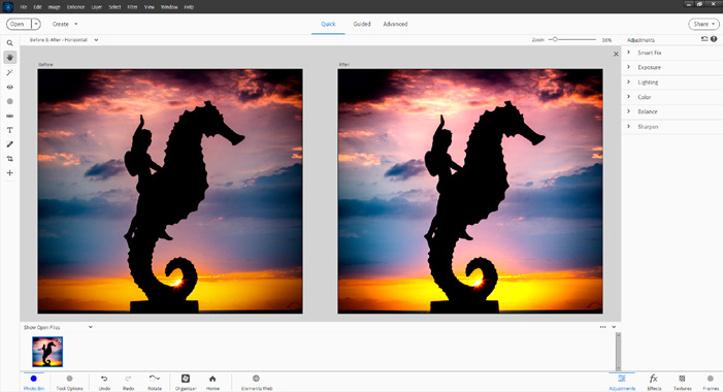
4. From the View drop-down list (in the upper left of the image window), choose Before & After – Horizontal, as shown in Figure 1-3.
5. Make edits to your photo.
Here’s an introduction to two simple edits you can make in Quick mode:
• Apply a Smart Fix: Click Smart Fix in the Panel Bin to see the options. To begin with, click Auto at the bottom of the Smart Fix panel. At the top left of the window, you find options for viewing by opening the drop-down menu. Choose After Only or choose Before & After (Horizontal or Vertical) to see before and after views.
Several items are listed in the Panel Bin below the Smart Fix option. Click an item to expand it, and move the sliders or click the thumbnail images to tweak the overall brightness, contrast, and color. In many cases, there isn’t a right or wrong adjustment. Play with the options to bring it close to your overall vision for the picture. For a more in-depth look at correcting photos in Quick mode, flip to Chapter 10.
Each of the Quick Fix options provides you with thumbnail previews showing you the result of a given edit. For a quick preview of an editing task, mouse over a Smart Fix thumbnail to see what the edit will look like when it is applied.
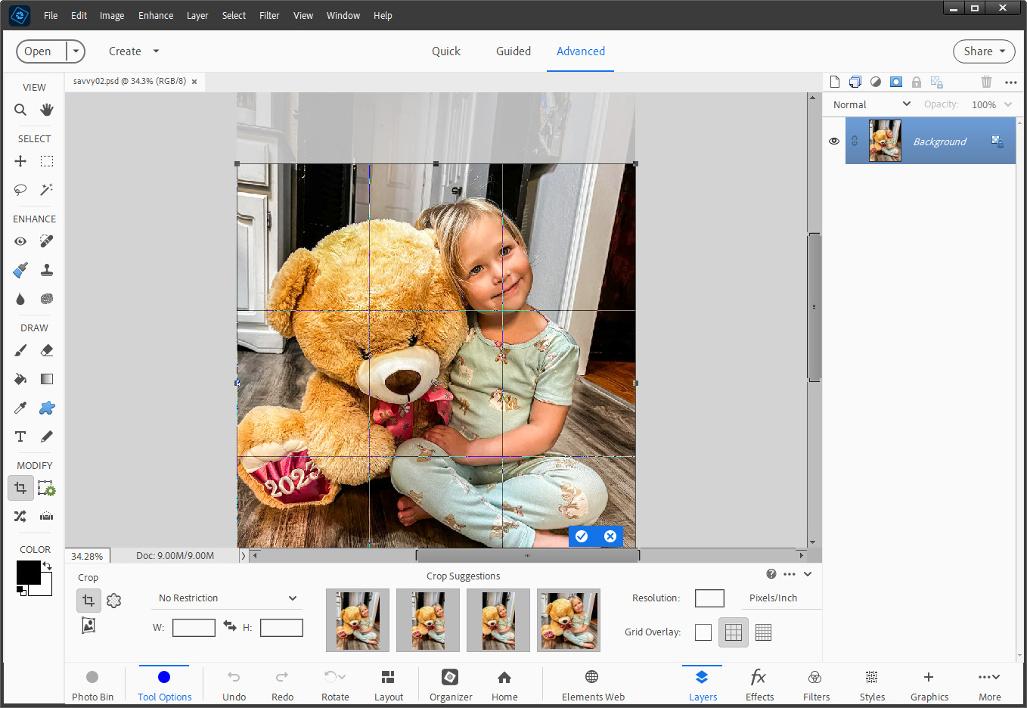
• Crop the photo: In the Tools panel on the left side of the window, click the Crop tool. You immediately see a rectangle on top of the photo. Choose No Restrictions from the drop-down menu to disable constraining proportions. Drag the sides to crop the image to your liking. When finished, click the green check mark, as shown in Figure 1-4, to accept your edit.
When making any one of a huge number of edits to your pictures, you often see icons on top of the image, similar to what’s shown in Figure 1-4. The blue check mark accepts the edit you’re making at the time the icons appear. The circle with a diagonal line is the Cancel button. Click this button when you don’t want to apply the recent edit.
At the bottom of the Editor window, you see some hints that Elements gives you for crop suggestions. Click one of the options to employ the respective crop.
6. Choose File ➪ Save As and, in the Save As dialog box that opens, provide a new name for the photo. Click Save.
Note: When you use Save As and give your image a new name, you don’t destroy your original image. You save a copy of the original with the new edits applied. For more on saving files, see the section “Saving Files with Purpose,” later in this chapter.
FIGURE 1-3: The before and after views in Quick mode.
FIGURE 1-4: The Crop tool sized on a photo.
Sharing a Photo
After you edit your photo, you can print the photo to share with family and friends or post the photo on a social network site.
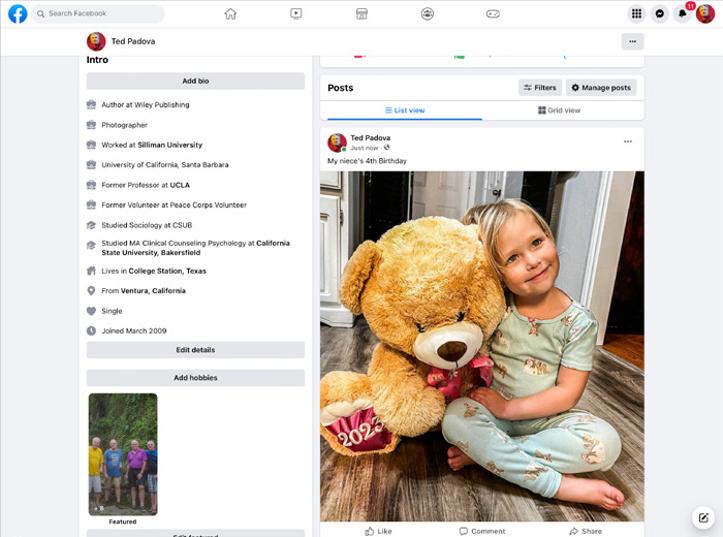
Photo: Ted Padova
Follow these steps to edit a photo and upload it to a Facebook account:
1. Prepare the photo you want to upload to Facebook.
Typically, digital cameras take photos sized very large — too large for an image that your friends and family will want to download quickly and view via Facebook on a computer screen or mobile device. To adjust your image so that it’s the right size and resolution for viewing online, follow these steps:
(a) Choose Image ➪ Resize ➪ Image Size.
(b) In the Image Size dialog box that appears, enter your desired width (or height).
Either Width or Height is fine because the image will maintain correct proportions by choosing either. A width of 720 pixels, 960 pixels, or 2,048 pixels works well.
Facebook recommends that supported sizes for regular photos are widths of 720 pixels, 960 pixels, and 2,048 pixels, with file sizes no more than 100KB — especially if you have text in the cover photo. When you save as JPEG, the files are compressed, and you’ll find the larger size to be within Facebook recommendations. However, you don’t have to be too concerned about staying within Facebook recommendations. You can upload images much larger than 100KB, but the uploads and screen refreshes will take longer. Just be certain to stay within 100 KB if you have text on a cover photo.
(c) Select the Resample Image check box if for some reason the box is not selected.
(d) Type either 72 or 144 in the Resolution box.
For screen viewing only, 72 ppi is fine. However, if you want your friends to print the image, 144 is a better choice. You can use either resolution. Be sure the file size is no larger than 100KB.
The image is sized to a workable size for Facebook. Click OK when finished editing in the Image Size dialog box.
2. Choose File ➪ Save As ➪ JPEG to save the file as a JPEG.
After clicking Save, the JPEG Options dialog box opens. Set the Quality to 10 (the maximum) and leave the rest of the settings at the default. Note the location where you save the file on your hard drive. (JPEG is one of many file formats that Elements supports.)
FIGURE 1-5: An edited photo uploaded to Facebook.
3. Open the Share menu in the Organizer and click Facebook.
Your photo is sent to Elements Web (Beta). In Elements Web, click the Share button to add your photo to your Elements Web account. Double-click the photo and click the Upload button. When the pop-up menu opens, click Facebook.
We have a chapter devoted entirely to working with Elements Web (Beta). Take a look at Chapter 18 to see precisely how you can upload photos to social media accounts.
When you complete the steps to upload your photo, it appears on your Facebook timeline, as shown in Figure 1-5.
Retracing Your Steps
In Elements, Undo is a favorite command for both beginners and experienced users alike. If you don’t like a change to your image, you simply choose Edit ➪ Undo or press the keyboard shortcut Ctrl+Z (⌘ +Z on the Mac).
Because the process of trial and error (and thus the ability to undo your work) is so important to making your image look just right, Elements also offers ways to undo that are much more sophisticated than simply reverting to the last view. In the following sections, we introduce you to these more sophisticated tools.
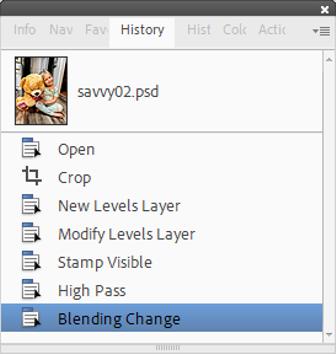
Using the History panel
On the History panel, you see a record of your changes in an editing session, and from this record, you can undo your changes from any step in an editing sequence. To work with the History panel, you must be in Expert mode. After you click Expert at the top of the Photo Editor, here’s how undoing with the History panel works:
1. Click Advanced in the Photo Editor and choose Window ➪ History.
The History panel displays a record of each step you made in the current editing session, as shown in Figure 1-6.
2. To undo one or more edits, click any item on the History panel.
Elements reverts your image to the selected edit. All edits that follow the selected item are grayed out.
3. If you want to bring back the edits, click any step that’s dimmed on the panel.
Elements reinstates your edits up to that level. If you make a new edit after going back a few steps, the dimmed steps disappear.