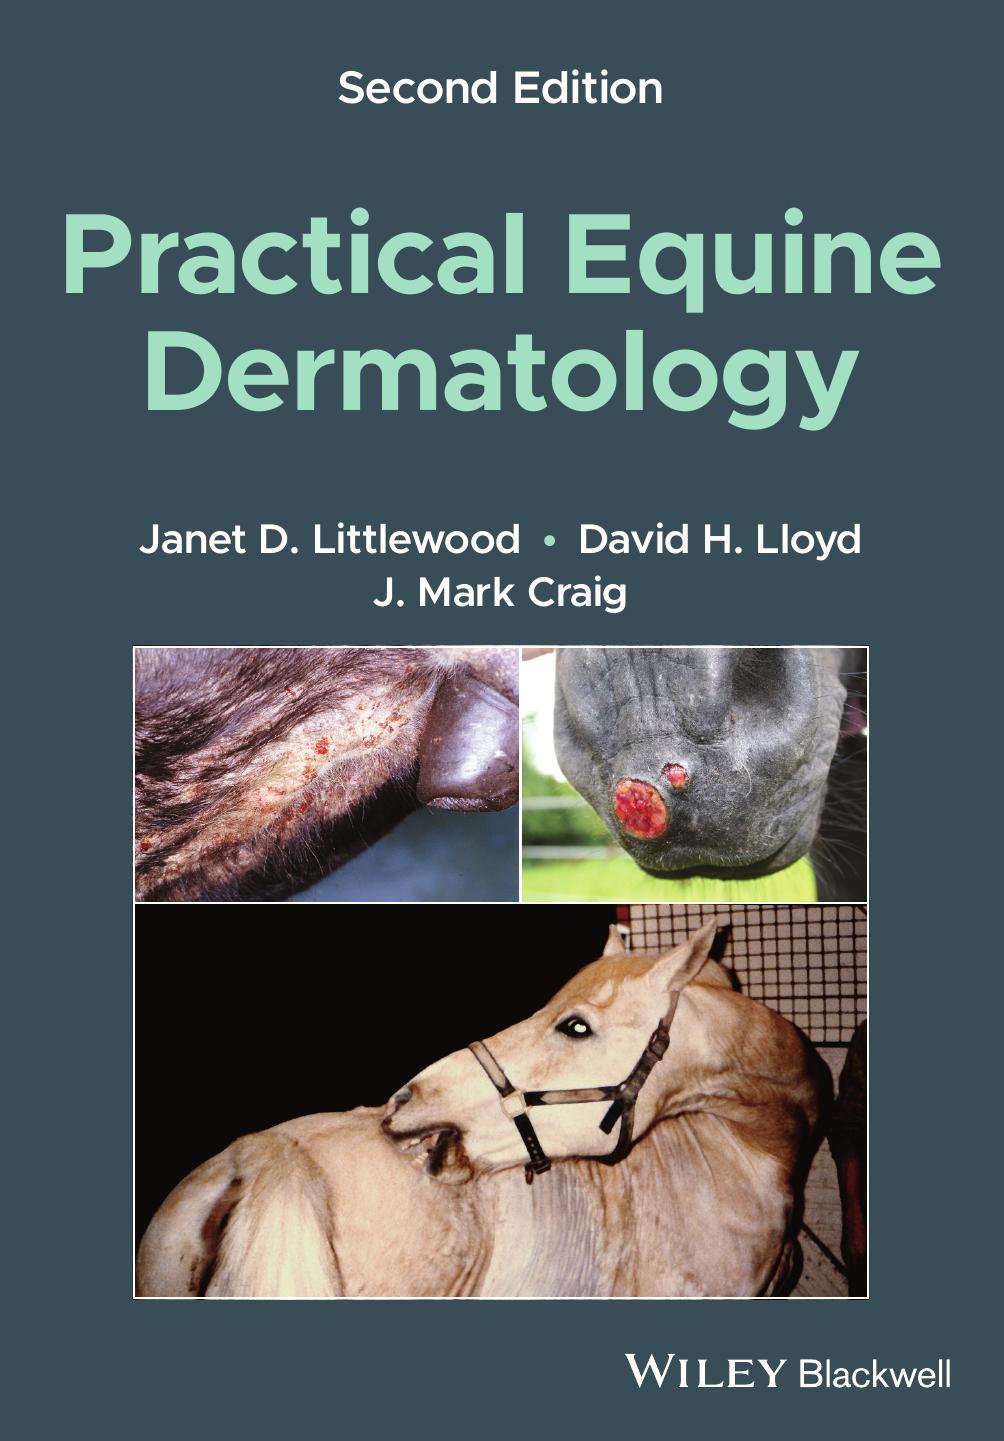
Practical Equine Dermatology
Second Edition
Janet D. Littlewood
Veterinary Dermatology Referrals
Cambridge, UK
David H. Lloyd
The Royal Veterinary College Hatfield, UK
J. Mark Craig
Re-Fur-All Referrals Newbury, UK
This second edition first published 2022 © 2022 John Wiley & Sons Ltd
Edition History
Blackwell Science Ltd. (1e, 2003)
All rights reserved. No part of this publication may be reproduced, stored in a retrieval system, or transmitted, in any form or by any means, electronic, mechanical, photocopying, recording or otherwise, except as permitted by law. Advice on how to obtain permission to reuse material from this title is available at http://www.wiley.com/go/permissions.
The right of Janet D. Littlewood, David H. Lloyd, and J. Mark Craig to be identified as the authors of this work has been asserted in accordance with law.
Registered Offices
John Wiley & Sons, Inc., 111 River Street, Hoboken, NJ 07030, USA
John Wiley & Sons Ltd, The Atrium, Southern Gate, Chichester, West Sussex, PO19 8SQ, UK
Editorial Office
9600 Garsington Road, Oxford, OX4 2DQ, UK
For details of our global editorial offices, customer services, and more information about Wiley products visit us at www.wiley.com.
Wiley also publishes its books in a variety of electronic formats and by print-ondemand. Some content that appears in standard print versions of this book may not be available in other formats.
Limit of Liability/Disclaimer of Warranty
The contents of this work are intended to facilitate diagnosis and treatment by veterinary practitioners of diseases of equine skin. In view of ongoing research, equipment modifications, changes in governmental regulations, and the constant flow of information relating to the use of medicines, equipment, and devices, the reader is urged to review and evaluate the information provided in the package insert or instructions for each medicine, equipment, or device for, among other things, any changes in the instructions or indication of usage and for added warnings and precautions. While the publisher and authors have used their best efforts in preparing this work, they make no representations or warranties with respect to the accuracy or completeness of the contents of this work and specifically disclaim all warranties, including without limitation any implied warranties of merchantability or fitness for a particular purpose. No warranty may be created or extended by sales representatives, written sales materials or promotional statements for this work. The fact that an organization, website, or product is referred to in this work as a citation and/or potential source of further information does not mean that the publisher and authors endorse the information or services the organization, website, or product may provide or recommendations it may make. This work is sold with the understanding that the publisher is not engaged in rendering professional services. The advice and strategies contained herein may not be suitable for your situation. You should consult with a specialist where appropriate. Further, readers should be aware that websites listed in this work may have changed or disappeared between when this work was written and when it is read. Neither the publisher nor authors shall be liable for any loss of profit or any other commercial damages, including but not limited to special, incidental, consequential, or other damages.
Library of Congress Cataloging-in-Publication Data Applied for [PB: ISBN: 9781119765486]
Cover Design: Wiley
Cover Image: © Janet D. Littlewood, Kieran O’Brien
Set in 10/13pt Palatino by Straive, Pondicherry, India
10 9 8 7 6 5 4 3 2 1
1
A structured approach is essential. Vital information is obtained during the history-taking process and sufficient time must be allowed for this. Accurate information on husbandry is particularly important. Clinical examination must include systemic and skin components. The process is illustrated with flow diagrams (Figures 1.1 and 1.2).
TAKING THE HISTORY
The approach (Figure 1.1) is similar to that adopted in other species. Points to include are:
• Breed, age, sex, origin:
– Consider these aspects carefully; in many conditions, these simple data will have an important impact on your diagnostic considerations.
• History of skin problems in related animals.
• Type of husbandry and use:
– Length of time owned.
– Use – competitions, general riding, breeding, racing.
– Feeding regimen.
– Periods spent in stable or at pasture.
– Type of stable and bedding – stable hygiene, contamination.
– Conditions in paddocks – mature meadow pasture or new grass ley, proximity of water, trees.
– Seasonal changes in management.
– Routine health care procedures – vaccination, deworming.
Practical Equine Dermatology, Second Edition. Janet D. Littlewood, David H. Lloyd and J. Mark Craig. © 2022 John Wiley & Sons Ltd. Published 2022 by John Wiley & Sons Ltd.
Basic details
Owner’s complaint
Chronological development
General health
Special senses
Types of husbandry
Evaluation of history
DIAGNOSIS INDICATED
Breed, age, sex, origin ...
Presenting signs
Progression: seasonality, treatment ...
Other systems: endocrine, gut, respiratory ...
Ocular, otic disease ...
Diet, prophylaxis, environment, exercise, contact, transmission ...
e.g. Classical rain scald; wet weather; previous history of infection. Focus examination on skin & examine smears from scabs
DIAGNOSIS UNCLEAR
Careful general & dermatological examinations. List differentials; construct a diagnostic plan. Conduct appropriate test/trials & derive a diagnosis
Figure 1.1 Taking the history. Components and the sequence of the history taking process. Analysis of the history should enable the clinician to construct an initial list of differential diagnoses that may help to focus the clinical examination along particular diagnostic lines. It may enable the diagnostic process to be abbreviated where a likely diagnosis is indicated, or it may point towards the need for a more detailed approach.
– Grooming procedures – sharing of grooming kit, tack, grooms.
– Equipment used in contact with horse – boots, bandages, saddle cloths, rugs.
– Contact with other horses, other species – opportunities for disease transmission.
– History of the current problem.
◦ First signs, progression, response to treatment and management changes.
◦ Seasonal effects.
◦ Previous episodes of disease.
◦ Results of any diagnostic tests.
◦ Current or recent therapy – includes questions about use of over-the-counter and non-veterinary products.
◦ Evidence of transmission – lesions in other horses, other species, humans.
– General health – concurrent or previous conditions.
Initial differentials
Physical examination
Review and modify differentials
Initial tests or trial therapy
Narrow differentials
Definitive tests or trial
DIAGNOSIS NOT CONFIRMED
From history: selective work-up?
All systems; dermatological; lesion sites
Determine tests; identify sampling sites
May need more than one stage
Select confirmatory tests or trial
e.g. Fungal culture, ectoparasiticide
DIAGNOSIS CONFIRMED
SPECIFIC THERAPEUTIC OR MANAGEMENT PROCEDURES
Figure 1.2 Clinical examination and diagnostic procedures. A thorough general and dermatological examination should be carried out unless the history points clearly towards a diagnosis. Examination coupled with history enable a list of differential diagnoses to be drawn up, formulation of a diagnostic plan and the selection of appropriate tests and sites to be sampled, and/or therapeutic trials.
CLINICAL EXAMINATION
A full clinical examination to assess both the general health status and the skin is necessary in most cases. Ensure that the animal is adequately restrained and that you have sufficient light. Work systematically down each body region, beginning at the head and ending at the tail and perineal region. Be sure to include all aspects of the feet including the coronary band and the frog. The skin may need to be cleaned to observe some lesions. In some instances, sedation may be necessary.
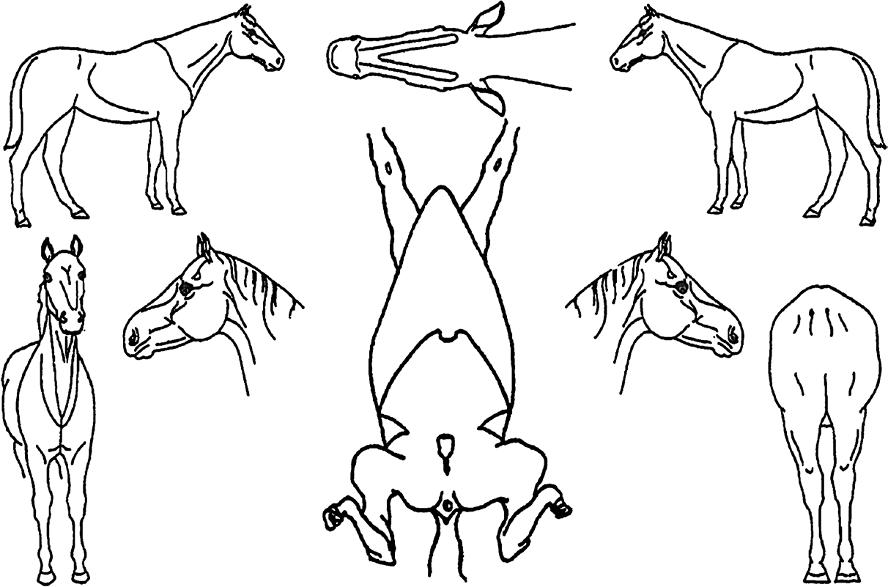
A record of the distribution and severity of primary and secondary lesions should be kept. Forms including a horse outline make this much easier (Figure 1.3).
It may be helpful to visit and examine the paddocks and exercise areas used.
EQUINE DERMATOLOGY EXAMINATION FORM
Horse:.................................................
Owner:................................................
Distribution of lesions
Date:..........................
Owner complaint:
Description of lesions:
Differential diagnoses:
Diagnostic tests:
Figure 1.3 Example of an examination form for recording distribution and nature of lesions in equine dermatology cases.
DIAGNOSTIC TESTS
The history and clinical examination should enable you to formulate a list of differential diagnoses. It may help to create a problem list, identifying the relevant historical features and predominant clinical signs, categorising them as contagious or non-contagious, and allocating the disease within the following groups, which form the basis for the problem-orientated approach in this book:
• Pruritic
• Crusting and scaling
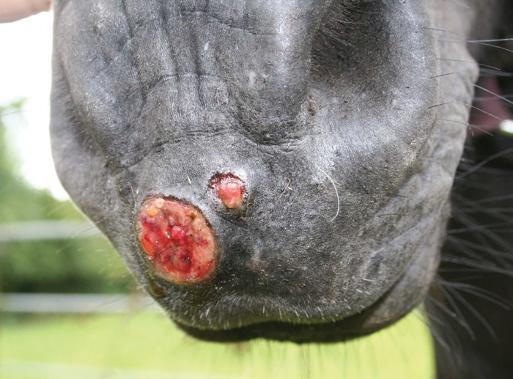
• Ulcerative and erosive
• Nodular or swollen
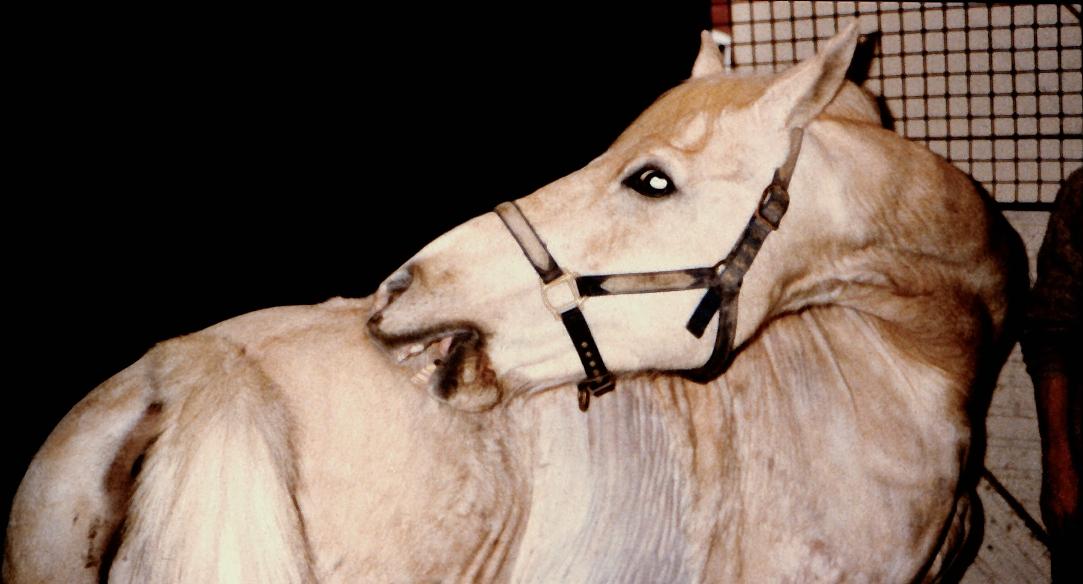
• Alopecia/hair coat changes
• Pigmentary disorders
A diagnostic plan can then be constructed, diagnostic procedures selected, and samples collected. Sample collection may include the following techniques.
Hair plucks
Useful to determine whether the lesions of alopecia or hypotrichosis are due to self-inflicted damage (fractured hair shafts, split ends) indicating that the condition is pruritic, or due to abnormal hair growth (absence of anagen roots, abnormal catagen roots), and to examine for dermatophytes and for parasite eggs.
• Choose fresh, unmedicated lesions.
• For suspected dermatophytosis, where cultures are required, first lightly clean the areas to be sampled with 70% alcohol (to reduce contaminant organisms).
• Tissue or epilation forceps can be used to grasp gently and pull out hairs from the periphery of the lesion.
• Samples for microscopy can be placed on adhesive tape wrapped around a microscope slide and mounted in a drop of liquid paraffin just prior to examination.
• Samples for fungal culture submission should be held in paper or sterile, non-airtight containers to prevent a humid environment that might support the growth of saprophytic organisms.
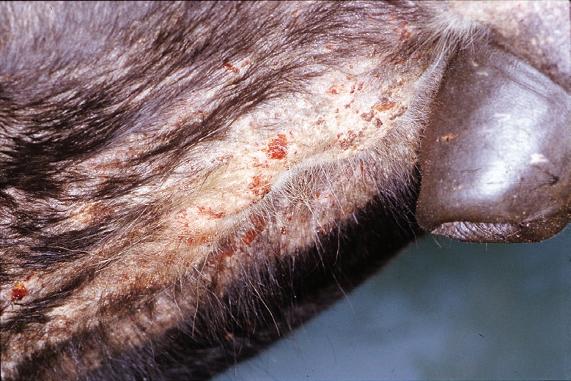
Crusts
Useful for cytological examination looking for bacterial organisms (particularly Dermatophilus) and for submission for fungal and bacterial culture.
• Choose a fresh, unmedicated lesion.
• Impression smears of the underside of freshly removed crusts, stained with a rapid Romanowsky-type stain (e.g. Diff-Quik, Hemacolor, Rapi-Diff, Speedy-Diff) or Gram’s stain, can provide a quick method of diagnosis for dermatophilosis.
• Crusts can be collected and held in paper envelopes or sterile containers for transport to the laboratory.
• Dried crusts can be emulsified in a drop of sterile saline on a slide, warmed to allow rehydration of material, prior to airdrying and fixing (heat fixation for Gram’s stain, methanol/ethanol fixation for rapid- differentiating Romanowsky- type stains) for cytological examination and identification of bacterial and fungal organisms.
Coat brushings
These allow for examination for surface-living external parasites and dermatophytes where the lesions are diffuse or extensive. Scrapings are better for deeper resident mite infestations.
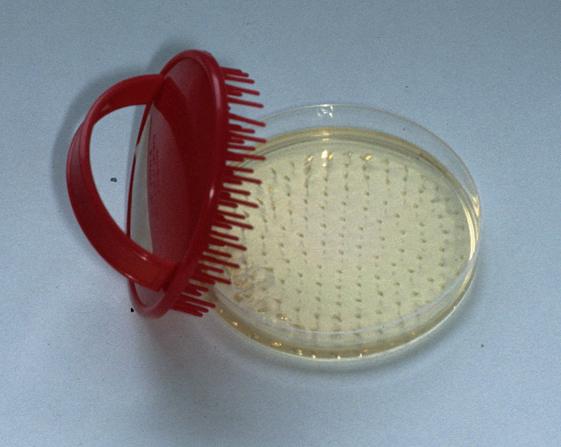
• Use a sterile scalp brush or new toothbrush to brush firmly over the lesions (Mackenzie brush technique; Figures 1.4a and b). Place the brush in a paper envelope to protect it prior to submission for dermatophyte culture.
• A scalp brush or wooden tongue depressor can be used to collect debris directly into a sterile Petri dish for external parasites. Material should be examined promptly as chorioptic mange mites are highly motile and easily lost from sample containers.
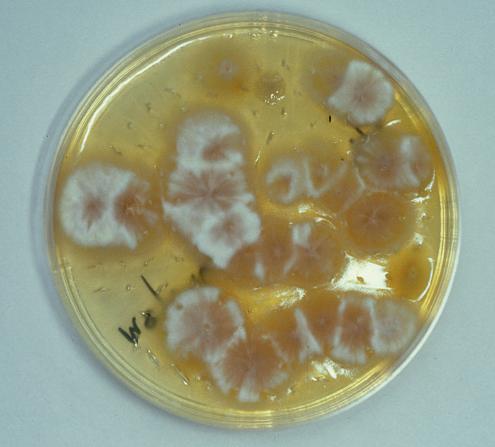
Figure 1.4 (a) A coarse-toothed brush (e.g. 90 mm Denman scalp brush) facilitates sampling of large areas of skin and coat. The collected hair can be removed and examined, or the teeth may be embedded in a fungal culture medium as illustrated. (b) Here Microsporum canis has been isolated using this technique.
(a)
(b)
Skin scrapings
Skin scrapings can be performed for detection of external parasitic diseases such as chorioptic mange, larval stages of harvest mites, demodicosis (rare), or for dermatophyte culture and cytology.
• If necessary, remove hair over areas to be sampled by careful clipping.
• Use a wooden tongue depressor for superficial sampling or a large, curved scalpel blade if deeper samples are required, with the sharp edge blunted to reduce the risk of injuring the horse or operator.
• Moisten the sample site or the collection tool with liquid paraffin (more useful for examination for mites), water or normal saline (for dermatophytes).
• Gently scrape crusts, scales, and associated hair so that the material accumulates on the blade or tongue depressor. Transfer onto a microscope slide with more liquid paraffin, or with potassium hydroxide solution if collected in aqueous medium, which allows clearing of debris and easier identification of pathogens.
• Deeper scrapings are needed for suspected demodicosis, deep enough to cause capillary ooze.
• Sample several sites, collect plenty of material, and divide amongst several slides to make thin suspensions, which are quicker and easier to examine efficiently.
Surface adhesive tape samples
An alternative method for obtaining surface material, including Oxyuris equi eggs, surface- living ectoparasites, hair fragments, exfoliated cellular material, and surface microorganisms for direct microscopical examination or after staining; it is less traumatic and avoids the risk of injury associated with skin scrapes. This technique is particularly useful for identification of chorioptic mange mites which are highly motile, but also allows detection of other pathogens including dermatophytes and yeasts.
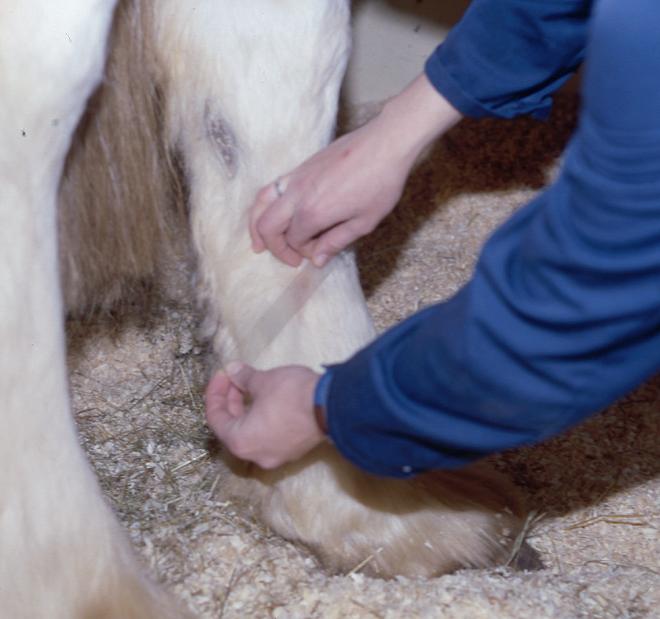
• A piece of clear adhesive tape (e.g. 3M Scotch Crystal, Sellotape Clear) is applied to the lesional area 3–4 times (Figure 1.5).
• Tape is applied (sticky side down) to a microscope slide over a drop of liquid paraffin for direct examination or over a drop of blue dye from a rapid Romanowsky-type stain kit.
• Excessive mounting medium or stain is removed by wiping with soft paper towel prior to microscopical examination.
Direct smears
From fresh, exudative, crusted, excoriated, or pustular lesions, a direct impression smear can be made for cytological examination and for microorganisms.
• Press a glass slide against the concave undersurface of a removed exudative crust, or against the surface of a freshly exposed lesion.
• For an intact pustule, gently break the overlying skin with a 25 g needle and press a clean glass slide to the ruptured lesion, or purulent material may be collected in the needle bevel and then transferred to the glass slide.
• For lesions at sites where it is difficult to apply a slide directly, material can be collected with a dry swab and then rolled onto a glass slide.
• Air-dry the slide and store in a slide box prior to heatfixing (for Gram staining) or immersion in methanol (for Romanowsky-type staining).
Wet crust preparations
For older, crusted lesions this technique enables microscopical examination of dried exudate.
• Representative sample of crust is placed on a glass slide with a few drops of normal saline.
• Material is finely chopped and macerated with a scalpel blade.
Figure 1.5 Surface adhesive tape sampling.
• Slide is left in a warm place for 20–30 min to allow rehydration of cellular material.
• Any large clumps of debris are gently removed prior to thorough drying and heat fixing of the remaining suspension prior to staining with a rapid Romanowsky-type stain kit.
Swabs
May be useful for bacteriology and fungal culture and collecting material for cytological examination.
• If the sample is to be processed within 30 min of collection, a dry, sterile swab can be used for bacterial and fungal culture, and smears. Otherwise, place swabs into suitable transport media (e.g. Amies charcoal medium, or Copan ESwabs).
• Samples collected from the skin surface may not be representative of the causative agent, so collect pus from an intact pustule or the underside of a freshly removed scab, or submit biopsy material for culture. Useful cultures may sometimes be obtained from a dry crust by rehydrating with sterile normal saline prior to processing.
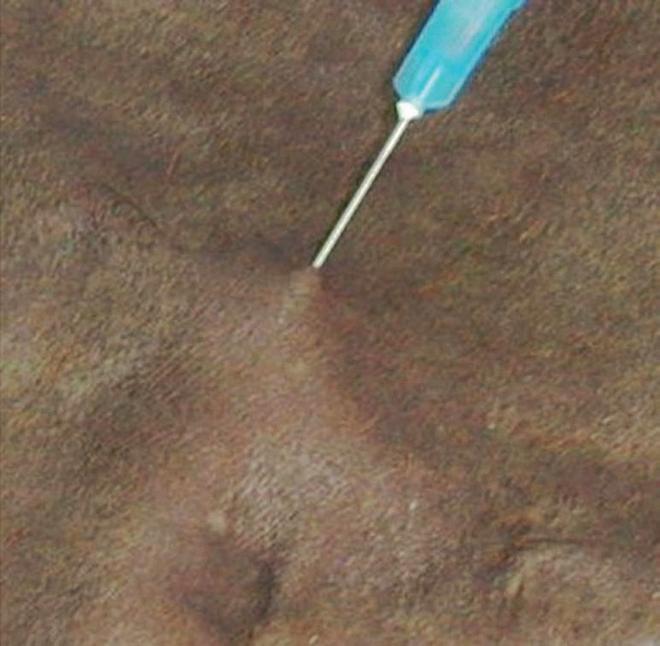
Needle aspirates
This technique is used for sampling nodules, masses, and enlarged superficial lymph nodes.
• A 20–22 g needle can be used, with or without a 5 ml syringe. The area to be aspirated should be carefully cleaned and disinfected.
• The needle is inserted into the nodule (Figure 1.6), mass, or lymph node and used to probe the tissue in several places, initially without aspirating, and subsequently whilst gently aspirating.
• The needle is withdrawn from the tissue and detached from the syringe, which is then filled with a small amount of air, reattached to the needle, and the sample expressed directly onto a clean slide for cytology or onto a swab for culture. A second slide is placed over the sample to spread the material. The slides are then separated gently to avoid damaging cells and air-dried prior to staining for microscopical examination.
Biopsy samples
Skin biopsies may be collected for a variety of reasons, including histopathology, fungal or bacterial culture, viral identification with electron microscopy, and immunohistochemistry. If in doubt, consult a pathologist as to the best way to process and transport the biopsy to the laboratory.
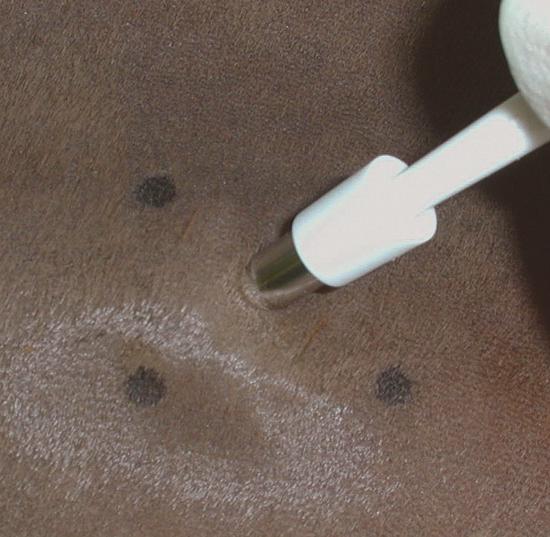
There are three common ways to take biopsy samples: by excision, biopsy punch (Figure 1.7), or shave biopsy (see Chapter 3). The most common is the punch biopsy technique described below.
• Sedation is generally necessary, followed by local analgesia. For the distal limbs, a nerve block (low or high four-point or abaxial sesamoid, depending on the area involved) may be performed or local infiltration below the sample site or as a ring block around the lesion. For facial and difficult to access sites, such as inguinal and perineal lesions, general anaesthesia may be required.
• Areas that include primary lesions should be selected where possible and sites not marred by medication. Take multiple samples unless only one lesion type and stage is present.
• Because sample orientation during histopathological processing cannot be predicted, ensure that the whole punch sample includes tissue of interest. If normal skin is to be included for comparison, this should be taken as a separate sample in an appropriately labelled pot. Where you wish to investigate the transition between lesional and healthy skin, take an elliptical excision sample with the long axis going from normal to abnormal.
• The selected sites may be marked using a coloured marker. Try to avoid areas overlying superficial ligaments, blood vessels, nerves, or superficial synovial structures associated with tendons and joints.
Figure 1.6 Fine needle aspiration of a nodular lesion. Source: Courtesy of Liz Steeves.
• It is important not to prepare the site surgically before sampling, since this removes surface material which may be of great diagnostic value.
• The selected site may be anaesthetised by injecting approximately 1–2 ml of mepivacaine or lignocaine hydrochloride without adrenaline into the subcutaneous tissue below the lesions.
• Wait for 2–3 min and test for sensation at the site with a needle.
• Use a 6–9 mm biopsy punch; generally, the larger the size of the punch is better. Ensure the cutting edge is sharp.
• Apply the punch with rotating movements in one direction to limit artefacts until through the skin, then withdraw. The sample may be attached to underlying structures by a thin attachment. Grasp the sample gently with small haemostat forceps or a hypodermic needle at the subcutaneous portion, lift from the surrounding tissue, and cut free using sharp scissors.
• Place the sample in the correct transport medium. For normal histopathology, 10% neutral buffered formalin is used. Keep samples for culture moist by wrapping in a sterile gauze swab soaked with sterile normal saline and consult the microbiology laboratory about the appropriate medium for submission.
• Clean around biopsy sites with diluted 2% chlorhexidine or povidone-iodine solution and suture using a single interrupted suture of 2–0 monofilament nylon. For sites where it might be difficult to remove sutures at a later date, an absorbable suture may be more appropriate.
Figure 1.7 The punch biopsy procedure enables rapid sampling and is suitable for most equine lesions. Source: Courtesy of Harriet Brooks.
• Topical antibiotic powder or spray may be used; bandages or adhesive dressings may be needed at some sites.
• Submit samples in appropriately labelled pots together with a fully completed submission form, including pertinent clinical history, in order to get the best value from your histopathologist and microbiologist.
Other samples
Collection and examination and/or analysis of forage and bedding may also be valuable.
Diagnostic investigations specific to individual diseases will be covered in the relevant chapters.
REFERENCES AND FURTHER READING
Cowell, R. and Tyler, R. (2001) Diagnostic Cytology and Hematology of the Horse (2nd edition). St Louis, Mosby Inc.
Sloet, M.M. and Grinwis, G.C.M. (2018) Clinical pathology in equine dermatology. Equine Veterinary Education, 30: 377–385.