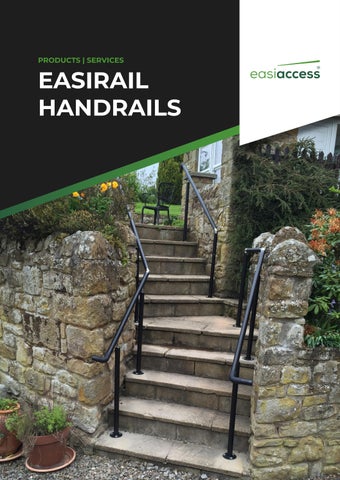

EASIRAIL HANDRAILS
EASIRAIL HANDRAIL SYSTEMS
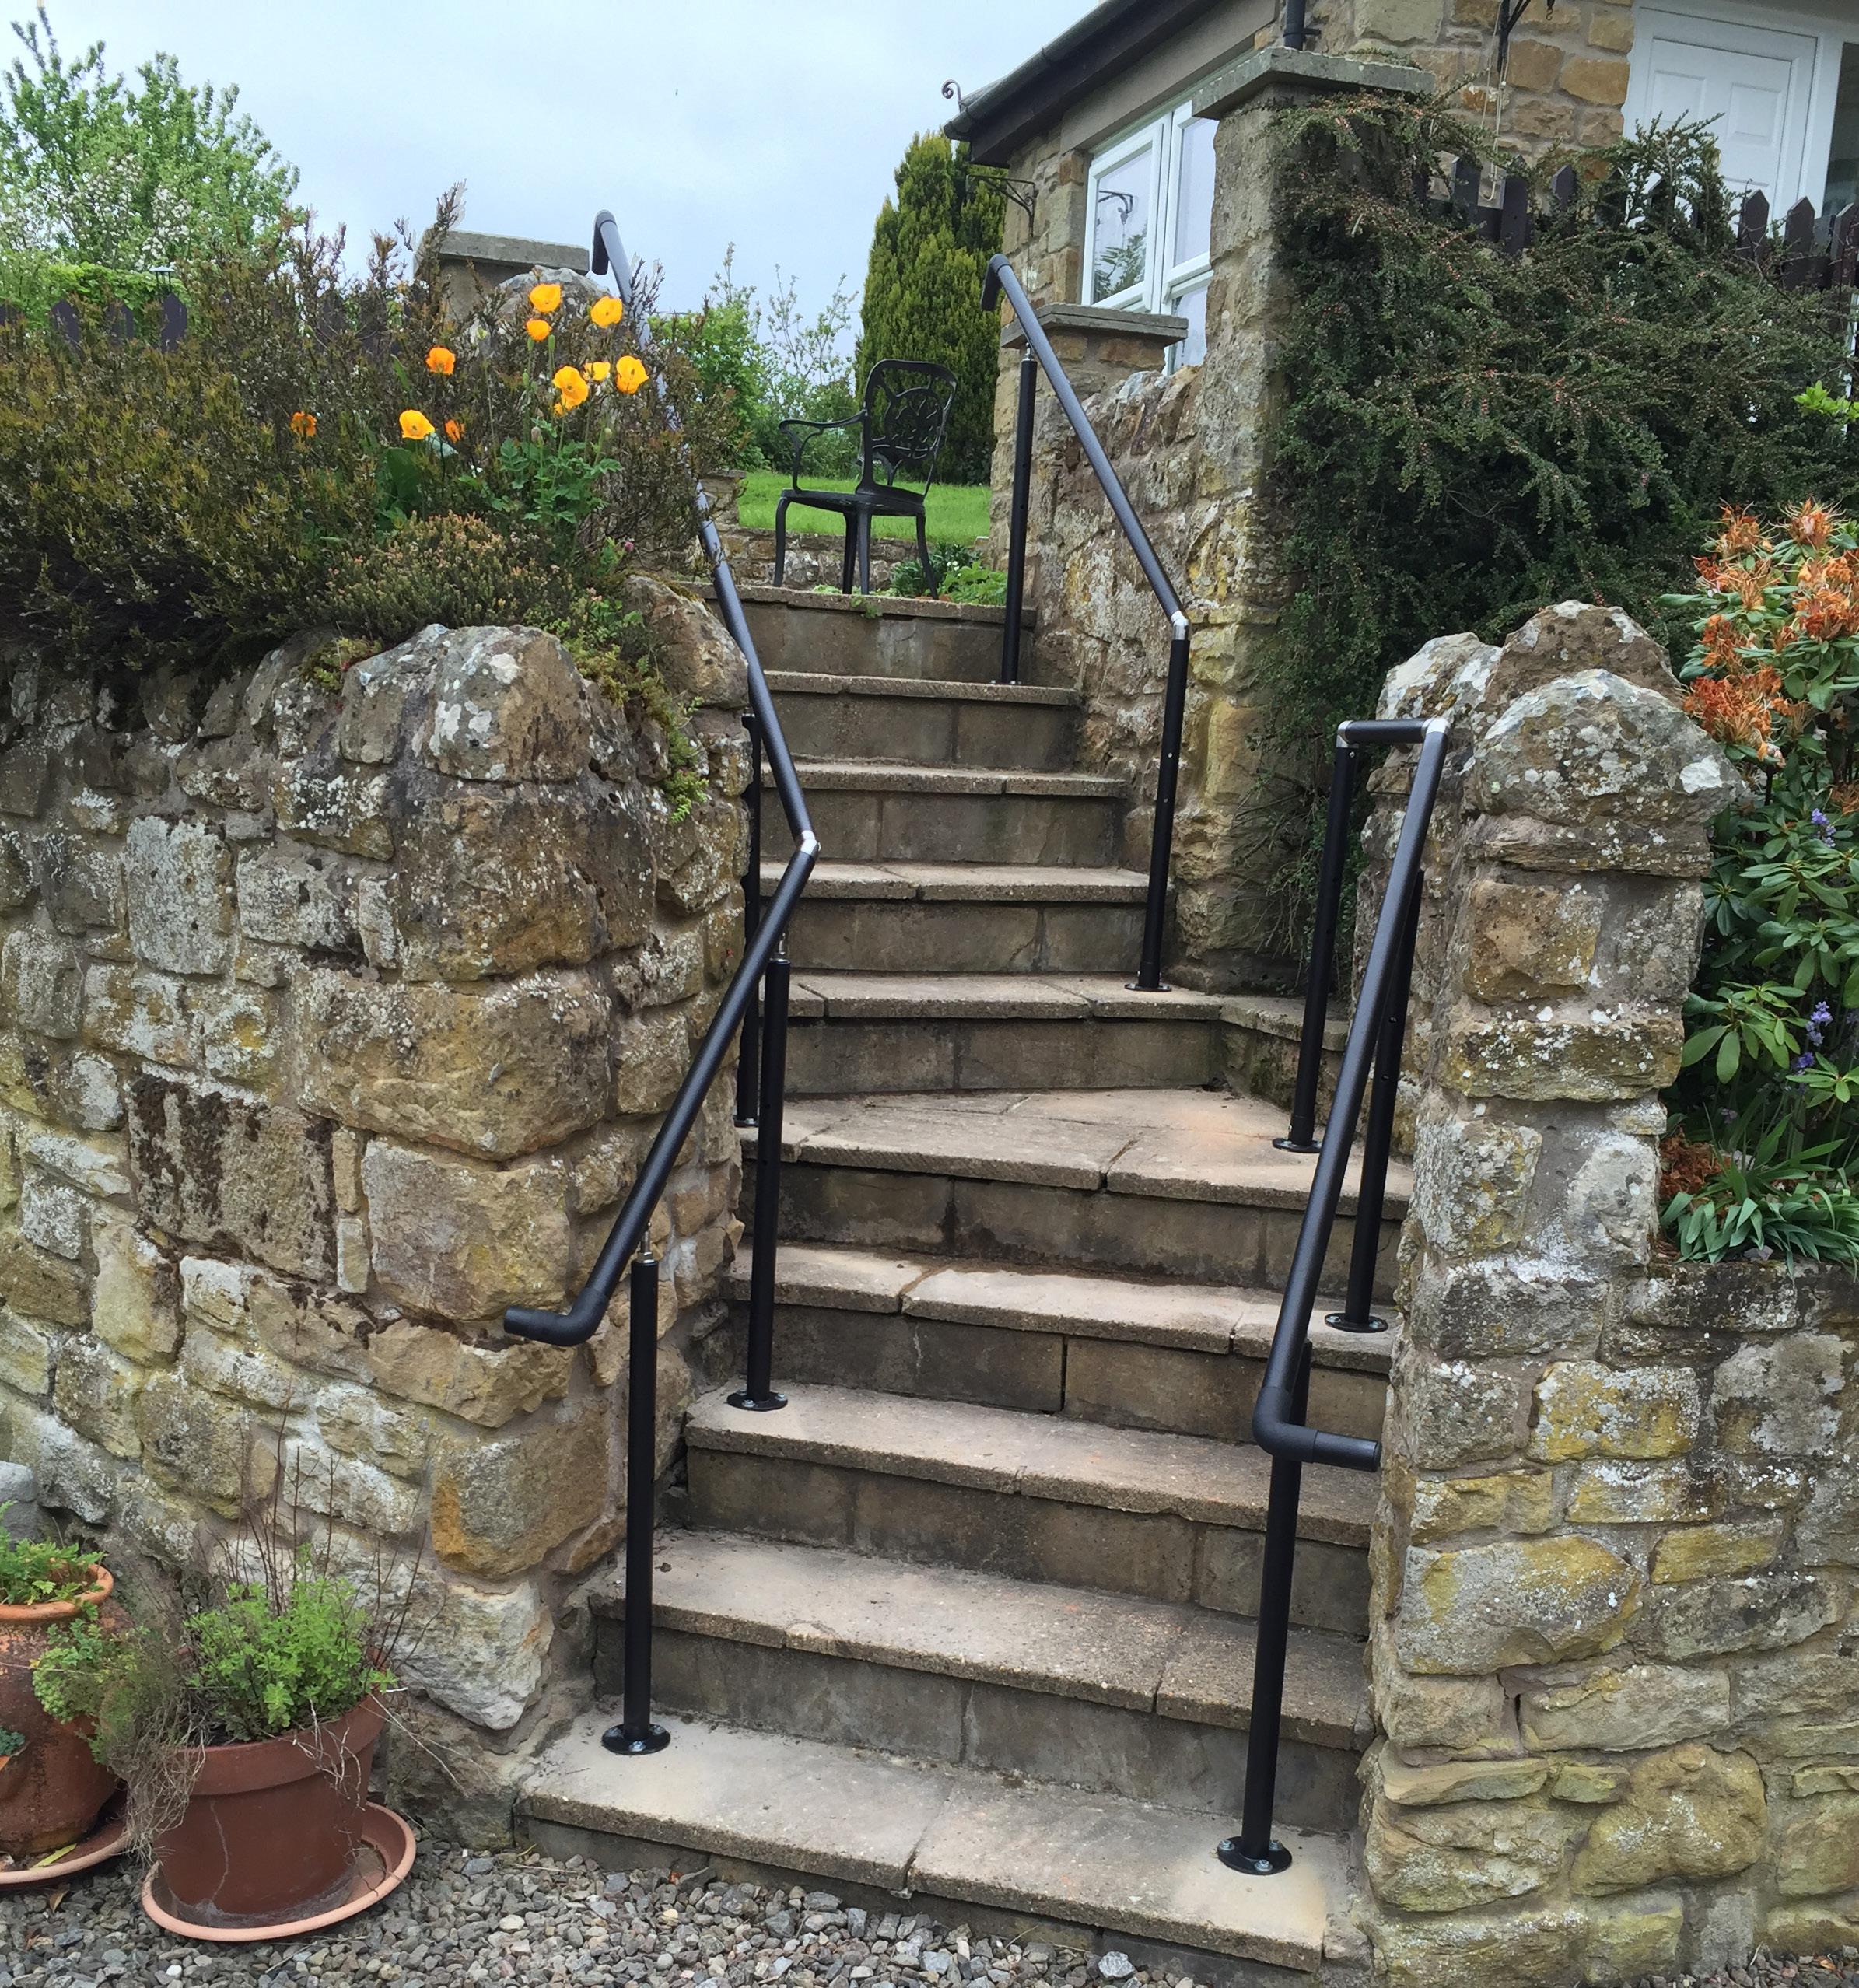
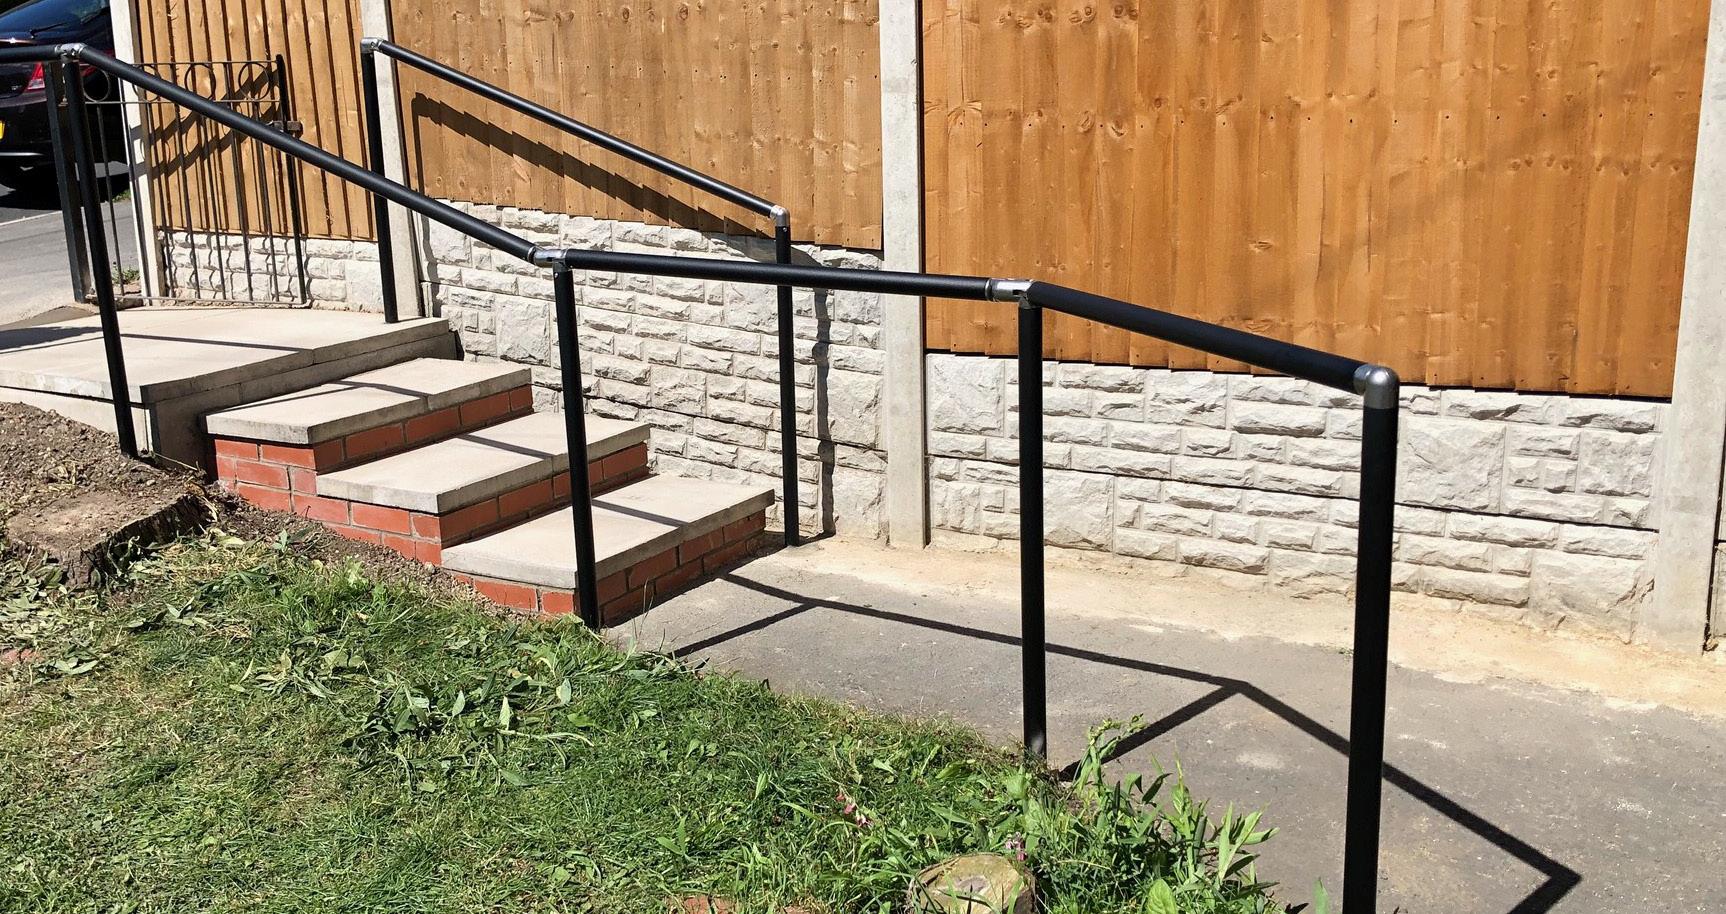
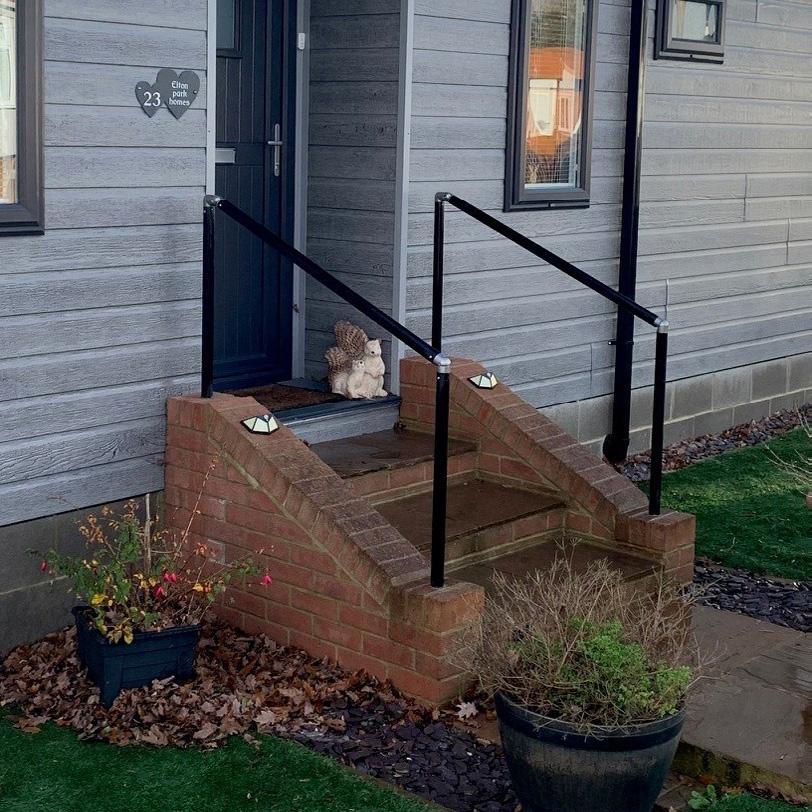
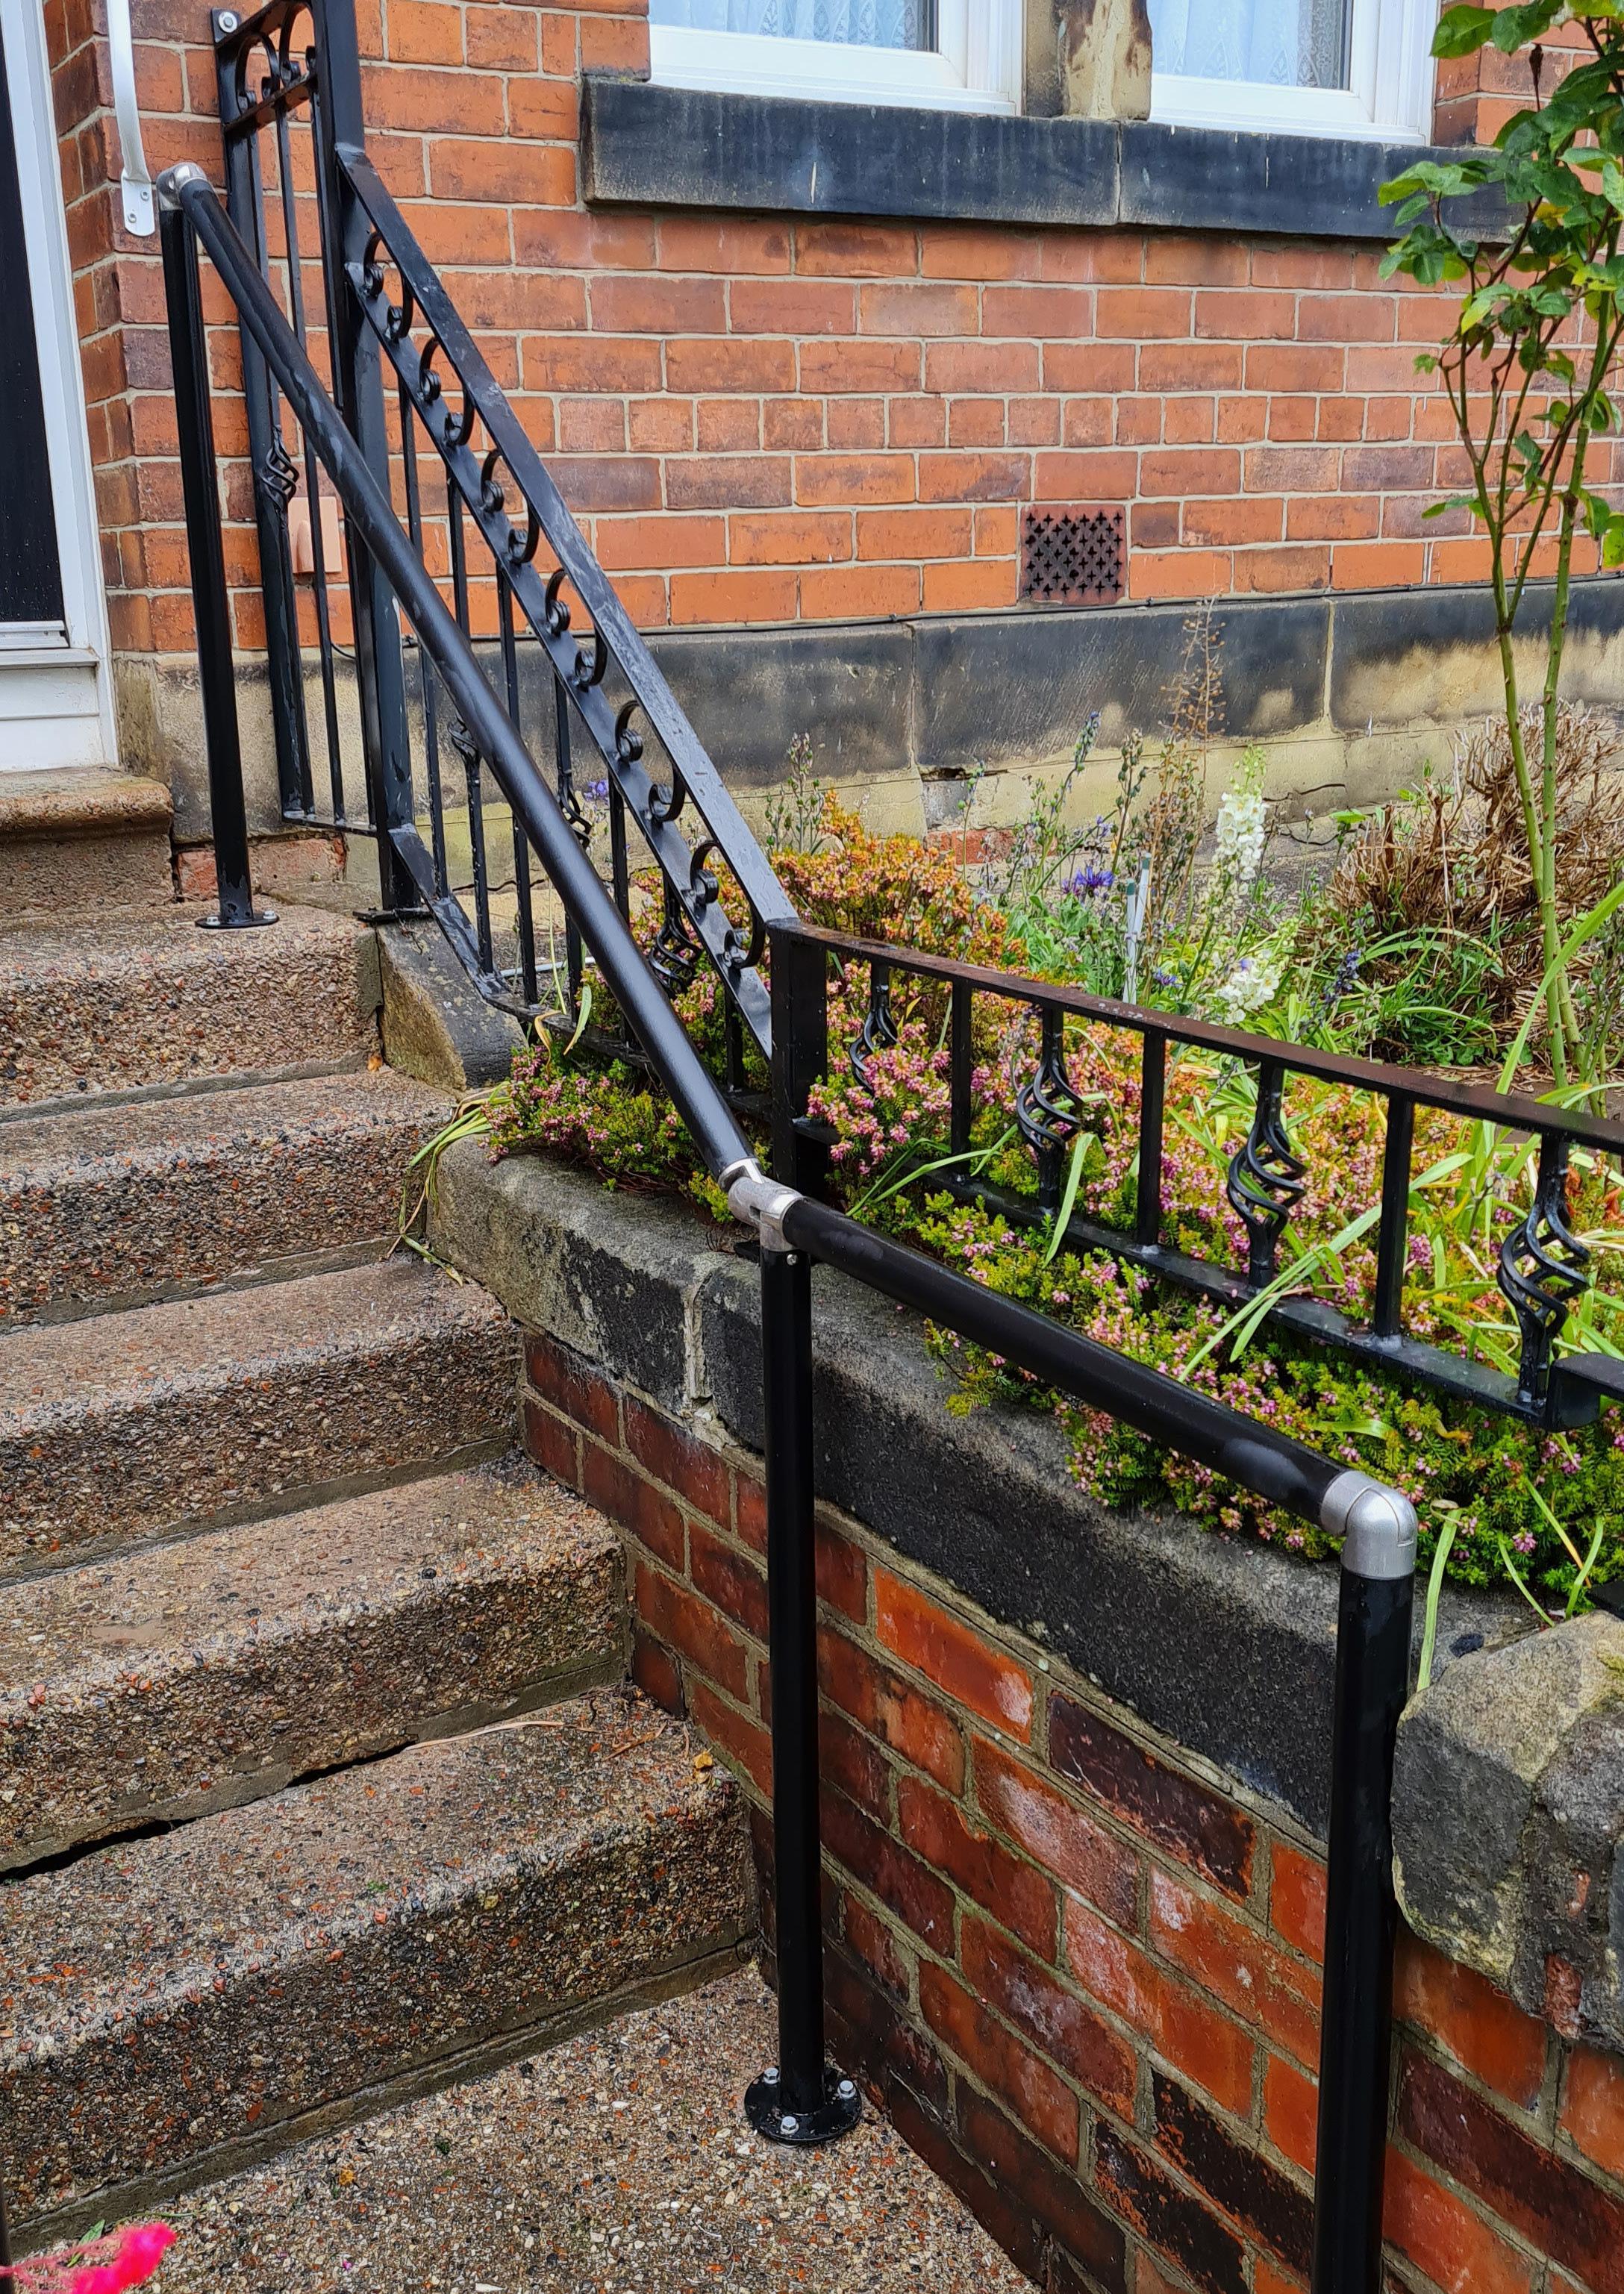
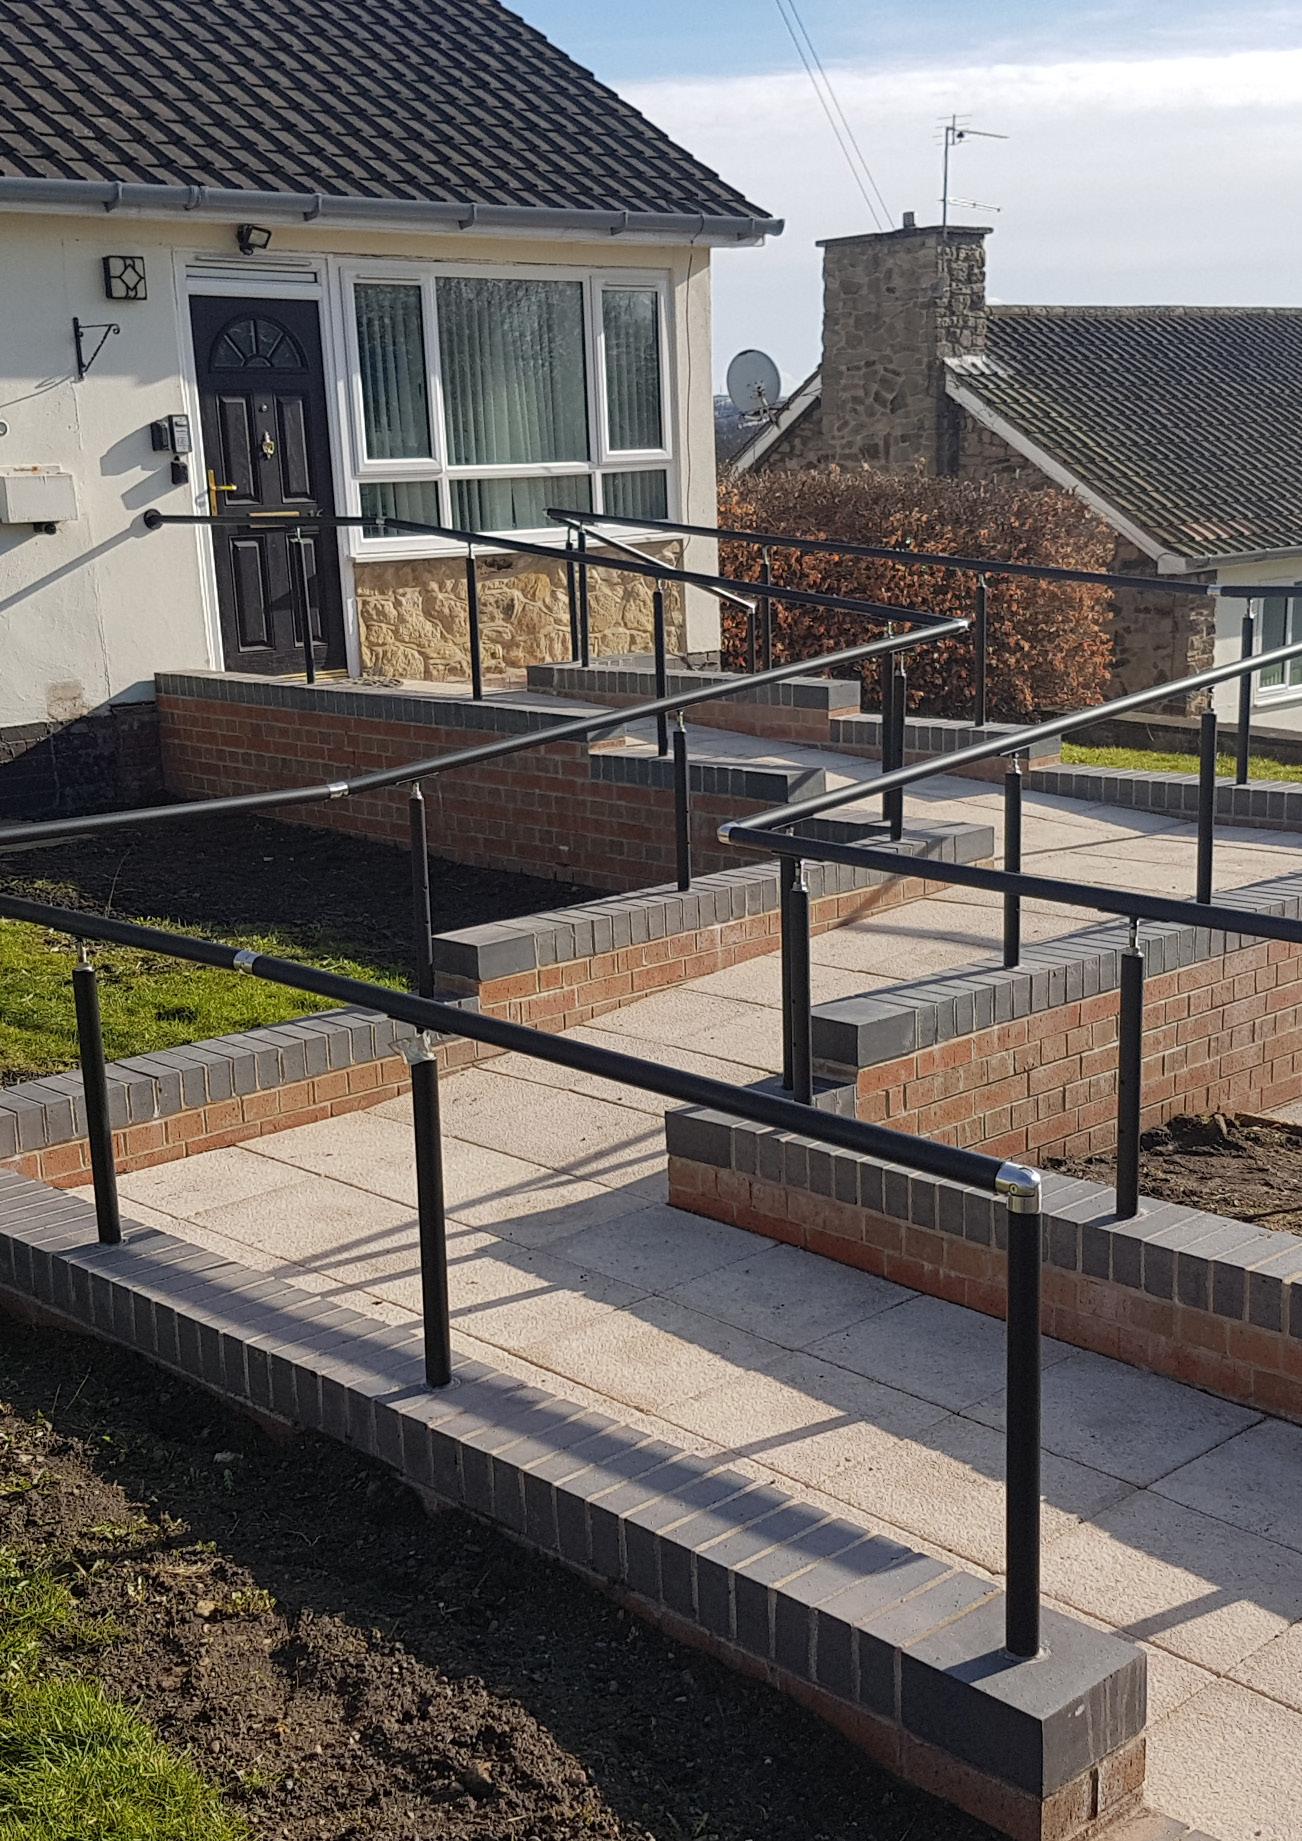
Whether positioned alongside existing steps or running down a walkway, Easirail avoids the traditional “industrial look” that other handrail systems provide, with oversized joints and a bare unpainted finish.
Using high quality materials and finishes, Easirail is designed to be fast to install, offering flexibility for a wide array of configurations.
All components are fully galvanised and ready coated in a warm touch finish for effective corrosion resistance.
The handrail is either selected from our pre-cut lengths or simply cut to size and attached using ultra strong rivets, providing a quick and secure method of installation.
FEATURES AND BENEFITS
DURABLE ‘NOT COLD TO THE TOUCH’ COATING
FULLY GALVANISED
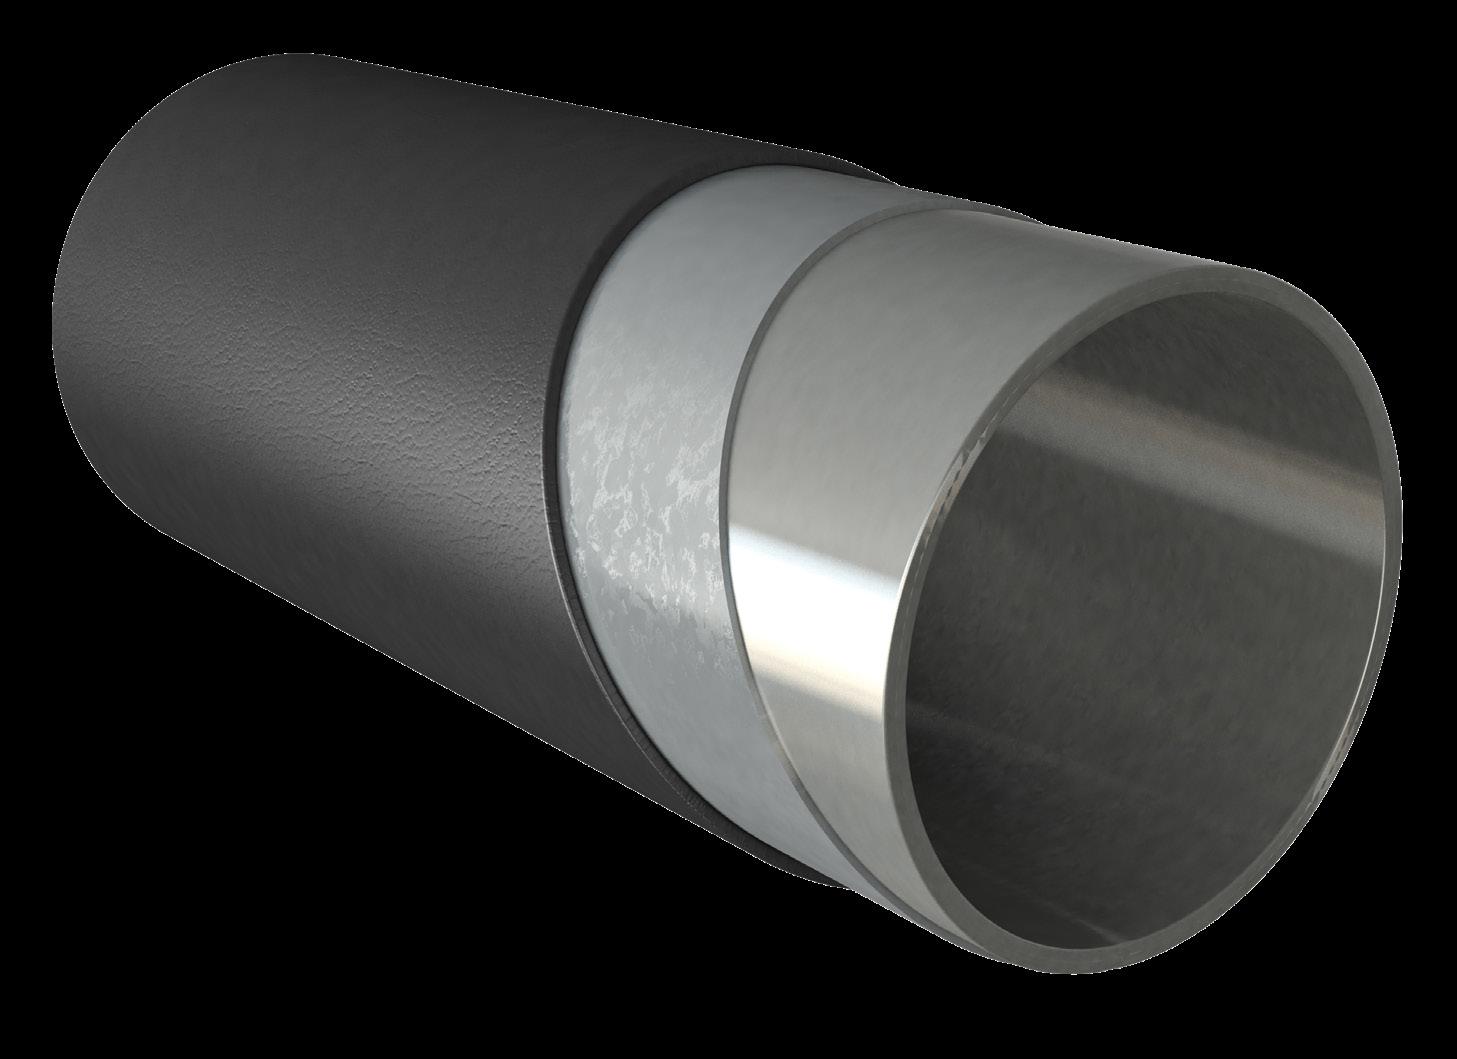
HIGH GRADE STEEL TUBE
WARM TOUCH COATING
ADJUSTABLE BRACKETS FOR FLEXIBILITY
EASILY INCORPORATES A 600MM MIDRAIL
SURFACE MOUNTED OR FIXED USING CONCRETE
AVAILABLE IN A VARIETY OF LENGTHS
STRONG CONSTRUCTION AND TESTED COMPONENTS
PROVIDES A CONTINUOUS 42MM DIAMETER HANDRAIL
QUICK AND EASY TO INSTALL WITH NO PAINTING REQUIRED
FULLY GALVANISED PROVIDING AN EFFECTIVE CORROSION RESISTANT FINISH SATISFIES BUILDING REGULATIONS AND GUIDANCE
EASIRAIL
EASIACCESS SERVICE
SUPPLY ONLY OR DESIGN AND INSTALLATION
Available as supply only or on a supply and install basis, Easiaccess guarantee excellent service provision from start to completion of your project.
Our sales and service team are able to assist you from initial enquiry and supply, through to design, installation and after sales support.
Our knowledgeable team can advise the correct specification of equipment for the type of configuration you need.
Should you require an installation service, Easiaccess have a wealth of experience in access solutions, from individual homes to large scale refurbishments.
Easirail installation teams are efficient and thorough, ensuring every installation is conducted with minimum disruption and the area is left clean and tidy. All Easirail configurations are ready for use immediately after installation.
We can also provide training on the full Easirail product range and its installation, giving you all the knowledge you need to both specify and install in any environment.
DISTRIBUTION
Easiaccess have extensive warehousing capabilities, allowing for a comprehensive stock inventory of Easirail to be held at any one time.
This enables us to cater for all of your Easirail requirements, with the aim of dispatching handrail and fittings to you within 48 hours.
For more information, contact our sales team on 0191 460 2777 or email at info@easiaccess.co.uk.
“Amazing! The fitters were lovely and explained everything that was being installed and how to look after it. Couldn’t be happier!”
- Sue
“What
an amazing company, were here early both days and got the job in no time at all.”
- Sam
EASIRAIL HANDRAIL SYSTEMS
PRODUCT SPECIFICATION
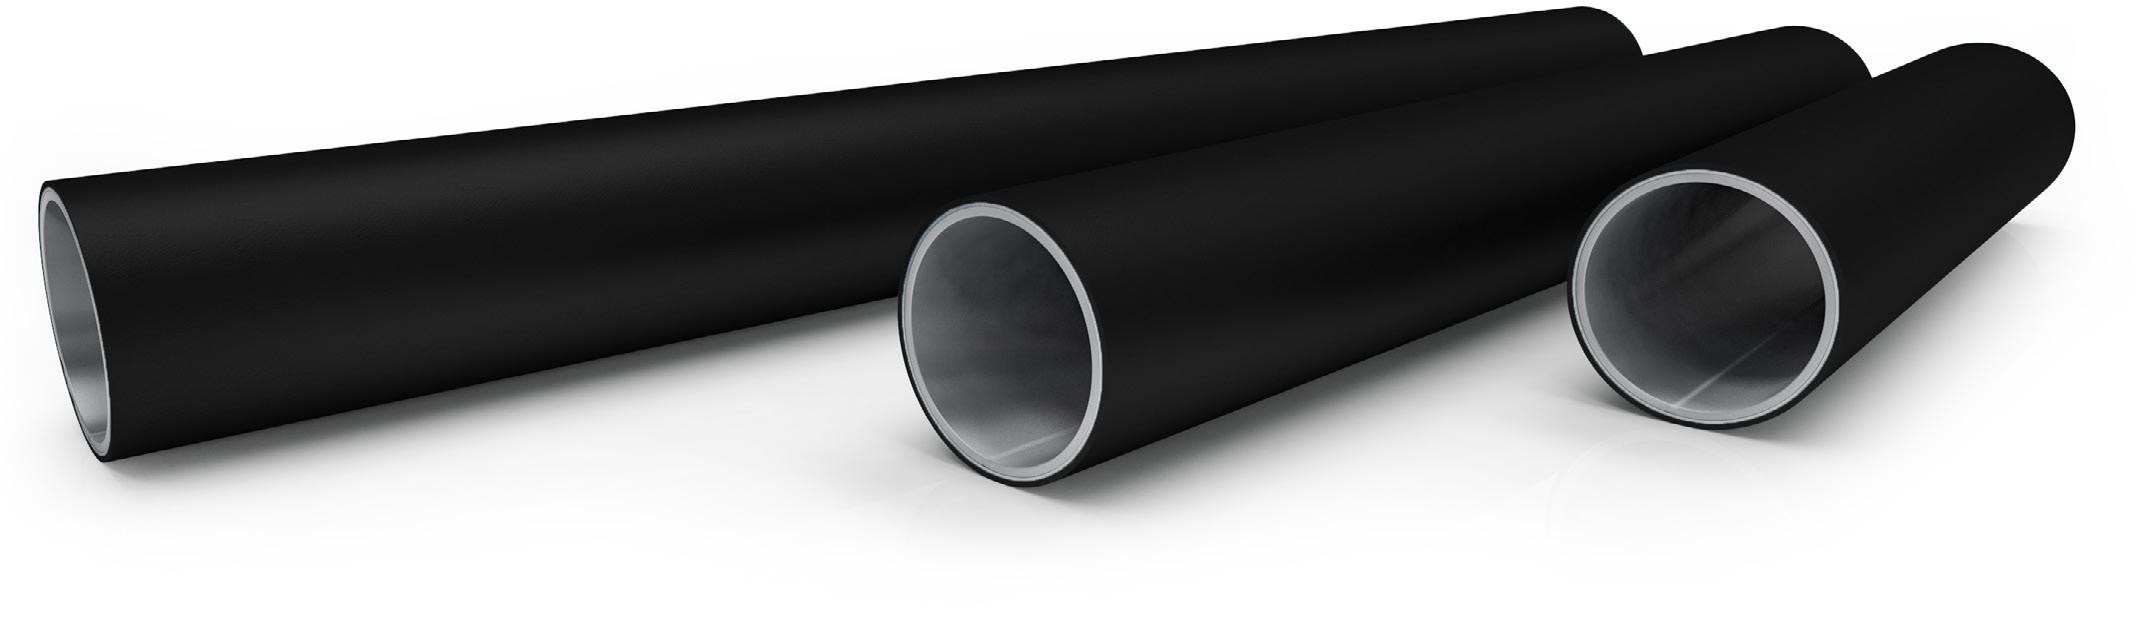
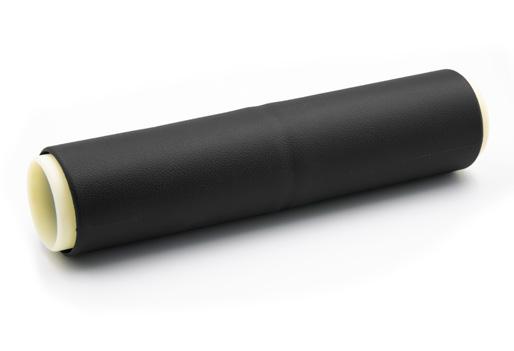
EASIRAIL HANDRAIL
Our 42mm handrail tube is attached directly to the posts and brackets using 4.8mm domed rivets providing a quick, strong and tamper resistant method of attachment. Additional rivets can be used to provide enhanced security, if required. All tubes are fully galvanised and powder coated providing a long lasting fine textured finish.
H1 100mm Handrail - also provides a simple termination with a CCON and HEC
Handrail
Handrail
Handrail
H5 500mm Handrail
H6 600mm Handrail
Handrail
Handrail
Handrail
Handrail
Handrail
H30 3000mm Handrail
EASIRAIL CAPS
The handrail tube is used in conjunction with the range of connectors and end caps, which either have a friction fit or are glued into position, providing an effective way to terminate a handrail.
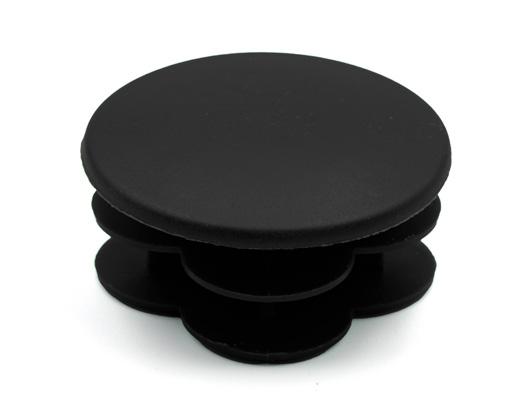
Inserts into the open end of the rail
BOX QTY: 40
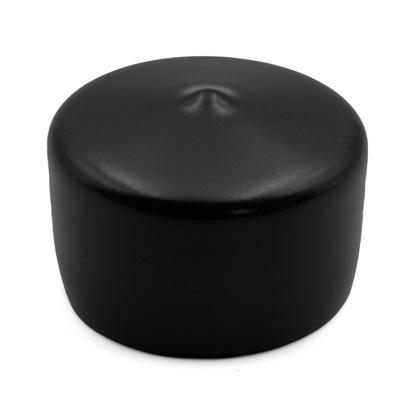
Covers the open end of a rail
HEC(B) HANDRAIL END CAP
Black RAL9005
EASIRAIL HANDRAIL SYSTEMS
STEP KITS
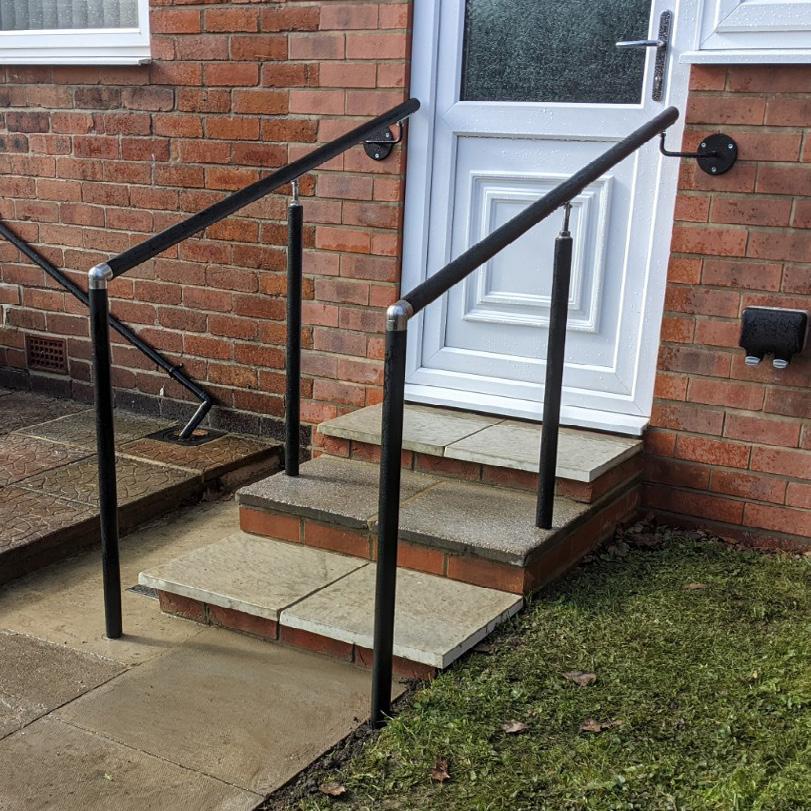
An off the shelf solution offering everything you need to provide handrail assistance at a stepped access point.
EASIRAIL WALL TO FLOOR STEP KITS
ER-WF1 (B)
WALL TO FLOOR 1 STEP KIT
Wall to floor handrail to fit single step projecting 270mm - 300mm
Kit includes ER-VP9T(B), UCON, H5(B), SWCON, HEC, and glue
ER-WF2 (B)
WALL TO FLOOR 2 STEP KIT
Wall to floor handrail to fit two steps projecting 540mm-600mm
Kit includes ER-VP9T(B), UCON, H8(B), SWCON, HEC, and glue
EASIRAIL FLOOR TO FLOOR STEP KITS
ER-WF3 (B)
WALL TO FLOOR 3 STEP KIT
Wall to floor handrail to fit three steps projecting 820mm-900mm
Kit includes ER-VP9T(B), UCON, H11(B), SWCON, and glue
ER-FF1 (B
FLOOR TO FLOOR 1 STEP KIT
Floor to floor handrail to fit single step projecting 270mm — 300mm
Kit includes ER-VP9T(B) x2, UCON, DCON, H5(B), and glue
ER-FF2 (B)
FLOOR TO FLOOR 2 STEP KIT
Floor to floor handrail to fit two steps projecting 540mm — 600mm
Kit includes ER-VP9T(B) x2, UCON, DCON, H8(B) and glue
ER-FF3 (B)
FLOOR TO FLOOR 3 STEP KIT
Floor to floor handrail to fit three steps projecting 820mm — 900mm
Kit includes ER-VP9T(B) x2, UCON, DCON, H11(B) and glue
EASIRAIL HANDRAIL SYSTEMS
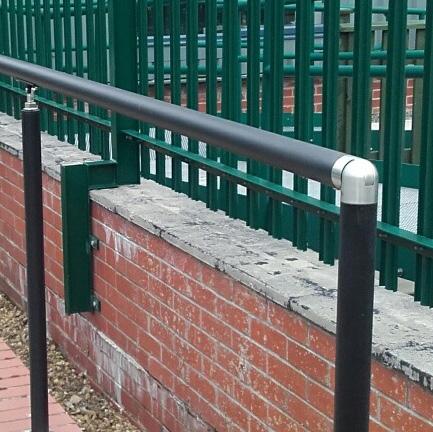
EASIRAIL WALL BRACKETS
The range of brackets provide the ability to attach a handrail to the wall, vertically or horizontally whilst the midrail bracket attaches to the adjustable posts creating a 600mm high inset midrail.
*Any RAL can be requested at additional cost. Please note all plates supporting the handrail are now stainless steel - see page 11.
HANDRAIL BRACKET
Attaches rail to a wall allowing horizontal angle adjustment
Requires x3 wall fixings (not included)
Standard Colour: BLACK (RAL 9005)
ER-MINI-SPBKT(B) WALL BRACKET
Attaches rail to a wall in fixed positions
Requires x2 wall fixings (not included)
Standard Colour: BLACK (RAL 9005)
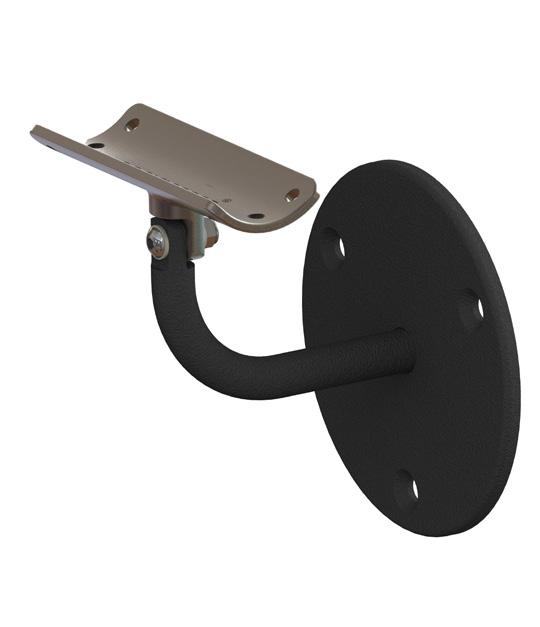
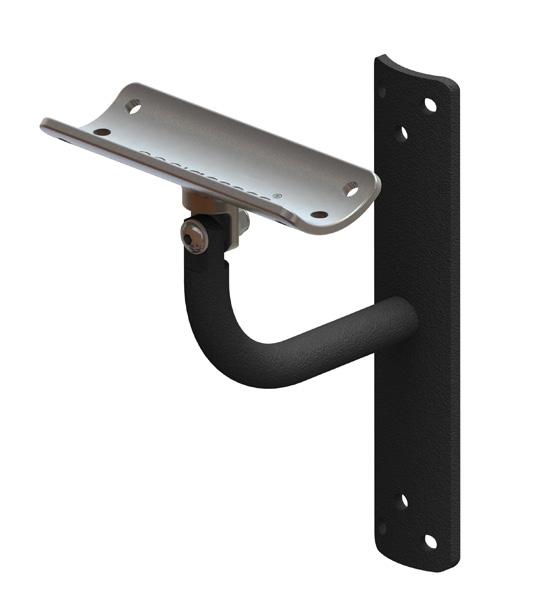
ER-SBKTL(B)
HANDRAIL BRACKET LEFT
Attaches rail to a wall offset, for ease of use. Allows vertical adjustment
Requires x3 wall fixings (not included)
Standard Colour: BLACK (RAL 9005)
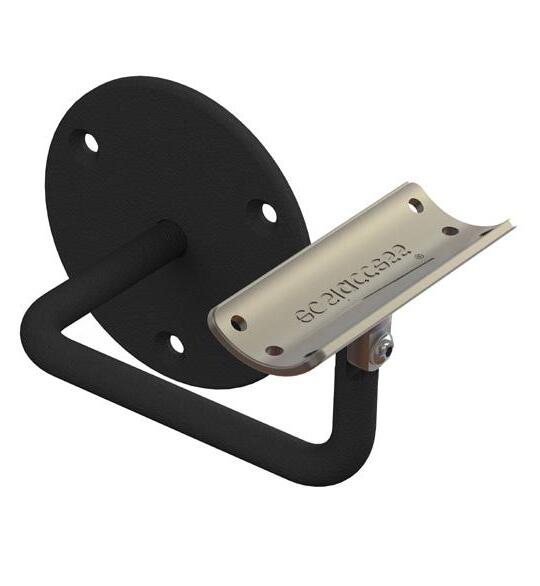
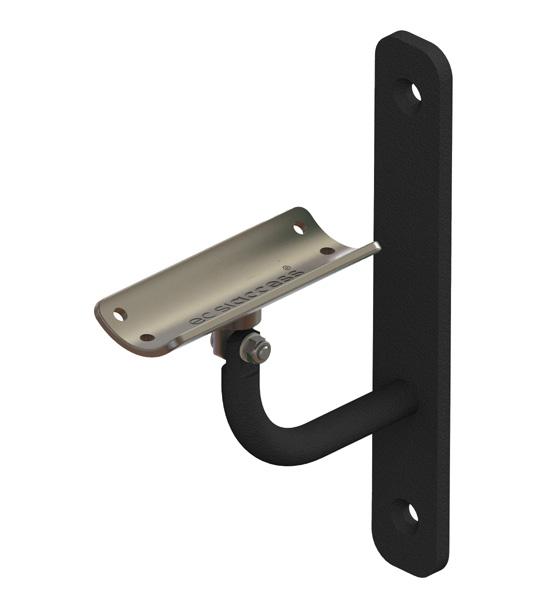
ER-SBKTR(B)
HANDRAIL BRACKET RIGHT
Attaches rail to a wall offset, for ease of use. Allows vertical adjustment
Requires x3 wall fixings (not included)
Standard Colour: BLACK (RAL 9005)
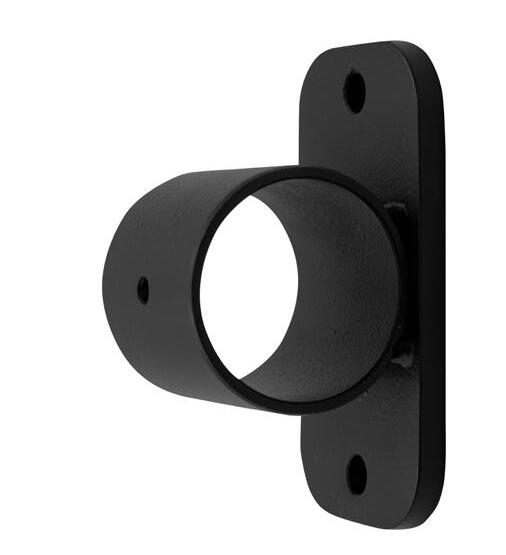
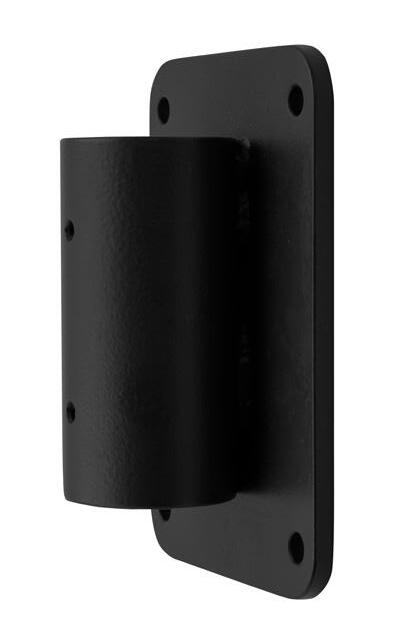
ER-SPBKT(B) WALL BRACKET
Attaches rail to a wall which is riveted in to position
Requires x4 wall fixings (not included)
Standard Colour: BLACK (RAL 9005)
ER-MBKT(B) MIDRAIL BRACKET
Attaches to a vertical post providing a 600mm high inset midrail with horizontal adjustment
Standard Colour: BLACK (RAL 9005)
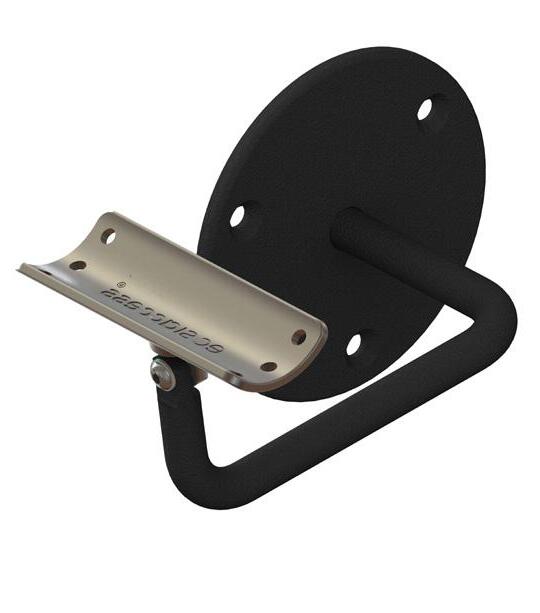
ER-SBKT(B) STEP BRACKET
Attaches rail to a wall allowing vertical angle adjustment
Requires x2 wall fixings (not included)
Standard Colour: BLACK (RAL 9005)
EASIRAIL HANDRAIL SYSTEMS
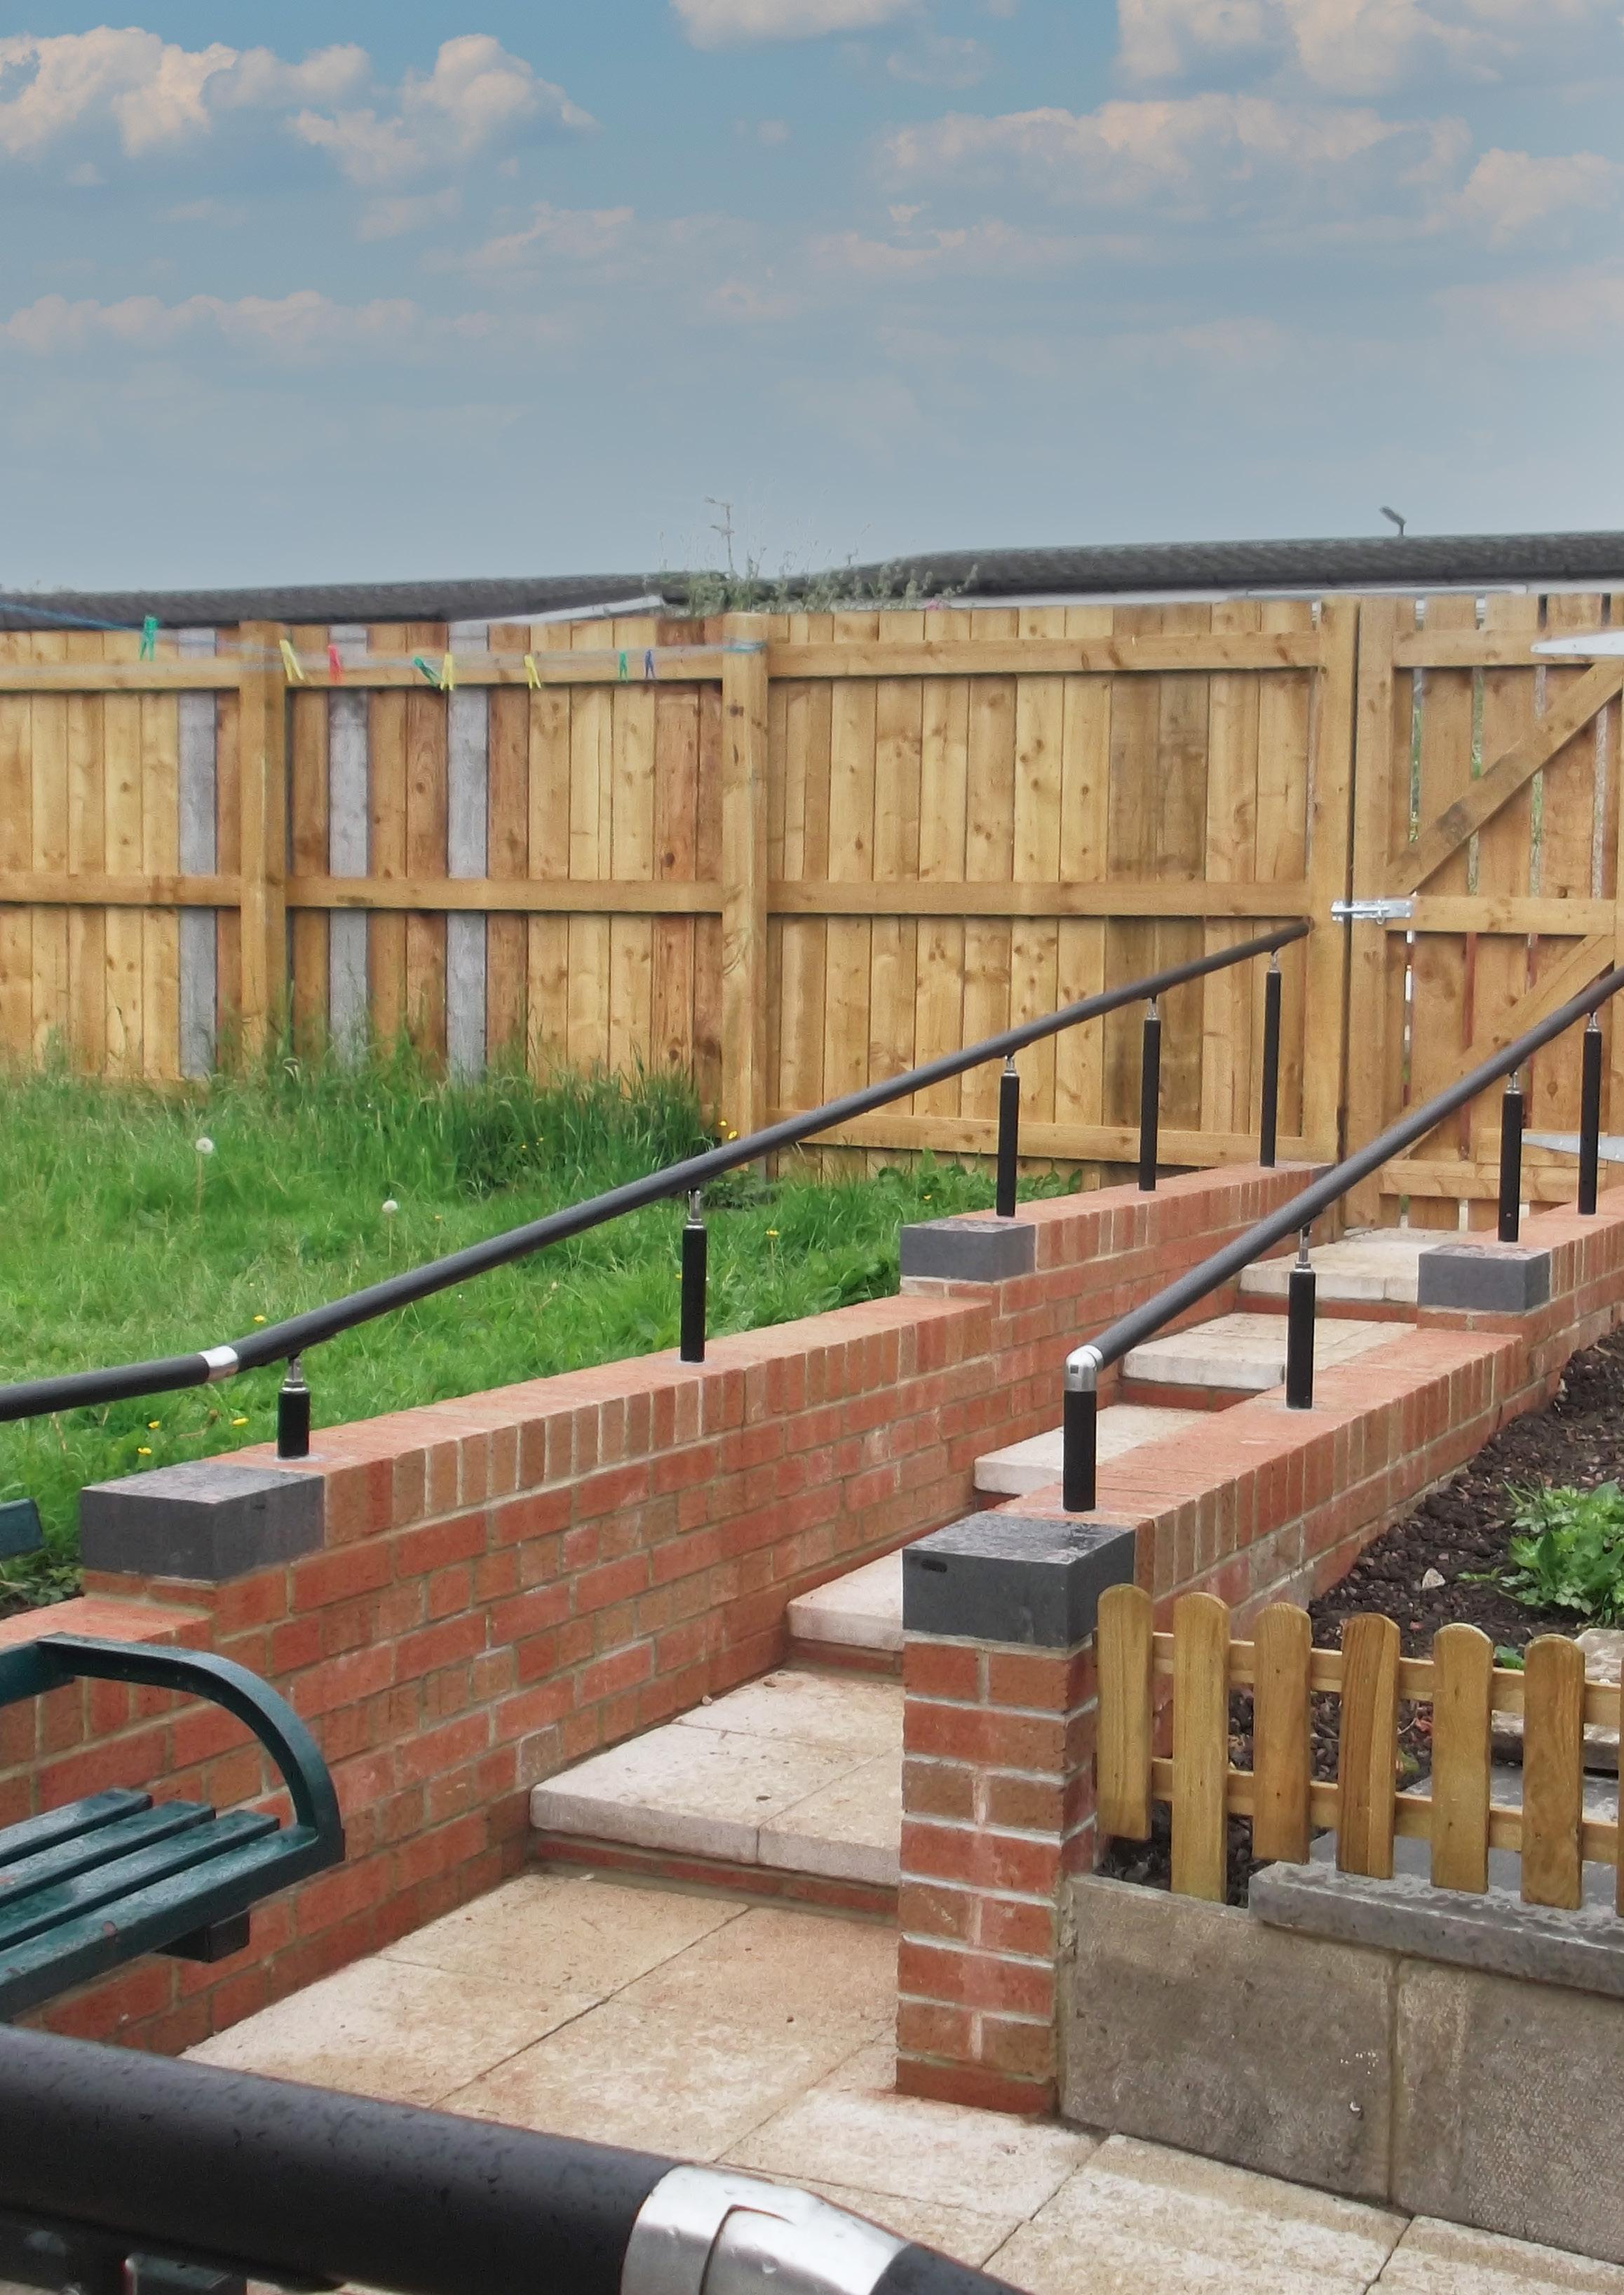
POSTS
EASIRAIL POSTS
Our adjustable posts are either surface mounted by securing directly to the ground or permanently fixed into concrete. The high-grade stainless-steel thread provides up to 30mm vertical adjustment, making an installation even easier when the ground is not running quite level.
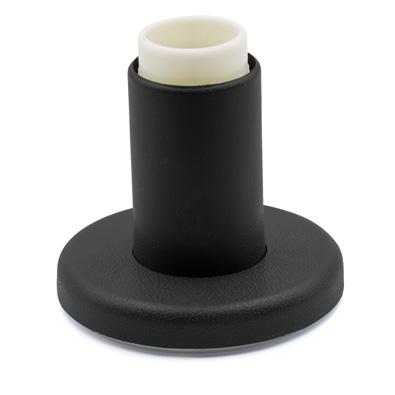
OPEN TOP TO RECEIVE A CONNECTOR
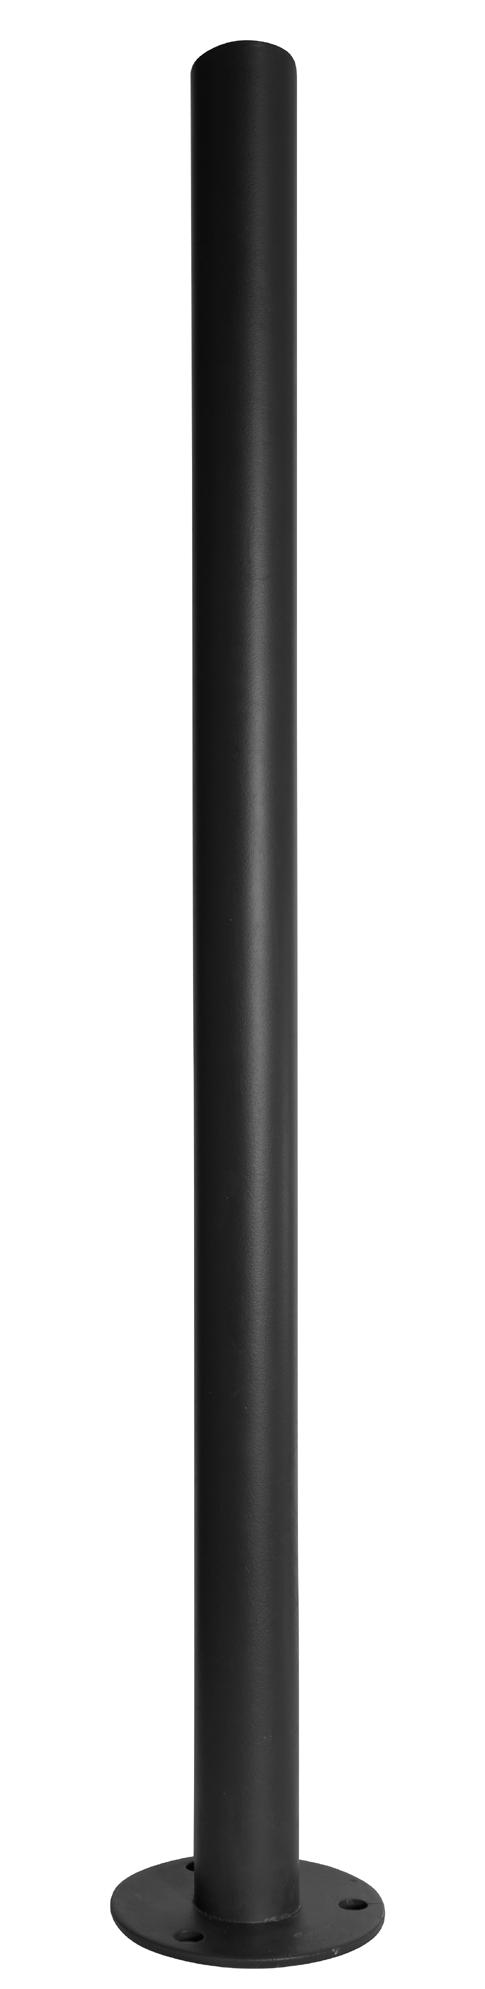
ER-VP9T(B) VERTICAL TERMINATION POST
900mm handrail post screwed/bolted directly to the floor
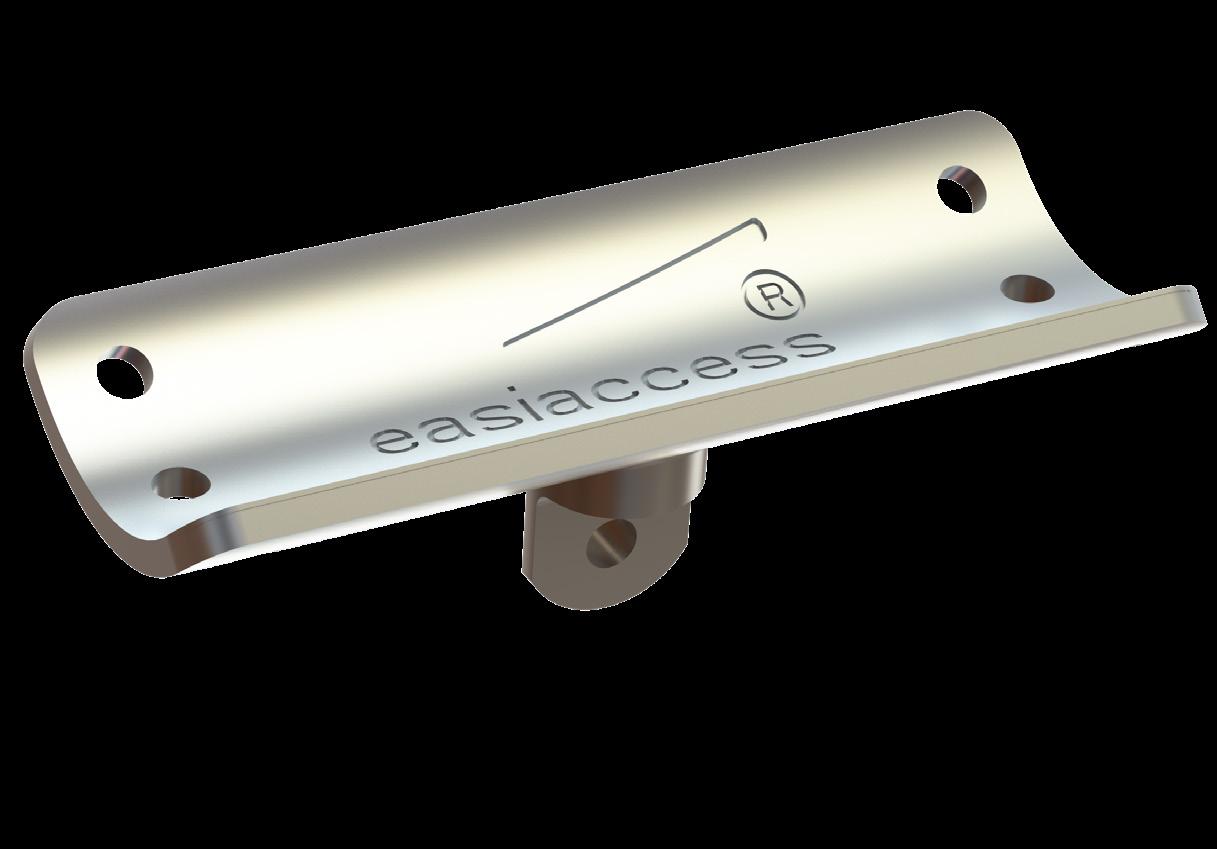
PIVOTING TOP PLATE
HEIGHT ADJUSTABLE
EASY TO USE LOCK SYSTEM

ER-VP9(B)/VP14(B)/VP18(B) VERTICAL POST
900, 1400 or 1800mm post lengths to support a handrail
EASIRAIL
POSTS
All our vertical posts, except for the termination post ER-VP9T(B), and bracketry incorporate a marine grade stainless steel top plate bringing the following benefits:
Resistant to corrosion and harsh environments even when they have been drilled or scratched.
Due to the construction of the stainless steel top plate, it ensures the handrails are exceptionally strong, durable, and long lasting.
• All vertical posts that utilise the top plates are embossed with our company logo –so you know you are getting a genuine product. The connectors are embossed with the product code for easy identification.
• Widened profile to better support the handrails and “cupped” to provide increased rigidity.
Multiple rivet hole positions and a short plate allowing for an easy, flexible installation.
• Stainless steel finish to match our connector range, utilises screw thread giving a “premium” look.
A wide range of horizontal adjustment is achieved by incorporating a central pivot point, allen bolt and nut to secure the rail in position.
EASIRAIL POST OPTIONS
CODE DESCRIPTION
EFFECTIVE CORROSION RESISTANCE
MULTIPLE RIVET HOLES FOR EASE OF ATTACHMENT
ADJUSTABLE FOR FLEXIBILITY
ER-VP9 900mm Vertical Post – floor fixed post with a stainless steel height adjustable pivoting bracket (requires x3 floor fixings, not included).
ER-VP14 1400mm Vertical Post – can be set into concrete or attached to a side wall and complete with stainless steel height adjustable pivoting bracket.
ER-VP18 1800mm Vertical Post – can be set into concrete or attached to a side wall and complete with stainless steel height adjustable pivoting bracket.
ER-VP9T 900mm Vertical Termination Post – provides termination of a 900mm handrail straight to the ground; screwed or bolted directly to the floor.
H15 (Used as post)
H15 Handrail 1500mm – can be used as vertical termination post; to be core drilled into ground with 900mm high projection from ground. Other lengths can also be used for this purpose.
Our posts can easily incorporate a midrail (using our ER-MBKT or IMCON) and satisfy all access regulations. The termination post, which is secured to the ground, provide an alternate means of finishing a handrail without a return loop or overhang.
If you have any queries about our Easirail post options or any other Easiaccess product then please do contact us and a member of our team will aim to help you as best as we can.
Black RAL 9005
Black RAL 9005
Black RAL 9005
Black RAL 9005
Black RAL 9005
EASIRAIL HANDRAIL SYSTEMS
CONNECTORS
EASIRAIL STAINLESS STEEL CONNECTORS
Stainless steel connectors are precision manufactured from an external grade material ensuring longevity and are simply glued into position, or riveted providing an extremely strong fix. More connectors are in development so stay in touch for updates.
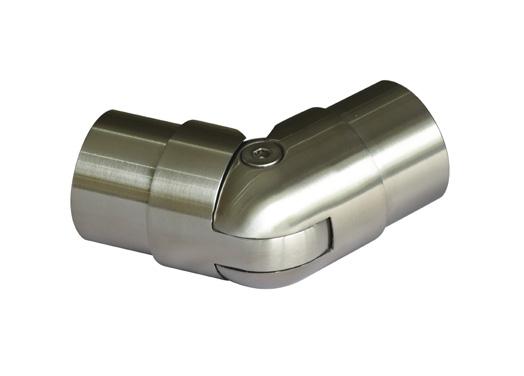

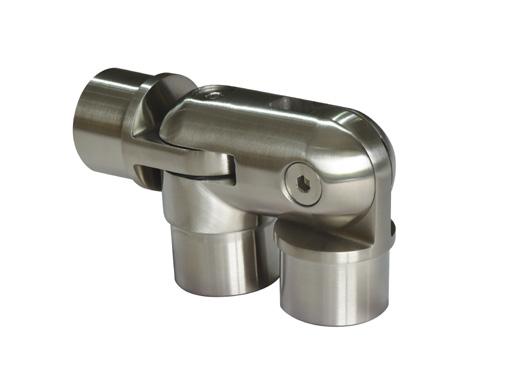
UCON
ADJUSTABLE CONNECTOR
Connecting rails between 90-180º
BOX QTY: 20
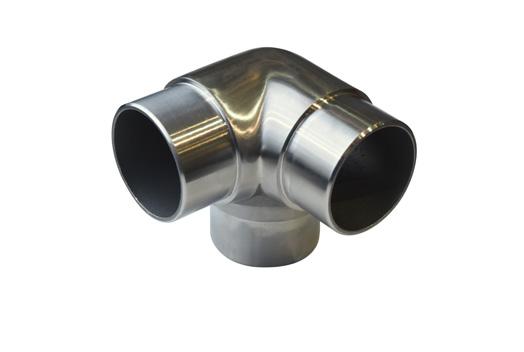
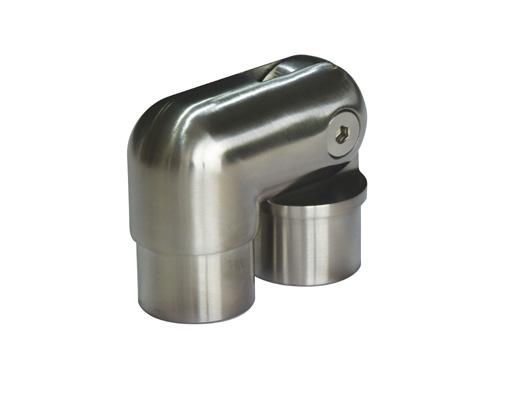
CTCON
CORNER TEE CONNECTOR
Connecting rails at 90º and a post
BOX QTY: 20
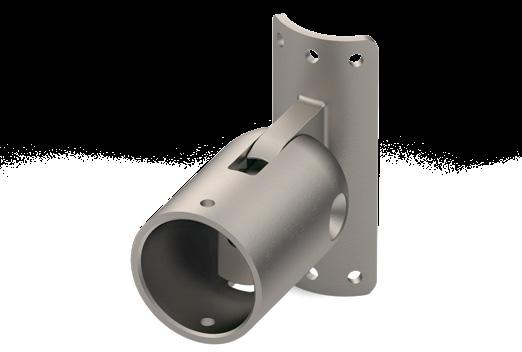
SWCON
STEP WALL CONNECTOR
Connecting rails at an angle to a wall
BOX QTY: 20
EASIRAIL STANDARD CONNECTORS

IMCON INLINE CONNECTOR
Providing an in-line midrail or post extension
BOX QTY: 20
MCON
MULTI ANGLE CONNECTOR
Connecting a post and rails at a horizontal and vertical angle
BOX QTY: 20
DCON TERMINATION CONNECTOR
Connecting a post and rail at variable angles
BOX QTY: 20
SSCON
STRAIGHT CONNECTOR
Connecting two straight rails
BOX QTY: 20
The standard connectors provide a friction fit and are manufactured from a UV resistant, hard wearing thermoplastic outer cover and nylon inner collar.
ACON(B) ANGLE CONNECTOR
Connecting rails that meet at an angle (~1:12)
BOX QTY: 50
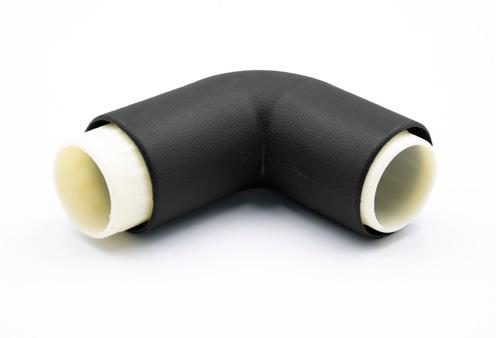
CCON(B) CORNER CONNECTOR
Connecting rails that meet at 90º
BOX QTY: 100
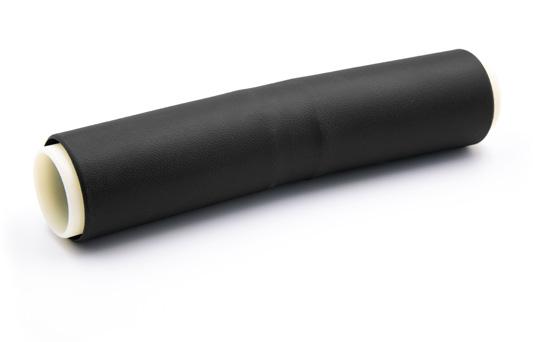
SCON(B) STRAIGHT CONNECTOR
Connecting straight rails
BOX QTY: 50
WCON(B) WALL CONNECTOR
Connecting rails to the wall
BOX QTY: 50
EASIRAIL HANDRAIL SYSTEMS
ACCESSORIES
EASIRAIL ACCESSORIES
Our handrail system includes a multitude of accessories to assist with any installation. Please see a list of some of them below.
CODE
DESCRIPTION
ER-SGHV Easiaccess quick set glue (50ml)
M12-20 Battery rivet tool with 12v 2.0Ah battery and charger
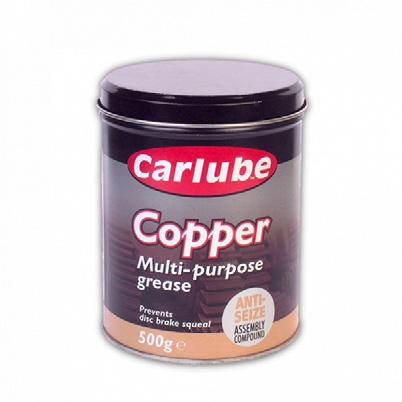
GREASE Grease 400ml - for use when installing rails with rivets
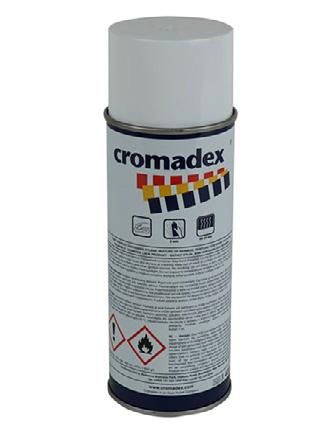
SPRAY RAL matched spray 9005
RVT Stainless steel domed head ultra-strong rivets
FFXN Floor fixing – Concrete Anchor Bolt HUS-V 8x95 HILTI
WFXN Wall Fixing – Concrete screw fixing HUS 6x45 HILTI
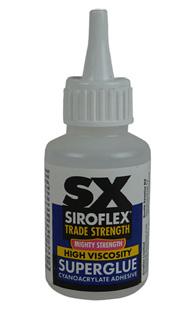
ER-SGHV QUICKSET GLUE
Easiaccess quick set glue (50ml)
M12 BPRT-201X
BATTERY RIVET TOOL
12v 2.0Ah battery and charger
SPRAY
RAL MATCHED SPRAY
Available in RAL 9005
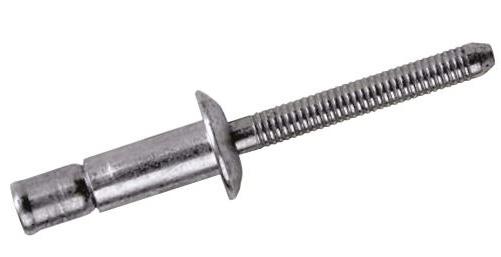
RVT
ULTRA STRONG RIVETS
Stainless steel domed head

GREASE
400ML GREASE
For when installing rails with rivets

FFXN
FLOOR FIXING
Concrete Anchor Bolt HUS-V 8x95 HILTI
WFXN
WALL FIXING
Concrete screw fixing HUS 6x45 HILTI
EASIRAIL HANDRAIL SYSTEMS
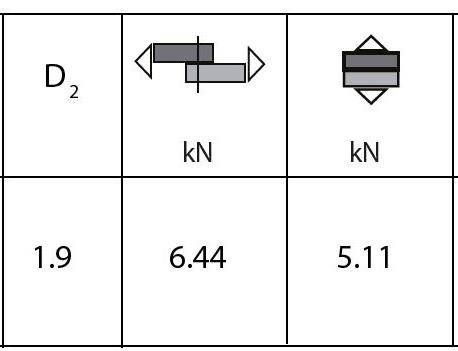
RIVETS
DOMED HEAD STRUCTUAL RIVET
Our rivets are multi-grip structural break-stem fasteners, providing a fully sealed joint and visible lock for quick and easy inspection.

Body: Stainless steel
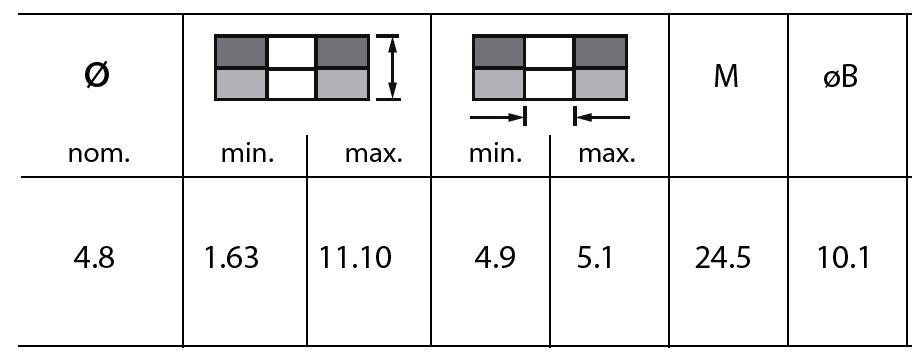


Stainless steel
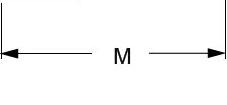
Measurements in millimetres unless otherwise stated.
Key Features
Excellent hole fill via radially expanded body provides very strong, vibration resistant joints and compensates for irregular, oversized, slotted or misaligned holes
Good sheet take-up performance for large gap closing capability
• Stem mechanically locked into body avoids damage, electrical problems or rattling caused by loose stems
• Multi-grip capability
• High shear and tensile strength Visible lock for quick and easy inspection
Stainless steel for effective corrosion resistance
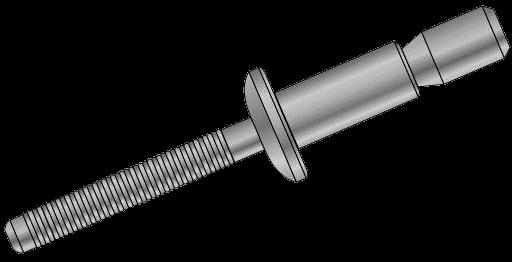
Stem:
EASIRAIL HANDRAIL SYSTEMS
RIVETS
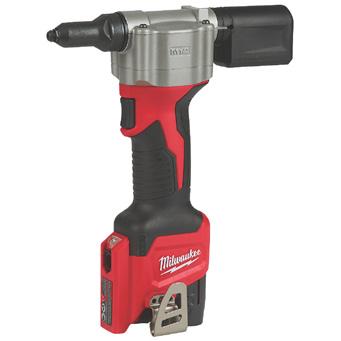
MILWAUKEE M12
An ergonomic cordless tool that offers reliable performance from a trusted brand.
The Milwaukee M12 is an ergonomic pop rivet tool with high performance motor for maximum productivity. RedLink overload protection delivers reliable performance and durability.
It can deliver up to 325 x 4.8mm stainless steel rivets on a single charge. Features tool-free access to easily clean the jaws, on-board nose-piece storage and removal tool for user convenience.
1 x 2.0Ah battery pack is included. Supplied in a heavy duty case and a 4.8mm nose-tip to suit our specific structural rivets.
Key Features
Suitable for 2.4, 3.2, 4.0 & 4.8mm rivets
LED work light
• Trigger switch
• 40 minutes charge time
Lightweight construction
Integrated belt hook
• 9 kN pulling force
• Mendrel collection attachment

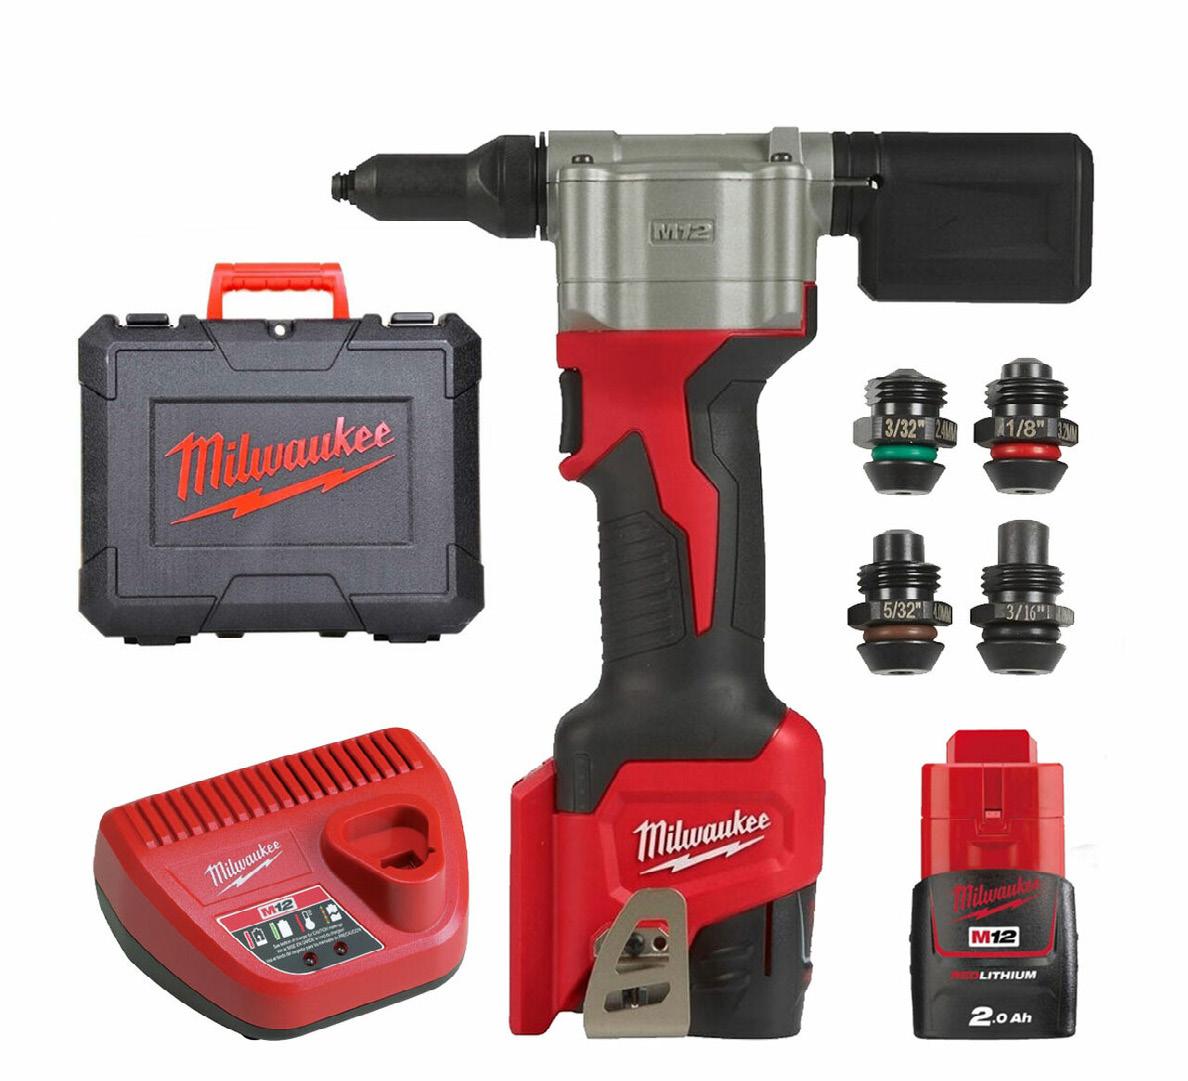
What’s included?
1 x Milwaukee M12 rivet gun
1 x 2.0Ah battery pack
1 x Charger
4 x Nose tips in various sizes
1 x 4.8mm nose-tip for use with our rivets
1 x Heavy duty case
1 x Instruction manual
EASIRAIL HANDRAIL SYSTEMS
BEST PRACTICE INSTALLATION GUIDE
REGULATIONS
Domestic Regulations
Over steps, a handrail should be between 850 - 1000mm from the pitch line of the flight and extending a minimum of 300mm beyond the top and bottom step. Over ramps, the vertical height to the top of the handrail from the surface of the ramp is between 900mm and 1000mm.
- 1000mm
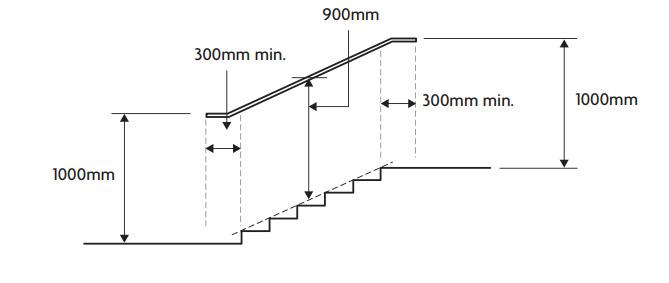
- 1000mm
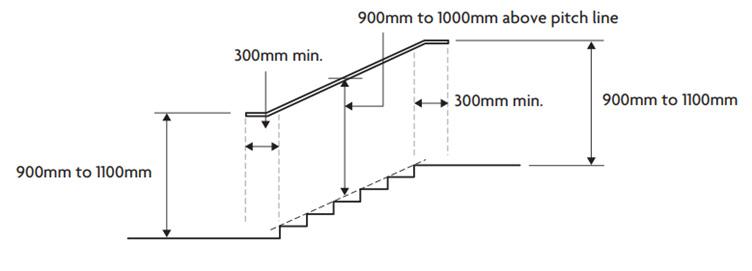
Public Access Regulations
The vertical height to the top of the handrail, above the pitch line of the steps or ramp surface, must be between 900mm and 1000mm.
INSTALLATION
Recommendations
With any installation that requires fixing to a wall or floor, an evaluation must be made on site as to the structural integrity of the surface that will provide the strength, be it a wall, floor, step or other.
Here are guidelines as to how Easirail should be installed in a number of common situations. As a general rule and in all circumstances, we suggest setting posts no more than 1200mm apart. This distance can be reduced in high traffic areas or to accommodate specific client and/or environmental considerations.
EASIRAIL HANDRAIL
SYSTEMS
BEST PRACTICE INSTALLATION GUIDE
INSTALLATION
Concrete/Core Drilling
Core drill using 50-60mm bit to the depth of at least 250mm. Set post in concrete/postcrete. *
Concrete - Floor Fixing
Mark and drill holes and use suitable exterior grade fixings through base plates of posts. Avoid drilling near edges as this may cause cracking of concrete. We recommend using galvanised threaded concrete bolts or anchor bolts.
Tarmac - Core Drilling
Core drill using 50-60mm bit to the depth of at least 300mm. Set post in concrete/postcrete. Proceed with caution when core drilling into tarmac as the quality of the tarmac can vary significantly. If unsure, proceed with the following installation method. *
Tarmac - Digging/Sawing
Cut a square with a concrete cutting saw and dig down to a minimum of 300mm, fill the hole with concrete/postcrete to secure. Easiaccess use a black dye to match with tarmac.
Flags - Core Drilling
Core drill using 50-60mm bit to the depth of at least 300mm. Set post in concrete/postcrete.*
Flags - Floor Fixing
For this option, the flag size must be a minimum of 600 x 600 x 50mm. Ensure flag is in a good condition and is firmly secured. In this situation, Easiaccess would use a galvanised threaded concrete bolt or anchor bolt, taking care when drilling and tightening, to avoid breaking the flag.
Block Paving
To set into ground, remove at least two blocks and dig down to a minimum of 300mm to achieve a good fixing, concrete/postcrete in place. Dye concrete to match block paving.
Bricks - Core Drilling
Core drill using 50-50mm bit. Drill through to a minimum depth to catch second course and set post in concrete/postcrete. *
Soft Ground
Dig down to a minimum of 300mm, tap post into clay/ground and fill hole with concrete/postcrete. Ensure concrete/postcrete is mixed well and to the correct ratios.
Wall Fixing
Ensure wall is flat and in sound condition and use suitable exterior fixings. The plate for the wall bracket will accept up to an 8m fixing and we recommend a minimum of 60mm long fixing to secure.
Choosing Fixings
There is not a single solution for fixings, as what might work on one surface may not be suitable for another. Always use a fixing that is rated for external use and is fit for purpose. Seek advice if unsure and refer to the product specification/ guidance for the fixing under consideration.
Easiaccess uses the following chemical anchor/ resin to secure the posts in combination with concrete/postcrete; FISCHER FIS VT VINYLESTER CHEMICAL MORTAR RESIN
For all our external screws/bolts we use HILTI fixings.
* N.B. Optional when core-drilling
Leave around 40-50mm space at the top and then fill remainder of the hole with an exterior grade fast set resin, leaving an ultra-strong and neat finish.
“Arrived promptly, did an excellent job fitting handrails in the cold, no mess left. Would definitely recommend.”
- Mark
EASIRAIL
HANDRAIL SYSTEMS
BEST PRACTICE INSTALLATION GUIDE
ADDITIONAL INFORMATION
Recommendations
Easiaccess supply handrail in several pre-cut lengths to reduce the need for cutting. If you do need to cut a handrail it must be sealed using a zinc rich spray and coated with a RAL matched paint. Easiaccess stock zinc rich sprays and matching paints in both green and black. Alternatively, if a cut rail is terminating with a stub end (for example butting up to a house wall) use a vinyl end cap (VHEC) to terminate the rail and a bead of silicone or glue to keep out any moisture. This removes the requirement for painting / drying, thereby reducing installation times.
The same care needs to be taken when drilling the handrail, as with any galvanised product, once the coating is broken, it must be sealed to prevent corrosion. After drilling the rail all metal filings must be removed. If the fillings are left exposed (without removing) they will rust and stain any surface they are in contact with.
Once any filings have been cleared away, dip the rivet in some grease before inserting into the 5mm hole. Be generous with the grease and simply wipe off when the installation is complete, as this forms a barrier between the steel and air.
From time-to-time rails will get damaged, either prior to installation or once installed. Surface knocks and scratches can easily be covered with the RAL matched paints. We would recommend carrying a small stock of these for such instances.
Riveting
When designing the Easirail handrail system we wanted to create a system that was very robust and could ensure a long-life span – hence our reason for utilising rivets as they maintain a high shear and tensile strength. It also allows a visible lock for a quick and easy inspection while remaining tamper proof.
Together with a cordless rivet gun which provides a quick and effortless method of attachment, you can be assured of many years trouble free use.
Gluing Stainless Steel Connectors
Place a good coating of glue around the inside of the tube and quickly twist/screw in the connector to get a good coverage before it is finally aligned.
• Once the posts have set, consider marking and cutting all rails to size in advance to minimise disturbance on freshly glued joints.
• The glue can take up to 30 minutes to “go-off however, this is subject to weather conditions and can easily vary (it takes around 24 hours to achieve maximum strength). During this time, avoid undue/excessive movement.
• If installing in inclement weather, consider placing a rivet through each connector to secure it.
Hints and Tips
An Easirail installation is only as good as the person installing it – always use the correct ground and exterior fixings.
Always use appropriate PPE (eye protection, gloves, etc.) when drilling, cutting, riveting and gluing.
The stainless steel thread and locking nut provide a level of vertical adjustability so you can “fine tune” an installation as required.
Check that you have drilled/riveted each bracket once an installation is complete and ensure all fixings are secure.
If you have any questions with regards to this guide or need any more information on the full product range, please contact one us.