3 minute read
Remodel a coffee table into a bench


By Megan Keller The Woman Today
I’vehad this coffee table since the early 2000s when I moved into my very first home. I purchased it from Target and it has moved to a lot of places with me.
About eight years ago, my sweet dog Sasha decided the table would make a great chew toy. Yet, I still kept the table around and am unwilling to let it go.
Recently, as we’ve been purging things to donate from our home, I rediscovered this table in a dark corner of the basement, full of dust. Again, I’m not willing to let it go.
I thought there had to be a way to repurpose it, and that's when it came to me — it's a great height, still very sturdy, this could become a bench! I have wanted one in my entryway for some time, so this was a great project to take on.
I have never repurposed anything before and was nervous, considering this was planned to go into this issue of The Woman Today. I decided the theme for this project was to “make something out of what you have in your home and purchase nothing!” I think most of us tend to have a lot of things lying around, and we can make something out of those items.
I created this bench in about two afternoons. It was so fun, my husband helped me with the tools and my mother and I worked on the cushion together. We all had a great time watching this old coffee table turn into something so darn cute.
Step one: Remove top
First, I needed to remove the top of the coffee table.
Step two: Prepare the surface
The coffee table had a heavy glossy finish on it. To ensure the paint would adhere, I sanded it down to remove all that finish. Next, I wanted to beat up the table to make it look even more worn, since I was going for a vintage look. I used a hammer, a screw and chains, hitting them all over the table to really give it some dents and remove that smooth look. (If you are having a bad day, this is a great stress reliever!)
Step three: Paint the table
I had some leftover orange/autumn paint I used for my base, let it dry, and then painted a layer of serenity-blue chalk paint over the orange. Once dried, I used sandpaper to gently sand the blue down, until I got the orange to come through. I recommend testing this on another piece of wood prior to starting your project so you can get a feel for how to sand the paint and see the results.
Step four: Fix the edges
Since my sweet dog Sasha chewed the top of this when she was a puppy, I needed to router the edges to smooth them out. This is where my husband came in to help and make sure I did it correctly. We initially used a jigsaw, but the router tool worked better. It was easy to use, and it was pretty fun, too!
Step five: Create the cushion
To create the bench cushion, I used some old pleather material I had on hand for the cover. The next challenge was to figure out what to use for stuffing, since I didn’t want to buy anything. I had some old pillows that weren’t being used (pretty sure they belonged to my parents over 30 years ago). Since they were so old, they were very compressed and the material was easy to work with. We removed the covers, and cut the cotton to fit the table top. We then took the fabric and stapled one side of the seat. We had to keep positioning the fill to make sure we could get it somewhat even. This took two people to do — I was grateful my mom was there to help. We tugged, stapled and cut the fabric to fit until it was completed all the way around the bench seat. This was the hardest task of the whole project.
Step one: Remove top
Step three: Paint the table
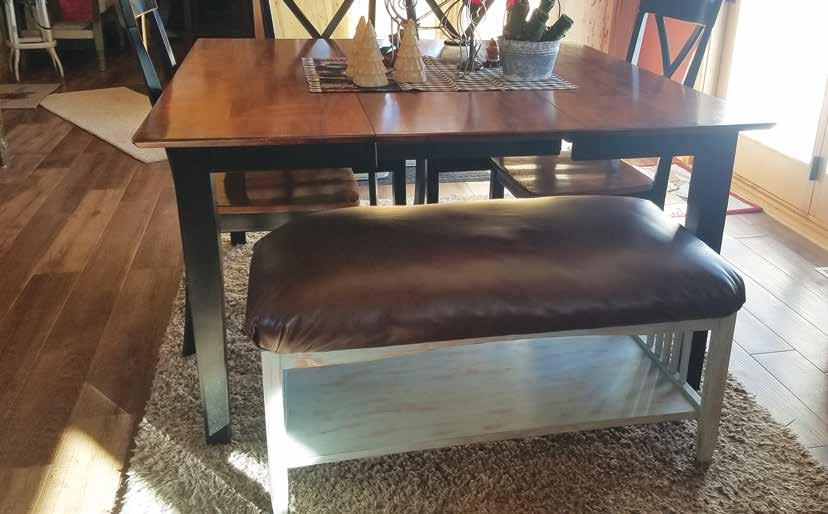
Conclusion
I have to say, I just love how this old, abandoned table of mine was turned into something super cute. Was it perfectly done? No. However, I love how vintage it looks and the cushion is very comfy to sit on. For my first time repurposing something out of things I had lying around my home, I’d say it was a success! We live in a world where things tend to be disposed of quickly. Take a peek at what you have, challenge yourself to your own DIY project made from things you have lying around in your home.

Feel free to send those projects to us, we would love to see your master creations. D
Step two: Prepare the surface


