4 minute read
Printer Maintenance

Your PhotoCake printer uses Edible Ink. With PhotoCake Online, your system will regularly remind you to run routine maintenance prints. You can delay the preventative maintenance to print at a later time. Be sure to follow through to keep your ink flowing.

Here are some recommendations to keep your printer in tip-top shape:
Daily Maintenance
1Print every day
Print an image or color test every day to keep your ink flowing smoothly.
2Leave the Printer powered on
The Printer will run minor maintenance when not in use.
VIDEO DEMO
Check out the PhotoCake® Printer Maintenance Videos decopac.com
Weekly Maintenance
1Clean Printer surface
Wipe the outer surface of your Printer with a damp cloth. Allow to air dry before use.
2Clean Printer rollers
Power Printer off. Wipe rollers (located inside the Printer cover and Printer bed) with a damp cloth.
Do not use excessive moisture and do not drip liquid inside the Printer. Allow to air dry before use.
Always sanitize surfaces which come into contact with food per food safety procedures.
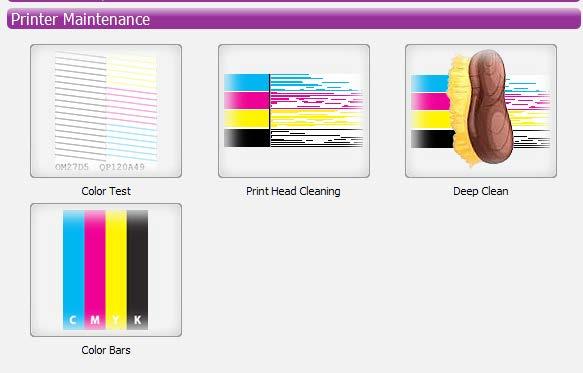
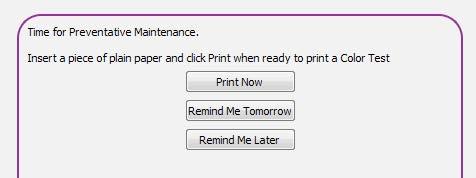
Color Test
Color Test will determine the quality of the ink flow.
A. Insert a piece of plain paper and select “Print” when ready.
B. Compare Color Test to On Screen Images.
C. If Color Test matches the image on the left, select “Done”.
If Color Test matches the image on the right, select “Clean” to clean your Print Head.
Print Head Cleaning
Print Head Cleaning will help alleviate distorted, faint, or streaked colors.
A. Insert a piece of plain paper and select “Print” when ready.
B. A Color Test will print once the Print Head Cleaning is complete (may take a few minutes).
C. Compare Color Test to On Screen Images.
D. If Color Test matches the image on the left, select
“Done”. If Color Test matches the image on the right, select “Clean” to clean your Print Head.
Color Bars
Perform a Color Bars to prime and push ink through Print Head.
A. Deselect colors, if any, which you may not need to have primed.
B. Insert a piece of plain printer paper and select “Print” when ready.
C. Review printed Color bar(s) for any distortions or absences (breaks) in the color bar(s). If any distortions or absences, go to the Print Head Cleaning option.
Cleaning Solution and Swabs
The Cleaning Solution and Swabs are best used for minor clogs. If you have a major clog see the deep clean steps.
A. From the printer menu, navigate to “Setup”; select “Maintenance”.
B. Select “Ink Cartridge Replacement” and remove ink cartridges.
C. Slide the carriage to the middle of the printer.
D. Unplug the power cable from printer.
E. Apply Cleaning Solution (#23808) to PhotoCake Printhead Cleaning Swab (#23743).
Do not oversaturate.
F. Using one cleaning swab per nozzle, gently clean clogged nozzle(s), 5-10 seconds each nozzle.
G. Use a dry, clean swab to absorb excess moisture. Let dry for 2-4 minutes.
H. Plug in, power printer on, and insert ink cartridges.
I. Perform printhead cleaning 2-3 times.
J. Print a color bar to check proper color flow. Repeat cleaning if necessary.
K. For further assistance, contact DecoPac Customer Support.
Printhead Cleaning Swabs #23743 Print Head Cleaning Solution #23808

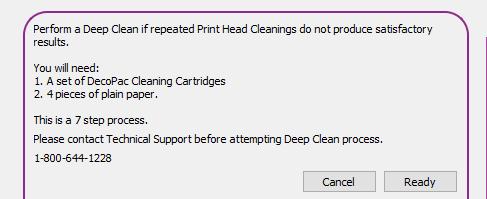
Deep Cleaning
The Deep Clean option should only be completed with PhotoCake Tech Support (1-800-644-1228). Perform this process if repeated Cleaning Solution and Swabs, Print Head Cleanings, & Color Bars do not produce satisfactory results or preparing your printer for seasonal storage. This is a 7-step process that requires Cleaning Cartridges and several pieces of plain paper. Utilizing a 7-step process, this option is the most aggressive means of clearing clogs from the printer. This option should only be used sparingly as excessive utilization can wash out the channels of the print head.
1Install Cleaning Cartridges
These can be installed into the printer following the same procedure for replacing your ink Cartridges. A Cleaning Cartridge for each ink should be installed to ensure this process works correctly.
2Print Color Bars
The fluid in your Cleaning Cartridges is a clear liquid designed to break down any edible ink that may have dried in the Printer.
By flushing this fluid through the print head, any color lingering in the system is pushed out, and should start to fade on the print.
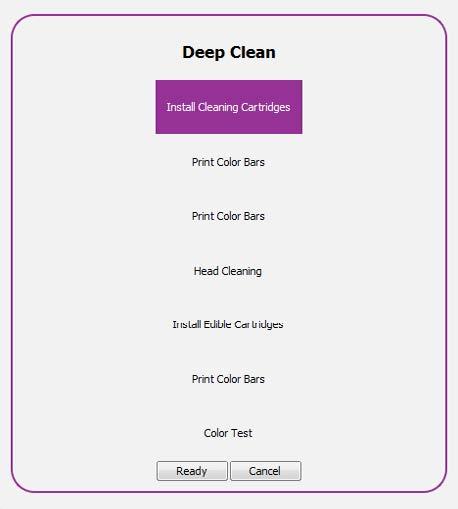
3 Print Color Bars (again)
This will perform the same process as above, but the fading of your colors should be vastly more apparent.
4Head Cleaning
This will perform the internal cleaning step on the Printer.
5Install Edible Cartridges
It's always best to use completely new inks after performing the Deep Cleaning. Putting in the same inks runs the risk of causing the same color issues to return.
6Print Color Bars
This will prime the Print Head with the fresh ink. This will ensure no
Cleaning Fluid is still in the Printer.
7Color Test
This last print is to make sure everything was a success; on this print there should be no color issues and no breaks in the lines.