2 minute read
Advanced Options

ADVANCED OPTIONS Collage
AGo back to the screen in the “Edit the Topping” section and make new changes to your photos.
BWith one or more photos/Non-Licensed images already on the Canvas, add an additional photo. C With a printer detected and one or more photos/Non-Licensed images already on the canvas, scan in a photo from your printer. D To remove a photo from the collage, click on the photo, then select “Delete
Photo” to get rid of it. E With one or more photos/ Non-Licensed images already on the canvas, add an additional Non-Licensed image. F To remove a Non-Licensed image from the collage, click on the image, then select “Delete Image” to get rid of it. G Move selected photo/ Non-Licensed image on top of the others on the canvas. H Send photo/ Non-Licensed image to the back of the Canvas.
FUN FACT
Collages can be created with Non-Licensed images from the library and personal photos!
E A B C D
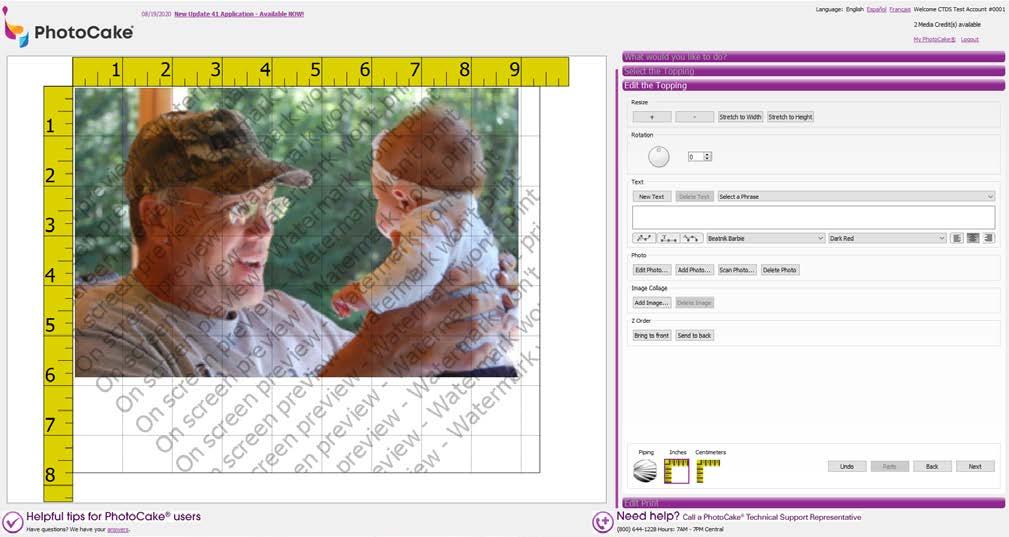
G H F
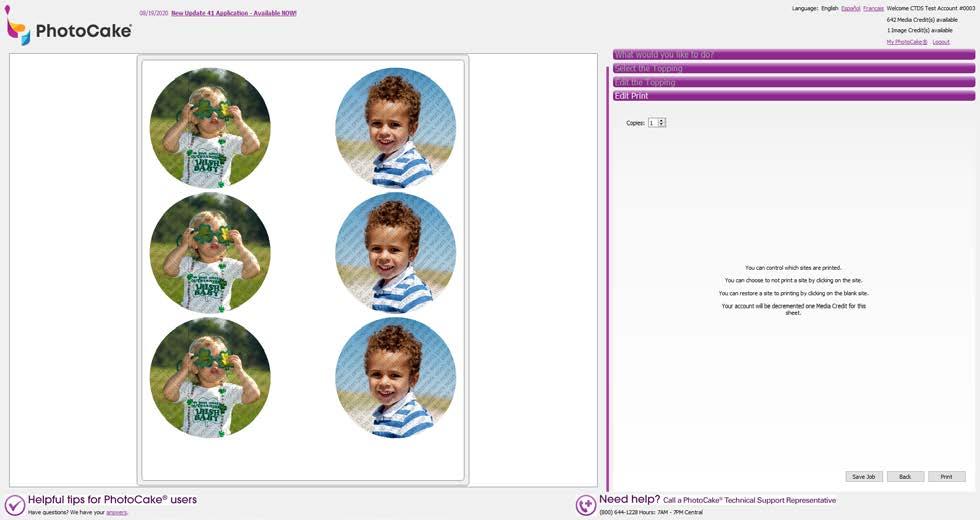
Pre-Cut Site Selection
1When creating a PhotoCake using personal photos and media with pre-cut sites, you can select unique images for each pre-cut site of the sheet.
2The pre-cut site selection will only appear when applicable on the “Edit the Topping” menu. 3 To select a site, simply click on the circle on that site. 4 Add photos and text as needed. For further information on how to add photos, please view page 16. 5 By default, your design is duplicated forward to all sites, if you do not require a unique design on each site of your pre-cut, simply click ‘Next’ and all pre-cuts will have the same design. 6 If you require only two out of six images to be unique, apply your first design to the first site. Then, click on the fourth site and apply your second design, this will create a sheet with two different designs on it. 7 The Pre-Cut site selection menu is color coded for convenience; identical sites will have matching colors, and sites with a black dot have a unique design.
Direction that “duplicate forward” refers to: