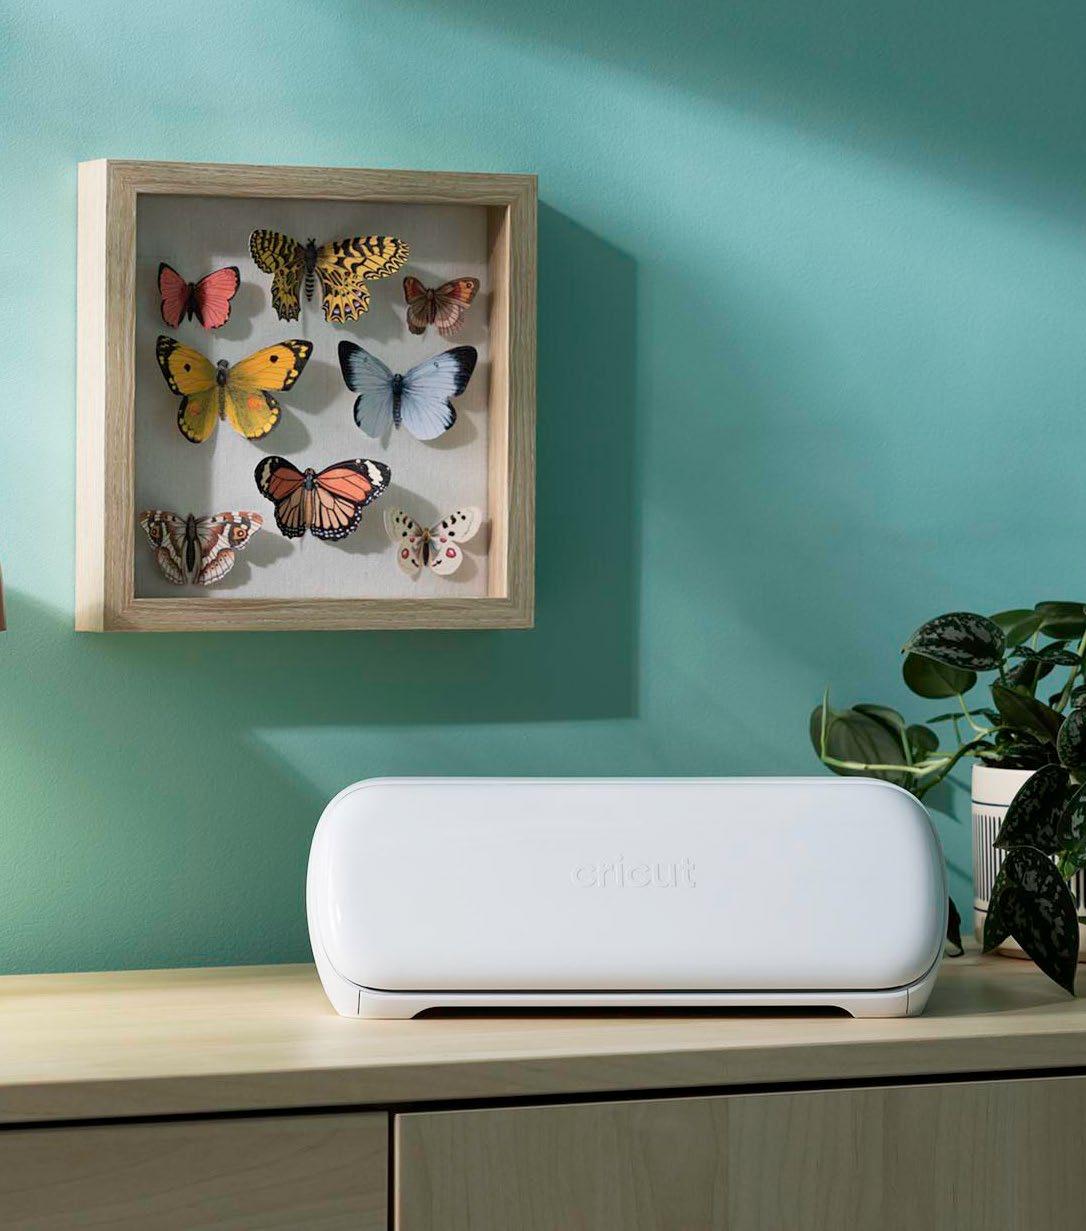

Welcome to the ultimate guide to a year full of creativity, inspiration, and endless Cricut possibilities. Whether you’re making everyday magic, celebrating holidays, or marking life’s special moments, this look book is here to spark your imagination. This guide is packed with project ideas for making the perfect personalized accessories, creating the most unique gift, or putting that special touch on your home or office, we’ve got all the ideas, colors & designs to help.

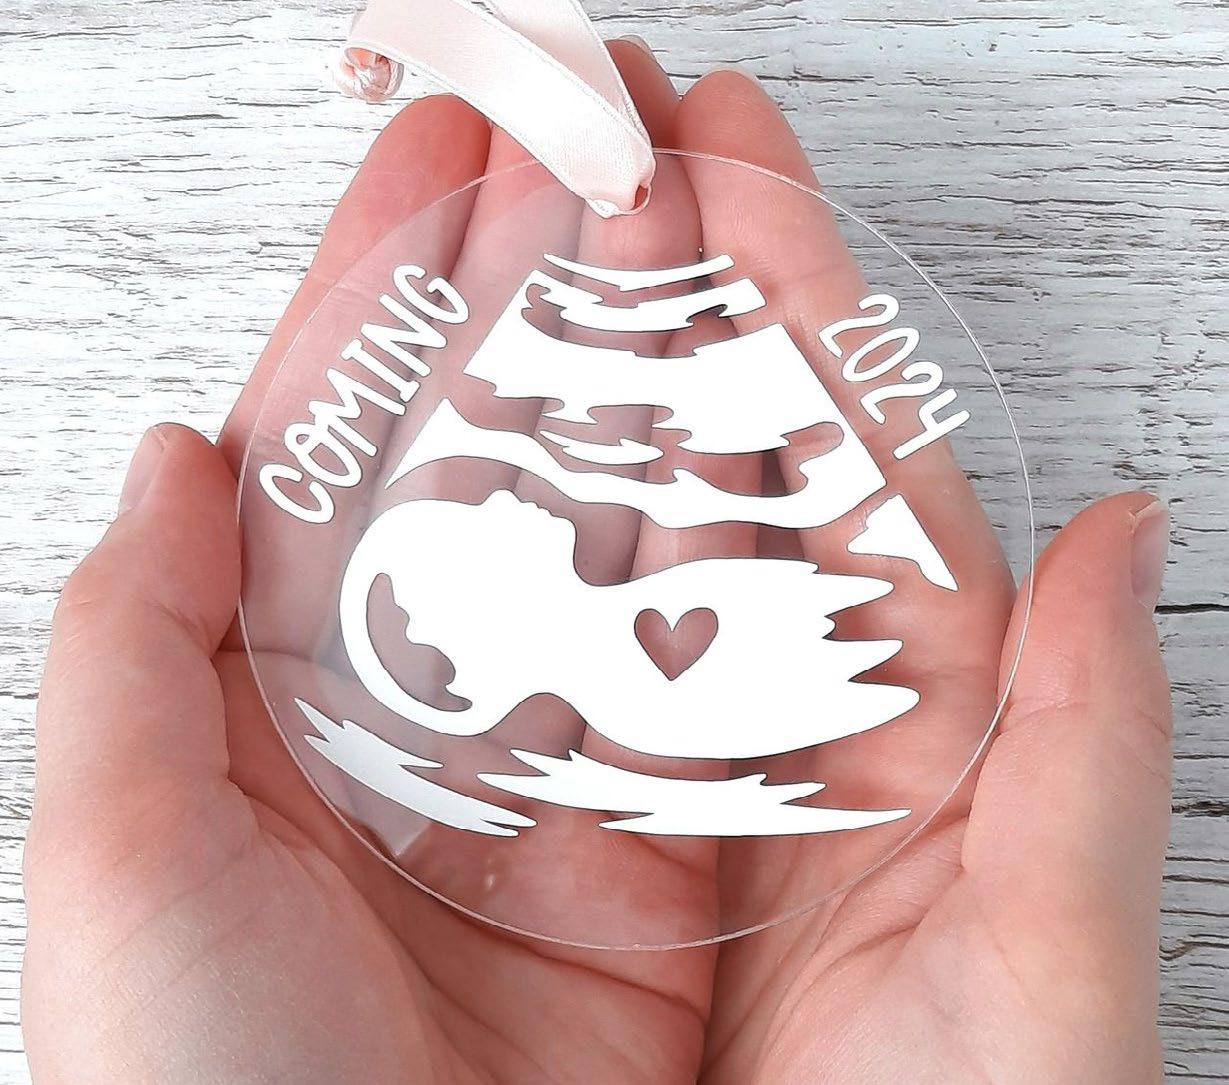
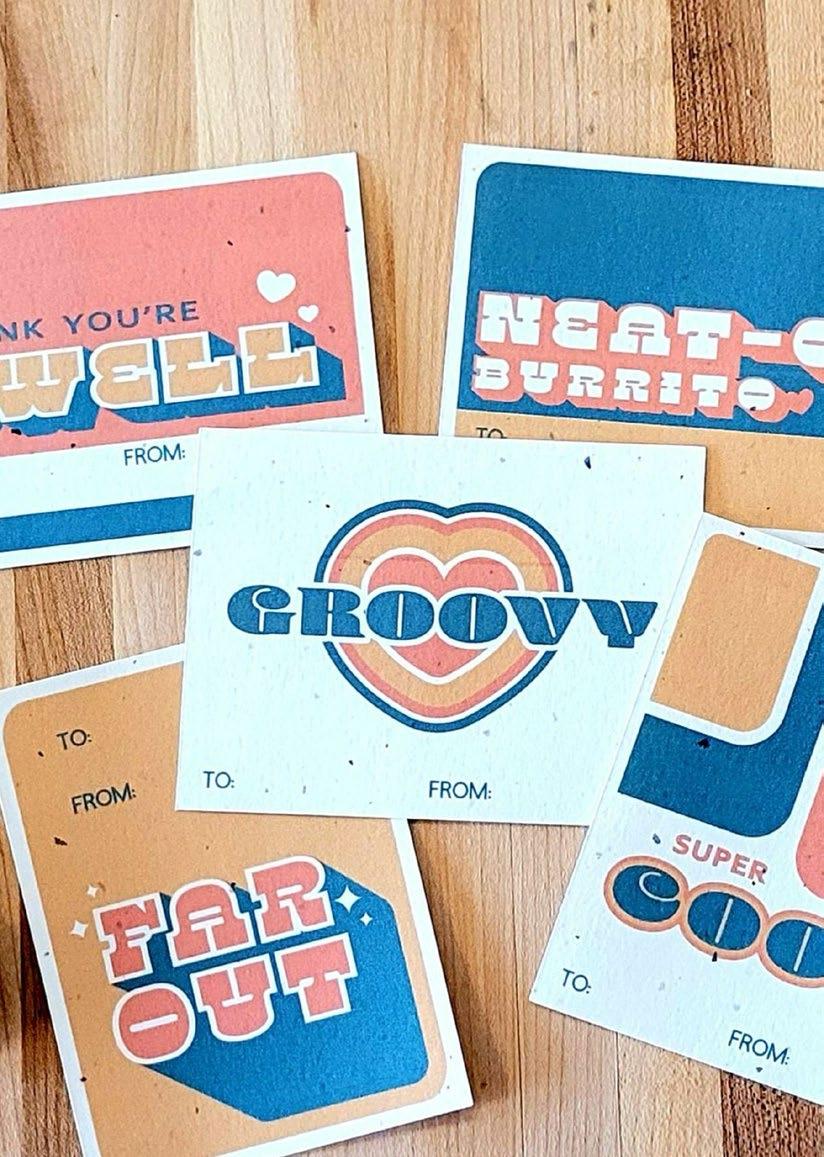
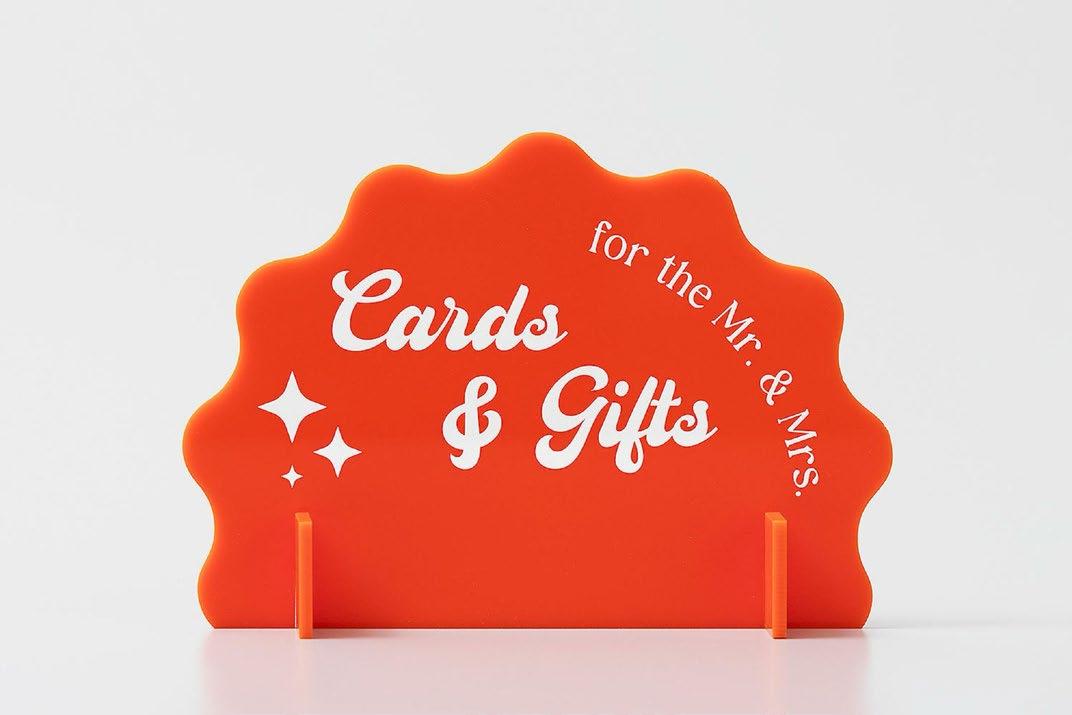
Life’s biggest moments deserve the most meaningful creations. With Cricut, you can create heartfelt memories for every occasion—from personalized baby onesies and wedding décor to custom birthday decorations and graduation gifts that shine. Whether you’re celebrating milestones or creating keepsakes, Cricut helps you add that special touch to make every moment unforgettable.

Rachel McAffee


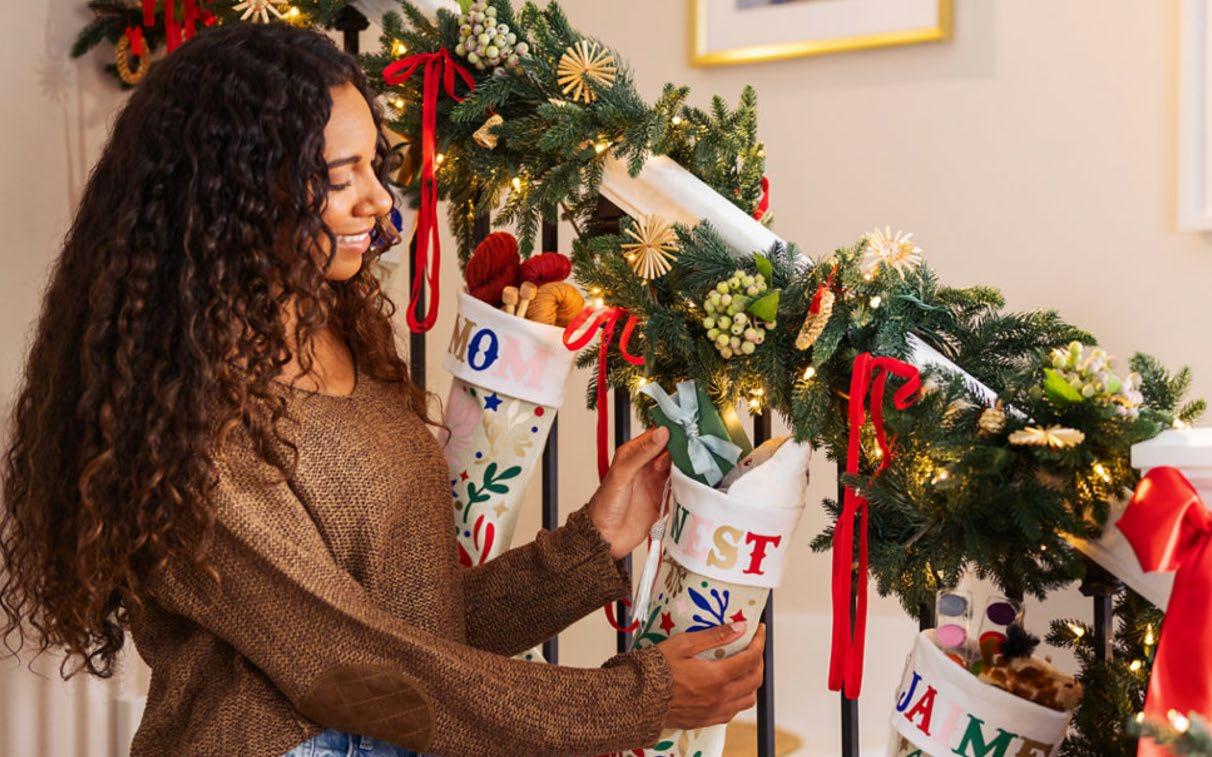
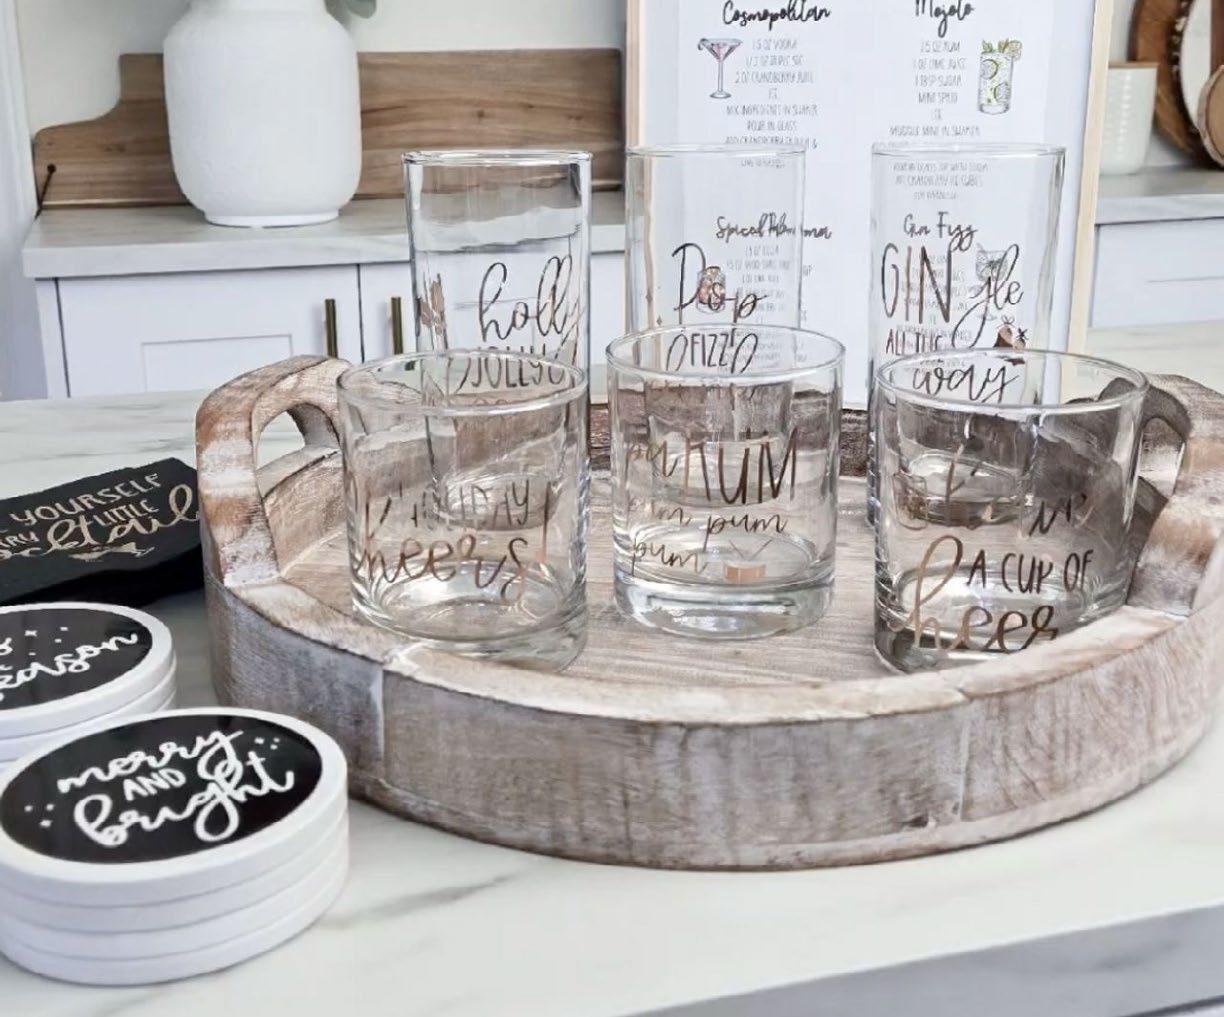
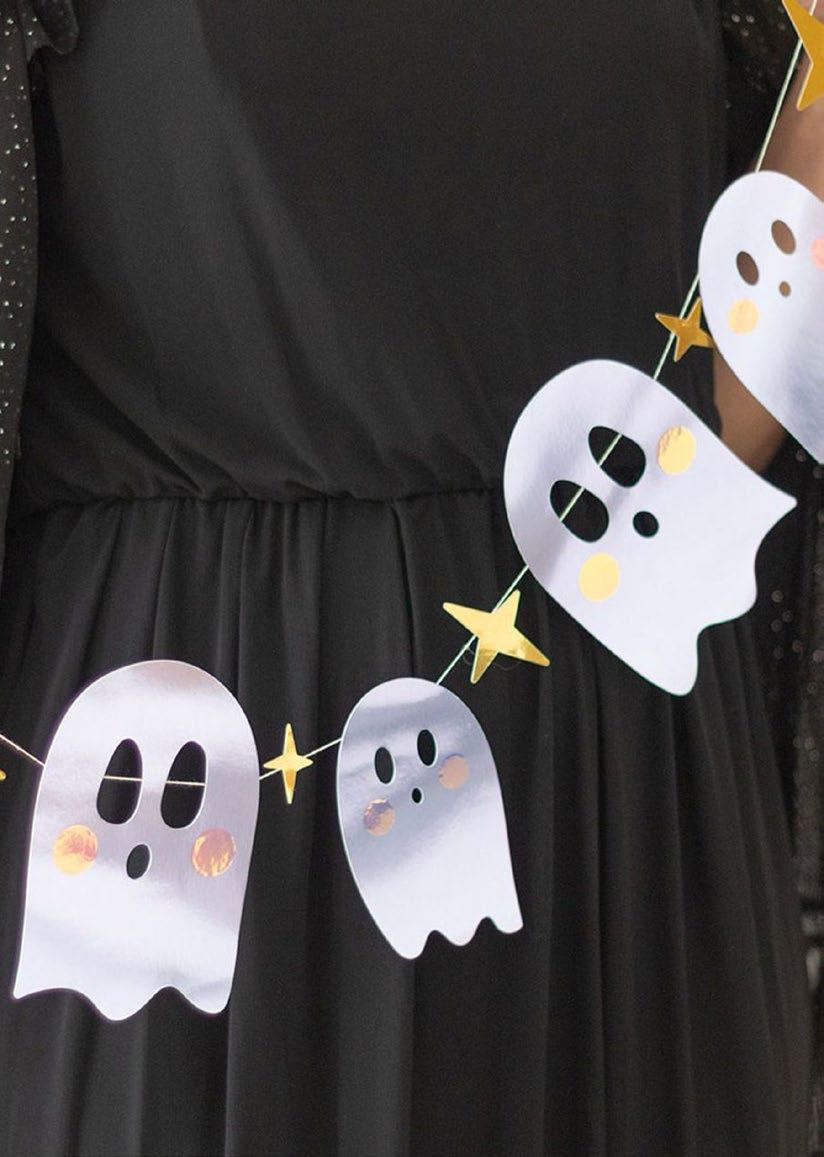
Holidays are all about creating magic, and Cricut makes it easy to bring that festive spirit to life. From crafting personalized gifts that warm the heart to designing stunning décor and party details that wow your guests, Cricut can make every celebration extra special. Whether it’s adding a personal touch to your gift wrapping or hosting the holiday party of the year, Cricut helps you craft unforgettable moments for every holiday!


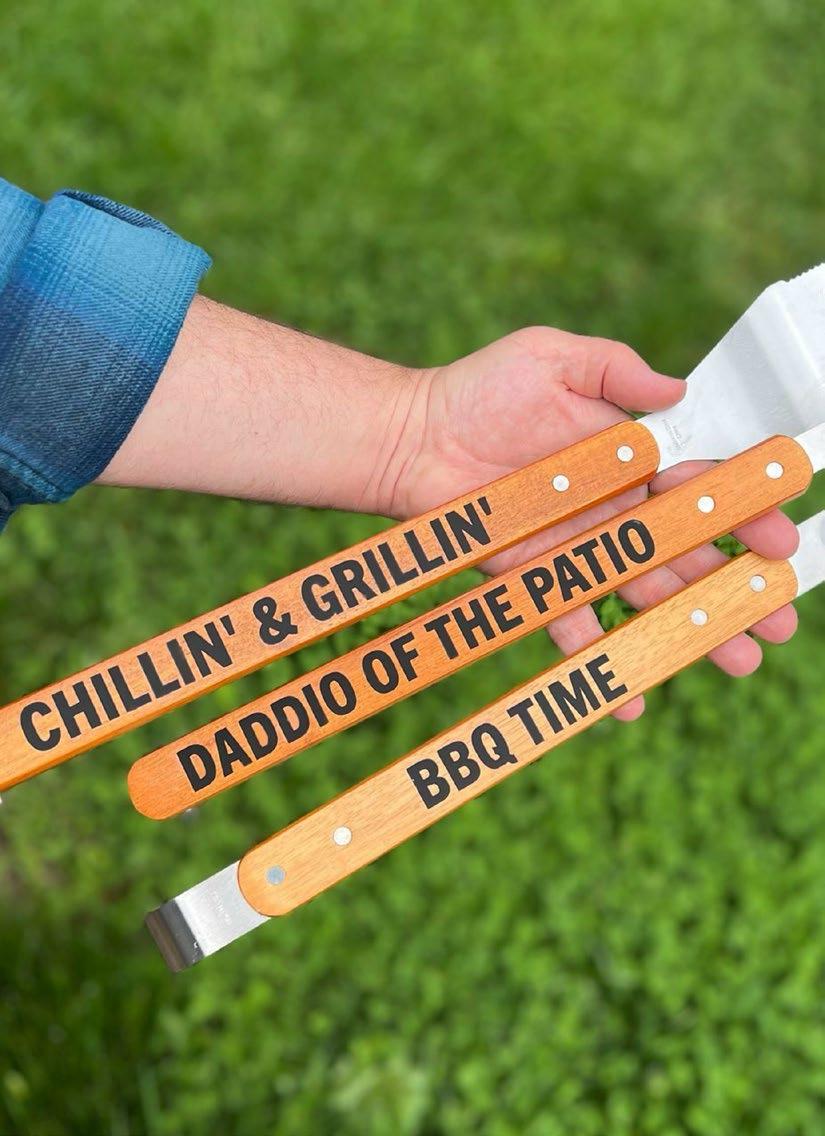

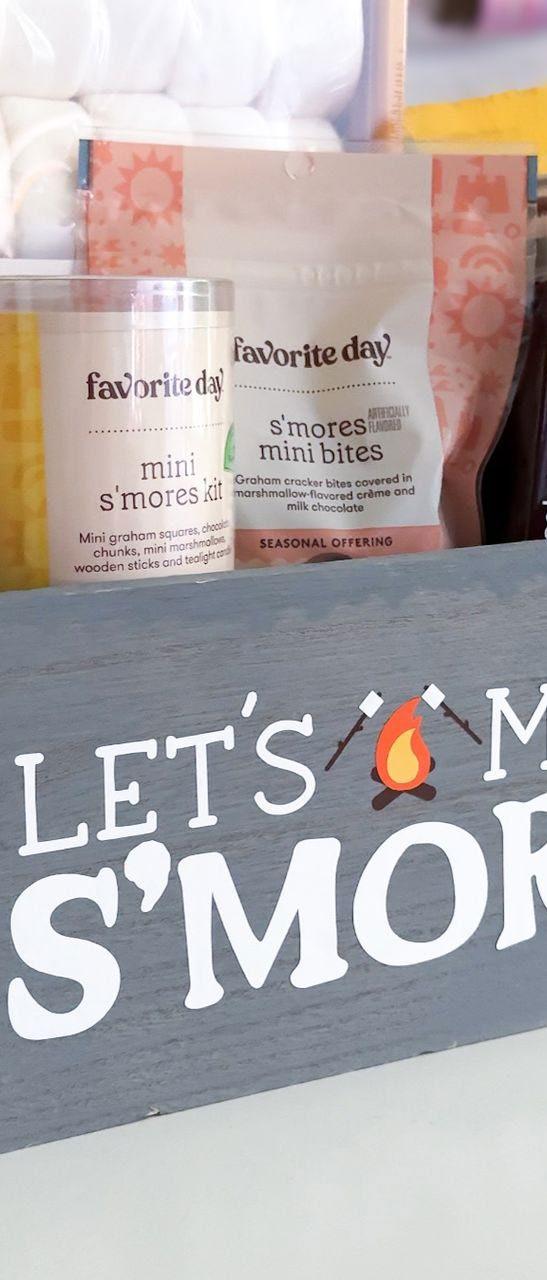
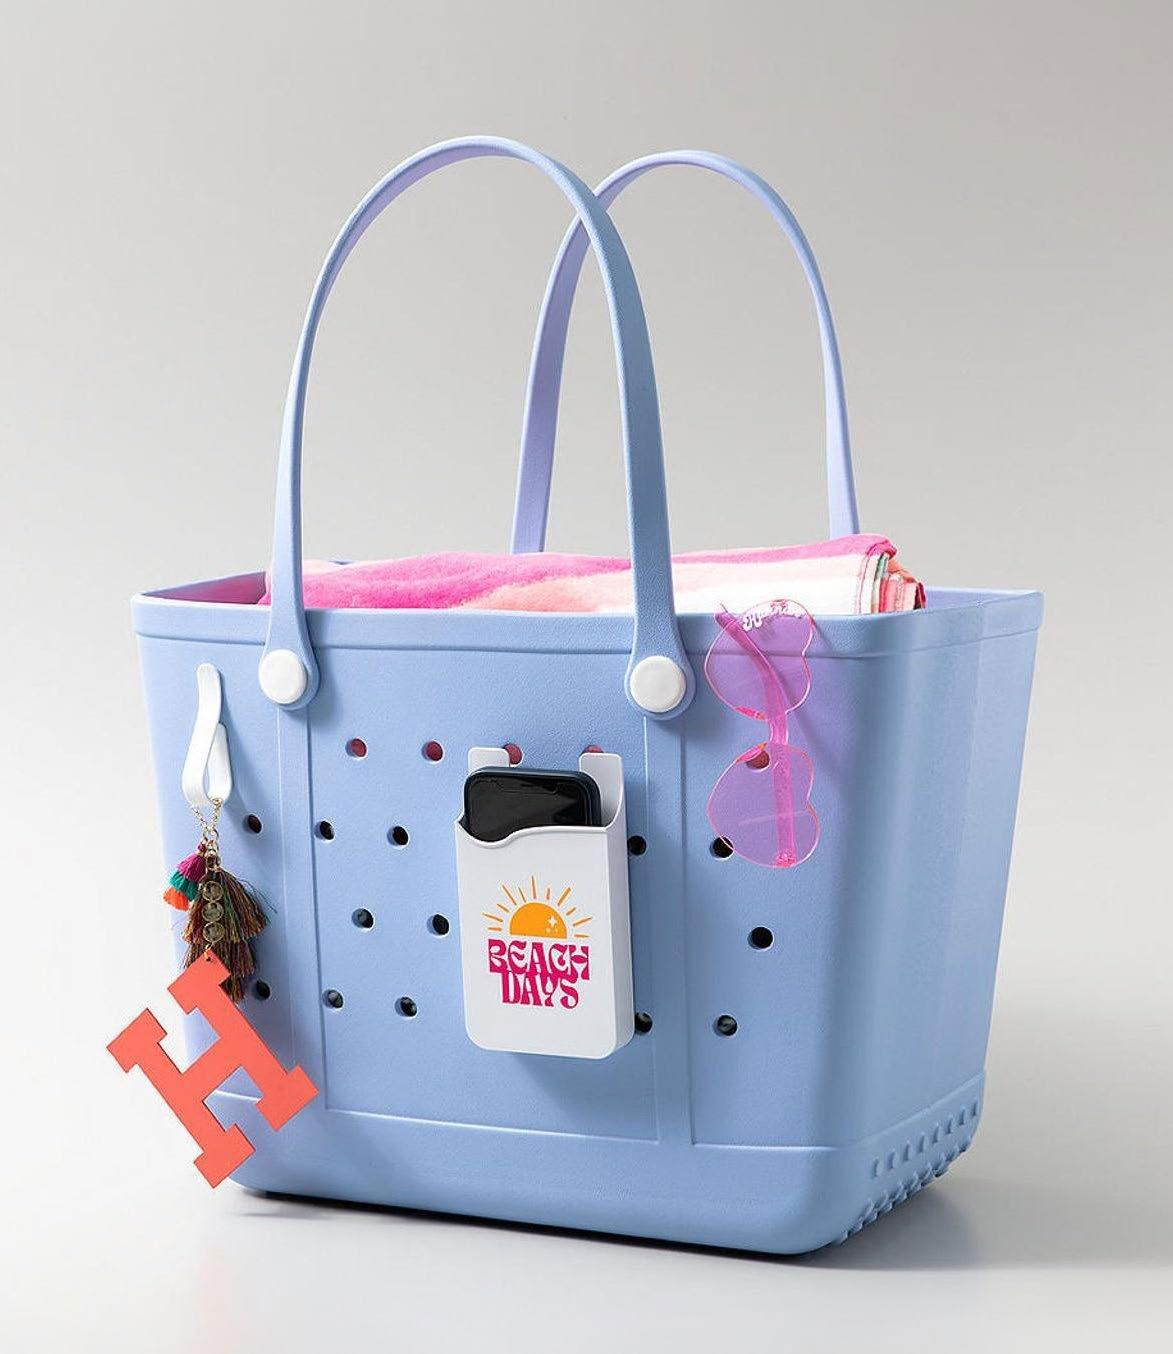
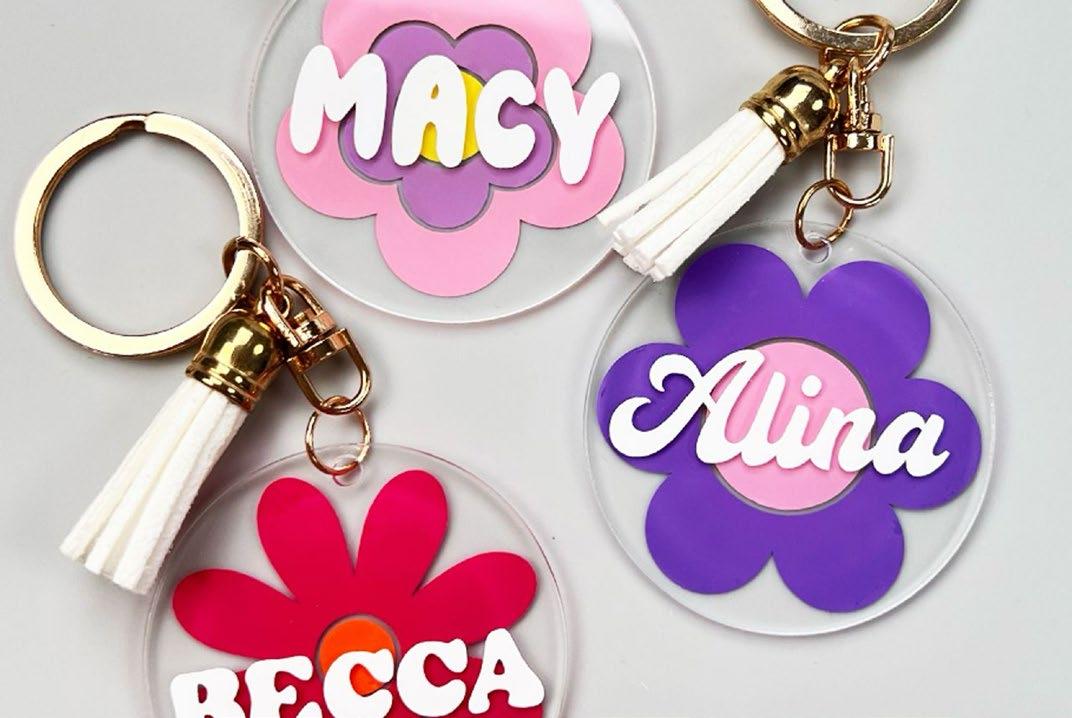
With Cricut, everyday life becomes a canvas for creativity! Whether you’re adding a personal touch to your home décor, crafting a custom tumbler or keychain, or designing a t-shirt that showcases your unique style, Cricut makes it easy to turn the ordinary into something extraordinary. No matter the day, Cricut helps you bring a little extra creativity into every corner of your life!


Need a little inspiration on your next project?
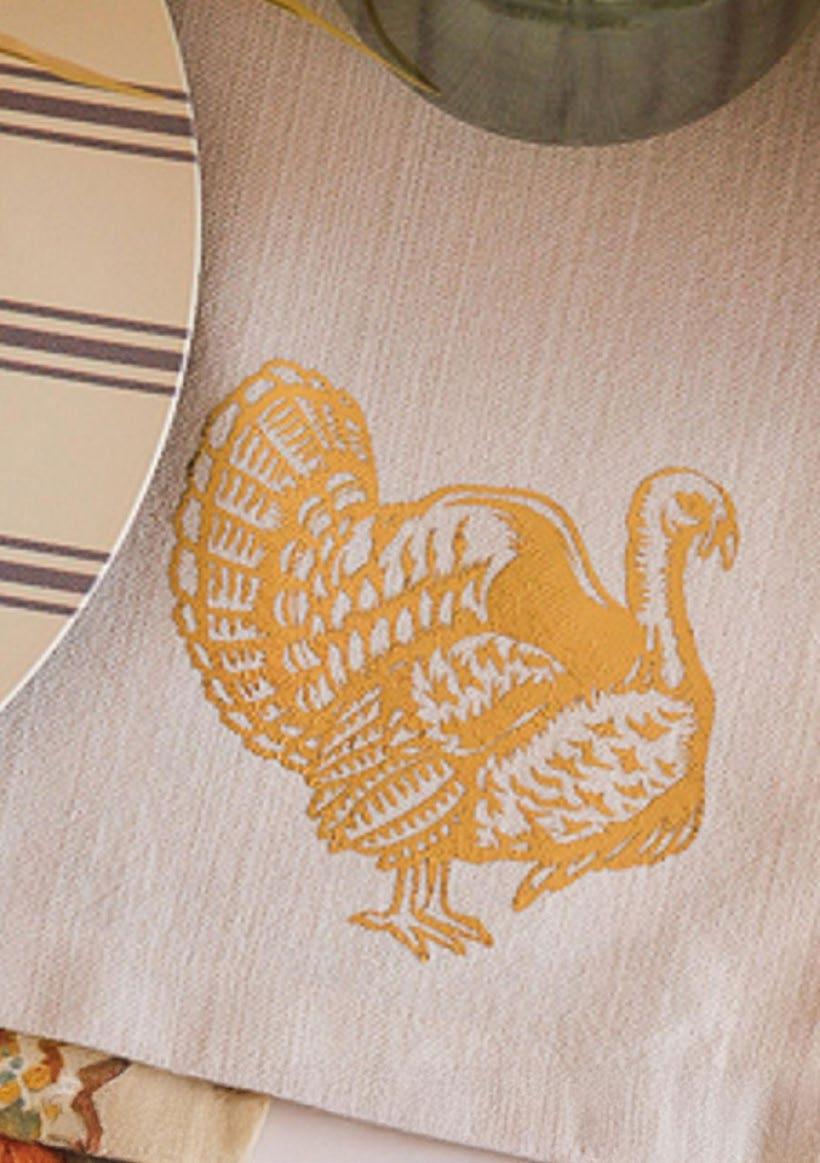
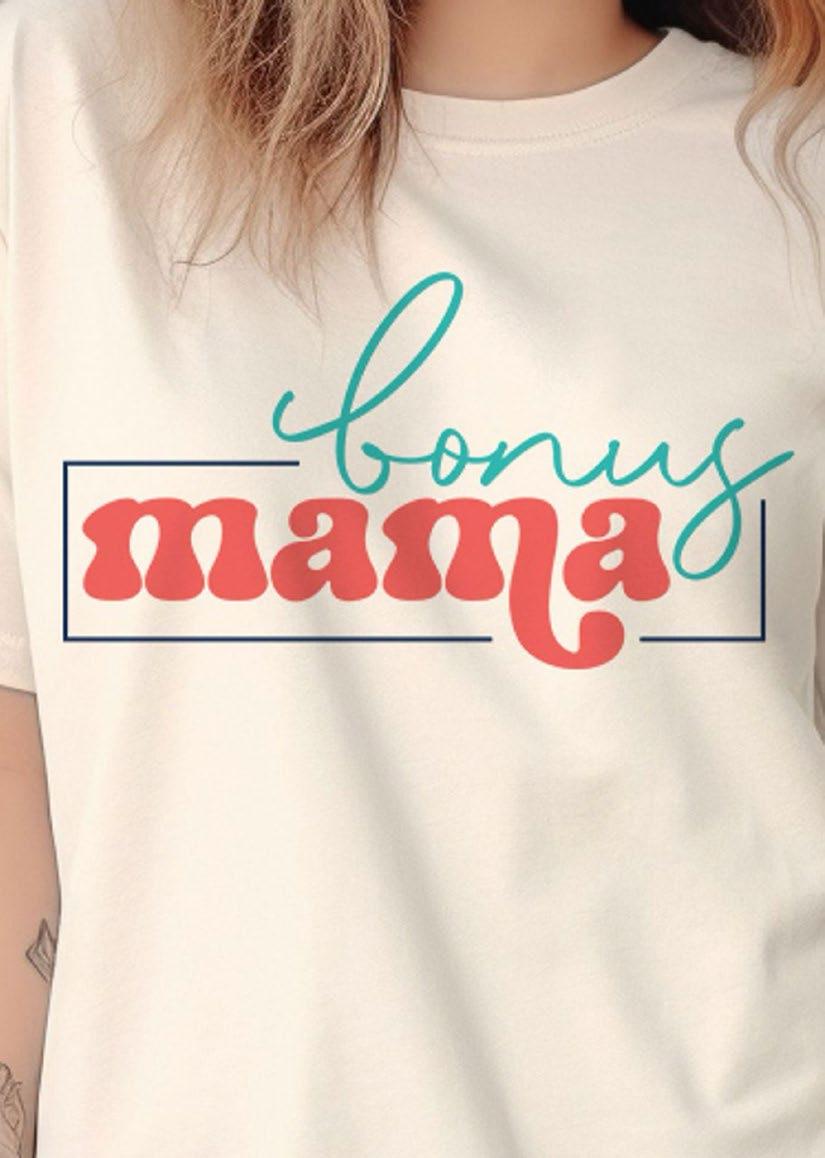
Created By: Hannah Lou

Materials to Cut
Cricut® Everyday Iron-On™, Black OR
Cricut® Smart Iron-On™, Black
Everything Else
Cricut® Standard Grip Machine Mat (not necessary for Smart Iron-On™)
Weeder
Cricut EasyPress®
Cricut EasyPress® Mat
Hoodie or T-Shirt
To alter the project, select Customize, then use the Edit panel to make changes.
Cut
Follow Design Space® prompts to cut images
Assemble
Use a Weeder Tool to remove unnecessary Iron-On pieces.
Go to the Cricut® Heat Guide for exact temperature and time settings
Press
Peel backer according to heat guide recommendations

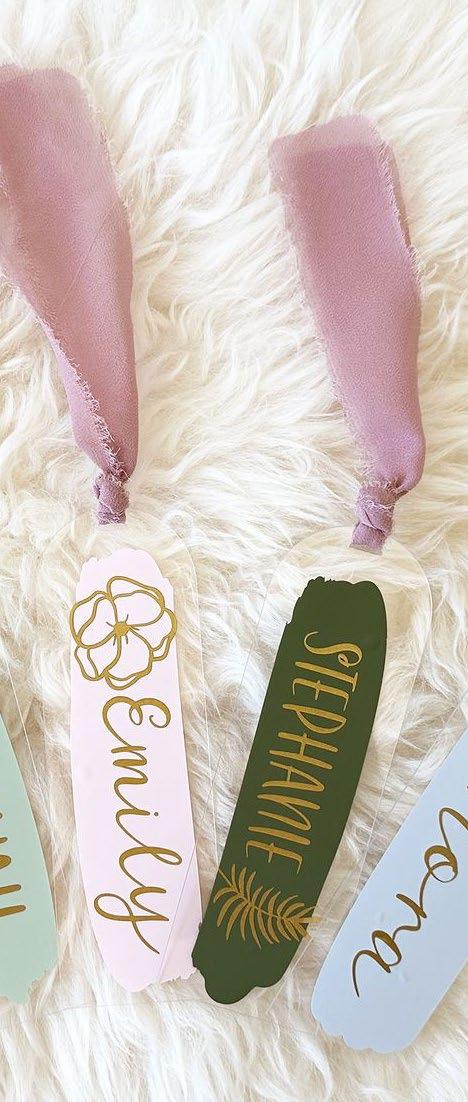
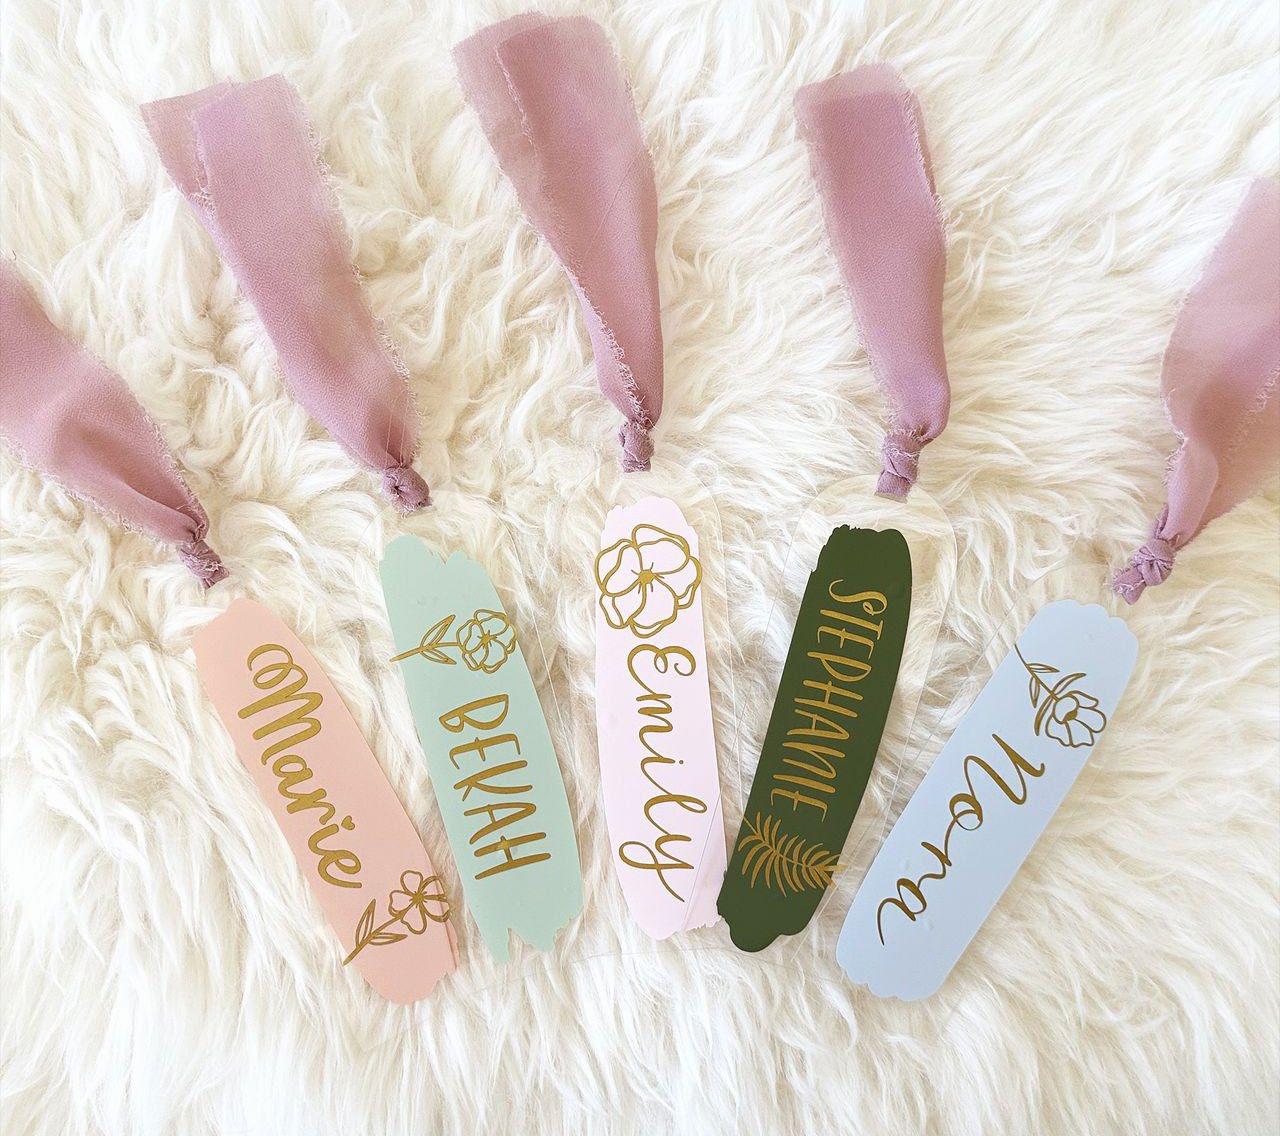
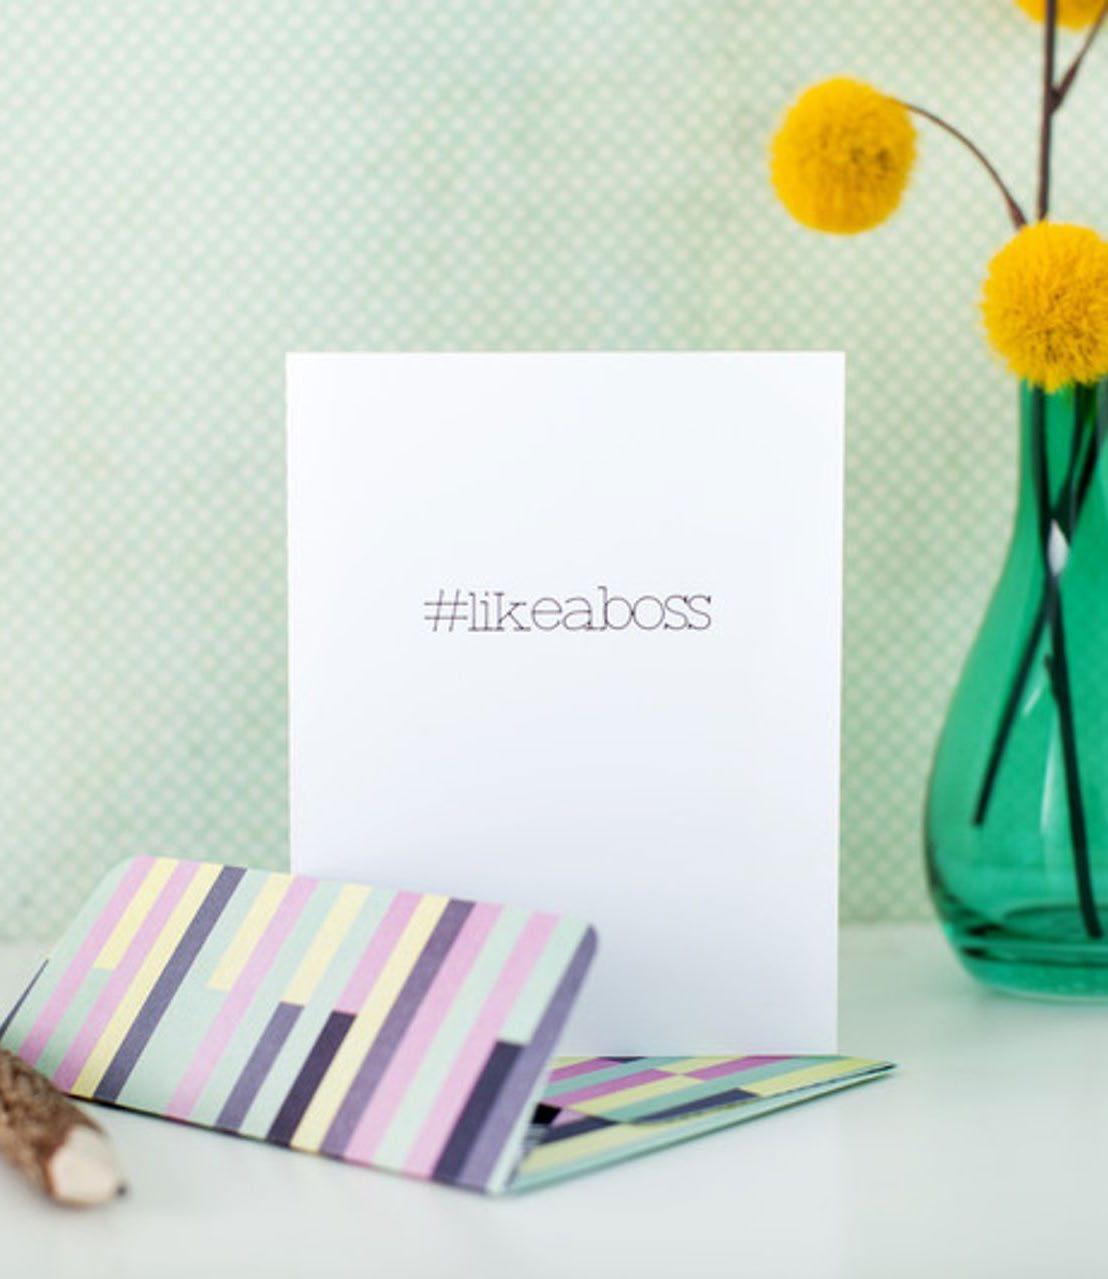
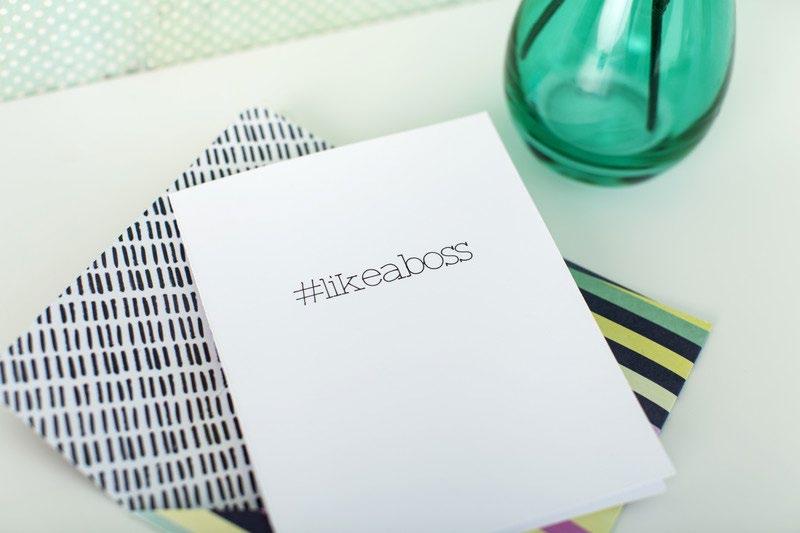
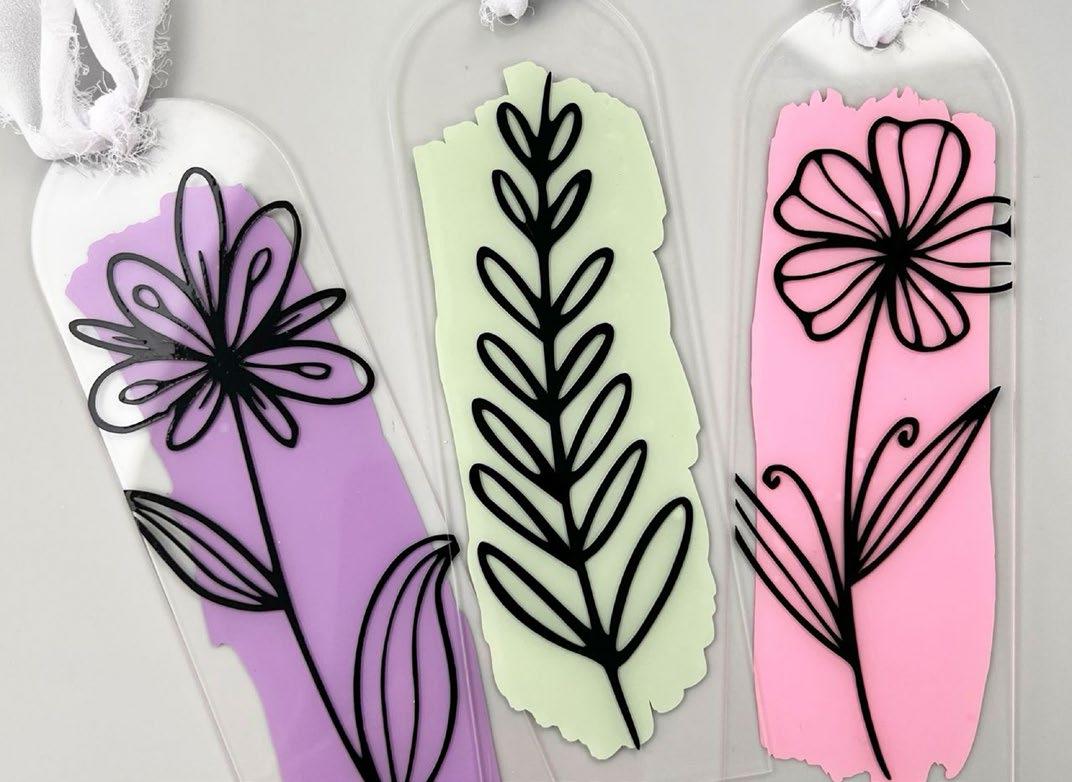
Created By: Wispy Willow Designs
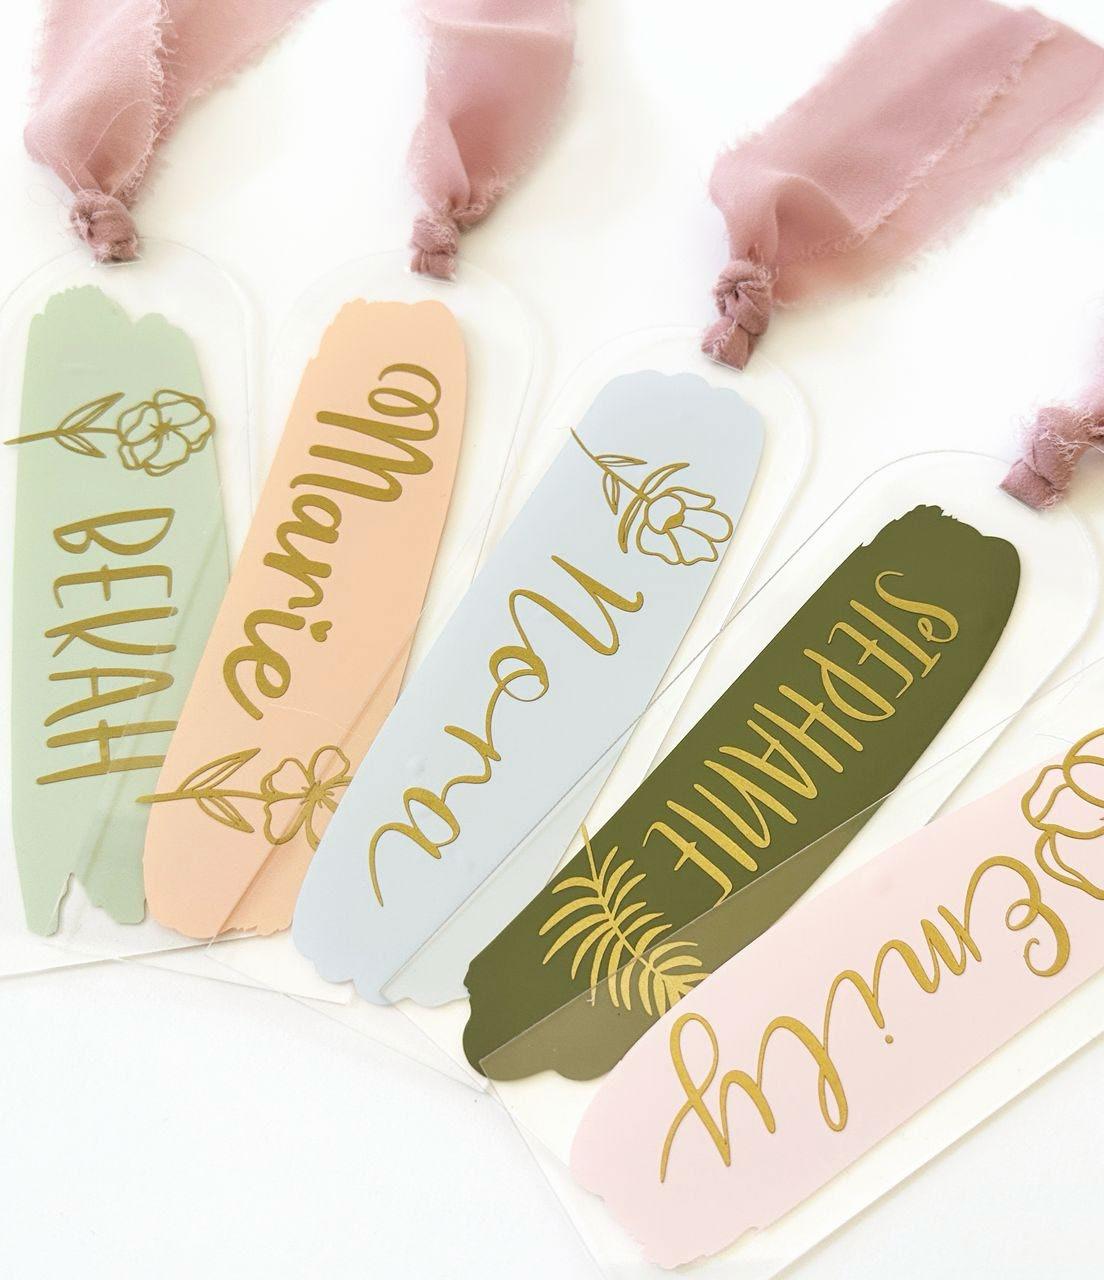
Materials to Cut
Cricut® Premium Vinyl, Gold OR
Cricut® Matte Metallic Smart Vinyl™, Champagne
Cricut® Premium Vinyl, Pastel Color of Choice (Backing Color)
Everything Else
Cricut® Standard Grip Machine Mat (not necessary for Smart Vinyl™)
Cricut® Transfer Tape
Weeder Scraper
Chiffon Ribbon of your choice
Clear Acrylic Bookmarks
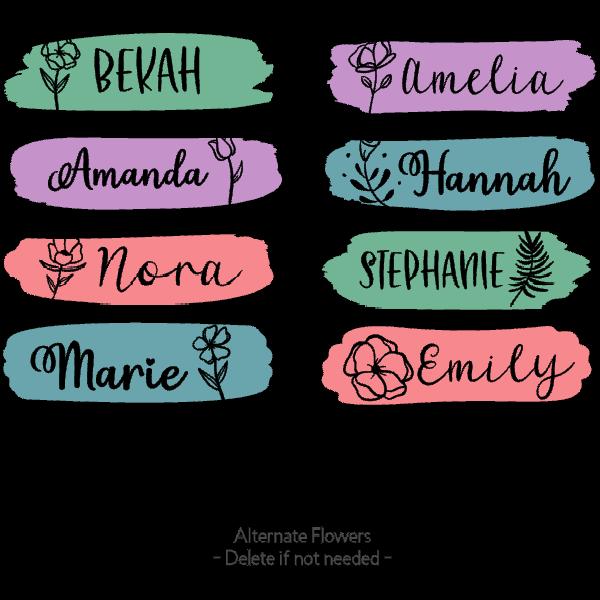
To personalize the project, select Edit a Copy, then use the Edit panel to make changes.
Cut
Follow Design Space® prompts to cut images
Assemble
Weed the vinyl and add transfer tape. Each bookmark will need one brushstroke and one name and flower.
Transfer the brushstroke on the front of the clear acrylic bookmark.
Transfer the name and flower on top of the brushstroke vinyl. Cut your ribbon. I used two bookmarks length of ribbon. Tie in a simple knot.
Tada! All ready to gift or place in your favorite book.
Check out the assembly photos in Design Space!
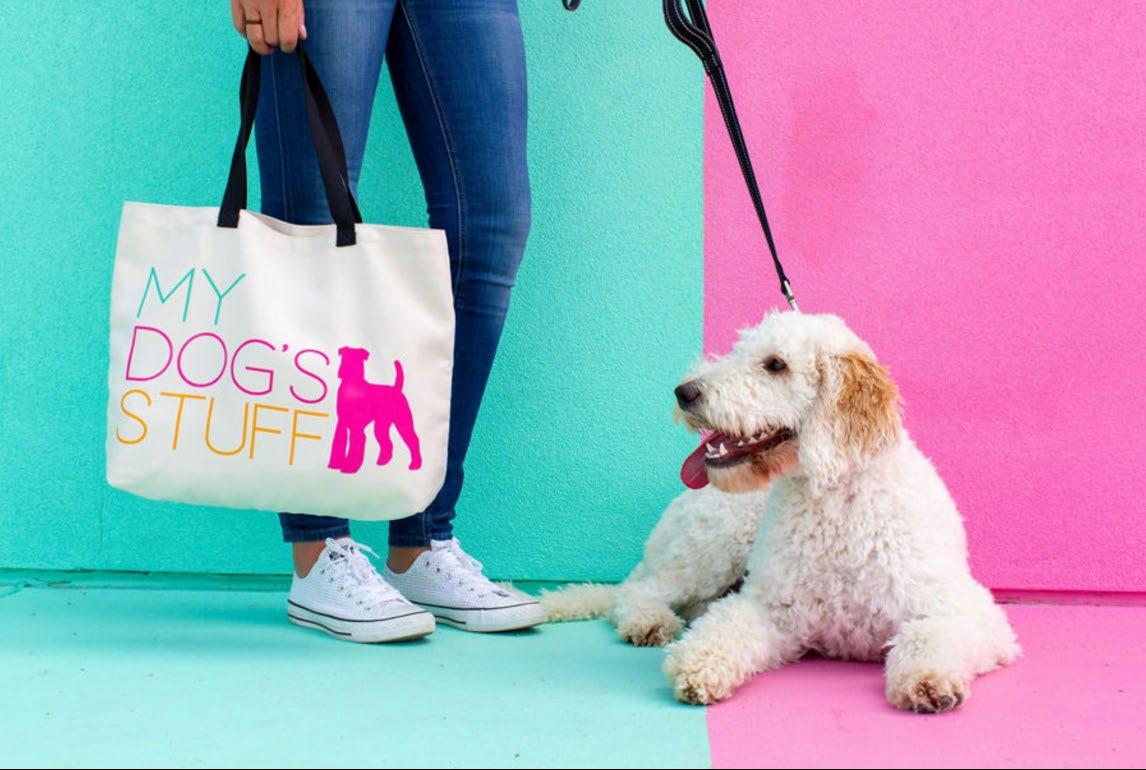
is My

Materials to Cut
Infusible Ink™ Transfer Sheets, True Yellow
Infusible Ink™ Transfer Sheets, Bright Teal
Infusible Ink™ Transfer Sheets, Party Pink
Everything Else
Cricut® Standard Grip Machine Mat - 12” x 12”
EasyPress® 12” x 10”
EasyPress® Mat20” x 16”
Reverse Action Tweezers
Lint Roller
Butcher Paper
Cardstock, White
Heat Resistant Tape (optional)
Tote Bag Blank
If you want to alter the project, select Customize, then use the tools in the Edit panel to make changes before you cut.
To personalize the text of this project, use the text tool to select the text you want to change, and type in your desired letters. Use the Attach option to preserve the arrangement of text before cutting.
Cut
Be sure to Mirror the mat when using an Infusible Ink™ Transfer Sheet and place the shiny side (clear liner) down on the mat.
Follow the prompts in Design Space® to cut the images from the Infusible Ink™ Transfer Sheet.
Assemble
Use the tweezers to remove unnecessary Infusible Ink™ pieces, leaving design on the clear backer.
For Cricut EasyPress® 3 download the Cricut Heat™ app to get precise settings and step by step instructions. For all other Cricut Heat Press machines, get time and temperature settings and instructions on the Cricut Heat Guide.
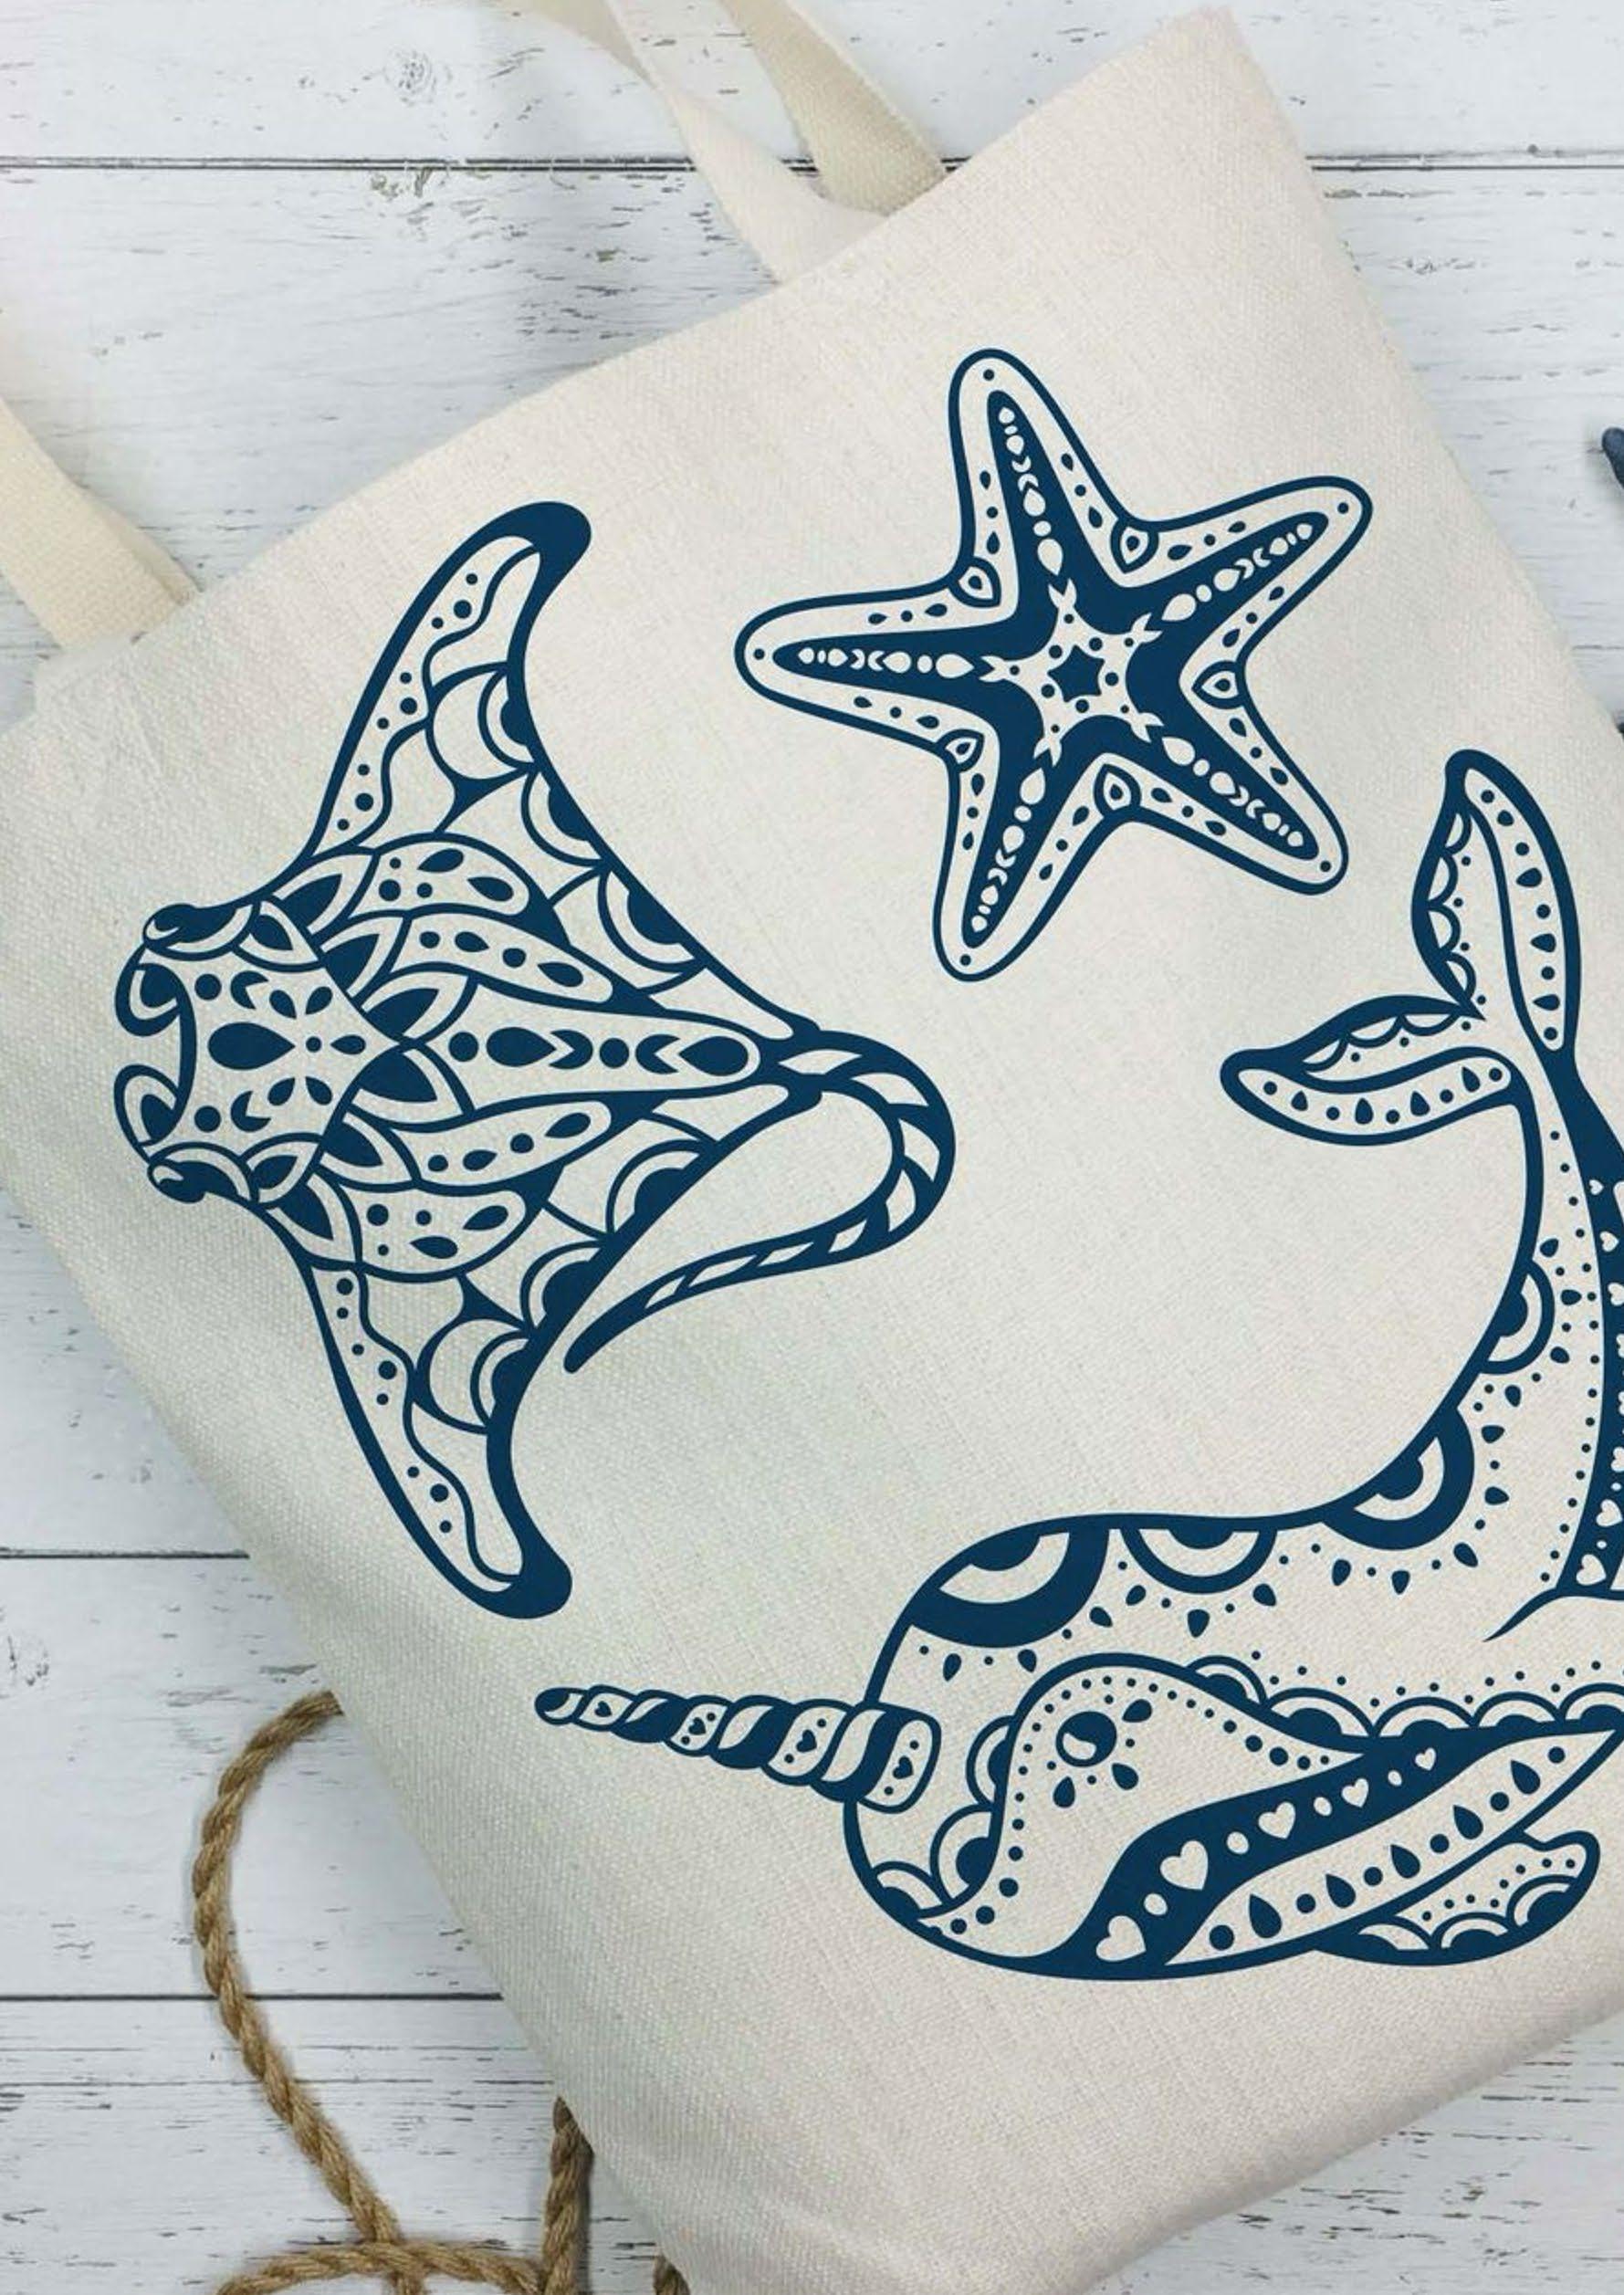
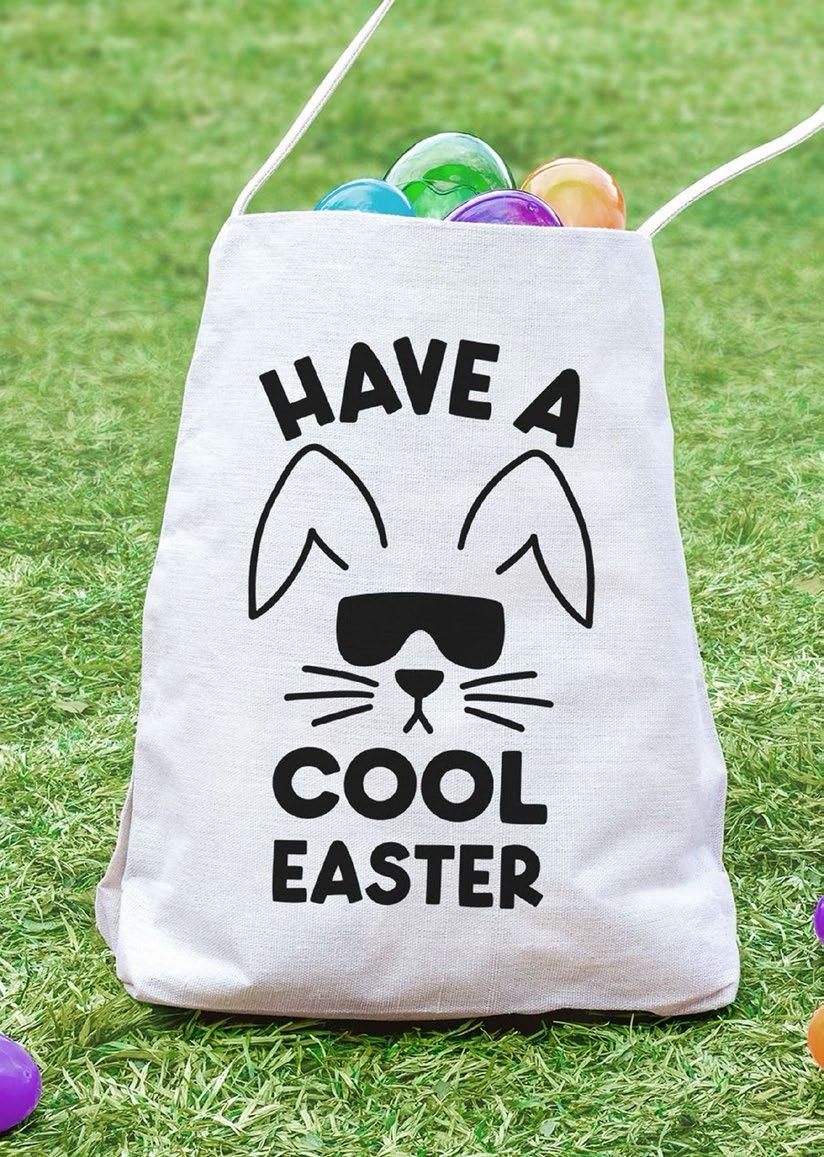
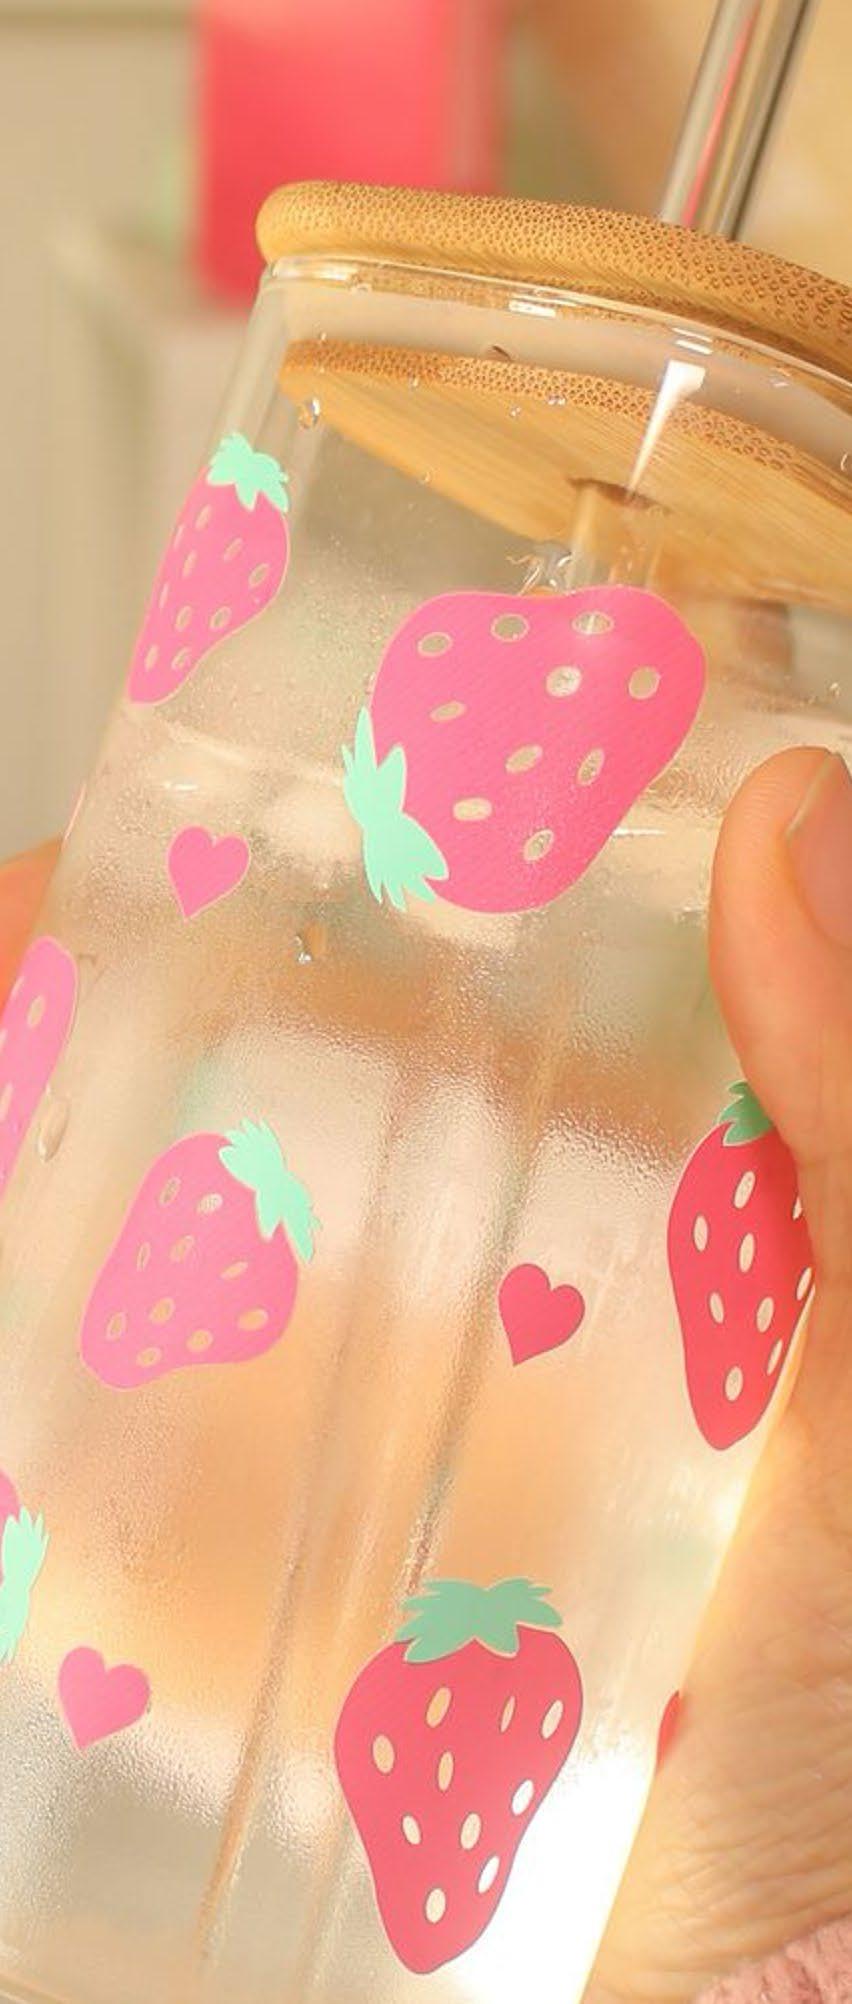
Created By: Starburst Craft - Sana Saad

Materials to Cut
Cricut® Cold-Activated, Color-Changing
Vinyl – Permanent, Light Pink - Magenta
Cricut® Premium Vinyl, Mint - Permanent
Everything Else
Cricut® Standard Grip Machine Mat
Cricut® Transfer Tape
Weeder
Scraper
Can Glass
To alter the project, select Customize, then use the Edit panel to make changes.
Cut
Follow Design Space® prompts to cut images
Assemble
Use a Weeder Tool to remove unnecessary vinyl pieces. Use Transfer Tape and a scraper tool to apply vinyl cuts to your can glass. Make sure your surface is clean and dry.
Check out the assembly video in Design Space!
Created By: Coriander Dear - Glitter Arty

Materials to Cut
Cricut® Everyday IronOn™, Gold OR
Cricut® Smart Iron-On™, Gold
Everything Else
Cricut® Standard Grip Machine Mat (not necessary for Smart Iron-On™)
Cricut Heat Press
Cricut EasyPress™ Mat
Weeder
Tote Bag
If you want to alter the project, select Customize, then use the tools in the edit panel to make changes before you cut.
When you’re ready, select Make It, and make sure you mirror your design.
Make sure your material is shiny side down on your cutting mat (or loaded into the machine directly when using Smart Iron-On™
Follow prompts in Design Space®
Assemble
Use a weeder tool to remove unnecessary iron-on pieces, leaving design on the clear backer.
For Cricut EasyPress® 3 download the Cricut Heat™ app to get precise settings and step by step instructions. For all other Cricut Heat Press machines, get time and temperature settings and instructions on the Cricut Heat Guide.

Materials to Cut
Cricut® Premium Vinyl™Permanent, Stone Yellow
Cricut® Premium Vinyl™Permanent , Pink Blush OR
Cricut® Smart Vinyl™Permanent, Stone Yellow
Cricut® Smart Vinyl™Permanent, Party Pink
Everything Else
Cricut® Standard
Grip Machine Mat (not necessary for Smart Vinyl)
Cricut® Transfer Tape
Weeder (or Tweezers)
Scraper (or Credit Card)
Cell Phone Holder
Follow Design Space® prompts to cut images
Assemble
1. Remove vinyl from machine mat. If using Smart Vinyl, skip to step 3.
2. Place protective cover back on machine mat.
3. Use hand scissors to trim material around cut design (this makes it easier for the next step and helps you save material for another project).
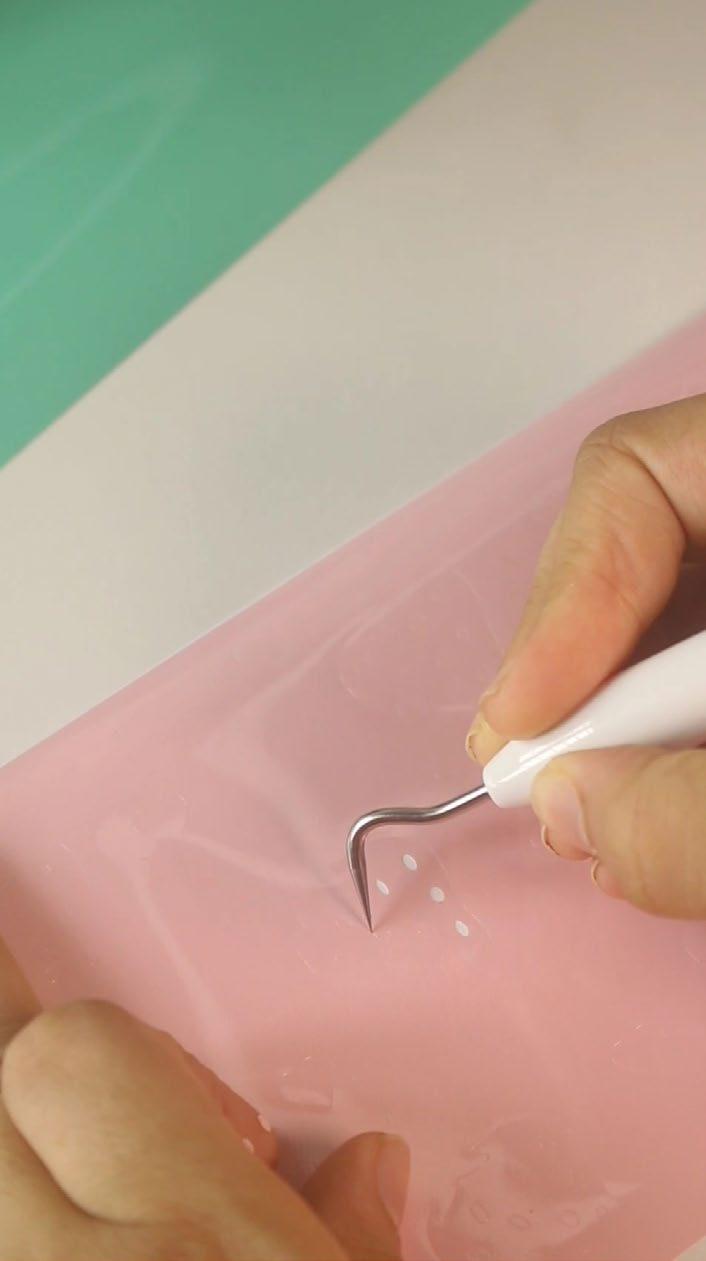
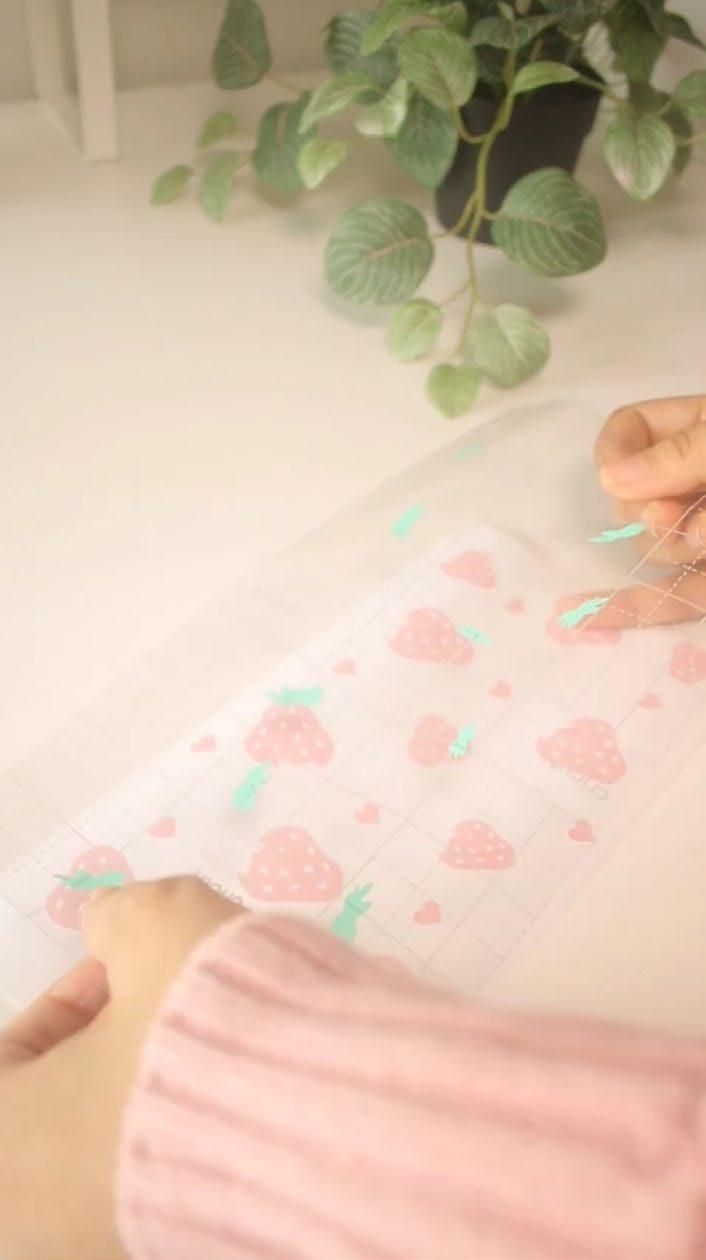
4. Use a Weeder tool, tweezers or your fingers to gently lift and peel away unwanted material from liner. Your cut design should remain on liner. This process is called weeding.
5. Cut a piece of Transfer Tape roughly the size of your decal. This clear film keeps pieces of your design in place during application.
6. Use Scraper tool (or credit card) to burnish (firmly press and smooth) Transfer Tape over your decal. Flip to burnish the backside, too.
7. Slowly peel back the white liner at an angle, making sure decal adheres to tape. If any pieces remain on liner, reapply the Transfer Tape, then burnish again.
8. Slowly peel back the white liner at an angle, making sure decal adheres to tape. If any pieces remain on liner, reapply the Transfer Tape, then burnish again. TIP: Press hard – you will not damage the material.
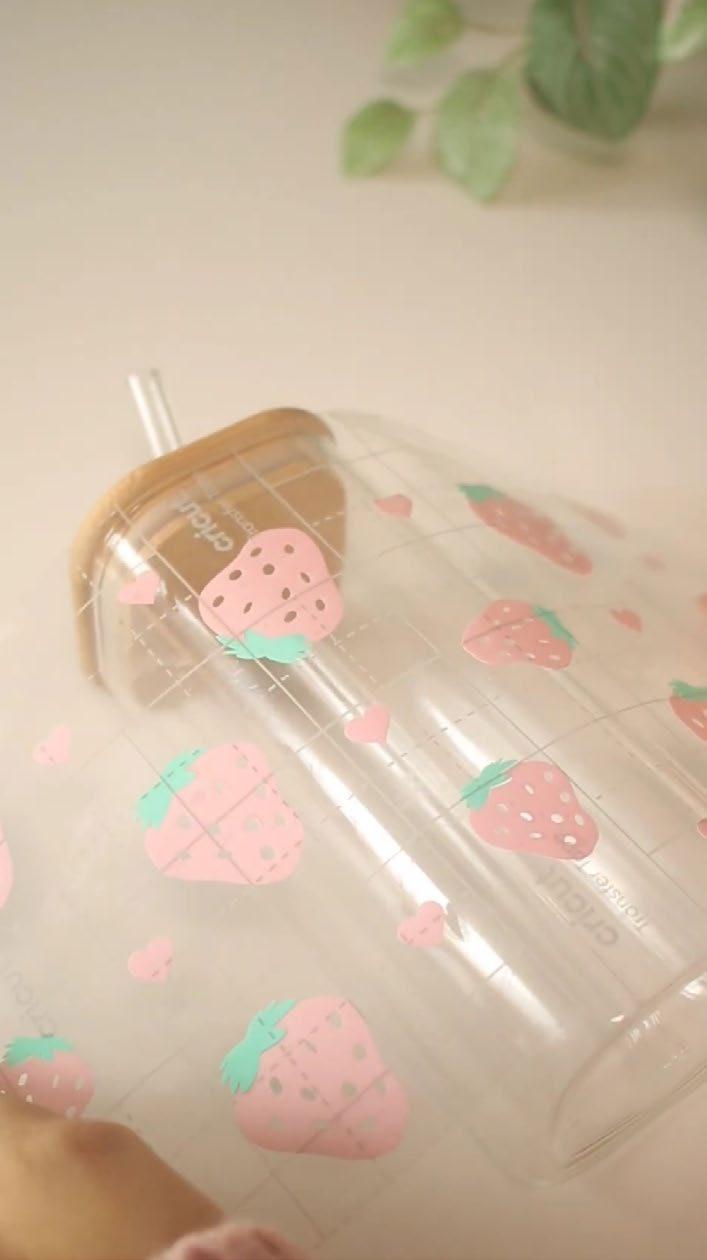
9. Prepare the base. Ensure your surface is clean and dry.
10. Place decal in desired position.
11. Use Scraper tool (or credit card) to firmly press (burnish) decal to surface.
12. Slowly peel back Transfer Tape at a 45-degree angle, using a back and forth motion to release the vinyl. If pieces of decal remain on tape, press back down to burnish again. When Transfer Tape is removed, push bubbles in vinyl out toward edges with a scraper tool (or credit card).
Created By: Pkay Oldham
Materials to Cut
Cricut® Value Vinyl, White
Cricut® Value Vinyl, Orange
Cricut® Value Vinyl, Yellow
Cricut® Value Vinyl, Brown
Everything Else
Cricut® Standard Grip Machine Mat
Cricut® Transfer Tape
Weeder
Scraper
Caddy
To personalize the project, select Edit a Copy, then use the Edit panel to make changes.
Cut
Follow Design Space® prompts to cut images
Assemble
Weed away unnecessary vinyl pieces
Layer your yellow flame onto your orange flame
Layer your flame layer on top of your brown logs
Pickup your white vinyl with transfer tape and then also pick up your fire layer
Use a scraper tool to transfer your entire design to your caddy
Check out the assembly video on Cricut Instagram!
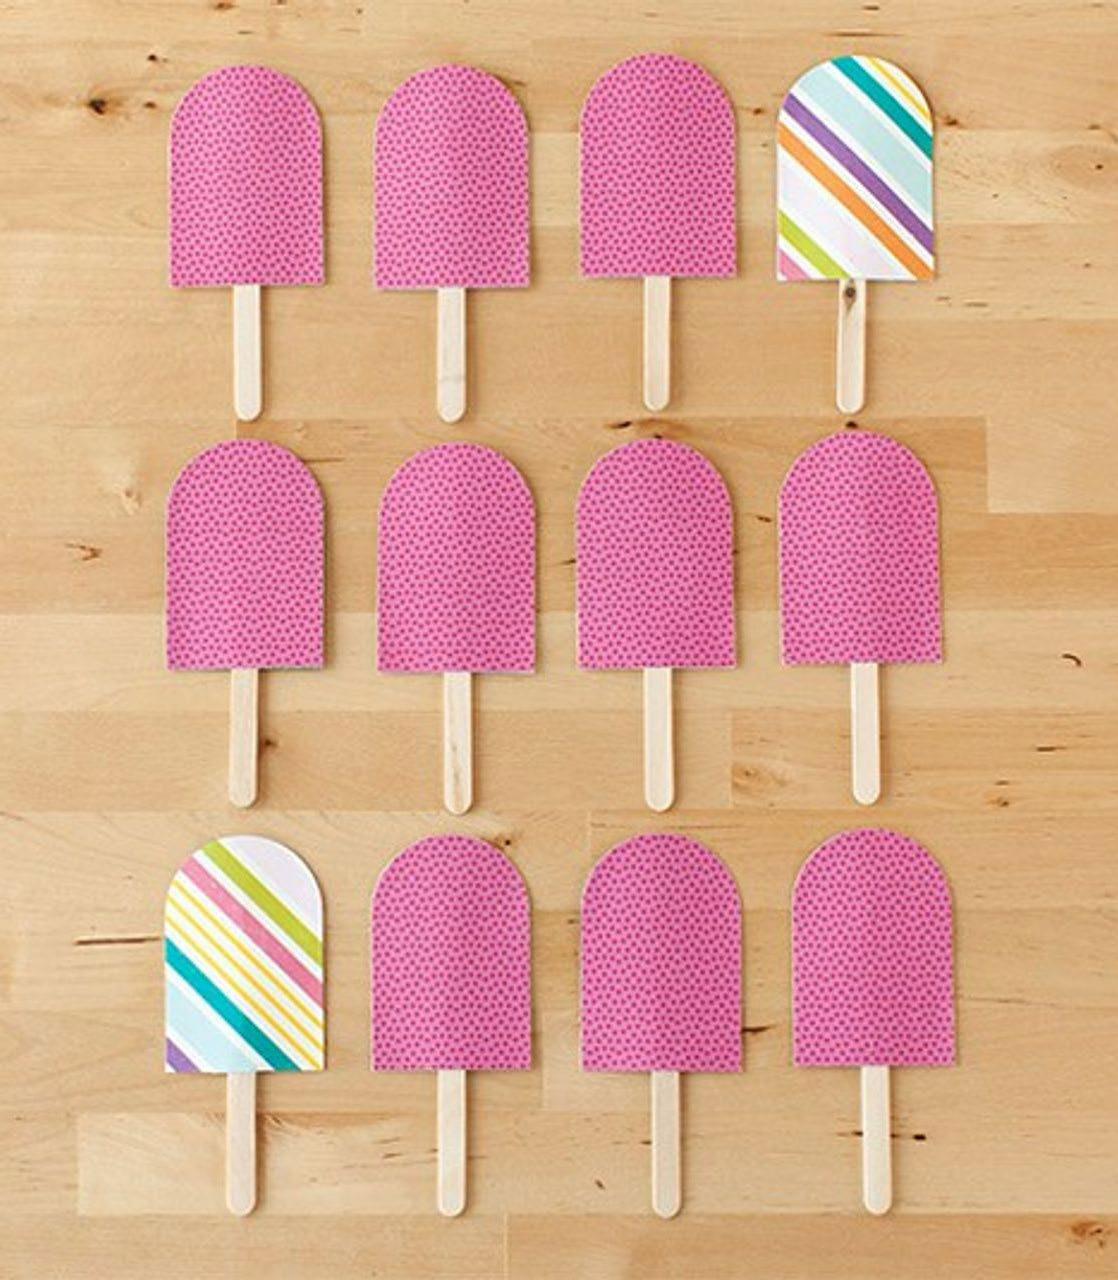
Materials to Cut
Cardstock, Same Pattern
Patterned Cardstocks, Varying Colors
Everything Else
Cricut® Light Grip
Machine Mat
Hot Glue Gun and Glue Sticks
Popsicle Sticks, 12
If you want to alter the project, select Customize, then use the tools in the Edit panel to make changes before you cut.
Cut
Follow the prompts in Design Space® to cut the images from the cardstock.
Assemble
Glue Popsicle sticks to the back of your same patterned cardstock.
Back the same patterned cardstock with patterned Popsicle pieces.
Materials to Cut
Chipboard, 2mm
Cardstock, Brown
Everything Else
Cricut® StrongGrip
Machine Mat
Cricut® LightGrip
Machine Mat
Single Scoring Wheel or Double Scoring Wheel (depending on material)
Knife Blade
Spray Adhesive
Masking Tape
Spackle
Spray Paint, Metallic
Adhesive for Paper
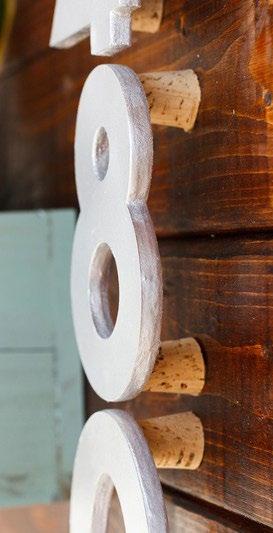
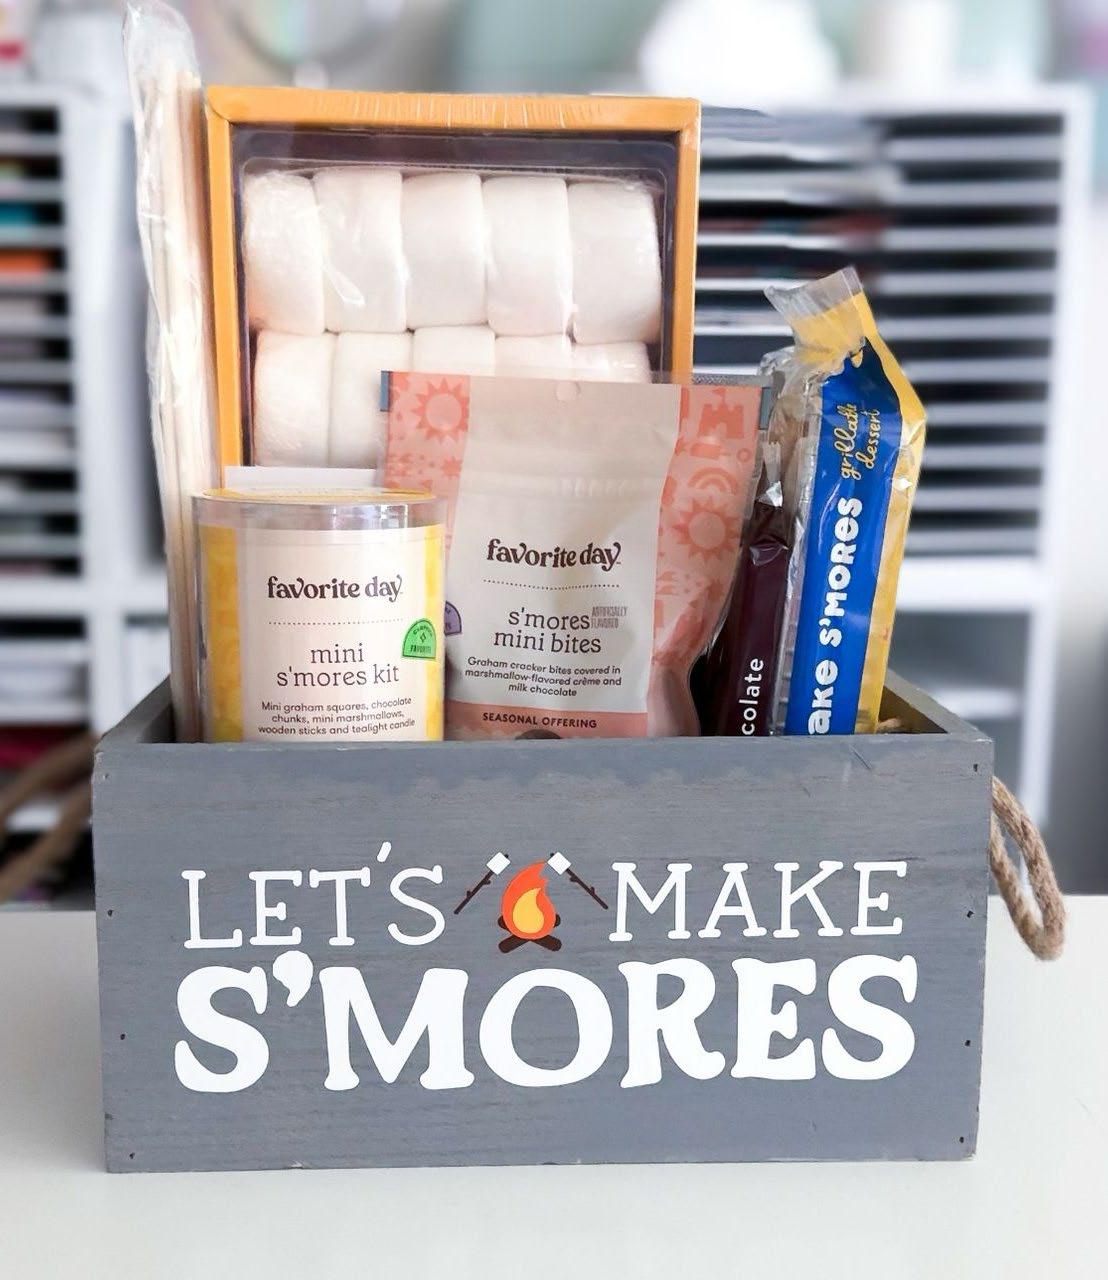
Start making!
If you want to alter the project, select Customize, then use the tools in the Edit panel to make changes before you cut.
To make changes to this project, use the Mat Preview screen to adjust colors or move pieces to different mats. Make sure all of your pieces are within an 11” x 11” (27.9 cm x 27.9 cm) area, oriented to the top left corner of the mat.
For best results, chipboard should be opened and left out for 24 hours to acclimate to your climate. If your chipboard starts to warp, place it under a heavy object.
If you are covering chipboard before cutting, coat both the back of the paper and the top of chipboard with an even coat of adhesive. Press the paper or photo down with the brayer (or firm, even hand pressure) and allow to dry completely before cutting. Additional passes may be needed for a complete cut.
Follow the prompts in Design Space® to cut the images from the cardstock.
Mat 1 to 3 - Use masking tape or painter’s tape to secure edges of the chipboard to your mat.
Follow the prompts in Design Space® to cut images from the chipboard, using the correct cut setting and the Knife Blade.
Before removing your project from the machine, double check to make sure your project has cut all the way through and perform another cut pass if necessary before unloading the mat.
For painted chipboard projects, we recommend assembling before painting. Using a sealer will improve painting experience.
Assemble
Layer 10 chipboard number pieces together with spray adhesive.
Layer one cardstock number on top of the chipboard stack. Smooth spackle along the edges of the layered numbers until the layers are indistinguishable. Allow the spackle to dry and harden. When dry, spray the letters with metallic spray paint.
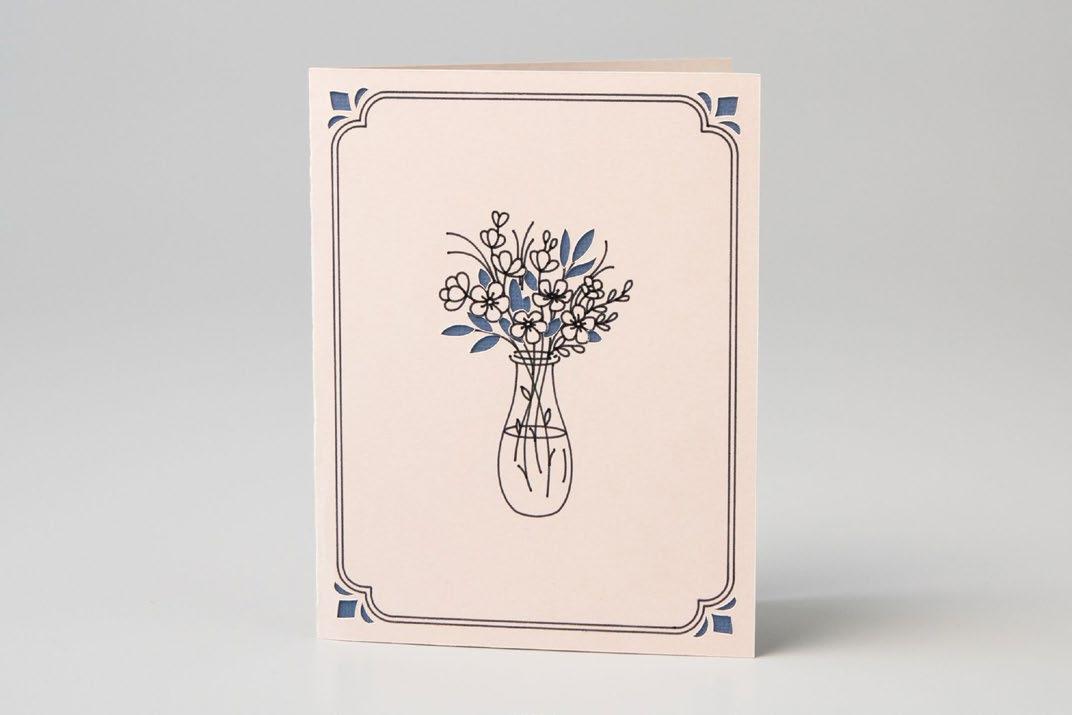
Materials to Cut
Cardstock, White
Lined Patterned Paper
Everything Else
Cricut® LightGrip Machine Mat
Single Scoring Wheel or Double Scoring Wheel (depending on material)
Adhesive for Paper
Fine Point Pen, Midnight
If you want to alter the project, select Customize, then use the tools in the Edit panel to make changes before you cut.
Follow the prompts in Design Space® to cut the images from cardstock.
Insert your scoring tool when prompted.
Insert your materials in the machine, then follow the prompts to insert your Cricut® pen or marker into your machine and cut out the images.
Assemble
Fold along the score lines of the card and envelope. Fold the envelope into shape and glue the flaps.

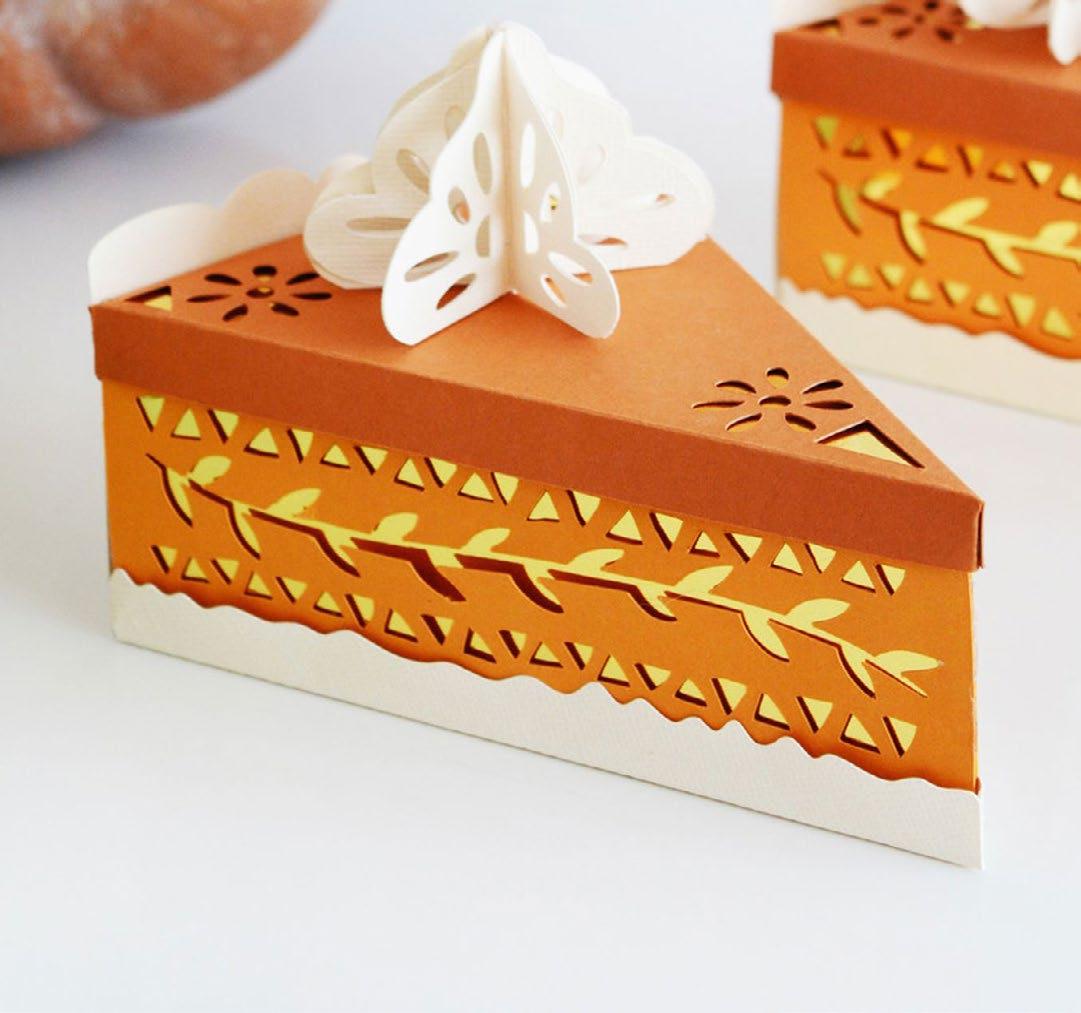
Materials to Cut
Cardstock, Orange
Cardstock, Pumpkin
Cardstock, Cream
Metallic Cardstock, Gold
Everything Else
Cricut® StandardGrip Machine Mat
Weeder
Cricut® LightGrip Machine Mat
Single Scoring Wheel or Double Scoring Wheel (depending on material)
Adhesive for Paper
Hot Glue Gun and Glue Sticks
If you want to alter the project, select Customize, then use the tools in the Edit panel to make changes before you cut.
If you plan on putting food items in your pie box, we recommend lining the box with food-safe wax paper, or packaging the food items properly before placing inside.
Cut
Follow the prompts in Design Space® to cut the images from the cardstock.
Insert your scoring tool when prompted.
Assemble
1. Fold along the score lines of the box and lid.
2. Slip the metallic gold cardstock cutouts into the inside of the box.
3. Fold the whipped cream cutouts and use adhesive to adhere the pieces together to make the 3D cream.
4. Use a glue gun to attach the assembled 3D cream to the top of the pie box.


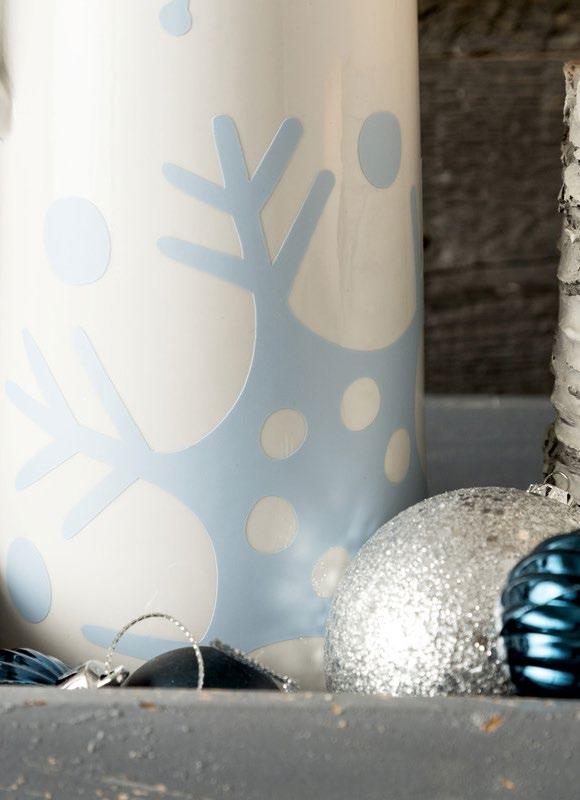
Materials to Cut
Premium Vinyl™Permanent, Silver
Everything Else
Cricut® StandardGrip
Machine Mat
Transfer Tape
Weeder
Scraper
Tall Ceramic Pitcher
If you want to alter the project, select Customize, then use the tools in the Edit panel to make changes before you cut.
Cut
Follow the prompts in Design Space® to cut the images from the vinyl.
Assemble
1. Remove the unneeded pieces using a weeder tool. It is usually easiest to move from the inside out when weeding.
2. Use Transfer Tape and your Scraper Tool to apply the vinyl cuts to your project. Make sure surfaces you plan to adhere to are clean and dry.

Design Space ®
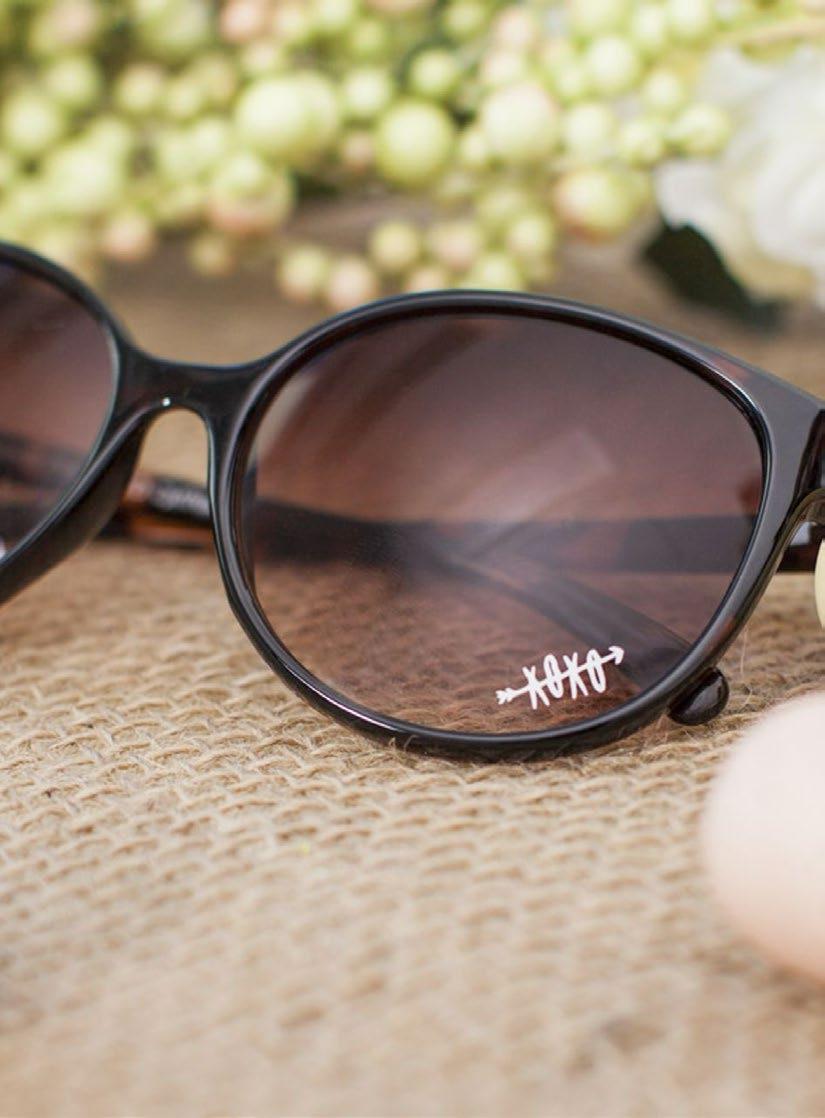
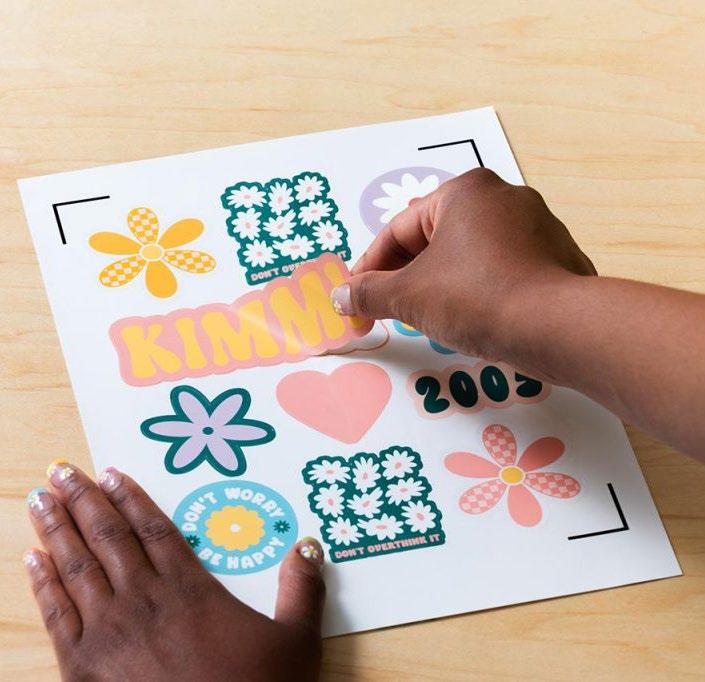
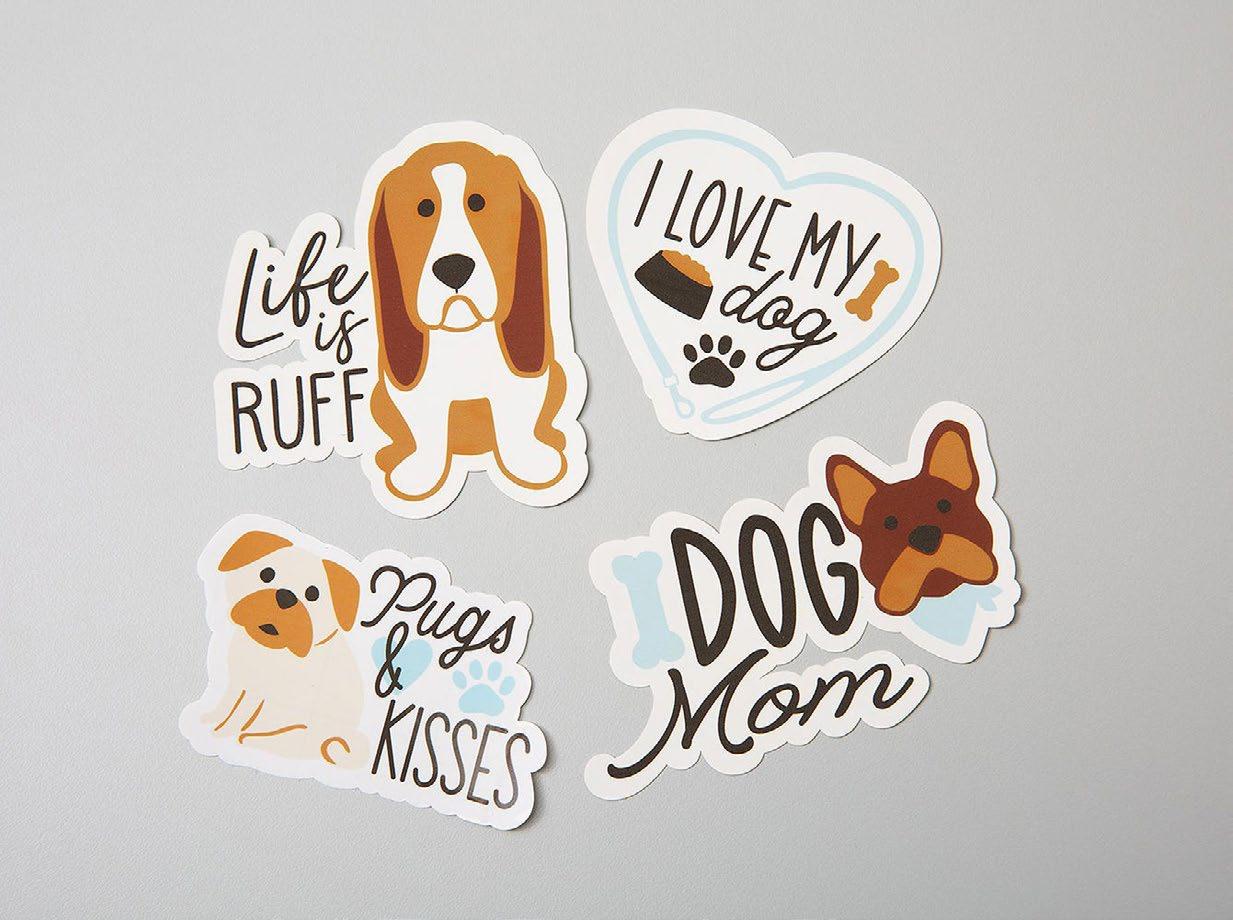
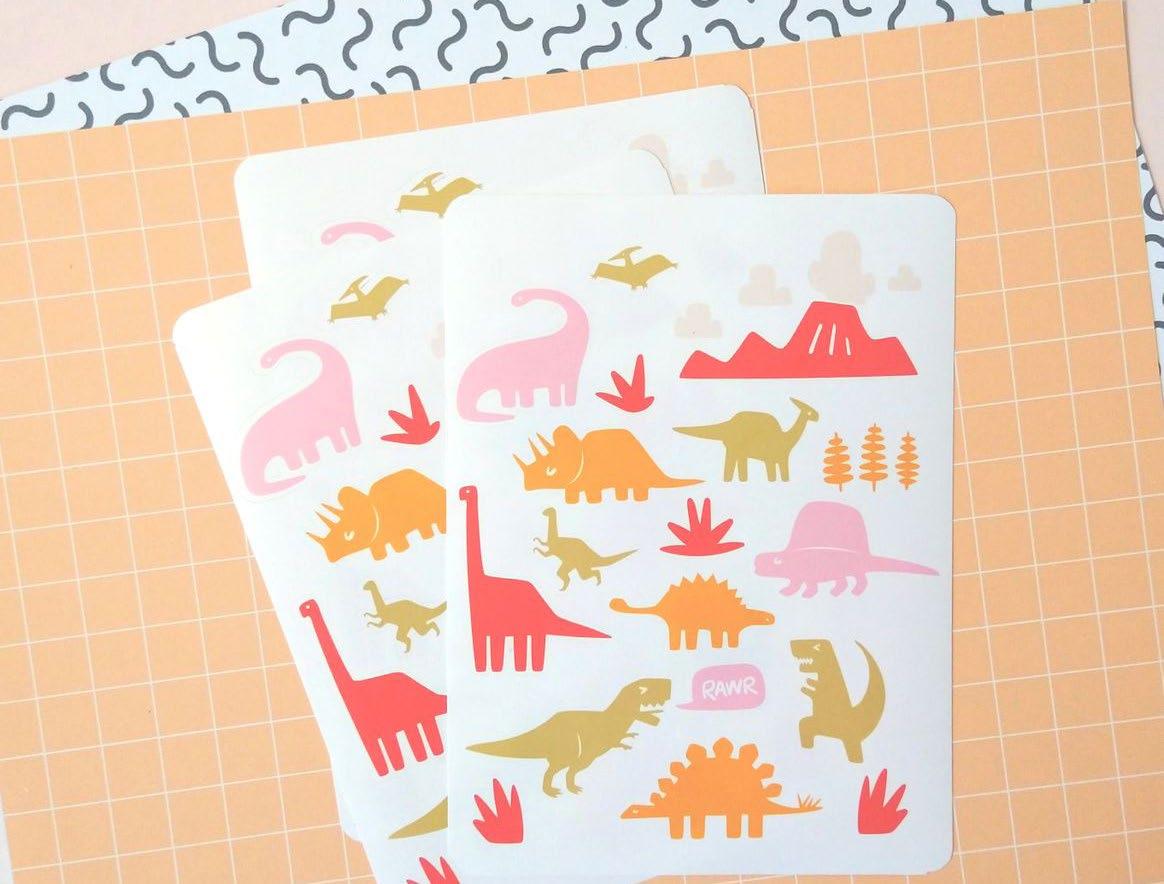
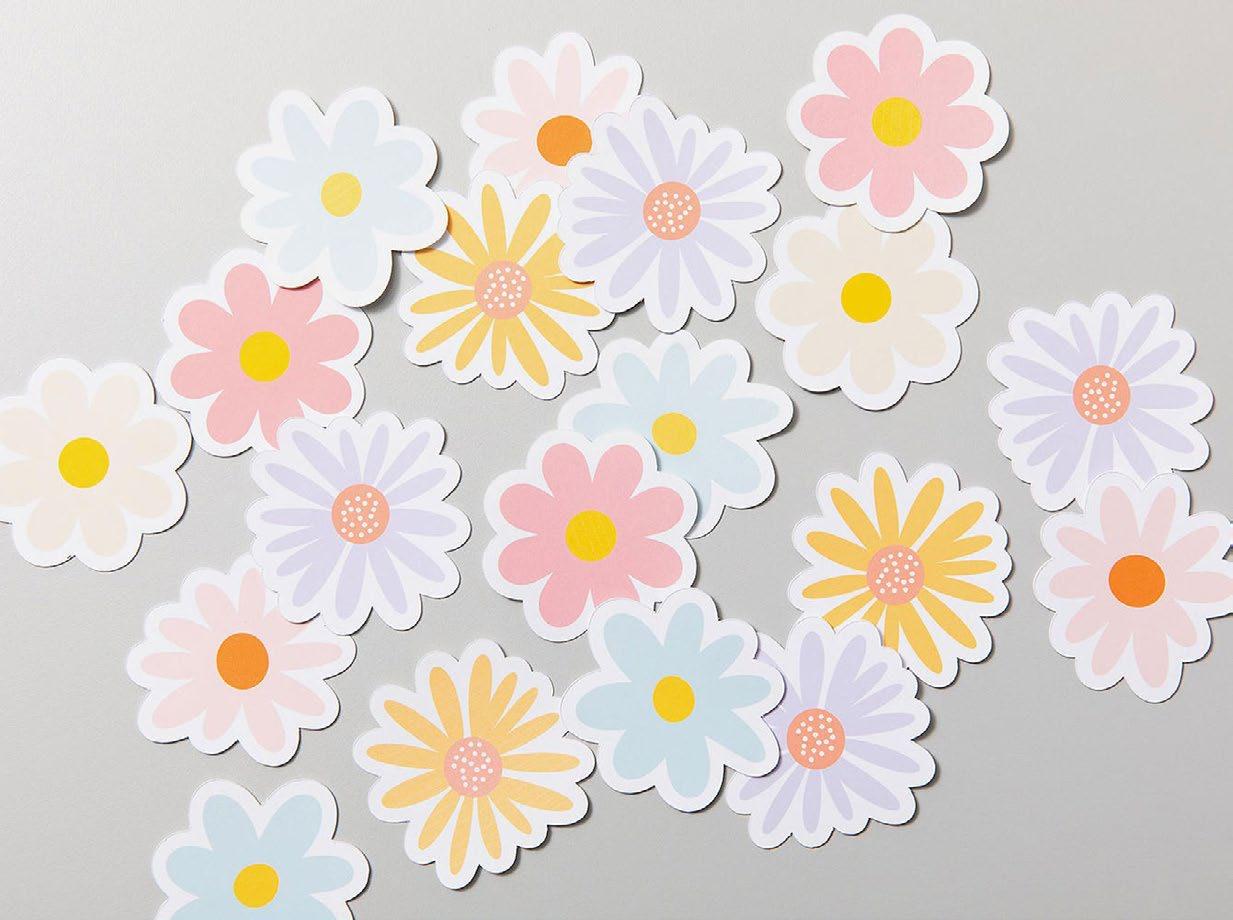
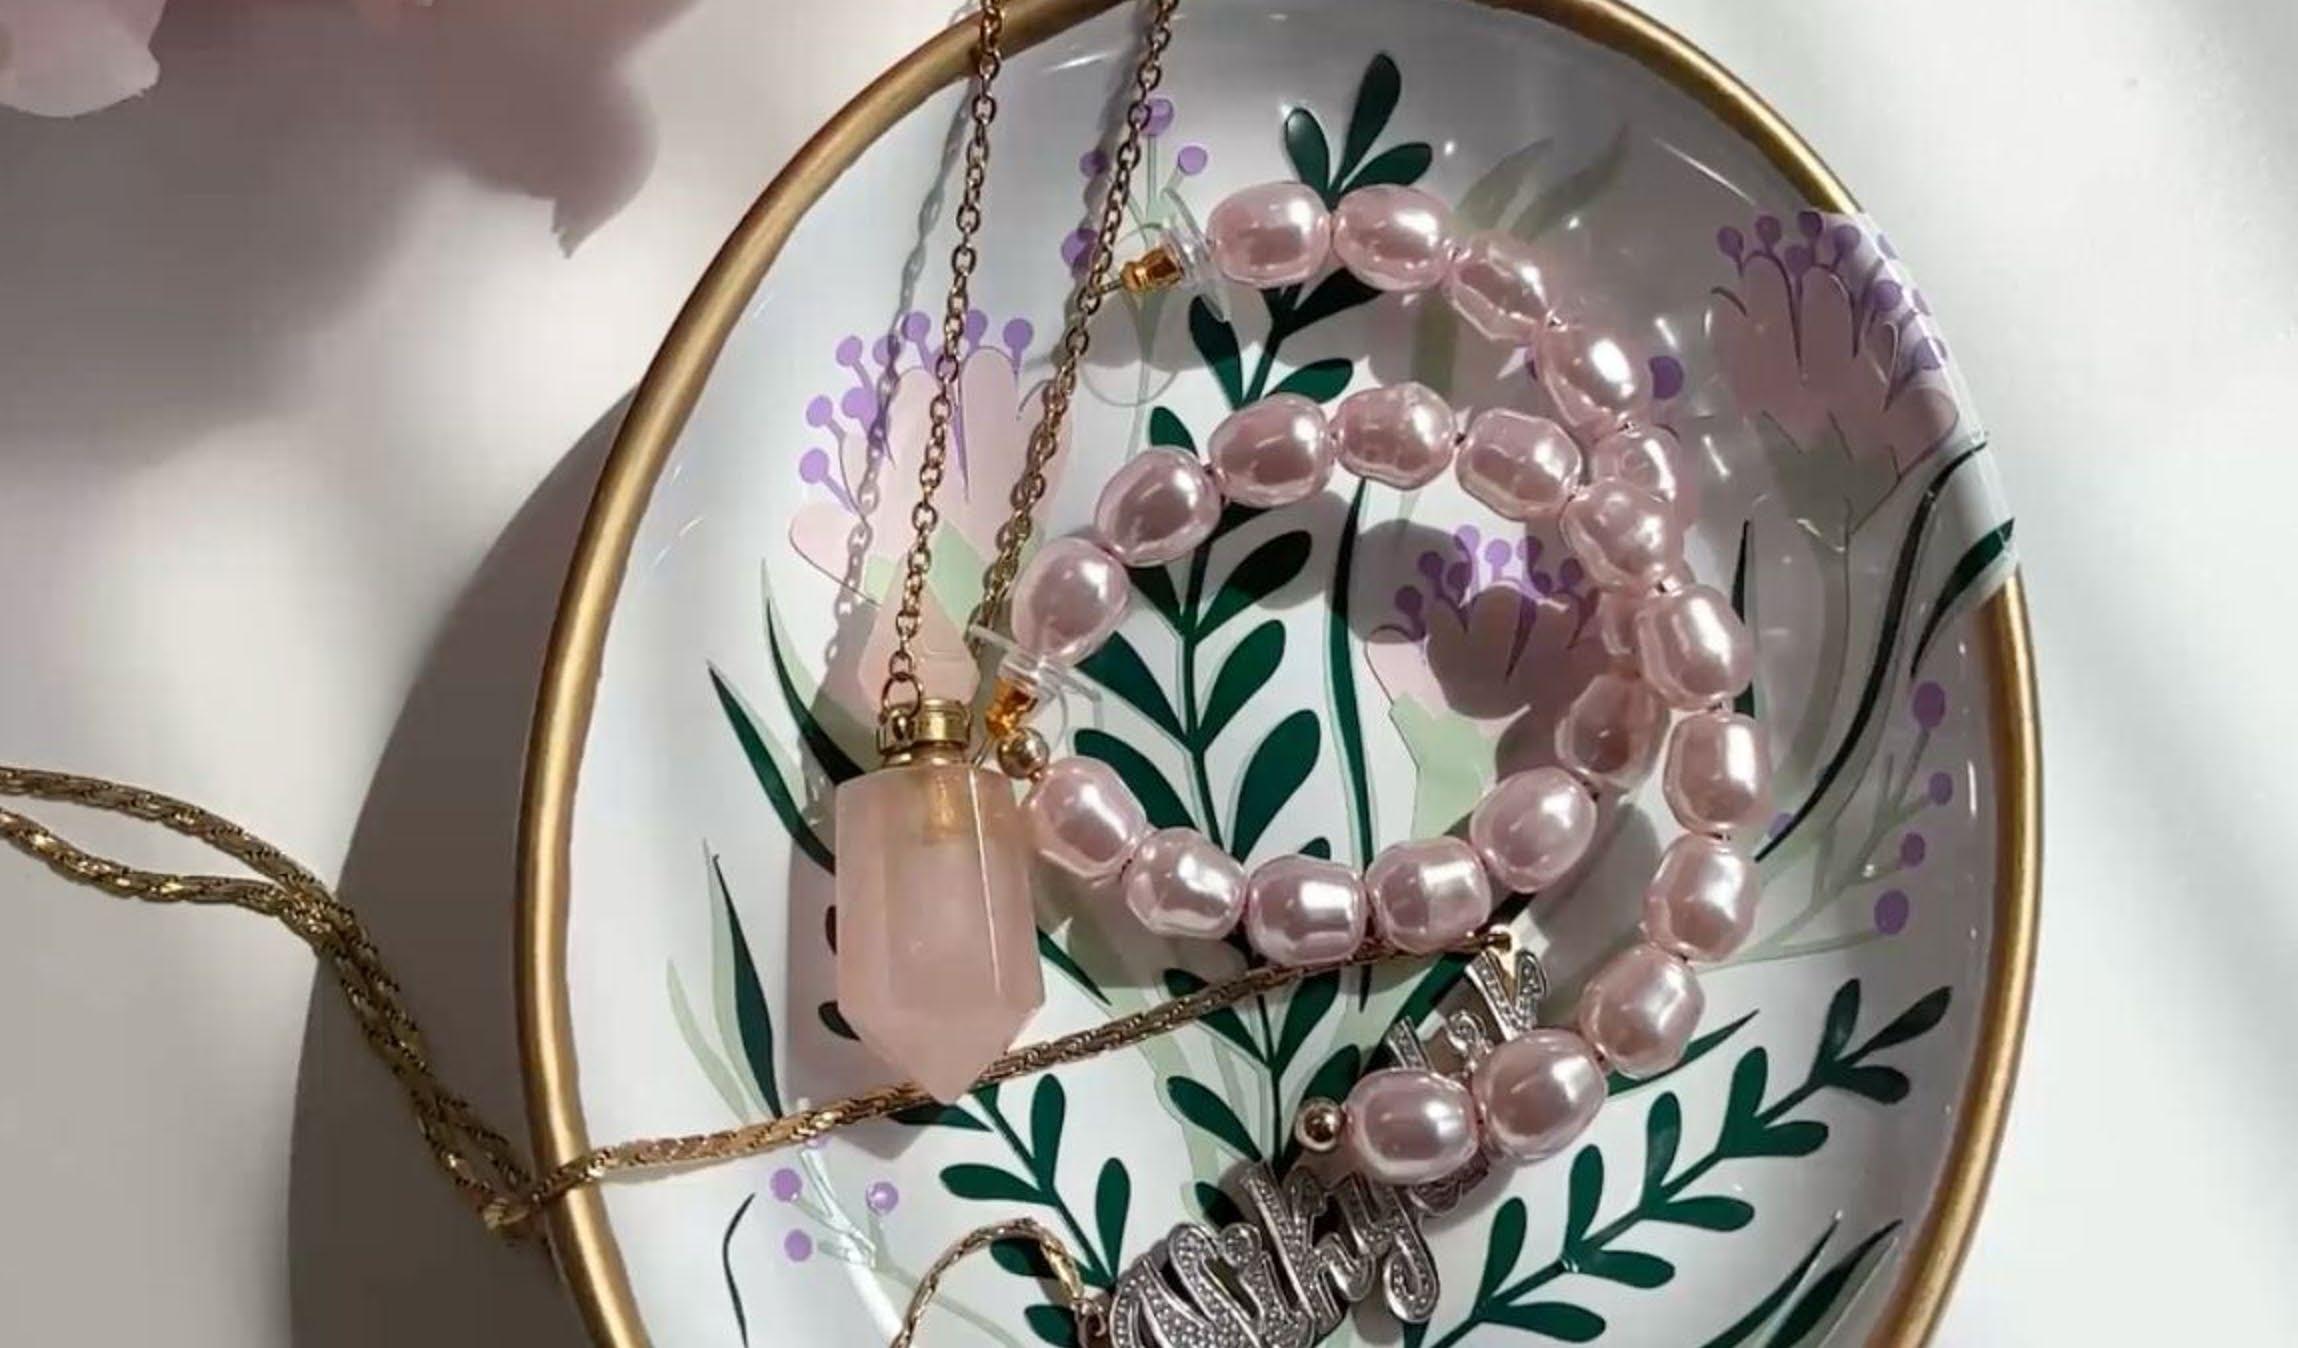
With Cricut, making stickers is easy, fun, and endlessly versatile! From everyday designs that brighten your planner to custom creations for parties and celebrations, you can craft stickers that are uniquely yours. With our incredible selection of printable sticker making materials, and the easy to use Create Sticker tool in Design Space®, the possibilities are endless!
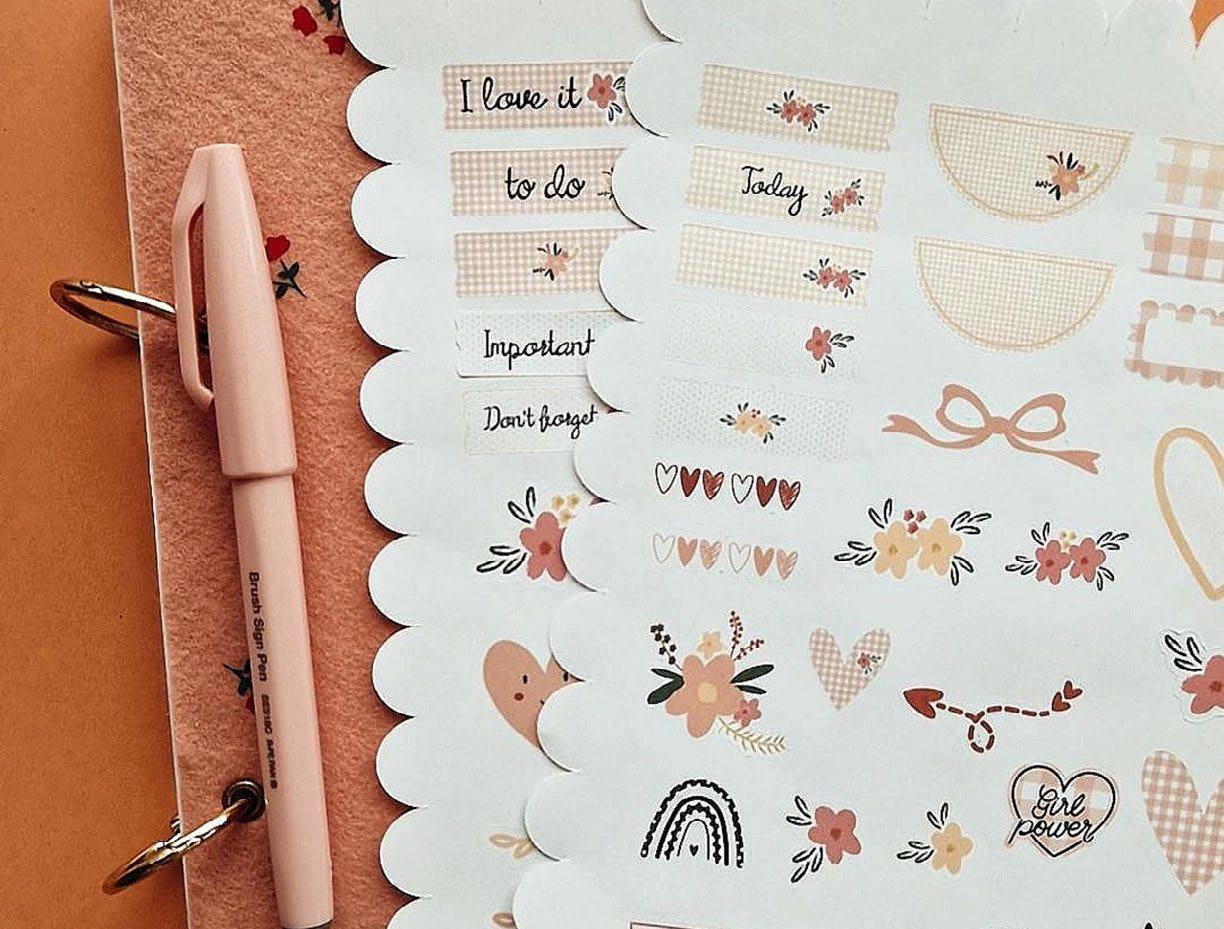

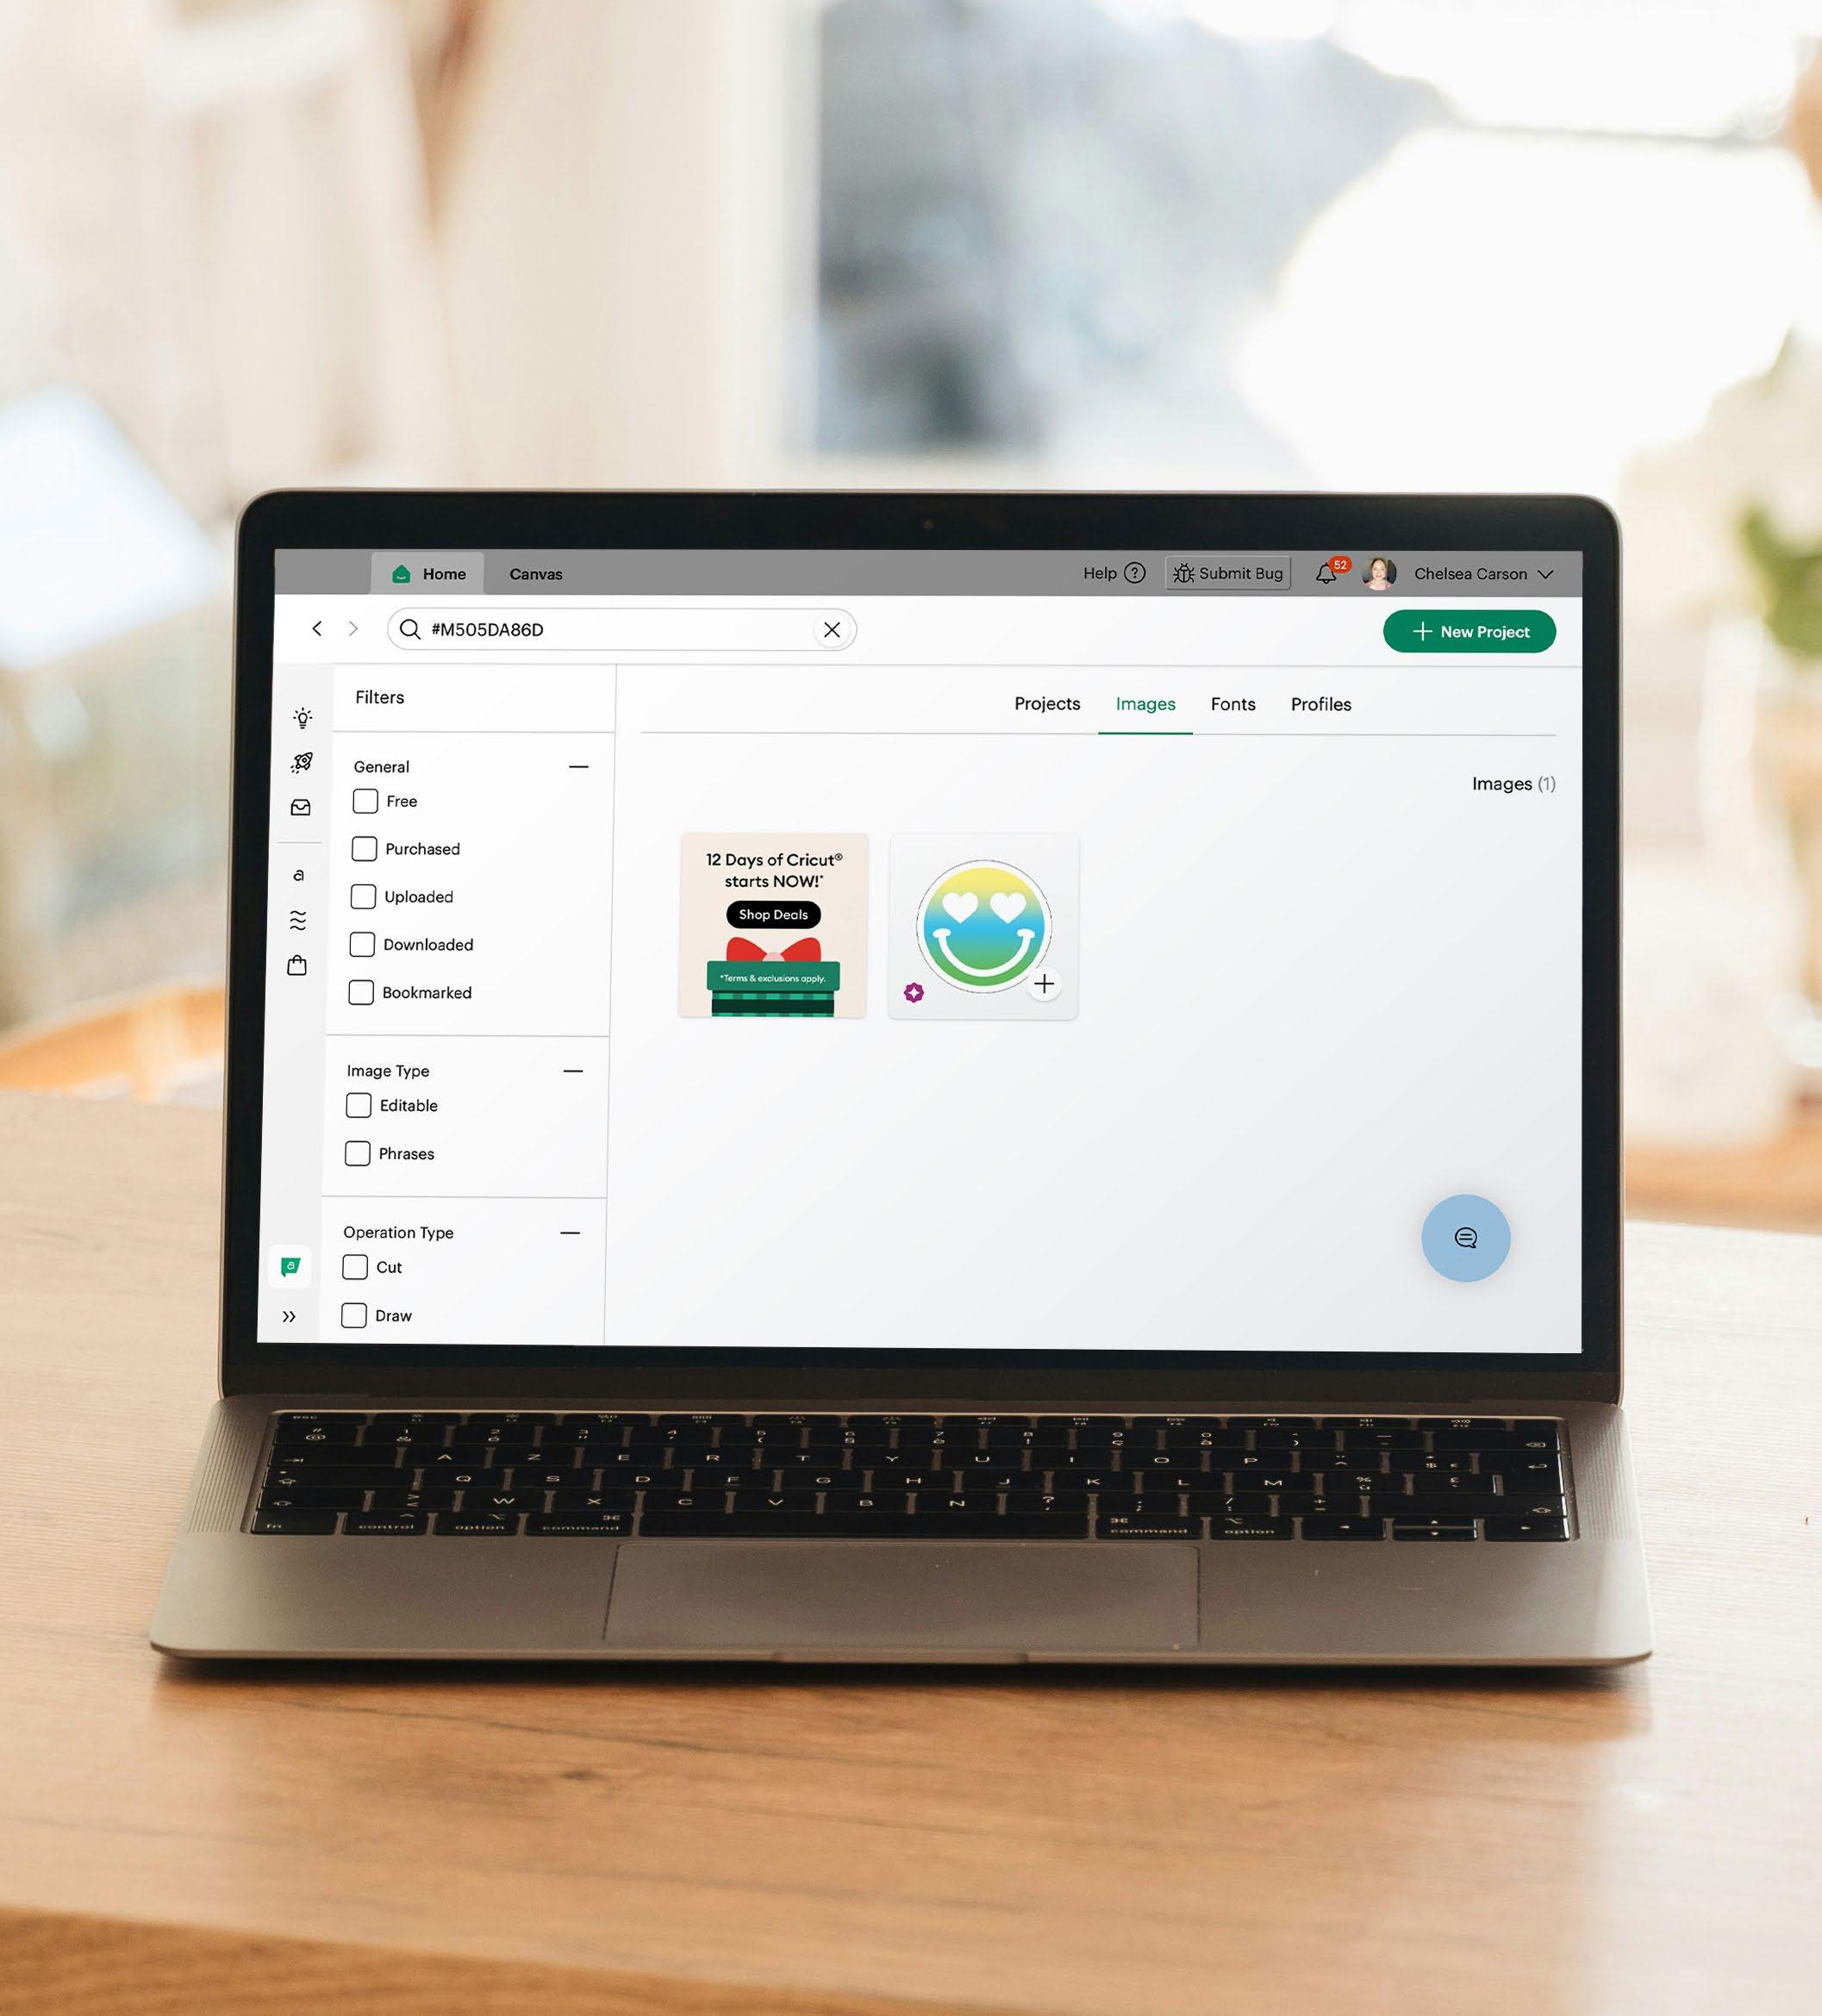
Simply search for the image number in Design Space®, click on the “Images” label at the top, and be sure to include the #!

By: ByDerowen #M4DFE5C2C

Cricut #MC42F3FB

Coriander Dean #M505BC710


By: Krys Mac Art #M4E07D0AA
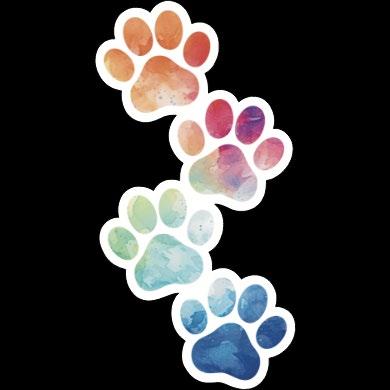
Apple Grove Designs #M4D281679


Pkay Oldham #M49A98D42

Cute Clipart And Things #M4E39819F

Design Inspo
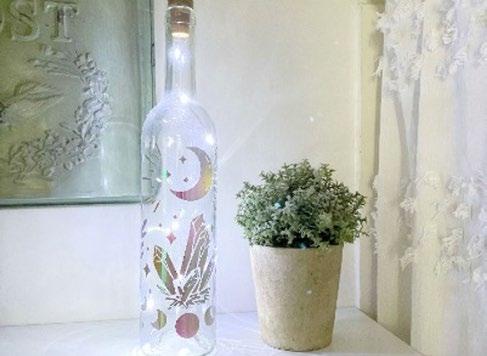
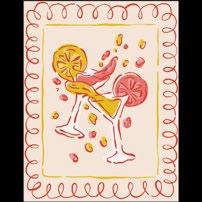
Dive into the 2025 motif & color trends!
Embrace the art of digital whimsy with this playful design board, where metaclassical aesthetics, cartoon-inspired details, and surreal colors create an eye-catching twist for everyday creativity.


Love the image? Easily find it in Design Space® by searching the image number.
Fonts
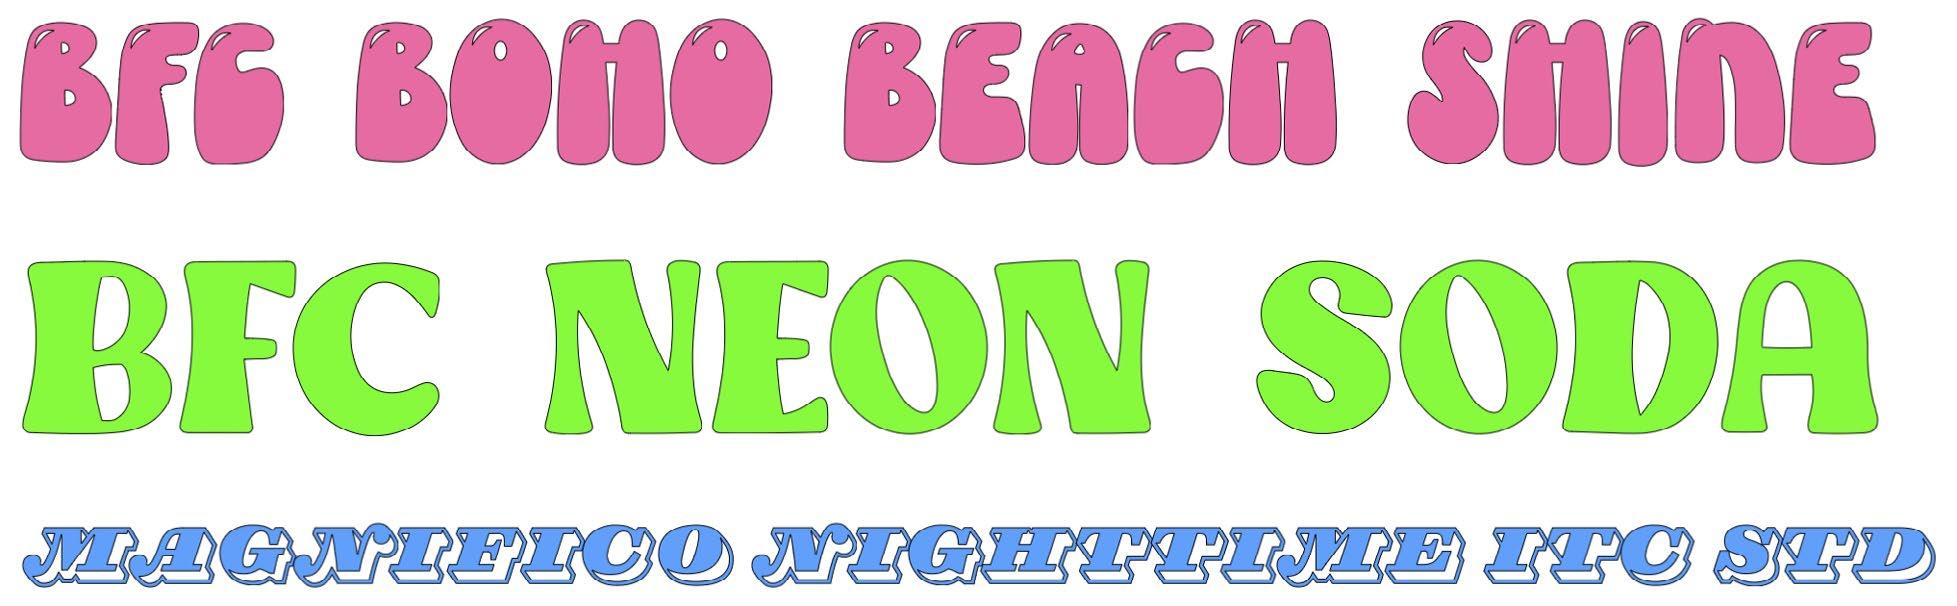
BFC Boho Beach Shine, BFC Neon Soda, Magnifico Nighttime ITC STD
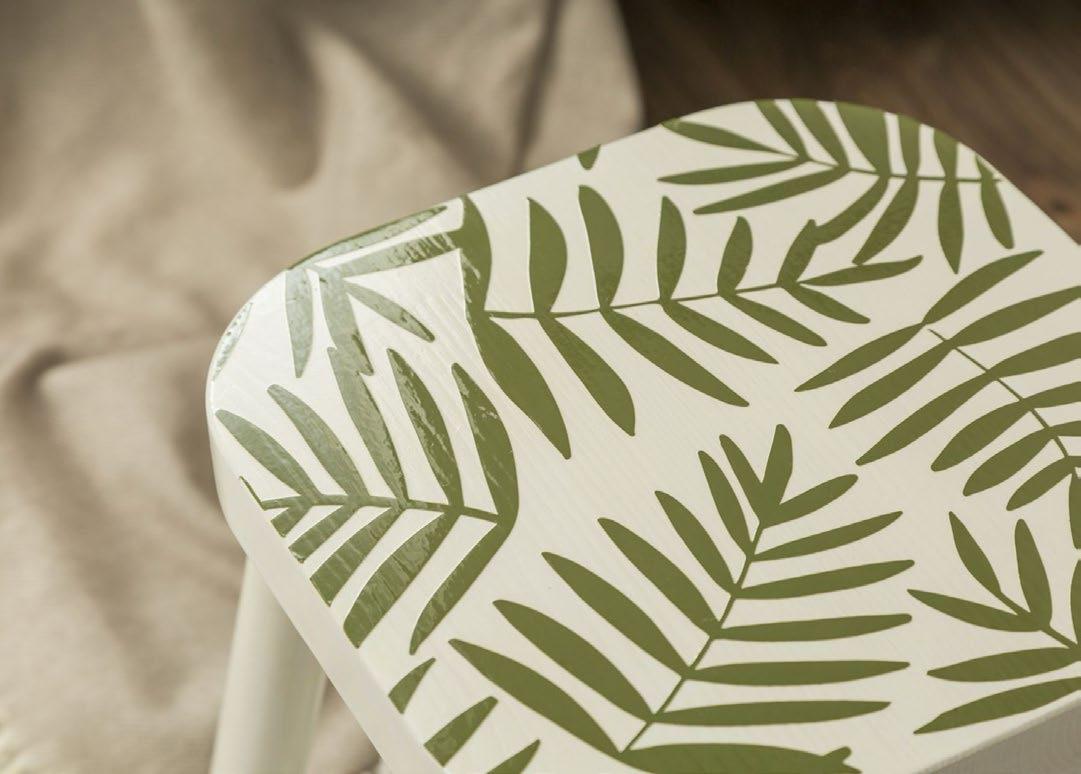
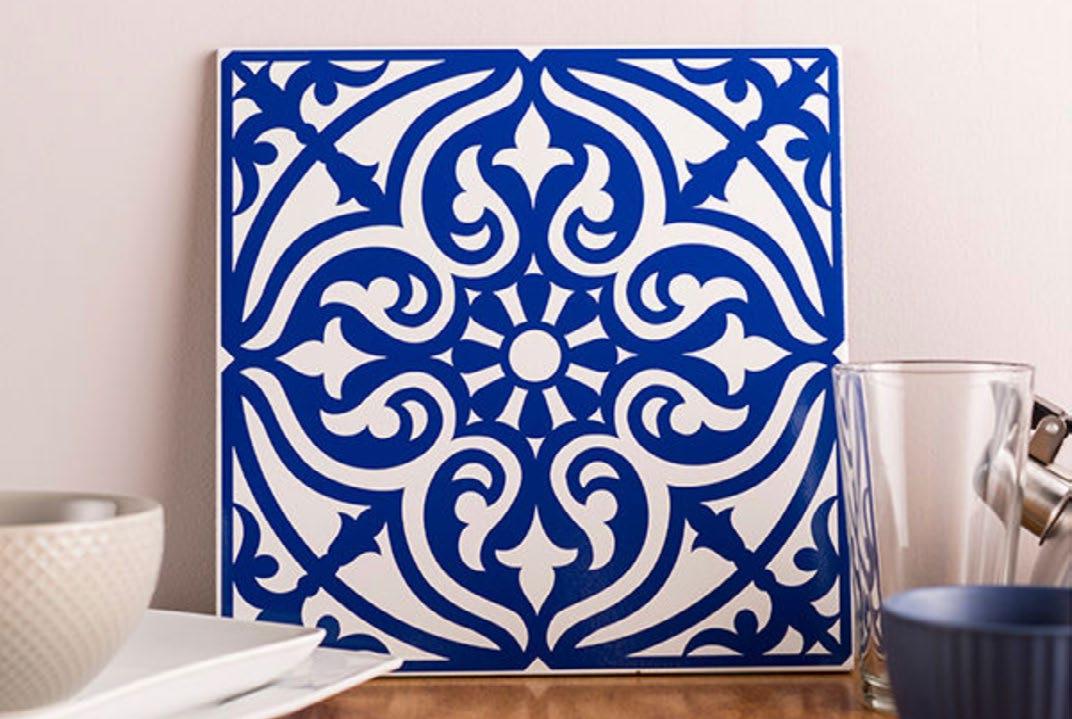
Ground your creativity in the beauty of nature with this theme, blending tropical greens, rustic materials, and a touch of folklore to craft designs that feel both mystical and restorative.


Love the image? Easily find it in Design Space® by searching the image number.
Fonts

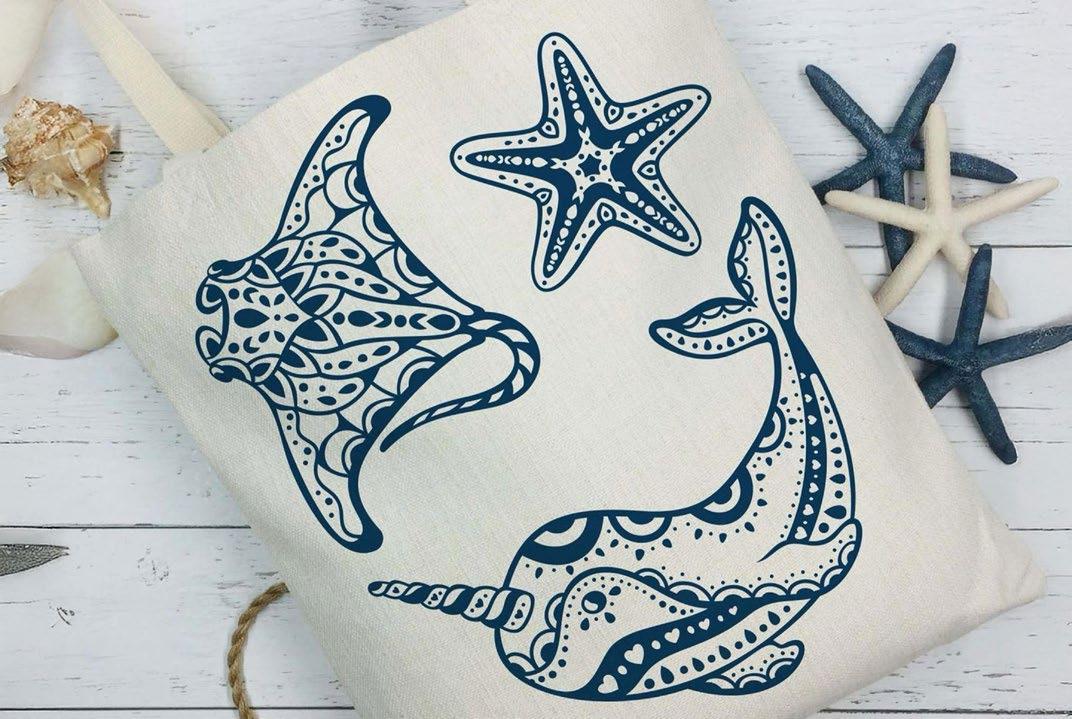
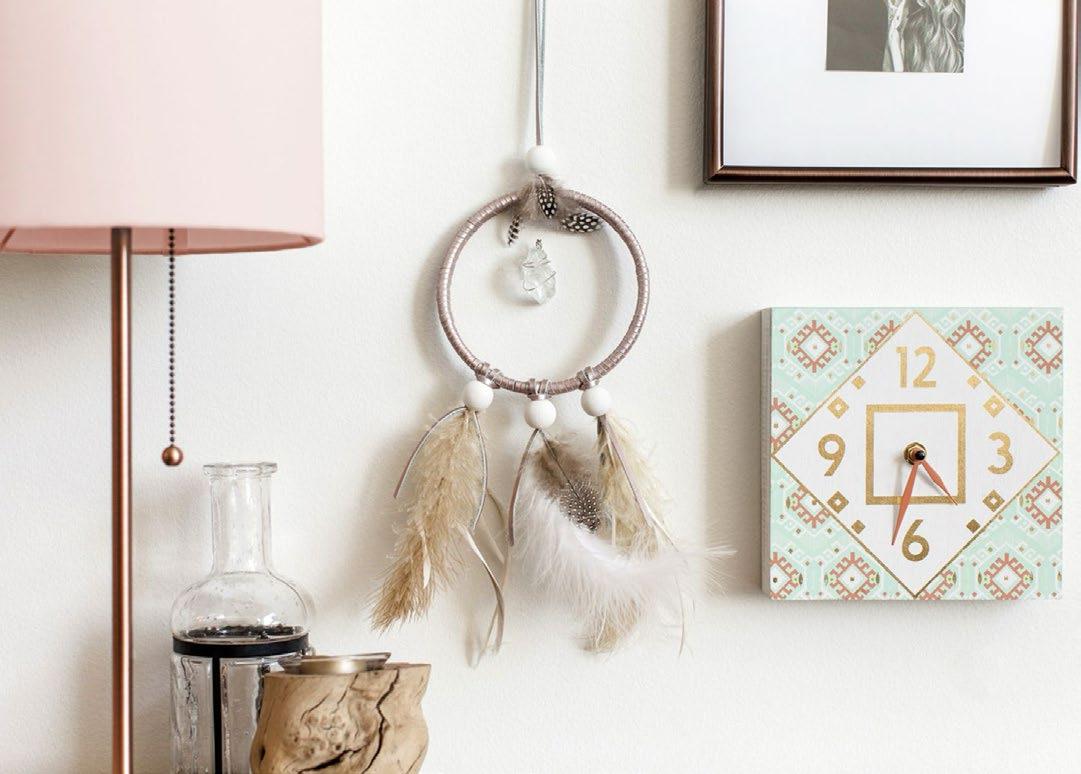
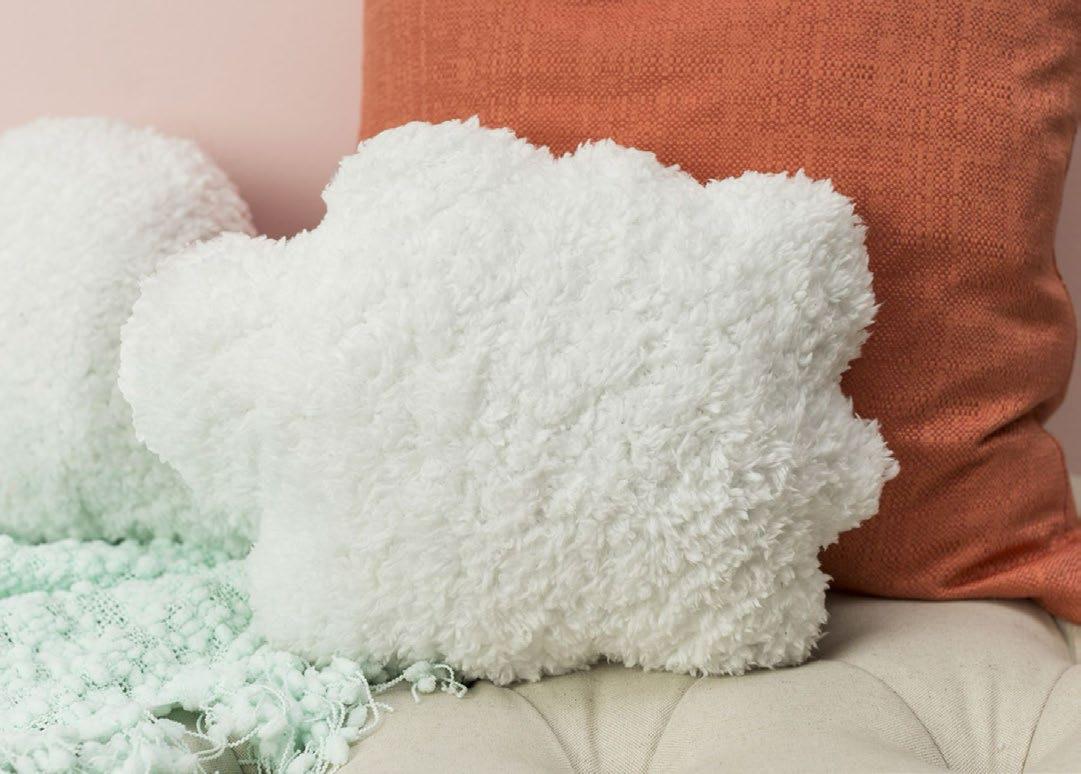
Let your creativity wander through seaside escapes and antique treasures, where soft neutrals and classic tones evoke the elegance and warmth of timeless designs.
#A1C6C8
#D8C3A5 #F4EFEA


#8D8D8A #E2A4A4

#M28A20A9E #MBA867 #M50602659 #M505D358B #M4D93604D
Love the image? Easily find it in Design Space® by searching the image number.
Fonts
Bickley Script Com, Avenida Com, Futura LT Condensed