Advent Calendar Bags
In this project, you’ll use iron-on (HTV) to create custom bags for
What you need
Preparation
Materials to Cut
Iron-on (HTV), Blush Iron-on (HTV), Raspberry Iron-on (HTV), Coral Iron-on (HTV), Mint
Everything Else
Standard Grip Machine Mat (Green)
Cricut® heat press
Pressing Mat
Weeder
Optional: Thin, cotton pressing cloth (if material is delicate)
Blank satin bags
Cut
When you’re ready, select Make, then follow the prompts in Design Space. Be sure to Mirror your design.
Assemble
Remove material from machine mat.
Place protective cover back on machine mat.
From the dull side of the iron-on, use Weeder tool to gently lift and peel away unwanted material from liner. Your cut design should remain on liner.
Using the Cricut Heat Guide, begin warming your Heat press to the correct settings. Place Pressing Mat on a hard, stable surface.
Prep satin bags by preheating for 5 seconds to remove moisture and wrinkles.
Position design where you want it on the bag, clear carrier sheet (shiny side) face up.
Place heat press over entire design applying consistent, firm pressure. Pressing time will vary by material, for accurate time settings, reference the Cricut Heat Guide.
Let design cool for 1 minute, then carefully peel liner away from project. If design lifts, press liner back over design and repeat pressing steps, especially around edges. Allow to cool, then peel liner away again. Repeat as necessary.
Allow project to cool completely before handling
Repeat steps for each bag.
When it comes to gifts, personal is perfect. With Cricut®, you can make something totally unique for your loved ones.
Foiled Hanukkah Gift Tags →
Vacation Sand Ornaments →
Personalized Holiday Light Sweatshirt →
Personalized Animal Stockings →
Drunk Skiing Mug→
Personalized Animal Stockings
In this project, you’ll use iron-on (HTV) to create personalized stockings.
What you need
Preparation
Materials to Cut
Iron-on (HTV), Cornflower Iron-on (HTV), Party Pink Iron-on (HTV), Purple Iron-on (HTV), Aqua
Everything Else
Standard Grip Machine Mat (Green)
Cricut® heat press
Pressing Mat
Weeder
Blank stockings
Cut
Select Customize to edit the names. When you’re ready, select Make, then follow the prompts in Design Space. Be sure to Mirror your design.
Assemble
Remove material from machine mat.
Place protective cover back on machine mat.
From the dull side of the iron-on, use Weeder tool to gently lift and peel away unwanted material from liner. Your cut design should remain on liner.
Using the Cricut Heat Guide, begin warming your Heat press to the correct settings. Place Pressing Mat on a hard, stable surface.
Prep the stocking by preheating it for 5 seconds to remove moisture and wrinkles.
Position design where you want it on the stocking, clear carrier sheet (shiny side) face up.
Place heat press over entire design applying consistent, firm pressure. Pressing time will vary by material, for accurate time settings, reference the Cricut Heat Guide.
Let design cool for 1 minute, then carefully peel liner away from project. If design lifts, press liner back over design and repeat pressing steps, especially around edges. Allow to cool, then peel liner away again. Repeat as necessary.
Allow project to cool completely before handling.
Repeat steps for each stocking.
'Tis the season for traditions and togetherness. Discover our top DIY hosting essentials.
Dreidel Table Decor →
Letter Napkin Rings →
3D Tree Name Tags (Place Setting) →
Christmas Cocktail Cups →
Candle Table Centerpiece →
Etched Whiskey Glasses →
Holiday Wreath →
What you need
Preparation
Materials to Cut
Printable Waterproof
Holographic Sticker Set
Everything Else
Light Grip Machine Mat (Blue)
Brayer or Scraper
Inkjet printer
Blank lantern candle holders
Prep
After printing design and letting the ink fully dry, peel strip off liner to expose a small area of the laminating sheet.
Line up the exposed area of laminating sheet on top of your printed sheet and smooth it down.
Peel off the rest of the laminating sheet liner and smooth onto the rest of the printed sheet using a Brayer or Scraper.
Place the sheet on a machine mat and load it into the machine for cutting. Ensure the page is oriented on the mat as it appears in Design Space.
Cut
When you’re ready, select Make, then follow the prompts in Design Space.
Assemble
Ensure your project surface is clean and dry. Peel stickers from liner by hand and carefully place each one.
Repeat steps for each candle holder.
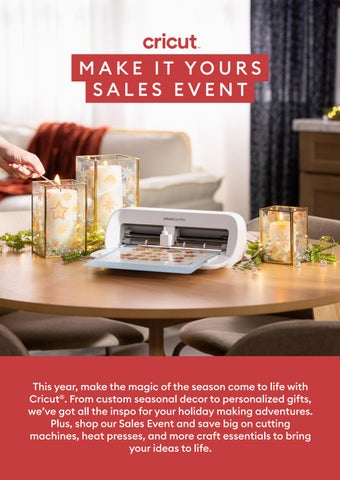
Make your way through the season with a Cricut cutting machine — now up to 40% off.