SerieS ruleS COMBAT!



Combat! is a solitaire game of man-to-man combat in the 20th and 21st centuries. In Combat! the player controls Friendly forces and attempts to complete a scenario against Enemy forces that are controlled by the game system. Combat! is almost infinitely expandable and will feature many nationalities and actions from the time era covered by the game.
These Series Rules contain standardized foundational rules for use from Combat! Volume 4 onward. (For Combat! Volumes 1-3, use their respective game rulebooks.) These Series Rules have altered little of the essence of the original rules. Nevertheless, veteran Combat! gamers should read these rules through to find what has changed in the various edits and clarifications. Each game also has its own Game Rules that only apply to that game. Game Rules always take precedence over the Series Rules.
Some of the images in this rulebook may not be found in the game that these rules came with. In all cases, the images in this rulebook are meant to be general illustrations of the Series Rules, rather than being an indication of the components of the game they are with. Similarly, not all of the rules presented here will necessarily apply to the specific game they are included with.
At the start of each Turn, the Player adjusts the cards in their Hand. The Player then plays one Friendly Card from their Hand. This card determines the Initiative values for each of the Player’s Teams and may have other effects depending on the card. After this the player assigns an Order to each Character on their side. An Order determines the actions that the Character can take in the Turn. After all Friendly characters have Orders assigned to them, the player draws an Enemy Card for each Enemy Team and places those cards on the Card Display, one for each Enemy color. These will determine the Initiative order of the Enemy Teams. The player picks an Enemy Card for each Alerted Enemy Character to determine the Order that they receive. The Order determines the actions that an Enemy Character will take that Turn.
The game Turn is played out in four Impulses. From the lowest numerical Initiative Value to the highest, each Team (Friendly and Enemy) activates in turn and each Character of that Team is Activated to perform the action specified on its Order marker
for that Impulse. All Teams will finish their Orders on Impulse 1 before moving to Impulse 2, then Impulse 3, and finally Impulse 4. At the end of the Turn all Orders are removed and various cleanup functions are resolved.
A Player’s forces are called a Squad, and will usually be composed of three Teams that are noted by a letter (A, B, C, and sometimes D). A scenario may also assign extra assets to the Player. Player forces use the white Order and informational markers and the green ‘Friendly’ cards. Non-Player forces are also called Teams but are only referred to by their colors: Red, White, Blue, and Yellow. Non-Player forces use the black Order and informational markers and the brown ‘Enemy’ cards. The terms Friendly and Player are used interchangeably through these rules; they mean the same thing. Likewise the terms Enemy and Non-Player are used interchangeably.
These are the acronyms that are used throughout the rules and a brief description of their meaning.
• KIA: Killed in Action. The Character is eliminated.
• LDR: Leadership. Leadership is shown in a black square on some of the Characters. It is both a value and a hex range and is a measure of how good they are as a leader. [Rule 21.0]
• LOS: Line of Sight. This is used to determine if a Character in one hex can see another hex. [Rule 16.0]
• MC: Morale Check. This is a Check of a Character’s Troop Quality as modified by Morale. [Rule 20.0]
• MG: Machine Gun [Rule 11.0]
• OBA: Off Board Artillery. This is artillery or mortar fire that originates from outside the playing area. [Rule 13.0]
• ROF: Rate of Fire. This is the number of shots that a Character has from a single fire. [Rule 10.4]
• TQ: Troop Quality. This is found in the red square on a Character’s marker. It is a measure of their skill and élan.
• TQC: Troop Quality Check. This is a Check of a Character’s Troop Quality. [Rule 20.0]
• WC: Wound Check. This is a Check of a Character’s Troop Quality as modified by Wounds. [Rule 20.0]
• WMC: Wound & Morale Check. This is a Check of a Character’s Troop Quality as modified by Wounds and Morale.
• WS: Weapon Skill. This is found in the white circles on a Character’s marker. It is a measure of a Character’s competence in various weapons and can vary from weapon to weapon.
Activate. During the Action Phase of each Impulse, each Team will Activate in Initiative order, and each Character of that Activated Team will, one at a time, perform any actions required or allowed by their Order; this is the Character’s Activation Character. This is the basic unit in the game--one man per marker. There is no stacking limit for Characters. Dummy Character markers are used on the Non-Player side to add fog of war to each battle. They are treated like Characters until they are revealed to be Dummies; at that point they are removed.
Checks. There are four different types of Checks in the game. These are used in many game processes to see if an event happens, if a Character does something particular, or if a Character is affected in a certain way. The ramifications of passing or failing a Check are described in each rules section. The Checks will be referred to by their acronyms throughout the rules and will also have a letter (in parentheses) by them which is keyed to the Checks Chart (found on page 32). Example: If the rules refer to a ‘WC (H)’ the player will reference the ‘H’ row of the Wound Check portion of the Checks Chart. The checks are:
• Troop Quality Check (TQC): When a Character is called upon to make a TQC, they roll a d10 and compare it to the Troop Quality value printed on their marker, with no modifications for Wounds or Morale. If the die roll is equal to or less than their Troop Quality they pass the TQC; if it is more than their Troop Quality they fail the TQC.
• Wound Check (WC): When a Character is called upon to make a WC, they roll a d10 and compare it to the value of their marker’s TQ modified by Wounds. If the die roll is equal to or less than their modified TQ they pass the WC; if it is more than their modified TQ they fail the WC.
• Morale Check (MC): When a Character is called upon to make an MC, they roll a d10 and compare it to the value of their marker’s TQ modified by Morale. If the die roll is equal to or less than their modified TQ they pass the MC; if it is more than their modified TQ they fail the MC.
• Wound & Morale Check (WMC): When a Character is called upon to make a WMC, they roll a d10 and compare it to the value of their marker’s TQ modified by both Wounds and Morale. If the die roll is equal to or less than their modified TQ they pass the WMC; if it is more than their modified TQ they fail the WMC.
Explosion. An Explosion occurs whenever an attack is made by a weapon that has a Blast rating such as Grenades or OBA
Hand Size. This refers to the maximum number of cards that a Player can keep in their Hand in a Turn. If, in Step 1c of a Turn, they have more cards than their Hand Size, they must discard the excess cards. A Player’s Hand Size is determined by the Game Rules.
Hit. A Hit is defined as any game process that would cause a Wound Card to be picked, or that forces a Close Call result. This could be from a Character firing, a Grenade, OBA, Melee, etc. Example: A Hit is caused when a Close Call result is gained from a Suppressive Fire attack.
Map. The Map (also called the Board) is the playing area for each battle. It is regulated with a hexagonal grid (called hexes).
Characters can only enter hexes that have a center dot. Most battles are fought on one Map but there may be scenarios that use multiple Maps placed together. The terrain on the maps is described in the Game Rules.
Morale. Morale is a measure of the psychological state of a Character. There are seven different Morale States that a Character may have. These are, from positive to negative: Berserk, Aggressive, Bold, Normal, Cautious, Shaken, Rout.
Orders. Orders are given to each Character at the start of each Turn but may also change during the course of a Turn. The Player chooses the Orders for their Characters but the Orders for NonPlayer Characters are determined by a game process. Orders determine what a Character is allowed to do in that Turn. For both Player and Non-Player Characters, certain situations require Mandated Orders which force various actions.
Randomize. A number of game processes call for randomizing, whether it is Characters, or hexes, or other things. To do this, simply assign an equal value to all eligible options and roll an appropriate die to randomize which one is chosen.
Spotted & Unspotted. A Spotted Character has been seen by the opposing side and can be targeted. An Unspotted Character has not yet been detected and cannot be targeted.
Wound. Light Wounds and Bad Wounds are gained from picking Wound Cards. Both of them are referred to as Wounds.
Wound Card. During play, both Friendly and Enemy Characters will be required to pick a Wound Card. When this is done, pick a Friendly Card and reference the bottom portion of the card. There are four possible results that can be obtained. A Close Call means that the Character must make a MC (M). Light Wound and Bad Wound results mean that the Character is given the specified Wound and must make a WMC (N). A KIA result means that the Character is eliminated.
Types of Dice. Combat! includes a six-sided die (called a d6) and ten-sided dice (called a d10). For the ten-sided dice, a roll of 0 is a zero (not a ten). When a player is called upon to roll a single six or ten sided die, it will be referred to as a d6 or a d10. When a player is to roll multiple dice it will be in a format such as this: 2d6. (This 2d6 example means that you would roll a d6 twice and add the rolls together.) When a player has to make a dice roll of d% it means that both d10 are rolled together and read as a number from 00-99. The colored die is read as the first digit and the white die as the second digit. Thus a colored 4 and a white 1 would be 41. A colored 0 and a white 8 would be 08. A roll of 00 is treated as zero-zero. A natural roll is what is shown on the die before any modifiers are applied.
Rule of 0. Any time a chance of success is less than zero there is still a possibility that it will succeed. This can apply to spotting, firing, OBA resolution, and other game play concepts. For this to happen, the initial die roll must be a natural 0. If the 0 is rolled, make a TQC (F), with the amount less than zero (from the initial chance of success) subtracted from the Character’s TQ. If the TQC is passed, the process succeeds. If the TQC is failed, the process fails. For game processes that do not have a Character initiating the act (such as OBA) use a generic TQ of 4 for this rule. Example: A Character with a 5 TQ and a 3 WS is firing at an
Enemy Character but has a -5 WS modifier to his shot. This would effectively give him a -2 WS (3-5 = -2) which is below 0. For his fire, he does roll a 0 and must then make a TQC (F) to see if he hits. The Character’s 5 TQ will be modified by -2 because the initial chance of hitting was two below 0. With a modified TQ of 3, he must roll a 3 or less to actually hit after rolling the initial 0.
Rule of 9. Anytime a natural 9 is rolled for any game purpose (such as spotting and firing) where there is not a specific result mandated for a 9, it is a miss or failure. This does not apply where a roll of 9 does have a mandated application, such as rolling for a Close Call MC (M).
Order Markers. White Order markers are used for Player Characters and black ones are used for Non-Player Characters. Order markers have four numbers running along their base, one number in sequence for each of the four Impulses. These numbers represent what the Character can do on each of the four Impulses [see Rule 7.0].
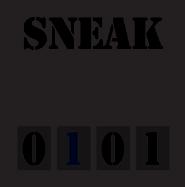
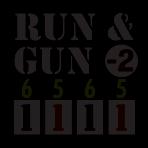
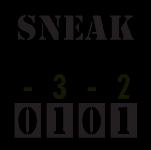
Shown here are four Order markers. The white Sneak and Aimed Fire markers are for Friendly Characters. The black Sneak and Run & Gun markers are for Enemy Characters. The white circle on the Run & Gun marker shows that a Character with this Order
Character Image
A picture of the Character
S-t Sorokin
The name and rank of the Character
suffers a -2 modifier to their WS. The yellow numbers on the Enemy Order markers are the movement directions for Enemy Characters [see Rule 8.22]. Rule 7.0 describes the numbers on the bottom of the markers.
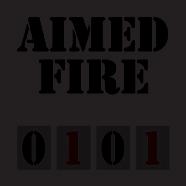
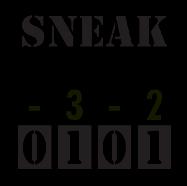
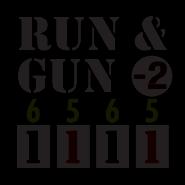
Informational Markers. These markers come in many different types. Some of them have a completely white or black background for Friendly or Enemy use, but most of them can be used universally (see examples on top of next page).
Modifiers on Markers. The numbers on the right hand side of some of the Order and Informational markers are modifiers that apply to the Character with the marker. Here is a key to these numbers:


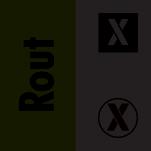
A white number in a black box is a modifier to the Character’s LDR value. An ‘X’ means they have no LDR value.
A white number in a red box is a modifier to the Character’s Troop Quality (TQ).
A red number in a white circle is a modifier to the Character’s Weapon Skills (WS). An ‘X’ means they have no WS.
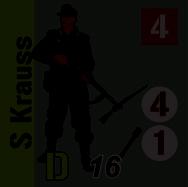
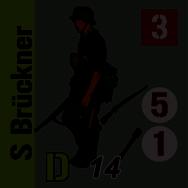
Character Markers. These can be used for the Friendly or Enemy side. S-t Sorokin (below) can be a Player or Non-Player Character. Dummy markers are only used for the Enemy side.
LDR 1 – Some Characters have a Leadership Value (LDR). S-t Sorokin has a Leadership of 1. This is used when performing a Plan Order and when another Character is performing a Rally Order.
TQ 4 – The Troop Quality of the Character.
Abilities – Some Characters have special Abilities. These are described in the Game Rules.
The color shows what Team they are on if they are part of the Enemy side.
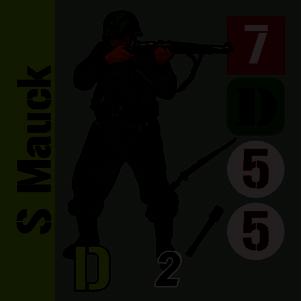
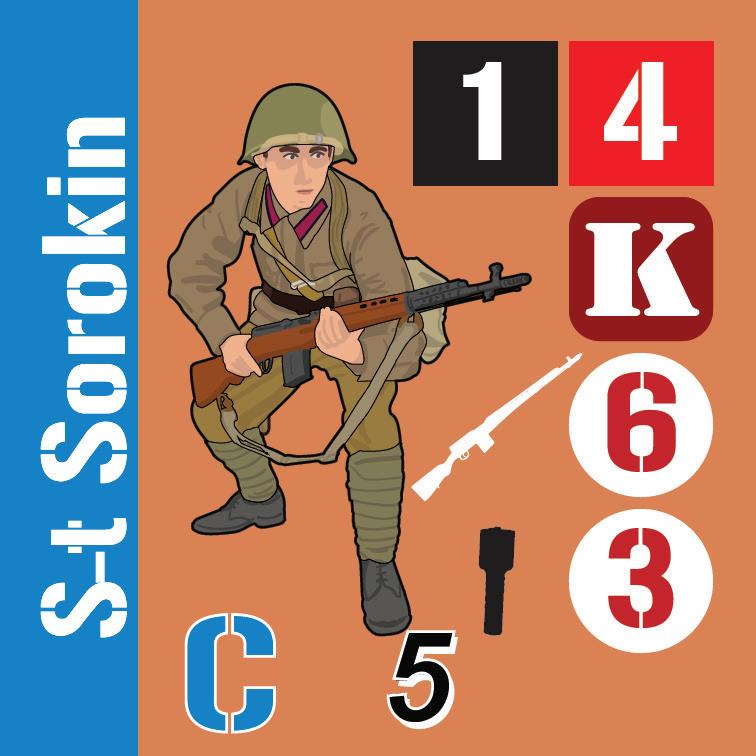
Weapons Skills - These are the Character’s Weapon Skills (WS) and are used when firing a gun, or throwing a Grenade. Characters will have different skill values depending on the weapons they are armed with. S-t Sorokin’s weapons are:
Tokarev SVT Rifle: WS 6 Soviet Grenades: WS 3 Blue
C - This letter shows what Team they are on if they are part of the Friendly side.
ID Number – This is the Character’s ID number. This matters for setting up scenarios.
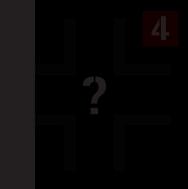
Each Character counter is double-sided. The front side (with the image) shows the Character after they have been Spotted. The back side (with the question mark) shows an Enemy Character in an Unspotted condition. Because a Player needs to see the fronts of their Characters, a Player Character is shown as Unspotted by placing an Unspotted marker on them. Once they are Spotted, this marker is removed [see Rule 17.3].



Initiative marker for Player’s C Team (British)
Initiative marker for Non-Player’s Blue Team (American)
X, Y, & Z are overflow markers for large stacks of Characters
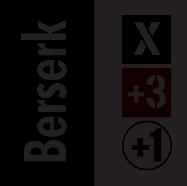
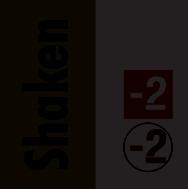
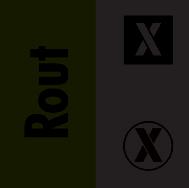
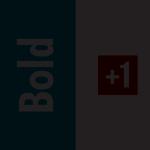
Berserk Morale marker
No LDR value
TQ is increased by 3
WS is increased by 1
Shaken Morale marker
TQ is reduced by 2
WS is reduced by 2
Rout Morale marker
No LDR value
No WS values
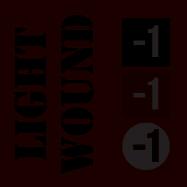
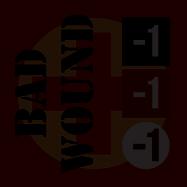
Light Wound marker
LDR, TQ, WS all reduced by 1
Bandaged Bad Wound marker
LDR, TQ, WS all reduced by 1
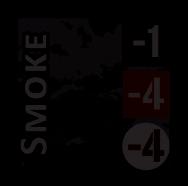
Smoke marker
LDR reduced by 1
TQ and WS reduced by 4
Follow this sequence of play for each game Turn:
STEP 1 – Friendly Card Phase
a) If the Player does not currently have any cards in their Hand they draw one card from the Friendly Card deck [see Rule 5.1]. Cards cannot be played for their Discard effects in Steps 1a, 1b, or 1c.
b) The Player adds any cards to their Hand that were placed aside in the previous turn due to a successful Plan Order.
c) Any cards in excess of the Hand size are discarded per the Player’s choice.
d) The Player must play one card from their Hand for Initiative. The Initiative values on this card will be used by their Teams for this Turn. [see Rule 5.1].
e) If the Friendly Card played for Initiative says to ‘resolve an Event’ the Player resolves the Event per the game’s instructions.
STEP 2 – Friendly Order Phase
The Player assigns an Order to each of their Characters that does not have a Mandated Order [see Rule 7.0].
STEP 3 – Enemy Card and Order Phase
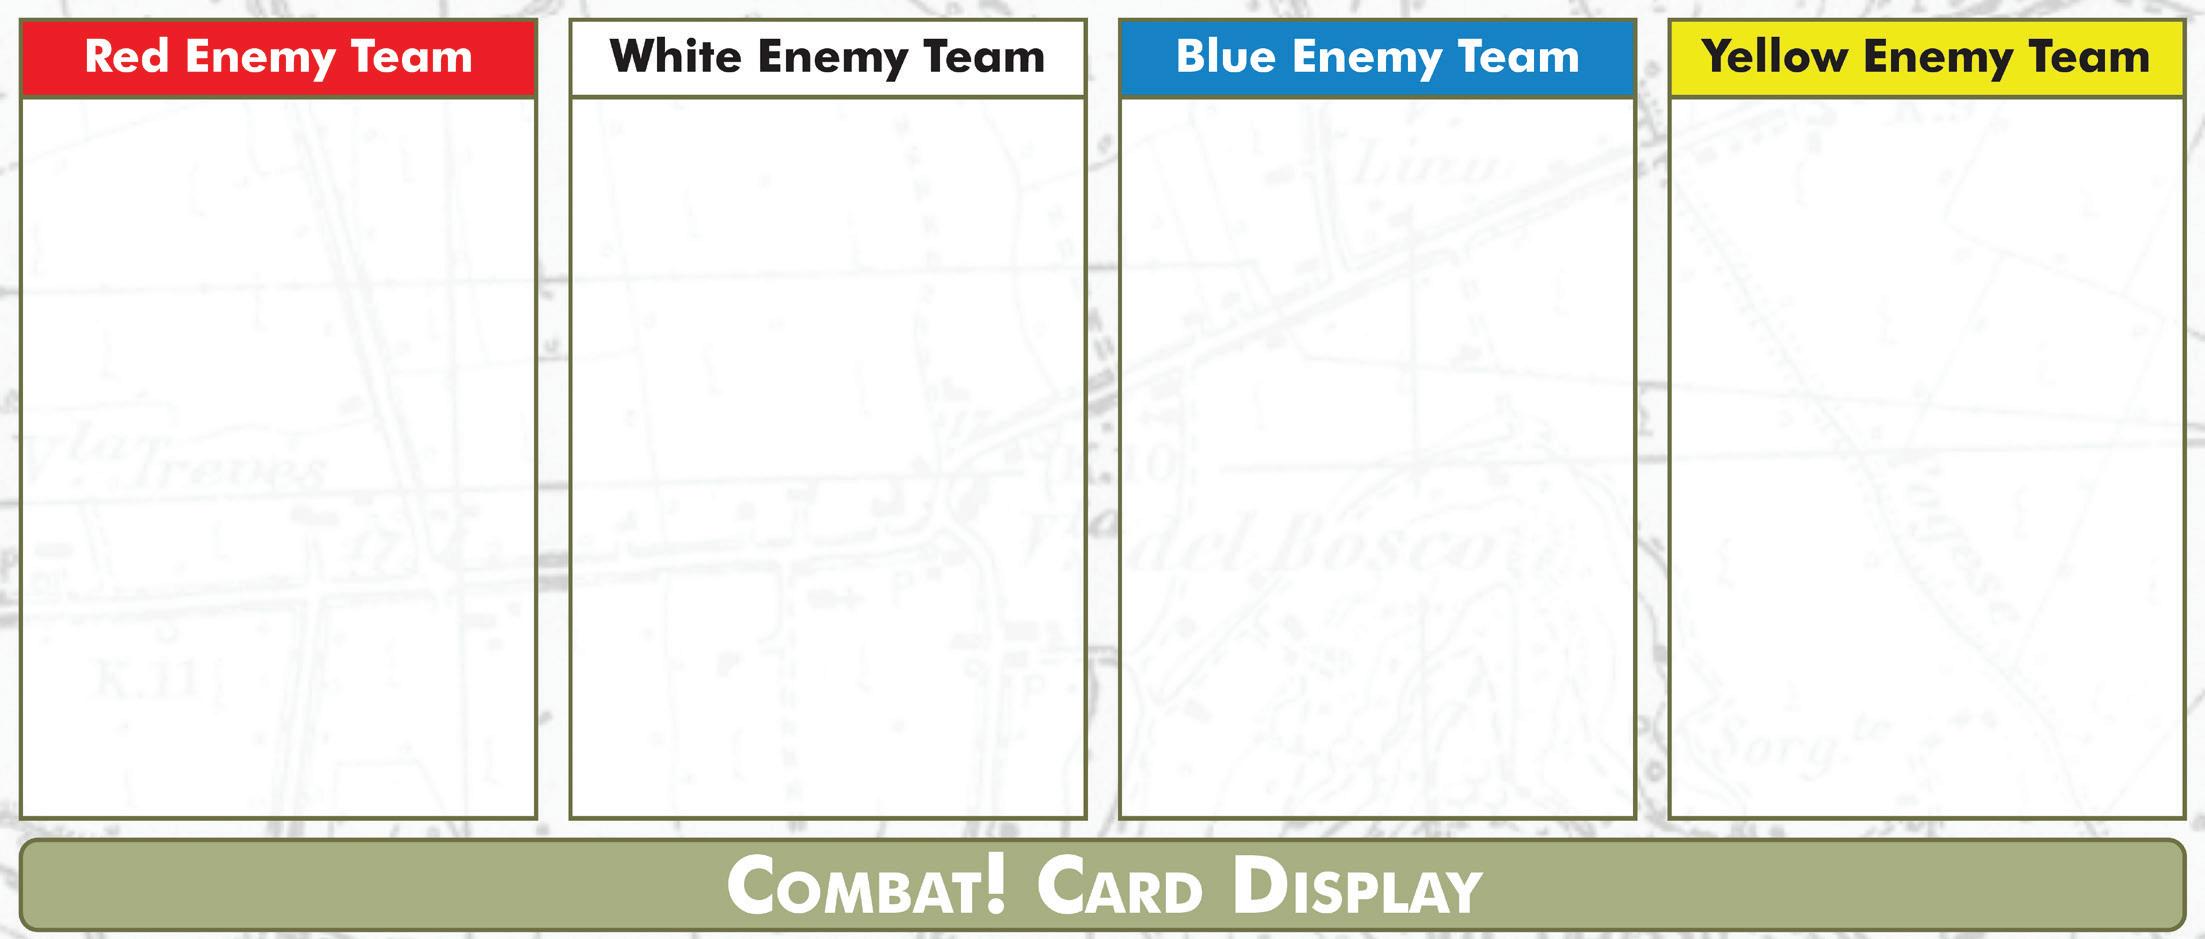
a) Draw an Enemy Card for each of the four Enemy Teams to determine the Enemy Teams’ Initiative values. Place the first card in the Red box on the Card Display, the second in the White box, the third in the Blue box, etc.
b) Determine the Initiative order of all Friendly and Enemy Teams and arrange the Initiative markers in the correct order on the Initiative Track [see Example on page 8].
c) If using one of the optional methods for giving Enemy Orders, Enemy Characters will be given Orders now [see Rule 6.2].
STEP 4 – Action Phase
a) Resolve all Impulse 1 Orders of each Character of the first Team on the Initiative Track. This is called being Activated and the Character is active. Each Character, one at a time, performs points i), ii) and iii) below for the Impulse until all Characters of the Team have been Activated.
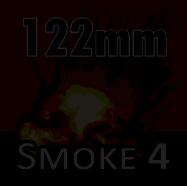
OBA Impact marker It has a Smoke value of 4 (Soviet)
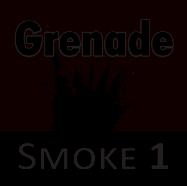
Grenade Impact marker It has a Smoke value of 1 (Soviet)
Grenade marker Used to show a live Hand Grenade (German)
i) Perform the action as required on the activated Character’s Order marker [see Rule 7.0]. If the activated Character is an Alert Enemy Character without an Order, they draw a card and receive an Order. Grenade Attacks are resolved in the 3rd Impulse at the end of this point.
ii) After doing their Action, Characters may attempt to Spot opposing Characters that are Unspotted [see Rule 17.7]. This is done for the active Friendly or Enemy Character whether they are Alert or not.
iii) If this is a Friendly Character’s Activation, they may choose to Duck Back unless they have Rout or Berserk Morale [see Rule 7.61].
b) Activate each Team on the Initiative Track in order from left to right, and complete points 4a i-iii) for each Team.
c) Repeat steps 4a and 4b for Impulses 2-4.
STEP 5 – End Phase
a) Resolve all Medical Aid Orders [see Rule 7.65].
b) Resolve all Hide, Rally, Reload, and Search Orders.
c) Resolve all Plan Orders. If a Plan Order is successful, place any generated cards to one side (they are not yet in your Hand) [see Rule 7.67].
d) Add or remove Smoke markers [see Rule 22.0].
e) Any Waiting Characters within 3 hexes of an Alert Character of their same side are now Alerted. Place an Alert Marker on them [see Rule17.21].
f) Remove all Orders from all Characters (except Melee Orders) and reset the Initiative Track.
g) Place Enemy Cards that are on the Card Display in the Enemy Discard pile.
h) If this is the last Turn, the game is over. Check the scenario victory conditions.
i) If this is not the last Turn, reset the Impulse marker to Impulse 1 and set the Turn marker to the next Turn. (Note that the Turn marker has a ‘+20’ side for use with longer scenarios.) Return to Step 1 for the next Turn.
Combat! uses two decks of cards – Friendly Cards and Enemy Cards. Friendly Cards are held in the Player’s Hand and are either played to the Card Display for their Initiative values or used for their Discard effects. Enemy Cards are used to determine Enemy Initiatives and to allocate orders to Enemy Characters. These are the processes to follow in the Friendly Card Phase of each Turn.
Step 1 a) If you do not have any cards in your Hand, draw a single card. This is the only way to acquire new cards other than by using the Plan Order [see Rule 7.67].
Step 1 b) During this Step add any card(s) to your Hand that were acquired from planning on the previous Turn.
Step 1 c) If you have more cards in your Hand than your Hand Size, discard any excess cards of your choice to the Friendly Discard pile. The Hand size is found in the Game Rules. This Step is the only time that excess cards are discarded.
Step 1 d) You must now play one card from your Hand which will be used to determine the Initiative values for your Teams. Set it aside until the Initiative order of all Teams is determined and then place it in the Friendly Discard pile. This card’s Initiative values will be used for all 4 Impulses of a Turn.
Step 1 e) If the Friendly Card played is an Order Card that causes an Event, the Player resolves the Event per the game’s instructions.
Friendly Cards have three bands of information on them. At the top are the Initiative Values. In the middle is the Card Type and Card Text. At the bottom are the values that are used when the card is drawn as a Wound Card [see Rule 18.1].
The Initiative section shows the Initiative values for Friendly Teams A, B, and C. It also has Initiative values for Team D and any Crews.
The boxed word tells the Card Type that this is (Discard).
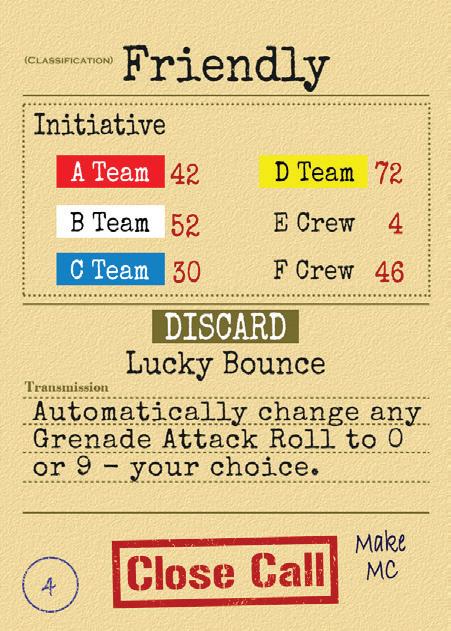
The Card Text below the card type shows the effect of playing the card (Lucky Bounce) and its explanation (...change any Grenade Attack roll...).
The bottom section shows the effect when the card is picked as a Wound Card (Close Call--Make MC).
The number on the bottom left is the serial number of the card (4). It does not affect play.
Initiative Values. There are six Initiative values listed. They apply to the three Teams that make up your Squad (A, B, and C) as well as any D Team assets that the scenario may allow. (The ‘E Crew’ and ‘F Crew’ Initiative values are for Combat! games that have vehicles or guns.) Initiative is determined in order from low to high. In other words, the Team (Friendly or Enemy) with the lowest Initiative will get to act first during each Impulse [see the example on page 8]. In Step 1d of the Turn, the Player plays one of their cards for its Initiative values.
There are three types of Friendly Cards--Order cards, Discard cards and Event cards--as shown in the box in the middle of each card. Each type of card has its own descriptive Card Text. Cards can only be played from a Player’s Hand
Order Cards. When Order cards are played, the text of the card takes place immediately and often has an effect for the whole turn. If the Order Card states an effect on a random Character in a Team, randomize the affected Character.
Example: In Step 1d the Player plays card 25 for Initiative. It is an Order Card which contains the text, “Trip: One Random Friendly Character from “A” Team may only be given a Hide Order this turn”. The player assigns values to their A Team members:
1-2 = Sgt Turk
3-4 = Pvt Braddock
5-6 = Pvt Kirby
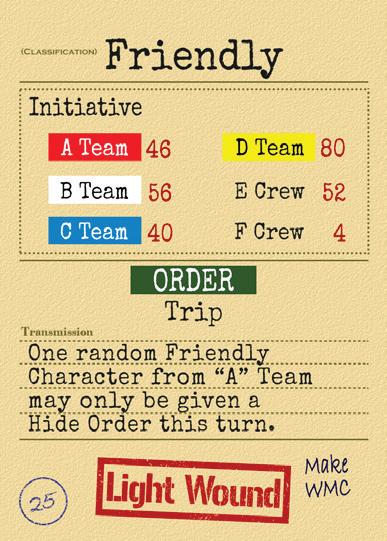
He then rolls a d6 and the result is a 4. This means that Pvt Braddock may only be given a Hide order this turn.
Some Order Cards specify a Friendly or Enemy Event. When one of these is played as an Initiative Card, resolve the Event in Step 1e and use the card to determine Initiatives in Step 3b.
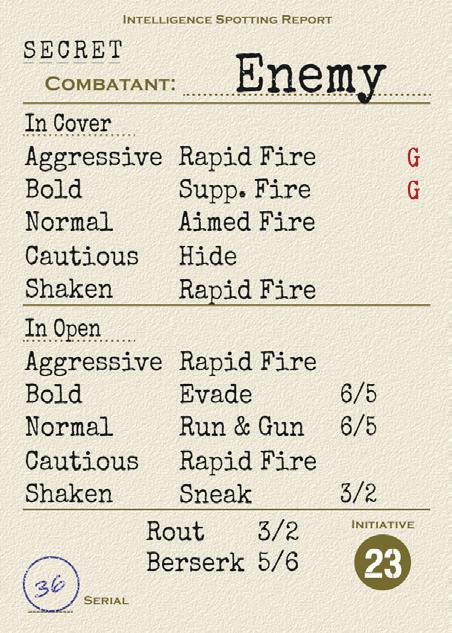
The In Cover section shows the Orders to give to Enemy Characters when they are in Cover [Rule 15.1]. The Character’s Morale State [Rule 19.0] will determine which Order they are given. Example: A Bold Character in Cover is given a Suppressive Fire Order, but may be given a Grenade (G) Order.
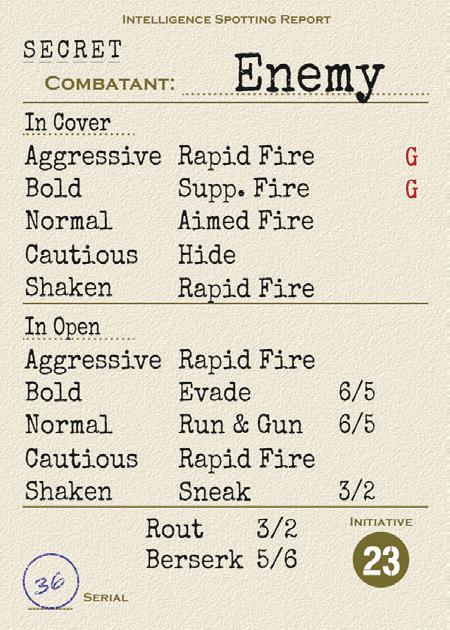
The In Open section shows the Orders to give to Enemy Characters when they are in Open [Rule 15.1]. The Character’s Morale State will determine which Order they are given. Example: A Shaken Character in Open is given a Sneak 3/2 Order.
The Rout and Berserk lines show which Order directions that Characters in those Morale states will move [see Rule 19.0].
The number on the bottom right is the Initiative value of the card (23). The number on the bottom left is the serial number of the card (36). It does not affect play.
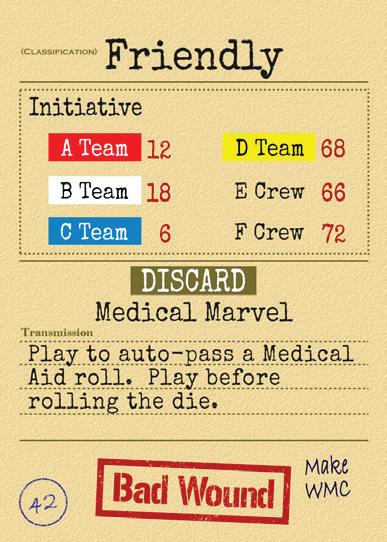
Discard Cards. These can be played as normal Initiative cards in Step 1d of the Friendly Card Phase. They can also be played at any time (except Steps 1a through 1c of the Turn) for the one-off effect described in the Card Text. When they are played as Discards for their text they take effect immediately, although many of them will only have an effect in narrow applications. The Discard effects may override normal game rules. If they are played as Initiative cards, the player does not get the benefit of the Card Text. Example: Card 42 specifies “Medical Marvel: Play to auto-pass a Medical Aid roll”. This card would have no effect unless you were about to resolve a Medical Aid Order.
Event Cards. There are specific Event Cards (such as card 52) and there are also Order Cards that cause Events (such as card 46). An Event of the appropriate type (Friendly or Enemy) is resolved when an Event Card is picked, or when an Order Card that triggers an Event is played for its Initiative. When either of these happen, resolve the Event per the Game Rules.
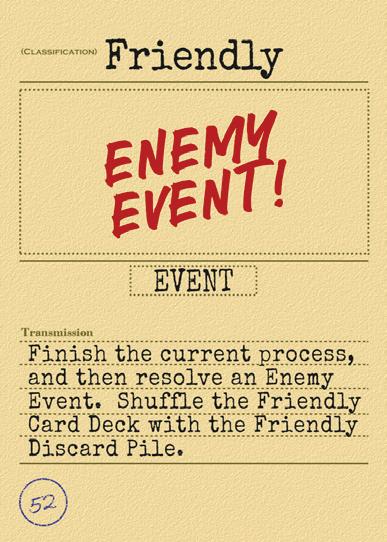
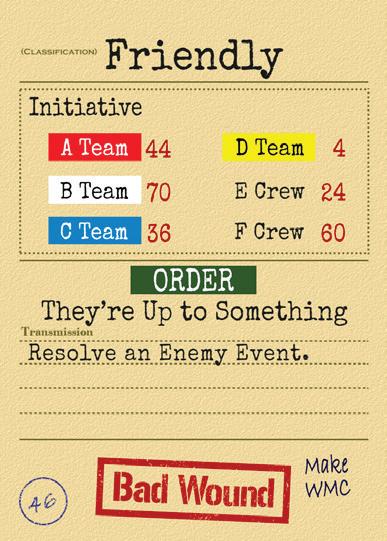
When an Event Card is drawn for any reason, finish whatever process was being done (drawing cards from a Plan Order, resolving a Hit, etc., which may involve drawing more cards) and then resolve the Event. After the Event is resolved, reshuffle all Friendly Cards. If an Event Card is picked as part of a Player’s initial Hand, discard it and draw a replacement card--do not resolve the Event! Once the Player’s Hand is filled, reshuffle the Friendly cards.
There are two standard ways to receive new cards: If, in Step 1a of a Turn, you have no cards in your Hand, draw one card. Also, a Friendly Character who successfully performs a Plan Order [see Rule 7.67] will add cards equal to the Planning Character’s LDR value to their Hand. Cards generated by Plan Orders are kept aside, and are not added to your Hand until Step 1b of the following Turn.
Example: At the start of Turn 5 you play your last card for Initiative. You now have no cards in your Hand. During Turn 5 you perform a Plan Order with one of your Characters who has an LDR value of 1. At the end of Turn 5 [Step 5c] you make a WMC (P) for the Friendly Character with a Plan Order and pass. You draw one card and place it to one side. In Step 1a of Turn 6 you add a new card to your Hand (because you currently do not have any cards in your Hand). In Step 1b, add to your Hand the card that was placed to one side in Step 5c of the previous Turn, giving you 2 cards in total. You must play one of these for Initiative in Step 1d of Turn 6.
In the Sequence of Play, the next step would be for the Player to give Orders to each of their Characters (Step 2) and after that all Enemy Cards would be drawn for Initiative, and Initiative order determined. The use of Orders will be dealt with in the next rules section, but in order to complete the game’s rules on card play, the Enemy Card and Order Phase (Step 3) will be presented first.
In Step 3a of the Enemy Card and Order Phase one Enemy Card is picked for each Enemy Team and is placed on that Team’s colored box on the Card Display. These cards will be used to determine the Initiative values of the Enemy Teams. Any time there are not enough Enemy Cards, reshuffle their Discard Pile.
The Player played a card in Step 1d which had the Initiative values for all Friendly Teams, and in Step 3a Enemy Cards are played for all Enemy Teams to determine their Initiative values. In Step 3b all these Initiative values are used to mark the Initiative order for the Turn on the Initiative Track. See the example on page 8 for a detailed description of this process.
There are three possibilities as to the timing and method of Enemy Characters being given their Orders. The standard system is presented first and then two optional methods.
As each Enemy Team is Activated, in Step 4a i), any eligible Alert Enemy Character that did not previously have an Order, will be given a new Order and act on it as appropriate. To do this, pick an Enemy Card for each eligible Character. On the Enemy Card, compare the Character’s Cover Status with their Morale State to determine which Order they will receive. Place the appropriate Order on each Character. See the example on page 8. Orders will be covered in depth in the next rules section.
Option 1: Players may give all eligible Enemy Characters their Orders in Step 3c. This is a simpler system but it allows the Player to “see” the Enemy Orders ahead of time, so it takes away some of the tension of unknowing. As the Turn progresses, more Enemy Characters may become eligible to receive Orders as they become Alert. When this happens, assign them Orders per the standard method.
Option 2: When a Player is playing a battle with a large number of Enemy Characters, they can use the Initiative card that was played for each Enemy Team to determine the Orders for all Enemy Characters of that Team. When this is done, Orders for all eligible Enemy Characters will be assigned in Step 3c and those who later receive Orders will use the same card. The process is very simple: just refer to the Initiative Card for the Team and cross reference the In Cover/In Open status of each Character in the Team with that Character’s Morale. This will give an Order for each Character. Some of those Orders will be the same but many will be different. This method eliminates the tedium of picking an Order for every Character in larger battles.
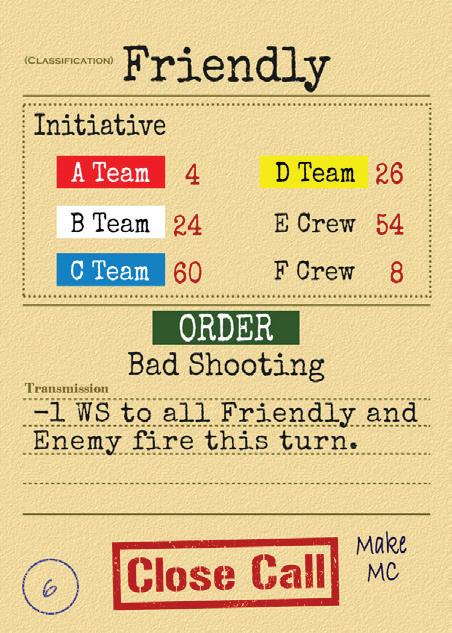
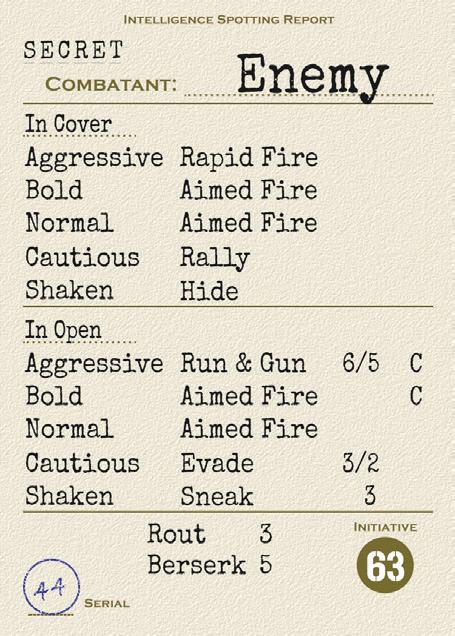
In Step 1d, the Soviet Player played Friendly Card 6 for the card’s Initiative values. In Step 3a, the four Enemy Cards shown below were drawn--one to each of the German Enemy Teams’ colors. The Soviet Friendly Initiatives will be 4 for the A Team, 24 for the B Team, and 60 for the C Team. There is no Player D Team in this scenario and no Crews.
The German Enemy Initiatives will be 63 for the Red Team, 7 for the White Team, 3 for the Blue Team, and 23 for the Yellow Team.
In Step 3b, when Friendly and Enemy Initiative values are compared, the Initiative markers will be placed on the Initiative Track in the order seen below. In each Impulse of the Turn, the Enemy Blue Team will go first. Next will be the Friendly A Team, followed by the Enemy White Team, and so on. Once the Initiative order is determined, place the Friendly Card in the Friendly Discard pile.
If using the option for a large number of Enemy Characters [Rule 6.2, Option 2], the Orders on each card would apply to each member of that Team. Thus the Enemy Yellow card played in Step 3a would apply to every eligible Yellow Character on the board. See the example below.
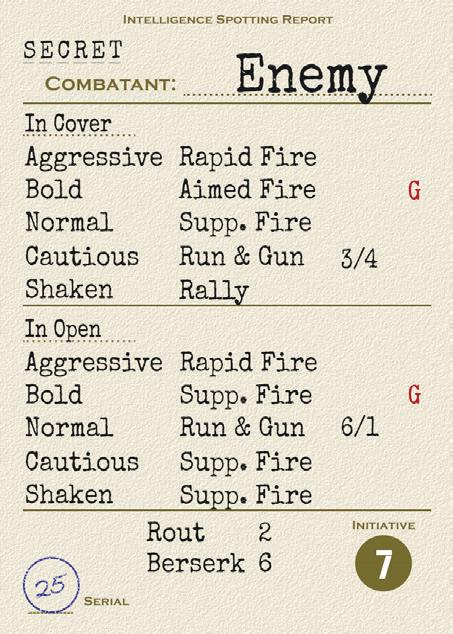
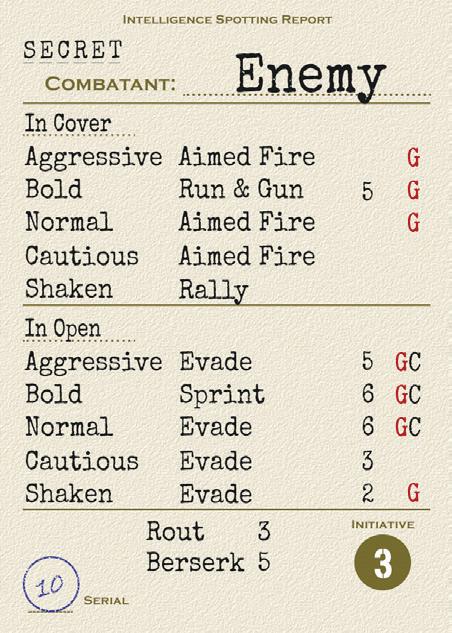

Enemy Orders Example
This is an example of Option 2 from Rule 6.2 but it illustrates many of the concepts in giving Enemy Orders.
Because of using Option 2, the Orders for the Enemy Yellow Team are determined in Step 3c. Yellow activates 4th in each Impulse for this Turn. Their default Morale is Normal.
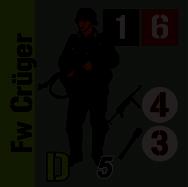

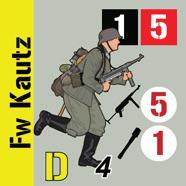
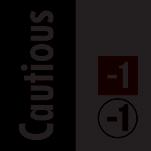
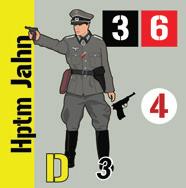
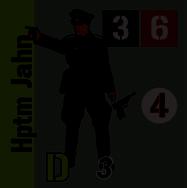
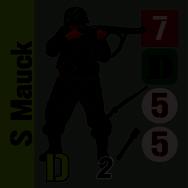
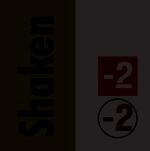
Character 4 is In Cover and Cautious. He will be given a Hide Order.
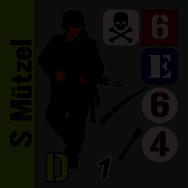
Character 5 is In Cover and Bold. He may be given a Grenade Order (G); if not, he will Suppressive Fire.
Character 3 is In Open and Normal. He will be given a Run & Gun 6/5 Order.
Character 2 is In Open and Shaken. He will be given a Sneak 3/2 Order.
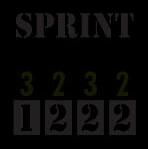
Character 1 has Rout Morale. He will be given a Sprint 3/2 Order. 5 4 3 2 1
In Step 2 the Player must assign Orders to all their Characters. Orders for Enemy Characters are assigned during their Team’s Action Phase or in Step 3c [see Rule 6.2]. Orders may only be given to eligible Alert Characters [see Rule 17.22]. Certain situations require Mandated Orders, which means that there is no choice for the Order given to that Character. Important: If a Character does not have an Order marker on them, they are considered to be in ‘No Order’ status for spotting and firing.
All Orders have four numbers along the bottom of the marker. These four numbers correspond to the 4 Impulses in the Turn. In other words, on the 1st Impulse, all Characters will follow the leftmost number; on the 2nd Impulse, the number next to it, and so on. There is a general system of numeric values and color coding to the Orders but gamers should always check for how an Order is to be processed until such time as they know them.
• A ‘0’ means the Character cannot move or fire in that Impulse.
• A black ‘1’ means the Character must move 1 hex during their activation.
• A black ‘2’ means the Character must move 2 hexes during their activation.
• A blue ‘1’ means the Character has the option of moving 1 hex during their activation.
• A red ‘1’ means the Character can possibly fire if they have an eligible weapon and a Spotted target in LOS.
• An ‘M’ means the Character resolves a Melee attack.
The numbers and/or letters on the right hand side of some Order markers are modifiers that apply to the Character with the marker. These will be described with each Order [see the examples in Rule 3.0]. The yellow numbers on the Non-Player (black) markers show the directions that they will move.
There are three Move Orders that are used for no other purpose than to move a Character. The actual resolution of moving (including how to move Non-Player Characters) will be described in Rule 8.0.
There is a hierarchy of move Orders. From fastest to slowest, they are: Sprint, Evade, Sneak. The Move Orders are:
7.21 Sprint
Rough terrain (as described in the Game Rules) hinders Sprint movement. When a Player Character with a Sprint Order enters Rough terrain, their Order is immediately changed to a Duck Back Order. This is a Mandated Order. For Non-Player Characters in this situation, see rule 8.4.
On Impulses 2, 3 and 4 a Player Character must move at least one hex but may choose to Duck Back. In other words, they are not forced to move both hexes if they Duck Back after the first hex.
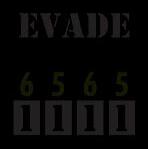
This Move Order is slower than Sprint but is faster than Sneak. Characters with an Unbandaged Bad Wound cannot be given Evade Orders; Non-Player Characters in this situation would have Evade downgraded to Sneak
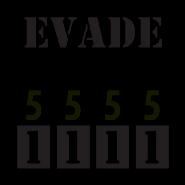
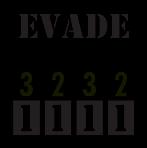
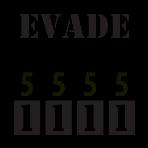
This Order has the numbers 1-1-1-1 on it which means this:
Impulse 1: Must Move 1 hex; cannot Fire
Impulse 2: Must Move 1 hex; cannot Fire
Impulse 3: Must Move 1 hex; cannot Fire
Impulse 4: Must Move 1 hex; cannot Fire
This is the most cautious of the move orders and offers the best protection. Certain terrain types may require a Sneak Order to be able to move into or out of the hex. These situations will be described in the Game Rules.

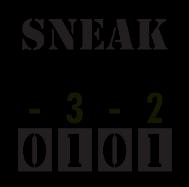
Player Characters: This Order has the numbers 0-1-0-1 on it which means this for Player Characters:
Impulse 1: Cannot Move or Fire
Impulse 2: May Move 1 hex; cannot Fire
Impulse 3: Cannot Move or Fire
Impulse 4: Must Move 1 hex; cannot Fire
Non-Player Characters: This Order has the numbers 0-1-0-1 on it which means this for Non-Player Characters:
Impulse 1: Cannot Move or Fire
Impulse 2: Must Move 1 hex; cannot Fire
Impulse 3: Cannot Move or Fire
Impulse 4: Must Move 1 hex; cannot Fire
The only difference in the Sneak Order between Player and Non-Player Characters is that Player Characters have the option to move (or not move) in the 2nd Impulse whereas Non-Player Characters must move.
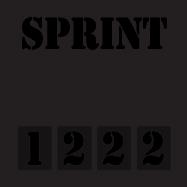
This is the fastest Move Order. Characters with any type of Bad Wound, or an Unbandaged Light Wound, or a Heavy Weapon cannot be given this Order; NonPlayer Characters in these situations would have Sprint downgraded to Evade Therefore when a Non-Player Character with a Light Wound has a Sprint Order picked for them, their Order is downgraded to an Evade Order with the same directional numbers.
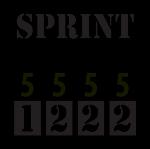
This Order has the numbers 1-2-2-2 on it which means this: Impulse 1: Must Move 1 hex; cannot Fire Impulse 2: Must Move 2 hexes; cannot Fire Impulse 3: Must Move 2 hexes; cannot Fire Impulse 4: Must Move 2 hexes; cannot Fire
When Characters with a Sneak Order have something happen to them that would normally cause them to Duck Back (including a voluntary Duck Back in Step 4a iii) they go directly to a Hide Order instead.
There are four Fire Orders that are used for no other purpose than to fire a gun. A Character does not have to have a target in LOS to be given any type of Fire Order. The actual resolution of Firing will be described in Rule 9.0.
Some Fire Orders mandate that a Character must fire. However, if modifiers reduce a Character’s WS to below 0, use this rule: Player Characters do not have to fire (although they still may). NonPlayer Characters will only fire if they fail a TQC (G).
7.31 Aimed Fire
This is the most accurate of the Fire Orders. It will be given on many occasions. It can be utilized as a form of opportunity fire as the Character covers the ground in front of them.
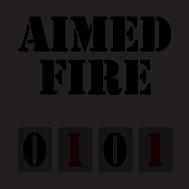
This Order has the numbers 0-1-0-1 on it, which means this:
Impulse 1: Cannot Move or Fire
Impulse 2: May Fire but cannot Move (Non-Player must fire)
Impulse 3: Cannot Move or Fire
Impulse 4: May Fire but cannot Move (Non-Player must fire)
Note that both firing choices are optional for a Player Character but a Non-Player Character must fire if they have an eligible target. Non-Player Characters that have Normal Morale, are in Cover, and have LOS to a Spotted Player Character that is an eligible target, will be given an Aimed Fire Order if they pass a TQC (D). This is a Mandated Order. However, if there is a Spotted Friendly Character within 3 hexes, they will instead be given a Rapid Fire Order if they are capable of using it. A Non-Player Character will receive this Mandated Order only if all the conditions apply. Otherwise, they receive an Order per the normal procedure. Apply this rule before picking an Order Card. This rule is modified for MG duos [see Rule 11.6].
7.32 Rapid Fire
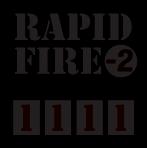
This is a less accurate form of fire. The firer is concentrating more on putting a maximum number of rounds down range and less on accuracy. This Order cannot be given to Characters who have Slow Weapons [see rule 10.1]. If a Rapid Fire Order is picked for an Unspotted Enemy Character, that Order will be changed to Aimed Fire if, once they are Spotted or attempt to fire, it is found that they have a Slow weapon.
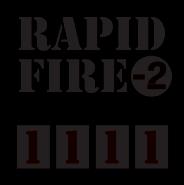
The -2 on the right side of the marker shows that a Character firing with this Order has a -2 modifier to their WS.
This Order has the numbers 1-1-1-1 on it which means this:
Impulse 1: Must Fire (if possible); cannot Move
Impulse 2: Must Fire (if possible); cannot Move
Impulse 3: Must Fire (if possible); cannot Move
Impulse 4: Must Fire (if possible); cannot Move
Note that if the Character has a Spotted opposing Character within range they must fire on any given Impulse.
7.33 Slow Suppressive Fire
This Order aims to suppress the target rather than to hit it. The advantage of this type of fire is that no Order/Terrain modifiers apply to the shots. The disadvantage is, that when a successful Hit is made from Slow Suppressive Fire, do not draw a Wound Card. Instead the target receives a ‘Close Call’ result for every Hit and must make an MC (M) for each Close Call [see Rule 18.0].
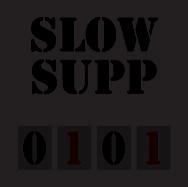
The Order has the numbers 0-1-0-1 on it, which means this:
Impulse 1: Cannot Move or Fire
Impulse 2: May Fire but cannot Move (Non-Player must fire)
Impulse 3: Cannot Move or Fire
Impulse 4: May Fire but cannot Move (Non-Player must fire)
Note that both firing choices are optional for a Player Character but a Non-Player Character must fire if they have an eligible target.
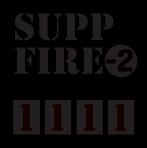
This Order aims to suppress the target with rapid fire. This Order cannot be given to Characters who have Slow Weapons [see rule 10.1]. The advantage of this type of fire is that no Order/Terrain modifiers apply to the shots. The disadvantage is, that when a successful Hit is made from Suppressive Fire, do not draw a Wound Card. Instead the target receives a ‘Close Call’ result for every Hit and must make an MC (M) for each Close Call.
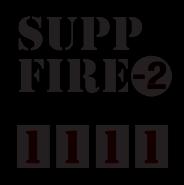
The -2 on the right hand side of the marker shows that a Character firing with this Order has a -2 modifier to their WS.
This Order has the numbers 1-1-1-1 on it which means this:
Impulse 1: Must Fire (if possible); cannot Move
Impulse 2: Must Fire (if possible); cannot Move
Impulse 3: Must Fire (if possible); cannot Move
Impulse 4: Must Fire (if possible); cannot Move
Note that if the Character has a Spotted opposing Character within range they must fire on any given Impulse.
All Enemy Cards with a Suppressive Fire Order use the phrase ‘Supp. Fire’ (which means Suppressive Fire). They do not differentiate between Slow Suppressive Fire and Suppressive Fire. Therefore when a ‘Supp. Fire’ Order is determined, give the Enemy Character a Suppressive Fire Order unless they have a Slow Weapon, in which case they will receive a Slow Suppressive Fire Order. If a Suppressive Fire Order is picked for an Unspotted Enemy Character, give them a ‘Supp Fire’ Order and if necessary, change it to ‘Slow Supp’ if, once they are Spotted or attempt to fire, it is found that they have a Slow weapon.
There are three ‘Mixed’ Orders that have movement together with some other function. These Mixed Orders are:
7.41 Run & Gun
This Order is a combination of movement and fire. Therefore it is both a Fire Order and Move Order. It is very useful for keeping mobility while retaining the ability to fire. It is not necessarily firing from the hip, but more a short dash followed by a hasty shot.

Characters with Unbandaged Bad Wounds cannot be given this Order. When necessary, a Run & Gun Order is downgraded to a Sneak Order. Therefore when a Non-Player Character with a Bad Wound has a Run & Gun Order picked for them, their Order is downgraded to a Sneak Order with the same directional numbers.
The -2 on the right side of the marker shows that a Character firing with this Order has a -2 modifier to their WS. The ‘below 0 WS’ clause in Rule 7.3 applies to Run & Gun. If the Character does not fire because of the ‘below 0 WS’ rule, they will move.
The Order has the numbers 1-1-1-1 on it which means this:
Impulse 1: Must Move 1 hex; cannot Fire
Impulse 2: Must Fire (if possible); if not must Move 1 hex
Impulse 3: Must Move 1 hex; cannot Fire
Impulse 4: Must Fire (if possible); if not must Move 1 hex
Note that if the Character has a Spotted opposing Character within range they must fire on Impulses 2 and 4.
This Move Order is only available for Player Characters. It allows a Character with the Order to carry (or drag) something while they are moving. The Order is primarily used to carry Incapacitated Characters but Game Rules could specify other objects as needing a Carry/Drag Order to move them. Any Friendly Character can be carried/dragged by this Order except those who have Rout or Berserk Morale. Note that KIA markers (both Friendly and Enemy) can be carried with this Order. This may matter in a scenario if the victory conditions require the Player to bring a body from the battlefield.
In order to receive this order, a Character must start the Turn in a hex with the object being carried. If a Character is being carried, they lose any Order they had (which may trump a mandatory Hide) and both Characters are now considered to have Carry/ Drag Orders. Both Characters move on the Initiative of the carrying Character. Characters with an Unbandaged Bad Wound cannot be given this Order initially but they can be the one being carried/dragged.
The Order has the numbers 0-1-0-1 on it, which means this:
Impulse 1: Cannot Move or Fire
Impulse 2: Must Move 1 hex; cannot Fire Impulse 3: Cannot Move or Fire
Impulse 4: Must Move 1 hex; cannot Fire
7.43 Charge
Once a Charge bonus has been used in Melee, if there is still a foe in the hex, replace the Charge Order with a Melee Order.
Characters with Charge Orders will stop their movement for the Turn as soon as they enter a foe’s hex and their foe’s current Order will be changed to a Melee Order. If a Character is unable to enter a foe’s hex in Impulse 3, the Character must change their order to Duck Back at the end of Impulse 3. This is a Mandated Order
Characters with a Charge Order receive a +1 TQ bonus for their Melee attack in Impulse 4 only [see Rule 14.0].
There are three types of Grenade Orders which share many similarities. The details of resolving Grenade attacks are found in Rule 12.0. The range for thrown Grenades will be found in the Game Rules but will generally be about 3 hexes. Grenade Orders of any type cannot be given in Impulses 2-4. The Grenade Orders are:
This Order enables a Character with a Grenade WS to throw a Hand Grenade at a foe. It may only be given if there is a Spotted opposing Character within Grenade range, or 1 hex beyond Grenade range, of the throwing Character. The foe does not have to be in LOS.
This is an Order given with the intent of attacking a foe in Melee. This Order can only be given to a Character who has a Spotted opposing Character in LOS within 4 hexes. In other words, they have to know a foe is near, they have to see the foe, and they have to be able to potentially reach the foe in this Turn. Charge Orders cannot be given in Impulses 2-4. A Character with an Unbandaged Bad Wound cannot be given this Order. Note that a Character can enter a foe’s hex with any Order (and thus Melee) but the Charge Order gives a Melee bonus in the 4th Impulse. The actual resolution of the Melee caused by this Order is described in Rule 14.0.
This Order has the numbers 1-1-2-M on it which means this:
Impulse 1: Must Move 1 hex toward nearest foe; cannot Fire Impulse 2: Must Move 1 hex toward nearest foe; cannot Fire Impulse 3: Must Move 2 hexes toward nearest foe; cannot Fire Impulse 4: Must Melee. If not in a Melee hex, no action
On all Impulses, a Character with the Charge Order must move to a hex that brings them closer to the nearest Spotted foe. Player Characters are free to choose the hexes they will enter. When Non-Player Characters are moved, if there are multiple hexes that they can enter, they will choose the hex with the best protection (defined as the hex that gives the best WS modifier for a Charge Order). If the protection is equal in multiple hexes, randomize the hex they will move to. Player Characters with a Charge Order can Duck Back in Step 4a iii) of their Activation if they are not yet in Melee and do not have Berserk Morale.
If a Character enters a foe’s hex on the 1st Impulse, discard the Charge Order and replace it with a Melee Order; they will not get the Melee bonus in any ensuing Melee rounds. If a Character enters a foe’s hex on Impulses 2 or 3, they retain the Charge Order and will receive the Charge Melee bonus in the 4th Impulse Melee.
The Order has the numbers 0-1-1-1 on it, which means this: Impulse 1: Cannot Move or Fire; place Grenade marker Impulse 2: May Move 1 hex; cannot Fire Impulse 3: Must throw Grenade
Impulse 4: May Move 1 hex; cannot Fire
On Impulse 1 place a Grenade marker on the Character who has the Grenade Order. The Grenade is now ‘live’ and will explode in the Turn.
On Impulse 2 a Character can move a single hex. This move is optional but may be necessary (no longer optional) to try to get within Grenade range of a foe. Enemy Characters will only choose to move if that move is needed to bring a Friendly Character within Grenade range, or it will place them adjacent to a Building hex that has a Friendly Character. If Enemy Characters do move, it must be closer to the nearest Spotted Friendly Character; if necessary, randomize the Friendly Character that they will move towards. If there is a choice of hexes to move to, they will choose the one with the best protection. If there is still a choice, randomize the hex.
On Impulse 3 the Character will throw a Grenade up to its maximum range (as found in the Game Rules). Remove the Grenade marker from the Character and place it in the target hex. Resolve the Grenade attack immediately [see Rule 12.2].
On Impulse 4 the Character has the option to move a single hex. Enemy Characters will only take this option if it will move them to better protection (defined as the hex that gives the best WS modifier for a Grenade Order). If they are adjacent to a hex with better protection than their current hex, move them to it. If there are several eligible hexes, randomize the hex to move to.
If a Character has a Grenade marker, and is forced to change their Order before throwing the Grenade, the Grenade marker stays in the hex and will explode at the end of the Character’s Impulse 3 Activation (Step 4a i). This is a dropped Grenade.
This Order is only used by Friendly Characters. It generates Smoke, which provides Cover. Smoke Grenades will not always be available; each game’s rules will detail the availability of Smoke Grenades and their range. Even if Smoke Grenades are available, Characters must pass a WC (J) to be given this Order. If they fail the WC, they must be given another Order.
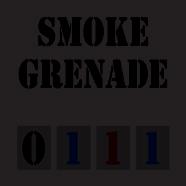
The Order has the numbers 0-1-1-1 on it, which means this:
Impulse 1: Cannot Move or Fire
Impulse 2: May Move 1 hex; cannot Fire
Impulse 3: Must throw Smoke Grenade
Impulse 4: May Move 1 hex; cannot Fire
On Impulses 2 and 4, the Friendly Character has the option of moving one hex. On Impulse 3 they must throw the Smoke Grenade to any hex within range. Once it is thrown, place a Smoke Grenade marker in the target hex and place a Smoke marker there [see Rule 22.0]. If a Character Ducks Back before throwing the Smoke Grenade, the Order is canceled but there is no other effect.
7.53
a. Friendly Characters that do not have Rout or Berserk Morale may voluntarily remove their Order and replace it with a Duck Back Order at the end of any Impulse in which they are Activated. This takes place in Step 4a iii).
b. When any Routed Character enters a Cover hex that is out of the LOS of all Spotted opposing Characters, they must make a TQC (B); if they pass this TQC, they will be given a Duck Back Order. This is a Mandated Order.
c. When an Enemy Character moves into a Cover hex and they are in LOS of a Spotted Friendly Character, they must make a TQC (C). If they pass, they will be given a Duck Back Order; it is a Mandated Order. If they fail, they will continue with their current Order. This rule does not apply to Enemy Characters that are Routed or Berserk, or that have Run & Gun, Charge, or Grenade Orders, or who are Guards.
d. Certain Checks force a Character to immediately replace their Order with Duck Back. These are Mandated Orders
e. After the last opposing Character is vanquished in a Melee, all surviving Characters have their Melee Orders changed to Duck Back [see Rule 7.68]. This is a Mandated Order.
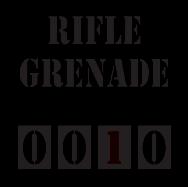
Rifle Grenades are only used by Characters that have a Rifle Grenade WS on their marker. For Player Characters, this Order can only be given if they have a Spotted Enemy Character in range and LOS and they pass a WC (J). If they fail the WC, they must be given another Order. For Non-Player Characters, see Rule 8.24.
The Order has the numbers 0-0-1-0 on it, which means this:
Impulse 1: Cannot Move or Fire
Impulse 2: Cannot Move or Fire
Impulse 3: Must fire Rifle Grenade
Impulse 4: Cannot Move or Fire
The Character may not move on any Impulses. On Impulse 3 they must fire the Grenade up to its maximum range unless they no longer have a target in LOS; in that case they simply do not fire. Place a Grenade marker in the target hex and resolve the attack immediately [see Rule 12.2].
Note that Rifle Grenades do not ‘arm’ (the act of firing it arms the Grenade). If the Character Ducks Back prior to firing on Impulse 3 the Rifle Grenade Order is simply removed. Rifle Grenades have a Range Modifier that affects the firer’s WS (like other weapons) [see Rule 10.3]. Rifle Grenade use is not considered as ‘firing’ for card play or shooting; it is a Grenade type of Order.
These Orders have various purposes which are described under each Order. All of these Orders (except Duck Back and Melee) have the numbers 0-0-0-0 on them, which means this:
Impulse 1: Cannot Move or Fire
Impulse 2: Cannot Move or Fire
Impulse 3: Cannot Move or Fire
Impulse 4: Cannot Move or Fire
7.61
This Order is special in that it may not be given out during the Friendly or Enemy Orders Phases. When it is received, it replaces the Character’s current Order. There are several ways in which this Order is placed:
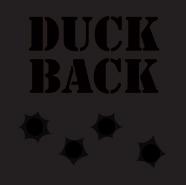
f. If a Non-Player Character is Out of Ammo and they do not have a secondary weapon, they will be given a Duck Back Order. This is a Mandated Order.
When a Character with a Duck Back Order is activated, they must change their Duck Back Order to a Hide Order; this is a Mandated Order.
When Characters with Sneak, Hide, Rally, or Reload Orders have something happen to them that would normally cause them to Duck Back (including a voluntary Duck Back in Step 4a iii) they go directly to a Hide Order instead of Duck Back
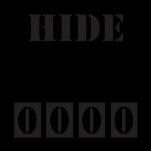
7.62 Hide
This Order allows a Character to gain the best defensive benefit from the terrain they occupy. It can be voluntarily given to Player Characters, and Non-Player Characters can receive it from their Order Cards. It also can be gained involuntarily.
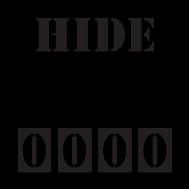
When a Character with a Duck Back Order is activated, they must change their Duck Back Order to a Hide Order; this is a Mandated Order.
When a Character fails an MC (L) due to an Explosion, they will of course Duck Back, but they must be given a Hide Order in the next Turn. This is a Mandated Order and is one of only two situations where a Character’s Order for the next Turn is predetermined.
Characters with a Hide Order retain that Hide Order if something happens that would normally force a Duck Back Order; they do not go to Duck Back!
Characters can also use a Hide Order to become Unspotted. At the end of the Turn, during Step 5b, any Characters that were assigned a Hide Order in their Orders Phase will become Unspotted if they meet these conditions:
• They are in Cover terrain or a Smoke hex
• They are not in the LOS of any Spotted opposing Character
• They pass a TQC (E)
7.63 Rally
This Order is used to increase the Morale state of a Character. It may be given to Characters with a Morale State of Cautious or Shaken [see Rule 19.0].
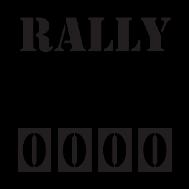
For Player Characters, this is a matter of the Player’s choice. For Non-Player Characters, Rally Orders for Cautious and Shaken Characters are generated by the Enemy Order Cards. See Rule 19.4 for how to resolve Rally Orders.
Routed Characters (both Player and Non-Player) must attempt to gain a Rally Order in their Order Phase. They may only be given a Rally Order if they meet these conditions:
• They are in Cover terrain or a Smoke hex
• They are not in the LOS of a Spotted opposing Character (for this determination, they do get the benefit of Small or Low terrain--see Rule 15.2)
• They pass a TQC (A)
Routed Characters that fail to meet the conditions above must be given the fastest Move Order that they can accept. Player Characters will move as fast as possible in the direction of their Friendly Board Edge (as defined in the scenario). Non-Player Characters will move using the directional numbers found on the ‘Rout’ line of their picked Enemy Order Card.
When Characters with a Rally Order have something happen to them that would normally cause them to Duck Back (including a voluntary Duck Back in Step 4a iii) they go directly to a Hide Order instead of Duck Back
7.64 Reload
During the course of the game a Character may gain a Low Ammo or Out of Ammo marker [see Rule 10.4].
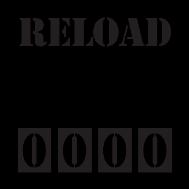
A Character can still fire if they have a Low Ammo marker but they cannot fire if they possess an Out of Ammo Marker. At the end of the Turn, during Step 5b, any Characters that have this Order remove any Low Ammo or Out of Ammo marker they have.
Player Characters can be given this Order if they have a Low Ammo or Out of Ammo marker. Non-Player Characters are given this Order only if they are Out of Ammo and the Order determined for them is any type of Fire Order (including Run & Gun). In this case, give them a Reload Order instead of the Fire Order.
When Characters with a Reload Order have something happen to them that would normally cause them to Duck Back (including a voluntary Duck Back in Step 4a iii) they go directly to a Hide Order instead of Duck Back.
7.65 Medical Aid
This Order is for Friendly Characters only. It may be given for any number of purposes, as specified in the Game Rules. It could be used to search an enemy officer for papers, remove demolition charges from a bridge, find and mark a minefield, look for a fugitive in a building, or anything else.

At the end of the Turn (during Step 5b) the Player makes a WMC (P) for each Character with a Search order. If the WMC is passed, the Search is a success; if not, it is a failure. The ramifications of success or failure will be determined by the Game Rules.
This Order is used for Friendly Characters only. It allows the player the possibility to draw additional Cards to their Hand. Only Characters that have an LDR value may perform a Plan Order.
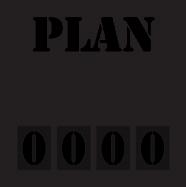
At the end of the Turn (during Step 5c) the Player makes a WMC (P) for each Character with a Plan order. For each Character that passes the WMC, the player draws a number of cards equal to that Character’s LDR value. All cards gained from a Plan Order are placed aside--they are not yet in the Player’s Hand. They will be added to the player’s Hand during Step 1b of the following turn.
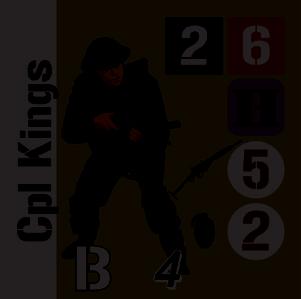
Example: Corporal Kings has an LDR value of 2. If Kings has a Plan Order and passes a WMC (P) during Step 5c, the Player will receive 2 cards. These cards are placed aside until Step 1b of the following Turn.
7.68
This Order is given to any Character that enters a hex with a Character of the opposing side [see also Rule 14.1]. Simply replace the Characters’ current Orders with Melee Orders. The only exception is that when a Character with a Charge Order enters a foe’s hex on Impulses 2 or 3, they retain their Charge Order.
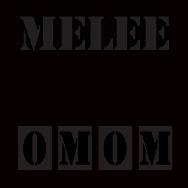
The Order has the numbers 0-M-0-M on it, which means this:
Impulse 1: Cannot Move or Fire
Impulse 2: Must Melee; cannot Move or Fire
Impulse 3: Cannot Move or Fire
Impulse 4: Must Melee; cannot Move or Fire
If a Melee is not ended in the 4th Impulse [Rule 14.2] all Characters in the hex keep the Melee Order on them for the next Turn; they do not remove them in Step 5f. This is the other situation where a Character’s Order for the next Turn is predetermined.
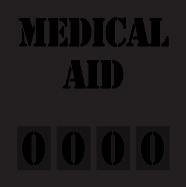
This Order is for Friendly Characters only and can only be used by Characters who have the Medic Ability (per the Game Rules). The Character performing Medical Aid may use it on themselves or another Character (Friendly or Enemy) but can only bandage one Wound per Turn [see Rule 18.3]. The Character receiving the Medical Aid must have a Hide, Rally, or Plan Order at the start of the Turn, or be in a No Order status.
At the end of the Turn (during Step 5a) the Player makes a WMC (P) for each Character with a Medical Aid Order. If they succeed, one Wound marker in their hex is flipped to its Bandaged side. If they fail, there is no effect.
Characters with a Melee Order and an active foe will never be given other Orders. At the end of the Activation when a Melee is ended, all surviving non-Guard Characters have their Melee Orders changed to Duck Back. This is a Mandated Order
A number of game situations create Mandated Orders. These are circumstances that either force a Character to be given an Order at the start of the Turn, or to change their Order during the course of the Turn. There are many varieties of Mandated Orders: Mandated Orders in the Order Phase
•Enemy Characters must see if they will be given Aimed Fire or Rapid Fire Orders [7.31]
•A failed MC (L) from an Explosion in the previous Turn forces a Hide Order [7.62]
•Routed Characters might be given a Rally Order [7.63]
•Routed Characters that cannot be given a Rally Order are given the fastest Move Order [7.63]
•Melee Orders are carried over from the previous Turn [7.68]
Mandated Orders during the Action Phase
•A Character who Sprints into Rough terrain must Duck Back
•A Character must Duck Back after a failed Charge [7.43]
•Various Checks force a Duck Back [7.61]
•After a Melee is ended, change to Duck Back [7.61, 7.68]
•When an Enemy moves into Cover in LOS of a Spotted Friendly Character, the Enemy might change to Duck Back [7.61]
•When any Routed Character enters Cover out of LOS of a Spotted foe, they might Duck Back [7.61]
•When a Character with a Duck Back Order is Activated, change their Order to Hide [7.62]
•A Non-Player Character who is Out of Ammo and does not have a secondary weapon will Duck Back [10.4]
•When a Non-Player Character has to change their Move Order due to Incompatible terrain [8.4].
On any given Impulse, when it is a Team’s Action Phase, each Character of that Team, in turn, completes Steps 4a i) through 4a iii) before the next Character of the Team starts. A Player may Activate the members of their Team in any order they want. Non-Player members of a Team are activated from the lowest hex number (by numerical value) to the highest. If multiple NonPlayer Characters are in the same hex, randomize who goes first. Example: It is the 3rd Impulse of the Turn and the Enemy Blue Team is being activated. That Team has four Characters on the map; one each in hexes 12.02 and 15.17, and two Characters in 16.09. The Character in 12.02 is activated first, followed the Character in 15.17. Last will be the Characters in hex 16.09 but the one who goes first in that hex will be randomized.
Many Activations will include movement because various Orders allow for the movement of the Characters. Many Orders that allow movement require the Character to move, but a few of them allow an option to move. This differentiation is covered in depth in each Order. The Player is free to move their Characters unless they are Routed or Berserk [see Rules 19.21 and 19.31].
When a Character moves, they are placed in an adjacent hex. The Sprint and Charge Orders allow a Character to move 2 hexes in an Impulse. No Character can return to their starting hex in an Impulse. When a Character with a Sprint Order enters Rough terrain, they must stop and change their Order to Duck Back [see also Rule 8.4.]
The basics of assigning Enemy Orders by picking Enemy Cards are covered in Rule 6.2 and the example on page 8. This section of rules expands on that process for Movement.
A Non-Player force has one Directional Compass for each of their four Teams. These Directional Compasses are used to determine the movement of Non-Player Characters. Each scenario will specify the location and facing of the Directional Compass markers. Usually they will face the same direction, but not always. When they face different directions, the Blue Directional Compass controls the movement of Blue Characters, the Red Compass controls the Red Characters, etc. The Directional Compass will be oriented so that its arrow points to a particular hex (per the scenario instructions). This will allow a fixed reference for moving Enemy Characters. In general, directions 5 and 6 will be the move directions of an advancing Enemy, while directions 2 and 3 will be retreating directions.
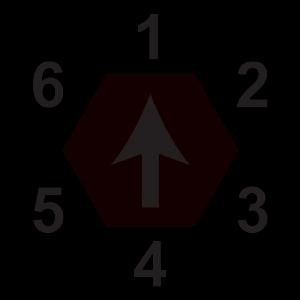
The Enemy Cards have shorthand numerical abbreviations for the directions on the Enemy Move Order markers. If there are two numbers on the Enemy Order Card (such as 4/3) double that notation for all Order markers except Sneak. For Sneak Orders with two numbers, use the numerical notation as it is. Therefore if the card says ‘Sprint 4/3’ the Order marker used would be ‘Sprint 4/3/4/3’ but if the card says ‘Sneak 4/3’, the Order marker used would be ‘Sneak -/4/-/3’.
If there is a single digit number on the Enemy Order Card, quadruple that notation for all Orders except Sneak. For Sneak Orders with a single number, double the numerical notation. Therefore if the card says ‘Run & Gun 6’ the Order marker placed on the Character would be ‘Run & Gun 6/6/6/6’ but if the card says ‘Sneak 1’, the Order marker used would be ‘Sneak -/1/-/1’.
8.23 Enemy Movement Resolution
When an Enemy Character has a movement Order in their Action Phase, the numbers on the Order regulate how they move. The lower (boxed) numbers show the number of hexes they will move, and the middle (yellow) numbers show the direction they will move. That direction is determined by referencing the Team’s Directional Compass. See the example in Rule 8.5.
8.24 Enemy Grenade and Charge Orders
Some of the Order lines on the Enemy Cards contain the letter G and/or the letter C on the far right side. These mean that the Character might be given a Grenade (G) or Charge (C) Order. Charge and Grenade Orders cannot be given on Impulses 2-4.
If a ‘G’ or ‘C’ notation applies to an Enemy, you must first determine if they will do one of these two Orders. This is done by making a WC (K) for the Character. If both letters are present, make the WCs in order from left to right. The first WC that passes is the Order they will be given. If neither of them is passed, give the Character the Order on the card.
In order to give an Enemy Character a Charge Order, there must be a Spotted Player Character in LOS. The Spotted Player Character must also be within 4 hexes and the Enemy must be capable of reaching their hex with Charge movement at the moment the Order is given. If these conditions do not apply, do not even roll for the Order. (Note that these Charge restrictions also apply to Player Characters; they are just played smarter.)
For Enemy Characters, the Grenade (G) option is used for both Hand Grenades and Rifle Grenades. In order to give an Enemy Character a Hand Grenade Order, there must be a Spotted Player Character within their Grenade range +1 hex. An Enemy Character with a Rifle Grenade WS will be given a Rifle Grenade Order if there is a Spotted Friendly Character in range and LOS. To be eligible for Enemy Grenade attack determination, the target hex cannot have any Non-Player Characters in it. Example: An Enemy Character picks an Order Card with a ‘G’ option on it. The Grenade range for that Character’s nationality is 3. Therefore, in order to roll for the ‘G’ Order, there must be a Spotted Player Character within 4 hexes. The Player Character does not have to be in LOS.
8.25 Enemy Rout & Berserk Movement Orders
Enemy Characters that have Rout Morale status are treated differently for their Orders. When an Order Card is picked for a Routed unit, the Routed unit is given the fastest move Order possible with movement directions per the Rout line of the card. Remember that from fastest to slowest, the Orders are: Sprint, Evade, Sneak A Routed Character with an Unbandaged Bad Wound can only Sneak. The card picked for him has the number 3 on the Rout line. He will be given a ‘Sneak -/3/-/3’ Order. Another Routed Character has no Wounds and the card picked for him has the numbers 2/3 on the Rout line. He will be given a ‘Sprint 2/3/2/3’ Order.
Enemy Characters that have Berserk Morale status have a hierarchy that determines what Order they are to be given [see Rule 19.22]. If they are given a Move Order, they are treated similarly to Routed units except that they use the ‘Berserk’ line of the Enemy Order Card that is picked for them. A Berserk Character with an Unbandaged Light Wound picks a card with the number 6 on the Berserk line. He will be given an Evade 6/6/6/6 Order. If he did not have the Light Wound he would be given a Sprint 6/6/6/6 Order.
Certain hex types and/or conditions are defined as Impassable in the Game Rules. These might be Board Edges, Water hexes, Fire hexes, etc. When a Non-Player Character tries to move into

one of these hexes, follow this procedure: If the impassable move direction is 5 or 6, they will move to the other direction (5 or 6). If the impassable move direction is 1 or 4, they will move to the other direction (1 or 4). If the impassable move direction is 2 or 3, they will move to the other direction (2 or 3). If the Character still cannot move via this alteration, move them to the first legal hex in a clockwise direction from where they were trying to move. Any temporary movement alteration is for the current Impulse only and the Character’s Order marker is not changed. Example: Character 16 (in hex 14.00) has an Evade 6/5 Order. On the 1st Impulse he cannot move in direction 6, so he instead moves in direction 5 without changing his Order. His move for the Turn would be in hexes 1-4. If hex 1 were Impassable, his 1st Impulse move would be clockwise to hex W. He would then move to hex X (direction 5) on the 2nd Impulse; hex Y (because he could not move in direction 6) on the 3rd Impulse; and then hex Z (direction 5) on the 4th Impulse.
Some Terrain affects only certain types of moves. For instance, when Characters Sprint into Rough terrain hexes they must Duck Back. When a Non-Player Character attempts to move into a hex that would end their move Order or that is not allowed for their move Order (but would be allowed for another move Order) use this system: At the instant that the Character would attempt the hindering move, change their Order marker to the fastest move that is allowed for that hex’s terrain. Sprint will change to Evade or Sneak Evade and Run & Gun will change to Sneak. If a Sprinting Character has already used one of their two moves, their move is ended for the Impulse but they are still given the new Order. Example: Character 14 (in hex 18.00) has a Sprint 5 Order. On the 1st Impulse he moves forward to hex A. On the 2nd Impulse, he moves to hex B but he cannot move the second hex of his Sprint Order without entering the Rocks and ducking back; Rocks are incompatible with Sprint. Therefore his Order is changed to Evade 5 and his movement is ended for the 2nd Impulse. He moves to hex C in the 3rd Impulse, and hex D in the 4th Impulse. See also the description of ‘Soldier 1’ in the Movement Example. ? ? C B A D 1 X Y W 2 Z 4 3




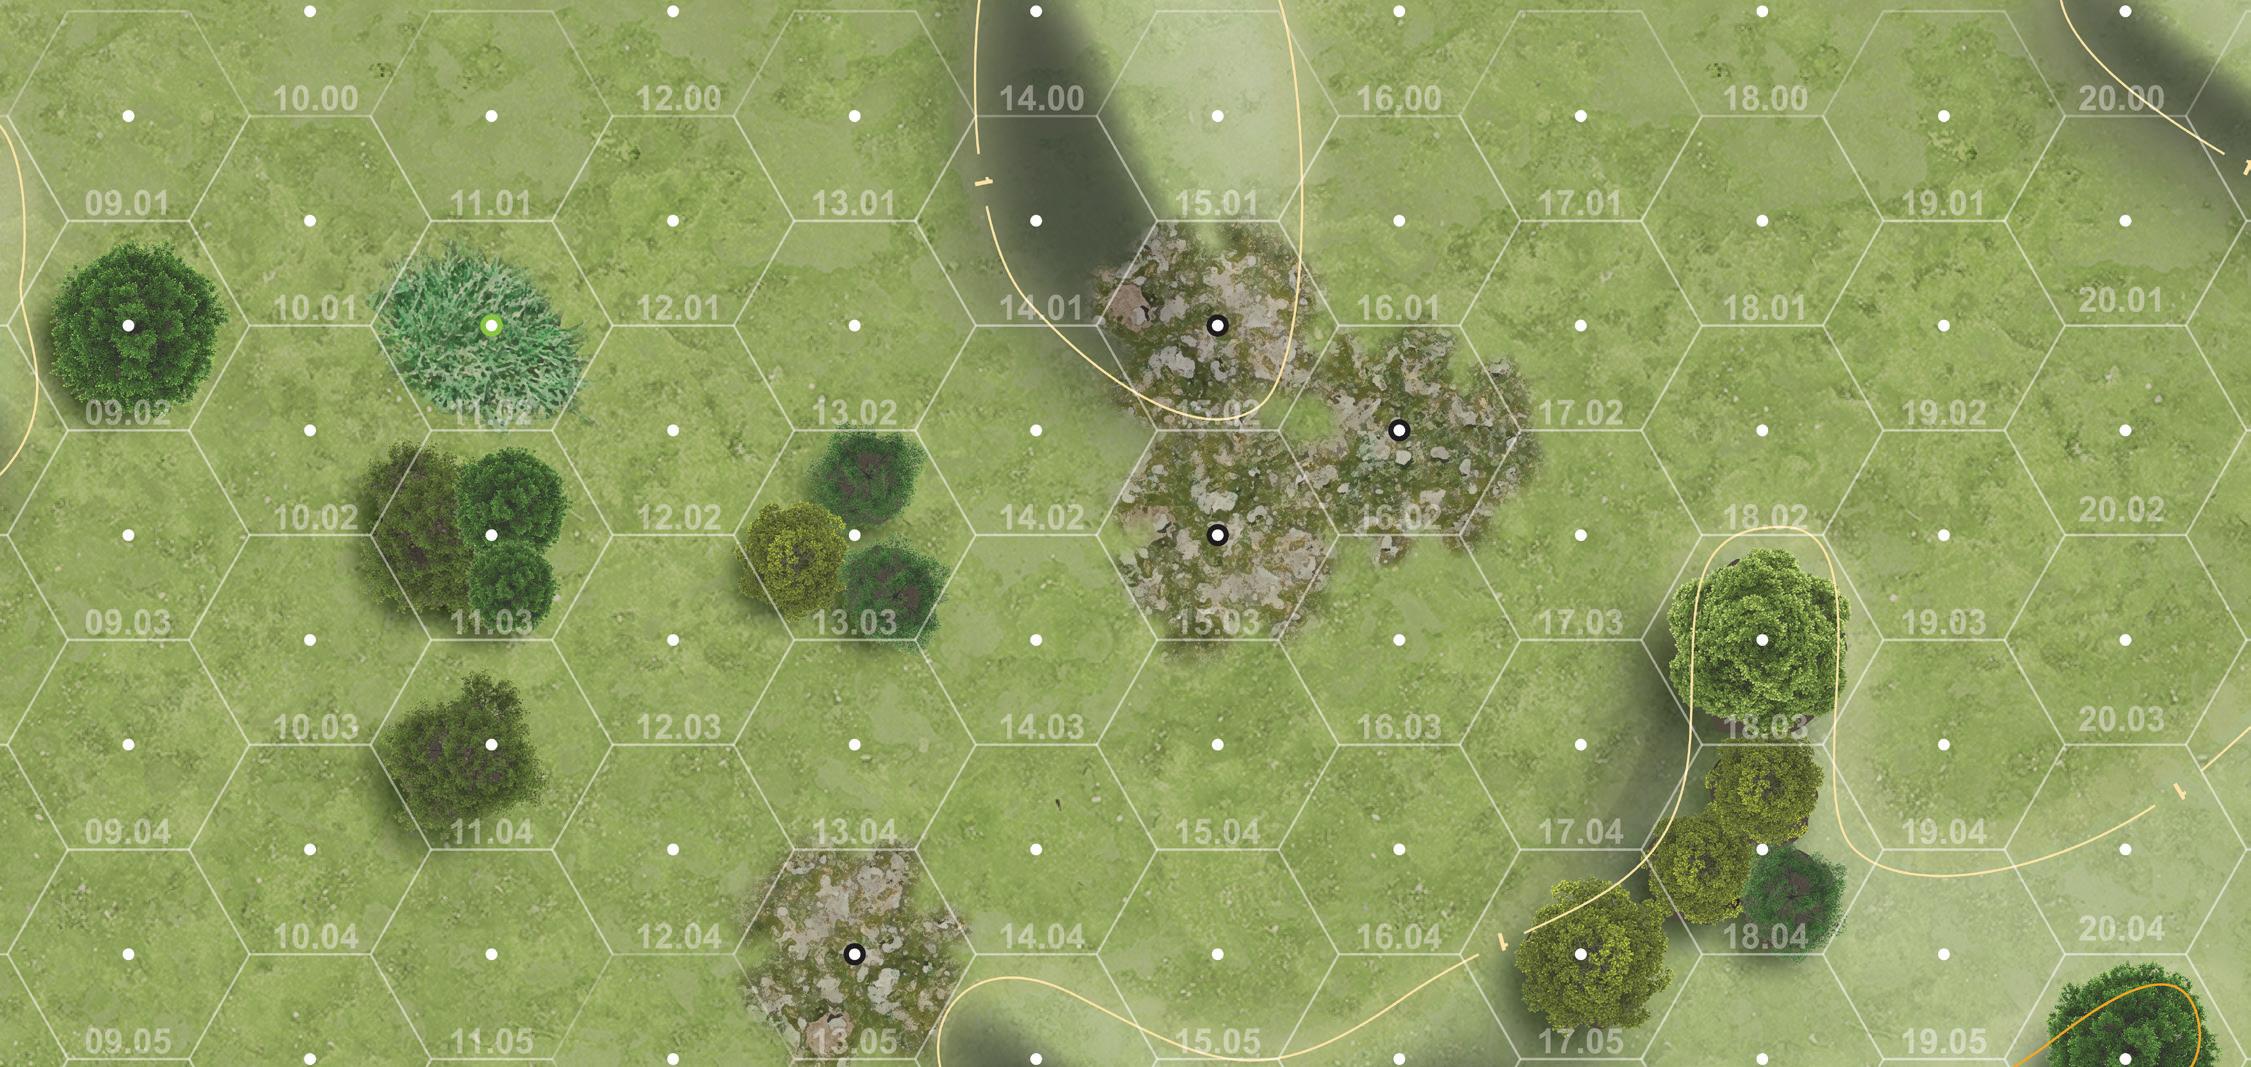
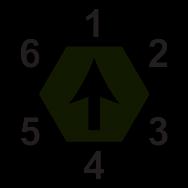
The Movement example on page 15 expands the diagram on page 8. All Characters are using the same Directional Compass.
The Unspotted White Character has a Rapid Fire Order determined for him. When he is revealed, if he has a Slow Weapon, it will be changed to Aimed Fire.
Character 5 has a Suppressive Fire Order determined for him, but it has a ‘G’ notation next to it. Since there are no Spotted Player Characters within his Grenade range, he is given a Suppressive Fire Order. He has a weapon capable of using Suppressive Fire. If he did not, it would be changed to a Slow Suppressive Fire Order.
Character 4 has a Hide Order. He simply Hides.
Character 3 has a Run & Gun 6/5 Order. He is given the Order marker shown and then will execute his Order as follows. On the 1st Impulse he will move one hex in direction 6. On the 2nd Impulse, if he has a Spotted Player Character to fire at, he will do so; otherwise he will move one hex in direction 5. If he fires he will not move. On the 3rd Impulse he will one hex in direction 6. On the 4th Impulse, if he has a Spotted Player Character to fire at, he will do so; otherwise he will move one hex in direction 5. If he fires he will not move.
Character 2 has a Sneak 3/2 Order. In the 1st Impulse he will not move. In the 2nd Impulse he will move one hex in direction 3. In the 3rd Impulse he will not move. In the 4th Impulse he will move one hex in direction 2.
Character 1 has a Sprint 3/2 Order. In the 1st Impulse he will move one hex in direction 3. In the 2nd Impulse he will move two hexes in direction 2. In the 3rd Impulse he will move two hexes in direction 3 (off of our example area). In the 4th Impulse, he will move two hexes in direction 2 (off our example area).
If hex 20.02 (black square) is a Rough hex, Character 1 will move one hex in direction 3 (dotted line). In the 2nd Impulse he will move one hex in direction 2 (dotted line) and, because he cannot Sprint into the Rough hex without ending his move, his Order is immediately changed to Evade 3/2 (with his move finished for Impulse 2). In the 3rd Impulse he will move one hex in direction 3; in the 4th Impulse, he will move one hex in direction 2 (dotted lines).
Firing is the process of shooting a gun (rifle, pistol, machine gun) with a Fire Order. To fire, a Character must:
• Have a Fire Order
• Have LOS to a Spotted opposing Character
• Have sufficient range with the Weapon being used
• Not be in ‘Out of Ammo’ status for that Weapon
Players are free to have their Characters fire at any target unless there are multiple Non-Player targets in the same hex that is being fired at. In that instance they will fire at the easiest target to hit. If there are still multiple choices, randomize the target.
When Non-Player Characters have a Fire Order, they will choose their target in the following priority order. Any ties in priority will be resolved by random selection:
1. The easiest target to hit
2. The closest Player Character
If a Player Character has WS in more than one weapon, the Player chooses which weapon that Character is firing. Non-Player Characters with WS in more than one weapon will fire with the topmost weapon on their marker, unless it is Out of Ammo.
Follow this procedure when resolving any fire:
1. Count the range in hexes from the firer to the target. Count the target’s hex but not the firer’s.
2. Apply any WS modifier required for the range based on the weapon being used [see Rule 10.3].
3. On the Order/Terrain Chart, cross reference the target’s Order with the terrain they occupy. This will give an ‘Attack’ modifier to the Firer’s WS. This step is not used for any type of Suppressive Fire because Suppressive Fire is not modified by the target’s Order or Terrain.
4. Apply any other WS modifiers to the firer’s WS. These may come from Wounds, Morale, the firer’s Order, or Smoke [see Rule 22.0]. These all affect Suppressive Fire.
5. Roll a number of d10 equal to the weapon’s ROF [Rule 10.5]. If a die roll is equal to or less than the modified WS, the shot has Hit; otherwise the shot misses.
6. If a roll is a natural 0, increase the firer’s Morale State by one level if the Wound Card caused a Wound; a Close Call does not raise Morale. With this rule, a Character can only gain one Morale level per Impulse and cannot go Berserk.
7. If a roll is a natural 9, the shot automatically misses. In addition, place a Low Ammo Marker on the firing Character unless they already have a Low Ammo Marker, in which case flip it to the Out of Ammo side. Characters firing pistols are immune from this rule; pistols never run out of ammo (in game terms).
8. Draw a Wound Card for each Hit to find the damage done [see Rule 18.0]. Exceptions: A Hit from Suppressive Fire is automatically a Close Call. Also, some Order/Terrain combinations will limit the effect of a Hit to a Close Call; see the Game Rules. When either of these exceptions apply, do not pick a Wound Card; instead simply resolve the Close Call.
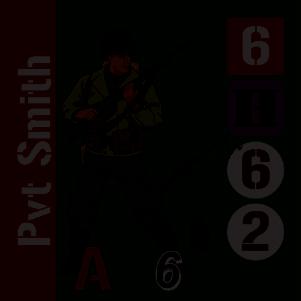
Example: Private Smith has a WS of 6 with his Browning Automatic Rifle. It can use a ROF of 2. He is using Rapid Fire (-2 to WS) but is firing at 3 hex range (+1 to WS for a BAR). His target has an Evade Order in Open terrain (-1 to WS). Smith’s modified WS is 4. He rolls for two shots and on a 4 or less each shot hits.
To fire on a hex occupied by both Friendly and Enemy Characters, the firing Character must have an Aimed Fire or Slow Suppressive Fire Order, must use a weapon with a ROF of 1, and must be at a range of 5 hexes or less. If these conditions are in place, they can fire at an opposing Character in the hex; otherwise they cannot fire. Note that since no Characters can fire into a Melee hex, this would only apply to firing at a Guard, or firing at a hex that only has Routed Characters of both sides. A hex with Characters from both sides in it is not an eligible hex for any part of the fire attack process except as noted in this rule.
Some Weapons are identified as ‘Slow’ in the Game Rules and on the Weapon Charts. These are generally bolt-action rifles. Characters may not use a Rapid Fire or Suppressive Fire Order with a Slow Weapon. If those Orders are assigned to an Enemy Character with a Slow Weapon, they will instead be given an Aimed Fire or Slow Suppressive Fire Order. If an Unspotted but Alert Enemy Character is assigned one of these Orders, the Order will be replaced as soon as the Character is Spotted and it is revealed that they have a Slow weapon.
Some Weapons are identified as being ‘Heavy’ or ‘Very Heavy’ in the Game Rules and on the Weapon Charts. These are generally machine guns but could be any heavier Weapon such as the BAR Rifle or small mortars.
A Character with a Heavy Weapon cannot be issued a Sprint Order. They also have an extra -2 WS penalty if performing a Run & Gun Order, in addition to the normal -2 WS penalty for Run & Gun.
A Character with a Very Heavy Weapon cannot be given a Charge, Run & Gun, or Sprint Order. A Character with a Very Heavy Weapon and no Assistant may only move with a Sneak or Carry/Drag Order. Characters with a Very Heavy Weapon cannot Carry/Drag anything but their Weapon.
Each Weapon has Ranges listed for it on the Weapon Characteristics Chart. This chart shows the weapon’s maximum range and also the WS modifiers when firing at different ranges. Example: The DP28 (image in right column) has a Maximum Range of 200 hexes. If it is being fired at a target that is 16 hexes away there is a -2 modifier to the Firer’s WS; at 2 hexes away there is a +1 WS modifier.
When a 9 is rolled for firing, the firing Character is marked as Low Ammo. A Character with Low Ammo can still fire. If a Low Ammo Character rolls a 9 when firing, their status is changed to Out of Ammo. A Character who is Out of Ammo cannot fire unless they have another weapon, such as a pistol. If a Non-Player Character goes Out of Ammo in a Turn, immediately replace their current Order with a Duck Back Order unless they have a secondary weapon to fire with; in that case, keep the firing Order. If a Character has a Reload Order in Step 5b, they will remove their Low Ammo or Out of Ammo marker. Players are free to Reload or not as they choose. Non-Player Characters will be given a Reload Order in their Orders Phase if they are in an Out of Ammo state and they pick a firing Order (including Run & Gun). When this happens, give them a Reload Order instead.
Some Weapons have a ROF greater than 1. When firing, roll the number of dice equal to the ROF. These should be rolled one at a time as the Weapon may run out of ammo mid-burst. Some Weapons allow the player to select the number of shots fired.
For example, the DP-28 (shown below) can have a 3 or 1 ROF. For Player Characters, the ROF used must be chosen prior to rolling the dice. If an Enemy Character fires a Weapon with multiple ROF settings, they will use the highest ROF number unless they are firing at a hex with Enemy and Friendly Characters, in which case they will choose a 1 ROF [see Rule 9.3]. Any ROF can be used for any fire (Rapid, Aimed, Run & Gun, Suppressive, etc.).
Example: Sgt. Parker opens fire with his M1 Thompson SMG on a Player Character charging toward him. The Thompson has a ROF of 3 so Parker will roll for 3 shots. The first roll is a 9 – an automatic miss and a Low Ammo Marker is placed on the sergeant. The second roll is also a 9 so, as well as missing, the Low Ammo Marker is flipped to its Out of Ammo side. The third die is not rolled as the weapon is Out of Ammo.
MGs are divided into two classifications: Belt-Fed and Magazine. MGs are also usually categorized as Heavy or Very Heavy Weapons [see Rule 10.2]. Each game’s rules and Weapon Characteristics Chart will specify what guns are MGs and the type of MGs that they are. The DP-28 is a Heavy, Magazine Machine Gun. It can use a 3 or 1 ROF.
An MG duo consists of two Characters: an Operator and an Assistant. Each game will identify which Characters are the Operators and Assistants and they will have an image of an MG on their marker. In order to constitute an MG duo, two Characters must start the Turn in the same hex and must have the same Order. Having the ‘same Order’ means that only the Operator is given an Order marker and the Assistant is inherently following the same Order. Character #20 is an MG Operator. Character #21 is an Assistant. Both Characters have an MG icon under their TQ. Character #20 has the higher TQ (and so would receive the MG marker).
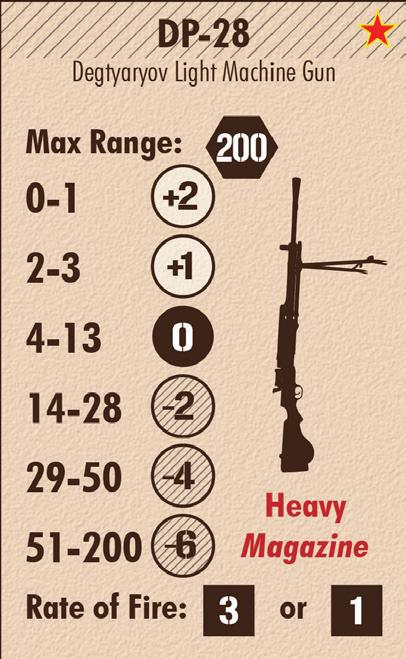
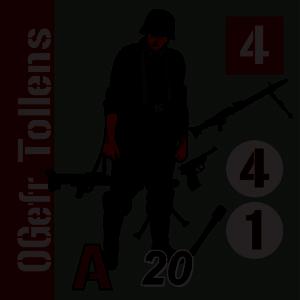
Non-Player squads will never have another Character join an MG duo in any capacity. For Player squads, if one of the members of the MG duo is not available, any Player Character can act as an MG Assistant with no penalty. For Player squads, if a Character who was not part of the original MG duo wants to fire the MG (that is, be the Operator) they suffer a -2 to their WS in addition to any other normal modifiers. If Player Characters of different Teams are an MG duo, they use the Initiative of the Operator. Belt-fed MGs suffer a -3 WS penalty for the Operator (firer) if there is no Assistant present. Magazine MGs suffer a -1 WS penalty for the Operator if there is no Assistant present. An MG that has a Run & Gun Order is treated as if they do not have an Assistant for purposes of going Low Ammo or Out of Ammo.
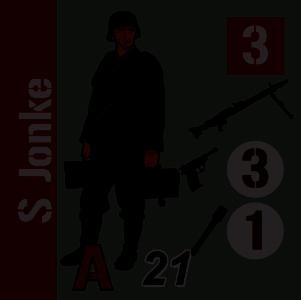
When a Non-Player MG Operator is Spotted and identified, their Assistant’s marker is always placed with them although the Assistant may not yet be Spotted. When an MG Operator fires, both he and the Assistant are Spotted. In any other situation they must be Spotted individually.
Each Character in an MG duo has their own individual Wounds and Morale State.
Wounds. A Character with an Unbandaged Bad Wound cannot fire an MG or act as an Assistant.
MG markers of the appropriate type are used to denote who is firing the MG; that is, who is the Operator. MG markers are initially placed on the Character designated as the Operator. MG markers move with their assigned Character whenever that Character moves. In an MG duo, MG markers are instantly moved to the member of the MG duo who has the highest current WS for MG purposes. Whoever has the MG marker is the current Operator. Example: If Character #20 (from page 17) takes Wounds and Morale losses that reduce his WS to 2, move the MG marker to Character #21 who has a WS of 3.
If an MG marker has no Characters of its side in its hex, place it on the map. If a Player Character in the hex of an MG marker does a successful Search Order, place the MG marker on the Character and they can fire or move with the MG in the next Turn. If a Character fires an Enemy MG, they always get the -2 WS penalty for not being part of the original duo. If captured Enemy MGs receive a Low Ammo marker, they go directly to Out of Ammo. They cannot be reloaded.
Anyone who fires an MG has a WS in that weapon equal to their printed TQ. Be aware that this is a WS, not a TQ. Therefore only Wound or Morale changes that affect WS will affect their firing. Other than the use of the printed TQ for firing an MG and these specific MG WS modifiers, MGs are fired like other guns. The specific MG WS modifiers are:
• -3 to WS for Belt-fed MG with no Assistant
• -1 to WS for Magazine MGs with no Assistant
• -2 to WS if firer is not part of MG duo (includes captured use)
• -2 to WS with Run & Gun Order if the MG is Heavy
An MG goes to Low Ammo (and Out of Ammo) status if they roll a ‘9’ twice on the same fire. Therefore, to go directly to Out of Ammo in a single fire, they would have to roll a ‘9’ four times! If there is no Assistant present, the MG goes Low Ammo (and Out of Ammo) with a single roll of 9--just like all other guns. Place the Low Ammo/Out of Ammo marker on the MG, not on the Characters. (This denotes that only the MG is hindered, not the Characters’ inherent weapons.)
Example: Character #20 has an MG-34 marker and has a printed TQ of 4. His WS in the use of the MG is 4, which is equal to his printed TQ. He has Bold Morale which raises his TQ by 1 but it does not affect his WS for the MG. His Morale later goes down to Cautious which reduces his WS by 1. His WS in the MG is now 3. His MG can fire 4 shots. With his Assistant, he fires at a target with a Duck Back Order in a Crater (-1 Attack WS modifier), giving him a modified WS of 2. He rolls a 9, 9, 2, and 9. The MG is now Low Ammo but it got one Hit from the roll of 2.
Morale. If either member of an MG duo has Berserk or Rout Morale, the two members must receive separate Orders. If the Assistant has Berserk or Rout Morale, the MG does not get the benefit of an Assistant; he cannot act as an Assistant.
For the Non-Player side, the members of an MG duo share the same Order, which is determined by (and given to) the Operator. For the Player side, the Assistant is assumed to have the same Order as the Operator but the Player can give them different Orders if they wish. Example: If the MG Operator and Assistant want to fire the MG together, only give a Fire Order to the Operator; the Assistant does not get a separate Order but will instead share the same Order as the Operator.
If either member of an MG duo Ducks Back or is eliminated, the other member of the duo will Duck Back. If either member of an MG duo receives a Mandated Hide Order, the other does also.
Non-Player MG Operators (and any valid Assistant) will ignore Charge and Grenade checks if they have an MG marker.
To reload an MG, a Reload Order is given to the MG Operator. Normally the MG Assistant will share this Order. If no MG Assistant is present, or the MG Assistant is incapable of functioning as an Assistant the Operator can still be given a Reload Order, but in Step 5b they must make a WMC (P). If they pass the WMC, the MG is reloaded. If they fail, it is not. A Player can voluntarily give their MG Assistant an Order other than Reload, but if they do that, the Operator will have to make the WMC (P) for their Reload Order. When MG duos have a Reload Order, use the ‘Reload MG’ line of the Order/Terrain Chart for any Firing or Spotting at them.
The Aimed Fire Mandated Order of Rule 7.31 does apply to NonPlayer Characters with MG markers with these modifications: It applies to them in any Morale State except Rout and Berserk, and any terrain (not just Cover). Also, if there is a Spotted Player Character in LOS within 3 hexes, they are automatically given a Rapid Fire Order; no TQC (D) is required.
In this section, the term ‘Grenade’ refers to Hand Grenades, Rifle Grenades, and Smoke Grenades unless a differentiation is made. Grenade markers have a front side with the grenade’s image that represents a live grenade. The back side (with the Smoke value) is the Grenade Impact side. Smoke Grenades only have a Smoke Grenade Impact side since they are never live. Rifle Grenades only use the Impact side of a Grenade marker.
Each nation’s Grenades will have a section on the Weapon Characteristics Chart. This is how to read the Grenade display: Max. Range: This is the Maximum Range that the Grenade can be thrown. (Rifle Grenades use ranges just like firing.)
Blast: This is the number of dice to roll when a Grenade explodes. There are two values: the higher number (on the left) is used for Grenade Near rolls; the lower number (on the right) is used for Grenade Far rolls. (Think of Blast as a Grenade’s ROF.)
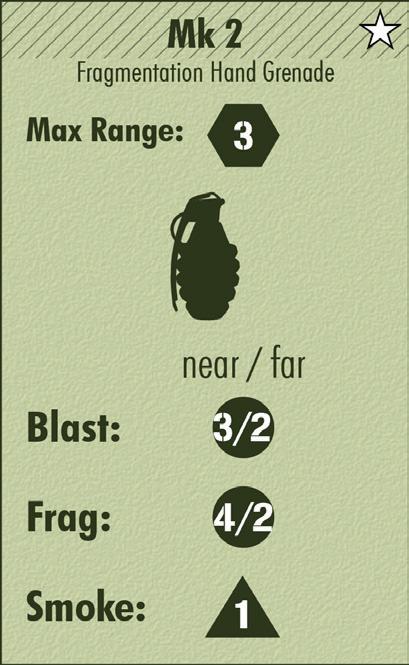
Frag: This is short for Fragmentation. When the Blast dice are rolled, if the modified Frag number or less is rolled, the Blast die has scored a Hit. Frag is modified by the Order/Terrain Chart attack modifiers just like firing a gun. The left Frag number is used for Grenade Near attacks and the right number is used for Grenade Far attacks. (Think of Frag as a Grenade’s WS.)
Smoke: This is the Smoke value of the Grenade [see Rule 22.0].
12.2
Grenade Orders are processed in the owning Character’s 3rd Impulse. The Grenade Attack takes place at the end of Step 4a i) of the owning Character’s 3rd Impulse Activation.
For a Smoke Grenade Order, simply place the Smoke Grenade Impact marker in any hex within range, along with a Smoke marker. A Smoke Grenade does not do any damage; it only creates Smoke.
For a Rifle Grenade Order, a Player Character places a Grenade Impact marker in any hex with a Spotted Non-Player Character that is in LOS and is within range, and the attack is made at that moment. If there is no longer an eligible target on the 3rd Impulse, the Grenade is not fired.


For a Grenade Order, a Player Character throwing a Hand Grenade moves the Grenade marker from their hex to any target hex of their choice that is within range and has a Spotted Non-Player Character in it. Flip the Grenade marker to its Grenade Impact side and the Grenade’s attack is made at that moment. If there are no eligible target hexes, the Player Character can throw the Grenade at any hex as long as it does not contain an Unspotted Non-Player Character.
A Non-Player Character’s Grenade is processed just like that of a Player Character except for determining their target hex. The Impact marker is placed in the hex of the nearest Spotted Player Character. If there are multiple choices, place the Impact marker in the hex in which there would be the least adverse effects on the Attack roll. If there are still multiple choices, randomize the target hex. Non-Player Characters will never choose a hex with a Character of their side as the target hex; they must throw their Grenade into a different target hex. If there are no eligible hexes, the target hex must be the one closest to the nearest Spotted Player Character; randomize a hex if there are several possibilities.
A hex with Characters from both sides in it is not an eligible target hex for any part of the Grenade Order process.
If a Hand Grenade cannot be thrown because the thrower lost their Grenade Order--they had to Duck Back for instance-the Grenade is ‘dropped’ in the hex. Its attack is resolved in that Character’s hex as a Grenade Near attack on all Characters in
the hex. A ‘dropped’ Grenade attack takes place in the normal sequencing; see Rule 12.3. (This will never happen with a Rifle Grenade or Smoke Grenade Order; they are not ‘live’ like a Hand Grenade.)
Grenade Attacks are resolved at the end of Step 4a i) of the owning Character’s 3rd Impulse Activation. To resolve a Hand Grenade or Rifle Grenade Attack, roll a d10 and compare it to the Character’s Grenade WS or Rifle Grenade WS. The WS is affected by Wounds, Morale, and Smoke but not the target’s Order/Terrain status. The WS for Rifle Grenades is adjusted by any range modifiers. For Hand Grenades, add 3 to the die roll if the target hex is not in LOS (this is not for Rifle Grenades--they only target hexes in LOS).
If the modified die roll is equal to or less than the Character’s modified WS, all Characters in the hex immediately suffer a Grenade Near attack.
If the modified die roll is 9 or more, the Grenade lands in a randomly determined adjacent hex and all Characters in that hex immediately suffer a Grenade Far attack. (Roll a d6 and consult a Directional Compass on the map to find which hex it lands in.)
On any other result, all Characters in the target hex immediately suffer a Grenade Far attack.
If a natural 0 is rolled, and that roll would only generate a Grenade Far result, make a ‘Less than 0’ TQC (F) with no modifiers to the throwing Character’s TQ. If the TQC is passed, it is a Grenade Near result. If it is failed, it remains a Grenade Far result.
Dropped Grenades [see Rule 12.2] are automatically resolved as a Grenade Near attack against all Characters in the hex.
Grenades cannot willingly be thrown in a Melee hex, or the hex of a Character of the throwing/firing side, but they may land there accidentally.
When a Grenade Near or Grenade Far result is determined for a hex, follow these steps for the Blast and Frag resolution for each Character in the hex. Roll separately for each Character.
1. The Grenade’s Blast rating shows how many d10 to roll for the attack. This number will be different for Grenade Near and Grenade Far. Roll the number of Blast dice.
2. Compare each Blast die roll with the Frag number for Near or Far attacks. Modify the Frag number by each affected Character’s Order/Terrain status. Smoke does not affect Frag. Each Blast die that is equal to or less than the modified Frag number is a Hit. A Wound Card is picked for each Hit. If a Blast die roll is higher than the modified Frag value, that roll does not cause a Hit.
3. Any character in or adjacent to a Grenade’s hex when it explodes, must make an MC (L), whether they are wounded or not. This MC (L) is in addition to any Checks gained from Wound Cards. If they fail the MC (L), they will Duck Back and must be given a Hide Order in the next Turn. The Character who threw the Grenade is exempt from this extra MC (L)--do not make it--unless the Grenade lands in their own hex.
4. After a Grenade attack is resolved, place a Smoke marker in the hex along with the Grenade Impact marker.



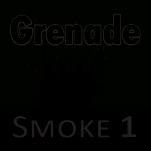
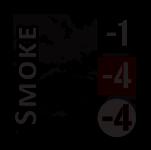
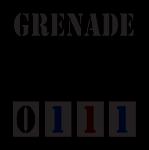
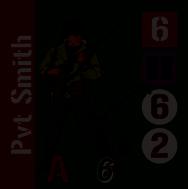
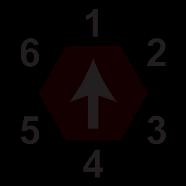
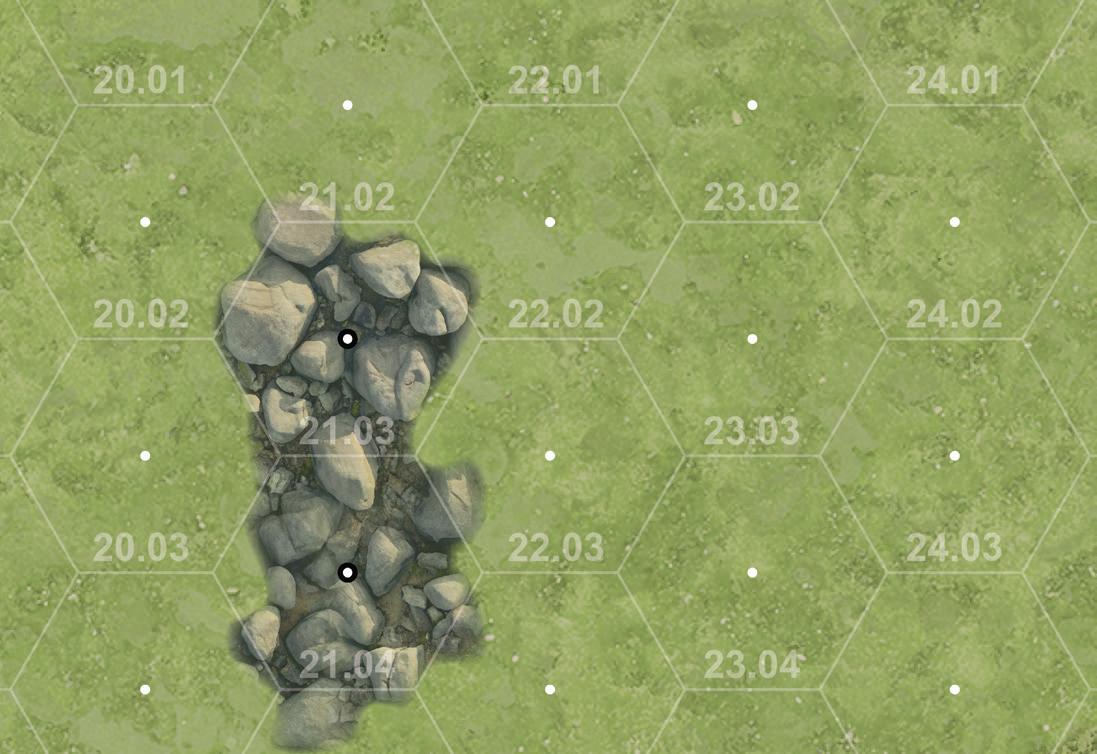
Private Smith drew an Enemy Order Card with a ‘G’ on it. He can possibly throw a Grenade because there is a Spotted opposing Character in hex 20.03 (Jahn). That hex is within his Grenade Range of 3, plus 1 hex. He made a WC (K) and rolled a 4 which meant he passed the Check. He is given a Grenade Order and a Grenade marker is placed on him. On his 2nd Impulse he must move to hex 23.02 or 23.03 so he can be within Grenade Range of an opposing Character. Since the hexes are the same in protection, the actual hex is randomized to 23.03.
On his 3rd Impulse he throws the Grenade. He cannot throw it at Mauck because he is not Spotted. So, he throws it at Jahn in 20.03. Smith’s WS in Grenade is 2 and he adds 3 to the d10 roll because he does not have LOS to the target. He rolls a 6 which, with the +3 modifier is a 9. The Grenade misses the target hex. Smith now rolls a d6 to see where it lands. He rolls a 2 and the Grenade will land in the hex with the Unspotted Mauck. Mauck will now be attacked with a Grenade Far attack. Smith flips his Grenade marker over to its Grenade Impact side and places it in Mauck’s hex.
For Grenade Far, an American Grenade has a Blast value of 2 and a Frag value of 2 (see illustration on page 19). Smith rolls two d10 attacks and must normally roll a 2 or less for a Hit. However, the target has a Grenade Order in Rocks which nets a -2 modifier for attacks. Smith must therefore roll a 0 to get a Hit and thus pick a Wound Card. Any other roll is not a Hit and Mauck will only make the obligatory MC (L). If Mauck does get a Wound, not only will he pick a Wound Card, but he will also make the MC (L). Jahn must also make an MC (L) because he is adjacent to the target hex. Let us say that Smith rolls a 6 and 8 for his two Blast rolls. He does not Hit. For the MC (L), the target rolls an 8 (which is a failure) so he must Duck Back and go down in Morale. Because he had to Duck Back, he will drop his Grenade in his own hex. When he is activated, he will resolve a German Grenade Near attack on himself, and both he and Jahn (who is adjacent) must make another MC (L)! Luckily for Smith he threw his Grenade first! If Jahn fails either of his Morale Check (L) rolls, he will Duck Back and lose his Plan Order. If either Character fails their MC (L) roll, they must be given a Hide Order next Turn.
Let’s say that for Smith’s Grenade throw at Jahn’s hex he rolled a 0. He adds 3 to that die roll for a 4 total. This is higher than Smith’s WS in Grenades so it is a Grenade Near result which hits Jahn’s hex. However, since the roll was a natural 0, he now makes a TQC (F) with no modifiers. On a 6 or less (Smith’s TQ) it is a Grenade
Near result and on a 7-9 it remains a Grenade Far result. If it does become Grenade Near, Jahn will be attacked with a Blast value of 3 (3 dice rolled) and a Frag value of 4 (with a -1 modifier for Plan in Open terrain) plus there will be the normal MC (L) for Jahn and Mauck after all the Blast attacks are resolved.
Lastly, no matter what else happens, a Smoke marker is placed in the target hex. On his 4th Impulse Smith will not move because there is no better Cover to move to.
Off Board Artillery (OBA) attacks are generated by Random Events during the game, or per scenario instructions. The Game Rules will have the following information:
• The type of OBA and the number of OBA Impacts.
• A method for determining any OBA scatter and the final Impact hex of each OBA round.
These Series Rules do not cover those issues, but simply show how to resolve OBA once it actually lands in a hex.
Once the type of OBA is determined, the Weapon Characteristics Chart gives this information about it:
Blast. This specifies the number of attack die rolls made by the OBA against each affected Character. Roll that number of dice separately for each Character that is attacked. (Think of Blast as the OBA’s ROF.)
Frag. Frag is short for fragmentation. This number or less must be rolled by each Blast die in order to score a Hit.
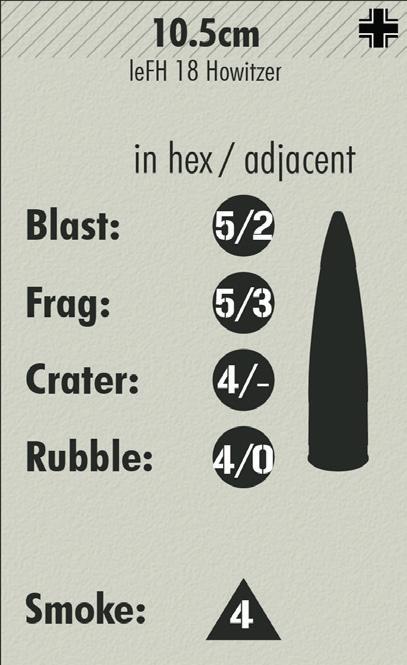
This number is modified by the Order/Terrain Chart like any other attack. For each Hit, draw a Wound Card for the affected Character. (Think of Frag as the OBA’s WS.)
Crater. After completing an attack on a hex, roll a d10. If the result is equal to or lower than the Crater rating of the OBA, place a Crater marker in the hex. This hex is now treated as Crater terrain and all other terrain in the hex is ignored. Do not make this roll if the artillery lands in a Building hex.
Rubble. If the OBA Impact is in a Building hex, do not roll for Crater. Instead roll a d10 and compare it with the Rubble rating of the OBA. A die roll equal to or less than the Rubble rating places a Rubble marker in the hex. All occupants of the hex are eliminated; replace them with KIA Markers. This hex is now treated as Rubble terrain and all other terrain in the hex is ignored.
Smoke: This is the Smoke Value of an OBA Impact [see Rule 22.0].
Some OBA explosions are large enough to affect adjacent hexes as well as the target hex. When this is the case, there are two values for the Blast, Frag, Crater and Rubble ratings. These ratings are separated by a slash with the number to the left indicating the values to use for the target hex and those on the right to be used for all adjacent hexes.
When OBA lands in a hex, place an OBA Impact marker of the appropriate type in the hex and follow these steps to finalize the attack on each affected Character. Roll separately for each affected Character.
1. The OBA’s Blast rating shows how many d10 to roll for the attack. If the Impact affects adjacent hexes, this number will be different for the Impact hex and adjacent hexes. Roll the number of Blast dice for each affected Character.
2. Compare each Blast die roll with the appropriate Frag number (In-hex or Adjacent). Modify the Frag number by each affected Character’s Order/Terrain status. Smoke does not affect Frag. Each Blast die that is equal to or less than the modified Frag number is a Hit. A Wound Card is picked for each Hit. If a Blast die roll is higher than the modified Frag number, that roll has no effect.
3. Any character in or adjacent to an OBA Impact hex when it explodes must make an MC (L), whether they are wounded or not. This MC (L) is in addition to any Checks gained from Wound Cards. If they fail the MC (L), they will Duck Back and must be given a Hide Order in the next Turn.
4. After determining the OBA effects on Characters, roll for Crater and Rubble as necessary.
5. Lastly, after an OBA attack is resolved, place a Smoke marker in the Impact hex along with the OBA Impact marker.
If Characters from opposing sides are in the same hex at the same time, it is a Melee hex. Remove their current Orders and place a Melee Order on each Character. There are three exceptions to this rule:

Exception 1: If a Character with a Charge Order enters a foe’s hex on Impulses 2 or 3, they retain the Charge Order and will receive the Charge Melee bonus in the 4th Impulse Melee. Once a Charge bonus has been used in Melee, if there is still a foe in the hex, replace the Charge Order with a Melee Order.
Exception 2: If one or more of the Characters in the hex have a Morale State of Rout, follow these procedures:
• If a side has Characters in a Melee hex with a Morale State of Rout but also has non-Routed Characters in the hex, the Characters with Rout status replace their Morale State with a Shaken marker at the start of their next Activation, and will take part in the Melee as normal. The presence of non-Routed friends causes the Routed Characters to take heart and join in the fight. This can apply to both sides at the same time.
• If only one side has Routing Characters in the hex and that side has no non-Routing Characters in the hex, the Routing Characters Surrender; there is no Melee [see Rule 19.5].
• If both sides have Routing Characters in the hex with no nonRouting Characters, they will ignore each other and continue with their Orders; there is no Melee.
Exception 3: If the Characters of the opposing sides in the same hex consist of a Guard and Prisoners, with no other Characters of the Prisoners’ side in the hex, there is no Melee [see Rule 19.5].
Characters with a Melee or Charge Order who are already in a Melee hex will make a Melee attack when they are Activated in Impulses 2 and 4. In other words, their Activation consists of making a Melee attack. Therefore Characters who move into a Melee hex on Impulses 2 or 4 will not make a Melee attack in that Impulse. A Character with a Charge Order receives a +1 to their TQ for their attack in the 4th Impulse.
To make a Melee attack, a Character makes a WMC (O):
• If the Character passes the WMC (O), a Hit is scored. Draw a Wound Card for an opposing non-Routed Character and apply the effects [see Rule 18.0]. Randomize the target if there is more than one non-Routed foe in the hex. Characters who are Hit in Melee do not receive a Duck Back marker.
• If the WMC (O) is failed, there is no effect.
When a Character enters the hex of an opposing Character, if any of the Characters in the Melee hex were Unspotted prior to the current Impulse, an Ambush will occur. Any previously Unspotted Character is now Spotted (no Spotting WC (I) is required) and a Just Spotted marker is placed on them (unless they already had one). The Just Spotted marker will remain on the Character until their first Melee Activation and if they attack in that Activation, they will receive a +2 Ambush modifier to their TQ. After their first Melee Activation remove the Just Spotted marker. Any Melee attacks against a Character with a Just Spotted marker suffer a -2 Ambush modifier to the attacker’s TQ.
Composite Melee Example: (This example ties a number of rules together, some of which have not yet been presented.) It is the 3rd Impulse. Medvedev, who is Unspotted (his marker is still flipped to the ? side), has a Charge Order and will Charge Leutnant Leist who has a Rapid Fire Order. Friendly Team B goes first in the Impulse but Soldat Kranz cannot Fire because it is the 3rd Impulse and also because Medvedev is not Spotted. Kranz does spot Medvedev at the end of Kranz’s Activation. Medvedev is flipped to his Spotted side and a Just Spotted marker is placed on him. Friendly Team C goes next in the Impulse but Leist cannot Rapid Fire at Medvedev because Medvedev was Just Spotted in this Impulse. The Enemy Red Team goes next in the Impulse. Medvedev completes his Charge, moving 2 hexes into Leist’s hex. Leist’s Rapid Fire Order is replaced with a Melee Order but Medvedev will keep his Charge Order until he makes his 4th Impulse attack. The Just Spotted marker also stays on Medvedev to show that he has Ambushed Leist. (Medvedev was not Spotted in a prior Impulse so he keeps the Just Spotted marker.)
In Impulse 4, Friendly B Team goes first but Kranz cannot fire at Medvedev because he is in a Melee hex. Friendly Team C goes next. Leist will do his Melee attack on
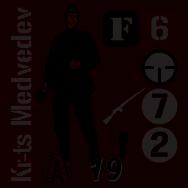
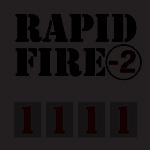
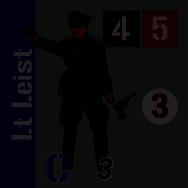
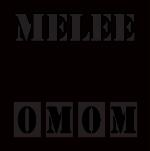

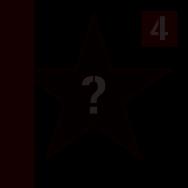
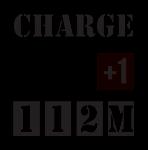
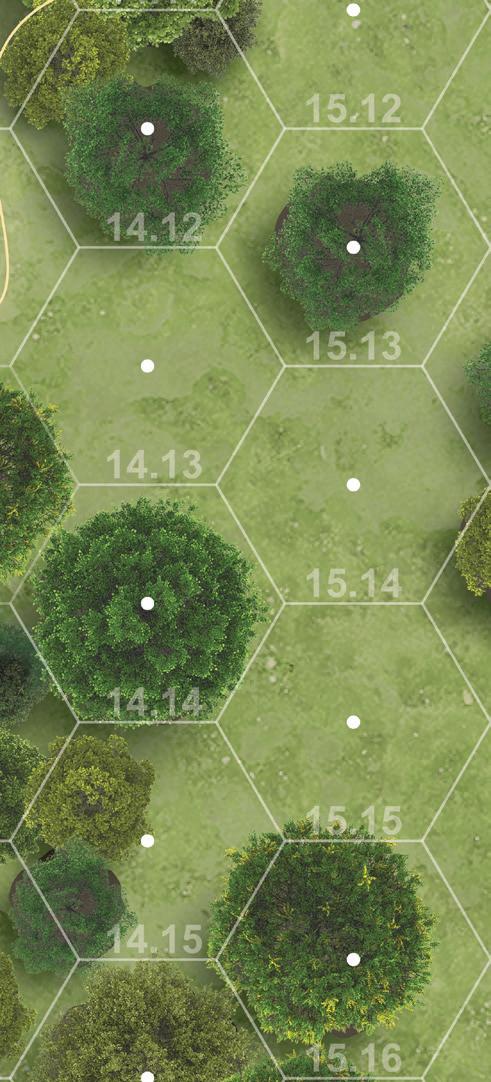
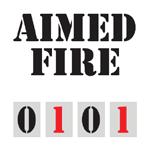

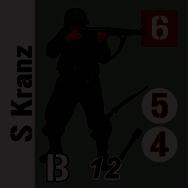
Medvedev but with a -2 TQ modifier because Leist was Ambushed. Leist’s effective TQ is 3. He rolls a 4 and fails to score a Hit. Now it is the Enemy Red Team Activation. Medvedev has a 6 TQ which is modified by +2 because he Ambushed Leist and +1 because he has a Charge Order. He has an effective TQ of 9 but, because of the ‘Rule of 9’ he will fail to Hit on a roll of 9. Thus he will score a Hit on a roll of 0-8. He rolls a 7 and a Wound Card is drawn for Leist. If the card is a KIA, Leist is removed, a KIA marker is placed in his hex, and Medvedev’s Charge Order will be replaced with a Duck Back Order. If Leist’s Wound Card does not result in a KIA, the Just Spotted and Charge markers will be removed from Medvedev and a Melee marker will be placed on him. Both Characters will have a Melee Order for the next Turn and will resolve the next round of Melee on the 2nd Impulse of the next Turn with no Charge or Ambush modifiers.
In a Melee Impulse, a side may declare that they will make a ‘Call to Surrender’ on their opponent. This is done in the Activation of the first Character that would Melee in that Impulse. No Characters of the ‘calling’ side may make a Melee attack in that Impulse; the call to surrender negates all their Melee attacks for that Impulse. Berserk Characters cannot call to surrender.
To make a Call to Surrender, a Character of the ‘calling’ side must have a Morale of Normal or better and the Character they are calling to surrender must have a Morale of Cautious or Shaken. Also, there cannot be any other opposing Characters in the hex. The Character being called to surrender makes a WMC (Q) with a -1 modifier to their TQ for every other Character of the ‘calling’ side in the hex. If they fail the WMC, they surrender.
Non-Player Characters will call to surrender if their Player Character opponent would potentially surrender on a roll of 3 or higher. Otherwise Non-Player Characters cannot call to surrender.
Example: There are two German Player Characters in a Melee hex, one with Bold morale and one with Cautious morale. There is also a British Character with Cautious morale in the hex. Because of the Bold Character, the German side can forego all Melee attacks for the Impulse and instead call the British Character to surrender. The British Character has a natural TQ of 4 which is modified by -1 (because he is Cautious) to a 3 TQ. When called to surrender, he subtracts a further 1 from his TQ because of the presence of the second German soldier. Therefore he will surrender on a WMC roll of 3 or higher. If the Germans are Non-Player Characters they will call the British Character to surrender because the chance to surrender is a die roll of 3 or higher.
A Character with a Melee or Charge Order in a Melee hex may not Spot outside of the hex. Characters in a Melee hex will never be given another Order (except that Charge can change to Melee). A Melee hex may not be fired into or have a Grenade willingly placed in the hex.
Characters in Melee may not leave the Melee hex until all opposing Characters are eliminated or have surrendered. When there are no more opponents to fight in a Melee hex, the Melee has ended At the end of any Activation in which a Melee is ended (after Step 4a iii) all surviving Characters have their Melee Orders changed to Duck Back. As an exception, if there is a Guard and a Prisoner, they are in No Order status [see Rule 19.51].
These rules cover general principles about terrain and LOS. The specific terrain types, and what they affect, will be presented in the Game Rules. Terrain is divided into several classifications based on what those classifications affect.
Cover terrain is a classification that is used for almost all terrain types. In fact, Cover is the default classification of terrain; a terrain type must be specified as Non-Cover for it to not be Cover. Cover is one of the classes used for Enemy Orders. It also affects game situations for Characters Ducking Back, trying to Rally, etc. A hex with any type of Smoke in it is considered to have Cover status.
Open terrain is both a terrain classification and a terrain type. It is Non-Cover terrain. Open is one of the classes used on Enemy Order Cards to determine what Orders are given.
Rough terrain is a classification that affects movement. Examples of Rough terrain are marsh, rocks, rubble, and buildings. When a Player Character with a Sprint Order enters Rough terrain, they must stop movement and be given a Duck Back Order [see Rule 8.4 for Non-Player Characters].
Inherent terrain is terrain that is considered to fill the entire hex and, by extension, the hexsides of the hex. It principally affects LOS determination. When LOS is drawn through an Inherent terrain hex (or along the hexside) the terrain affects the LOS. (In most situations the LOS will be blocked.) It is important to remember that the image portrayed in an Inherent hex does not matter because the entire hex is supposed to be filled with that image. Examples of Inherent terrain are marsh and long grass. Smoke is considered as Inherent.
Non-Inherent terrain principally affects LOS determination. When LOS is drawn through a Non-Inherent terrain hex the actual image is what affects the LOS. So, if LOS is traced through the hex but it does not go through the image, that image does not block LOS. Examples of Non-Inherent terrain are buildings, trees, and walls.
Low terrain is below the level of the ground around it. A nonadjacent target in Low terrain cannot be seen if they have a Sneak, Hide, Rally, or Reload Order. Add one hex to ‘adjacency’ for each Level difference between a higher Level hex and the Low terrain hex. Examples of Low terrain are streams, foxholes, craters, and depressions.
Small terrain constitutes shorter terrain features. Small terrain only blocks LOS for Characters that are on the same Level and only if either Character has Sneak, Hide, Rally, or Reload Orders. Examples of Small terrain are logs, fields, and long grass. Small terrain does not block LOS to a higher Level hex.
Blocking Terrain will block LOS unless there is a height disparity to overcome it [see Rule 16.5]. Examples of Blocking terrain are buildings, walls, trees, and rubble.
Topographical Lines are used to denote different Levels of the hexes [see 16.1]. They are Non-Inherent terrain for tracing LOS.
Line of Sight (LOS) is used to determine if Characters can spot or fire at each other. In general, for LOS purposes, the terrain in a hex is ignored when spotting or firing into or out of the hex. LOS is always reciprocal. There are three basic concepts that are necessary to understand when tracing LOS: Level, Size, and Height.
Every Hex has a Level. The base Level of the hexes of a map is 0. Elevations above that Level will be 1, 2, 3, etc. Elevations can be below the base Level and would be called -1, -2, etc. A hex’s Level is determined by what Level the center dot is in; it has nothing to do with the terrain in the hex. In the LOS Example below, hex B is a Level 0 hex; hex C is Level 1; hex D is Level 2.
Every Terrain feature has a Size which will be noted in the Game Rules. Size is a measure of the vertical height of the terrain in a hex. The Size of a Terrain feature is indicated in the Game Rules by a number, with a larger number being a taller feature. Size has nothing to do with the hex itself or the Level of the hex. In the LOS Example, the Trees are Size 1. The Rocks (hex C) are Size ½. The Long Grass (hex A), Open (hex B), and Logs (hex E) are Size 0.
Size ½ terrain is a special type of terrain that is taller than ‘Small’ terrain [see Rule 15.2] and thus merits its own Size. Size ½ terrain always blocks LOS between hexes at the same Level but does not block LOS if the LOS is traced to a hex that is on a Level higher than the Size ½ terrain’s hex. Examples of ½ terrain are walls, hedges, and rocks. In the LOS Example, a Character in hex B (Level 0) does have LOS to D (Level 2) because the Rocks in hex C only have a Size of ½, and Size ½ terrain only blocks LOS for Characters on hexes of the same Level.
16.3
Height is the final measurement used for determining LOS. Height is the Level of the hex added to the Size of any terrain features in the hex. For Inherent terrain [see Rule 15.2] that Height number applies to the whole hex and its hexsides. For Non-Inherent terrain, the Height will be different depending on where the LOS is drawn through the hex. In the LOS Example, hex B has a Height of 0 (Level 0 hex plus Size 0 Open terrain). Hex C has a Height of
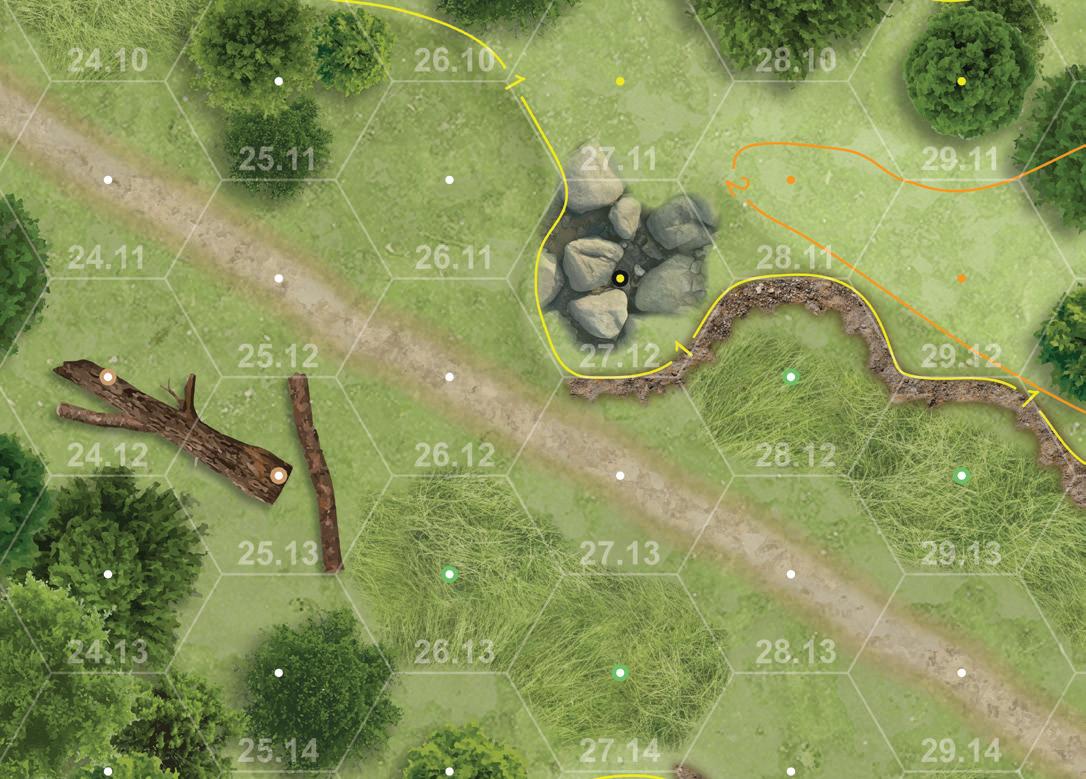
1½ (Level 1 hex plus Size ½ Rocks). Hex F has a Height of 2 (Level 1 hex plus Size 1 Trees). Hex D has a Height of 2 (Level 2 hex plus Size 0 Open terrain).
Reminder: Level + Size = Height
16.4
To trace LOS from one hex to another, run a string in a straight line between the center dots of the two hexes. The LOS is considered to be traced from the Level of one hex to the Level of the other. In general, if that LOS crosses any Blocking terrain, the hexes cannot see each other; if it does not cross Blocking terrain, they can see each other. There are many exceptions to this generalization which will be addressed below. Important: The hexes in which the firer/spotter and the target are located do not block LOS except possibly if one of the hexes is Low terrain.
Small terrain only blocks LOS if the firer/spotter or the target have Sneak, Hide, Reload or Rally Orders, and both involved hexes are on the same Level. Small terrain never blocks LOS if either the firer/spotter’s hex or the target hex is at a higher Level than the other. A Character in Small terrain is not hidden from LOS just because they are in that terrain; the Small terrain has to be between them and the firer/spotter to potentially block LOS. In the LOS Example, a Character in E (Level 0) can see a Character in G (level 0). The intervening Long Grass (Small terrain) in hex A does not block LOS. However, if the Character in G has a Hide Order, he cannot see E or be seen from E. This is because, in this situation, the Small terrain in A will block LOS. If a Character in H has a Sneak Order, hex C can still see him. This is because hex C is a Level 1 hex and thus higher than the Long Grass between them. Small terrain can only potentially block LOS between hexes at the same Level.
When a Character is in Low terrain and has a Sneak, Hide, Reload or Rally Order, they are considered to be out of LOS for all Characters except those who are adjacent to them. Add one hex to ‘adjacency’ for each Level difference. Hex J is a Level 0 Crater hex. Crater is Low terrain. A Character in J with a Rally Order could be seen from K or L, because they are adjacent. He could not be seen by a Character in M because that hex is not adjacent. A Character in N does have LOS to the Rallying Character in the Crater because hex N is a Level 1 hex and the 1 Level difference between the hexes adds 1 to the ‘adjacency’ rule.
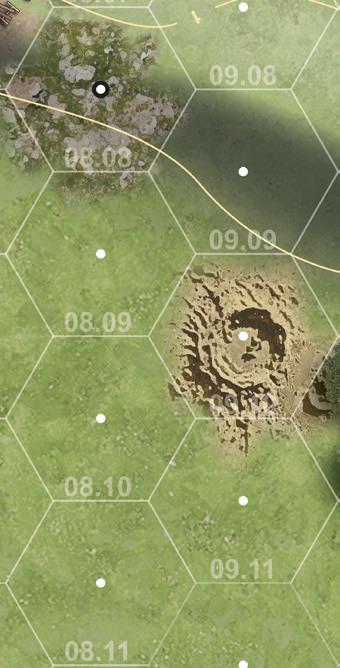
J N K M L
A G H B E D F C P O
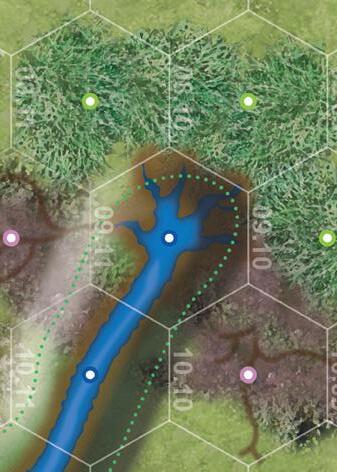
For Low terrain, LOS is not blocked if that LOS only goes through connected Depression or Stream hexes, even for Characters with Sneak, Rally, Hide, or Reload Orders. In other words, the Characters can look straight along the Depression or Stream to see each other, and their Order status does not matter. A Character in hex O has a Sneak Order. Normally LOS could not be traced to or from O unless the target was adjacent. However O and P can spot each other because the LOS runs only along connected Stream hexes.
When tracing LOS, if both involved Characters are on a Level equal to or higher than any Blocking Terrain, LOS is not blocked. There are three types of situations where Blocking Terrain, hex Levels, and Height all come into play to determine if LOS is blocked. From simplest to most complex, they are:
Situation 1: When Characters are on the same Level, if there are any intervening hexes that have a Height greater than the Level of the Characters’ hexes, the LOS is blocked. Hexes Q and R are on the same Level; they are both Level 0 hexes. Hex S has a Height of ½ because of the Hedge. LOS is blocked from Q to R because of hex S.

Situation 2: When Characters are on different Levels, if there is an intervening hex that has the same or greater Height than the taller of the two Levels, the LOS is blocked. Hexes T and V are on different Levels; hex T is a Level 1 hex and hex V is a Level 0 hex. Hex U has a Height of 1 (Level 0 hex plus a Tree that has a Size of 1). Because hex U has a Height equal to the Level of hex T, hexes T and V cannot see each other.
the Height of the intervening Blocking Terrain hex plus 1, from the Level of the higher Character’s hex. The resulting number is the reduction in Blind Hexes. A Character in a Level 4 hex is trying to see over a Blocking Terrain hex with a Height of 1. Are the Blind Hexes reduced any? The simple equation is: 4 (Character’s Level) minus 2 (Blocking Terrain Height of 1 plus 1) equals 2. The number of Blind Hexes is reduced by 2.
Situation 3 Example: A Character in a Level 2 hex (W) is trying to trace LOS to a Character in a lower Level hex (Y) who is 8 hexes away. There is an intervening Tree hex (X) with a Height of 1 that is 6 hexes away from the higher Character. That Tree causes 2 Blind Hexes (red dots) which normally means that Characters in hexes W and Y cannot see each other. But is the elevation difference between the higher Character and the Tree significant enough to reduce the number of Blind Hexes? The Character’s Level of 2, minus the Blocking Terrain’s modified Height of 2 (1+1 = 2) equals 0. There is no reduction to the Blind Hexes; W and Y cannot see each other. However, note that W can see Z and can see all the plain beyond Z.

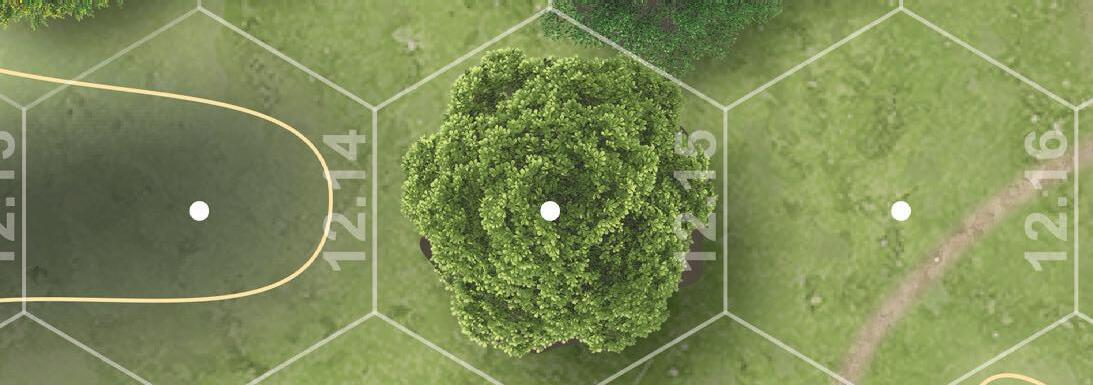
Situation 3: When Characters are on different Levels, if there is an intervening hex that has a Height less than the Level of the higher Character, the LOS may be blocked. These three factors determine if it is blocked or not: Blind Hexes, Blind Hex Reduction, and Continuous Slope.
Blind Hexes. The hex beyond the Blocking Terrain (from the higher Character’s perspective) is considered a Blind Hex and cannot be seen. The number of Blind Hexes created by the Blocking Terrain will increase based on the range from the higher Character to the Blocking Terrain. Each group of 5 hexes (or portion thereof) from the higher Character to the Blocking Hex creates 1 Blind Hex. If the distance is 13 hexes, there will be 3 Blind Hexes, if the distance is 2 hexes, there will be 1 Blind Hex, etc.
Blind Hex Reduction. The number of Blind Hexes may be reduced if the higher Character has a significant elevation advantage. To find if there is a Blind Hex reduction, use this formula: Subtract

Continuous Slope. The pancake levels of the terrain on the map do not allow for LOS down what would, in real life, be a smooth, continuous slope. To represent the reality of a continuous slope, one more rule needs to be added, which takes precedence over the Blind Hex rules. A Character on a higher Level hex may see over and down any hexes of their same elevation feature (hill) as long as each adjacent hex decreases one or more Levels and there is no Blocking terrain. Hex 3 (Level 3) can freely see hex 2 (Level 2) and hexes 1, 1A, and 1B (Level 1) because there is a Continuous Slope. None of hexes 3, 2, or 1 can see hex 0 because hexes 1A and 1B (both Level 1) interrupt the Continuous Slope. Only hex 1B could see hex 0 (and vice versa).


3
1 1B 1A 2 0 CONtiNuOus sLOPE
Slivers are the little bits of terrain that extrude from one hex to an adjacent hex but that do not define the terrain type of the adjacent hex. They are most frustrating when they come from buildings, trees, and topographical lines. How do these affect LOS?
If, as LOS leaves (or enters) a Character’s hex, it crosses a sliver of blocking terrain, and the blocking terrain is part of the terrain image in the Character’s hex, then LOS is not blocked by that sliver (although other terrain in the hex that LOS enters might block LOS). This rule is reciprocal for Characters at either end of an



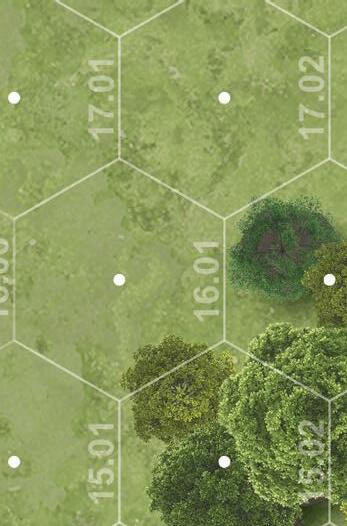
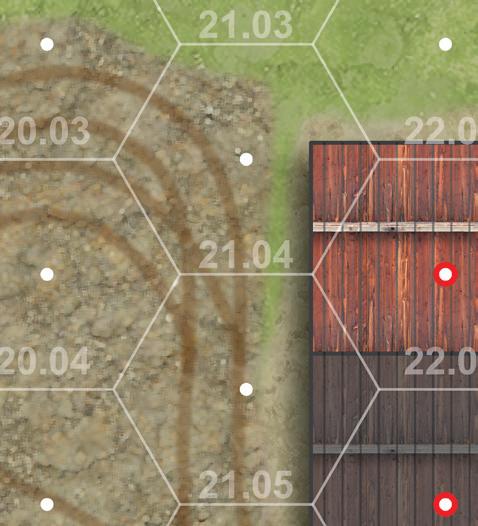
Hexes 1 and 2 can see each other; the sliver of Tree in hex 3 does not block LOS. Note that A cannot see B because of the blocking Tree that straddles hexes 1 and 3; that blocking Tree is not part of hex A or B. Hexes 4 and 5 can see hexes 6, 7, and 8. The slivers of Building do not block LOS. Hex 9 can see hex 10; the sliver of topographical line just beyond hex 23.13 does not block LOS.
16.7 Spotting
During a Character’s Activation, in Step 4a ii) of the Action Phase, make a Spotting attempt versus each Unspotted opposing Character they have in LOS. Characters will attempt to Spot regardless of their status (Unprepared, Waiting, etc.). Characters in Melee cannot Spot.
16.71 Spotting Process
To attempt to Spot a Character, follow this process:
1. Count the range from the Spotter to the Target. Count the Target’s hex but not the Spotter’s. On the Spotting Range Chart, find that distance and apply any modifier to the Spotting Character’s TQ.
2. On the Spotting Chart, cross-reference the Target’s Order with the Terrain they occupy. This will also give a modifier to the Spotter’s TQ.
3. Make a WC (I) using the modified TQ of the Spotter. If they pass the WC, the target is Spotted. If they fail, there is no effect. Characters also become Spotted if they fire a weapon or throw a Grenade within LOS of an opposing Character, or they enter a foe’s hex. This is automatic; no WC is made.
16.72 Unspotted Enemies
There is a difficulty involved in these cases: 1) a Friendly Character becomes ‘Spotted’ by firing, or throwing a grenade, and the only Enemy Characters in LOS are Unspotted; and 2) Unspotted Enemy Characters are trying to Spot. Are the Enemy Characters real or Dummies? There are two methods to solve this conundrum:
• The first method is to allow them to Spot in case 1, and for case 2, make a WC (I) for Spotting using the generic TQ on the back of the marker. In either case, if they Spot the Friendly Character, flip them over to see if they are a Dummy. If they are a Dummy, the Friendly Character is not Spotted and the Enemy Character marker is removed. If they are not a Dummy, the Character is Spotted and the Enemy Character marker is flipped over to their Unspotted side.
• The second method is just like the first method except that the Enemy marker is never flipped over; if they Spot the Friendly Character, that Character is Spotted. Yes, that means that Dummy markers will occasionally Spot Characters, but just consider that the Character has somehow alerted the Enemy to his presence. This method allows for more fog of war.
Each scenario will specify whether the Characters on a side are Prepared or Unprepared. These states can apply to Friendly or Enemy Characters. Unprepared Characters are not ready for the foe so there will be a delay for them in receiving Orders when they become Alert. Prepared Characters are ready for the opposing side and will receive an Order the moment they are Alerted (see below). A Prepared or Unprepared state does not apply to Alert Characters; it only applies to Waiting Characters.
Each scenario will specify whether the Characters on a side are Waiting or Alert. These states can apply to Friendly or Enemy Characters. If the scenario specifies that a side is Alert, all characters of that side will Activate as normal; none of the rules in 17.21 or 17.22 apply to them. Alert Characters will never return to Waiting status. Player Characters are always Alert unless a scenario specifies otherwise.

There are double-sided markers used to record the Alert/Waiting state of Characters. You may either place Waiting markers on all Characters and then remove them when they become Alert, or choose to only place them when Characters become Alert.
A Character in a Waiting state is considered to have No Order for spotting and for being fired on (see ‘No Order’ on the Order/Terrain Chart and Spotting Chart). Waiting Characters are Activated in their Action Phase, they just cannot be given Orders until they become Alert. They can Spot however in Step 4a ii).

A Waiting Character will immediately become Alert at the moment any one of the conditions below is satisfied:
• In Step 4a ii) of their Activation, they have LOS to a Spotted opposing Character.
• A weapon is fired within 10 hexes.
• A Character of their side within 3 hexes is Hit by firing.
• A Character in their hex is fired at (whether or not the shot hit).
• An opposing Character enters their hex.
• An Explosion goes off within 10 hexes.
• There is a Melee within 3 hexes.
• At the end of the Turn (Step 5e) if there is an Alert Character of their side within 3 hexes.
• A Waiting Non-Player Character successfully spots a Player Character [see Rule 16.7].
• A Waiting Player Character successfully spots a Non-Player Character. If the spotted Character is revealed as a Dummy, it is removed and the Player Character is not Alerted.
The moment a Character becomes Alert, mark them as Alert and follow these procedures depending on whether their side’s state is Prepared or Unprepared:
• If the side’s state is Prepared, immediately draw an Order Card for the just-Alerted Enemy Character (and give them an Order) or place an Order on the just-Alerted Friendly Character. If
their Activation for the Impulse has passed, they will not act on the Order until the next Impulse. If their Activation for the Impulse has not passed they will act on the Order this Impulse. If they are Alerted in Step 5e they do not receive Orders.
• If the side’s state is Unprepared, do not determine an Order for the newly-Alerted Character until the Character’s Activation in the next Impulse. Important: When the Order is placed, the Character will not begin acting on it until the following Impulse. If the Unprepared Character is Alerted on the 4th Impulse, or at the end of the Turn, they will Activate normally in the next Turn without any delay in their Orders.
Examples: An Unprepared, Waiting Character becomes Alert on Impulse 2 due to gunfire 7 hexes away. His Impulse 2 Activation comes after he was Alerted but because he was Unprepared, he does nothing. In his Impulse 3 Activation he is given an Order but he does not act on it. In his Impulse 4 Activation he acts on the Order. If the same Character was Prepared and Waiting when the gunfire went off in Impulse 2, he would become Alert, would immediately be given an Order, and would act on it in his Impulse 2 Activation.
If a Character enters a hex with an opposing Character who is in a Waiting state, the opposing Character is now Spotted (if they were previously Unspotted) and is now Alert. If the opposing side is Unprepared, on their Activation in the next Impulse they will not get to act. Example: A Character enters a hex containing an Unspotted, Unprepared, Waiting opposing Character on Impulse 1. The foe is flipped to his Spotted side, is given a Just Spotted marker, and is now considered Alert. A Melee marker is placed on the Characters. The Friendly Character will Activate in the 2nd Impulse and get a free Melee attack with a -2 modifier because the foe has a Just Spotted marker. On Impulse 2 the foe activates last but will not act this Impulse as he was Unprepared; nevertheless his Just Spotted marker is removed in his Activation. This rule does not apply to entering a hex with an opposing Alert Character.
All Characters are either Spotted or Unspotted. A Character who is Spotted has the front of their marker showing--the side with the picture. An Enemy Character that is Unspotted has the back of their marker showing--the side with the question mark. Friendly Characters are marked as being Unspotted by having an Unspotted marker placed on them. This marker is removed when they become Spotted. The Spotting process is found in Rule 16.7.
17.31
The default state for all Characters is Unspotted. Unspotted Characters remain so until they are Spotted by the opposing side. Unspotted Characters may not be fired at, or targeted by Grenades or a Charge.

If an Unspotted Enemy Character is given an Order (or attempts to execute an Order) and, when they are Spotted (or revealed) it is found that they cannot fulfill that Order, immediately change their Order to Rapid Fire or Aimed Fire (whichever they can do). Examples: An Unspotted Enemy Character is given a Grenade Order. When he is Spotted, he is found to be an officer who has no Grenade Skill. His Order is immediately changed to Rapid Fire. An Unspotted Enemy Character has a Rapid Fire Order. On the 1st Impulse he is flipped over to fire and is found to have a Slow Weapon. His Order is changed to Aimed Fire and he is flipped back to his Unspotted side.
Characters become Spotted by the opposing side per the process described in Rule 16.7. Also, if they fire a weapon or throw a grenade while in LOS of an opposing Character they give themselves away and become Spotted.

On the Impulse that a Character has been first Spotted, no Character may target them and they cannot be used for determining Enemy Grenade or Charge Orders. Place a Just Spotted marker on any such Characters as a reminder of this. Remove all nonMelee ‘Just Spotted’ markers at the end of the entire Impulse, after all Activations have been resolved. On the next Impulse they may be targeted as normal. Other than the prohibitions mentioned, a ‘Just Spotted’ Character is treated as Spotted.
Characters that are Spotted are eligible for all types of attacks. They will remain Spotted throughout the game unless they use this process: Spotted Characters can use a Hide Order to become Unspotted. At the end of the Turn, during Step 5b, any Characters that have a Hide Order will become Unspotted if they meet these conditions:
• They are in Cover terrain or a Smoke hex
• They are not in the LOS of any Spotted opposing Character
• They pass a TQC (E)
Whenever a Hit is obtained through firing, Explosions, or in Melee, the player draws a Wound Card to see the effect of the Hit. Drawing a Wound Card means picking a Friendly Card and referencing the Wound section at the bottom of the card. Place the card in the Friendly Discard pile once the Wound is resolved. A successful Hit from Suppressive Fire causes a Close Call result (see below) but no Wound Card is drawn. Certain Order/Terrain combinations may limit the effect of an attack to a Close Call, as described in the Game Rules.
There are four possible Wound Card results:
Close Call. When a Close Call is received, remove the target’s Order and replace it with a Duck Back Order*. The target must also make an MC (M). These are the possible results of the MC:
• If they roll a natural 0 their Morale is increased 1 level. They can go to Berserk Morale from this result.
• If they pass (without rolling a 0) there is no other effect.
• If they fail (without rolling a 9) their Morale is reduced 1 level.
• If they roll a natural 9 their Morale is reduced 2 levels.
Light Wound & Bad Wound. When either of these Wound results is received, place the appropriate Wound Marker on the target. Remove the target’s Order and replace it with a Duck Back Order*. The target must also make a WMC (N). These are the possible results of the WMC (N):
• If they roll a natural 0 their Morale will not change.
• If they pass (without rolling a 0) their Morale is reduced 1 level.
• If they fail (without rolling a 9) their Morale is reduced 2 levels.
• If they roll a natural 9 their Morale is reduced 3 levels.
KIA. When a KIA result is picked, remove the Character marker and replace it with a KIA marker of the appropriate Friendly or Enemy designation.
*Exceptions. Characters with Sneak, Hide, Rally, or Reload Orders do not Duck Back when a Wound Card is picked for them. Instead, they are given a Hide Order. That is, they go directly to Hide. Also, a Character in Melee will not Duck Back or Hide
Light Wounds. Characters with Unbandaged Light Wounds may not be assigned Sprint Orders. Their LDR, TQ, and WS values are all modified by -1.
Bad Wounds. Characters with Unbandaged Bad Wounds may not be assigned Sprint, Evade, Run & Gun, Charge, or Carry/Drag Orders. Their LDR, TQ, and WS values are modified by -3.

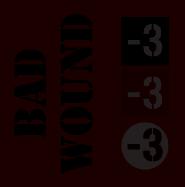
Note that the TQ modifiers for Wounds affect every game function except Troop Quality Checks and Morale Checks [see Rule 20.0].
A Player Character who has the Medic Ability (per each game’s rules) can perform a Medical Aid Order to try to bandage Wounds. Only one Wound marker can be affected by each Medical Aid Order, so only one Wound marker can be bandaged per Turn. The Character must make a WMC (P) in Step 5a of the Turn and, if they pass, the Wound is Bandaged--flip the Wound marker to its Bandaged side. If they fail, there is no effect.
A Character with a Bandaged Light Wound has no movement restrictions. Their TQ is modified by -1.
A Character with a Bandaged Bad Wound may not be assigned Sprint orders. Their LDR, TQ, and WS values are modified by -1.
Bandaged Characters do not count as “wounded” for scenario victory purposes.
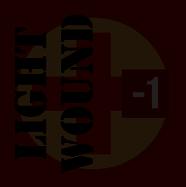

Incapacitated status happens when a Player Character has Wounds that, by their negative TQ modifiers, bring the Character’s TQ to zero. Incapacitated status only applies to Player Characters; when Non-Player Characters have their effective TQ brought to 0 by Wounds, they are eliminated.
Incapacitated characters are ignored by Non-Player Characters for everything: firing, spotting, Prisoner status, etc. They are not given Orders, and so are in a ‘No Order’ status unless they are benefiting from a Carry/Drag Order. They do not have any Morale state. Any Incapacitated Characters on the map at the end of a scenario are considered Prisoners if they are closer to an Enemy Character than they are to a Friendly Character.
Incapacitated Characters can be moved by a Carry/Drag Order and can be given Medical Aid. If Wounds are Bandaged so that their TQ goes above 0, they are no longer Incapacitated but have Shaken Morale.
If the total TQ modifiers from a Character’s Wounds exceed the Character’s TQ (in other words the total
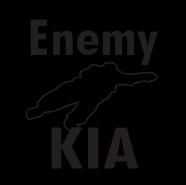
modifiers from Wounds would take a Character’s TQ to below zero) that Character is eliminated. Remove the Character marker and any Morale, Wound, or Ammo markers they had. Place an appropriate Friendly or Enemy KIA marker in the hex. Enemy Characters are also eliminated if the total TQ modifier of their Wounds equals their TQ. Lastly, Characters become eliminated from a KIA Wound Card result.
Note that Morale TQ Modifiers do not apply in determining KIA or Incapacitated status; only Wounds apply.
Each Character can be in one of seven Morale states (also called Morale levels). Morale states are exclusive--a Character can only have one of them at any one time. These are (from best to worst):
Berserk (No LDR value, +3 TQ, +1 WS)
Aggressive (+2 TQ)
Bold (+1 TQ)
Normal
Cautious (-1 TQ, -1 WS)
Shaken (-2 TQ, -2 WS)
Rout (No LDR value, cannot fire)
Each scenario will specify a default Morale state for all of the Characters on the Friendly and Enemy sides. Do not place Morale markers on Characters who are at the default Morale state. For any Morale state other than the default, a Morale marker of the appropriate type must be placed on the Character.
A Character’s Morale state can rise one level due to:
• Rolling a natural 0 when firing, if the Hit causes a Wound or KIA.
• Rolling a natural 0 when making an MC (L or M) due to an Explosion or a Close Call.
• Passing a Rally WC (H). A natural roll of 0 goes up 2 levels.
A Character’s Morale State can fall due to:
• Failing an MC (L or M) due to an Explosion or a Close Call.
• Failing a WMC (N) from a Wound.
• Rolling a 9 on a Rally WC (H).

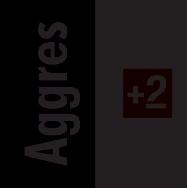
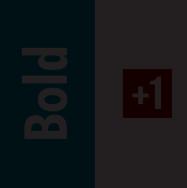
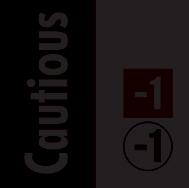


Most of these Morale States modify a Character’s TQ and some of them modify a Character’s WS or LDR value. (See the Morale markers and the list above for each marker’s effects.)
A Friendly Character with any Morale state except Berserk or Rout, can be freely given any Order within the normal rules. For Enemy Characters, the Morale states are used to determine the Orders they receive each Turn (see page 8 and Rule 8.2).
Berserk Morale is gained by a Character rolling a natural 0 when they make a MC (L or M), and the Character already had a Morale state of Aggressive. When this occurs their Morale will go up to
Berserk. Berserk Morale negates any LDR values on a Character. It also adds 3 to a Character’s TQ and adds 1 to their WS. Berserk Player Characters may not Duck Back in Step 4a iii).
19.21 Player Characters
Player Characters with a Morale state of Berserk will be given Orders in this priority. Follow the list down and use the first entry that applies to the Character:
1. If they have LOS to a Spotted Enemy Character that can be reached with a Charge (4 or less hexes away) they will be given a Charge Order (if Wounds allow) and will Charge the nearest Enemy in LOS.
2. If they have LOS to a Spotted Enemy Character, they will be given a Run & Gun Order (if Wounds allow). All movement will be toward the Enemy Board Edge (as defined in the scenario).
3. They may be given any of the following Orders at the Player’s discretion, (and as Wounds allow): Sprint, Evade, or Grenade. All Move Orders will be toward the Enemy Board Edge. Grenade Orders must take all optional moves and move toward the nearest Spotted Non-Player Character.
4. They will Sneak toward the Enemy Board Edge.
19.22 Non-Player Characters
Non-Player Characters with a Morale state of Berserk will be given Orders in this priority. Follow the list down and use the first entry that applies to the Character:
1. If they have LOS to a Spotted Player Character that can be reached with a Charge, they will be given a Charge Order (if Wounds allow) and will Charge the nearest Spotted Player Character in LOS.
2. If they have LOS to a Spotted Player Character and Wounds allow, they will be given a Run & Gun Order in the direction specified under the Berserk line on the Order Card.
3. If a Spotted Player Character is within Grenade range +1 hex, they will be given a Grenade Order. All optional moves must be taken, to move closer to the nearest Spotted Player Character (per the normal Grenade move process).
4. They will use the fastest Move Order that Wounds allow in the direction specified under the Berserk line on the Order Card.
Rout is the worst Morale State. Routed Characters are not in control of their own actions, so Players are limited in their control of them. They may only have Rally, Duck Back, Hide, or Move Orders. Rout Morale negates any LDR values on a Character and Routed Characters cannot use any weapon.
19.31 Orders for Routed Characters
Routed Characters (both Player and Non-Player) must attempt to gain a Rally Order in their Order Phase. They may only be given a Rally Order if they meet these conditions:
• They are in Cover terrain or a Smoke hex
• They are not in the LOS of a Spotted opposing Character
• They pass a TQC (A)
Routed Characters that fail to meet the conditions above must be given the fastest Move Order that they can accept. Player Characters will move in the fastest possible manner in the direction of their Friendly Board Edge. Non-Player Characters will be given the fastest possible move Order and will use the directional numbers found on the ‘Rout’ line of their picked Enemy Card.
Rally Orders can be given to Characters with Cautious, Shaken, or Rout Morale. At the end of the Turn, during Step 5b, make a WC (H) for each Character that has a Rally Order. If the Character is within LDR range of a Character of their side, they will add 1 to their TQ for the WC. These are the possible results of the WC (H):
• If they roll a natural 0 their Morale is increased by two levels.
• If they pass (without rolling a 0) their Morale is increased 1 level.
• If they fail (without rolling a 9) there is no effect.
• If they roll a natural 9 their Morale is reduced 1 level.
Whenever a Character with a Morale state of Rout is in a hex with a non-Routed Character from the opposing side, the Routed Character will Surrender if there are no non-Routing Characters from its own side in the hex The Surrendered Character is captured and becomes a Prisoner, and the Non-Routed opposing Character becomes a Guard.
Follow this process when a Prisoner is captured:
• Remove their Rout marker and replace it with a Shaken marker.
• Remove the Prisoner’s Order; they are in a No Order status.
• Give them an Out of Ammo marker. They also drop any MG.
• Remove the Guard’s Order and replace it with a Guard marker. The Guard is in a No Order status.
Once a Character is a Prisoner they are ignored by the Guarding side for all purposes, except that of Guarding and moving with them. A Prisoner is not given Orders; they are considered to have the same Order as their Guard and will move with their Guard.
A Berserk Character will not take prisoners. If they are alone with a Routed Character of the other side, that Character is eliminated.
19.52
If more than one Character is eligible to become a Guard, the Player can choose which of their Characters will be the Guard. For Non-Player Characters, the Guard is the one with the lowest modified TQ (randomize if there is a tie). A Guard remains in that status until another Character from their side starts the Turn in the same hex and takes over the Guard duties. The new Guard is given an Order as normal. Guards can have multiple Prisoners. If a Guard Routs, the former prisoner will take them prisoner!
A Guard Character is considered to have No Order status if they are fired on in the Turn they captured a Prisoner. On their next Turn they will be given an Order as normal. Player Guards cannot move closer to the Non-Player Board Edge.
If a Player Guard wants to keep their Prisoner(s), they must be given an Evade, Medical Aid, Sneak, Rally, Plan, or Hide Order, or be in No Order status. Note that to be given an Evade Order the Guard’s and Prisoner’s Wounds must allow it.
A Non-Player Guard is given an Evade Order (if possible) to move in the direction specified under ‘Rout’ for their Team. If the Guard or Prisoner’s Wounds preclude using Evade, the Guard will be given a Sneak Order. If they exit the map, the Friendly Character they were guarding is a Prisoner for victory purposes.
A Friendly Character will abandon Guard status if they are given any Order except Evade, Medical Aid, Sneak, Rally, Plan, or Hide. Also, if they are in a No Order status they do not abandon being a Guard. When a Character abandons Guard status, their Prisoner escapes. Prisoners will escape if the Guard receives a Duck Back Order; this also applies to Enemy Guards. When a Player Prisoner Escapes (or no longer has a Guard) the Player shifts them to any adjacent hex and gives them an Evade Order. When a Non-Player Prisoner Escapes (or no longer has a Guard) draw an Enemy card and check the ‘Rout’ direction. Immediately shift the Enemy Character one hex in that direction, based on the current Impulse, and give them an Evade Order based on that Rout direction. An escaped Prisoner will usually have Shaken Morale [see Rule 19.51] but it is possible they can escape with another type of Morale. They will be Out of Ammo.
A Friendly Character may choose to not accept a Routed Character as a Prisoner. If this happens, shift the Routed Character per the Escape rule above, but their Order and Morale do not change. Example: On Impulse 2, an Enemy Character Rout moves into the hex of a Friendly Character with a Grenade Order. If the Friendly Character accepts the Prisoner, they cannot throw the Grenade (or move) and the Grenade will explode in the hex. They do not accept the Prisoner, who is immediately shifted one hex in the Rout direction of an Enemy card, while keeping their original Order. If a Character of a Prisoner’s side moves into the hex of the Guard and Prisoner, the Prisoner is freed; they are given a Melee Order and will fight in the Melee, albeit with Shaken Morale.
During the game, Characters will be required to make Checks. The basis of all Checks is a Character’s TQ. The name of each Check describes whether Wounds or Morale are used to modify the TQ for the Check. Once this is understood, it will take the mystery out of the process of making Checks. There may be other modifiers for Checks (for instance a target’s Cover and/or Smoke will modify a Spotting WC (I)) but aside from situational modifiers outside of the Character, the two things inherent to the Character that can modify Checks--Wounds and Morale--are built into the name of the Check. The Checks Chart on page 32 covers the basic series Checks. Some Game Rules may add more Checks.
These are the four categories of Checks. Within each category are several types of Checks that are denoted by a parenthesized letter. When the rules say to make a certain Check, simply reference that Check category on the Checks Chart and find the appropriate letter entry of the specific Check. The Check categories are:
• Troop Quality Check (TQC): This is a Check versus Troop Quality only.
• Wound Check (WC): This is a Check where Troop Quality is modified by Wounds.
• Morale Check (MC): This is a Check where Troop Quality is modified by Morale.
• Wound & Morale Check (WMC): This is a Check where Troop Quality is modified by Wounds and Morale.
When a Character is required to make a Check, use their printed TQ and modify it per the type of Check. Roll a d10 and if the roll is equal to or less than the modified TQ, the Check is passed. If it is greater than the modified TQ, the Check is failed. The ramifications of passing or failing are specified in each pertinent rules section. For a few Checks, a natural roll of 0 or 9 has different effects; these are detailed under each Check in the rules.
If an Unspotted Non-Player Character has to make a Check, use the TQ value on the back of their counter--on their Unspotted side. If a game process that does not involve a Character requires a Check (such as OBA or Grenade Frag rolls) use a generic TQ of 4 for the resolution.
Some Characters have a Leadership (LDR) value and hence have Leadership abilities. A Character’s LDR value is both a number and a range in hexes traced from the Character. The range in hexes matters for Rallying and for card play. A Leader with an LDR value of 0 cannot Plan (because they would get 0 cards) but they can help Characters in their hex to Rally. Leadership is used for three main purposes:
Planning. Only Friendly Leaders can use Plan Orders. If they successfully Plan, they will receive a number of cards equal to their LDR value.
Rally. Leaders can help other Characters who have a Rally Order. They cannot help themselves Rally but another Leader could help them. If a Character with a Rally Order is within the LDR range of any Leaders of their side, their TQ is increased by 1 for the Rally WC (H). If multiple leaders are present the TQ bonus is only 1. Cards. Many Friendly Cards have effects on them that are tied to Leadership. Each card is different, but LDR values are used to determine if they have any effect.
Smoke of any type gives Cover status to a hex and is considered Inherent to the hex for LOS purposes. Smoke in a hex is denoted by double-sided markers: one side has Smoke and the other side has Fading Smoke. Both Smoke and Fading Smoke are considered as ‘Smoke’ for all other sections of these rules. The TQ modifier from Smoke only affects a WC (I) for Spotting.
Smoke markers have the following effects:
• The LDR value of a Character in a Smoke or Fading Smoke hex is lowered by 1.
• A Character who traces LOS into, through, or out of a Smoke hex will have a -4 modifier to their WS, and a -4 modifier to their TQ if Spotting. The WS modifier does apply to a Character’s Grenade WS and Suppressive Fire.

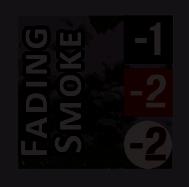
• A Character who traces LOS into, through, or out of a Fading Smoke hex will have a -2 modifier to their WS, and a -2 modifier to their TQ if Spotting. The WS modifier does apply to a Character’s Grenade WS and Suppressive Fire.
• These TQ and WS modifiers are cumulative if the LOS begins, ends, or crosses multiple Smoke hexes, but they do not compound for multiple Smoke markers in the same hex (which is unnecessary).
• If the cumulative Smoke LOS TQ modifier from one hex to another (inclusive) is -8 or more, they cannot see each other; LOS is blocked.
All types of Grenades and any Explosions will place Smoke. All of these weapons have a Smoke Value on the Weapon Characteristics Chart and on their Impact markers. These Smoke values determine how long the Smoke will last and how far it will spread. Follow these steps for placing and resolving Smoke:
1. When any attack occurs that generates Smoke, place the appropriate Impact marker and a Smoke marker in the hex.
2. In Step 5d of each subsequent Turn (not the Turn it was first placed!) add one Smoke marker in the next hex downwind of the previous one placed.
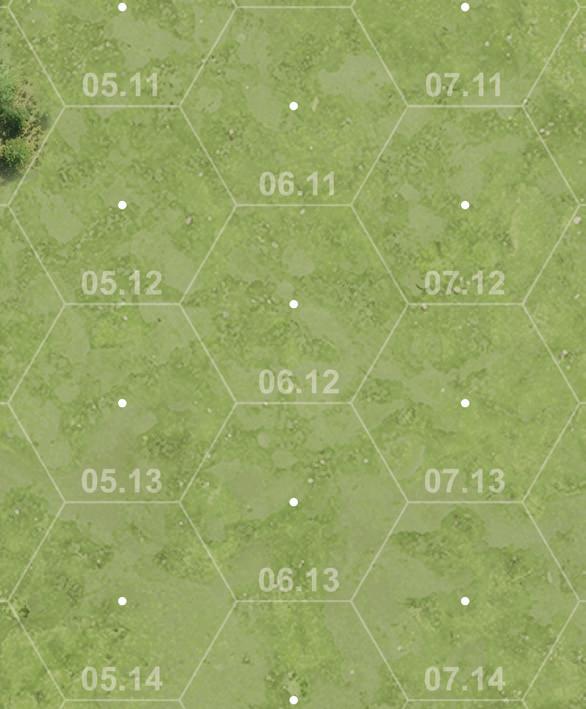
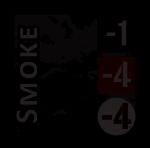



3. Continue adding Smoke markers until they have been placed in a total number of hexes equal to the weapon’s Smoke Value, as found on the Impact marker.
4. If, in Step 5d of a Turn, Smoke markers equal to the Smoke Value of the Impact marker had been already placed in the previous Turn, flip them all to their Fading Smoke side.
5. In Step 5d of each subsequent Turn, remove one of the Fading Smoke markers (starting with the one furthest downwind) until they have all been removed.
At the start of each scenario, Wind direction must be determined. Roll a d6 and compare it to any Directional Compass. Place the Wind marker in any convenient place on the map and point the marker’s arrow in the direction determined by the die roll. This will be the direction that Smoke will drift.


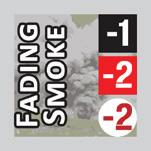


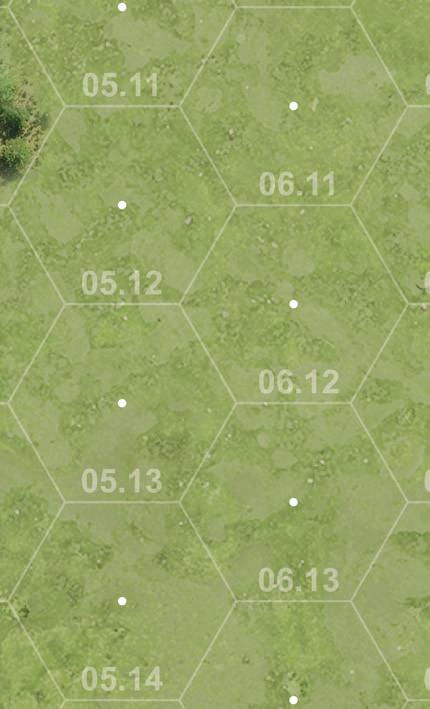


Smoke Example
In this example a German Smoke Grenade, 8cm Mortar, and Hand Grenade have all exploded during Turn 1. They each have the Smoke value listed on their marker. At the moment each one exploded, their Impact marker and a Smoke marker were placed in their Impact hex. Because this is the Turn that they exploded, no Smoke markers will be added at the end of the Turn in Step 5d.
In Step 5d of Turn 2 compare the Smoke value of each Impact marker with the number of Smoke hexes it has generated. The Grenade has a Smoke Value of 1 and already has one Smoke marker, so this will be flipped to its Fading Smoke side (shown by a pink border). The other two markers have Smoke values higher than the single Smoke marker they have generated, so both will have an additional Smoke marker placed in the direction of the wind (hexes 05.13 and 06.12).
In Step 5d of Turn 3 the Grenade in hex 07.13 will have the Fading Smoke marker and its Impact marker removed. The Smoke Grenade and 8cm Impact markers will have additional Smoke markers placed in hexes 05.12 and 06.11 respectively. They have reached their Smoke value limit.
In Step 5d of Turn 4 the Smoke markers generated by the 8cm Impact marker and the Smoke Grenade will be flipped to their Fading Smoke side. This is because they reached their Smoke value limit on the previous Turn.
In Step 5d of Turns 5-7 the furthest Fading Smoke marker will be removed until the last markers are finally removed in Step 5d of Turn 7.


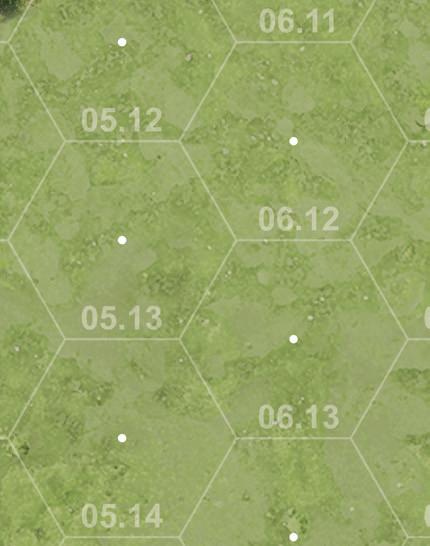




A
Action Phase (2.3, 4.0, 7.7, 8.1)
Alert (6.2, 17.2)
Ambush (14.3)
Artillery [OBA] (2.2, 13.0, 20.3)
B
Bandaged Wounds (7.65, 11.5, 18.3)
Berserk Morale (7.42, 7.61, 8.25, 19.2)
Blind Hexes [for LOS] 16.5
Blocking Terrain (15.2)
Blast and Frag (2.3, 12.1, 12.4, 13.1, 13.3)
C Cards (5.2, 6.1)
Character (2.3)
Charge Order (7.43, 7.68, 8.24, 14.1, 19.2)
Checks (2.3, 20.0)
Close Call (7.33, 18.1)
Continuous Slope [for LOS] (16.5)
Cover Terrain (15.1)
D
Dice (2.4)
Directional Compass (8.21)
Discard Cards (5.2)
E
End Phase (4.0)
Enemy Card and Order Phase (4.0, 6.0)
Escape (19.53)
Event Cards (5.2)
Explosion (2.3, 7.62, 12.4, 13.2, 13.3, 17.2)
F Fire Orders (7.3)
Firing (9.2)
Friendly Cards (5.0)
Friendly Order Phase (4.0, 7.0)
G Grenades (12.0)
Grenade Orders (7.5, 8.24, 12.2)
Guards (19.52)
Rules Credits, Series Rules version 1
Original Game Rules: Ross Mortell
Series Rules Revision: Mathew Hinkle
Hand Size (2.3, 4.0, 5.0)
Height [for LOS] (16.3)
Heavy Weapons (10.2)
Hit (2.3, 7.33, 12.4, 13.3, 14.2, 18.0)
Incapacitated (18.4)
Impassable Hexes (8.3)
Incompatible Terrain (8.4)
Inherent Terrain (15.2)
Initiative Track (4.0, 6.1, page 8)
Just Spotted (14.3, 17.32)
K KIA (18.5)
L
Large Battles (6.2)
Leadership (21.0)
Level [for LOS] (16.1)
Line of Sight [LOS] (16.0)
Low Ammo (7.64, 9.2, 10.4, 11.4)
Low Terrain (15.2, 16.4)
M
Machine Guns (11.0)
Melee (7.43, 7.68, 9.3, 12.3, 14.0)
Morale (6.2, 7.31, 11.5, 14.4, 19.0)
Morale Check [MC] (2.3, 7.33, 12.4, 13.3, 18.1, 19.2, 20.1)
Movement (7.2, 8.0)
Move Orders (7.2, 8.2)
N
Non-Inherent Terrain (15.2)
O
Open Terrain (15.1)
Orders (7.0, 8.2)
Order Cards (5.2)
Out of Ammo (7.64, 9.2, 10.4, 11.4)
P
Prepared / Unprepared (17.1)
Prisoners (19.51)
R
Rally (7.63, 15.2, 16.4, 19.31, 19.4, 21.0)
Randomize (2.3, 5.2)
Range of Weapons (10.3)
Rate of Fire [ROF] (2.2, 9.2, 9.3, 10.5)
Rifle Grenade (7.53, 12.0)
Rough Terrain (15.1)
Rout Morale (7.63, 8.25, 14.1, 19.1, 19.3)
Rule of 0; Rule of 9 (2.4)
S
Sequence of Play (4.0)
Size [for LOS] (16.2)
Slivers [for LOS] (16.6)
Slow Weapons (10.1)
Small Terrain (15.2, 16.4)
Smoke (12.1, 13.1, 15.1, 15.2, 17.32, 22.0)
Smoke Grenade (7.52, 12.0)
Spotting (16.7)
Spotted / Unspotted (2.3, 7.43, 9.1, 12.2, 14.3, 17.3, 20.3)
Surrender (14.4, 19.5)
T
Troop Quality Check [TQC] (2.2, 2.3, 2.4, 7.3, 7.31, 7.61, 7.62, 7.63, 11.6, 12.3, 17.32, 19.3, 20.1)
W
Waiting (17.21)
Weapons (10.0)
Wind (22.3)
Wound Check [WC] (2.2, 2.3, 7.52, 7.53, 8.24, 16.7, 19.4, 20.1, 21.0)
Wound & Morale Check [WMC] (2.3, 7.65, 7.66, 7.67, 11.6, 14.2, 14.4, 18.1, 20.1)
Wounds (2.3, 7.65, 11.5, 18.0)
Wound Card (2.3, 5.1, 7.33, 9.2, 12.4, 13.3, 14.2, 18.1)
Proofreaders: Brittani-Pearl Eaton-Koch, Clifton Franklund, Ethan Hinkle, Phoebe Hinkle, Adam Starkweather, Julian Thomas
A Any Routed Character starts their Turn in Cover and not in the LOS of a Spotted opposing Character [7.63, 19.3]
B Any Routed Character enters Cover when they are out of LOS of all Spotted opposing Characters [7.61]
C An Enemy Character** enters Cover in LOS of a Spotted Friendly Character [7.61] **Not for Routed or Berserk Characters, or those with Run & Gun, Charge, or Grenade Orders, or Guards.
D When giving Orders, an Enemy Character has Normal Morale, is in Cover, and has LOS to a Spotted Friendly Character [7.31, 11.6] Applies to MGs with any Morale and in any terrain
Receives a Rally Order Receives fastest Move Order
Receives a Duck Back Order Continues with current Order
Receives a Duck Back Order Continues with current Order
Receives a Rapid Fire or Aimed Fire Order Draw card for Order
E Any Spotted Character who has a Hide Order, is in Cover, and is not in the LOS of a Spotted opposing Character [7.62, 17.32] Becomes Unspotted Remains Spotted
F Does a natural roll of 0 succeed if the chance was Less than 0 [2.4, 12.3] Subtract from the TQ the number of points less than 0 of the initial chance of success (Do not use this modifier for Grenade attack rolls) Success Failure
G A Non-Player Character’s WS is below 0 for a Mandatory Fire [7.3] Will not Fire Will Fire
H
Resolve a Character’s Rally Order [19.1, 19.4, 21.0] +1 to TQ if in LDR range
Natural roll of 0 = +2 Morale Levels (cannot go to Berserk)
Natural roll of 9 = -1 Morale Level
I Attempt to Spot an opposing Character [14.3, 16.71, 16.72] Modify TQ for: Smoke, opposing Order/Terrain, and/or Range
Failure
J Can a Friendly Character be given a Smoke/Rifle Grenade Order [7.52, 7.53] Yes No
K Will an Enemy Character be given a Charge (C) or Grenade (G) Order [8.24]
L Character is in hex of, or adjacent to, an Explosion [7.62, 12.4, 13.3, 19.1, 19.2]
Natural roll of 0 = +1 Morale Level (can go to Berserk)
Natural roll of 9 = -2 Morale Levels and must Duck Back* (must Hide* next Turn)
M A Close Call Hit is received [7.33, 7.34, 18.1, 19.1, 19.2]
Natural roll of 0 = +1 Morale Level and must Duck Back* (can go to Berserk)
Natural roll of 9 = -2 Morale Levels and must Duck Back*
N A Wound is received [18.1, 19.1]
Morale Level & must Duck Back* Must Hide* next Turn
Morale Level & must Duck Back*
Natural roll of 0 = Must Duck Back* but no Morale change
Natural roll of 9 = -3 Morale Levels and must Duck Back*
Morale Level & must Duck Back*
Morale Levels & must Duck Back*
O Resolve a Character’s Attack in Melee [14.2] +2 TQ for Ambush; -2 TQ if Ambushed; +1 TQ for Charge Order Opponent Hit Draw Wound Card Opponent not Hit
P Resolve a Character’s Medical Aid, Plan, or Search Order, [7.65, 7.66, 7.67] or Reload an MG if there is no Assistant also Reloading [11.6]
Q A Character is called on to Surrender in Melee [14.4] -1 to TQ for each extra opposing Character in the hex
*A Character in Melee does not Duck Back or Hide Type