
CONTENTS Introduction . . . . . . . . . . . . . . . . . . . . . . . . . . . . . . . . . . . . . . 3 Graphic Components of the Game . . . . . . . . . . . . . . . . . . . 5 Sounds and Fonts . . . . . . . . . . . . . . . . . . . . . . . . . . . . . . . . . . 6 Space Shooter . . . . . . . . . . . . . . . . . . . . . . . . . . . . . . . . . . . . . 8 Creating a .exe Project . . . . . . . . . . . . . . . . . . . . . . . . . . . . . 19 Lesson # 8 Space Shooter with Python Lesson materials are attached to this PDF file. In order to get access to the materials, open the lesson in Adobe Acrobat Reader.
Python! We will use the pygame module for this. The game
outer
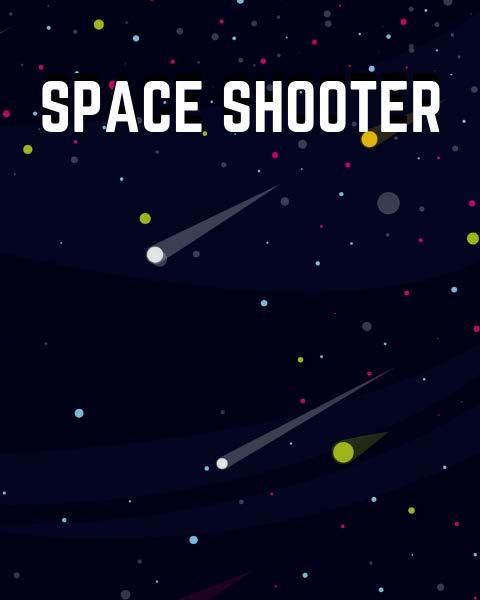
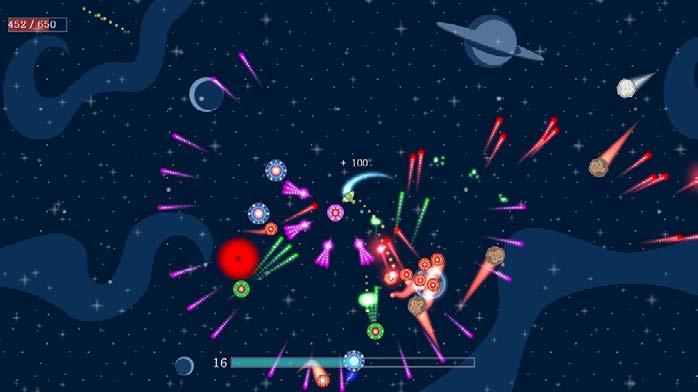
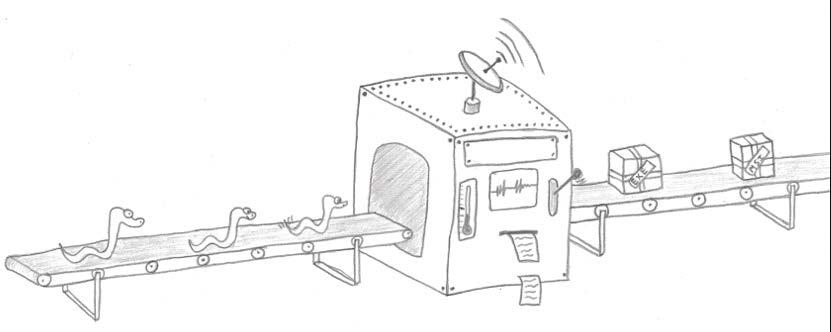
Space game with will take place in space. A space will encounter many The objective is to avoid by shooting missiles at them. The player can get that restore or increase
3
collision
bonuses
meteorites.
Shooter with Python Introduction Let's create a space shooter
damage (Figure 1). Figure 1
ship
health

The idea is not new: there are many space-related games, but they differ in interface and game mechanics. Let's take the best among the presented ideas and develop our game on this basis (Figure 2)! Create a new project where all the game components will be stored. The project needs custom modules written in Python and various graphic components to be prepared.
4 Lesson # 8
Figure 2
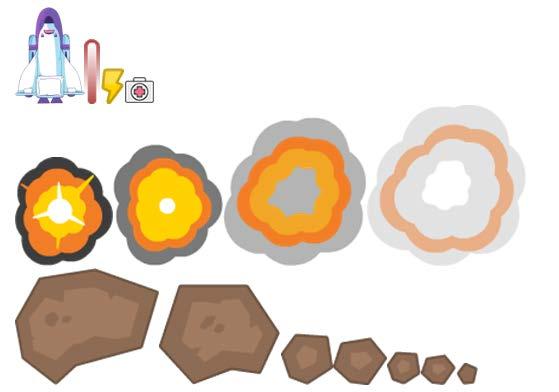
We will need a background image and a start menu picture for the shooter. You can use the GIMP graphics editor or Canva (a service for creating visual content) to create them or find them on the Internet (Figure 3). You can also find or draw icons of the space ship, asteroids of varying sizes, missiles, and explosions. Figure 3
Space Shooter with Python Graphic Components of the Game
5

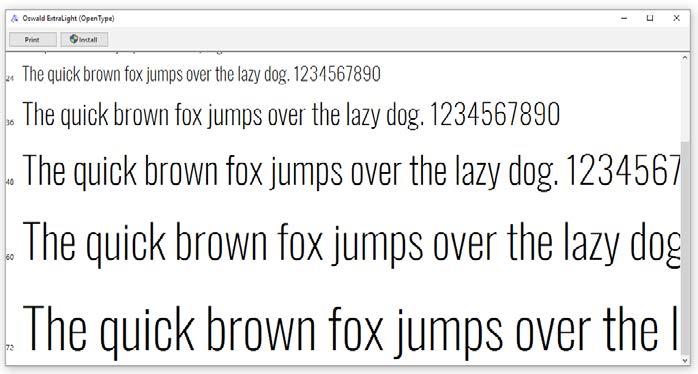
6 Lesson # 8 Note that images should be saved as .png files without a background (Figure 4). Sounds and Fonts Go to resources > sounds folder and put sounds and music there. Pick themed music in .wav and .ogg. Music and sounds will playback in the menu and during shooting and explosions, this means that every effect must have a specific sound.Select a font to use in the game. The pygame module has many fonts of all kinds that you can use by default. To get the full list of fonts, use the get_fonts() function. Figure 4

7 Space Shooter with Python Create a separate file and execute this code in it: import pygame fonts = pygame.font.get_fonts() print(fonts) Names of available fonts will be displayed in the console. However, the most suitable font for a shooter is Oswald (FigureDownload5). it to your PC and put it in resources > fonts. After you have suitable fonts selected, you can move to the next stage of the game development. Figure 5
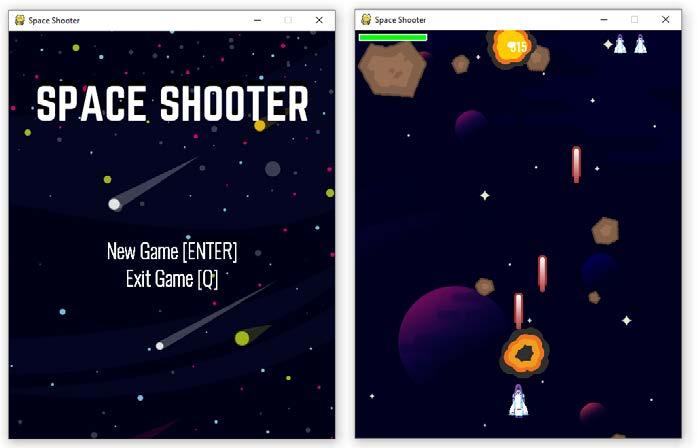
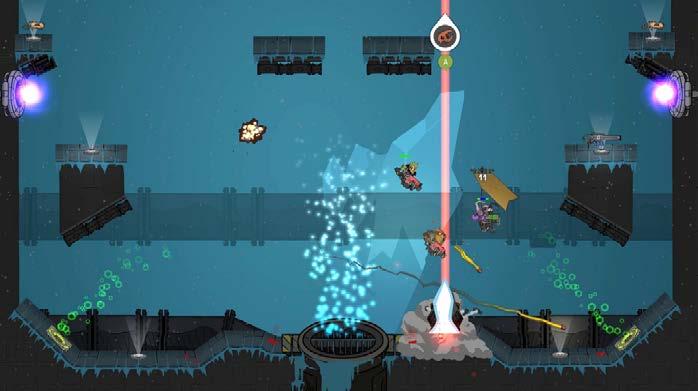
The player's health is in the upper left corner of the game, and the points scored in the middle. The more meteorites were destroyed, the more points the player scores. The number of lives is in the upper right corner. They mean that the player can die three times before the game is over (Figure 6).
8 Lesson # 8
Space Shooter Let's write the code.
As you already know, we are going to create a space shooter game. The player will control a space ship and shoot laser beams. Every laser beam can destroy a meteorite.
Bonuses may be randomly dropped: first aid kit and additional laser beams. If the player picks a first aid kit, the Figure 6
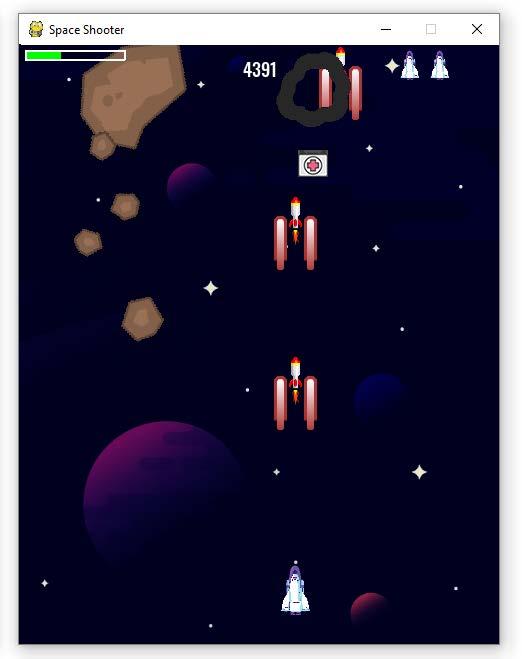
The maximum number of laser beams that the space ship can shoot is three. If the space ship shoots three laser beams, and the user manages to pick one more bonus that increases damage, then the space ship will shoot a missile instead of
9
beams. Constants.py Let's create the data folder and put custom modules there. This folder will contain the constants.py module with all the custom constants. Set the window size: width, height, and variables with default colors. WIDTH = 480 HEIGHT = 600 FPS = POWERUP_TIME60 = 5000 BAR_LENGTH = 100 BAR_HEIGHT = 10 # Colors WHITE = (255, 255, 255) BLACK = (0, 0, 0) NEAR_BLACK = (1, 0, 0) RED = (255, 0, 0)
Space Shooter with Python health will be partially restored if it was not full. If the player manages to collect additional beams, the number of lasers increases. The more collected bonuses, the more beams.
10 Lesson # 8 GREEN = (0, 255, 0) BLUE = (0, 0, 255) BLACK_BLUE = (19, 15, 48) YELLOW = (255, 255, 0) Declare variables that will store font names: # Fonts MAIN_FONT = 'Oswald-ExtraLight' SEC_FONT = 'Oswald-Medium' You should create more variables. Each of them will be used not to declare the image or sound name in the code but to store them in a separate module. This approach allows you to replace a game element by simply specifying a new name in the module: # Images MAIN_BG = 'main_menu_background.png' GAME_BG = 'game_background.png' SHUTTLE = 'space_shuttle.png' LASER = 'redlaser.png' MISSILE = 'missile.png' METEOR_LIST = [ 'meteor_big_00.png', 'meteor_big_01.png', 'meteor_medium_00.png', 'meteor_medium_01.png', 'meteor_small_00.png',
11 Space Shooter with Python 'meteor_small_01.png', 'meteor_tiny.png' AIDKIT] = 'first-aid-kit.png' POWER = 'powerup.png' # Music, Song, Sound ROCKET = 'rocket.ogg' PEW = 'pew.wav' RUMBLE = 'rumble1.ogg' MAIN_SONG = 'main_FrozenJam_song.ogg' MENU_SONG = 'menu.ogg' GETREADY = 'getready.ogg' SOUND = ['explosion_sound_01.wav', 'xplosion_ sound_02.wav'] Tools.py We need a module with the main settings of the window. Let's create one more module tools.py in the data folder. Declare several functions in it because we will need them to load additional elements like fonts from the fonts folder: import os def load_all_elements(directory, accept): elements = {}
12 Lesson # 8 for element in os.listdir(directory): name, ext = os.path.splitext(element) if ext.lower() in element)elements[name]accept:=os.path.join(directory, return elements def load_all_fonts(directory, accept=('.ttf')): return load_all_elements(directory, accept) Setup.py Create one more module in the data folder. The paths to the resources directory will be specified in it. As you remember, the above-mentioned folder has folders with assets, sounds, and fonts. Import modules to the program. In addition to external libraries, import the custom tools module. import os from data import tools Next, pass the full path to the directory to the PATH variable. Also, create two more variables to store the path to assets and sounds: PATH = os.path.dirname(os.path.dirname(__file__)) GFX = os.path.join(PATH, 'resources', 'assets') SFX = os.path.join(PATH, 'resources', 'sounds')
13 Space Shooter with Python FONTS = tools.load_all_fonts(os.path.join(PATH, 'resources', 'fonts')) Please note that fonts are loaded using the load_all_ fonts() function that we have created in tools.py. Game.py Place the main script game.py in the project folder, it will start the game. The module must have the required libraries imported: import pygame import random import os import sys from data import constants as c from data import setup First, initialize the main window of the game. Initialize the sound playback module pygame.mixer among other things. The time.Clock() method from the pygame library allows you to set the screen refresh speed: pygame.display.set_caption(screenpygame.mixer.init()pygame.init()=pygame.display.set_mode((c.WIDTH,c.HEIGHT)) 'Space Shooter') clock = pygame.time.Clock()
14 Lesson # 8 Then functions and classes are to be initialized. Open the project template where they all are already declared: def main_menu():… def draw_text(surf, text, custom_font, size, x, y):… def create_powerup_bar(surf, x, y, pct):… def create_player_lives(surf, x, y, lives, img):… def new_mob():… class Explosion(pygame.sprite.Sprite):… class Player(pygame.sprite.Sprite):… class Mob(pygame.sprite.Sprite):… class Pow(pygame.sprite.Sprite):… class Bullet(pygame.sprite.Sprite):… class Missile(pygame.sprite.Sprite):… As you can see, several classes are declared in our program. Let's briefly consider what functions they perform.
The Explosion class initializes explosions as laser beams collide meteorites and meteorites collide the ship. The Player class initializes the space ship controlled by the player. Next goes Mob that initializes meteorites and their spin. The Pow class declares bonuses that the player can get: healing and additional damage. The Bullet declares the laser beam. Finally, the Missile class declares the missile appearance.So,when the player collects three or more damage bonuses, the laser beam in the middle is replaced with a missile (Figure 7).
15
Figure 7
Space Shooter with Python
16 Lesson # 8 After functions and classes are declared, the variables will be initialized, and graphic components will be loaded from the resources folder. Pass the list of images of meteorites to the list variable: meteor_img = [] for image in join(setup.GFX,meteor_img.append(pygame.image.load(os.path.c.METEOR_LIST:image)).convert()) Also, declare a variable and load the background: bg = bg_rectc.GAME_BG)).convert()pygame.image.load(os.path.join(setup.GFX,=bg.get_rect() Next, initialize images of the space ship, laser beam, missile in a similar way: player_img = missile_imgbullet_imgplayer_mini_img.set_colorkey(c.BLACK)player_mini_imgGFX,pygame.image.load(os.path.join(setup.c.SHUTTLE)).convert()=pygame.transform.scale(player_img,(19,30))=pygame.image.load(os.path.join(setup.GFX,c.LASER)).convert()=pygame.image.load(os.path.join(setup.GFX,c.MISSILE)).convert_alpha()
17 Space Shooter with Python Initialize the explosion animation when the ship collides a meteorite and when a laser beam collides a meteorite: explosion_anim = {} explosion_anim['lg'] = [] explosion_anim['sm'] = [] explosion_anim['player'] = [] for i in range(9): filename = 'regular_explosion_0{}.png'.format(i) img = pygame.image.load(os.path.join(setup.GFX, filename)).convert() img_lgimg.set_colorkey(c.BLACK)=pygame.transform.scale(img, (75, 75)) explosion_anim['lg'].append(img_lg) img_sm = pygame.transform.scale(img, (32, 32)) explosion_anim['sm'].append(img_sm) filename = 'sonic_explosion_0{}.png'.format(i) img = pygame.image.load(os.path.join(setup.GFX, filename)).convert() explosion_anim[img.set_colorkey(c.BLACK) 'player'].append(img) After this initialize bonuses that the player can get: powerup_img = {} powerup_img['aidkit'] = pygame.image.load(os. path.join(setup.GFX, c.AIDKIT)).convert()
18 Lesson # 8 powerup_img['power'] = pygame.image.load(os.path. join(setup.GFX, c.POWER)).convert() What game can there be without music? Moving on to the initialization of music and sounds: shooting_sound = join(setup.SFX,pygame.mixer.Sound(os.path.c.PEW)) missile_sound = explosion_soundsjoin(setup.SFX,pygame.mixer.Sound(os.path.c.ROCKET))=[] for sound in player_die_soundpygame.mixer.music.set_volume(Sound(os.path.join(setup.SFX,explosion_sounds.append(pygame.mixer.c.SOUND:sound)))0.2)=pygame.mixer.Sound(os.path.join(setup.SFX,c.RUMBLE)) Initialize the main loop of the game: playgame = True menu_display = True while playgame:… After the game is over, close all windows and run the program: sys.exit()pygame.quit()
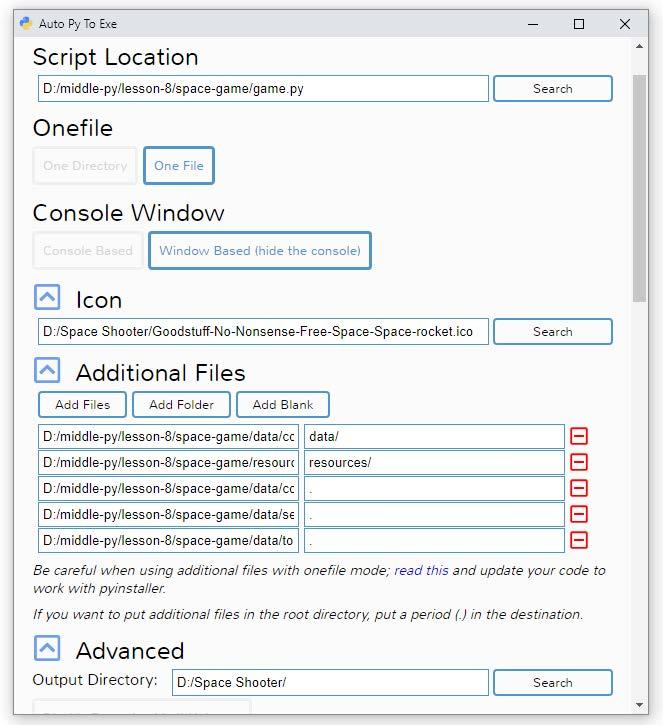
19 Space Shooter with Python Creating a .exe Project We have developed an exciting space shooter! But at the moment our project is a set of files and folders that require special conditions to be started. Let's gather all elements in a singe . exe file that all your friends can run. There are many modules that allow you to build the project. We will use auto-py-to-exe (https://pypi.org/ project/auto-py-to-exe/) (Figure 8). Make sure that the Chrome browser is installed to work with this module. Open the command prompt and install the module (Figure 9): >>>pip install auto-py-to-exe Figure 8 Figure 9

20 Lesson # 8 After the installation is complete, open the converter. Enter the command to open the app window Auto Py To Exe. Do not close the command prompt until you are done working with the converter! Enter this string in cmd: >>>auto-py-to-exe After this a new Auto Py To Exe window will open (Figure 10). Figure 10
Space Shooter with Python
Figure 11 Figure 12 Figure 13 Figure 14
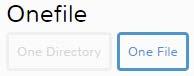
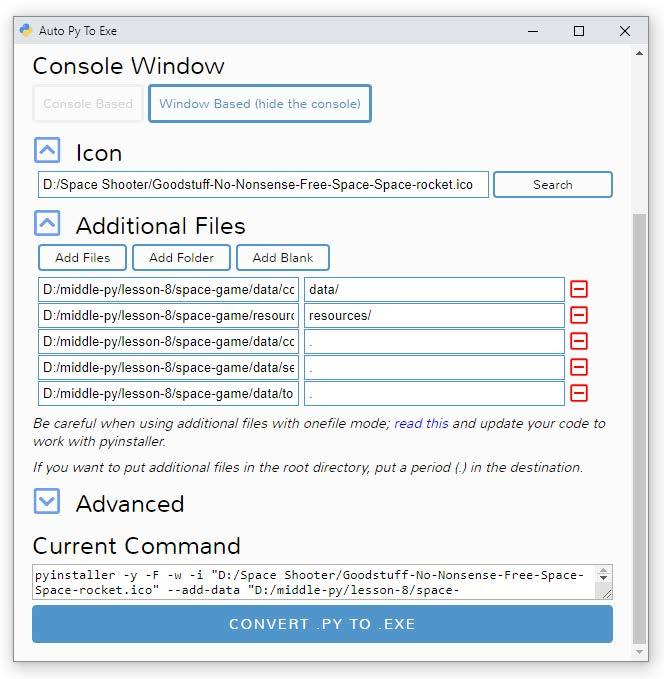
In the Console Window section specify that you want to open the game as a Windows app (Figure 12). You can also display your icon instead of the standard PyGame icon in the window with the app (Figure 13). Let's select a theme-related .ico image and specify the link to the icon in the Icon section (Figure 14).
21
In the Script Location sections specify the path to the main file of the game, that is, game.py which is in the project folder.In the Onefile section select One File to get only one .exe file upon building (Figure 11).

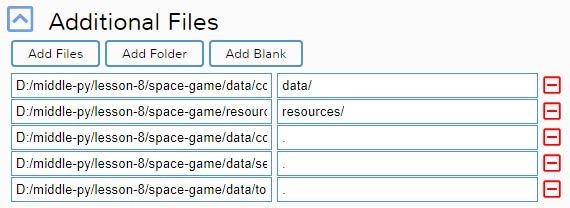
22 Lesson # 8 Notice the Additional Files section. Because the project has additional modules, assets, sounds, and fonts, you should specify which modules to add. In the Additional Files section, specify paths to all the fold ers you need (Figure 15). In the Advanced section, specify the path to the directory where the .exe file will be created (Figure 16). Figure 15 Figure 16
23 Space Shooter with Python When all settings are set, you can begin building the project! In the Current Command section you will see the com mand that starts the project building: pyinstaller -y -F -w -i "D:/Space game.py"data/tools.py";"."py";"."datapy/lesson-8/space-game/data/constants.py";"."game/resources";"resources/"py";"data/""D:/middle-py/lesson-8/space-game/data/constants.No-Nonsense-Free-Space-Space-rocket.ico"Shooter/Goodstuff---add-data--add-data"D:/middle-py/lesson-8/space---add-data"D:/middle---add-"D:/middle-py/lesson-8/space-game/data/setup.--add-data"D:/middle-py/lesson-8/space-game/"D:/middle-py/lesson-8/space-game/ We could have opened the command prompt and executed the same command. But we simplified the task by setting all the necessary parameters using the graphical interface of the application. Click CONVERT .PY TO .EXE to build the project (see Figure 17 on page 24).
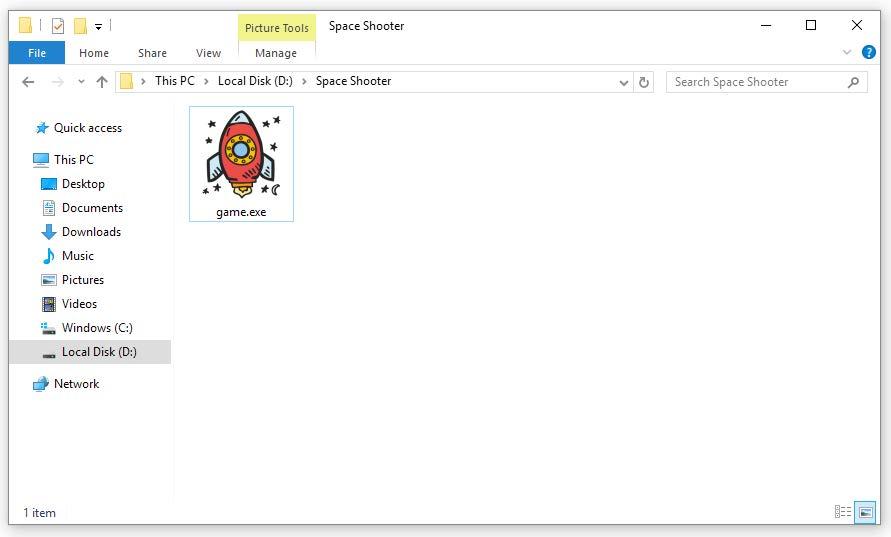
24 Lesson # 8 After the conversion is over, the .exe file will appear in the folder. Figure 17
Figure
Space Shooter with Python Run the file and start the game
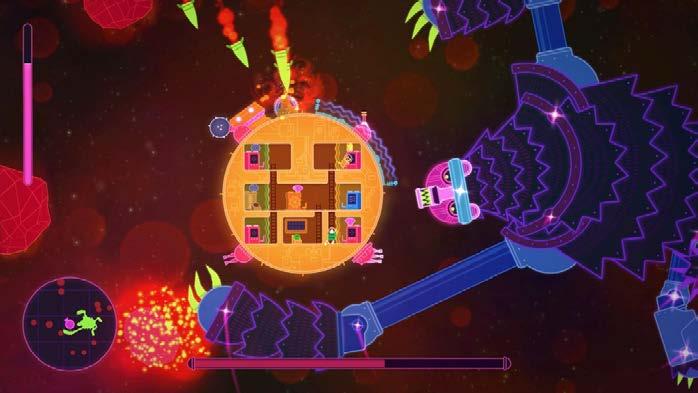
There are many space shooters out there so you can develop a similar game by getting the best of the topic you like (see Figures 19 and 20 on page 26). 18
(Figure 18)!
25
The project that we have developed during the lesson is a good example of how you can create a one-of-a-kind game using Python.
26 Lesson # 8 Figure 19 Figure 20
Fragments of works are used exclusively in illustration purposes to the extent justified by the purpose as part of an educational process and for educational purposes in accordance with Article 1273 Sec. 4 of the Civil Code of the Russian Federation and Articles 21 and 23 of the Law of Ukraine “On Copyright and Related Rights”. The extent and method of cited works are in conformity with the standards, do not conflict with a normal exploitation of the work, and do not prejudice the legitimate interests of the authors and rightholders.
Cited fragments of works can be replaced with alternative, non-protected analogs, and as such correspond the criteria of fair use. All rights reserved. Any reproduction, in whole or in part, is prohibited. Agreement of the use of works and their fragments is carried out with the authors and other right owners. Materials from this document can be used only with resource link. Liability for unauthorized copying and commercial use of materials is defined according to the current legislation of Ukraine.
All rights to protected pictures, audio, and video belong to their authors or legal owners.
Lesson Space Shooter with Python © STEP IT www.itstep.orgAcademy
# 8