


2 Lesson # 1 Introduction to micro:bit. Your First Program CONTENTS Introduction to micro:bit . . . . . . . . . . . . . . . . . . . . . . . . . . . 3 MakeCode . Creating the First Program . . . . . . . . . . . . . . . 9 Import Project . . . . . . . . . . . . . . . . . . . . . . . . . . . . . . . . . . . 16 List of Main Commands . . . . . . . . . . . . . . . . . . . . . . . . . . . 18 Creating Animation . . . . . . . . . . . . . . . . . . . . . . . . . . . . . . . 22 Upload Project to Device . . . . . . . . . . . . . . . . . . . . . . . . . . 25 micro:bit Mobile Application . . . . . . . . . . . . . . . . . . . . . . . 26 Lesson materials are attached to this PDF file. In order to get access to the materials, open the lesson in Adobe Acrobat Reader.
Introduction3 to micro:bit. Your First Program
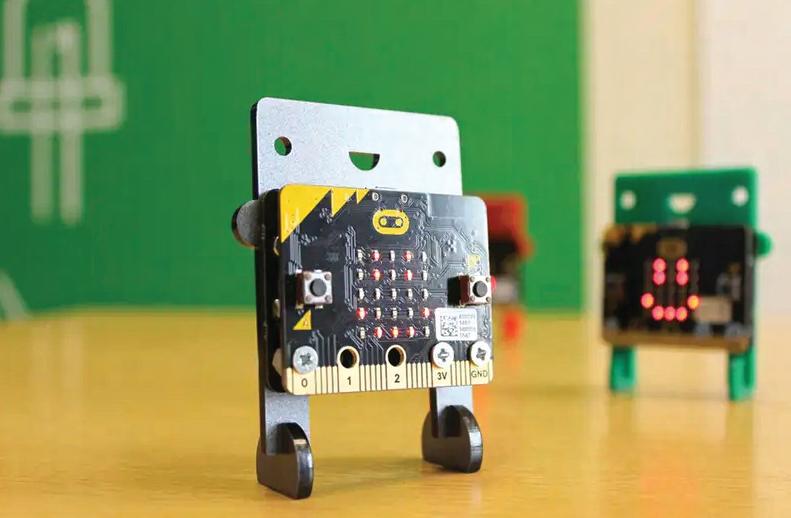
The micro:bit microcomputer is a board that can be programmed. Such a tool allows you not only to learn the basics of programming, but also teaches you to create cool devices, for example, a dancing robot or a machine that recognizes obstacles. You can develop a program for the board using blocks, as well as using programming languages JavaScript, Python (Figure 1).
Introduction to micro:bit
In this course, we will get acquainted with the micro:bit board, learn how to write code for it and program the board. We begin this fascinating way with studying the device.
Figure 1
4 Lesson # 1
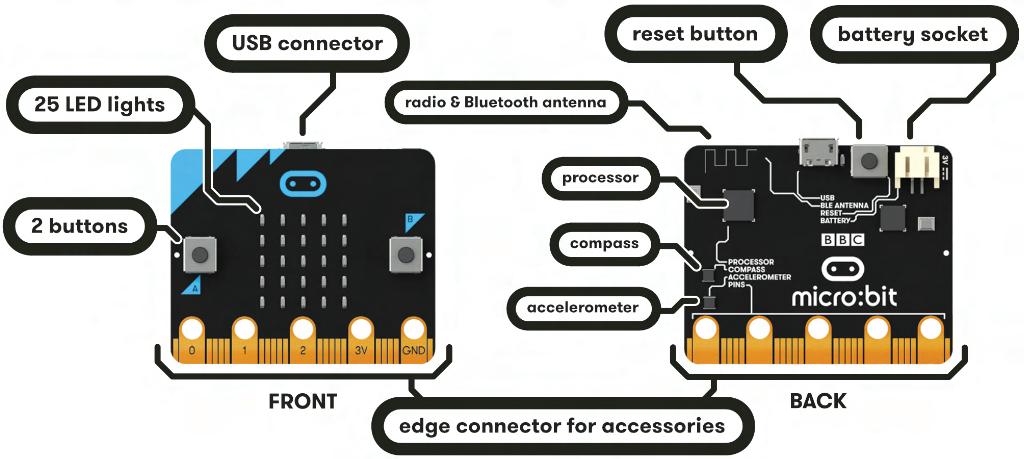
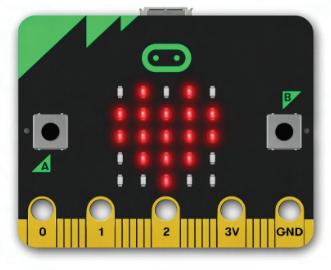
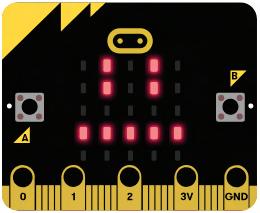
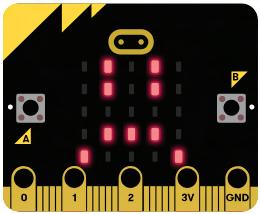
The device has 25 programmable LED bulbs. This makes the device a real interactive gadget. Thanks to LED, you can display text, numbers or simple images (smile, heart, arrow). Also, the LEDs work as a light sensor (Figure 3).
Figure 2 Figure 3
The boards, as well as its components are depicted in Figure 2. At the top, there is a USB-output. It is needed to connect the board to the computer and to download programs.
Program
Introduction5 to micro:bit. First
Your
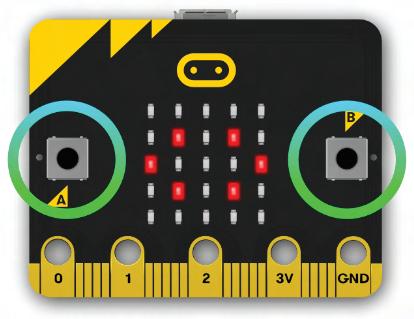
The A and B buttons are located to the right and left of the LED bulbs. They can also be programmed. As a result, a certain action will occur by pressing one of them, for example, all the diodes will light up (Figure 4).
Figure 4 Figure 5
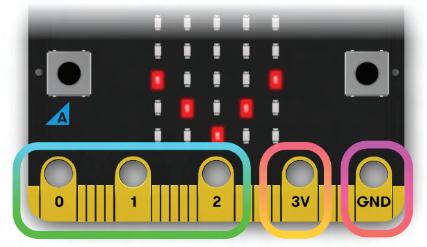
At the bottom of the board, there are pins – these are 25 connectors to which extensions can be connected. For example, it may be a humidity sensor for watering flowers, programmable motors for creating cars, or other components (Figure 5).
6 Lesson # 1
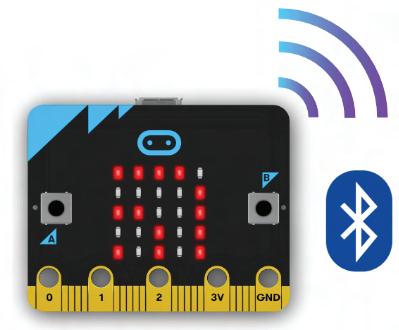
On the reverse side of the board, there is a Radio module and a Bluetooth antenna. The radio module communicates between micro:bit devices, for example, you can send messages or play. A Bluetooth connection allows you to upload the program directly from your mobile phone to the board (Figure 6). This is very convenient, because you can program directly on your smartphone!
Figure 6
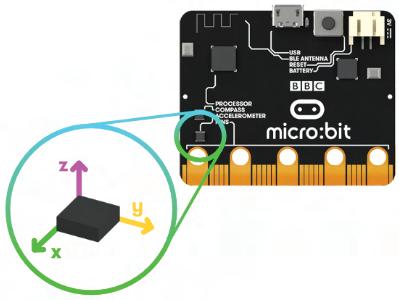
The micro:bit board supports accelerometer. Such a sensor makes it possible to determine the position of an object in space. Have you ever pay attention to how the screen orientation in the smartphone changes when tilting?
Also on the reverse side, there is a button to reset the previously loaded program (Reset).
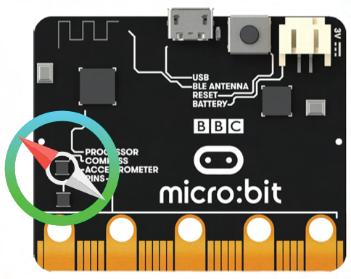
Introduction7 to micro:bit. Your First Program This is done using an accelerometer (Figure 7). The board also has a compass. It can also be calibrated (customized ) and used in your program (Figure 8). Figure 7 Figure 8
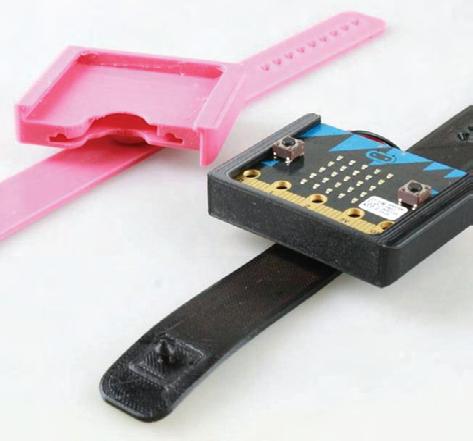
8 Lesson # 1 If we need to know the temperature data, a thermometer is available to us (Figure 9). Only one board provides all this! In addition to all of the above, you can purchase addons and accessories for such a device. For example, you can create a clock by yourself (Figure 10), an original ther mometer (Figure 11) or a timer with an interesting design (Figure 12). Figure 9 Figure 10–12


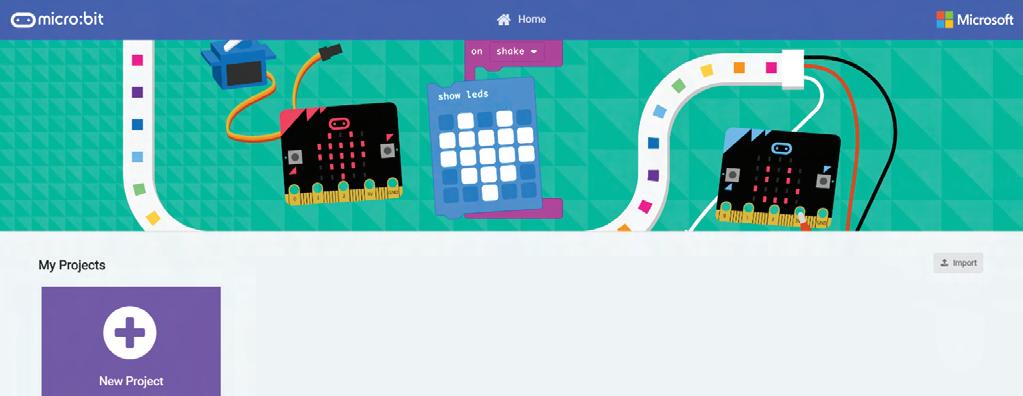
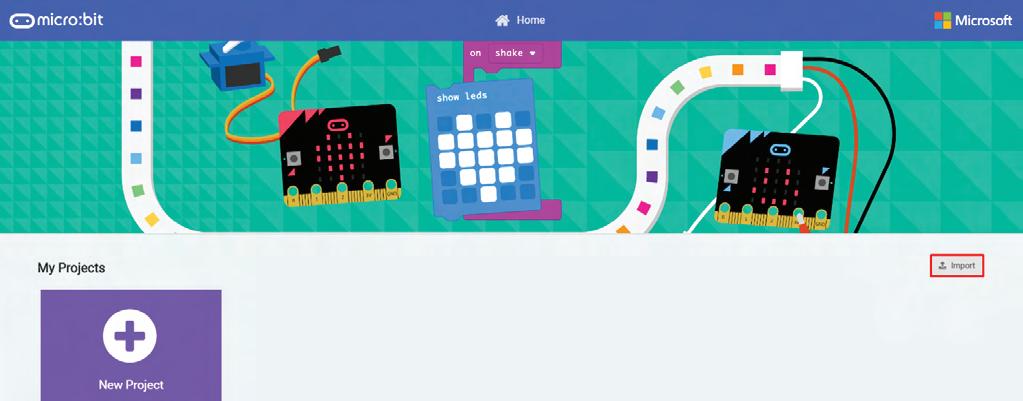
Introduction9 to micro:bit. Your First Program CreatingMakeCode.the First Program You can write the code and program the board in your browser using the https://microbit.org service. To begin with, we choose how we will write the code: in blocks, in JavaScript, in Python. Click Let’s code in the MakeCode Editor section (Figure 13). Then a new page will open and we will go to https://makecode.microbit.org. Here we can do one of the following actions: create a new project (New Project), import an already existing project from a personal computer (Import) or see the works of other authors. Click New Project and get acquainted with the features of the editor (see Figure 14 on page 10). Figure 13

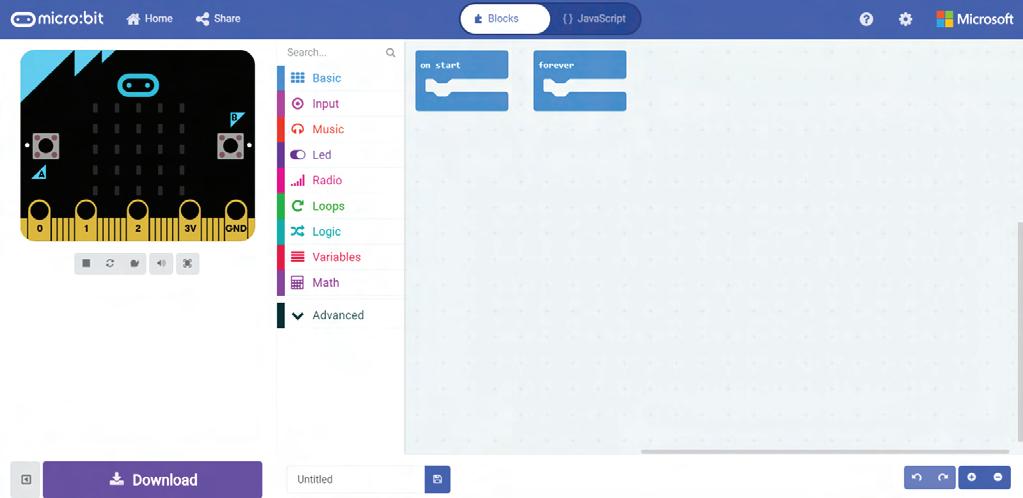
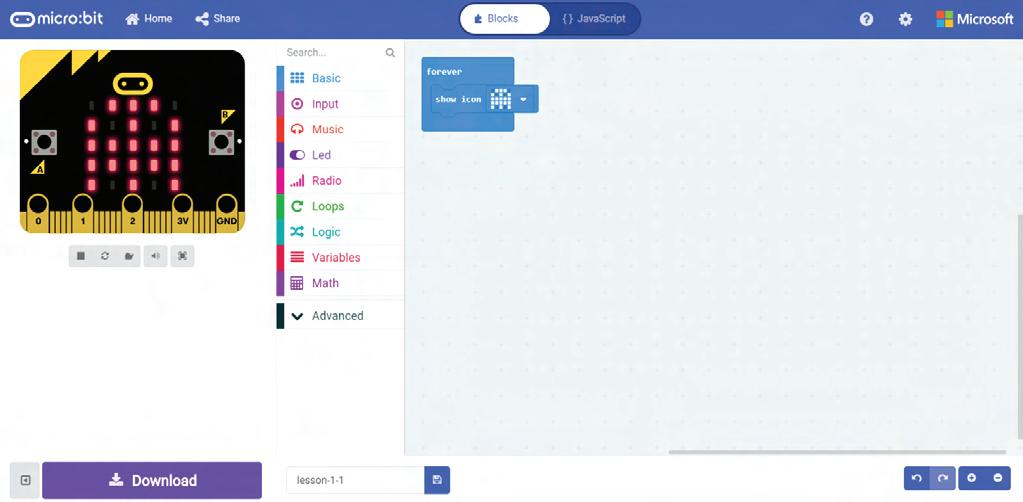
10 Lesson # 1 We see the code editor; let’s look at it in more detail (Figure 15). On the top panel, you can open the Home page, share the project with friends and classmates (Share), choose the Blocks or JavaScript editor view, open help or settings (Figure 16). Figure 14 Figure 15 Figure 16
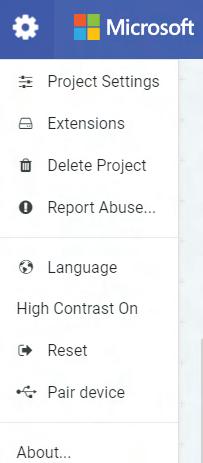
Introduction11 to micro:bit. Your First Program The settings section contains many useful options (FigureHere17).you can configure the project itself (Project Settings). It is also possible to connect extensions, for example, a Bluetooth module to control the device via a telephone, a sonar, so that the robot can “see” obstacles, a servomotor for controlling engines. Also in the settings, you can Delete Project, Report Abuse. Additionally, you can change the language (Language), change the color scheme (High Contrast On) or reset the entire project (Reset). By clicking Pair device, you can configure the board connection. The About menu item contains information about the software version. Figure 17
12 Lesson # 1
Drag a block to the workspace by opening one of the sections, for example, Basic, select a block, hold it with the left mouse button and drag it to the workspace. Removing unnecessary elements is also not difficult. Hold the block with the left mouse button and drag it to the left side, as shown in Figure 20, and then release the mouse button.
The finished program in Blocks mode is a collection of work blocks.
Then there is a list of commands (Figure 19). Each of the items contains blocks that can be dragged into the project. These are blocks of code that will be needed to program the board.This is followed by a workspace where we will make a program.
Figure 18
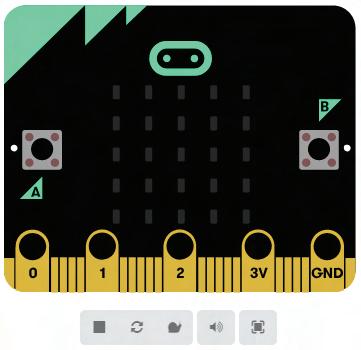
On the left side of the window, there is the board emulator, and below are a few buttons: stop the project, repeat, start in slow motion, turn off the sound, or open full screen (Figure 18).
Introduction13 to micro:bit. Your First Program Figure 19 Figure 20


14 Lesson # 1
The first button is needed in order to hide the chip. By clicking Download, you can upload the project to the board, and download the .hex file to the computer. Figure 21 Figure 22
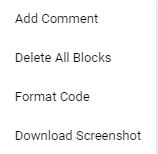
By right-clicking on the workspace, a context menu appears (Figure 21).
In the selected area, you can leave a comment, so as not to forget what the code segment is responsible for (Add Comment). Or we can clear all the blocks (Delete All Blocks). By pressing Format Code, all blocks will immediately align. This is very convenient, because then we will not have to align everything and drag it on our own. Additionally, a screenshot of all the blocks that make up the program (Download Screenshot) can be downloaded onto the computer.
The bottom panel contains a number of important elements (Figure 22).
Introduction15 to micro:bit. Your First Program The project must be renamed, because its default name is Untitled. Nearby there is the save button. In the right part, there are buttons to cancel and return the changes. For example, the wrong element has been removed or added. The zoom buttons (plus/minus) make it possible to change the size of the area in which the code blocks are located, that is, zoom in or out.
Let’s return to the home page and learn how to upload a project to the micro:bit environment. Import will be needed, for example, if we continue to work on a project or open a friend’s project. Click Import on the right side of the screen (Figure 23).
Figure 23 Figure 24
16 Lesson # 1 Import Project
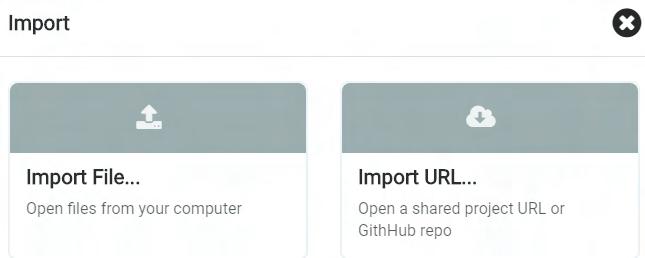
A modal window will open (a window on top of the home page of a website), where there are two ways to load the project: import from a computer or enter a URL. Select the first option – Import File (Figure 24).
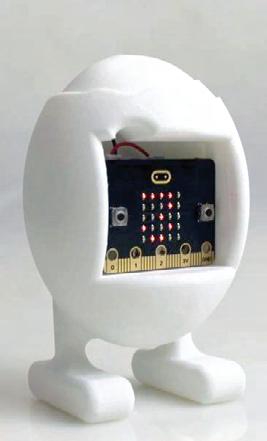
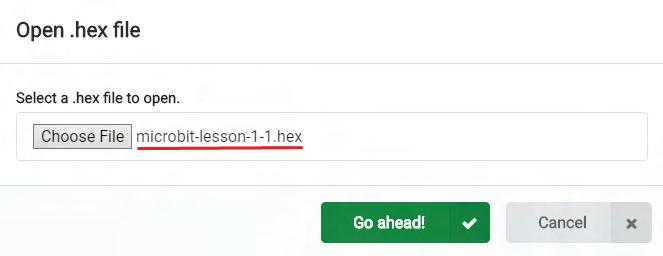
Then a window will appear in which we can select a file with the .hex extension and load it. After the file is selected, click Go ahead! (Figure 25). If done correctly, a window will open with the project. This is a very small program that displays the image of a ghost with the help of LED bulbs (Figure 26).
Introduction17 to micro:bit. Your First Program
Figure 25 Figure 26
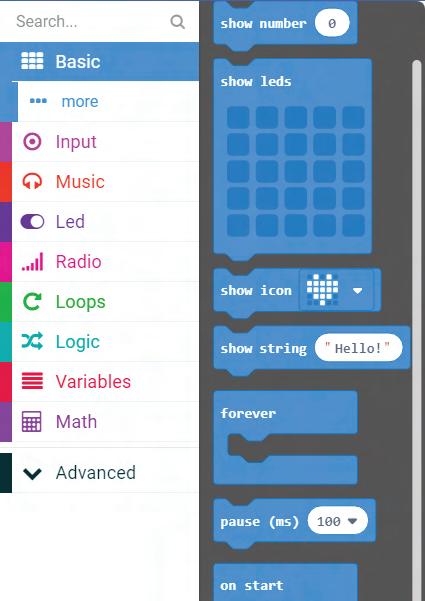
18 Lesson # 1 List of Main Commands Learn to write programs! There are a number of basic commands for creating programs. Each tab contains blocks. It is worth noting that the color of the tab matches the color of all the blocks that are inside.Let’stake a closer look at the commands in the Basic (Figure 27) and Input (Figure 28) section because they will be useful to us in many cases. Figure 27
Introduction19 to micro:bit. Your First Program
29). Figure 29 Figure 28
On the Basic tab, there is a forever block. It loops the running of a program, that is, it repeats it an infinite number of times. Any commands can be inside it, whether it is text or image output (Figure
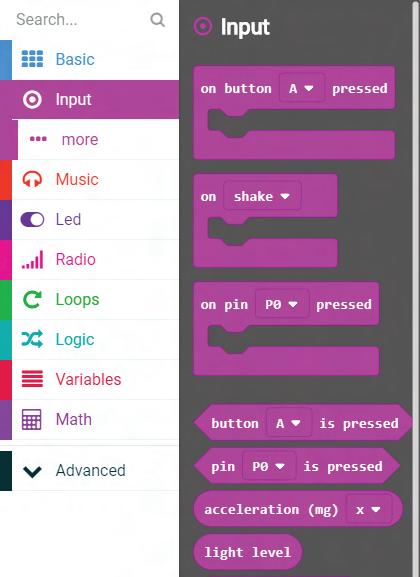

Figure 30 Figure 31 Figure 32
20 Lesson # 1
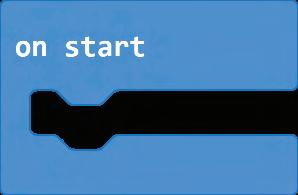
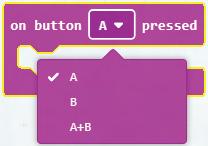
Then pay attention to the on start block. It allows you to perform an action only once after launch (Figure 30). Go to the Input tab. You can find several more com mands on it to launch the program, for example, by pressing button A (Figure 31).
But pay attention, if you click on the arrow next to the letter A , you will be able to choose another button (Figure 32).

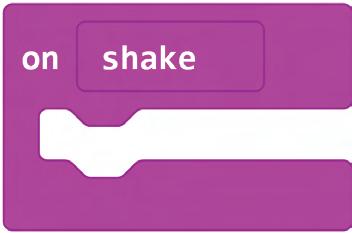
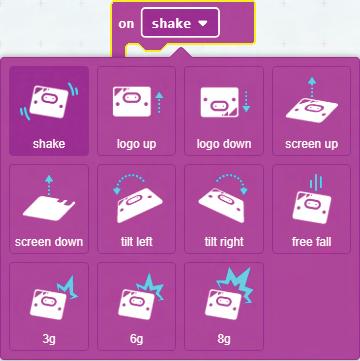
Introduction21 to micro:bit. Your First Program The micro:bit microcontroller allows you to run the program after shaking the device (Figure 33). The shake command can be configured by selecting for it the position at which the program will be activated (Figure 34). Figure 33 Figure 34
22 Lesson # 1 Creating Animation Link to the project: http://bit.ly/step-microbit-lesson-1-2Createananimatedemoticon . Drag the show leds block to the workspace. Clicking on one of the squares, it will be hughlighted in white, which means it will light up (FigureCreate35). an emoticon, highlighting the desired LEDs. Since we are going to animate, we need several such images. Click on the block with the right mouse button and copy it twice (Duplicate) (Figure 36). Figure 35 Figure 36


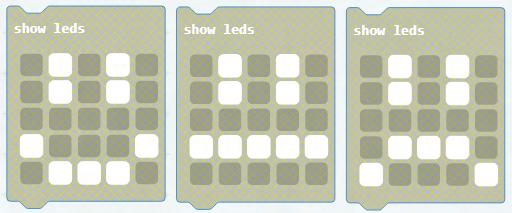
Introduction23 to micro:bit. Your First Program Create two more emoticons: neutral and sad (Figure 37). As you can see, the blocks are highlighted in gray. We merge them and place them inside the forever block so that the animation repeats indefinitely, and then launch the emulator (Figure 38). Figure 37 Figure 38
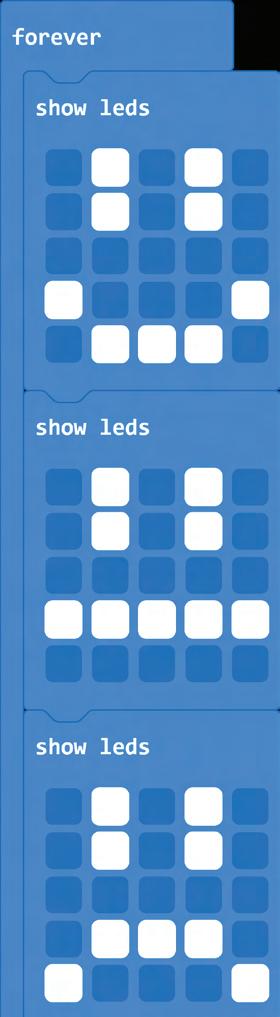
24 Lesson # 1 As a result, the animation will play until the Stop button is pressed (Figure 39-41). Save the project in .hex format to your computer. Next we need this file to upload it to the board. Figure 39–41

to micro:bit. Your First Program
Figure 42 Figure 43
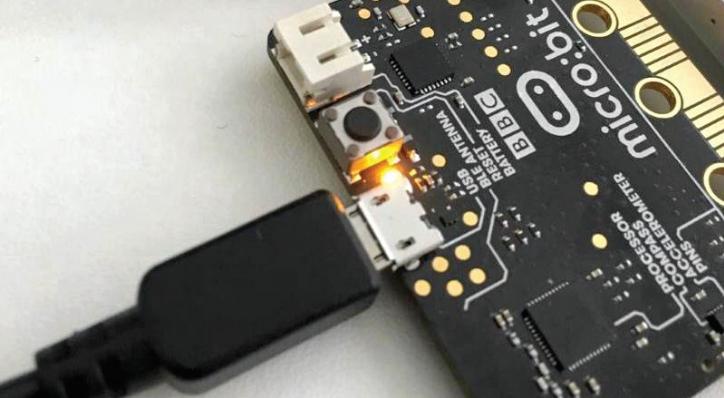
Now the program is loaded on the board. To start it, you need to apply power. There are several ways: connect via USB to powerbank or use charging from a smartphone, power from 3V batteries.
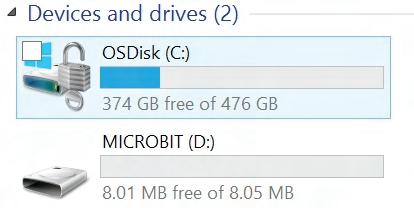
You can transfer data to the device via USB. We proceed as follows: connect the board via micro USB to a computer (Figure 42). The device will be detected as a normal flash drive (Figure 43). Open the MICROBIT folder in the explorer and copy the file with the project.
Introduction25
Upload Project to Device
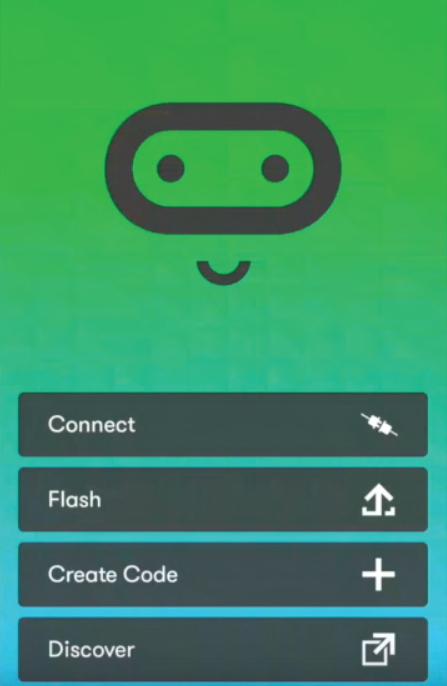
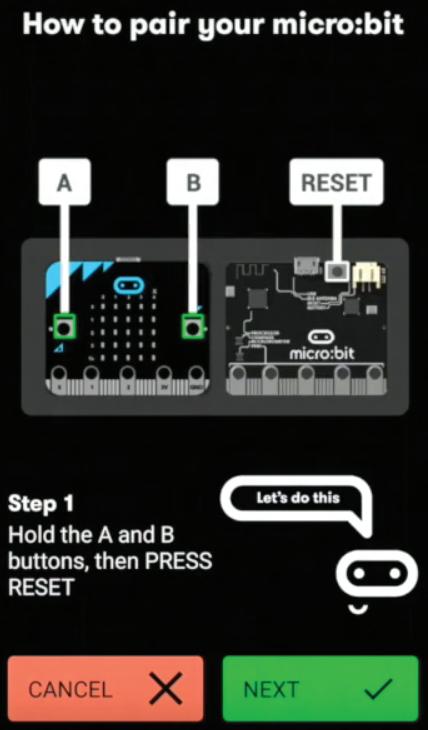
26 Lesson # 1 micro:bit Mobile Application You can work with projects for micro:bit right from your smartphone! It is very convenient and interesting. Click here to download the app from Google Play for Android devices or click here to download it from App Store for iOS devices and install it. On the main screen in the application, you can connect to the micro:bit device (Connect), view all projects created earlier, open them for editing or delete (Flash), create a new project in the online editor MakeCode (Create Code) or go to the official micro:bit website (Discover). Click Connect to connect to the board (Figure 44). Figure 44
Introduction27 to micro:bit. Your First Program The instruction appears; it consists of two steps. The instructions contains details of what to do. At the first step, we hold three buttons, and at the second, we mark the diodes that are lit up on the board (Figure 45-46). Figure 45 Figure 46

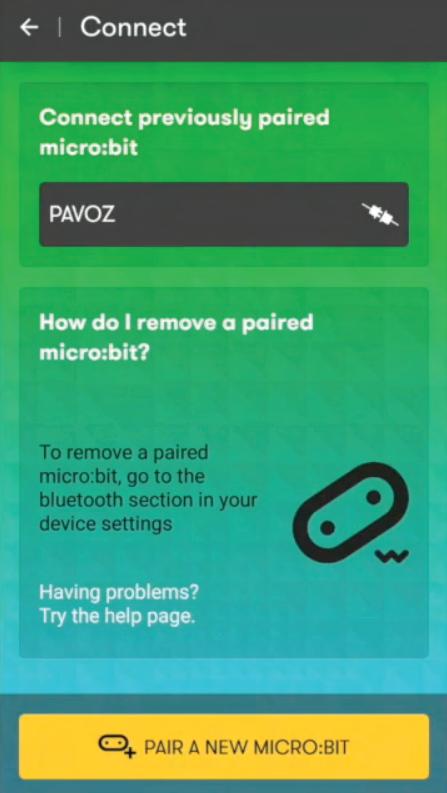
28 Lesson # 1 If the connection has been established, the device name will appear (Figure 47). Figure 47
Introduction29 to micro:bit. Your First Program
We got acquainted with the micro:bit board, created the first program for it, and also looked at how to load the code onto the board.
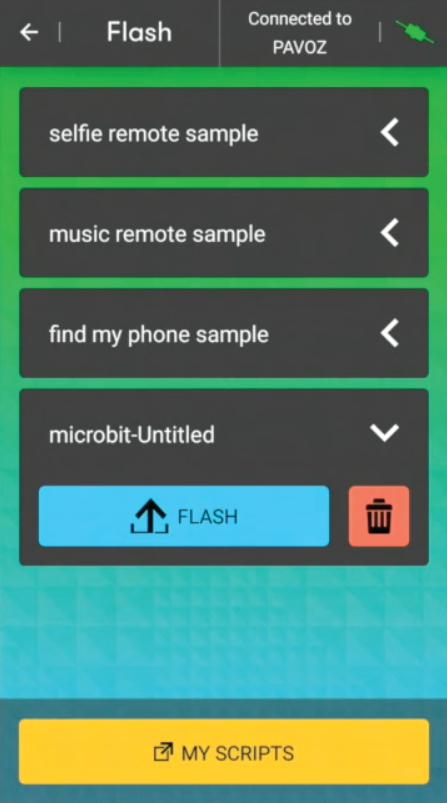
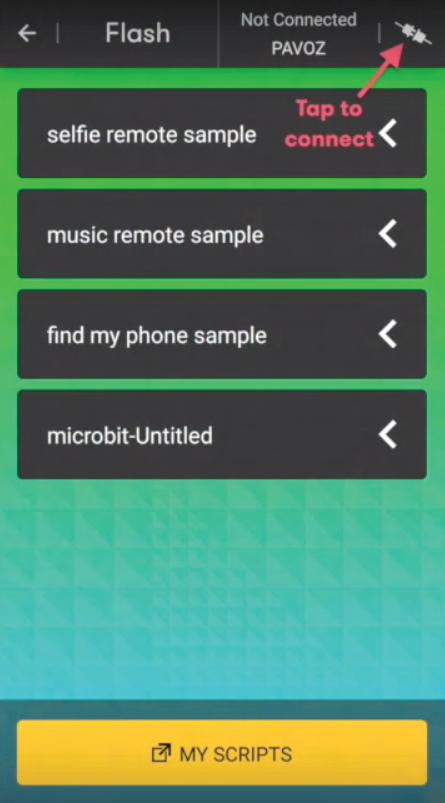
Now we will load the program onto the board. Open the Flash section, establish a connection by clicking in the upper right corner. Then open the file with the project and click Flash (Figure 48-49).
Figure 48 Figure 49
30 Lesson # 1 This is just the beginning of the journey, there are still many awesome projects ahead of us (Figure 50)! Figure 50
Cited fragments of works can be replaced with alternative, non-protected analogs, and as such correspond the criteria of fair use.
All rights reserved. Any reproduction, in whole or in part, is prohibited. Agreement of the use of works and their fragments is carried out with the authors and other right owners. Materials from this document can be used only with resource link. Liability for unauthorized copying and commercial use of materials is defined according to the current legislation of Ukraine.
Lesson # 1 Introduction to micro:bit. Your First Program
© STEP IT www.itstep.orgAcademy
All rights to protected pictures, audio, and video belong to their authors or legal owners.
Fragments of works are used exclusively in illustration purposes to the extent justified by the purpose as part of an educational process and for educational purposes in accordance with Article 1273 Sec. 4 of the Civil Code of the Russian Federation and Articles 21 and 23 of the Law of Ukraine “On Copyright and Related Rights”. The extent and method of cited works are in conformity with the standards, do not conflict with a normal exploitation of the work, and do not prejudice the legitimate interests of the authors and rightholders.