8 minute read
Tales From the Waterside

How Regular Sampling Improves Water Treatment and Saves Money
By Gene Tonetti, Water Systems Management, LLC
(Editor’s note: “Tales From the Waterside” features real-life experiences as shared by water treatment experts and how they approached problems or important lessons they learned.)
One of the most important and basic requirements for a successful water treatment program is proper water sampling techniques. For most seasoned water treatment professionals, this is a no-brainer; however, this topic is one that needs review from time to time.
Accurate water testing cannot compensate for poor sampling technique. In addition, it is of utmost importance that a true sample be representative of actual water conditions at the time of sampling. First, both you and your customer must know where to obtain your sample(s) within the water system.
An Unexpected Visit Let me begin by telling you a story that occurred in 1984 at a plant in southern Indiana that manufactured catheters for the healthcare industry. I made a cold call on the maintenance superintendent on a late Friday afternoon. I had no expectations of seeing him since I did not have an appointment, but I figured I could at least leave my business card and some sales literature. To my surprise, he asked me to come in and we began talking.
His first question to me was, “How often should we have to replace a Schedule 40 black iron condensate return line?” I told him that I had some customers that had plants that were 25 to 50 years old and that most of the condensate lines were the original ones installed during the plant construction. I also told him that this was not always the case, but it would not be unusual to see similar pipe longevity in a plant with a well maintained water treatment program. He said, “Well, I asked the question because we have been replacing one condensate pipe every week! I thought he was joking until he said, “We began using Schedule 80 pipe and we only have to replace the pipe every two weeks!” At that point, I knew something was very wrong.
As it turned out, during my survey of the plant the following Monday, I discovered the plant was not sampling the condensate where the pipe failures were occurring. They were sampling the condensate several hundred feet away from the point of failure at a location near a large autoclave. The pH at this location was always near 8.5 to 8.8. The autoclave used 60 pounds per square inch (psi) steam. The point of failure was near a large tank of rinse water that had a submerged steamheated plate exchanger that used low-pressure steam (10 psi). The plant was using a cyclohexylamine neutralizing amine. When I tested the condensate at the rinse water tank, the pH was 5.0.
The incumbent sales rep had no idea what was going on in the plant, as he had instructed the boiler operators to obtain their condensate samples at the autoclave, which is where he sampled. He was very indignant and told the maintenance superintendent he was not being fair after he found he lost the account to me after only three sales calls.
That sales rep really deserved to lose the account. He obviously was unaware of the problem that cost the plant
in weekly lost production as well as weekly replacement of pipe and wasted hours by plant maintenance personnel (it was a two-man job) to make repairs.
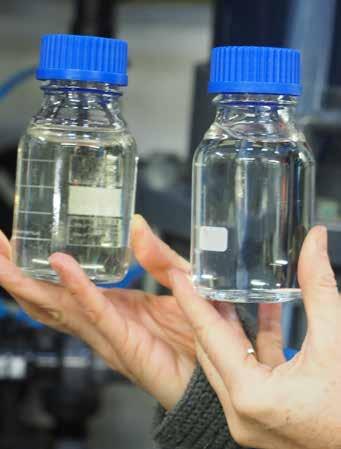
Thoughts on Sampling If I may, I would like to discuss a few ideas that have helped me over the years regarding sampling methods and proper sampling technique. First, we need to determine what type of sample bottle should be used. In almost all cases, a wide-mouth plastic bottle should be used for sampling. The wide-mouth bottle will minimize splashing during sampling. The bottle MUST be clean. NEVER use dirty water sample bottles. Throw dirty bottles away. Look professional. If bottles are to be reused, they should not be used for different sample points. In other words, do not use a previously used boiler sample bottle for sampling condensate or feedwater. Make sure the customer throws away any dirty bottles. I have seen operators use bottles that were so dirty that you could not even see the liquid level in them. Finally, always fill the bottle completely to displace any air.
Cooling coils should be used for all boiler, feedwater, and condensate samples. In actual practice, you may often visit a plant that has no cooling coil on the condensate return line. Most times, the condensate sample is obtained hot from a condensate receiver tank. The problem with this is that when the returning condensate reaches a vented receiver tank, a significant amount of carbon dioxide gas will be vented to the atmosphere, causing an increase in pH. The proper thing to do is to point out to the customer that there may be a significant difference in pH from the vented receiver tank versus the pH upstream of the tank.
Do not be surprised if there is significant push back from the plant on installing a sample cooler upstream of the receiver. However, if there has been a history of condensate line leaks upstream of the receiver tank, this may be enough justification for the plant to consider a cooling coil installation. The sample flowing into the bottle from the cooling coil should be near room temperature.
One more thing about cooling coils, the material of choice for the coil is stainless steel. If copper were to be used for the cooling coil, not only will it skew the test for copper but it can also affect the dissolved oxygen test when checking boiler feedwater. This is because dissolved oxygen can react with copper during the sampling process.
The next step is to determine the length of time to thoroughly flush the sample line. This will vary and be based on the length of the sample line, line size, and line pressure. For hot samples such as boiler, boiler feedwater, or condensate, this is relatively easy since you simply flush the line until hot water appears.
There are further considerations besides bottle type and bottle cleanliness, sample flush time, and sample temperature. It is critical to know where the chemical injection points are in relation to the point of sampling. This is usually most critical when sampling from a feedwater tank or the deaerator storage section. If you are trying to calculate boiler feedwater cycles based on conductivity ratios, and are feeding caustic, sulfite, or bisulfite or any other boiler chemical that can add conductivity to the sample, you may need to recommend a different sample point location.
On boilers, the best location to sample the boiler water is from the surface (sometimes referred to as the continuous) blowdown line. I have seen samples obtained by boiler operators from the boiler water level column or the sight glass. These two locations should NOT be used, as they are not representative of the chemistry in the bulk boiler water.
For cooling tower water samples, the sample flush time should be rather short, as most plants have a sample point installed in the cooling tower controller sensor line. By sampling at this location, you can compare controller conductivity, pH, ORP (oxygen reduction potential), and PTSA, a fluorescent marker molecule (if in use), with your hand-held test instruments. If there is no
sampling point at the controller, one should be installed. An alternate sample point would be at the cooling tower blowdown line, but the preferred point is the controller sensor sample line.
When sampling cooling tower water, prior to sampling check to see if any of the chemical feed relays on the tower controller are energized. By sampling during the chemical feed cycles, you may get an erroneously high inhibitor or oxidizer reading, depending on where the chemical injection points are in the system.
Return on Investment (ROI) Since the above case history occurred 36 years ago in 1984, it is difficult to come up with an ROI for that time. However, I can give you some current cost numbers on mild steel 2-inch pipe. The catheter company was replacing about 8 feet of Schedule 40 pipe every week. At a cost of $2.75/foot in 2020 dollars, the material cost would be $22.00 per week or $1,144.00/ year. Assuming lost production due to downtime was approximately one hour per day at $500 per hour, the lost production would be $500 per week or $26,000 per year. Total losses in production and pipe replacement in 2020 dollars would be $27,144 per year. The 2020 cost of a quality stainless steel sample cooler is about $950.
Installing a sample cooler at the proper location (rinse tank) would have saved the plant $26,194 per year.
Closing Thoughts The most important thing to remember when sampling is to obtain a representative sample for testing purposes. Care must be taken to avoid drawing samples near points of chemical injection. Cooling coils should always be used when obtaining hot samples to avoid flashing of steam as well as for safety considerations. Sample temperatures from cooling coils should be near room temperature. Table A lists sampling sites and where to sample and how frequently. The sample points listed are the preferred sample points.
Table A: Where and How Often to Sample?
Sampling Sites Where to Sample How Often?
Softener or Downstream of multiport Daily minimum Dealkalizer valve(s) Feedwater Storage section away from chemical injection lines* Daily minimum
Boiler Surface BD line * Daily minimum Condensate Upstream of vented Daily minimum receiver tank *
Cooling Tower Makeup Makeup supply line Daily minimum
Cooling Tower Controller sample valve Daily minimum
*Use stainless steel sample cooler.
Gene Tonetti is the founder of Water Systems Management. He has worked in the water treatment field for more than 41 years and has expertise in wastewater and high-purity, boiler, and cooling tower water. His experience in treating water includes treatment chemicals, chlorine dioxide, reverse osmosis, and process controllers. Mr. Tonetti is a 1973 graduate of Rose-Hulman Institute of Technology with a B.S. in biological engineering. He is an AWT Certified Water Technologist.